If you are running a Synology NAS in your environment, logging helps monitor activities, troubleshoot, and ensure optimal operation. Synology Logging is found throughout a Synology NAS system. Administrators can review and access logs on a Synology system for various purposes, including monitoring, security, and troubleshooting.
Importance of System Logs
System logs offer a comprehensive view of all activities on the Synology NAS. They provide crucial insights into performance hiccups, user access, file transfers, and even potential security threats. With logs, troubleshooting becomes more precise, and proactive measures can be instituted based on patterns observed.
What is Synology Log Center?
Synology Log Center is a centralized platform designed specifically for Synology NAS devices to monitor, review, and manage logs.
Several features make the Log Center an invaluable tool:
Unified Interface: The Log Center consolidates logs from different services and applications, offering a singular view for easy navigation.
Customization: Users can set specific criteria for log generation. This means you can choose to generate logs for specific events or applications, ensuring that the logs remain relevant and concise.
Real-time Monitoring: the Log Center gives you real-time logging. This feature allows users to observe activities as they unfold.
Alerts and Notifications: if you want it to, the Log Center in synology can be set to send out notifications. This can help to keep you alerted of certain events that you want to see
Data Export and Backup: he Log Center gives you the ability to export logs and even backup these records for future reference.
Navigating to the Log Center
If you head to the main menu, search for “Log Center”, and from here, you can access the application. Log Center provides tools for sorting, viewing system logs, and even generating detailed reports.
Viewing Logs with Log Center
From the main menu of your Synology NAS interface you can click on your , locate and click on your Main menu in the upper left-hand corner of the DSM 7.x interface. Search for “log” and you should see the “Log Center” icon.
If you right-click the Log Center icon, you will see the option to Add to desktop. This will add it to the desktop of your Synology DSM interface.

After you launch the Log Center package, you will see a prompt for Advanced Functions. It nudges you to install the Log Center package from the package center. What does this give you? By installing the application from the package center, you will have access to things like:
Archive settings
Log sending
Log Receiving
Settions History
Below, you see the prompt from the initial launch of Log Center to install the package.
In package center, if you search for Log Center you will see the following. Click the Install button underneath Log Center to install it.

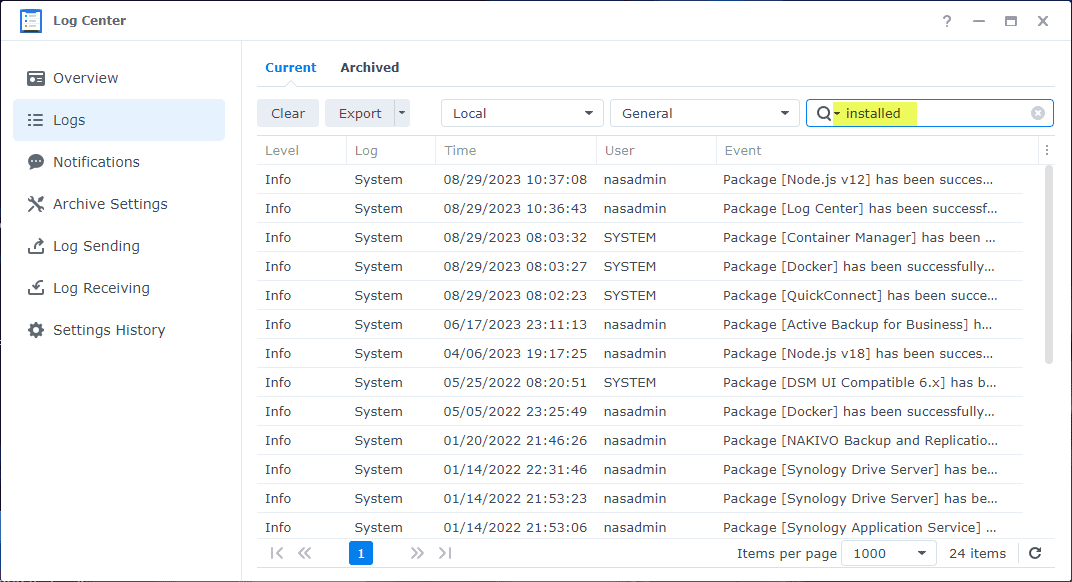
Now that we have Log Center installed, we can take a look at the types of logs we have available. Once inside, you’ll find different categories of logs. These include access logs that show:
General logging
Connection logging
File Transfer logging
Drives logging
Filtering and Searching: Use the search bar to search for something specific. Input keywords, IP addresses, or user names to narrow down results.
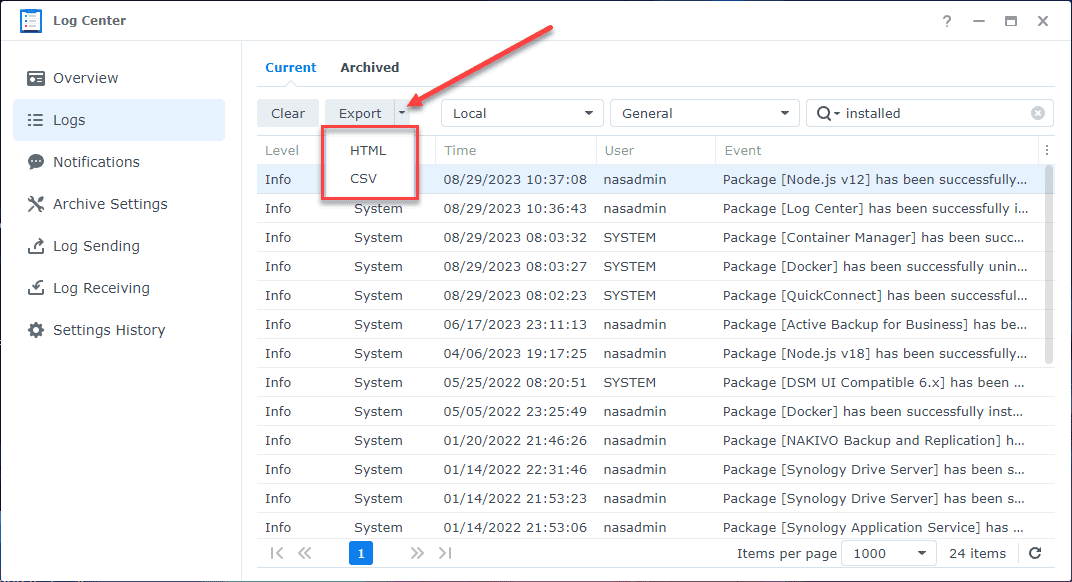
You can easily export logs from the Log Center interface by clicking the Export dropdown button. You can export to HTML and CSV.
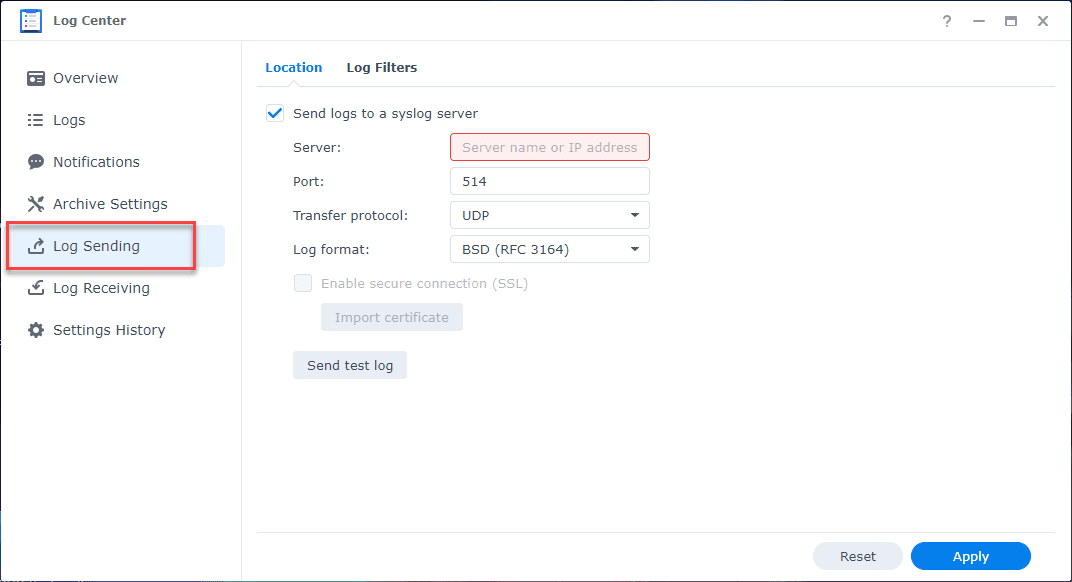
Sending logs from the Log Center to a syslog server is something you can easily do with the Log Center configuration.
Generating Logs with Synology Support
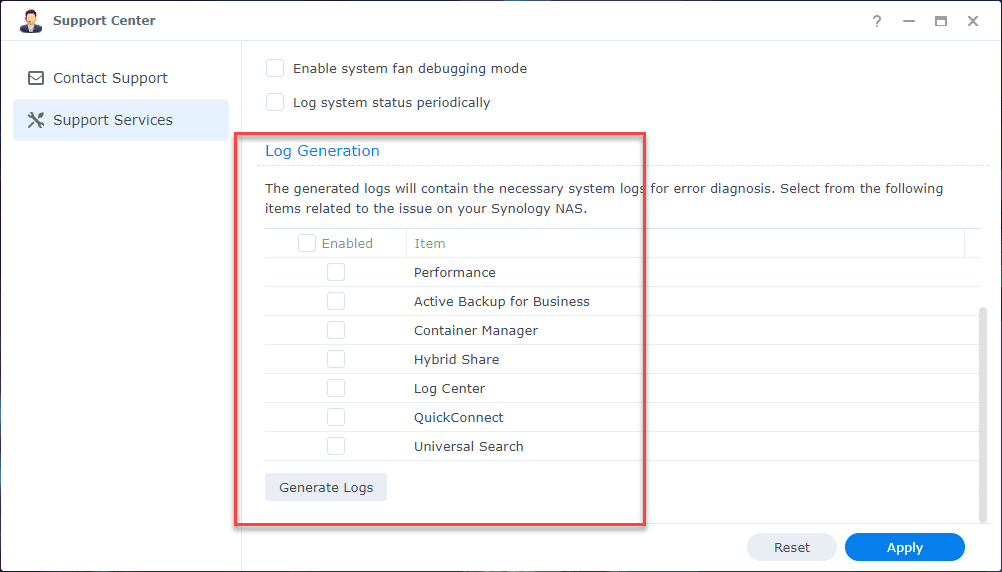
Beyond the Log Center, the Support Center is an essential resource. When issues arise that you can’t resolve via the logs, Synology’s Support Center is the go-to. They can access logs (with permission) to diagnose problems. Often, they’ll ask you to generate logs to send to their support services for detailed analysis.
How to Generate Logs for Synology Support
Open the Support Center from the main menu.
Navigate to the “Log Generation” tab.
Click “Generate Logs”. The system will compile all relevant log files into a single DAT file.
Once the log generation is complete, you can download the DAT file and send it to support services.
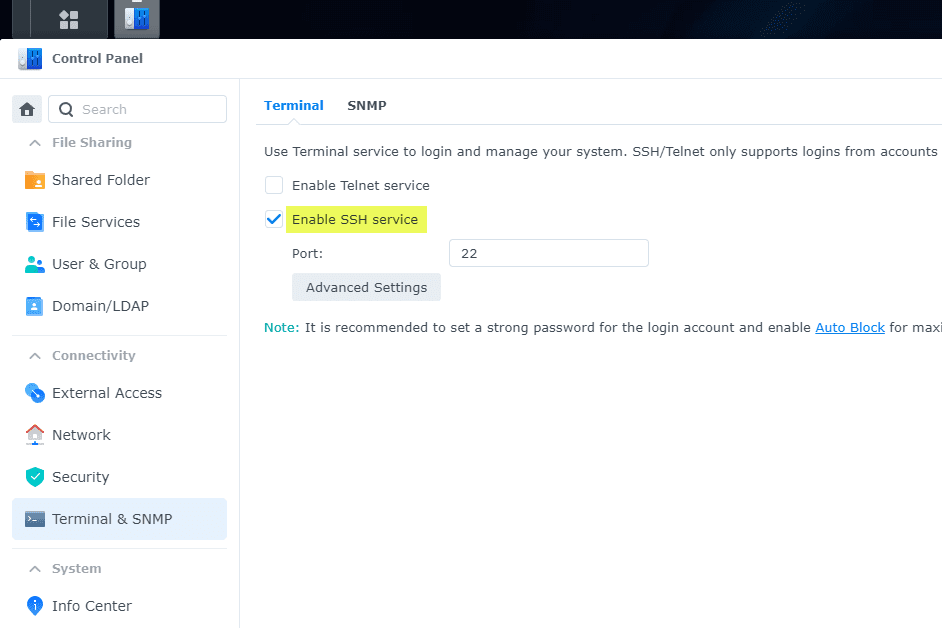
Viewing low-level logs using the terminal
There is another way to view logs at a low level using the terminal prompt. Enable SSH to your Synology NAS and then connect to the management IP. To enable SSH, navigate to Control Panel > Terminal & SNMP > Enable SSH service.
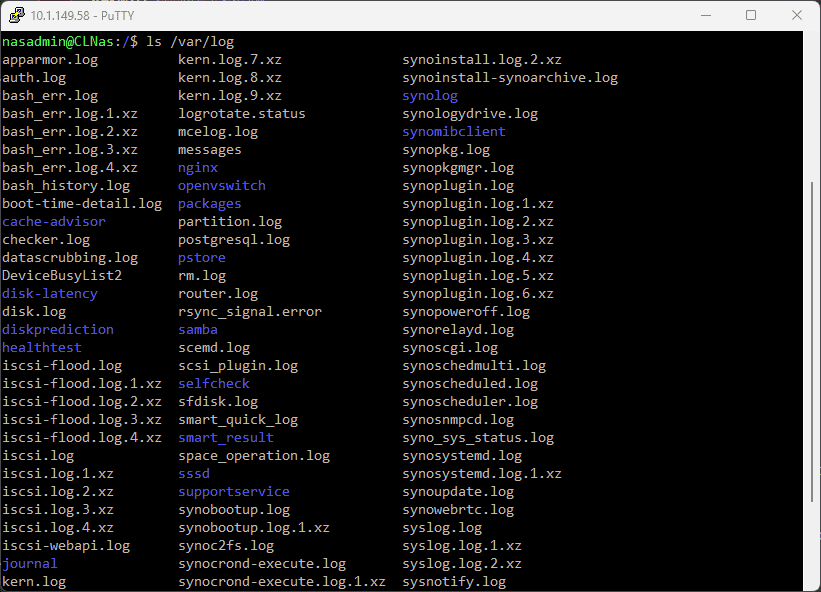
Once you connect to your Synology via SSH, enter the command:
ls /var/logYou will see all of the low level logs in the /var/log folder which you can open and view or download using SCP, etc.
Accessing and Managing Logs Securely
It’s recommended to access your Synology NAS using a secure connection. SSH (Secure Shell) is an encrypted channel to keep logs and files confidential. Also, when dealing with logs, managing who has access is essential. Restrict log access to trusted users and always monitor for unusual activity.
Key Takeaways: Monitoring, Accessing, and Utilizing Logs
Logs as a Diagnostic Tool: Logs are a great tool for monitoring, securing, troubleshooting, etc
Easy Accessibility: With tools like the Log Center and Support Center, accessing and managing logs is much easier
Security First: Always make sure that logs, files, and any data on the Synology NAS are accessed by you securely. Limit access, use encrypted connections, and review logs for things that are out of place.
Wrapping up
Logging on any device is a great way to keep a check on things, and make sure there are no anomalies that may show there is a security issue in the environment. Synology has good tools for logging as we have seen, so keep a check on your logs and you will have a more secure and better working synology storage environment.
Google is updating how articles are shown. Don’t miss our leading home lab and tech content, written by humans, by setting Virtualization Howto as a preferred source.
About The Author