In the last post, Hyper-V Cluster MPIO iSCSI installation and configuration, we looked at configuring MPIO multi-pathing on a Hyper-V host connected to iSCSI storage. In a home lab environment, you may want to play around with iSCSI storage for labbing out Hyper-V MPIO connections as I was doing in the last post. You can easily provisiong yourself a really great iSCSI SAN device by way of FreeNAS loaded in a virtual machine. You can add multiple network cards, storage, and have a ton of options and configurations to play around with. In this post, we will look at how to configure FreeNAS to enable connecting Hyper-V hosts to iSCSI targets and enabling MPIO multi-pathing. Let’s look at FreeNAS iSCSI Configuration for MPIO to see the settings you need to pay attention to when enabling multi-path for Hyper-V.
What is FreeNAS?
In case you haven’t heard of FreeNAS, it is a great software based storage solution that can be loaded on either hardware or virtual platforms. For my testing purposes, it provides a great solution to be able to easily work with storage solutions that are generally found in the enterprise such as iSCSI SANs, NFS datastores, MPIO configurations, etc. FreeNAS is based on FreeBSD which is a UNIX based server operating system developed at Berkeley. However, FreeNAS is a specialized version of FreeBSD that is storage specific and optimized for storage solutions supporting SMB, NFS, and block storage technologies like iSCSI.
FreeNAS iSCSI Configuration for MPIO
The steps to get FreeNAS configured for MPIO connections for iSCSI targets comprises a very short list of things. You need to do the following:
- Add additional network adapters to the appliance
- After adding the additional network adapters, configure network addressing
- Add multiple portals backed by the individual network cards
- Add extra iSCSI group for each iSCSI target
- Test connectivity
I am using the FreeNAS installer with a vSphere 6.7 virtual machine. Adding network adapters is as easy as adding the hardware to the VM and rebooting. For my iSCSI testing, I added two network adapters for the purpose of carrying iSCSI traffic.
Below, under the Network >> Interfaces section, you will see your network interface connections. These are editable and the iSCSI1 and iSCSI2 names are custom names that I configured.
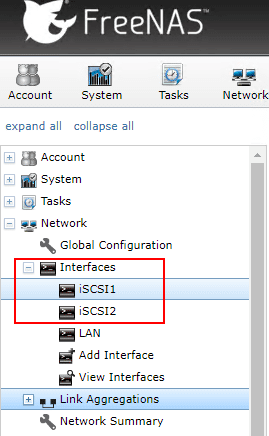
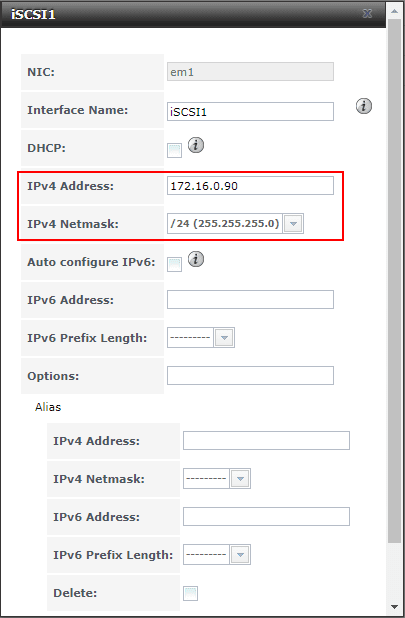
As you can see below, you can change the names and setup the network addressing. Note FreeNAS expects different subnets to be configured on each network adapter and will error if you have overlapping addresses configured.
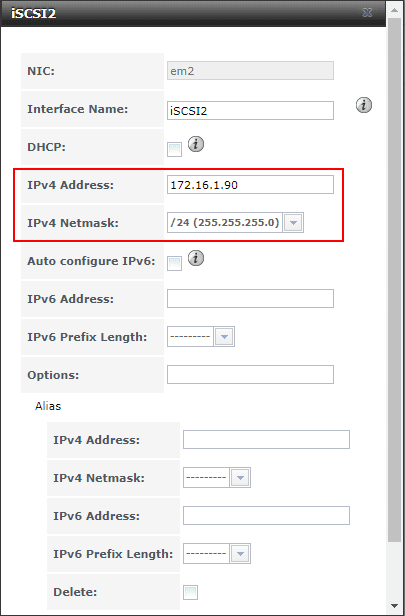
Configuring the second network adapter for iSCSI traffic.
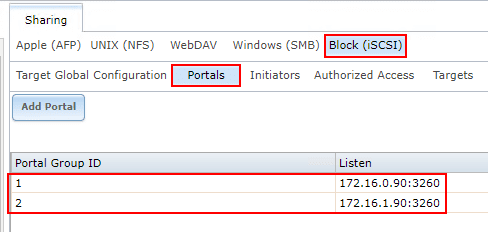
Now that you have more than one iSCSI network adapter configured on your FreeNAS appliance, you can configure multiple Portals. Note each portal utilizes the IP addresses for the respective network adapter. As a test here, I like to use telnet to test network connectivity to port 3260 which is the port used for iSCSI. This allows verifying connectivity before going any further.
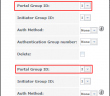
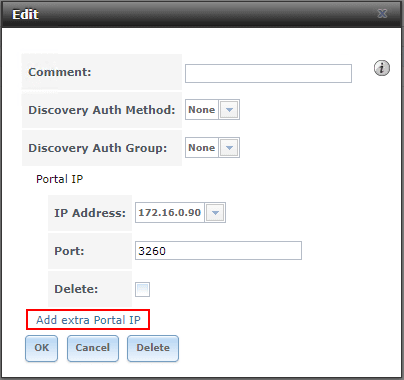
A quick look here at a step you don’t want to do. When I was initially configuring MPIO, I used the Add extra Portal IP option. However, this will place the two IP addresses on the same portal ID and won’t answer properly to the iSCSI MPIO requests. You want to configure multiple group IDs instead.
Now, that you have multiple portals/Group IDs configured with different IP addresses, these can be added to the targets.
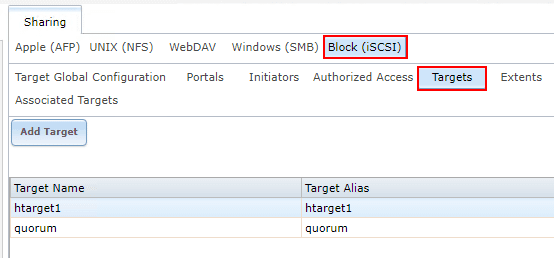
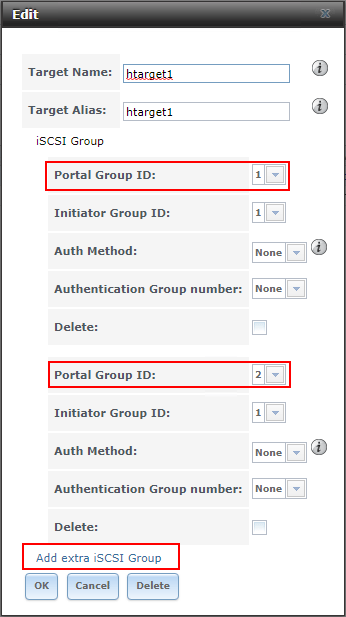
Once you have a target defined, you can click the Add extra iSCSI Group link to add the multiple Port Group ID backings.
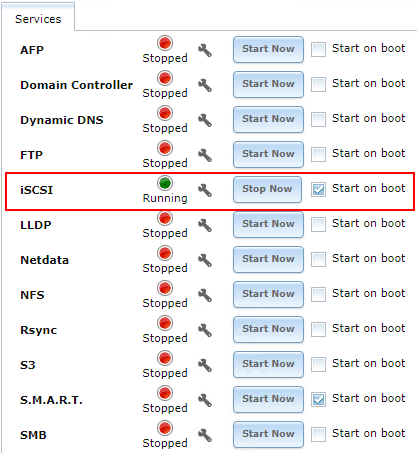
Make sure you have the iSCSI service running. It does hurt at this point to bounce the service to ensure everything is reading the latest configuration, however with FreeNAS the configuration should take effect immediately.
Takeaways
Hopefully this short little tutorial will help any who want to setup FreeNAS iSCSI Configuration for MPIO. This allows for easily playing around with MPIO with Hyper-V and other cool configurations. FreeNAS is a great storage solution especially for lab environments, but also a few production use cases I have seen as well. It is certainly worth checking out and playing around with. It certainly makes a great target for both vSphere and Hyper-V environments for me in the home lab and I am sure others have found interesting solutions utilizing FreeNAS as well.
More in this topic


Discuss this in the Community
Google is updating how articles are shown. Don’t miss our leading home lab and tech content, written by humans, by setting Virtualization Howto as a preferred source.
About The Author
