Self-hosted ChatGPT Chatbot UI in Docker
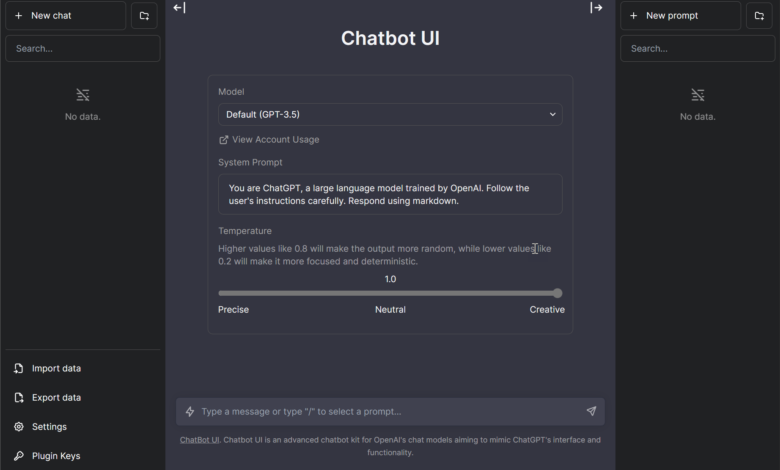
McKay Wrigley’s open-source ChatGPT UI project as an example of graphical user interfaces for ChatGPT, discuss how to deploy it using Docker. Let’s also see the details on customization options.
Table of contents
What is ChatGPT?
ChatGPT as most of us know now, this is a generative AI resource that allows you to chat with the AI model and it provides answers based from your chat interaction with it.
ChatGPT UI Project
McKay Wrigley’s ChatGPT UI project can be downloaded here on GitHub: (https://github.com/mckaywrigley/chatbot-ui), It allows you to install a GUI in your home lab that can then backend to the ChatGPT API.
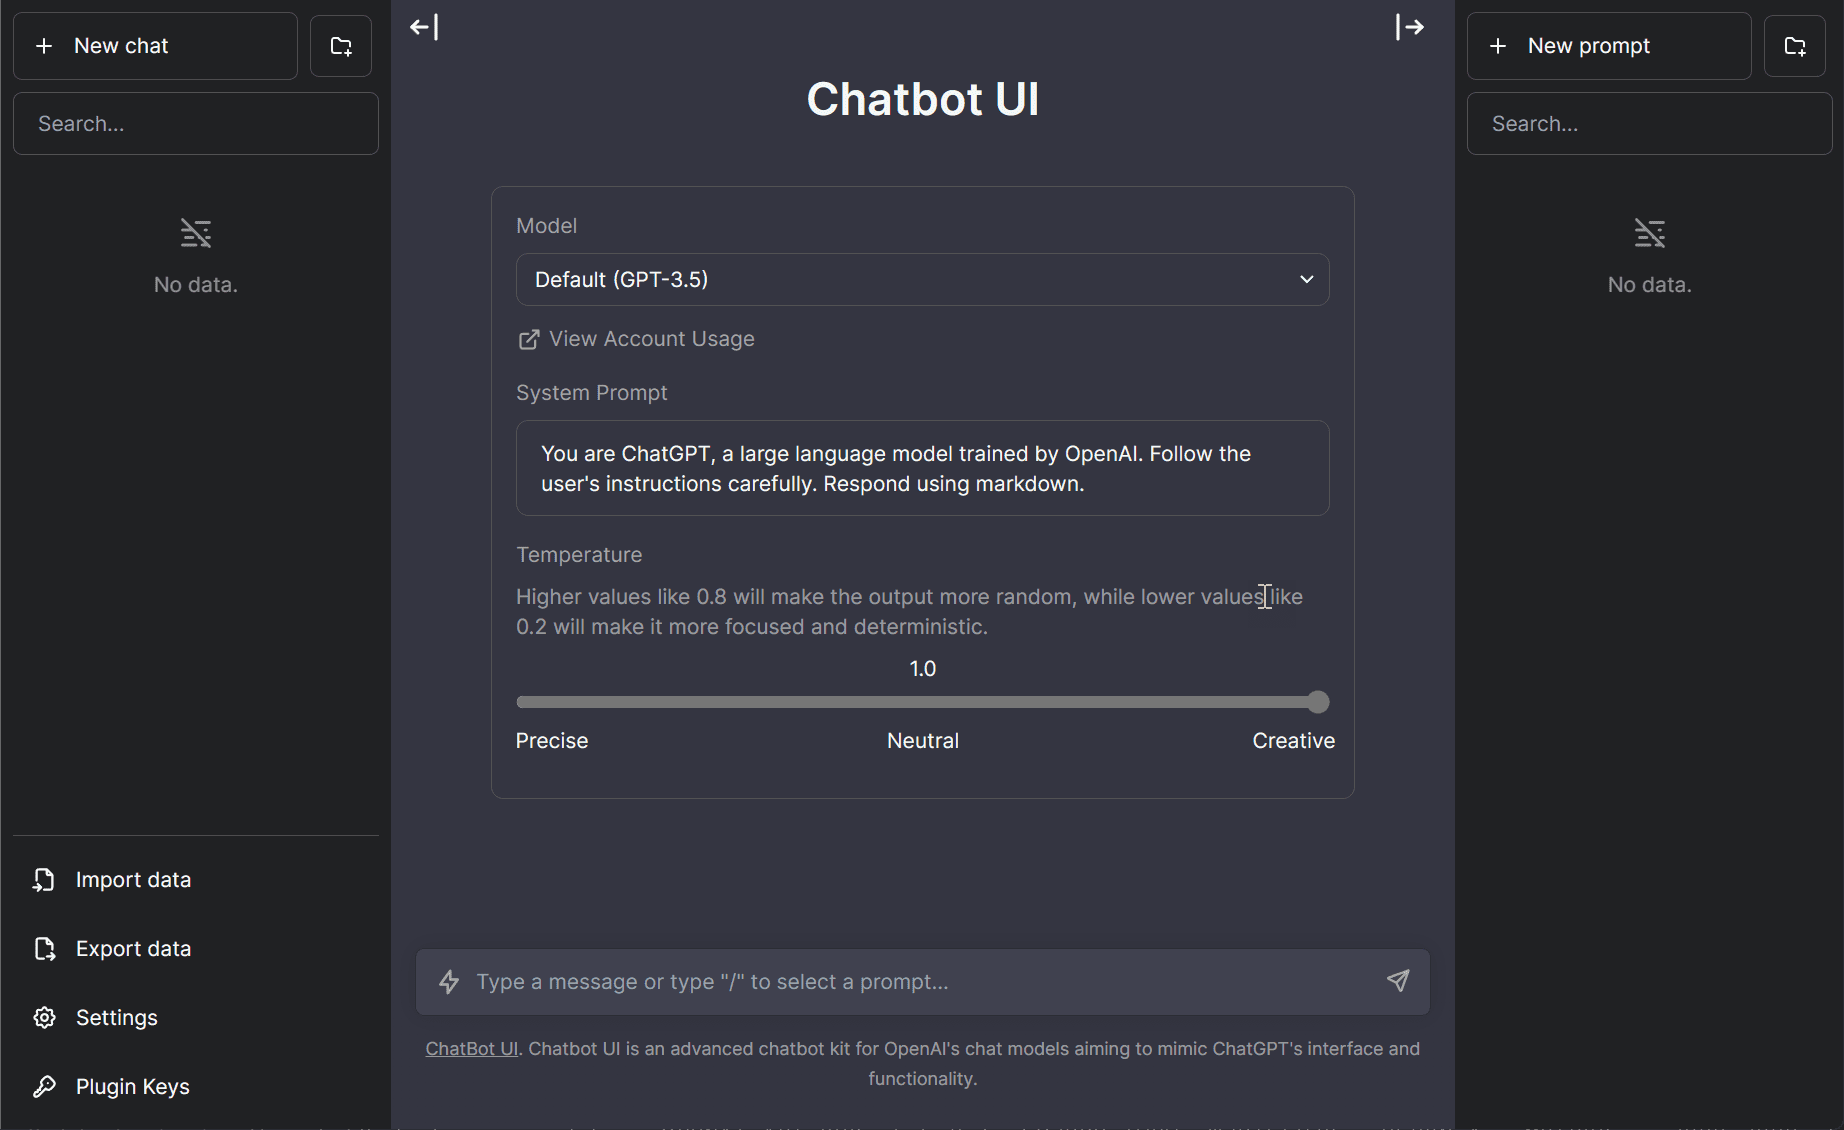
It provides a chatbot interface that includes things like customizable avatars, response buttons, and menu bars. These help to make sure you have control over the way things look and can be used with ChatGPT.
Deploying the ChatGPT UI Using Docker
Let’s look at setting up ChatGPT using Docker. First, install Docker on your local machine or server. Look at the official instructions here (https://docs.docker.com/get-docker/).
Deploy the container
You can learn more about the project and clone the repo here: GitHub – mckaywrigley/chatbot-ui: An open source ChatGPT UI.
Clone the ChatGPT UI project from GitHub using the following command to build it locally.
git clone https://github.com/mckaywrigley/chatbot-ui.gitGo to the project’s directory:
cd chatbot-uiBuild the Docker image:
docker build -t chatbot-ui .docker run -d -p 80:80 chatbot-uiAfter this, you should be able to open a browser and load the chatbot UI on your local machine or server by browsing to http://localhost or the Docker host’s IP address.
API key
You can also pull the prebuilt container from GHCR using the following docker run command. You will need to create an OpenAI API key. To generate your OpenAI API key, you can visit the link here: https://platform.openai.com/account/api-keys
Pull the GHCR container using your OpenAI API key
Once you have the API key, you can pull and run the container, replacing the OPENAI_API_KEY with your API key.
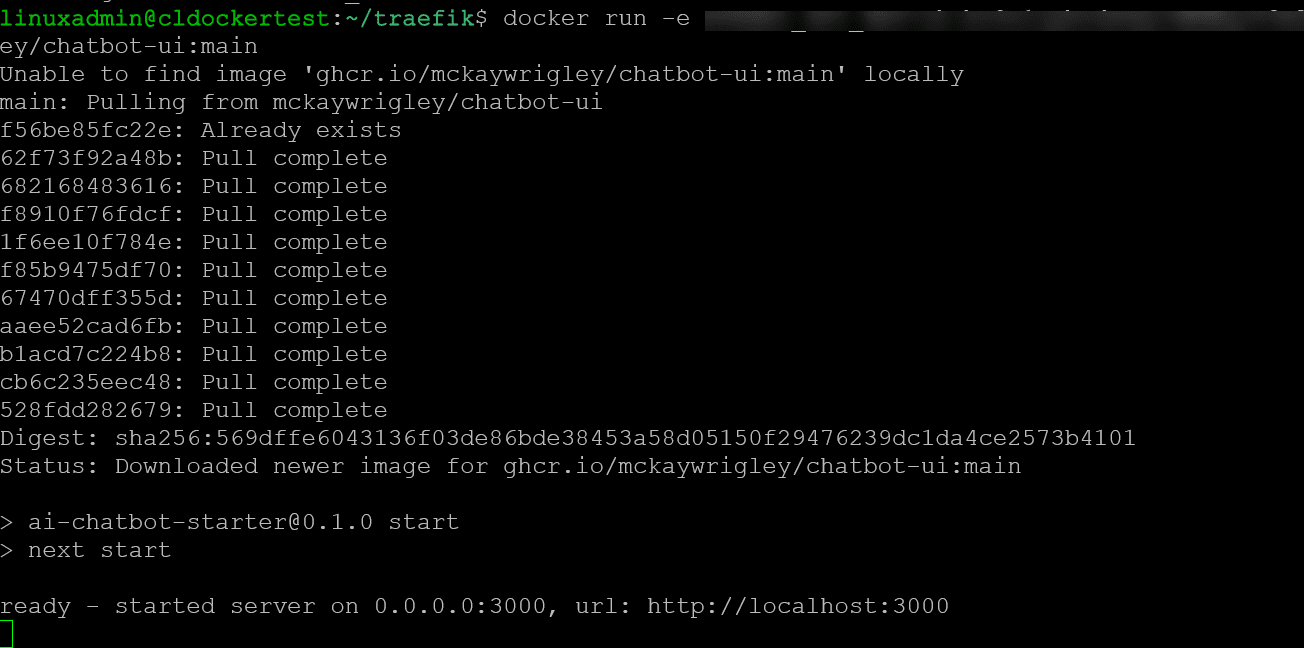
docker run -dit -e OPENAI_API_KEY=xxxxxxxx -p 3000:3000 ghcr.io/mckaywrigley/chatbot-ui:mainBelow, we are pulling the container using the Docker run command
Accessing the ChatGPT Chatbot UI
After spinning up the Docker container, you can browse out to port 3000 on your Docker container host and you will be presented with the Chatbot UI.
Environment variables with the Docker run command
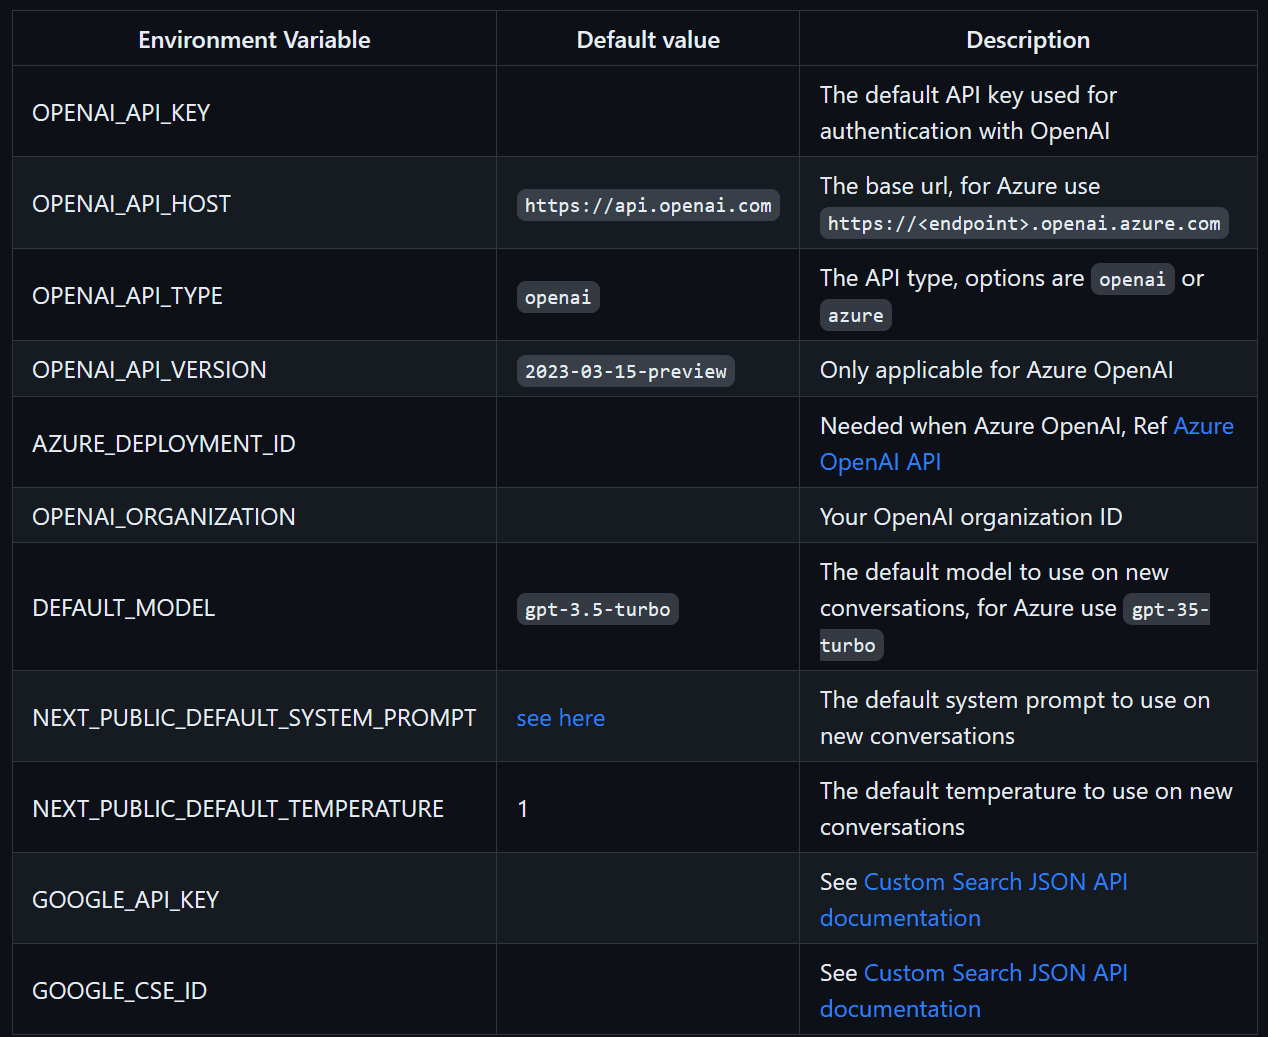
You can use the following environment variables when spinning up the ChatGPT Chatbot user interface:
Saving customized prompts
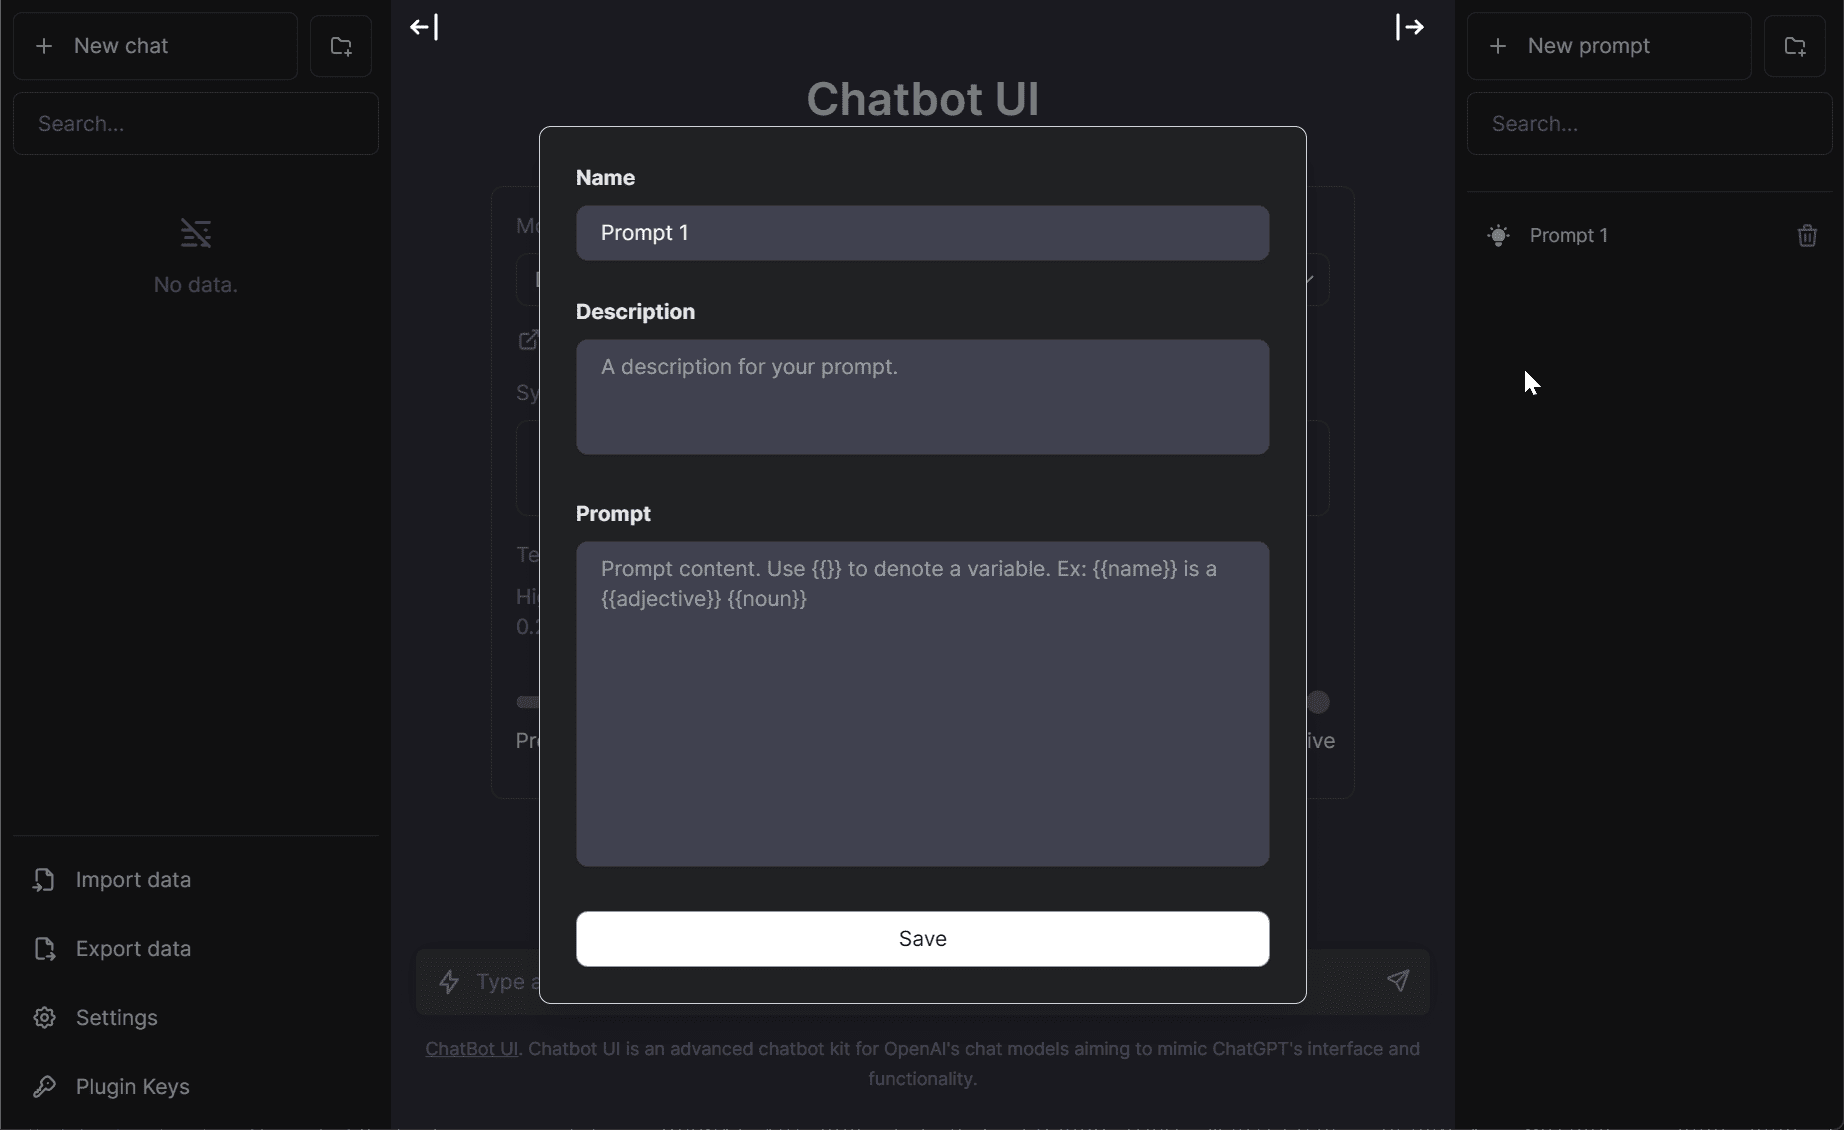
One of the really cool things you can do with the Chatbot UX in Docker is save your prompts. This allows quick and easy access to prompts you may use over and over in the Chatbot software, hosted in your own chatbots in Docker.
More posts you may like
Wrapping up
I found this project to be one that is cool to play around with and it gives us a glimpse of the possibilities of working with the ChatGPT API and the ability for different UIs to come about in the community. If you want more control over the UI, this is a great start to play around with a project that does just that.








80:80 did not work for me
docker run -d –name chatbot -p 3000:3000 chatbot-ui