Suse Rancher is one of the coolest open-source tools you can use to manage, create, and configure your Kubernetes cluster, and it provides many great features that we will discuss. If you are already running Rancher, one of the tasks as an admin you will need to do is upgrade Rancher server to the latest version to get the latest features, functionality, and capabilities. Let’s look at the process of performing a Rancher upgrade to the latest version.
Read my other Rancher posts here:
- Rancher cloud-config.yml Example SSH keys in VMware vSphere nodes
- Rancher Kubevirt with Harvester Virtual Machines with Kubernetes
- Install Longhorn Rancher for Kubernetes Block Storage
- Rancher Node Template VMware ESXi – Ubuntu Cloud Image
- Rancher Desktop v1.0 Features Installation and Configuration
What is Rancher?
Before we look at the process to upgrade Rancher, let’s look at what Rancher is exactly and why you might look at installing Rancher. When you install Rancher, you get an all-inclusive software stack for teams looking to provision and adopt microservices using containers and provides a solution to manage your Kubernetes clusters across any type of infrastructure, from on-premises to cloud environments.
Using Rancher in the home lab
I have been using Rancher in the home lab for some time now and it is a great way to spin up quick and easy Kubernetes clusters and have access to a large ecosystem of available apps and addons that come from the Rancher solution.
Upgrading the solution is easy as well, as we will see below. There are no file downloads to make and no real hoops to jump through to rollout a new Rancher container. Alternatively, you can simply perform a clean installation if you want to skip the upgrade process. However, upgrading allows maintaining your configurations, managed clusters, etc.
Kubernetes cluster management
Rancher Kubernetes is a platform that deploys production Kubernetes clusters and centrally manages your Kubernetes clusters, including authentication, access control, and provides observability features across your Kubernetes landscape when running your infrastructure stacks.
Kubernetes is the de facto container management solution that allows assigning an operator, controller, helm repo, and allows you to run helm get values, setup a service account for applications, configure plan metadata, and spin up a new node at any point in time.
Deploy Kubernetes anywhere
You can use Rancher to deploy Kubernetes clusters and nodes on top of bare metal, private clouds, public clouds, or VMware vSphere and have a centralized, global security policy. It allows using familiar tools like Helm to install apps from a Helm repo, or you can also use the built-in App Catalog to deploy applications across all your clusters.
Simple Single Docker container deployment
You can deploy Rancher as a simple Docker container that spins up a local cluster for your Rancher management cluster. You will want to consult the Rancher documentation for information on the Rancher Kubernetes engine, current Kubernetes version, and supported versions. You will also find information about upgrades and upgrading rancher to the latest version.
Upgrade Rancher version to the latest version
Like any solution, lifecycle operations for Rancher include upgrading rancher server version to take advantage of new features. You can find your current Rancher version in the Rancher console. You will either be running the Rancher server container on a single Docker host, or in a high-availability Kubernetes cluster.
To find the latest Rancher version, you can check the release notes here:
Releases · rancher/rancher (github.com)
Find the version of Rancher you are running
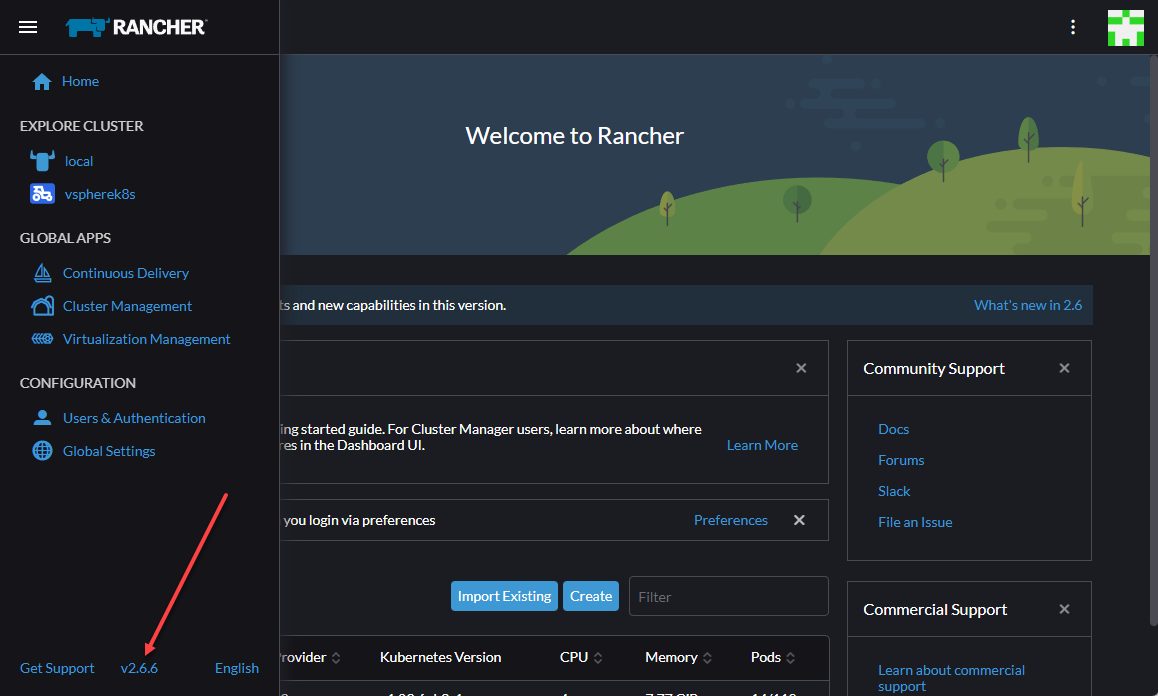
To find the version of Rancher you are running, log into Rancher and expand the menu on the left. At the bottom, you will see the Rancher version listed.
Overview of the process
The process to upgrade Rancher is fairly straightforward. The process I am showing below in this example is true upgrade of a standalone single Docker container for upgrades. The components of the upgrade will include the container and the data of your existing Rancher server container environment.
Upgrade process below
Let’s think about an overview of the Rancher upgrade process and resources upgraded as part fo the process.
Stop the running Rancher container
Tag the latest image
Back up your Rancher data
Pull the latest version or specific version of Rancher
Deploy the new Rancher node with Rancher data backup
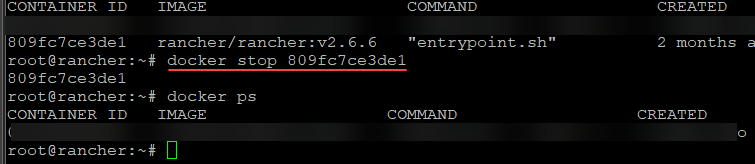
1. Stop the running Rancher server container
First, to prepare for the upgrade, stop your existing Rancher container. Review the Docker container running Rancher. We need to stop the running Docker container running the current version of the Rancher.
2. Tag the latest Rancher server image
One of the first things we need to do is tag the latest image with the version value. To do this, use the following command (keep in mind you will tag the latest version at the time of your upgrade accordingly). It will tag the new rancher server container for latest with the current version of the latest. Your values here may vary.
If you don’t tag the latest version of the Rancher server container, you may run into problems upgrading your Rancher server container, since you most likely already have a “latest” Rancher container downloaded and tagged as such from your first installation. So, we are changing the tag value to the latest version number.
docker tag rancher/rancher:latest rancher:v2.6.8
3. Back up your Rancher server data
Next, we need to back up the existing Rancher data to ensure we have the data to reconnect to the latest Rancher image.
Command to back up your existing Rancher data
Here, I am backing up the existing container data. I like to tag the name with the version I am going to. This way later, it is easy to understand which version and container it goes with.
docker create --volumes-from <your current Rancher container> --name rancher-data268 rancher:v2.6.8
4. Pull the latest version or specific version of Rancher server
The next step we can take care of is pulling down the latest version of the Rancher Docker container for our local cluster of Rancher.
Pull the latest container command
To do that, we can use the following command to pull the latest image from the Docker repository to get the latest Rancher server version installed:
docker pull rancher/rancher:v2.6.8The Docker container pull will progress and the image will successfully pull down.
5. Deploy the new Rancher node with Rancher data backup
On the final step, we need to deploy the new Rancher container using the data we backed up from our previous container.
Running the command
Now, we can deploy the new Rancher version using the docker run command:
docker run -d --volumes-from rancher-data268 --restart=unless-stopped -p 80:80 -p 443:443 --privileged rancher/rancher:v2.6.8
As you can see above, we are creating and running a new Docker container with the data backup we created
Wrapping Up
Hopefully this quick walkthrough of how to upgrade your Rancher server container will help any who may be struggling with the documentation from the Rancher site or the steps aren’t clear. Happy labbing everyone!
More in this topic


Discuss this in the Community
Google is updating how articles are shown. Don’t miss our leading home lab and tech content, written by humans, by setting Virtualization Howto as a preferred source.
About The Author
