If you are learning Proxmox and using it in your home lab environment, one of the things you will likely want to do is build a Proxmox cluster. Doing this provides high availability for your virtual machines and containers. If you are building clusters, you may need to remove nodes from cluster configurations in Proxmox. In a home lab, you may have power considerations, want less noise, or smaller footprint. This post will look at how to remove a node from the cluster manager in Proxmox and the steps to do this, including commands.
Proxmox cluster components and node roles
A Proxmox cluster allows you to configure multiple servers connected to work together as a logical unit instead of standalone cluster nodes. It provides high availability and load balancing of virtual machines. Each node in the cluster can host multiple virtual machines and containers.
You can add nodes to a cluster or remove a node from a cluster if needed. You will still have the remaining node or nodes left to provide resources for your workloads. The removed node can then become a standalone host.
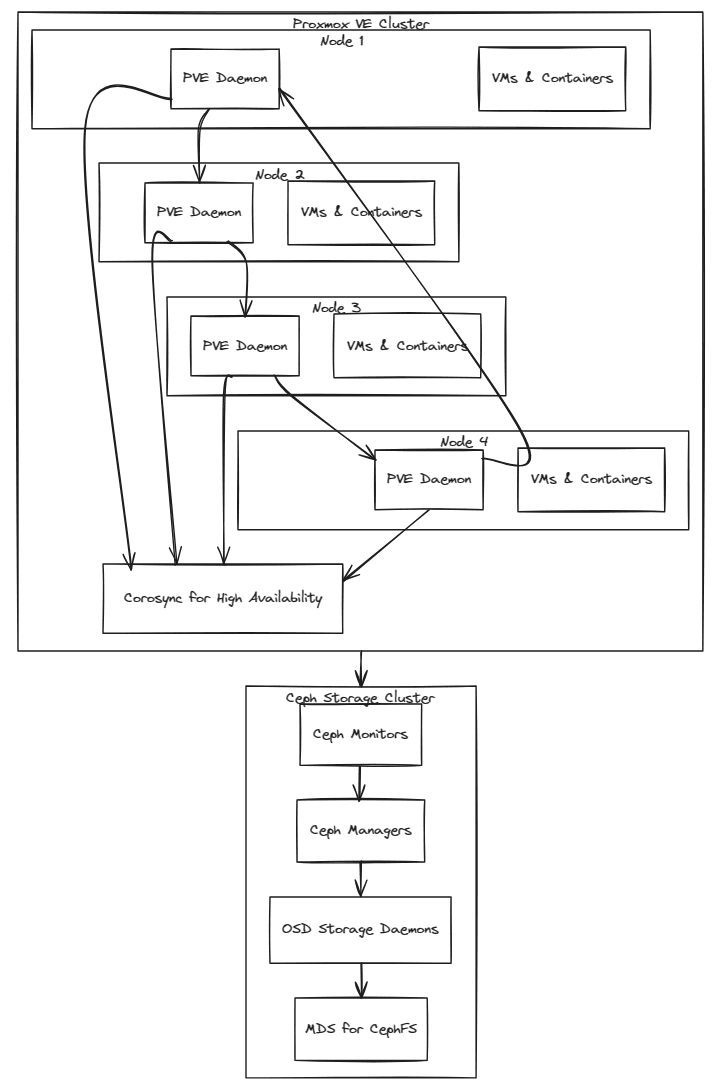
Check out the high-level diagram of a Proxmox PVE cluster with Ceph storage components setup.
PVECM command
The pvecm command is the tool you use to manage cluster nodes. It provides capabilities for checking the status of nodes, adding new nodes, and, crucially, removing nodes from the cluster. It is good to get familiar with pvecm commands for your cluster management.
You can view the pvecm command by SSH-ing into one of your Proxmox cluster nodes and typing:
pvecm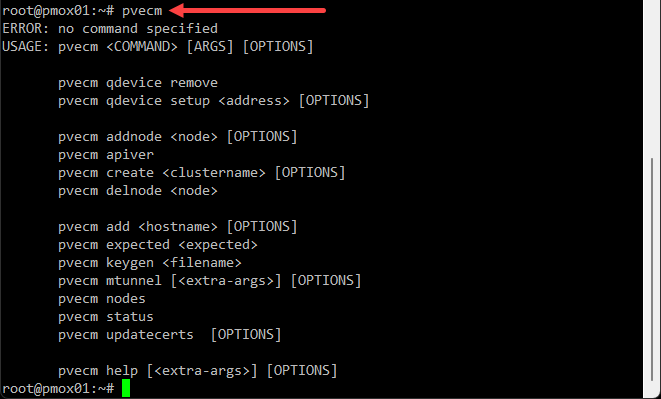
A good example that is practical of beginning to use the pvecm command is the following:
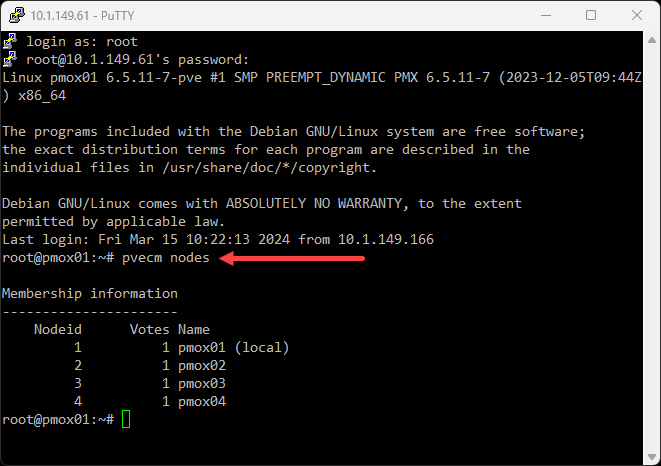
pvecm nodesThis command lists all nodes in the cluster and statuses. This definitely helps to understand the current topology before making changes or removing a node from a cluster, including the node ID that we will need later.
You can also see which nodes are listed in the directory:
/etc/pve/nodes/nodename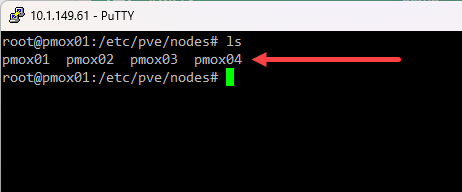
Preparing to Remove a Node
Before removing a node from the cluster, assess the impact on virtual machines and services running on the node. It may be necessary to migrate virtual machines to other nodes or plan for downtime.
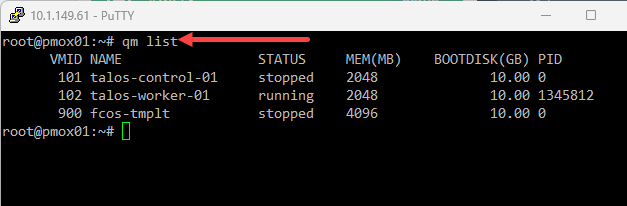
Example Command for Listing Virtual Machines on a Node using the following command
qm listThis command will show all virtual machines and containers running on the current node. So, you will want to remote into the node you are planning on removing from the cluster.
As a note, you can also migrate VMs in the Proxmox web GUI.
Make sure you have backups
Regardless of how well the process works and the fact that you have additional nodes in your Proxmox cluster, you want to make sure you have good backups of your virtual machines. Make sure you have a backup using Proxmox Backup Server, or you have a replication job that has created another copy of the data.
If you already have backups or replication jobs configured, check and make sure these are healthy and have good data that can be recovered.
Removing a node step-by-step
This involves the following workflow:
- Migrate virtual machines
- Cleanup Ceph HCI and CephFS (if applicable)
- Remove the node from a cluster using the pvecm command
- Shut down the node
- Verify and check the cluster after removal
1. Migrate virtual machines
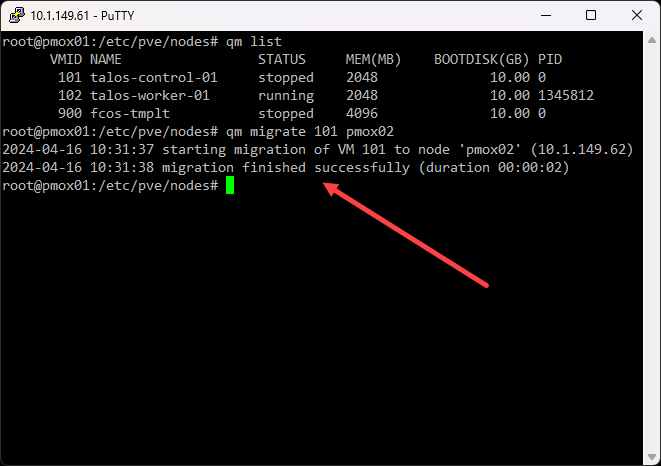
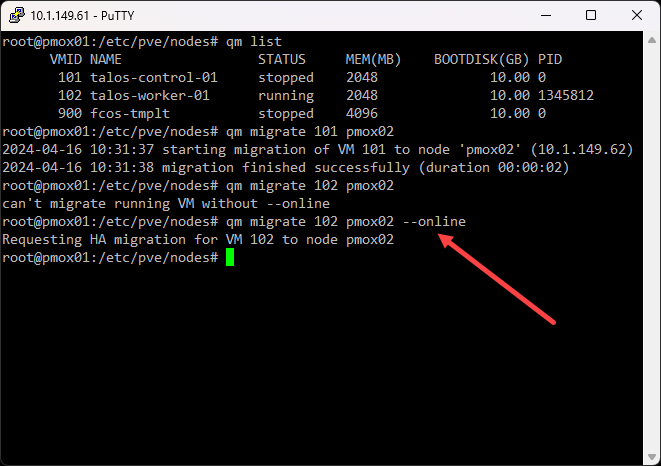
If any virtual machines or services were still running on the node, you can move those to another cluster node using the following command for VM migration:
qm migrate <VMID> <TargetNode>Replace <VMID> with the virtual machine ID and <TargetNode> with the node to which you want to migrate the VM.
You may need to use the –online flag if it is online:
Make sure the virtual machines have successfully migrated to a different host before you assume everything is good. Ping the VM, or remote into the VM to perform sanity checks on the health of the virtual machine.
Once you have done this for all VMs you have migrated, we can now move on to the next step.
2. Cleanup Ceph HCI and CephFS (if applicable)
There is additional complexity when you have a node that is contributing to Ceph HCI storage.
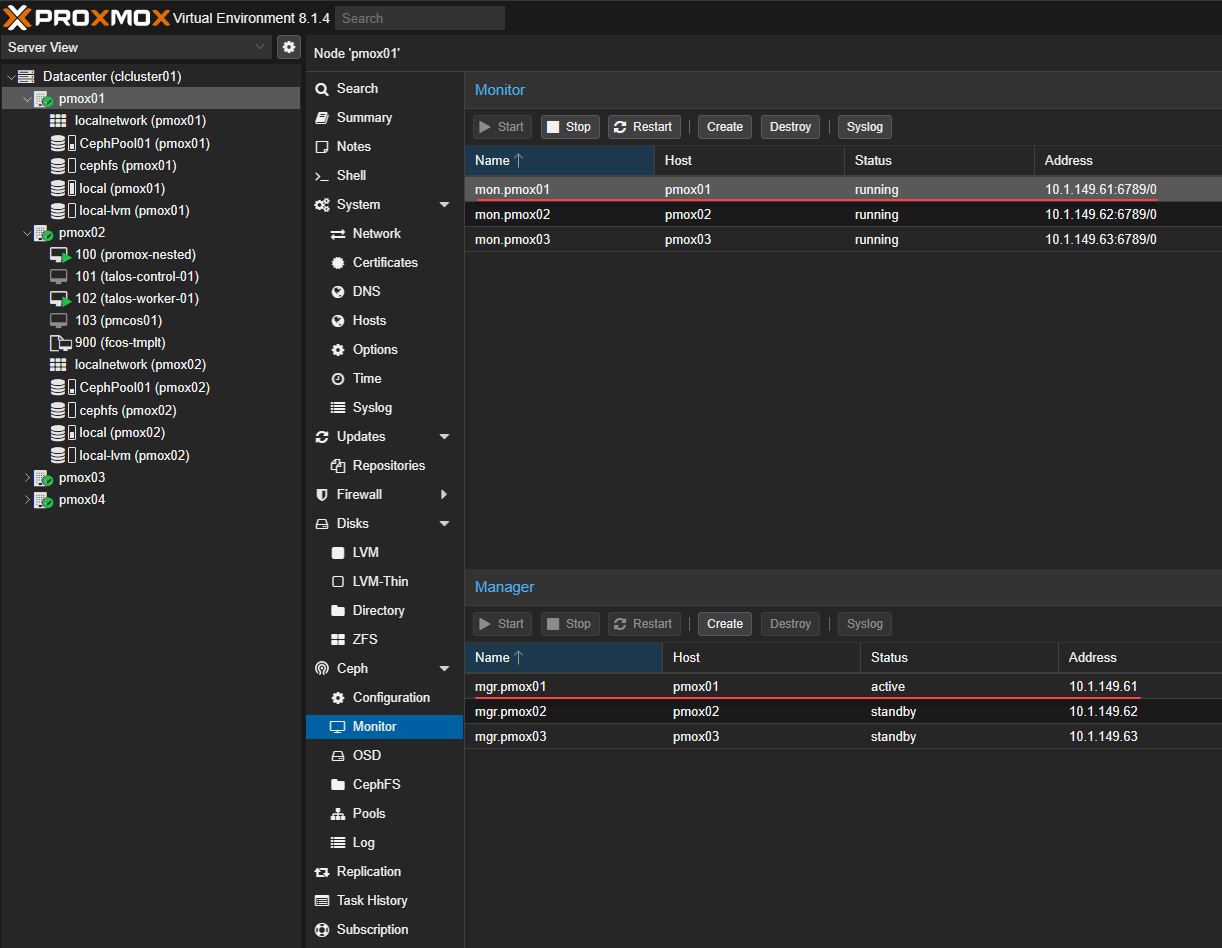
Get rid of the Monitor and Manager components on the node:
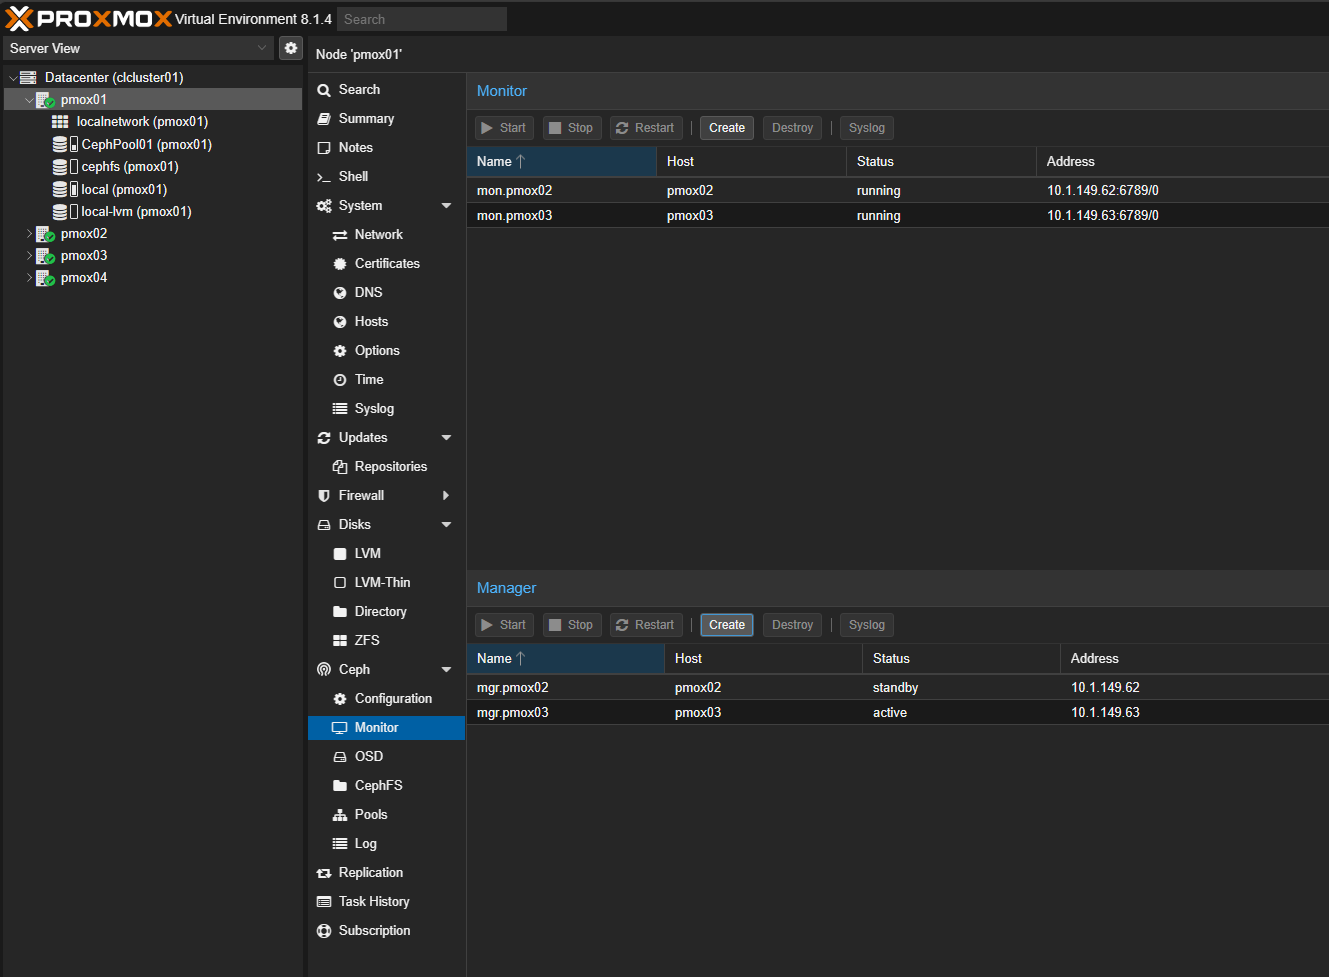
Below is after removing.
Next, down and out the OSDs:
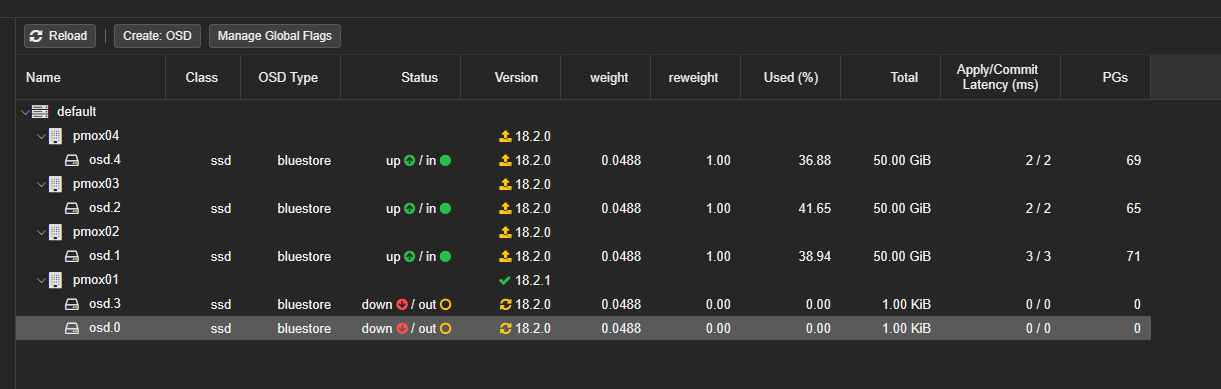
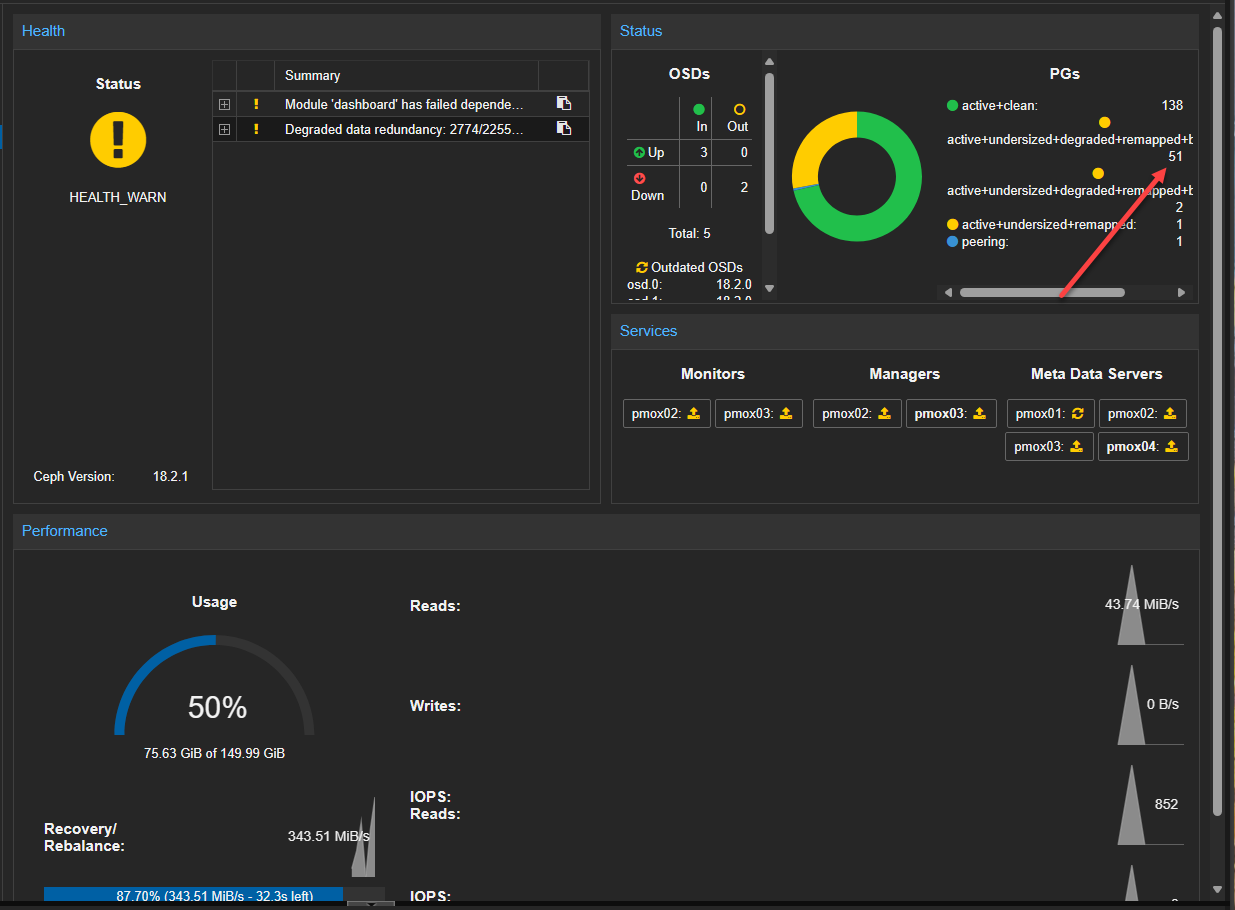
Make sure to allow time for the degraded state of the Ceph components to get healthy before destroying the OSDs. You will see this warning:
Components start rebuilding:
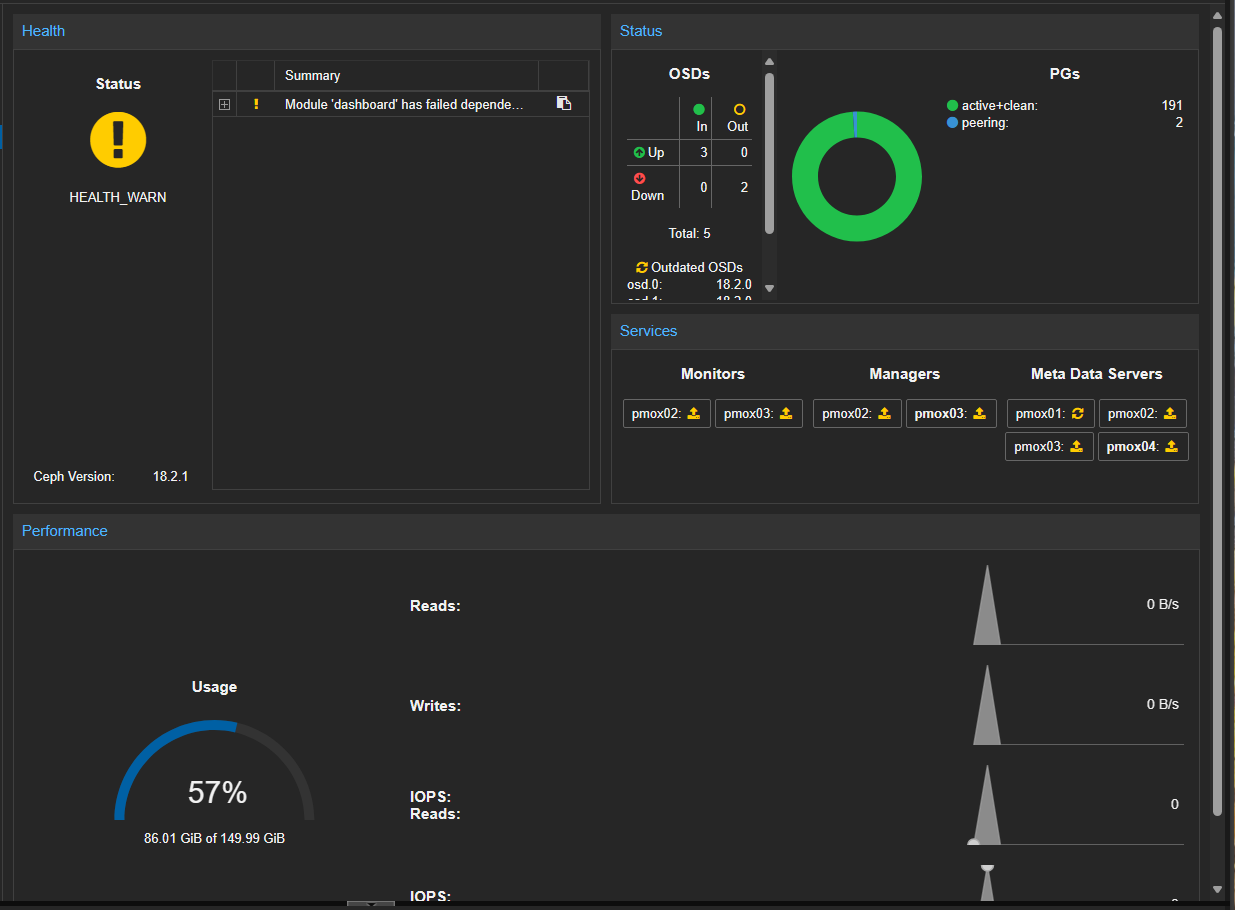
Components are rebuilt successfully:
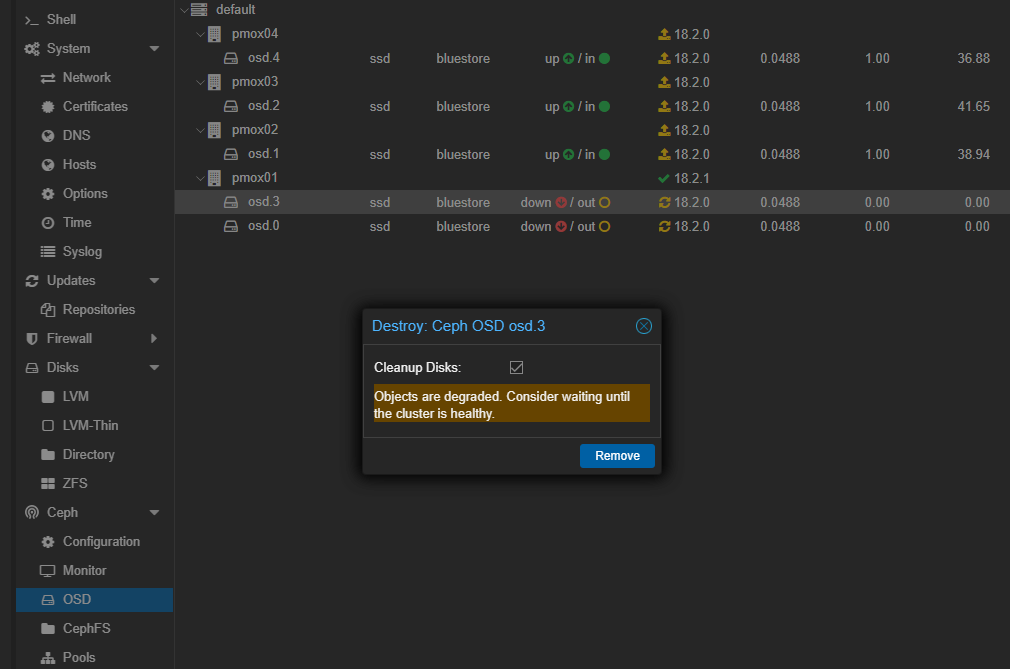
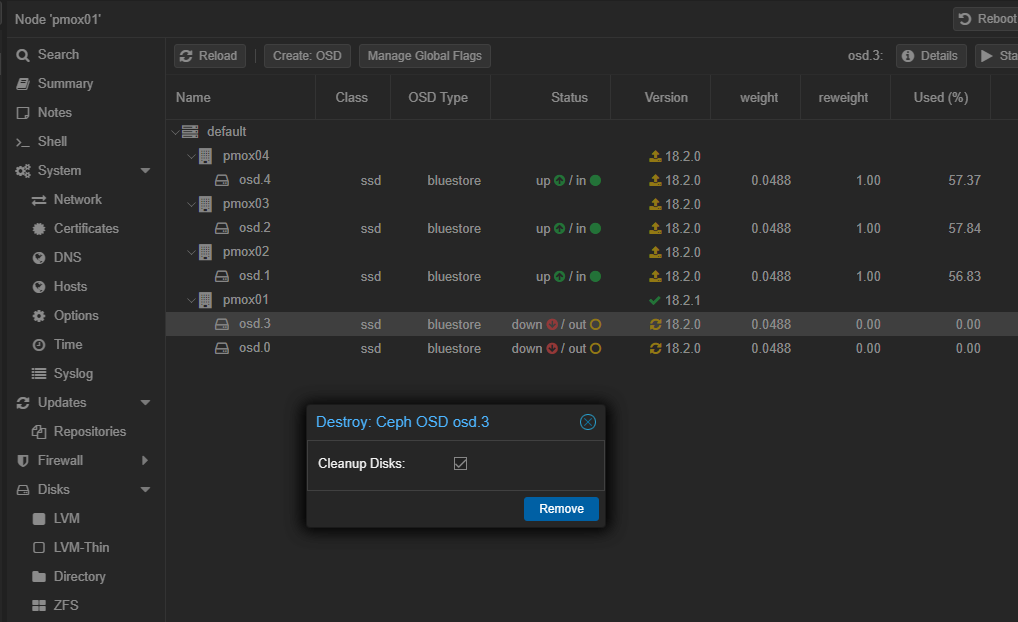
Now, we can destroy the OSDs on the host without issue. This will remove the local data on the OSDs that was used for Ceph.
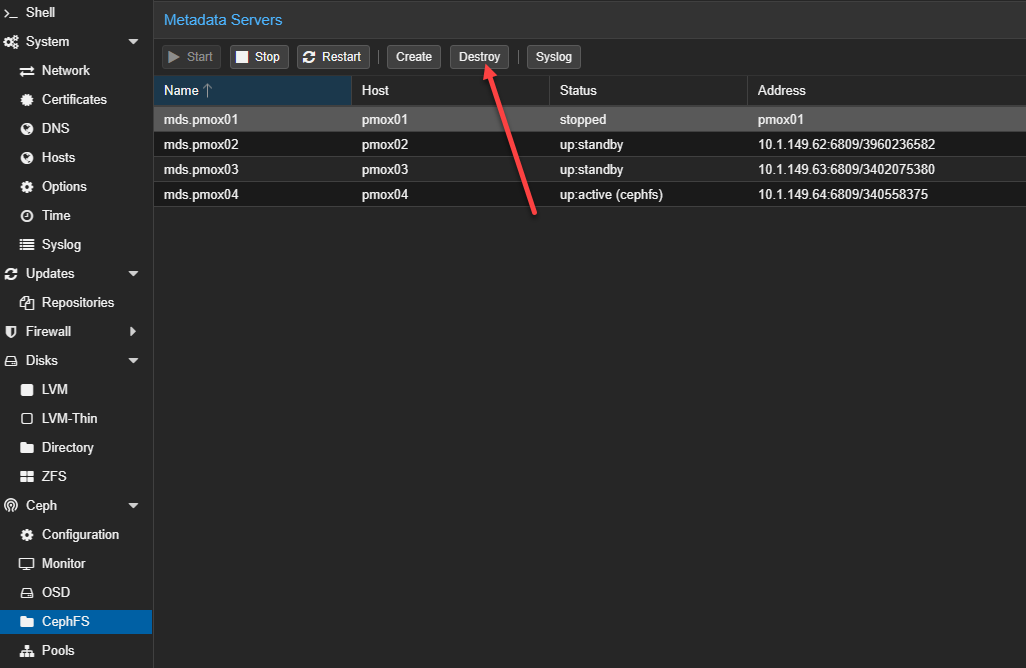
If you are running CephFS, make sure to stop and destroy the Metadata Servers.
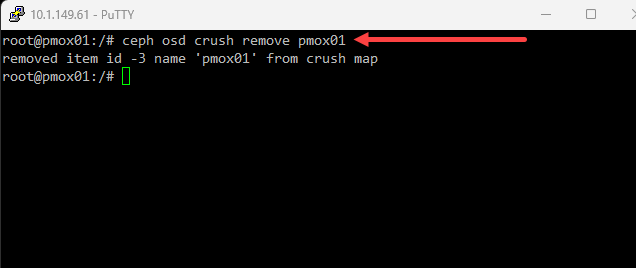
Remove the OSD from the Ceph crush map.
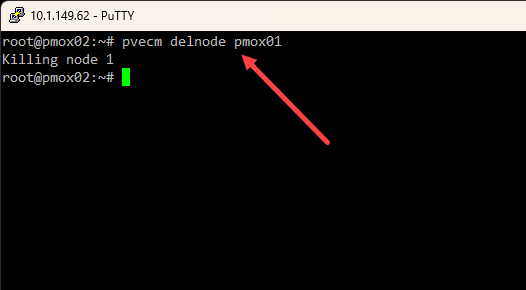
3. Removing the Node Using pvecm delnode
Use the pvecm delnode command to remove the node from the cluster. This command will update the cluster’s configuration and safely remove references to the node and the cluster conf file.
Example Command:
pvecm delnode nodenameReplace nodename with the actual name or ID of the node you want to remove.
4. Shut down the node
Now that everything has been removed, you can shut down the node if you don’t plan on utilizing it any longer after the delete process. Use the command below on the physical servers removed from the cluster.
Example Command for Safely Shutting Down a Proxmox Node:
shutdown -h nowThis command will safely halt the system.
5. Verify and check the cluster after removing a node
Verify the cluster is running correctly on the remaining nodes. Check the following:
- Check log entries, including cluster logs
- Check the load distribution
- Make sure virtual machines are healthy running on the new hosts
With the node removed, consider future maintenance plans. This might involve adding new nodes or upgrading existing ones.
Wrapping up
Removing a node from a Proxmox cluster is something you want to do with careful planning and execution. By following these steps, you can ensure the process is handled smoothly and maintain the integrity and performance of your Proxmox cluster, including your data. It adds additional complexity when you are running Ceph HCI storage.
More in this topic


Discuss this in the Community
Google is updating how articles are shown. Don’t miss our leading home lab and tech content, written by humans, by setting Virtualization Howto as a preferred source.
About The Author
