If you are working with Proxmox in your home lab or otherwise, one of the first things you will want to do is upload ISO installation media to your Proxmox host. You can mount a physical CD to your Proxmox host, of course. However, this is cumbersome and not feasible for remote configurations and installing a wide range of operating systems across the board in the Proxmox environment.
Uploading ISO installation media to your Proxmox host is the way forward for most. If you are like me, you may run into issues with a default installation of Proxmox and the partition size configured for ISO images by default. Let’s talk about Proxmox create ISO storage location and see how this is completed.
Take a look at the Youtube video walkthrough of the process below:
Proxmox VE Server and installing operating system guests
Promox VE Server is a great open-source hypervisor that provides many capabilities and features. It has the capability as a native feature to upload ISO files. You can then select file to select the ISO image you want to use to install guest operating system virtual machine instances.
An ISO file is a disk image that most software vendors provide to install operating systems. This includes Linux operating systems like Ubuntu and also Microsoft Windows operating system variants.
When you configure the virtual machine in Proxmox VE, you select the disc image and the ISO image is used as part of the virtual machine installation process.
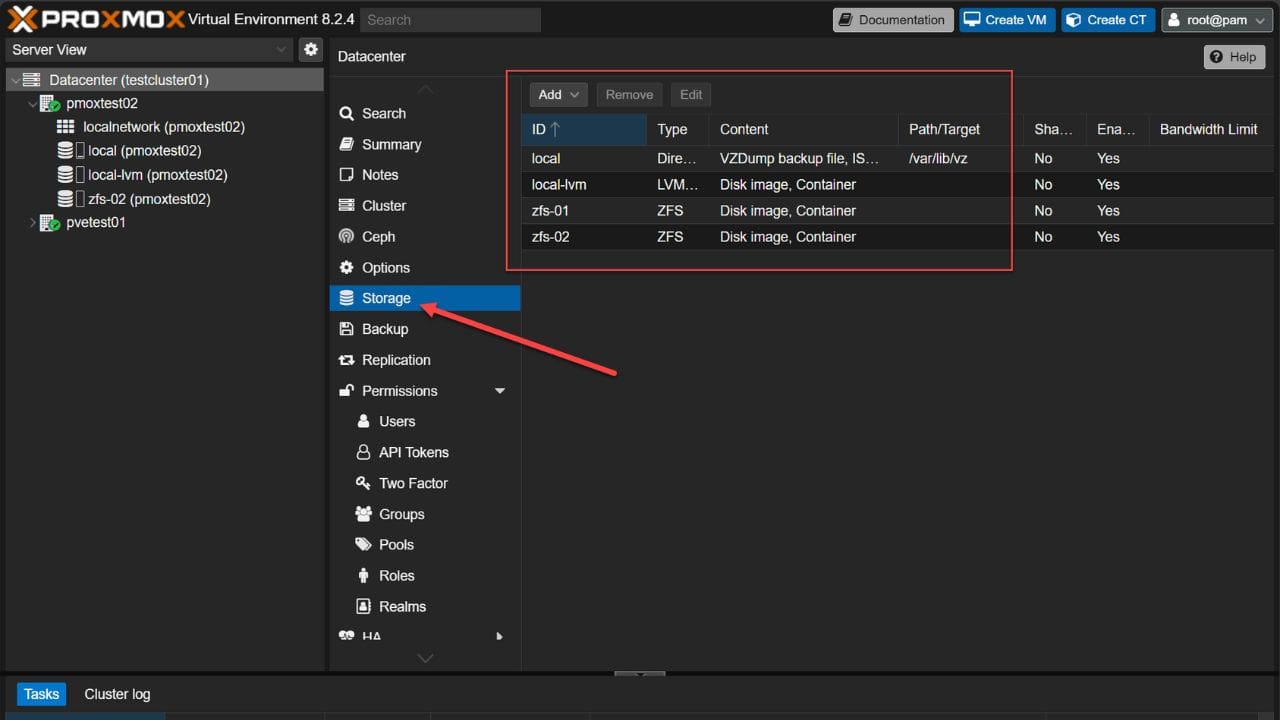
Uploading Proxmox VE ISO images to the server
Like VMware and other hypervisor solutions, the Proxmox VE server has the means to upload ISO files using the Server view interface.
In the Server View, click the storage pool location > ISO images > Upload.
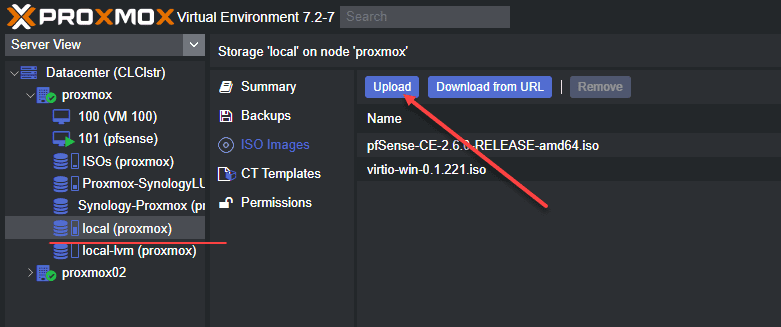
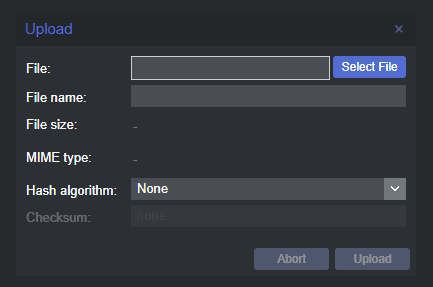
It will launch the box to upload the ISO files. Browse to your ISO file and click the Select file button to point to the ISO image you want to use and click finish.
As you can see, the upload can be perfromed from the browser, like other hypervisors, such as VMware.
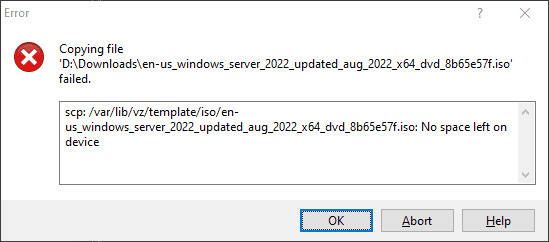
Proxmox VE ISO files storage disk space error
However, the following disk space error may be one issue with a default Proxmox VE installation.
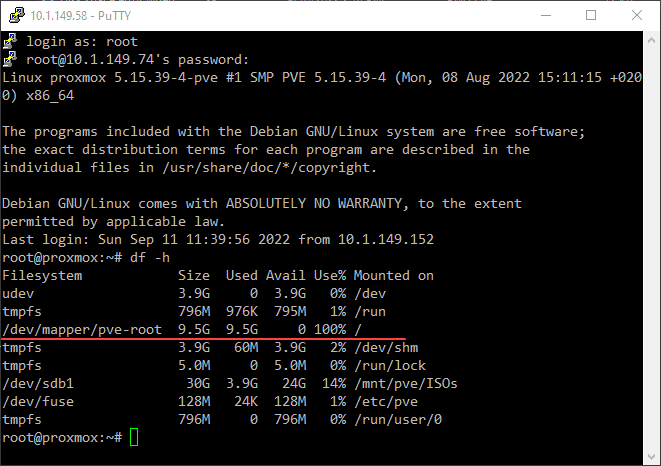
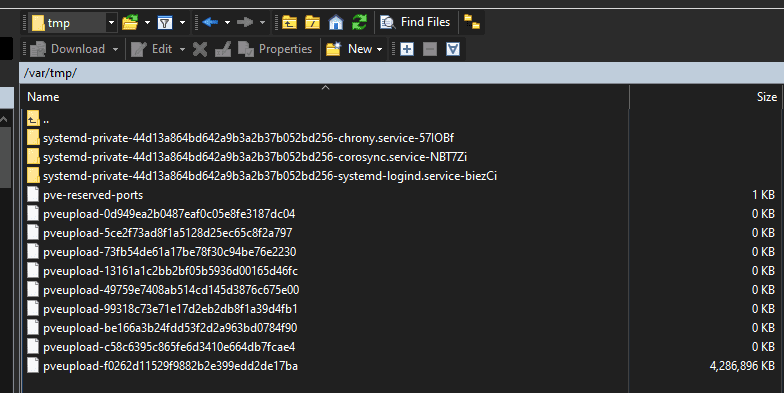
The default Proxmox VE installation storage pool space only included a 10 GB partition for uploading ISO files. When you upload an ISO image to a Proxmox VE server, it will first attempt to upload the ISO image file to the /var/
As you can see below, the image file is first uploaded to /var/tmp before they are staged into the permanent location found at /var/lib/vz/template/iso folder.
Proxmox Create ISO image Storage Location
How do we create a custom location for ISO storage location for storing your ISO image files in Proxmox VE?
First of all, we need to go through a directory creation process to create a custom location for uploading your operating system ISO files to your Proxmox VE server for creating your Server VM installation or other operating system VM installations.
The process involves the following steps:
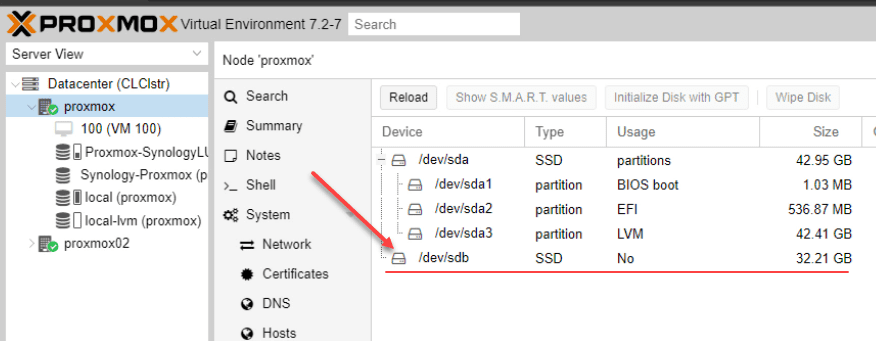
Add a new hard disk to your Proxmox host
Create a new Proxmox directory
View the storage location in your Proxmox server web interface
Add a new hard disk to your Proxmox host
The first step in adding an ISO image storage location in Proxmox is to add an additional hard disk where we can create a directory. Below, I have added a new hard disk to the Proxmox host. We can use this in the configuration of the new ISO image storage location, instead of the /var/lib/vz location on the screen.
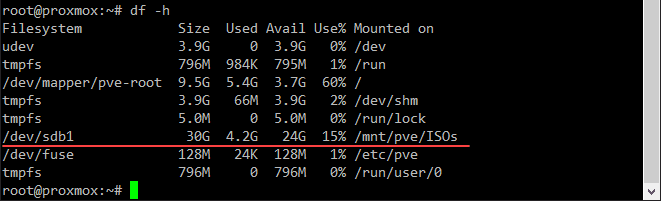
Viewing the new disk from the command line
You can view the new disk from the Promox command line using the command and switch:
df -h
This is the same command you would use in Ubuntu or other Linux distribution for viewing disk space for the store.
Create a new Proxmox Directory for ISO image upload iso files
Next, we navigate to the Disks > Directory > Create Directory button in Proxmox. Here we can create the directory we need and format the file storage for uploading ISO files.
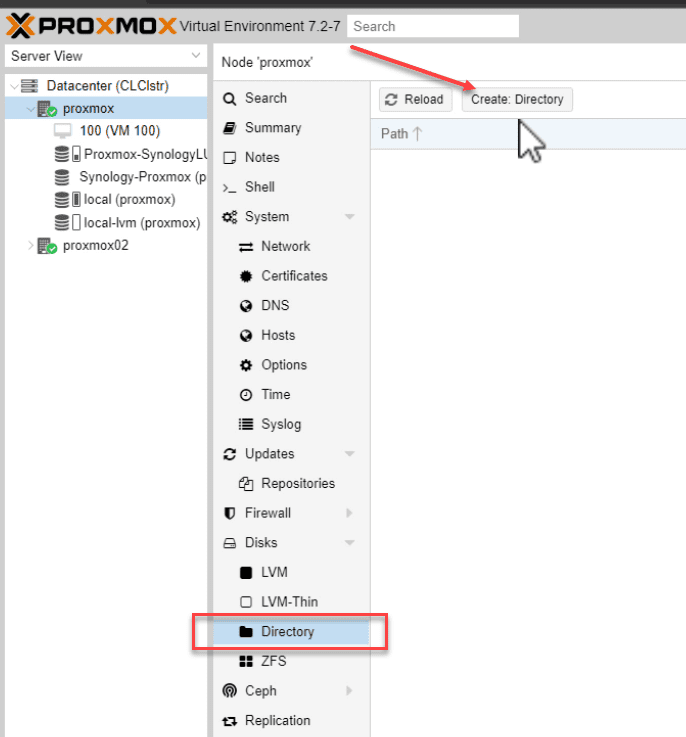
When you click the Create directory button, you will see the following Create Directory dialog box. Select the disk, filesystem, name, and check the box to Add storage. Then click the Create button.
Below is an example of creating a new ISO image storage location on a Proxmox server host. When you create the new directory, you can then ensure your ISO images are stored in the new location when uploading ISOs for creating your new VM hosted in Proxmox.

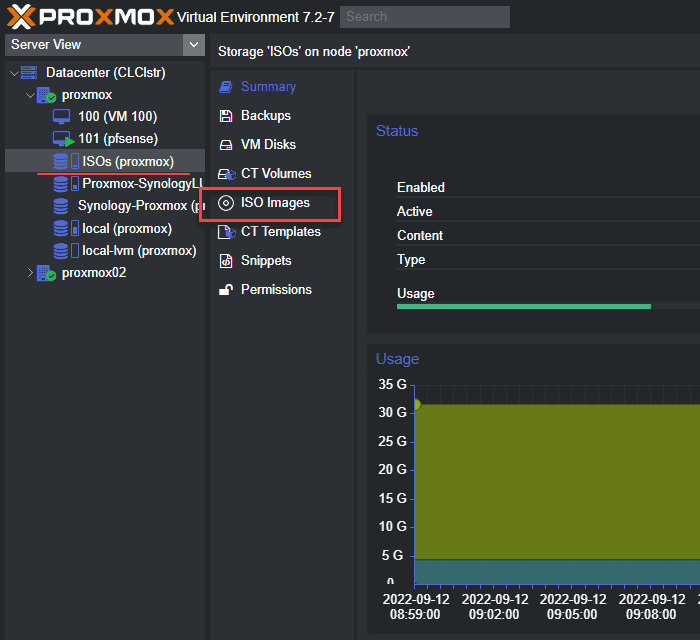
Viewing the new Proxmox ISO image location
After creating the new storage location, you will see the ISO image location listed in your Proxmox browser interface on the left-hand side.
Proxmox storage FAQs
What is Proxmox? Proxmox is an open-source hypervisor that allows easily running virtual machines and containers.
What is Proxmox ISO storage? This is storage in Proxmox allowing you to upload ISO files to storage and use these to install VM guests in Proxmox.
How do you upload ISO files to Proxmox server? You can do this using a web browser logged into your Proxmox host, or you can use SCP and an SCP utility like WinSCP.
Why might you get a disk upload error? If you use the default ISO storage location, you may receive the error on screen when uploading a large iso file operating system installations such as Windows Server 2022.
Wrapping Up
When learning about Proxmox, uploading ISO files to your Proxmox VE server is one of the first steps you will take when loading operating systems on your Promox host. If you want to learn about installing Proxmox as a virtual machine in VMware, you can look at my previous article covering that topic here.
Be sure to comment if you have alternative ways of handling the uploading and creation of ISO image file storage in Proxmox.