Proxmox iSCSI target to Synology NAS
Not long ago, I wrote a quick blog post detailing how to install Proxmox inside a VMware virtual machine. However, to really play around with the hypervisor, it is great to have storage to work with. I could’ve added a local disk to the VM. However, iSCSI sounded way more interesting, especially with the new addition of the Synology DS1621xs+ in the home lab environment. Let’s take a look at adding Proxmox iSCSI target to Synology NAS LUN and see what this process looks like.
Take a look at the video walkthrough of this process here:
Proxmox iSCSI target to Synology NAS
The steps to complete adding a Synology on Proxmox hypervisor server looks like the following:
- Create the iSCSI target on the Synology NAS
- Add a dedicated interface to your Proxmox server (if you don’t have already)
- Add the iSCSI target to Proxmox
- Create the LVM to the Synology iSCSI target
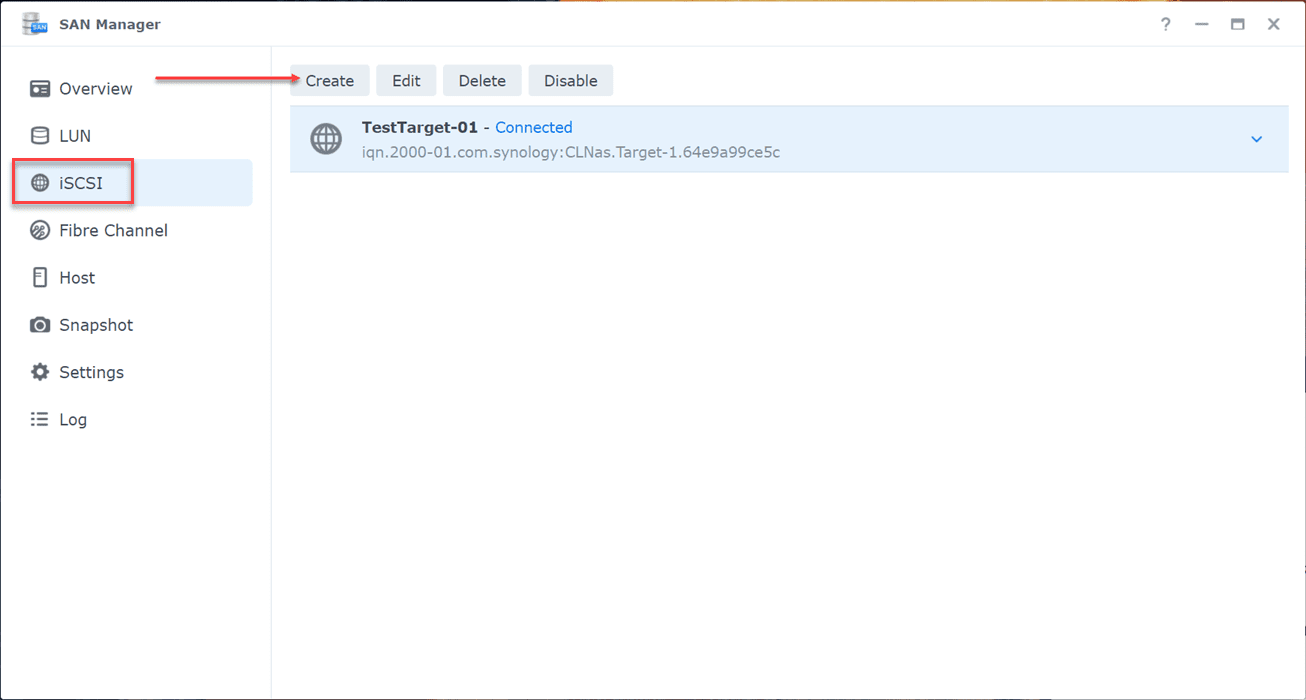
1. Create the iSCSI target on the Synology NAS
Let’s first create the iSCSI target on the Synology NAS device. This process is carried out in the Synology SAN Manager. Launch SAN Manager and click iSCSI > Create.
Configure a name for the iSCSI target and configure CHAP if you are using CHAP to secure the connections. For this test, I am leaving CHAP unchecked.

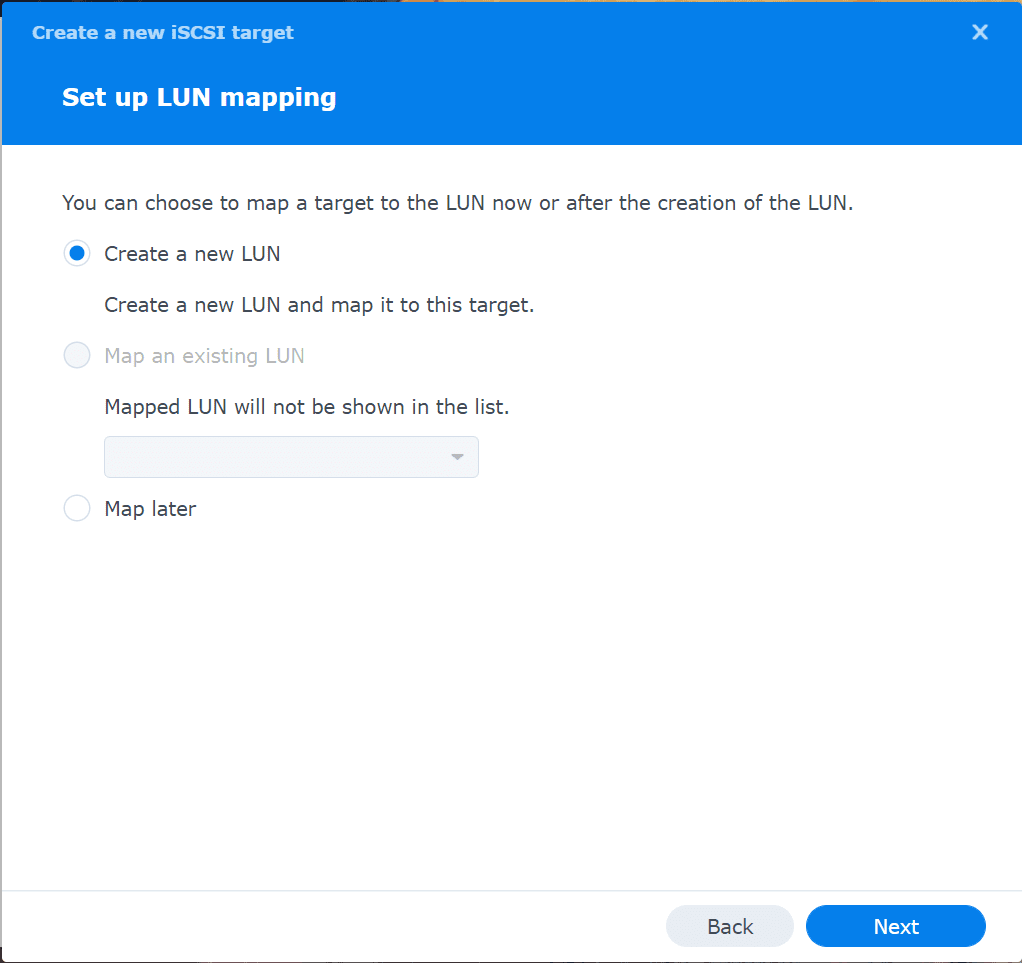
From the new iSCSI target wizard, it will prompt you to create or map to a LUN. I am creating a new LUN here.
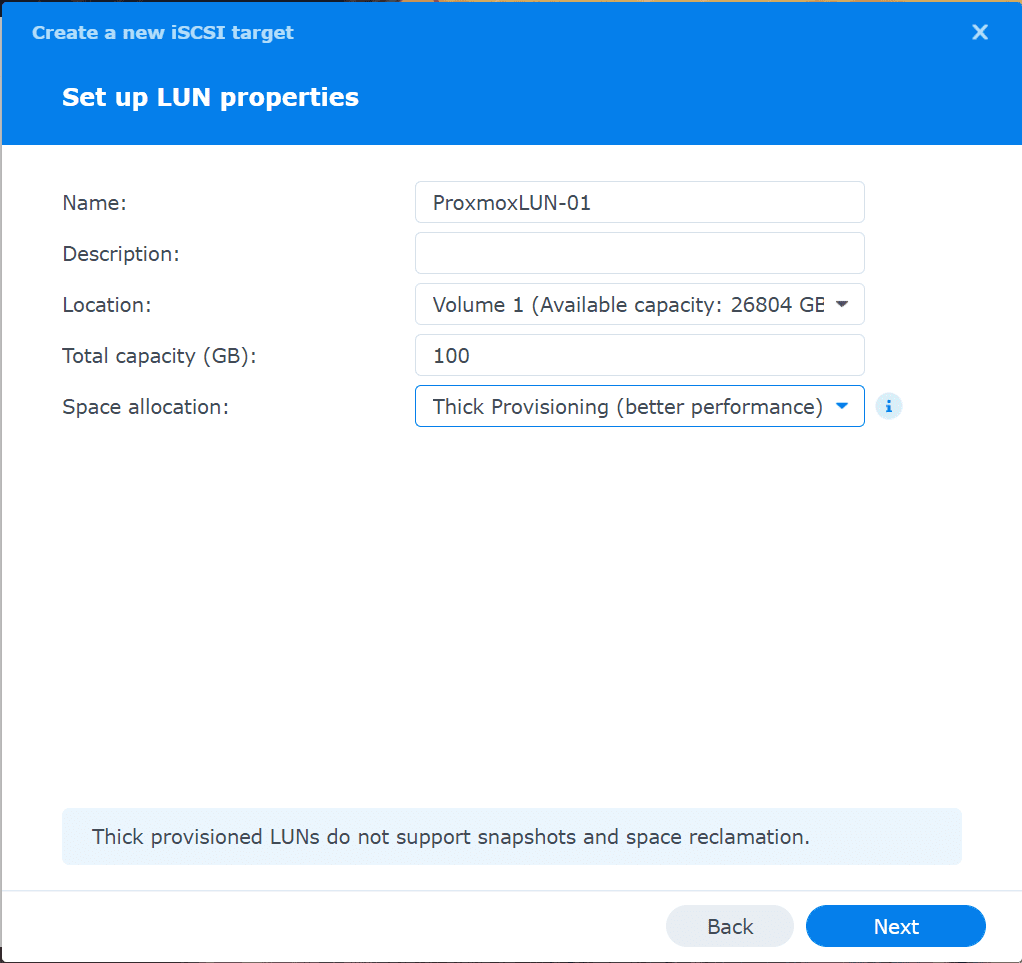
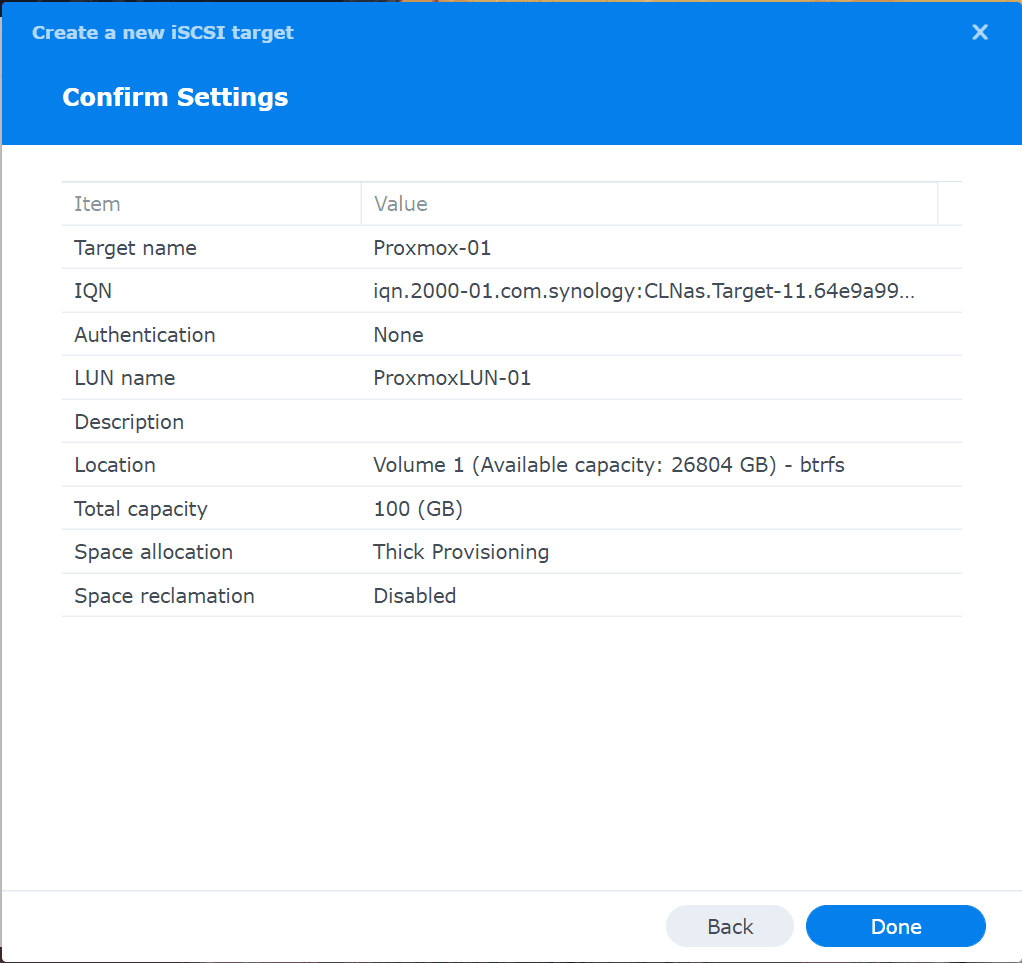
Name the new LUN and configure the Capacity and the Space allocation method (thick or thin).
Review the settings configured and click Done.
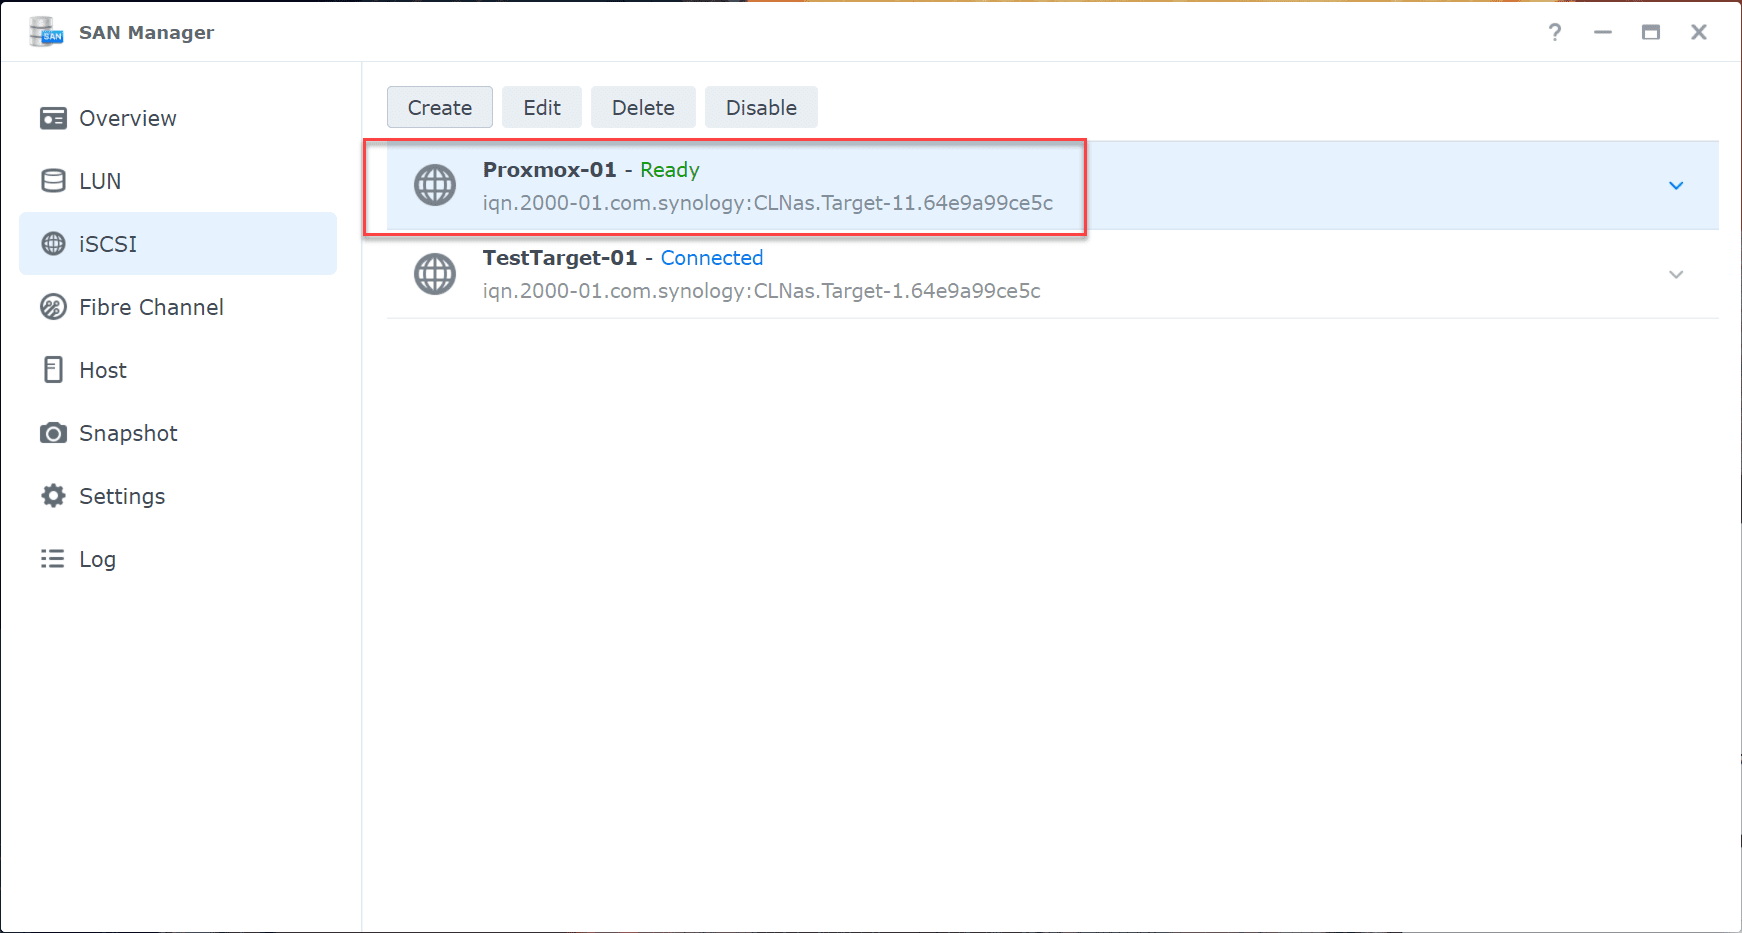
You will see your new LUN displayed in the list.
3. Add a dedicated interface to your Proxmox server (if you don’t have already)
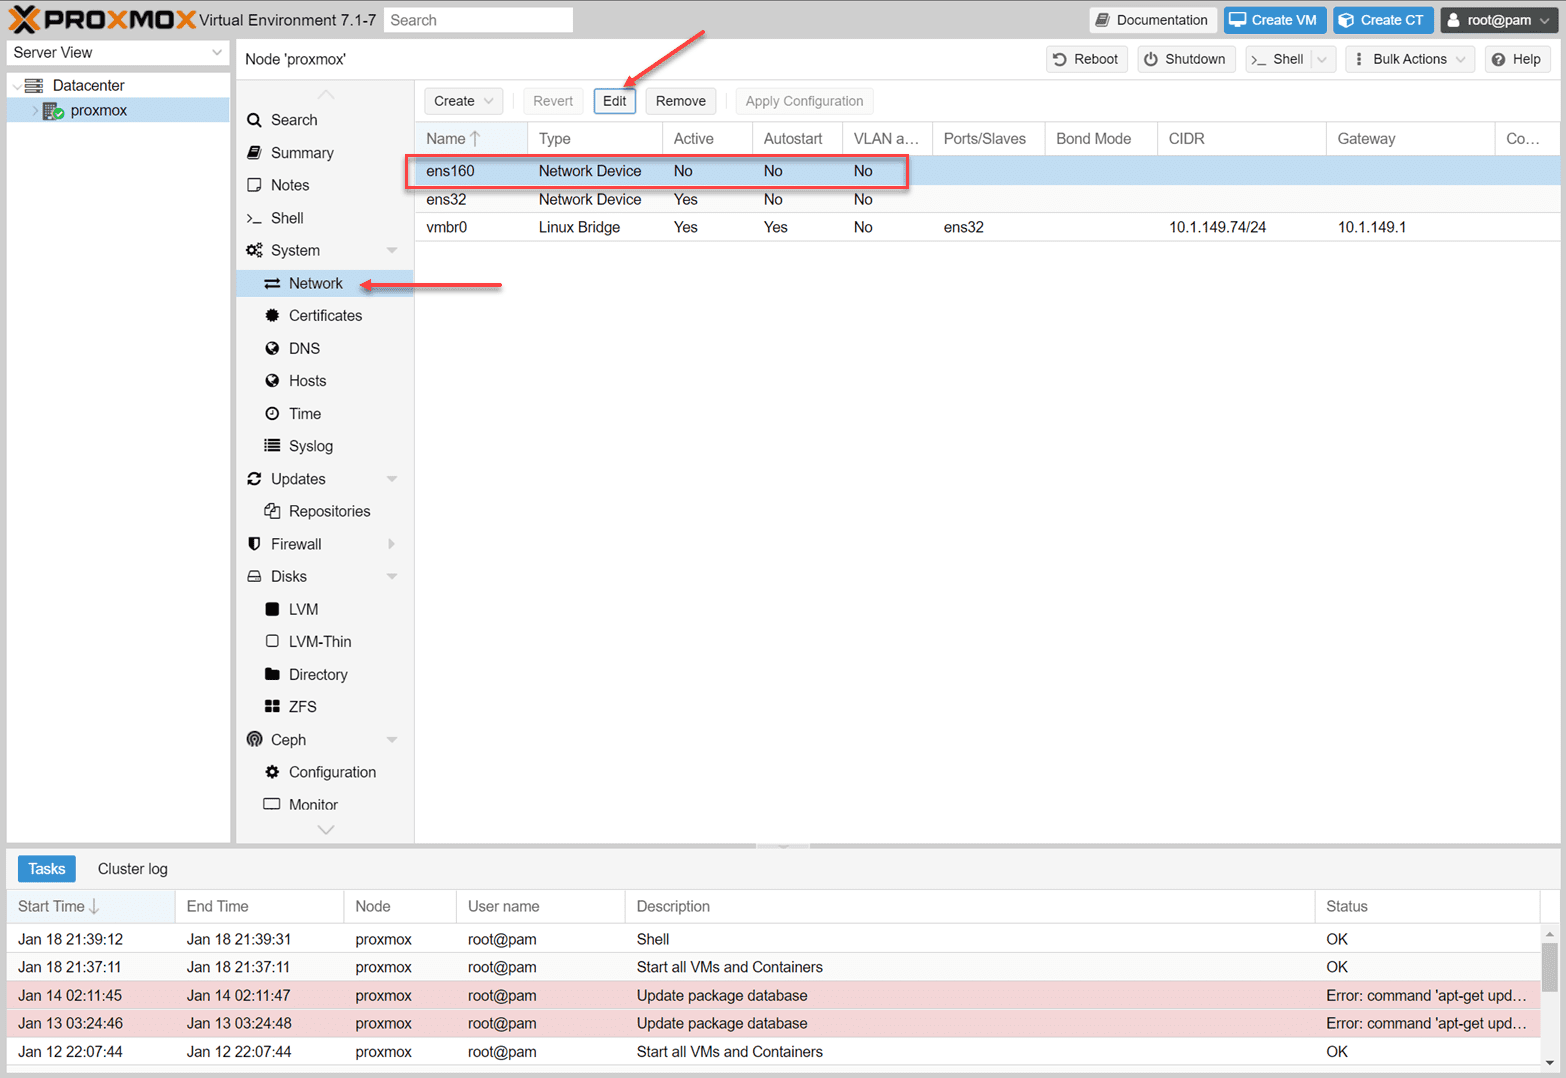
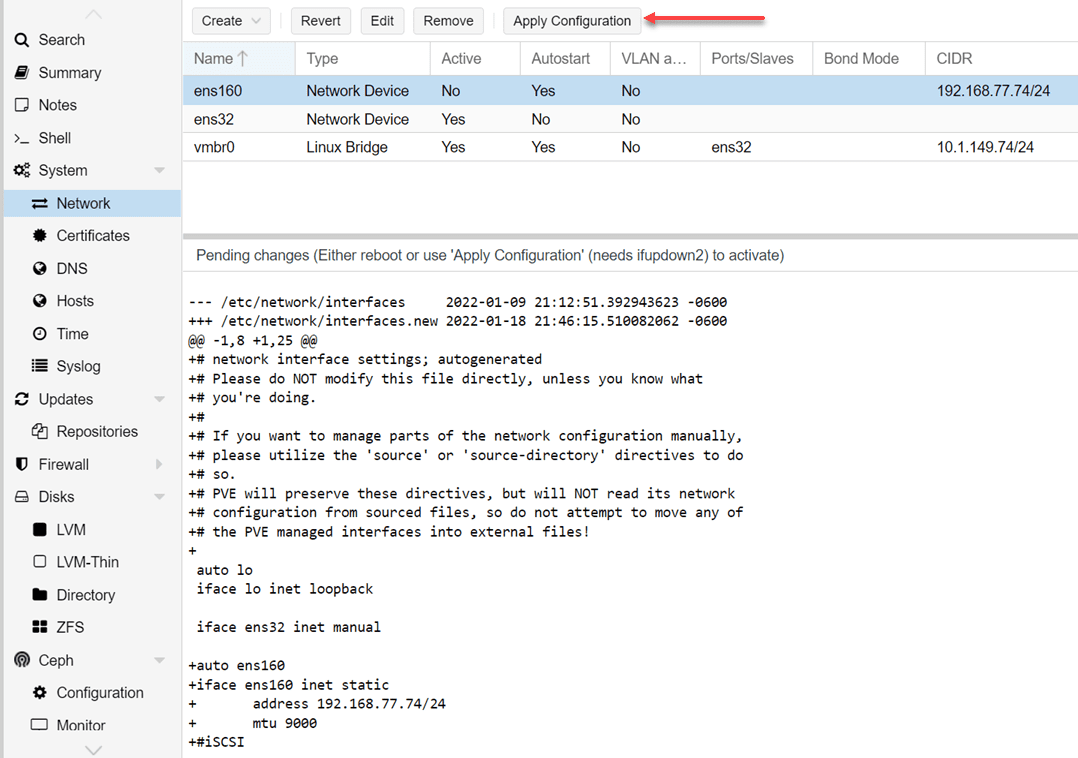
On the Proxmox virtual machine, I have added a secondary NIC to the VM for dedicated iSCSI traffic. Now, we need to configure the NIC with an IP address. To do this, in the Proxmox GUI, click your host > Network > <your network adapter> > Edit.
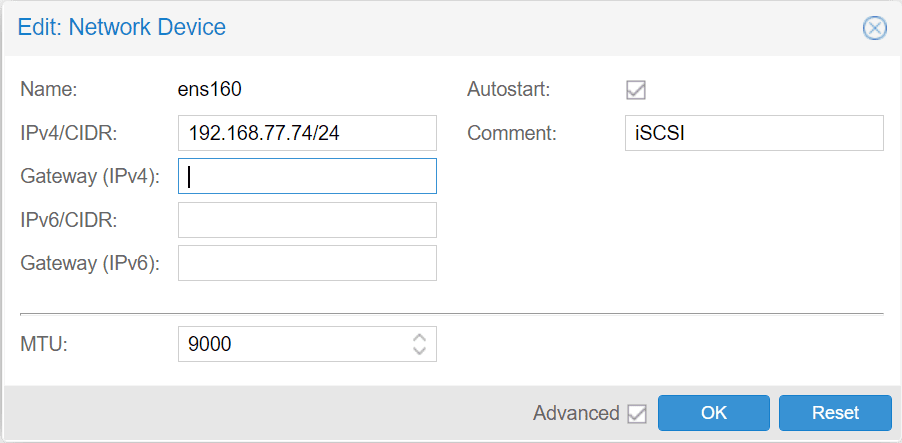
Enter the IP address you want to configure to communicate with your iSCSI target on the Synology NAS.
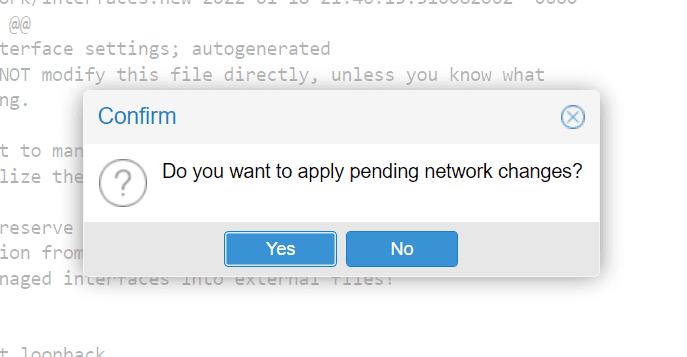
The IP address has been configured. However, the configuration needs to be applied as the Adapter Active status shows No. Click the Apply Configuration button at the top.
Confirm the new network settings.
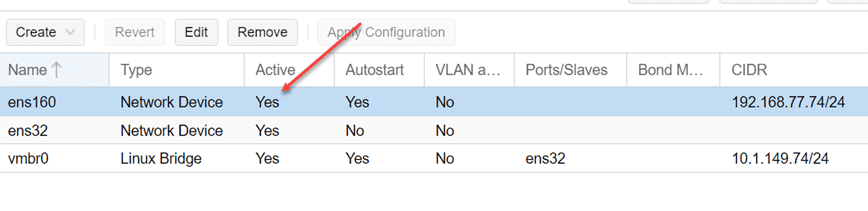
The new network adapter with the configured IP address now shows Active.
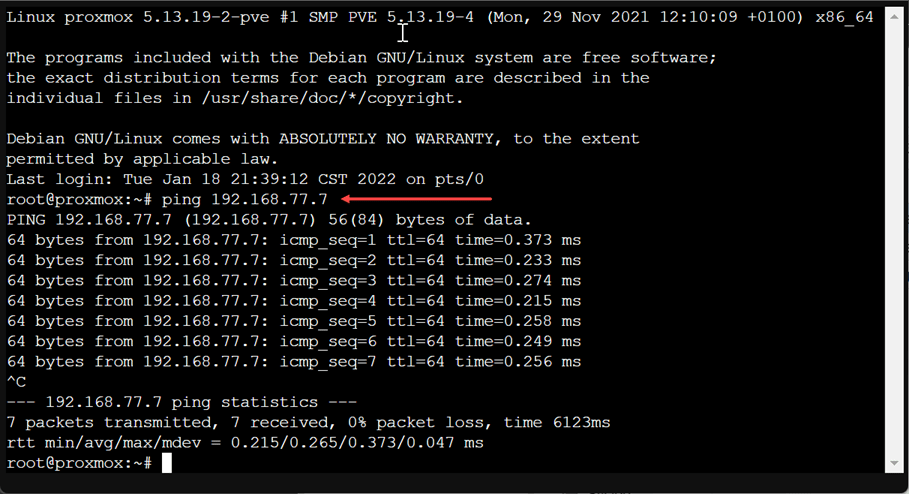
From your Proxmox server, ping your Synology iSCSI address to ensure you have connectivity.
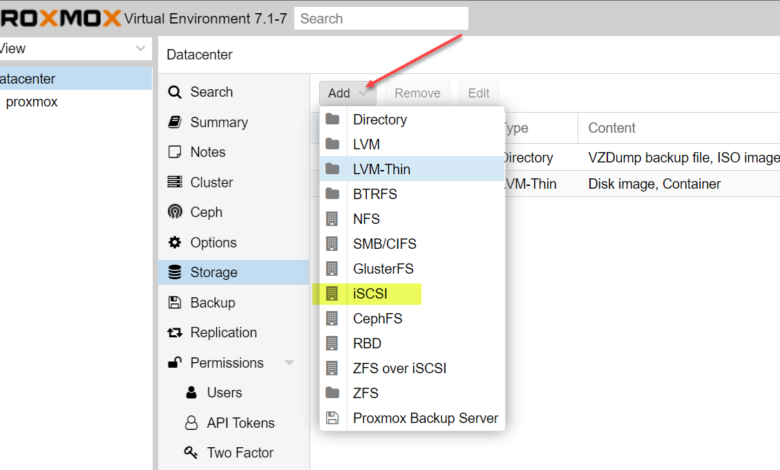
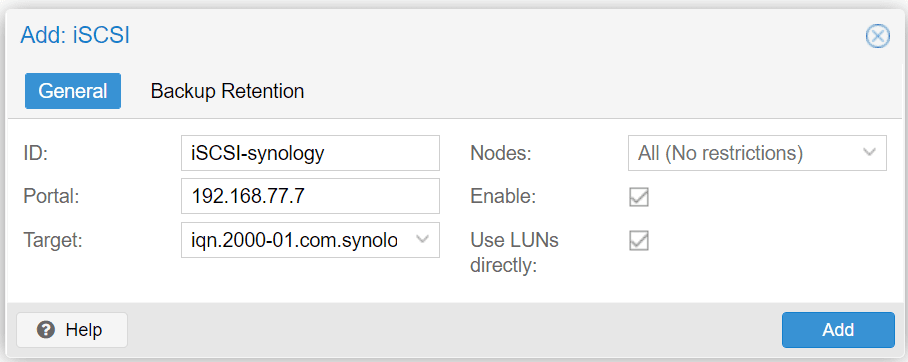
3. Add the iSCSI target to Proxmox
Next, lets add the Synology iSCSI target to Proxmox. Click your Datacenter > Storage > Add.
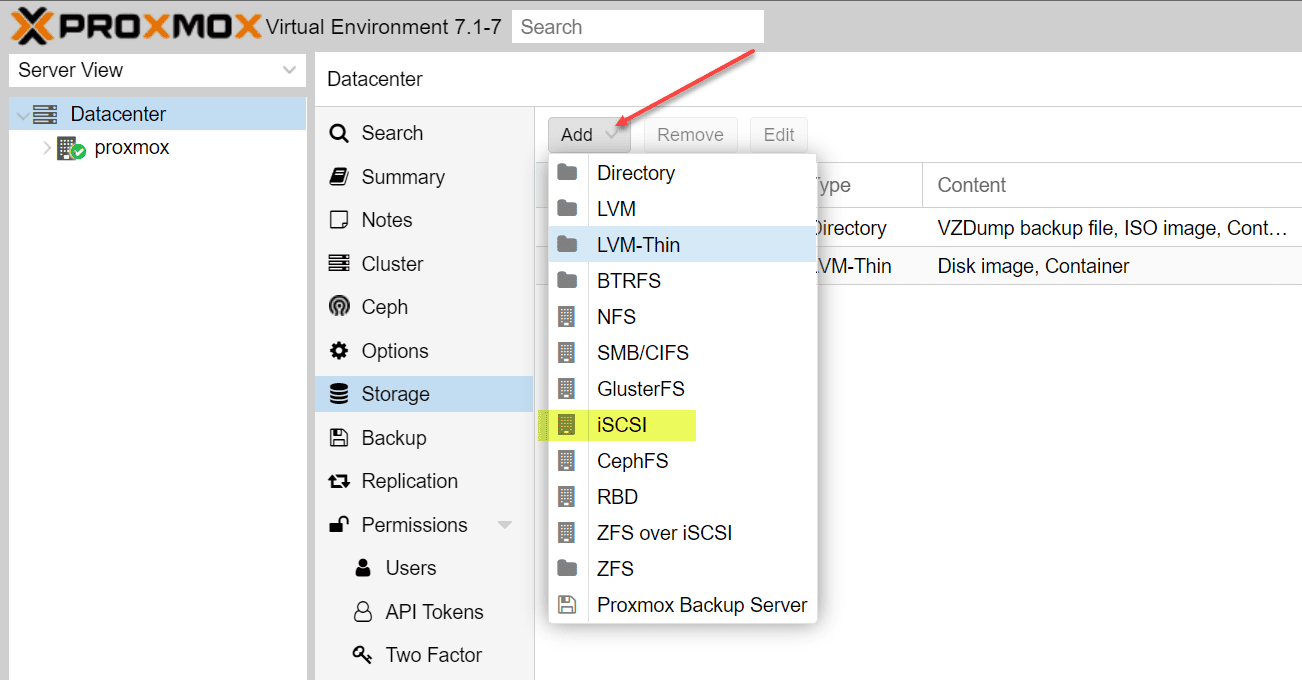
Configure the iSCSI ID, Portal, and Target.
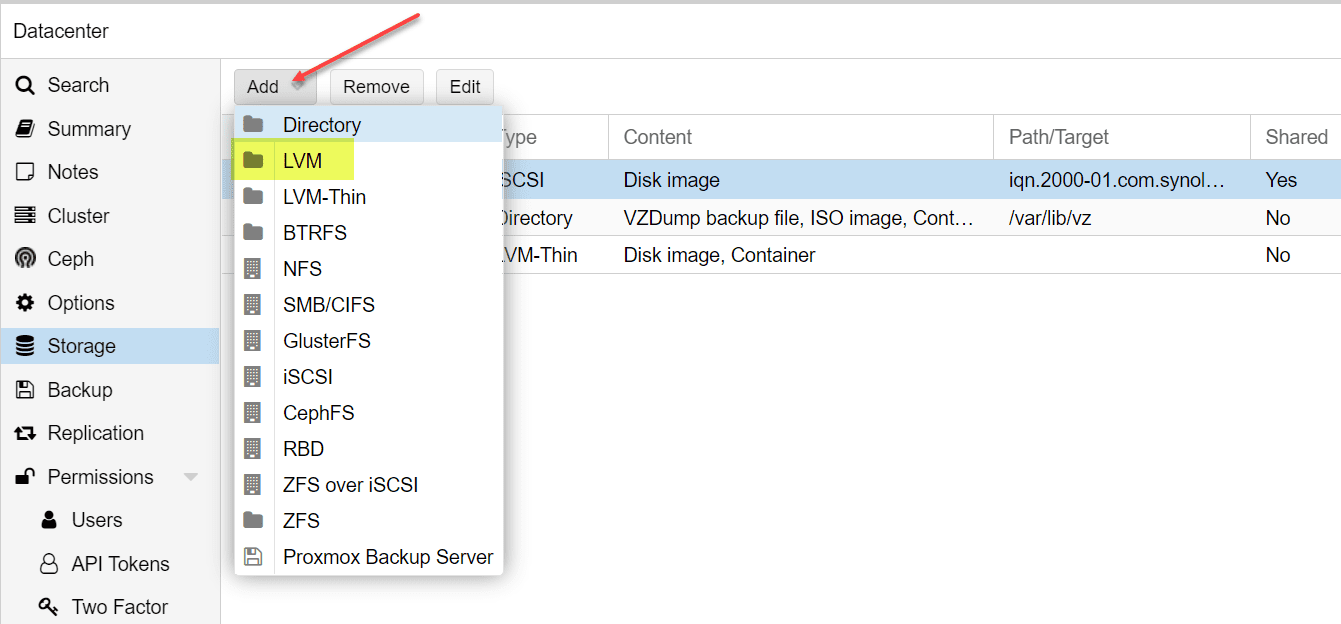
After adding the target, you will see it in your Storage list.

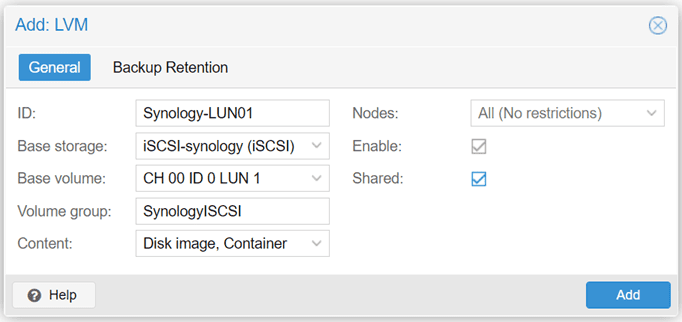
4. Create the LVM to the Synology iSCSI target
Now that we have the target added, we need to add an LVM to use the iSCSI storage. Click Storage > Add > LVM.
Add an ID, Base storage (choose from dropdown), Base volume (choose from dropdown), Volume Group (name this something intuitive), and Content as Disk image, Container.
You will now see the new iSCSI LUN displayed in your list of storage.
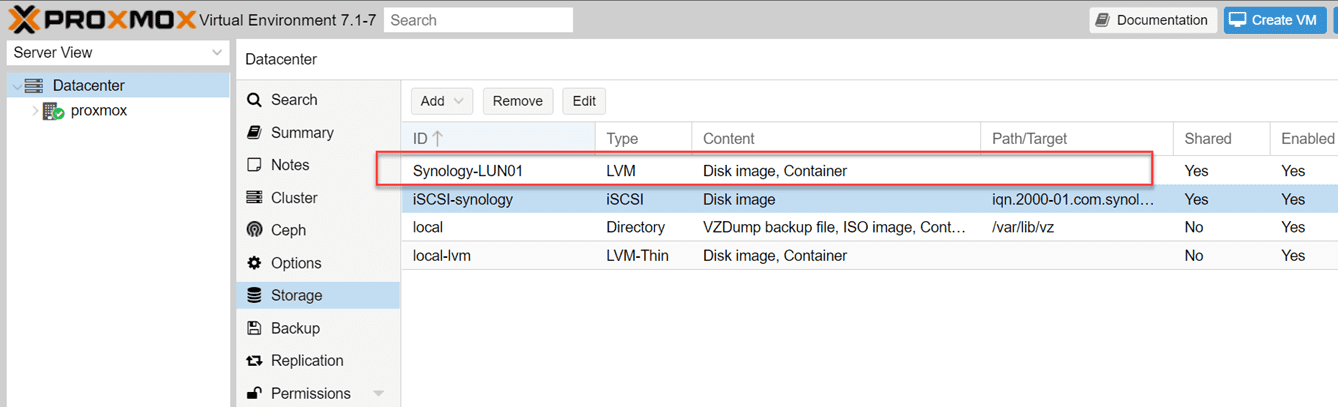
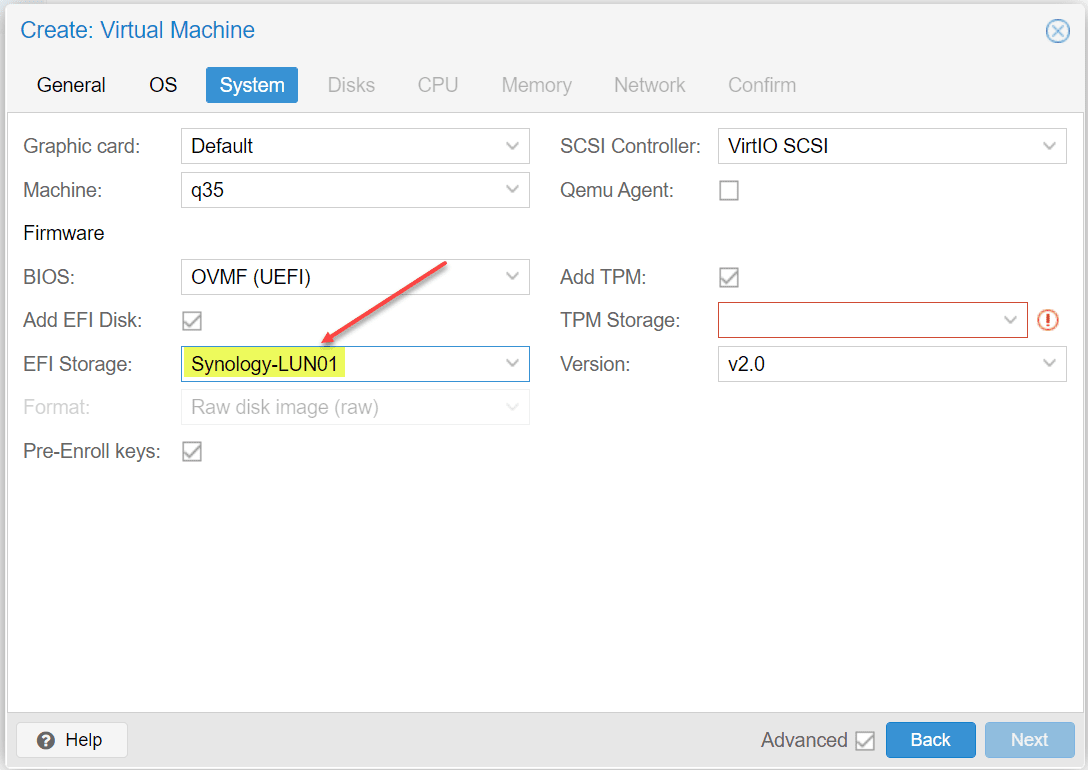
Now, when you create a new Virtual Machine, you will see the iSCSI LUN listed as available to select.
Wrapping Up
Hopefully, this quick walkthrough of setting up a Proxmox iSCSI target to Synology NAS helps to remove any uncertainty of how this is configured. From the Synology NAS side, the process is the same no matter which hypervisor you are using. Generally, the only change in how you add the iSCSI storage comes from the vendor side that you are adding the storage from. Using VMware vSphere and want to add an iSCSI target to your Synology NAS? Take a look at my post on how to do that here:


Sorry but very confusing. The video is very different from the doc above. Creating an extra adapter cant be done from the gui . The creation of this connection is very tricky
Hello,
Thanks for your tutorial but I think to have missed a point: where the ens160 interface has been setup as the specific one dedicated for iSCSI traffic? Yes, I see it is on the same subnet of the Synology NAS, but what if even the other interface (ens32) is on the same subnet?
In ESXi this task can be achieved pretty easily, but in Proxmox?
If I had two nics, how and where could I setup a specific nic only for storage tasks, like iSCSI traffic?
Thank you.
P.s.: ESXi user here who are evaluating the Proxmox migration. 😊
Ricardo,
Thank you for the comment! Please create a forum topic over on the forums under Proxmox Help: https://www.virtualizationhowto.com/community and let’s discuss it further there in more detail.
Brandon