There is no question that many organizations today are migrating away from the old way of provisioning desktops using image-based deployments to the much more modern approach of using cloud technologies to provision and configure workstations. Also, managing and enforcing policies and governance on workstations outside the walls of the corporate office requires a new approach to management and configuration. Microsoft Endpoint Manager, including Microsoft Intune, provides a great solution to provision and manage workstations from the cloud. If you are wanting to learn Microsoft Intune and Endpoint Manager, setting up a lab environment is a great way to do this. Let’s take a look at Intune lab setup using Autopilot and VMware vSphere and see how this is accomplished.
What you need for a Microsoft Intune Lab Setup
What exactly do you need for a Microsoft Intune lab setup to play around with Microsoft Intune as part of Microsoft Endpoint Manager? You do need just a bit of infrastructure at your disposal, but not much. In my home lab environment, I am running VMware vSphere for spinning up virtual machines. However, you can do the same thing with a copy of VMware Workstation or Hyper-V running in Windows 10. Really, you just need some way to spin up a virtual machine.
- A Windows 10 Virtual or physical machine
- Internet access
- Trial subscription to Microsoft 365 Business (includes Azure Active Directory Premium)
You can sign up for a free trial to Microsoft 365 Business here:
Once you have signed up for the Microsoft 365 trial edition, you will have access to the Microsoft 365 Endpoint Manager with Intune where you can provision Intune controlled workstations.

Ways to enroll in Microsoft Intune
There are a couple of ways you can enroll a workstation in Microsft Intune:
- Autopilot – Autopilot is a user-driven mode where end-users can open a brand new PC, power it up, log in with their corporate user account and the PC will automatically start provisioning the workstation with all the company sanctioned configurations
- Company Portal – The Company Portal app is a Microsoft Store app that users download and install from the Microsoft Store. Once installed, they log into the Company Portal app using their organization account and the PC becomes managed by the organization and receives the custom configurations pulled from Intune.
Intune Lab Setup with AutoPilot in VMware vSphere
For the purposes of this Intune lab setup, I will demonstrate how to do this with AutoPilot in VMware vSphere. You can easily follow the documentation found in the Microsoft document here:
However, I will cut to the meat of the tasks you need to perform. I will be using a VMware vSphere virtual machine running Windows 10. Virtual machines are very beneficial for lab environments since you can create snapshots, making it easy to revert and roll back if needed to perform certain steps over and over again.
So, where I am picking up with this process is I already have a clean, vanilla Windows 10 machine up and running and ready to start provisioning for use with Microsoft Intune.
Snapshots
Snapshots are useful in this process. If you have a clean Windows 10 virtual machine you have created for the Intune lab, it is helpful to create a snapshot before running the Out-of-box experience (OOBE) process. It will save you time in the long run.
If you don’t have a snapshot at that point, you can use the Reset Windows function in the Control Panel to reset Windows to the OOBE state. After we capture the hardware ID, we need to get the machine back to this state to test the Intune Autopilot enrollment and configuration.
Capture the Hardware ID of your virtual or physical machine
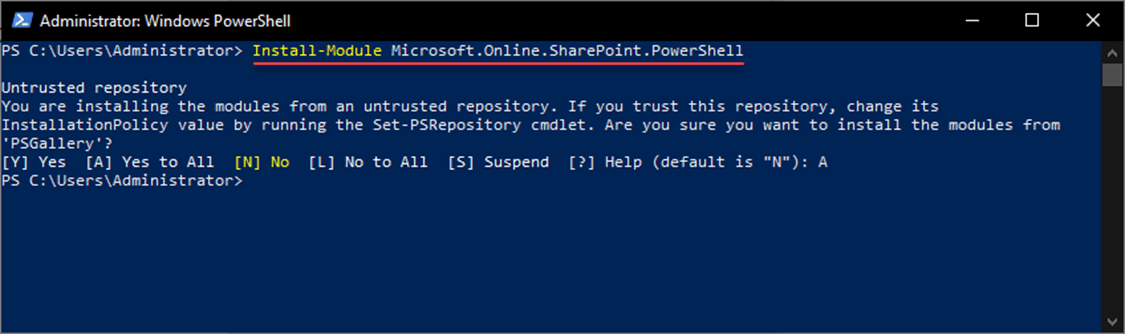
Outside of a lab environment, the Device ID is captured by the OEM manufacturer. They run what is known as an OA3 tool on each device that comes out of the factory. They submit information to Microsoft to identify the hardware in what is called a Computer Build Report (CBR). In a lab environment, as part of the setup, you essentially act as the OEM manufacturer that captures the CBR. However, you don’t have to use the OA3 tool the manufacturer uses. Rather, in a lab, you can run a PowerShell script that simulates the actions of the OA3 tool used by a device manufacturer. The PowerShell script captures the information just like the OA3 tool.
What are the steps to use the PowerShell script for an Intune lab setup with Autopilot? Note the following:
md c:\HWID
Set-Location c:\HWID
Set-ExecutionPolicy -Scope Process -ExecutionPolicy Unrestricted -Force
Install-Script -Name Get-WindowsAutopilotInfo -Force
$env:Path += ";C:\Program Files\WindowsPowerShell\Scripts"
Get-WindowsAutopilotInfo.ps1 -OutputFile AutopilotHWID.csv
If you take a look at the resulting AutopilotHWID.csv file, it will look something like the following. The file will be around 8 KB.

Once you have captured the hardware ID, save the resulting AutopilotHWID.csv file off the machine you are using for the Intune lab. We will be resetting Windows 10 and erasing all files to reset it to the OOBE as mentioned above.
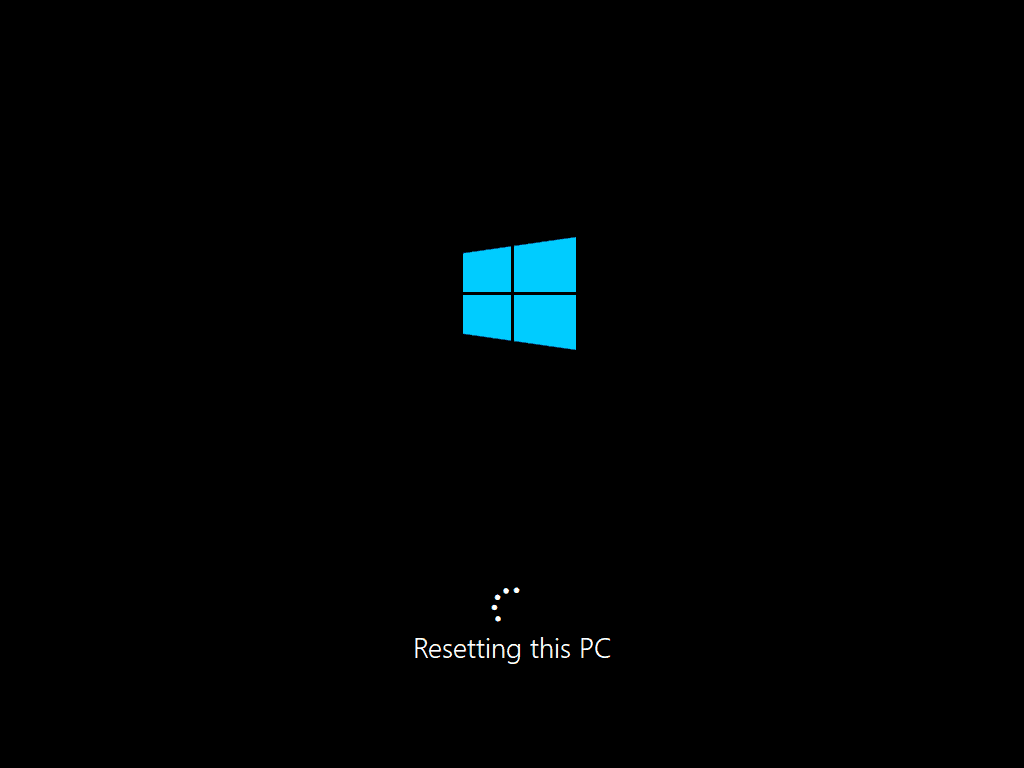
Reset Windows 10
On your Windows 10 Intune lab PC you will need to reset the PC back to the default out-of-the-box experience. Under Settings > Updates & Security > Recovery choose to reset your PC and follow the prompts.

The machine will reset back to factory Windows defaults.
Import the Autopilot CSV file in Microsoft Endpoint Manager
You will need to browse to endpoint.microsoft.com and login as an organization administrator.


Create an Azure Active Directory Group and Add the staged workstation to the Azure AD group
You will want to create an Azure AD group for housing your Intune lab workstation. For most everything in Azure, you can’t assign resources to an individual object. It requires assigning to a group. So, even though it seems overkill to create a group to house a single workstation, we still need to do this to assign the resources to the Intune lab Autopilot test workstation.

In the AutopilotLab group properties, click the Add members button.

In my case here, I am searching for the VMware vSphere VM that was added using the import of the hardware ID CSV. The search finds the device. Click the device and then click the Select button.

After a minute or so, the device should appear in the Direct members of the group.

Configure mobility (MDM and MAM) in Azure Active Directory
Now, let’s go back to the Azure Active Directory portal and configure the MDM and MAM configuration. to enable this on our Azure AD objects.

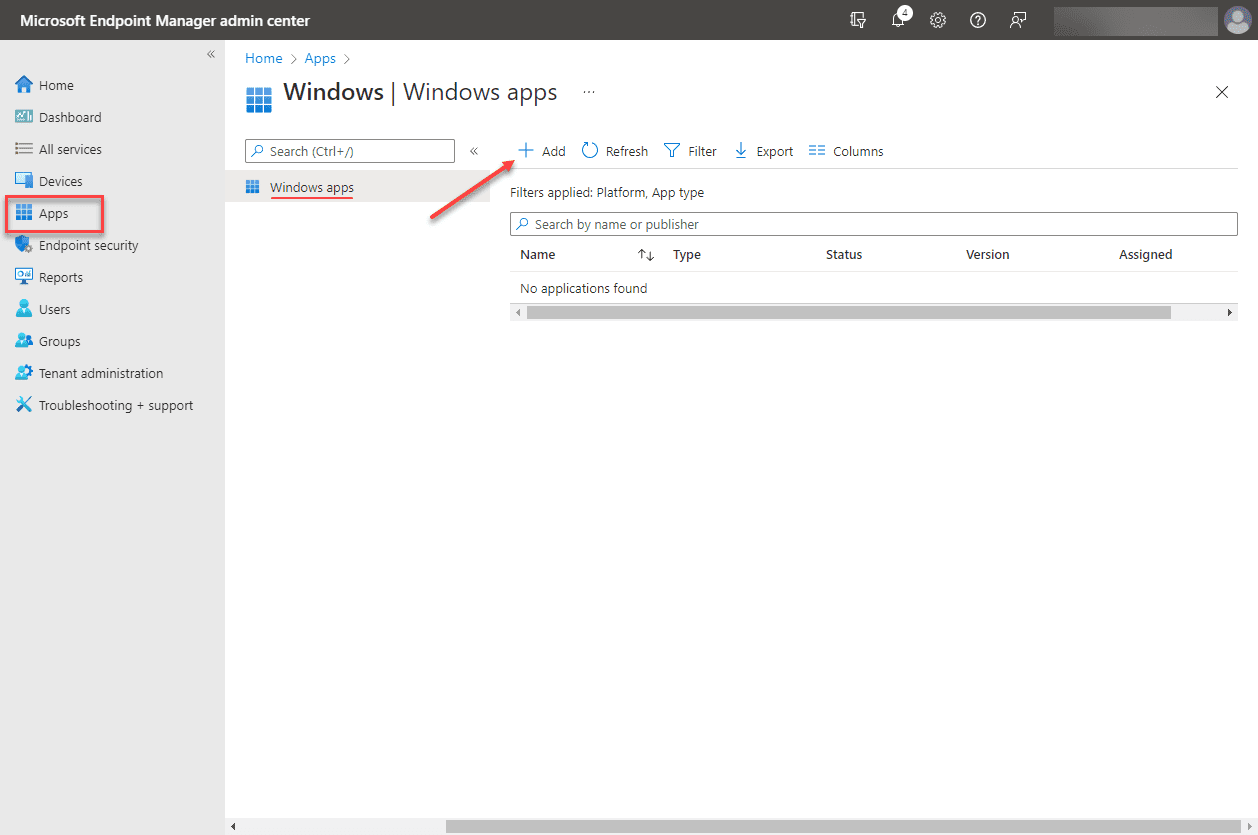
Assign Autopilot applications to the Autopilot Lab group
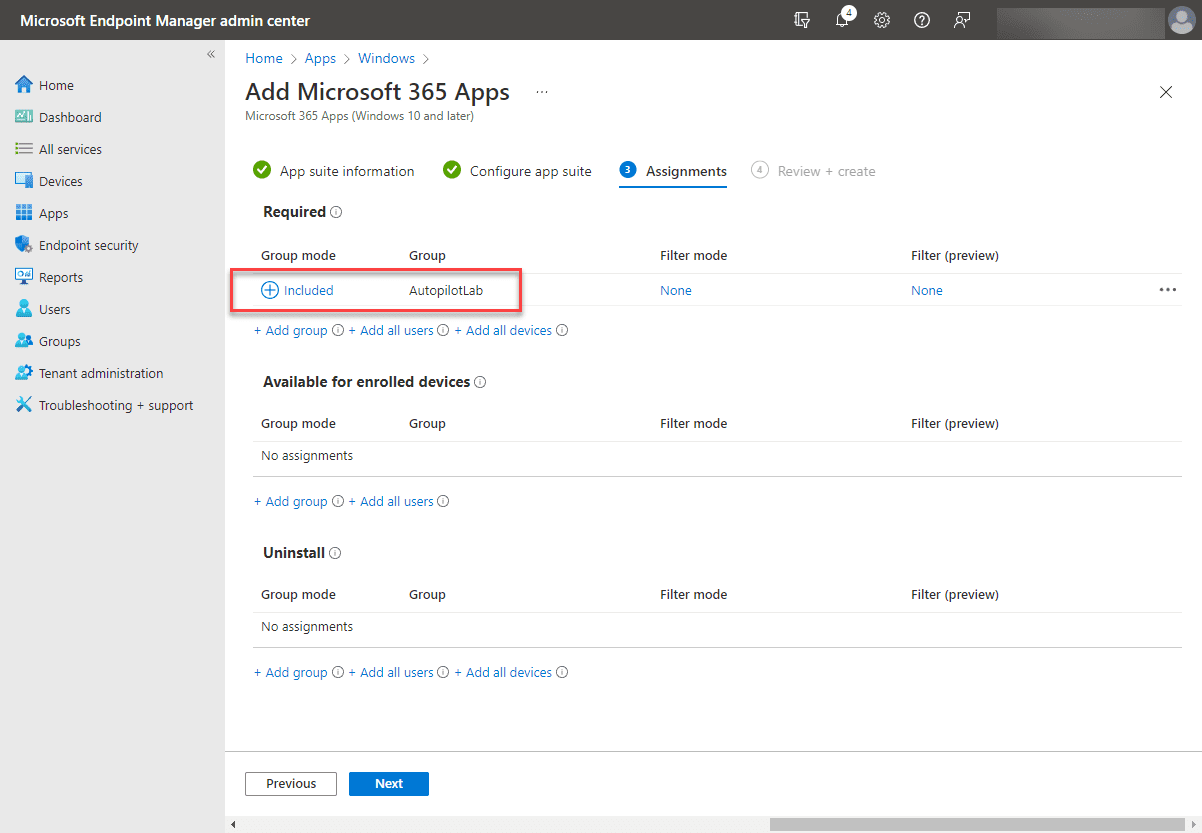
Now, we can start configuring apps to use as a test of the Autopilot onboarding of our lab workstation.
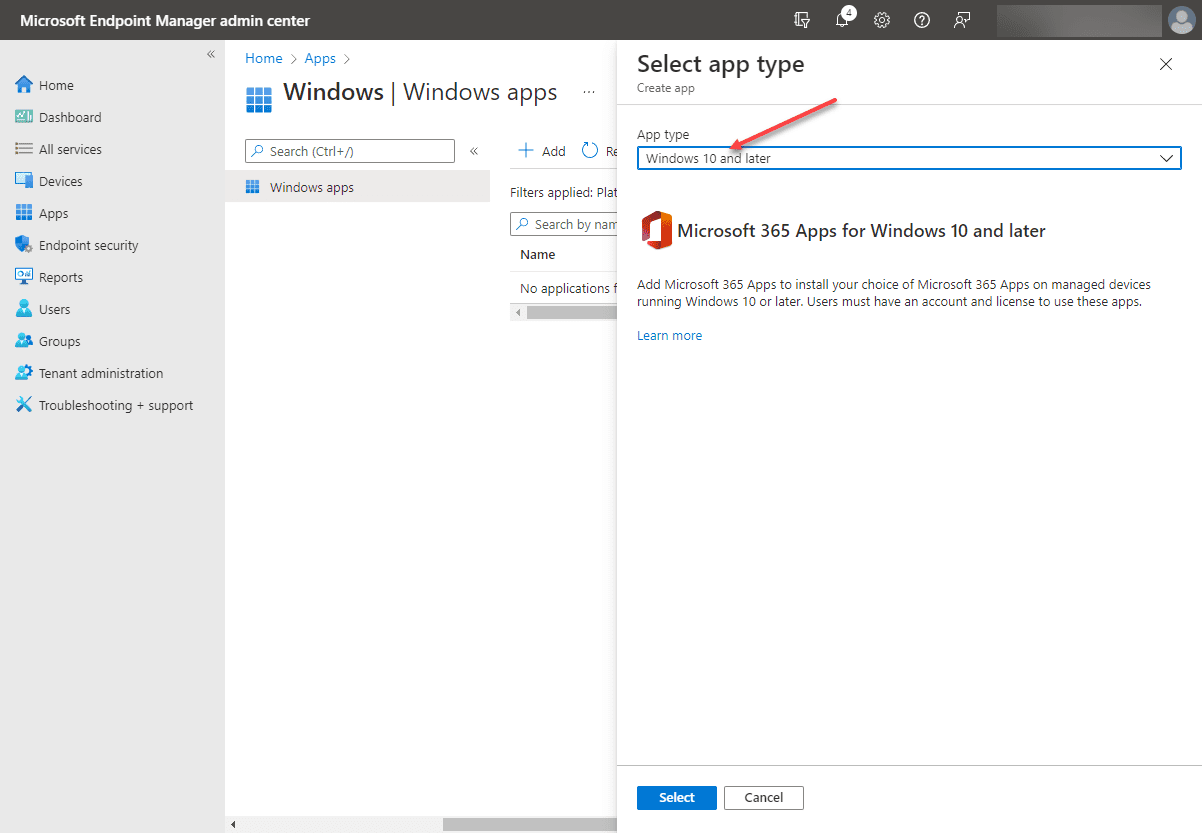
On the app type, for the test, let’s assign the Microsoft 365 apps for Windows 10 and later.


Creating a Autopilot deployment profile
Now that we have an app assigned, let’s create a Deployment profile for the lab environment. You can do this in the Enroll devices > Windows enrollment > Deployment profiles section.

Click the Create profile dropdown and select Windows PC.

This will launch the Create profile wizard. The first step in the wizard is to name the deployment profile.

Configure the out-of-box experience (OOBE). Here we are leaving this at user-driven, Azure AD joined.

Next, set the assignment. Here I have added the AutoPilotLab Azure AD group we created earlier.

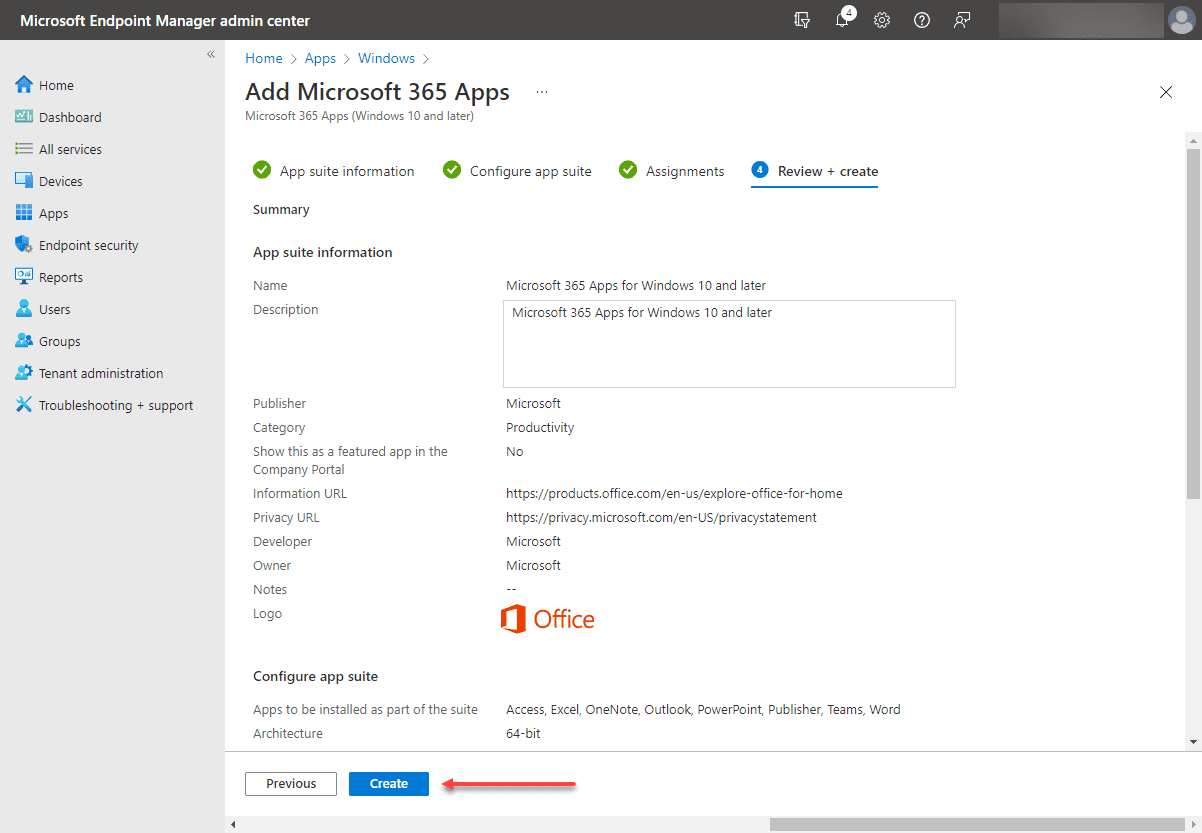
Finally, on the Review and create and select Create.

Synchronizing the Autopilot profile status
After creating the deployment profile, we need to wait until the profile assignment has synchronized with the Windows Autopilot device in our lab. If you check and see the Assigned designation is showing as No, it is ok.

Navigate to Windows Autopilot devices and you can click the Sync button to synchronize. It can take a few minutes to show the profile as assigned.

After waiting a few minutes, the profile status is Assigned.

Test the Autopilot deployment
Now that we have the components in place, assigned an application, and then the deployment policy, we can test the Autopilot deployment using our test workstation. As you recall, we reset the Windows 10 computer back to a clean factory default state. So, we are prompted with the out-of-box experience as expected. Below, you want to choose Set up for an organization.

Log in with an account in your Microsoft 365 organization. Since we have applied the deployment profile at the device level, it will apply to anyone who uses the device.

Things already look promising for our Autopilot lab. Clicking the Start button shows that we already have our Office apps being streamed down to the workstation.

After just a couple of minutes, clicking on Word brings up the fully installed Word app. Very cool!

With this, the Intune Lab Setup with AutoPilot in VMware vSphere has been successful. Just to recap, we have:
- Imported the hardware ID of a Windows 10 workstation into Endpoint Manager in Intune
- Reset the original Windows 10 workstation
- Created an Azure AD group and added the device to the group
- Assigned an application to the Azure AD group
- Created and assigned the deployment policy
- Tested the Autopilot deployment on the reset Windows 10 workstation
Wrapping Up
The Intune Lab Setup with AutoPilot in VMware vSphere was easy enough to accomplish. There are several things to do to set up the lab environment, including pre-staging the machine ID in Intune and resetting the lab PC. However, this is where snapshots are very effective. As shown, once the deployment policy was in place and the app assigned, after logging in with an organization account, Microsoft 365 apps were immediately visible. After only a couple of minutes, I could launch Microsoft Word.
Google is updating how articles are shown. Don’t miss our leading home lab and tech content, written by humans, by setting Virtualization Howto as a preferred source.
About The Author