Add NAS to VMware ESXi with StarWind SAN & NAS Free
Recently StarWind release a totally free SAN and NAS appliance that allows quickly spinning up a storage appliance based on various types of storage, both physical and virtual. This new appliance is totally free to download and provision. It makes adding a network storage target to your ESXi hosts extremely easy. If you are looking for a platform to add NAS to VMware ESXi, the StarWind appliance is definitely worth taking a look at for testing, labbing, and other use cases.
Brief overview of StarWind SAN & NAS Free
The new StarWind SAN & NAS Free appliance is a freely downloadable appliance from StarWind that allows you to get up to speed quickly using an OVF appliance format for VMware vSphere. I have used FreeNAS and TrueNAS platforms and these work really well in a lab environment for playing around with storage use cases to provision various types of storage to your ESXi hosts. However, the new StarWind SAN & NAS is even easier to get up and running and automatically provisions the iSCSI storage for you out-of-the-box.
This is not simply a lab tool. As noted from StarWind, officially, the new StarWind SAN & NAS Free appliance is meant for various use cases. The below is taken directly from the official StarWind page for the product:
“For Enterprise ROBO, SMB & Edge looking to transform their standalone hypervisor server or groups/clusters of servers into shared storage without buying any expensive proprietary components — we offer StarWind SAN & NAS Free. Repurpose your existing servers into a hardware-compatibility list (HCL) certified high-performance storage appliance, network-attached storage (NAS), storage area network (SAN), and/or backup target fully compatible with either VMware vSphere Hypervisor ESXi or Microsoft Hyper-V while using inexpensive commodity hardware
StarWind SAN & NAS Free is shipped as a ready-to-go Linux-based virtual machine (VM) deployed onto your chosen industry-grade hypervisor, Microsoft Hyper-V or VMware vSphere. The solution shares the same software-defined storage (SDS) features as StarWind VSAN, which allows it to fully unleash to power of ZFS as well as expose standard protocols like iSCSI, SMB, NFS, and others. Coming as a lightweight piece of software, StarWind SAN & NAS Free is not only easy to install and use thanks to a user-friendly Installation Wizard and an elaborate web-based user interface (UI) for storage management, but it also increases your return on investment (ROI) by allowing to repurpose your aging servers on top of being cost-free.“
Once thing to note, StarWind has made a change to the name of the solution. It was previously StarWind Free NAS & SAN. Now, the product is StarWind SAN & NAS Free. This is a subtle change. However, this may better align with where StarWind is taking the product.
Add NAS to VMware ESXi
Let’s look at the process to Add NAS to VMware ESXi using the new StarWind SAN & NAS Free product. This involves:
- Deploying the StarWind SAN & NAS virtual appliance OVF
- Configuring the storage options on the appliance
- Adding the storage to your VMware ESXi host
Deploying the StarWind SAN & NAS virtual appliance OVF
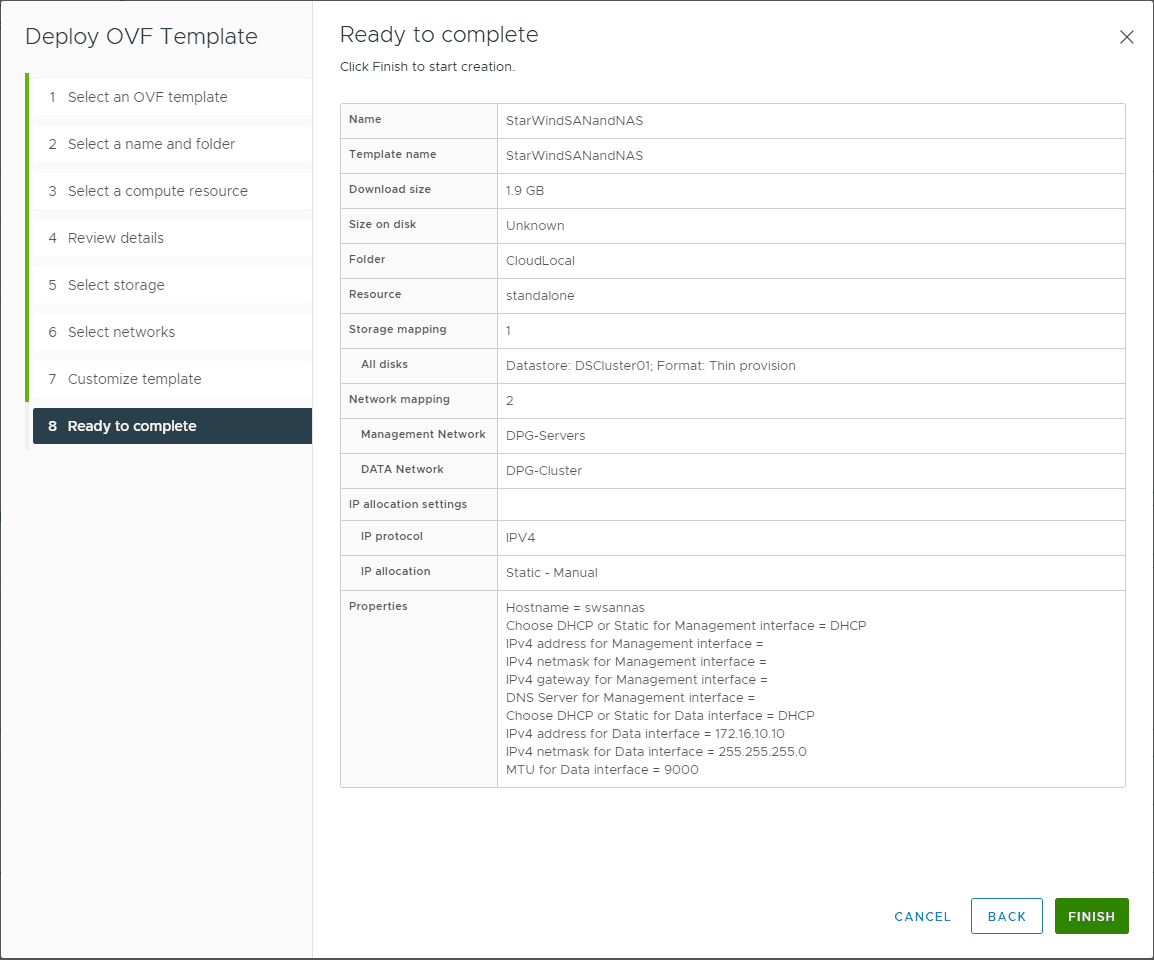
I won’t bore you guys with the process to deploy an OVF file as this is straightforward with the StarWind SAN & NAS Free appliance. Just follow the prompts and the OVF customization options that determine the network settings, etc of the appliance.
Configuring the storage options on the appliance
Once you have deployed the OVF appliance of the StarWind SAN & NAS solution, browse to the UI of the solution which is displayed on on the console of the virtual appliance. Once you connect for the first time, you will be greeted with the StarWind SAN & NAS – First Run Wizard.
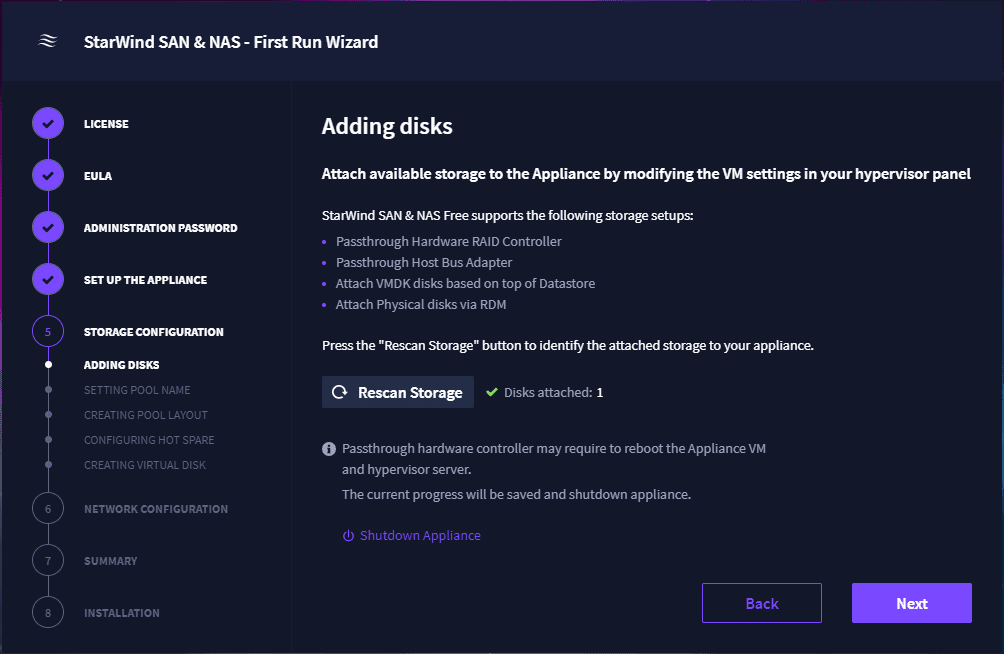
As you can see below, there are multiple storage configurations supported. These include:
- Passthrough hardware RAID controller
- Passthrough Host Bus Adapter
- Attach VMDK disks based on top of Datastore
- Attach Physical disks via RDM
Below, I have simply added an additional VMDK to the appliance and rescanned storage. You should see your disk showing as attached.
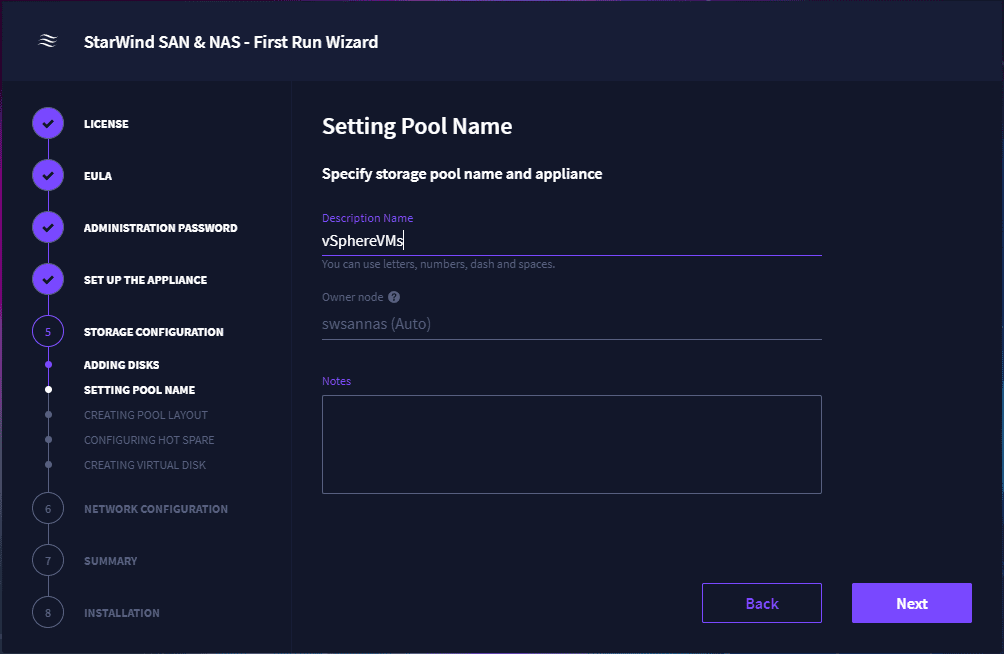
Next up in the configuration is specifying a Pool Name for the storage.
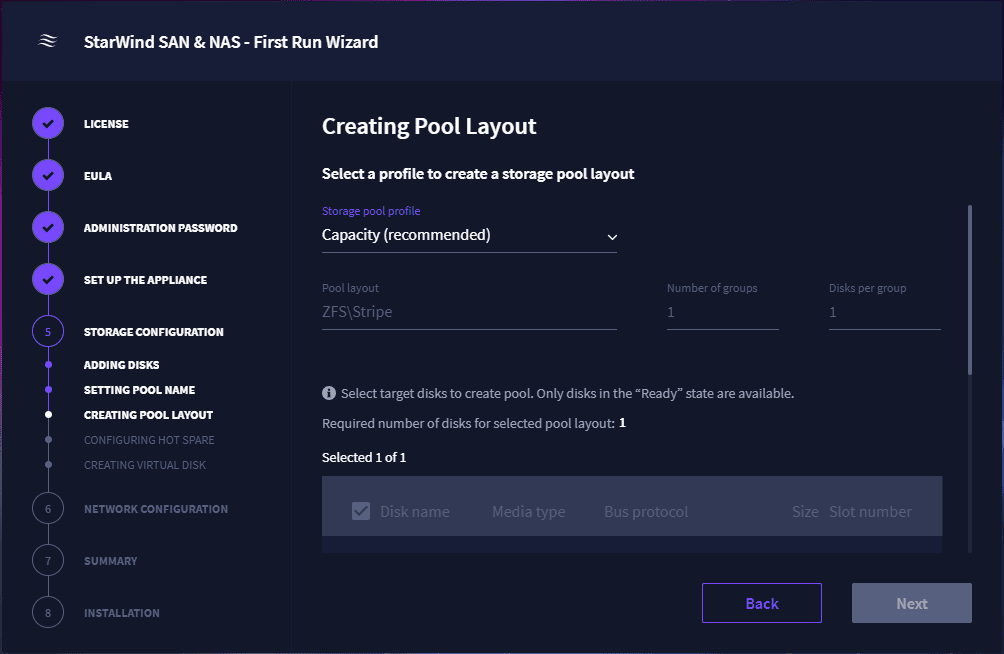
Create your Pool Layout with the Storage pool profile of choice.
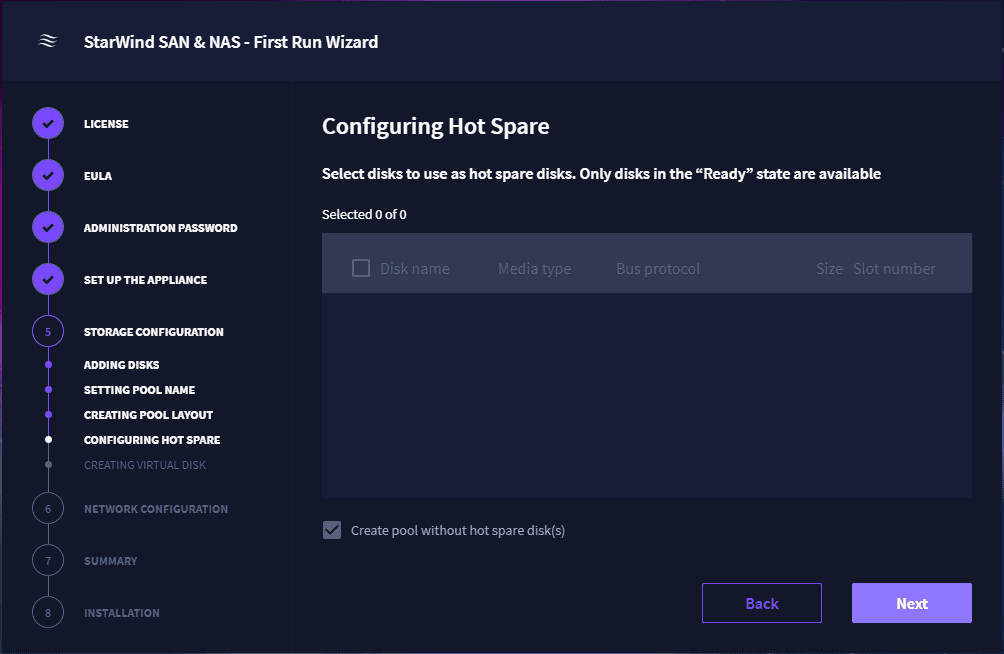
If you have another disk (for physical server implementations), you can add a hot spare to the configuration.
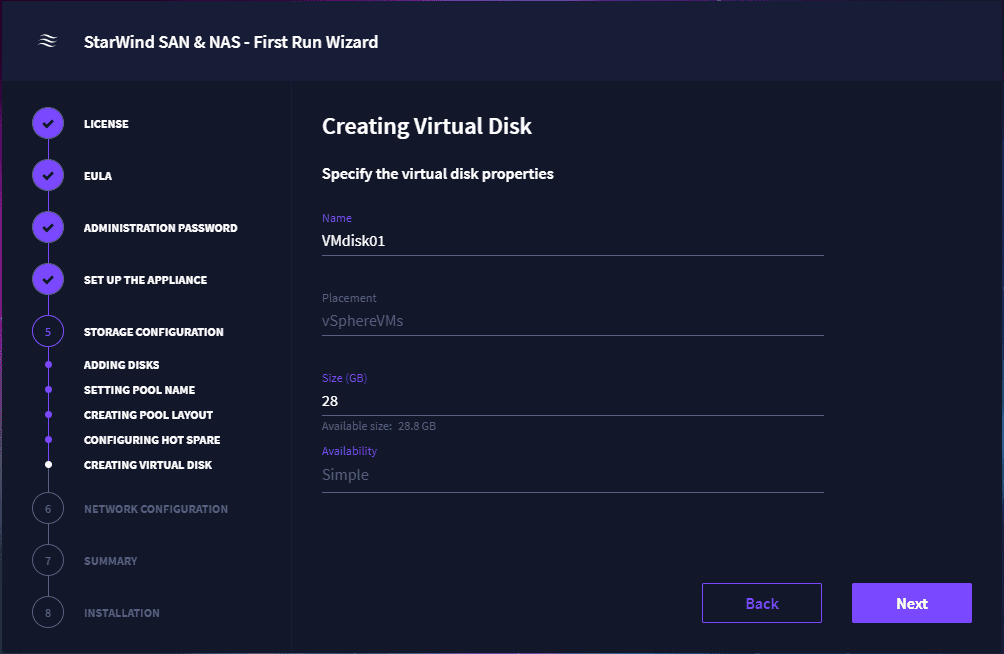
Create the virtual disk. Part of this process is specifying the virtual disk size.
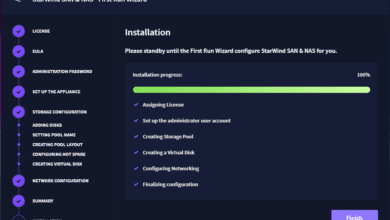
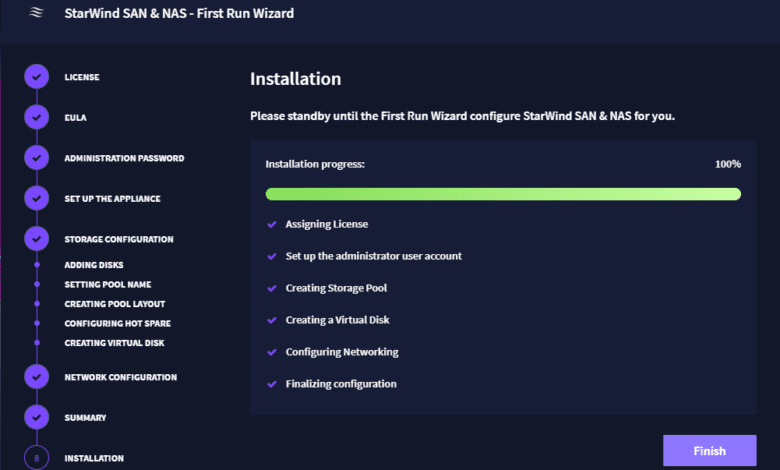
Once you make it through the storage configuration portion of the first run wizard, you will “install” the product. This only takes just a couple of minutes. Once done, click finish, and browse to the StarWind SAN & NAS Free browser interface in a web browser, port 8643.
https://<your StarWind SAN & NAS Free appliance>:8643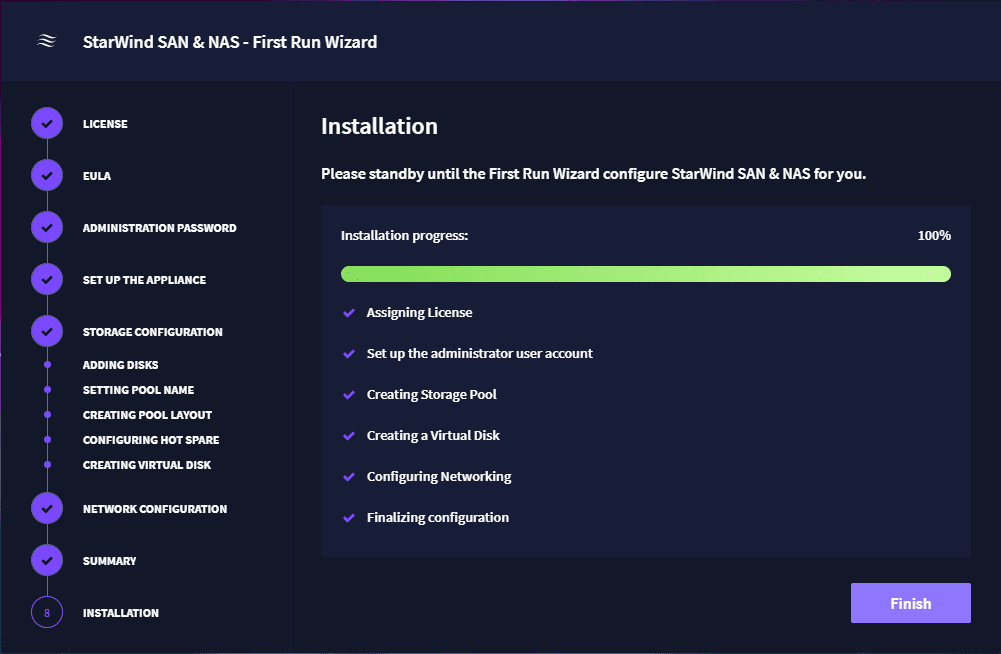
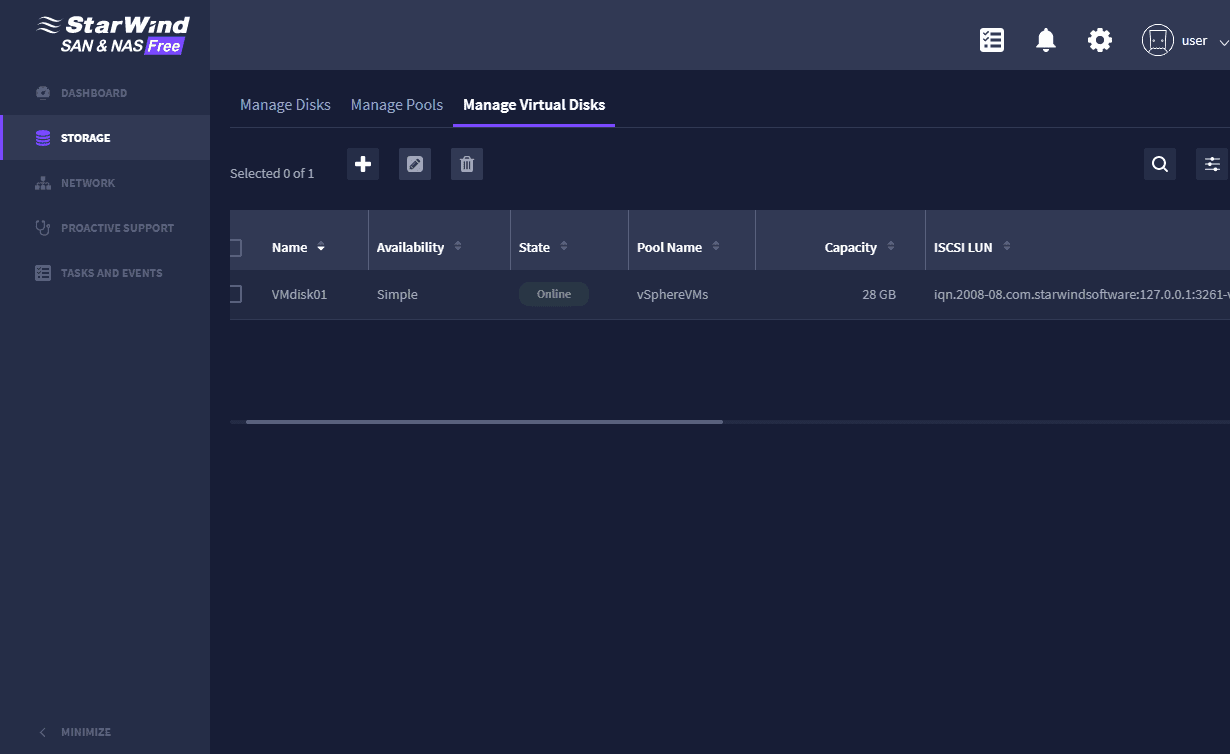
Once logged in, you will have access to the dashboard and various configurations of the appliance. If you navigate to the Storage > Manage Virtual Disks configuration, you will see the iSCSI LUN address listed.
Adding the storage to your VMware ESXi host
In the home lab, I am using many different implementations of nested VMware ESXi environments which makes learning and labbing extremely easy.
The final step after getting the StarWind SAN & NAS Free appliance up and running and the storage configured is adding the remote storage to your ESXi host.
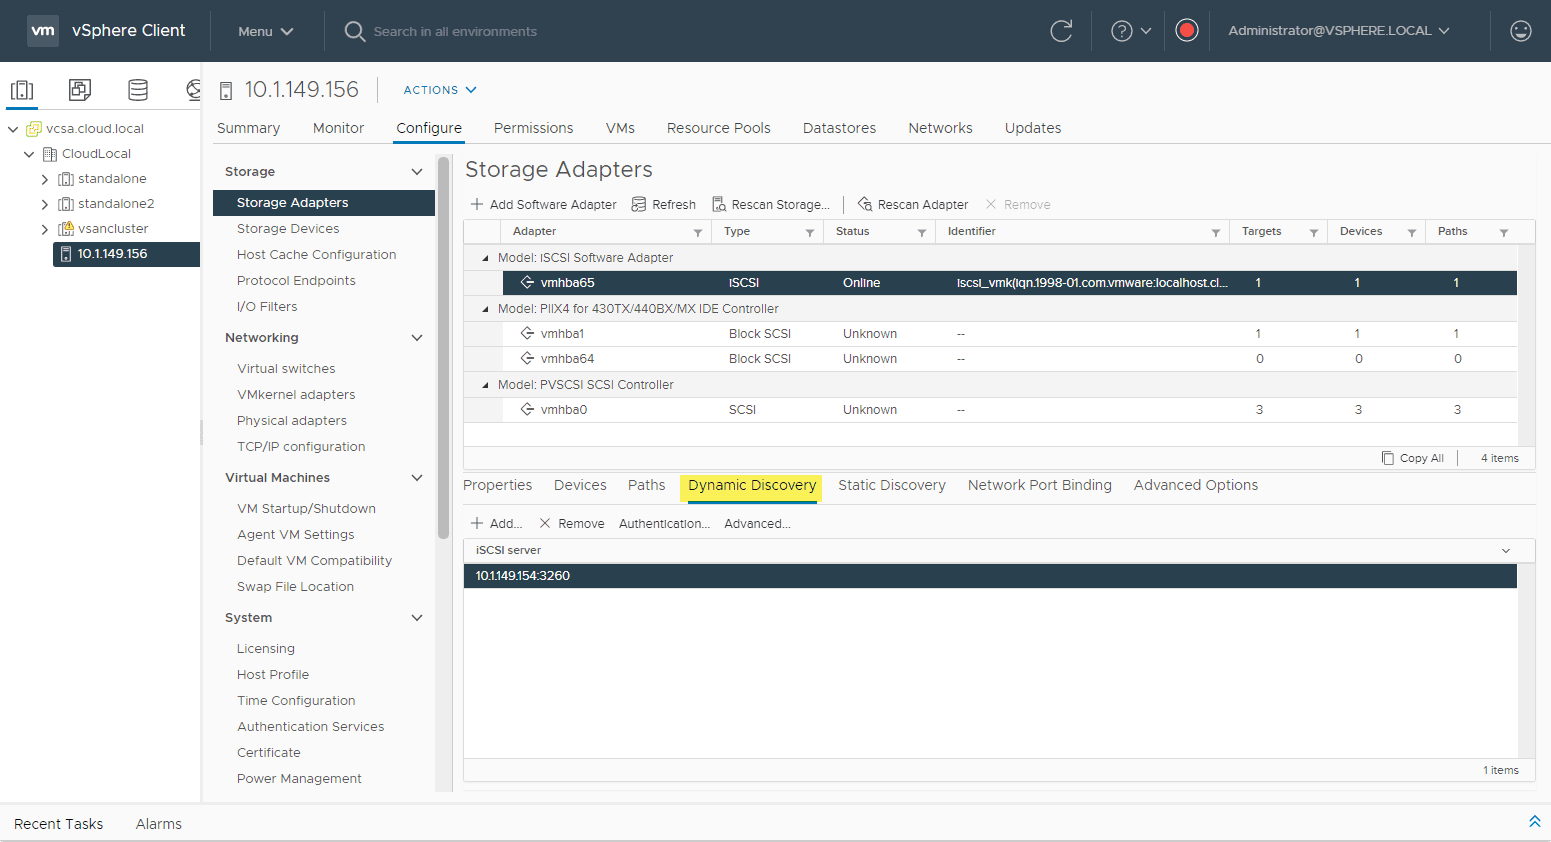
In the vCenter Server interface, browse to the Configure > Storage Adapters. Add a Software iSCSI adapter. Then, under the Dynamic Discovery add a Target Server. Here I am entering the address of the StarWind SAN & NAS appliance Data interface.
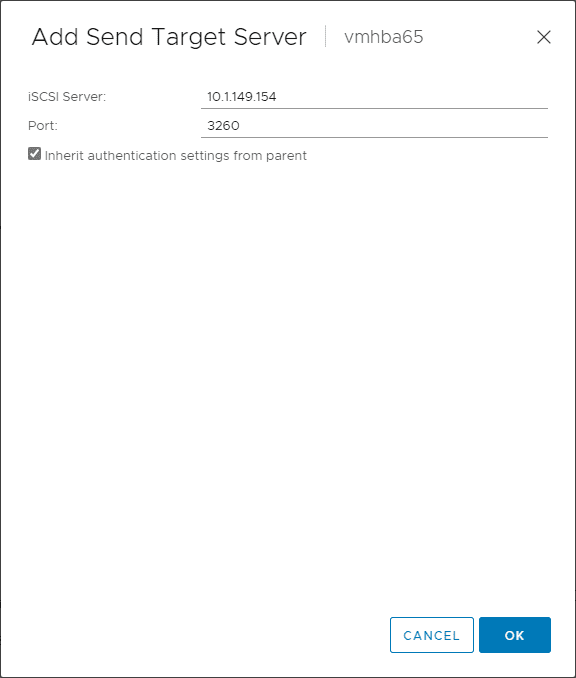
Under the dynamic discovery, you will see the IP address listed after adding it using the dialog box above.
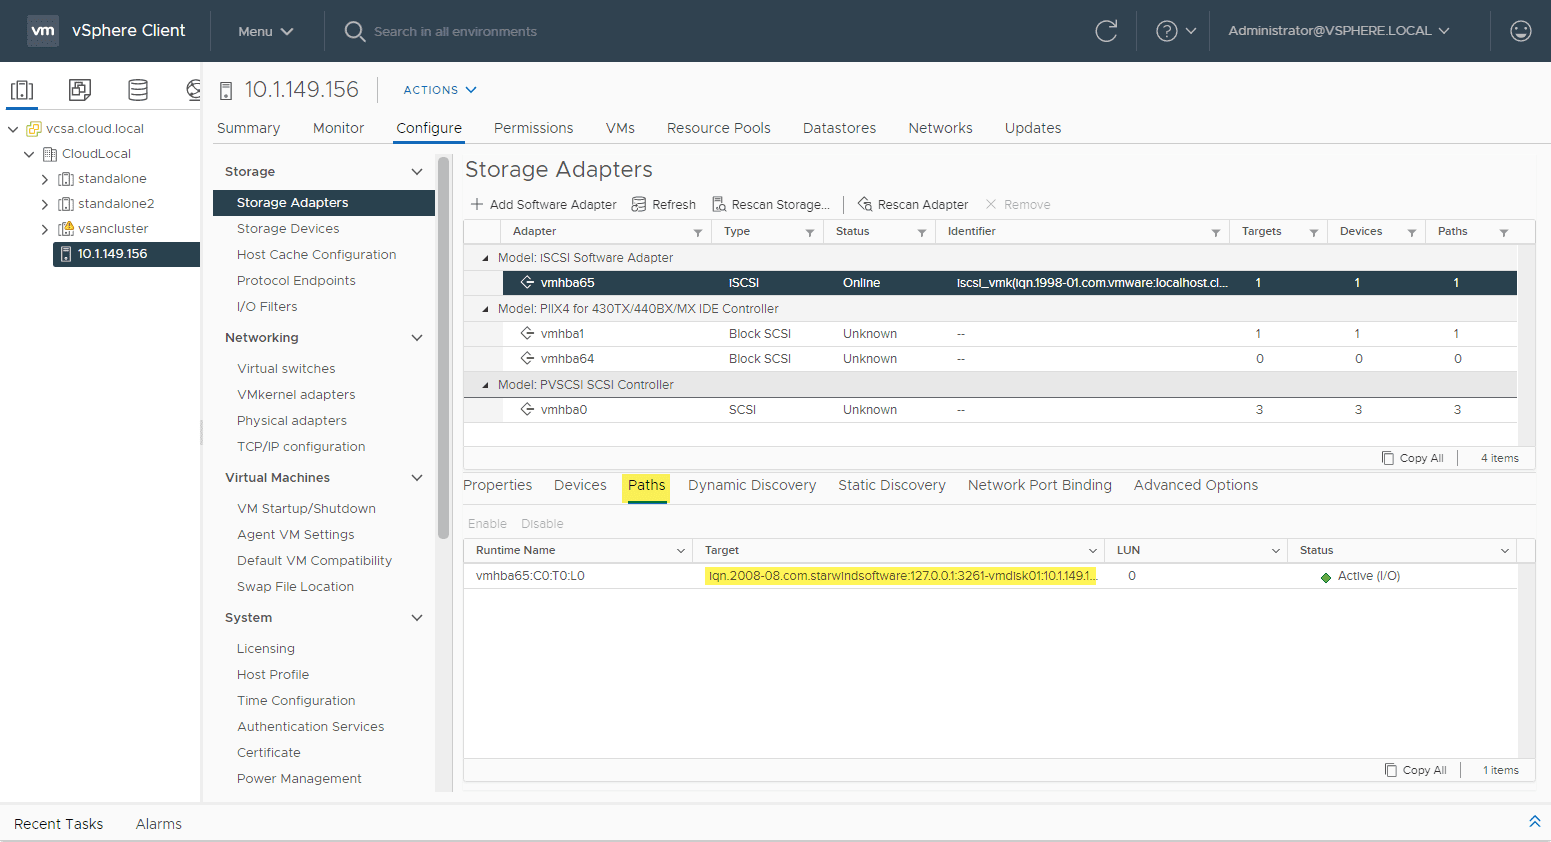
Once added, you should see the iSCSI path displayed in the Paths tab.
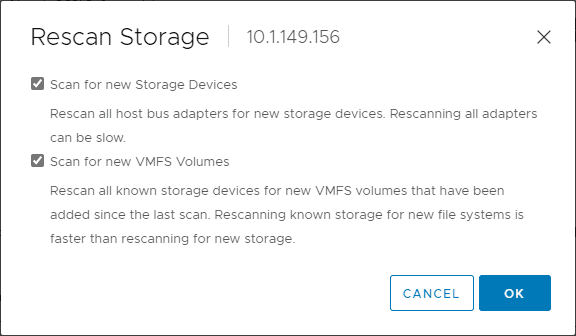
Rescan your VMware ESXi storage.
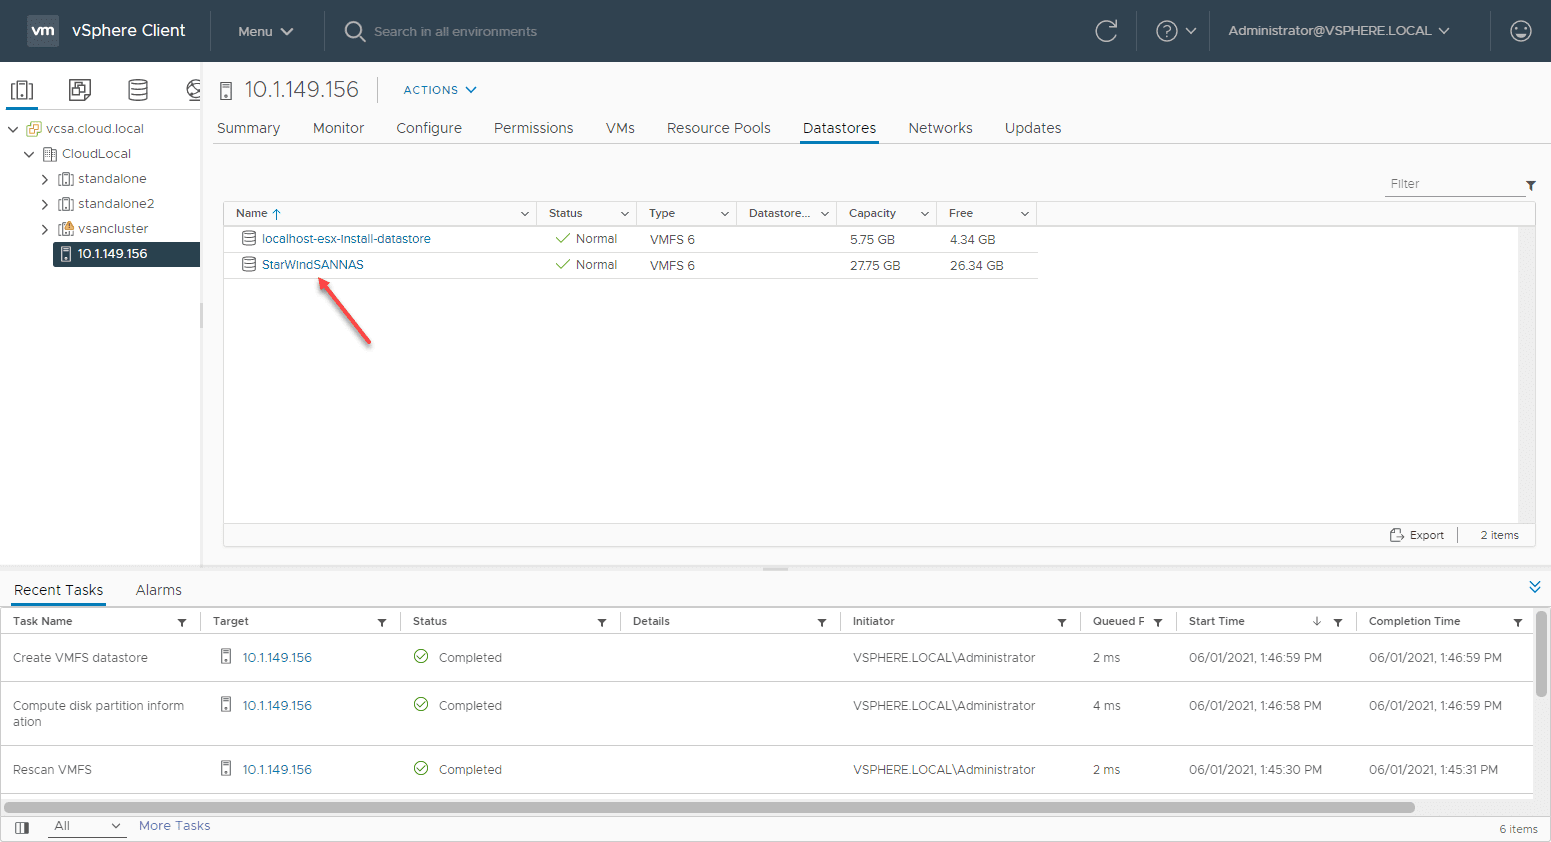
Next, add a new datastore and choose the new StarWind iSCSI target listed.
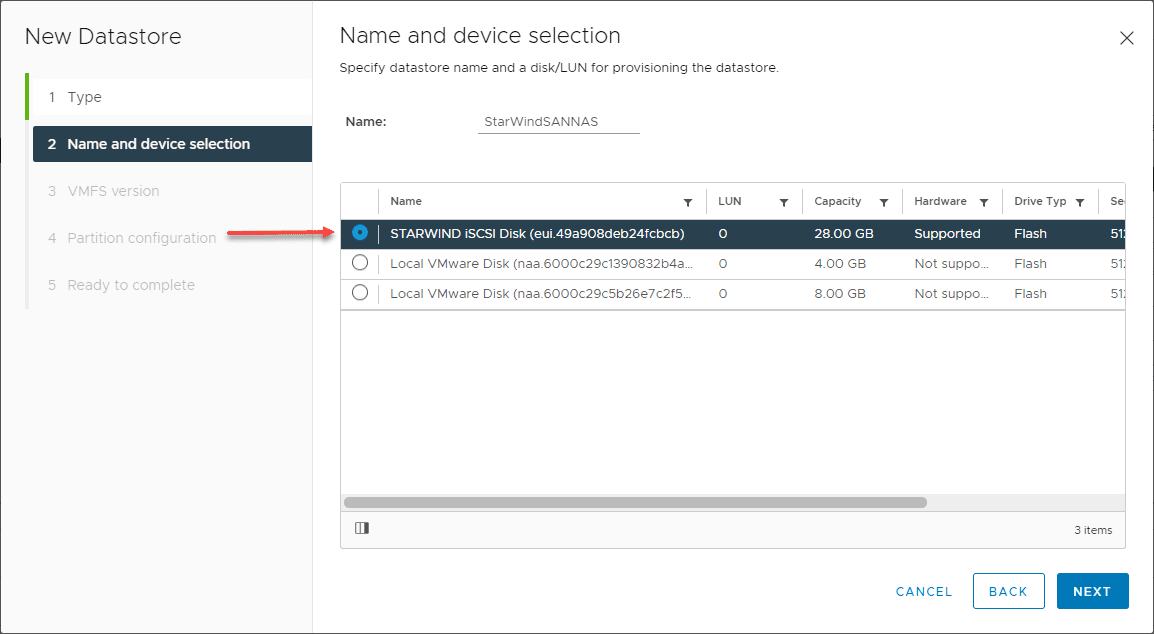
Format with VMFS 6 and name your datastore. It should be provisioned and you will see the new datastore listed under the Datastores tab in the vSphere Client.
Using the StarWind SAN & NAS Free solution, you can easily add NAS to VMware ESXi for various use cases. For me, this makes an excellent option to quickly spin up an iSCSI target for use with the home lab in testing remote storage connectivity, features, configuration, etc. One thing to note, at least as of now, the StarWind SAN & NAS appliance does not offer NFS connectivity options which would be great to see in a future release. Once this is added, it will fully round out the offering and provide many different options for testing, learning, and even using this solution in ROBO and other use cases for reprovisioning older hardware that may still serve the purpose of a storage target using the StarWind SAN & NAS solution.
Check out my other write up of the StarWind SAN & NAS Free version here: