Install Palo Alto VM Series in VMware vSphere
Recently, in the home lab, I have been doing a lot of lab networking configurations and testing various scenarios. Recently, thanks to the great guys at Palo Alto, I was able to get my hands on a VM-series firewall to do some testing across various fronts, including VMware NSX-T. However, before you can use the Palo VM-series firewall, you have to get it deployed into your virtual environment. I am installing the Palo VM inside a VMware vSphere 7 U1 environment, with a few hosts running various network configurations. Let’s take a quick look at how to install Palo Alto VM series in VMware vSphere environments.
Deployment Scenarios on VMware vSphere Hypervisor (ESXi)
There are many supported deployment scenarios when it comes to getting a Palo VM series in your VMware vSphere environment. These include the following scenarios:
- One VM-series firewall per ESXi host – In this scenario, you utilize the Palo VM series firewall to inspect all traffic leaving the ESXi host. The guest servers are configured, so they have no other network connectivity aside from traversing the Palo VM. This is for north-south connectivity. You can also require all VM guests to traverse the firewall for all server to server communication (east-west).
- One VM-series firewall per virtual network – You can also deploy a VM-series firewall for each virtual network you have configured on your ESXi host. A common use case for this is you may have an internal network, an external network, and a DMZ. You could have a VM=-series firewall sitting on each virtual switch, filtering traffic for each group. You would configure your vSwitches and guest virtual machine, so there is no other physical or virtual path to any other network. This ensures the VM-series will inspect all traffic between the groups.
- Hybrid environment – Both physical and virtual hosts are used. Using the VM-series, you can replace a physical firewall appliance that is typically used in an aggregation location. This allows implementing a common server platform and bypasses any hardware and software dependencies in the traditional firewall realm.
- Further secure VMware NSX-T environments – Most environments today have hybrid environments. NSX-only approach can provide micro-segmentation but is not foolproof. NSX is generally only deployed in a portion of the hybrid environment. Allowed traffic between micro-segmented boundaries can be a hole in security. Having L7 inspection between these trust zones is important. Palo VM-series bolster the NSX-T security mechanisms even further.
Install Palo Alto VM Series in VMware vSphere
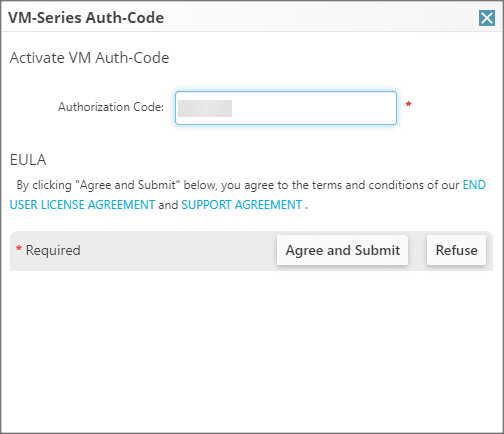
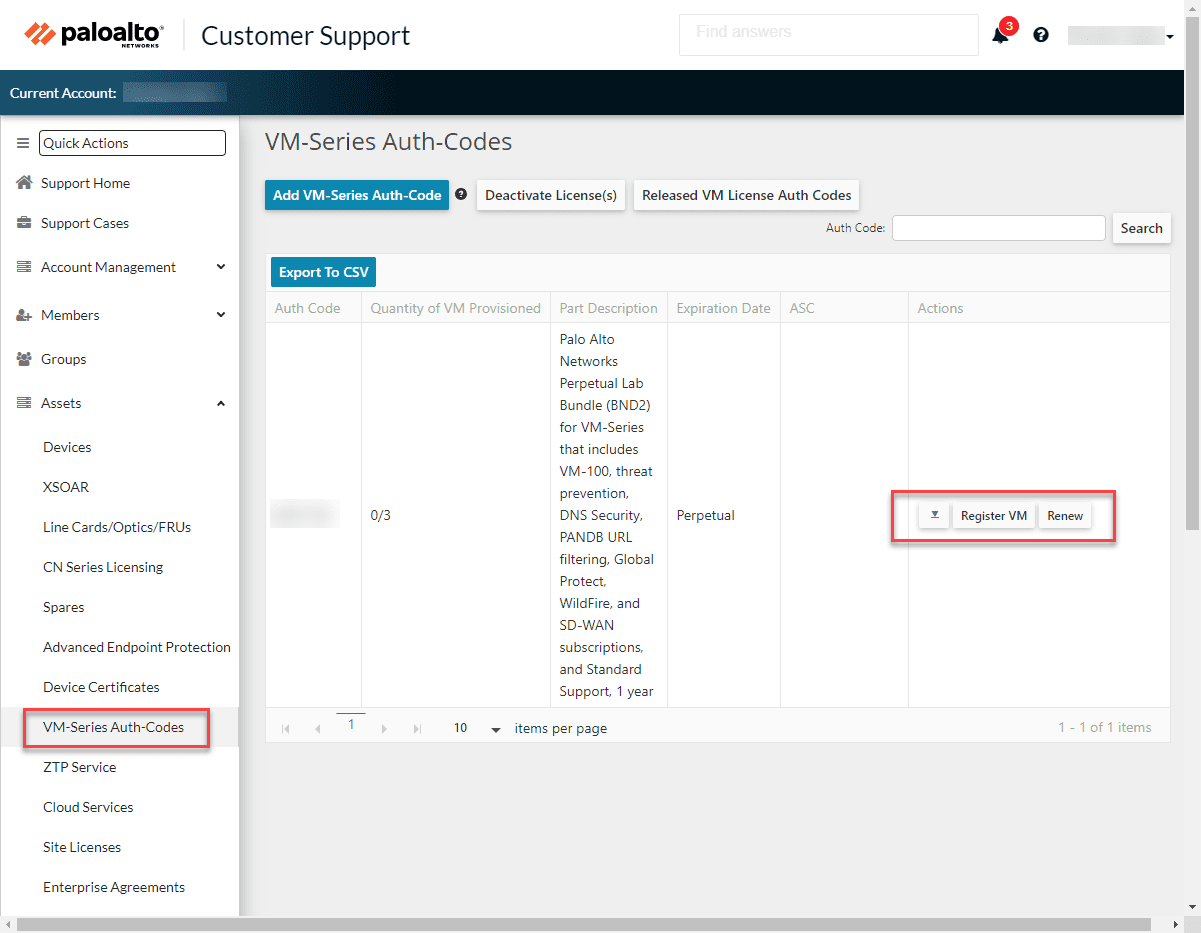
Palo Alto will give you an authorization code that will allow you to redeem the VM-series firewalls from the Palo Alto support portal. Below I am entering the authorization code and submitting to add the VM-series to the dashboard.
After entering the authorization code, you will see the pertinent VM-series firewalls displayed in the support portal for you to download. Click the downward triangle to launch the download dialog box.
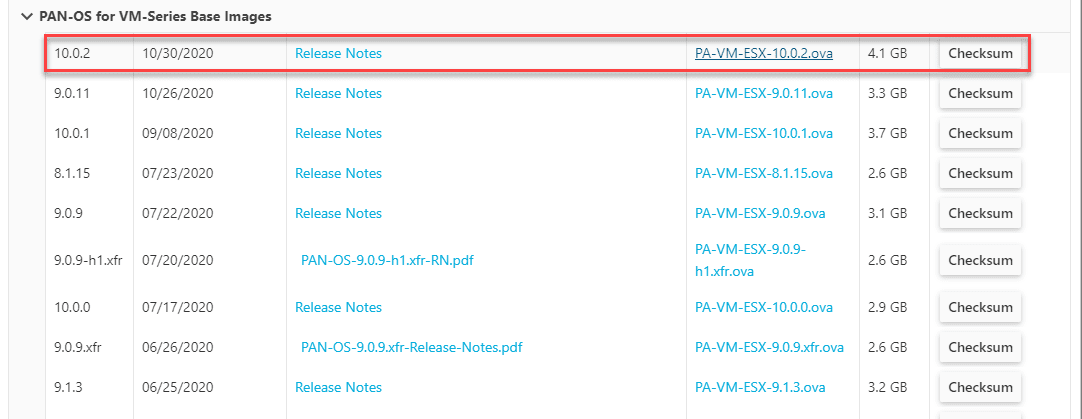
Scroll down in the download box to the PAN-OS for VM-Series Base Images section. I made the mistake of simply downloading the first listing for PAN-OS for 10.0.2. However, the first download is the PAN-OS image and not the OVA file. You have to scroll down to this section to retrieve the file.
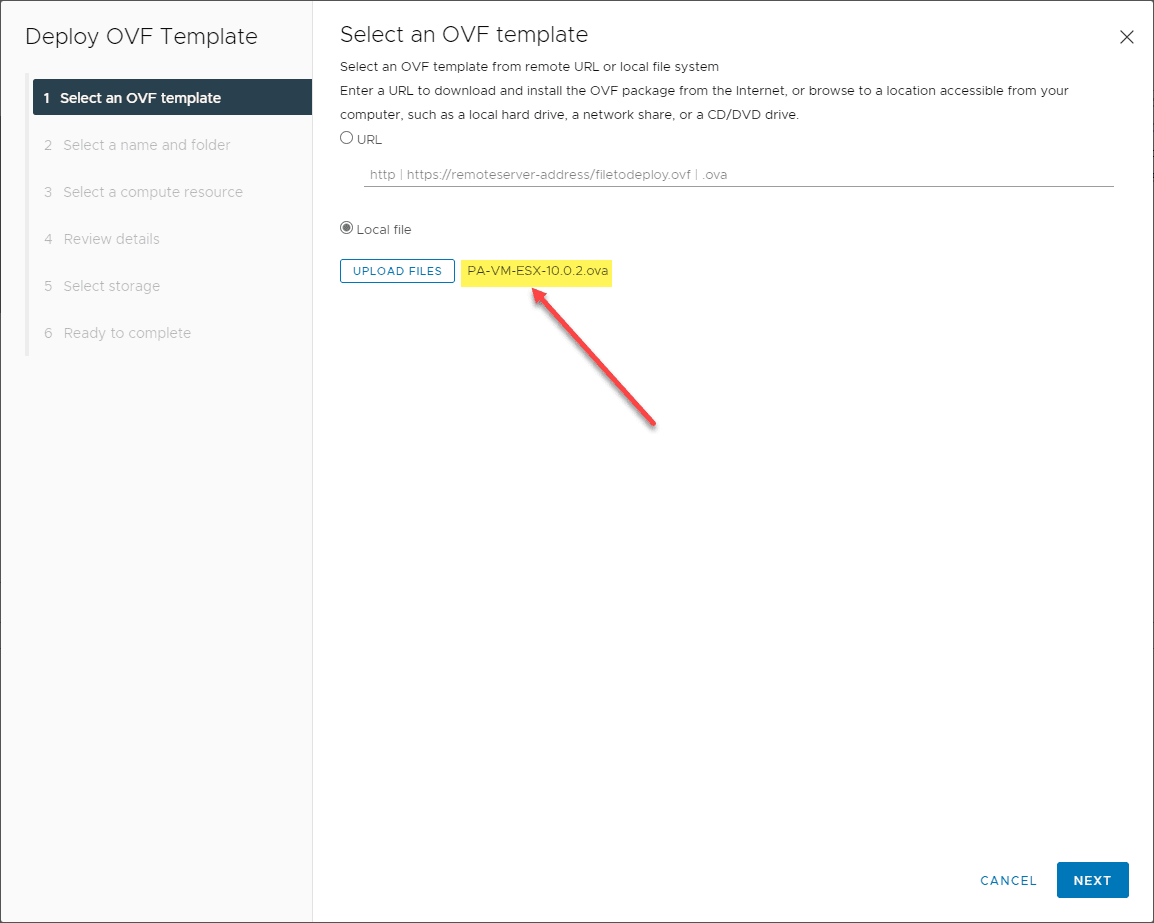
The next several steps are simply a normal OVA appliance deploy process for the OVA file. Choose your OVA file after you download in the vSphere Client.
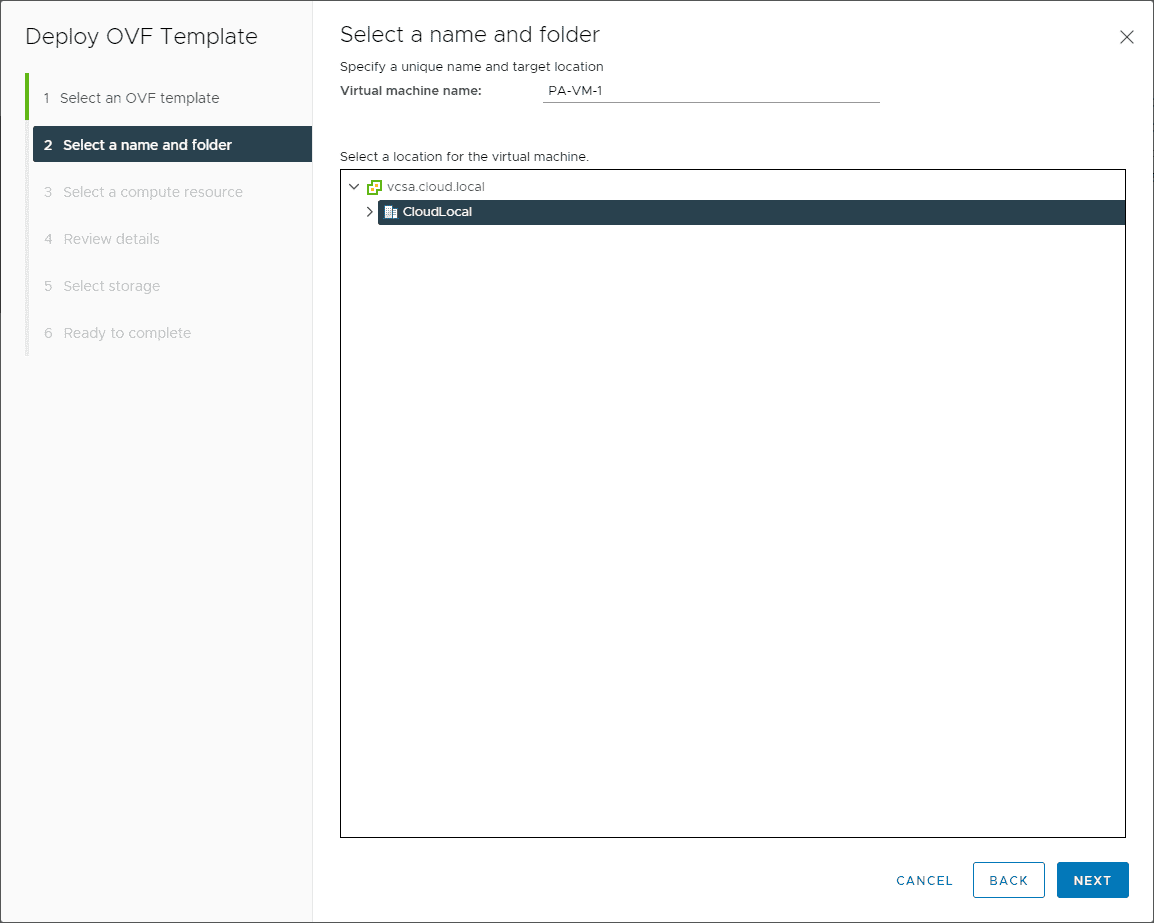
Choose the name and folder.
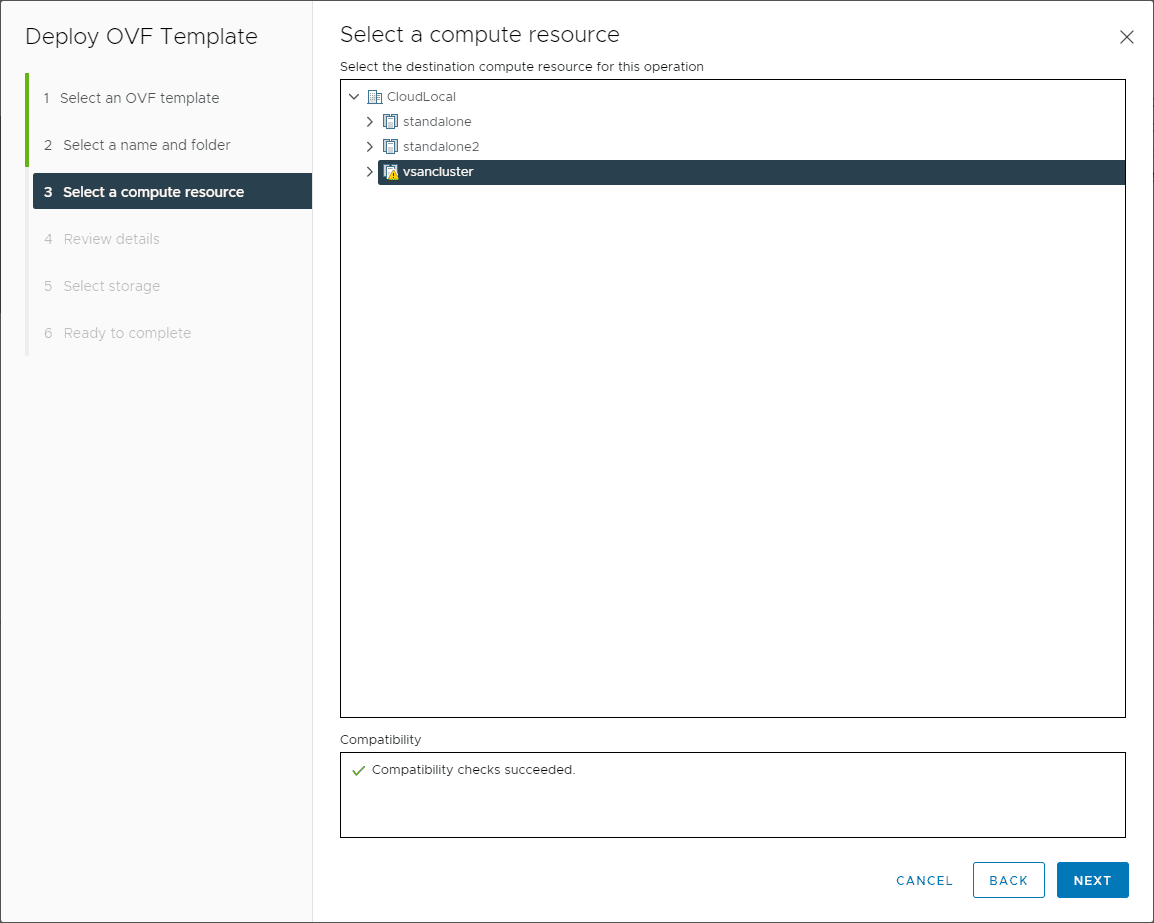
Select your compute resource.
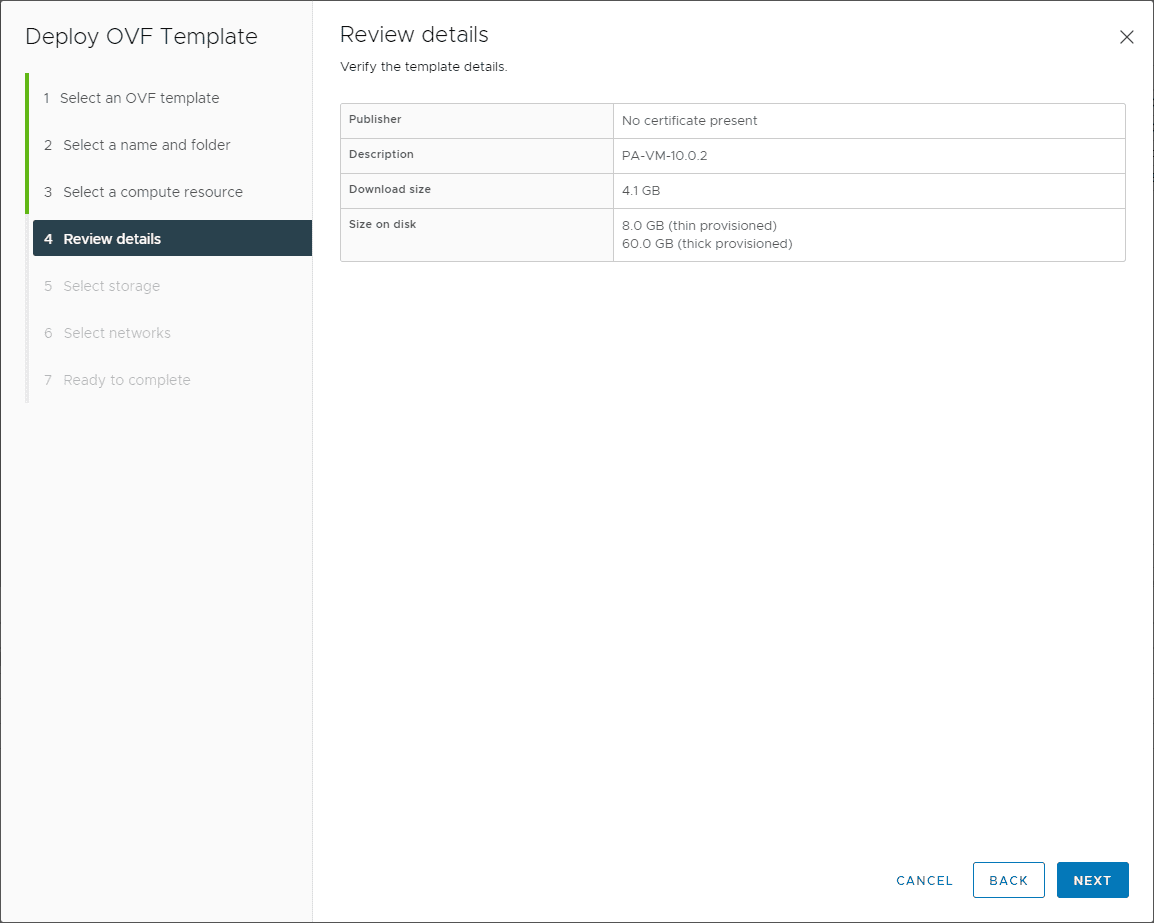
Review the initial deployment details.
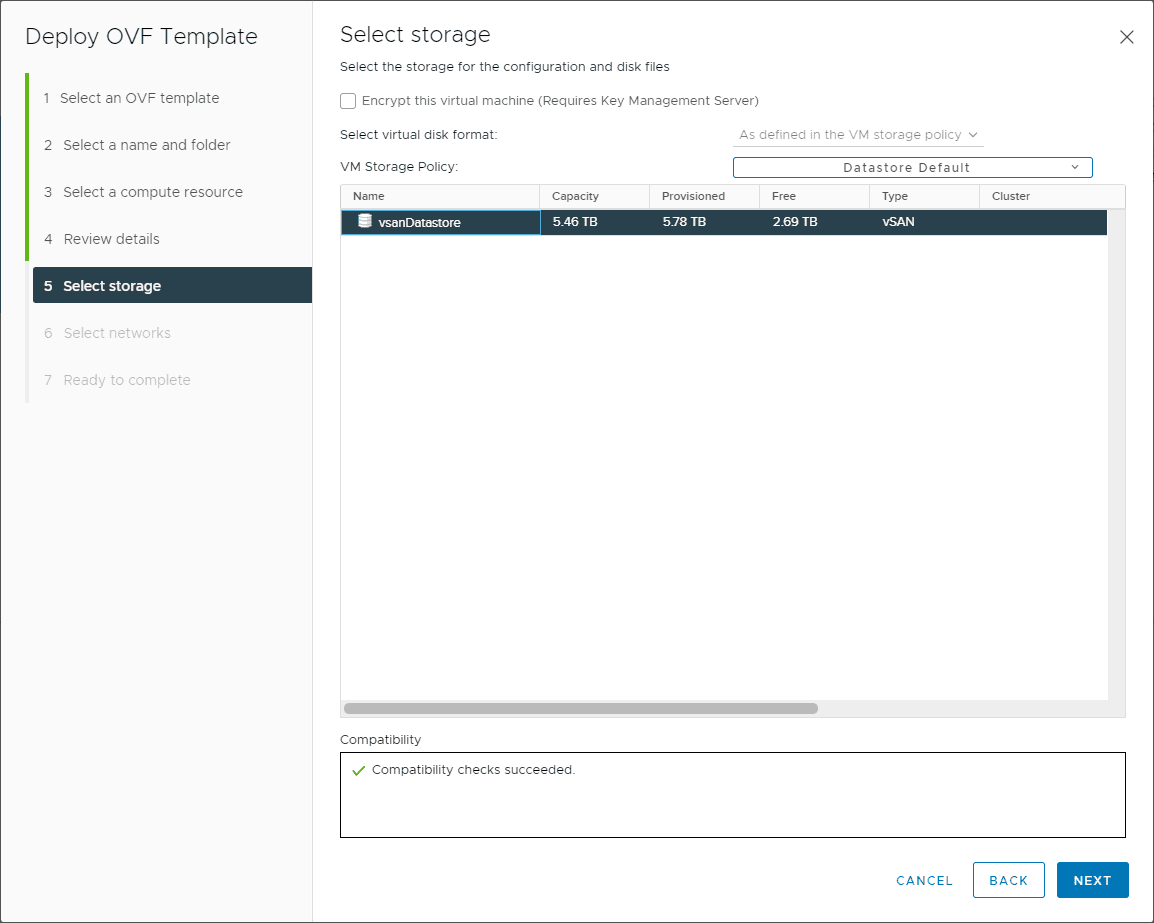
Choose the storage for the Palo VM series appliance.
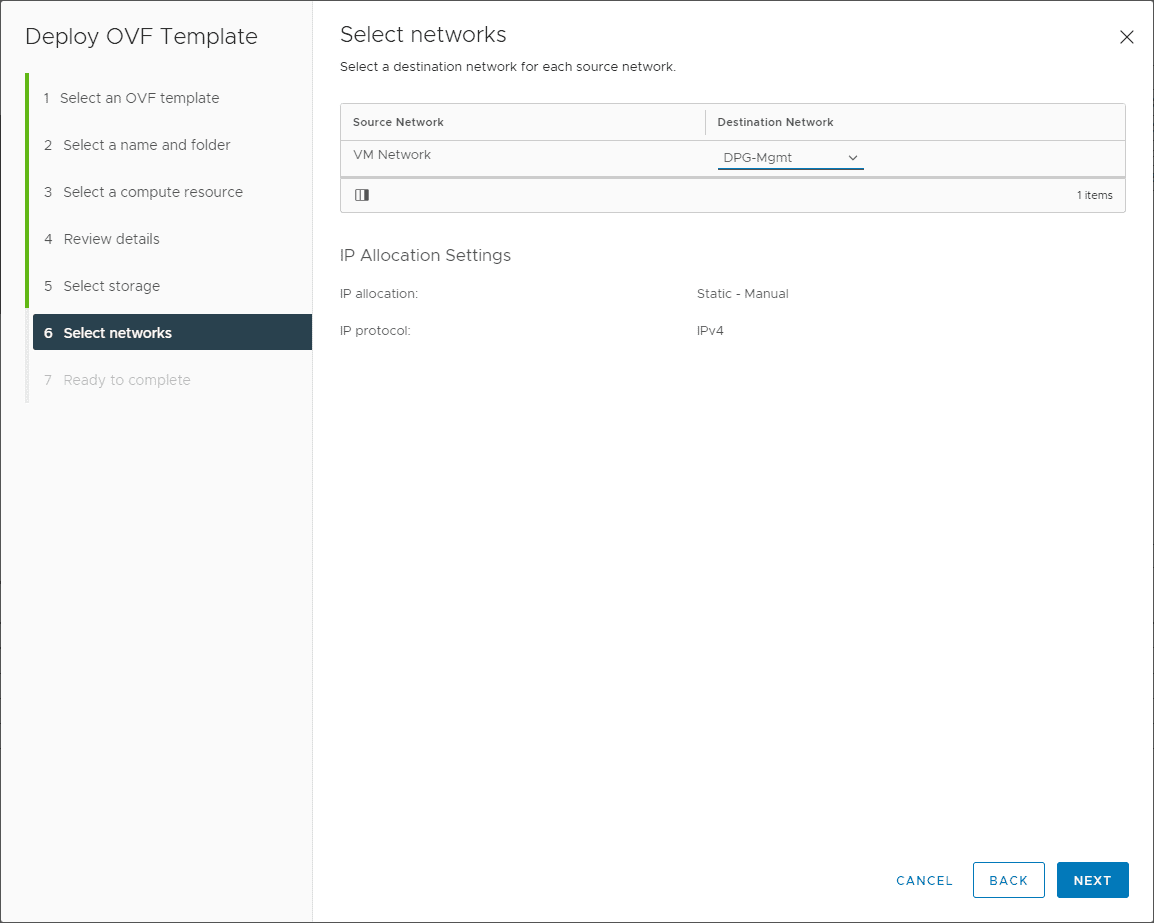
Select the network to use with the appliance deployment. The first network adapter on the VM is the management network. The appliance will deploy by default with three adapters configured. So you can choose the appropriate vSwitch to use with the Palo VM-series firewall for each interface to use the appliance for filtering, routing, etc. You can add up to 10 adapters on the appliance to support up to 10 different vSwitch connections.
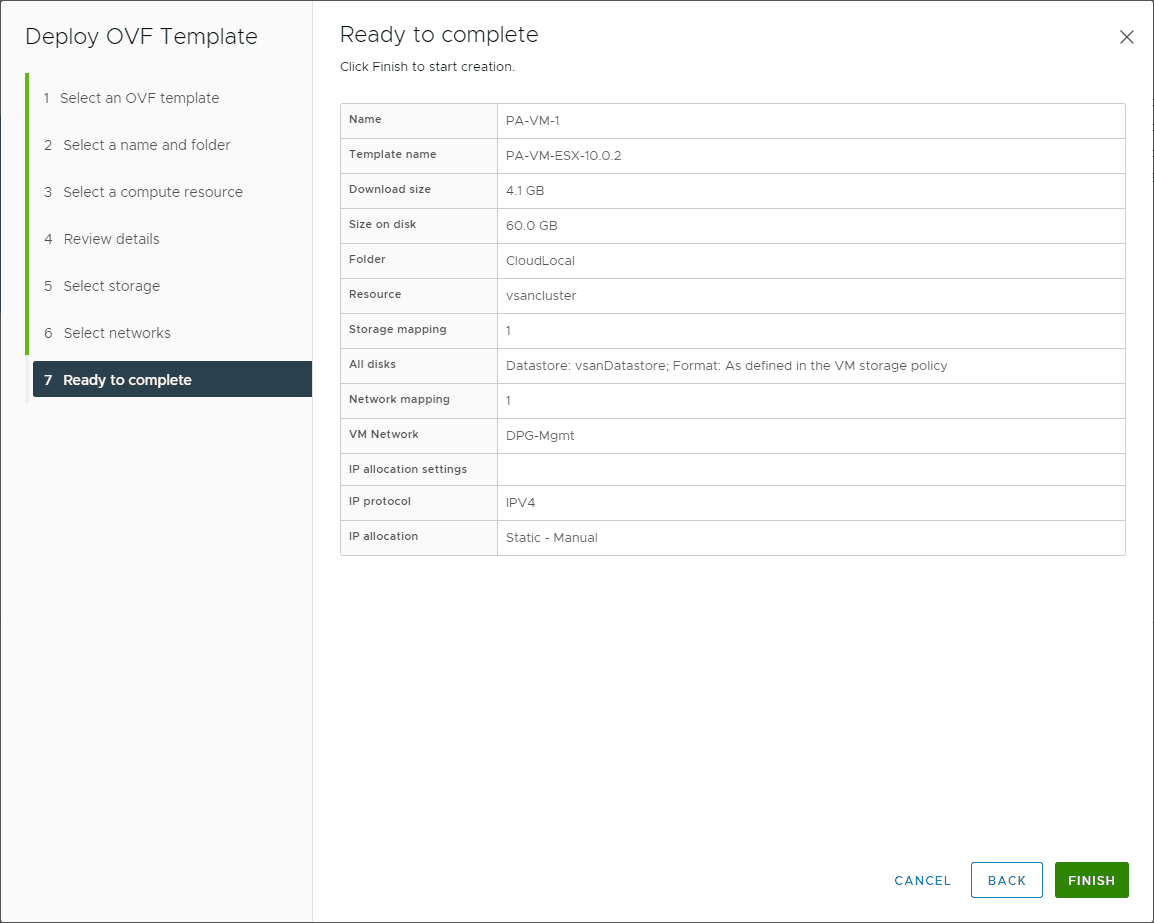
Finalize the deployment of the Palo VM-series firewall appliance.
Booting the Palo VM series firewall for the first time.
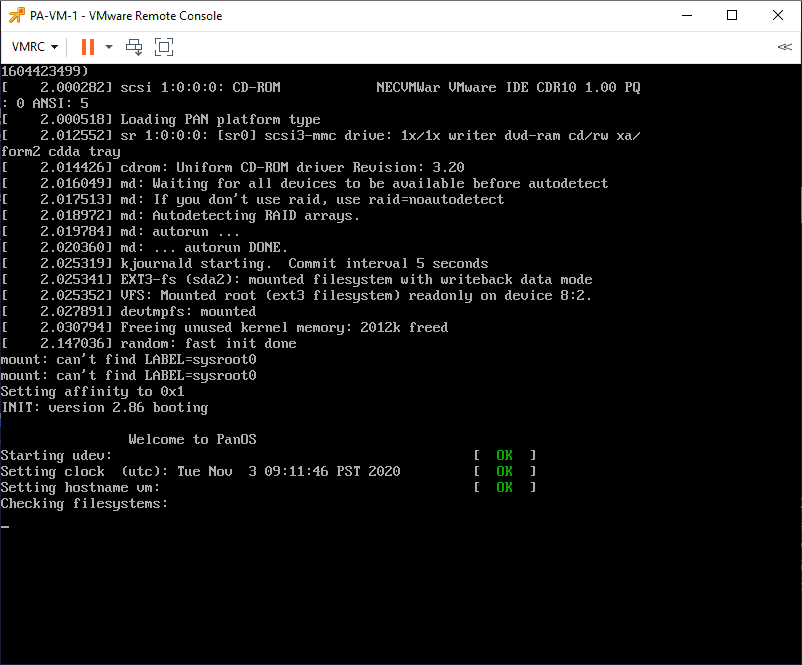
Configuring the management network
The Palo VM series firewall will be set to use DHCP on the first boot for the management interface. Most likely, you will want to assign a static address for the VM-series.
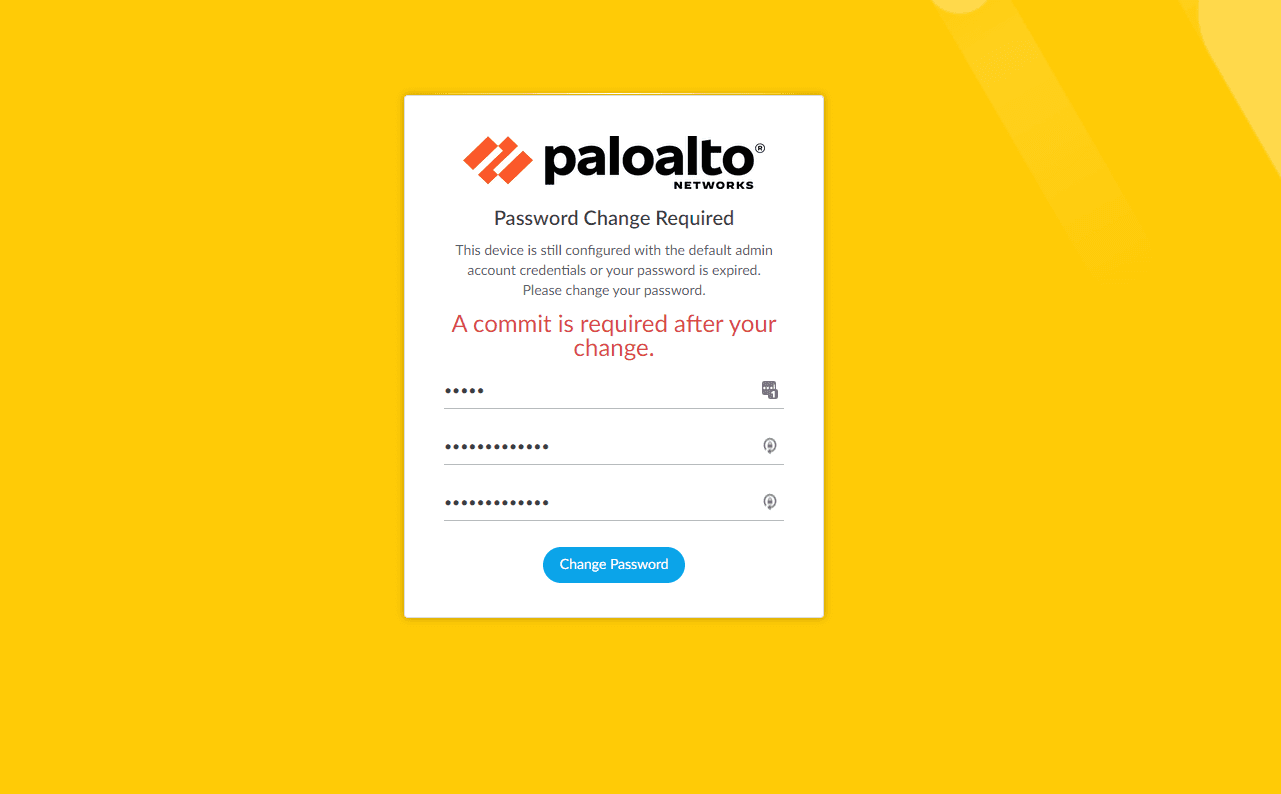
One quick little tidbit – the default user/password for the VM-series is admin/admin. I noticed that once you deploy, it won’t accept this for the first three logins. Then after it fails for three consecutive tries, it will ask you to reset the password. This is part of the “reset to factory behavior,” as noted here: https://knowledgebase.paloaltonetworks.com/KCSArticleDetail?id=kA10g000000CloQCAS. Also note, the password you set for the command line is only for the command line. You will need to enter admin/admin for the web console password as well. It will prompt you to change it the first time you log in.
Once you are logged into the command line console with the password you set, you can configure the management IP address. To do that, you will use the following commands:
configure
set deviceconfig system type static
set deviceconfig system ip-address<Firewall-IP>netmask<netmask>default-gateway<gateway-IP>dns-setting servers primary<DNS-IP>
Example:  set deviceconfig system ip-address 10.1.149.28 netmask 255.255.255.0 default-gateway 10.1.149.1 dns-setting servers primary 8.8.8.8

commit
exit
ping host 8.8.8.8
Once you have set the management IP address, you should be able to browse there in a web browser and access the web admin console like normal. Also note, the password you set for the command line is only for the command line. You will need to enter admin/admin for the web console password as well. It will prompt you to change it the first time you log in.
Concluding Thoughts
The process to Install Palo Alto VM Series in VMware vSphere is straightforward. It only took a few minutes from entering the authorization code, downloading the OVA, and deploying. Getting the Palo Alto VM-series firewall configured with a default configuration for your network is super easy. Once you have an IP configured, you can log in to the web console as expected to finish out your configuration, restore a configuration, etc.