Upgrade to ESXi 7 Update 1 using vSphere Lifecycle Manager VLCM
One of the great new features that was included starting in vSphere 7 is the new vSphere Lifecycle Manager (VLCM) tool. The new tool provides a declarative approach to upgrades and updates in your ESXi environment. With the release of vSphere 7 Update 1, I wanted to take it for a spin to get my ESXi 7.0b hosts updated with vSphere 7 Update 1 to start taking a look at the new version and experiencing the new capabilities. Let’s take a look at how to upgrade to ESXi 7 Update 1 using vSphere Lifecycle Manager (VLCM) and see the steps involved.
What is vSphere Lifecycle Manager (VLCM)?
In case you missed the news with the release of vSphere 7, VMware has introduced a new solution in place of the vSphere Update Manager (VUM) that we have all used over the past several versions.
The new vSphere Lifecycle Manager (vLCM) utility is a new “image-based” declarative model that basically allows the vSphere admin to tell the cluster/hosts how they should “look” and then the vLCM service aligns the cluster/host to the “image” that is specified. This image includes not only the vSphere ESXi image but also any vendor specific modules like firmware and other modules that you want to include as part of the declarative process.
Upgrade to ESXi 7 Update 1 using vSphere Lifecycle Manager VLCM
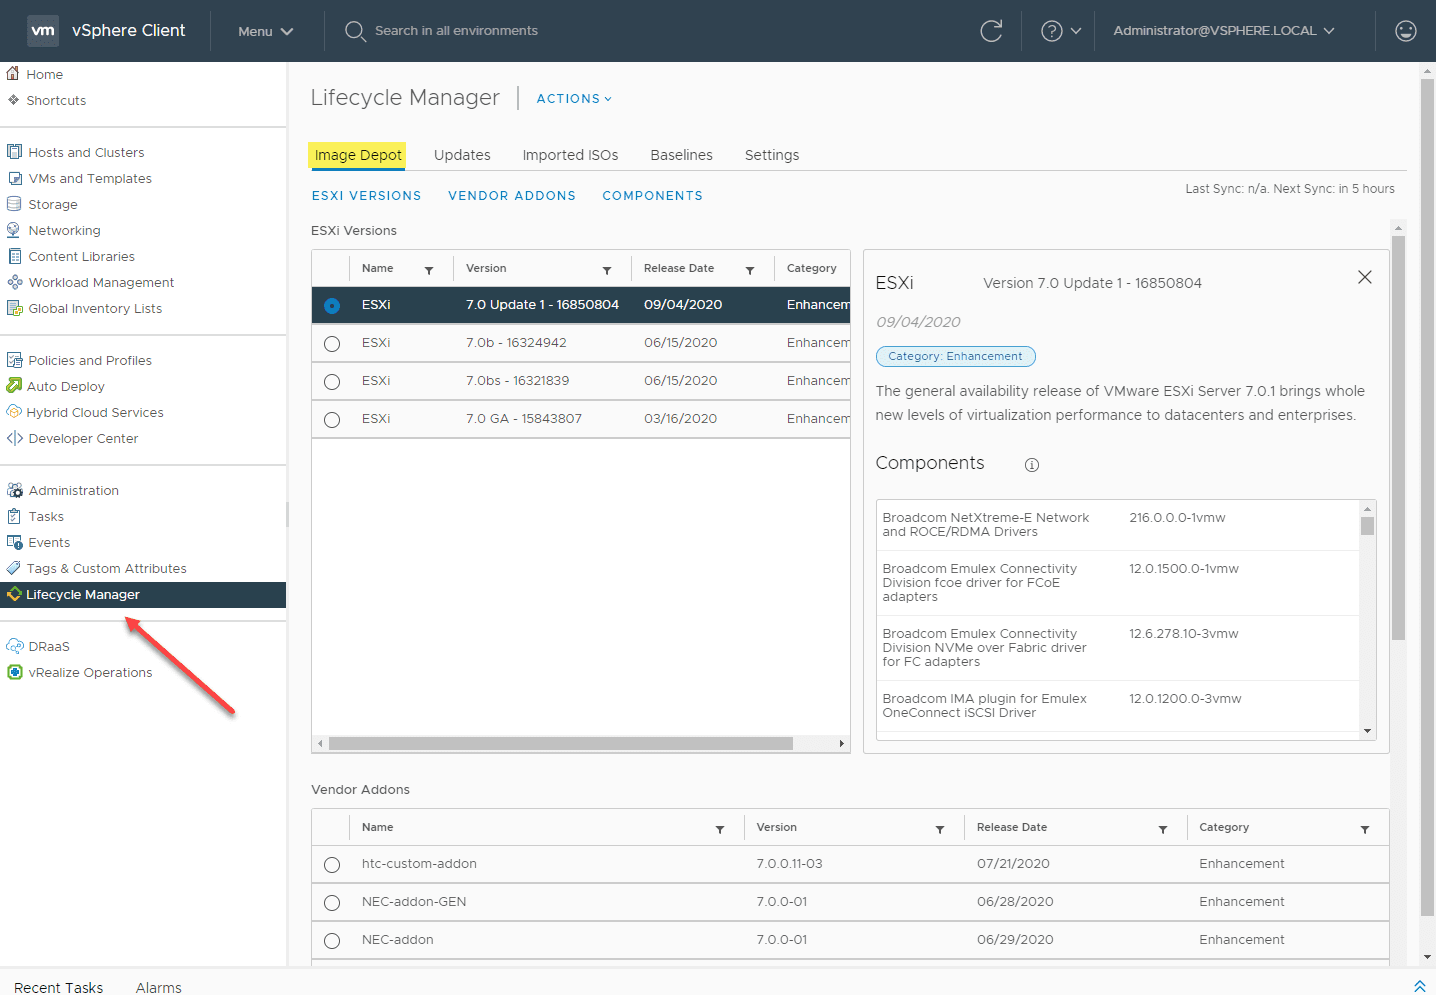
To see the images that are contained in the Image Depot, navigate to Menu > Lifecycle Manager. Click the Image Depot tab. As you can see, we have the vSphere 7 Update 1 ESXi image.
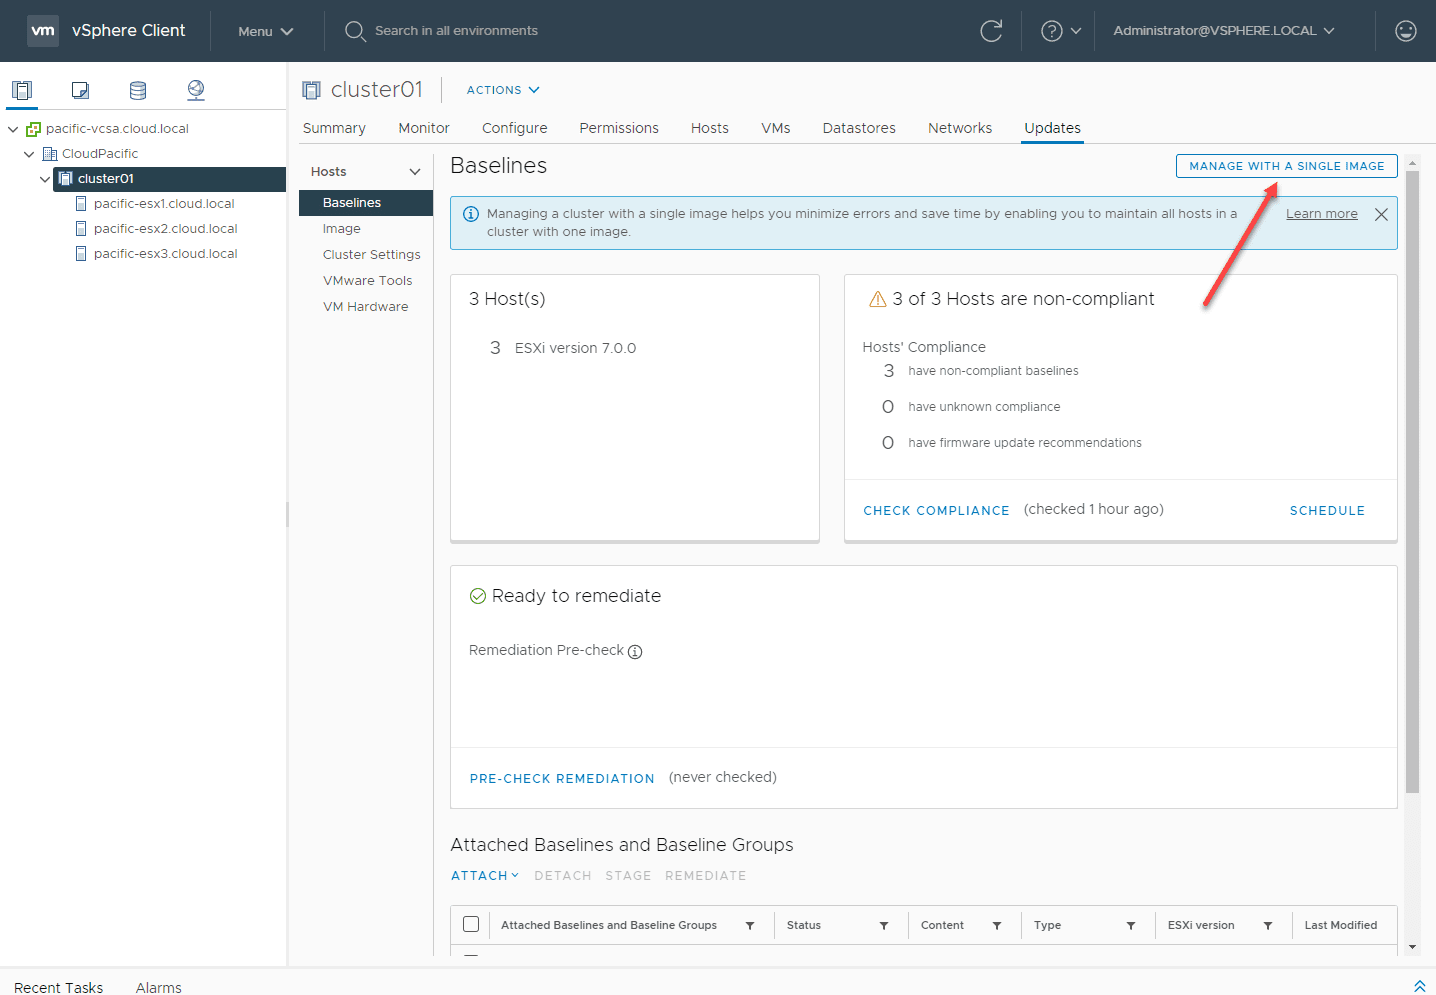
Let’s begin the process of using the vSphere Lifecycle Manager to upgrade our ESXi 7.0 hosts to ESXi 7 Update 1. We are going to remediate the entire cluster. So, click the cluster, then Updates tab. On the screen, click the button Manage with a single image button in the upper right hand corner.
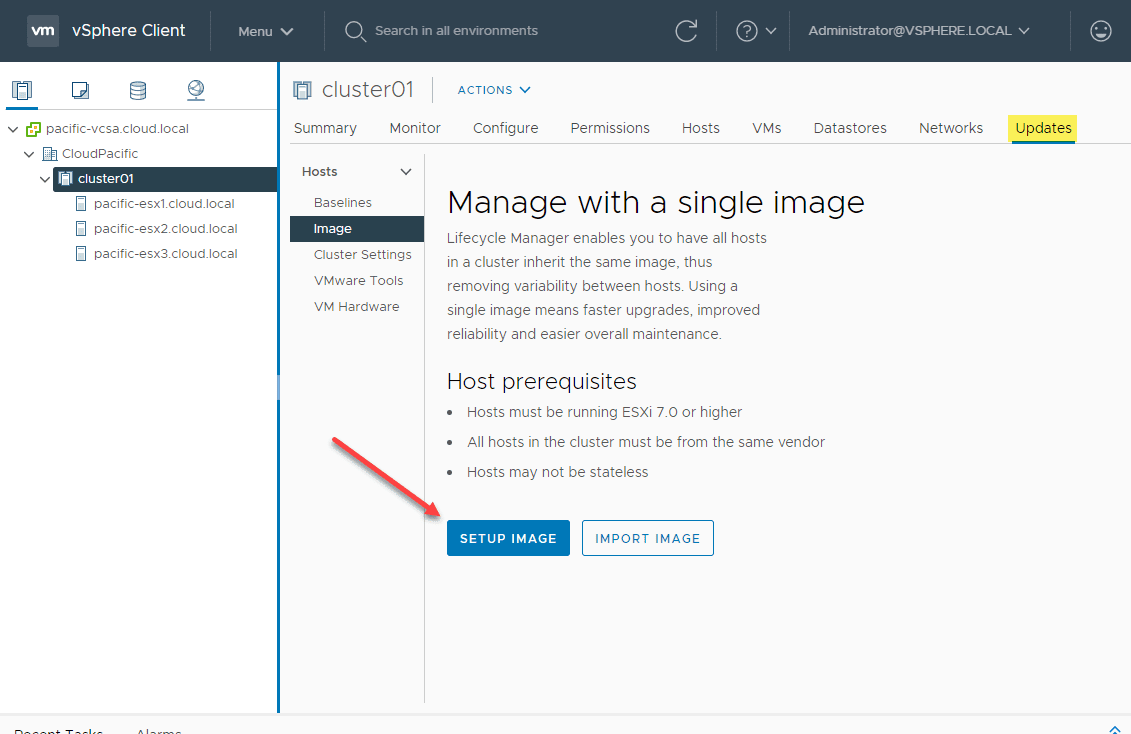
Click the Setup Image button to begin the process to setup the image for remediation.
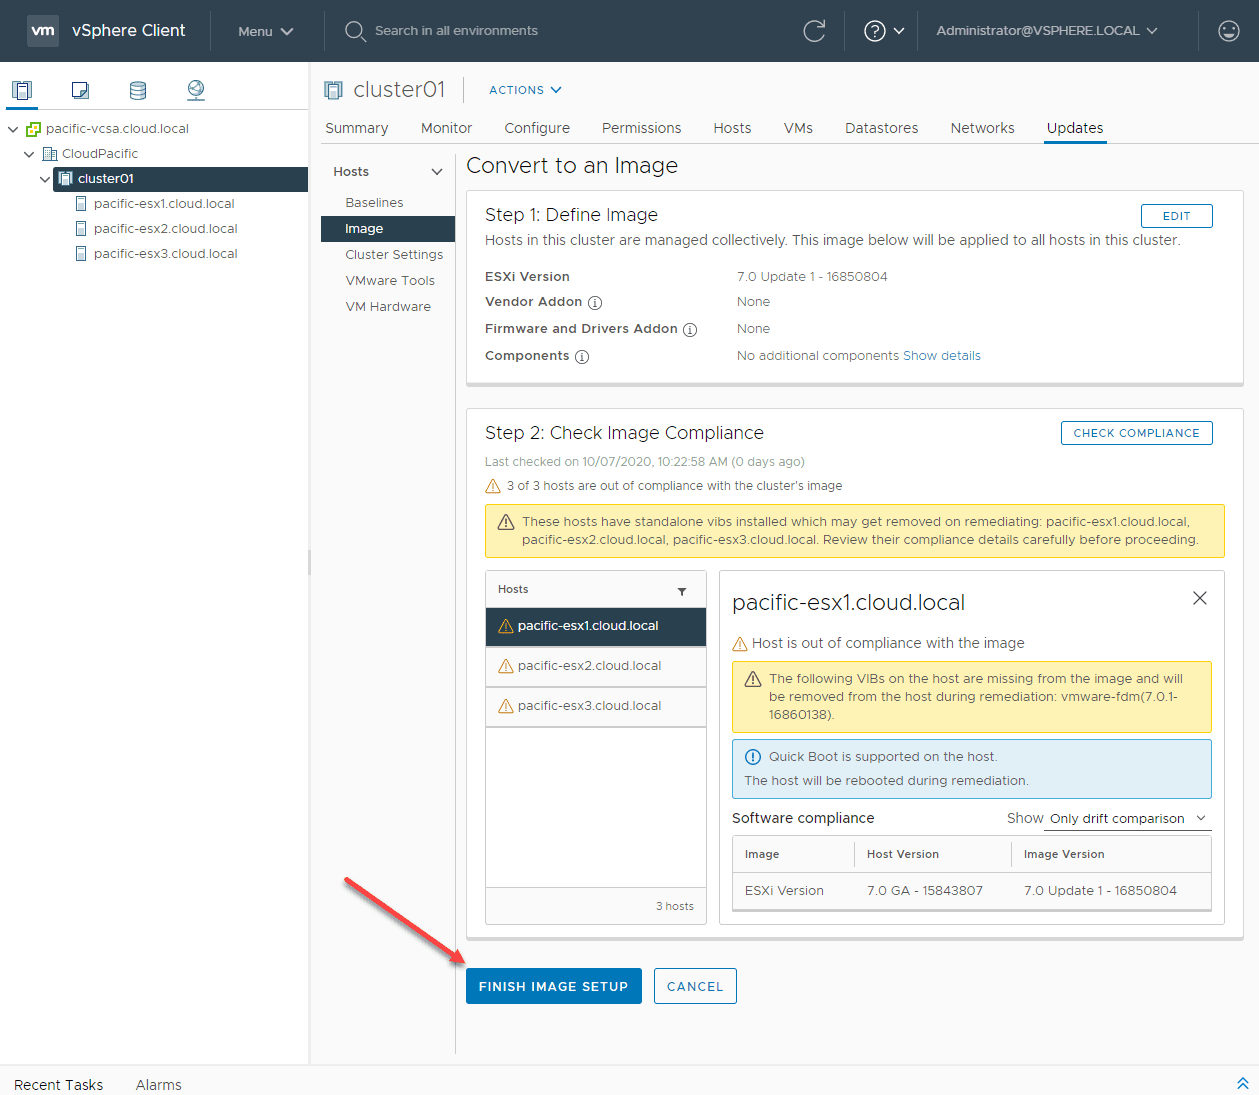
Here you choose the ESXi Version as well as any vendor addons to install. After you make your selections, the cluster is checked for compliance with the image. The results will display. Click the Finish Image Setup button.
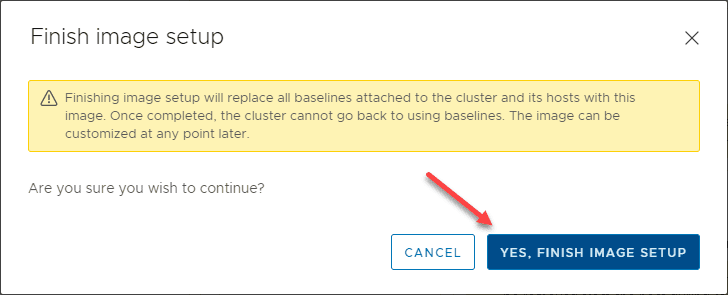
You will confirm the Finish Image Setup with a final click of the button on the dialog box.
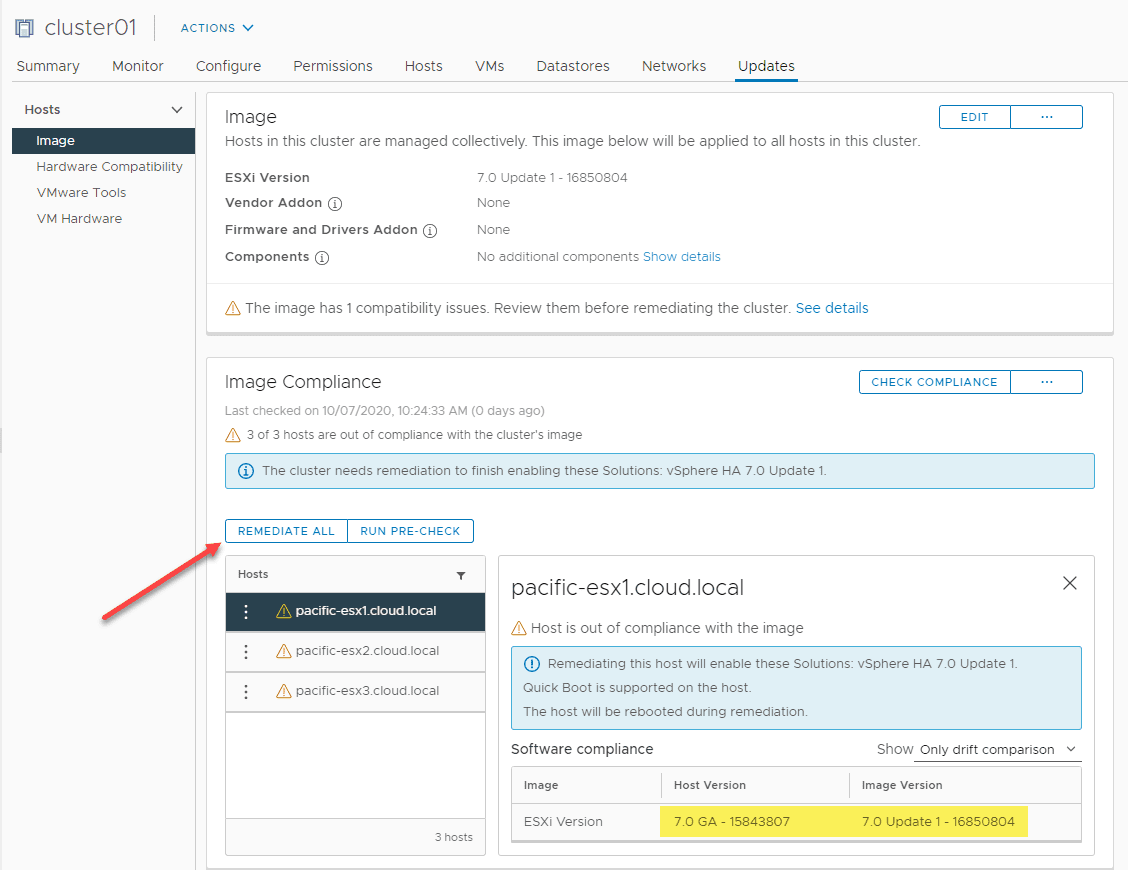
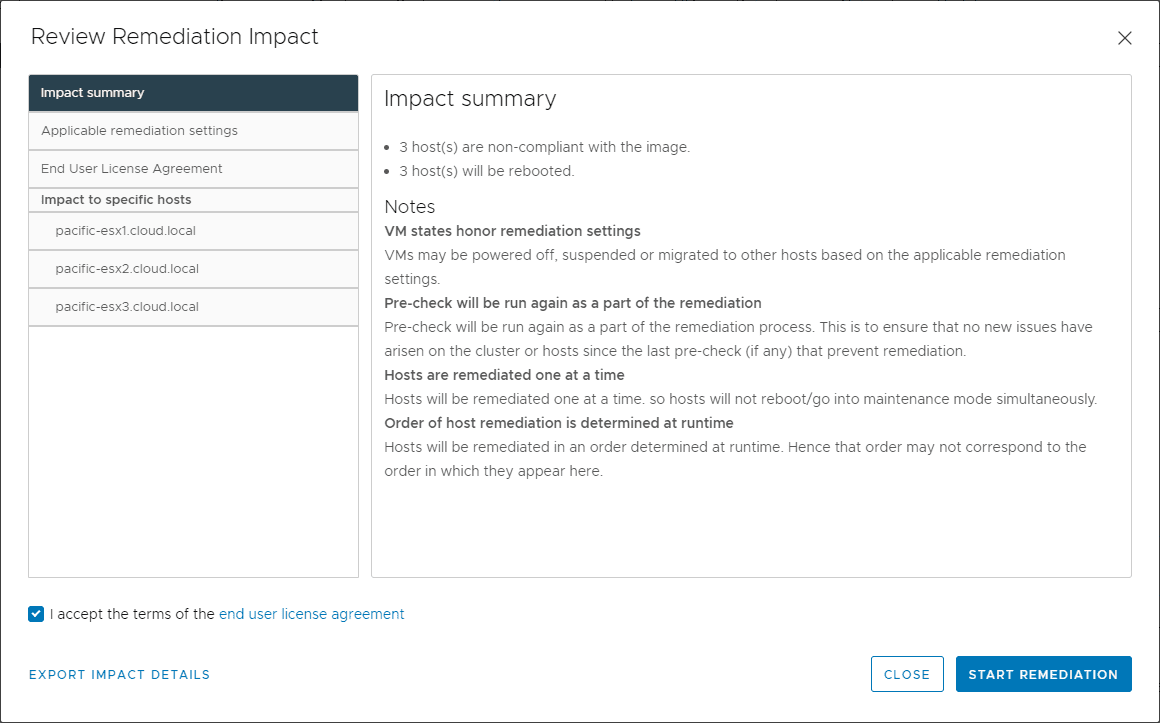
Next, the compliance will quickly check the cluster again and you will have the ability to click the Remediate All which will begin the process to remediate the entire cluster. You will first see the remediation impact before the process kicks off.
Review the Remediation Impact before beginning.
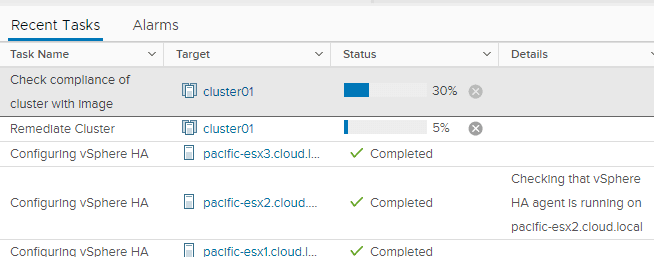
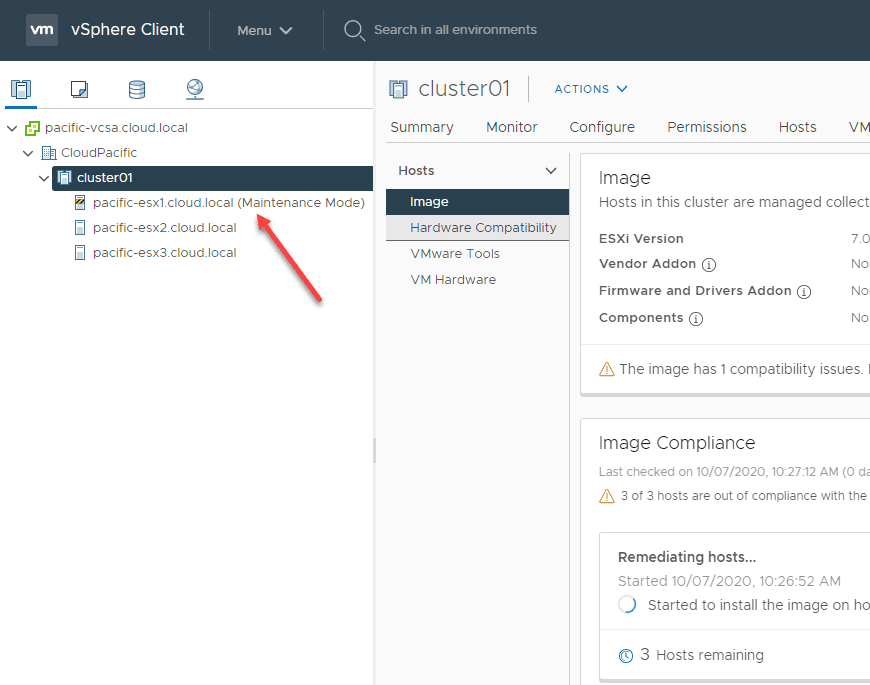
The remediation process as part of the vLCM utility begins. The process will roll through the hosts in the cluster, placing each in maintenance mode one at a time, applying the upgrade to vSphere 7 Update 1, and then rebooting. After the upgrade is successful, the host is taken out of maintenance mode and the next host is remediated.
The first host is placed into maintenance mode.
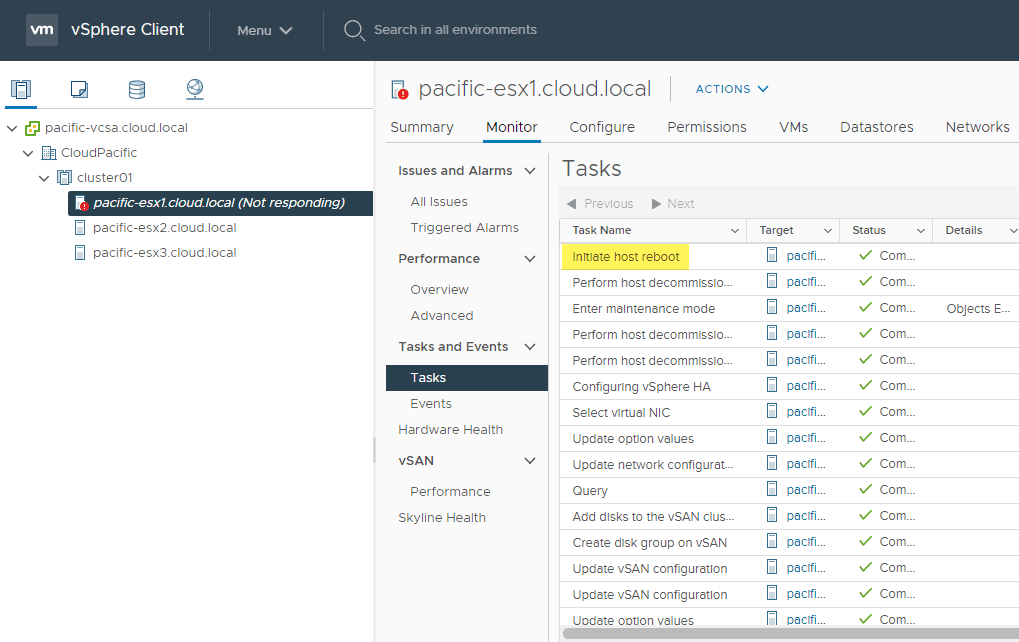
After only a few moments, the host is rebooted.
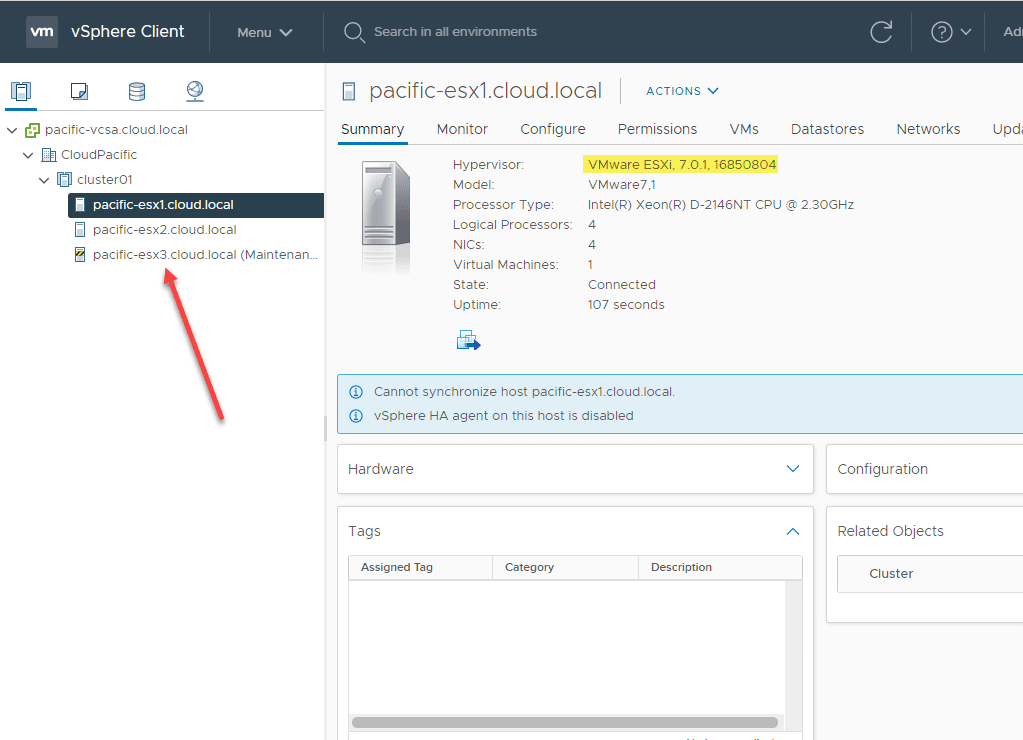
After the reboot, the host comes back up, exits maintenance mode and you can see the version has been updated. The next host is placed into maintenance mode and the process resumes.
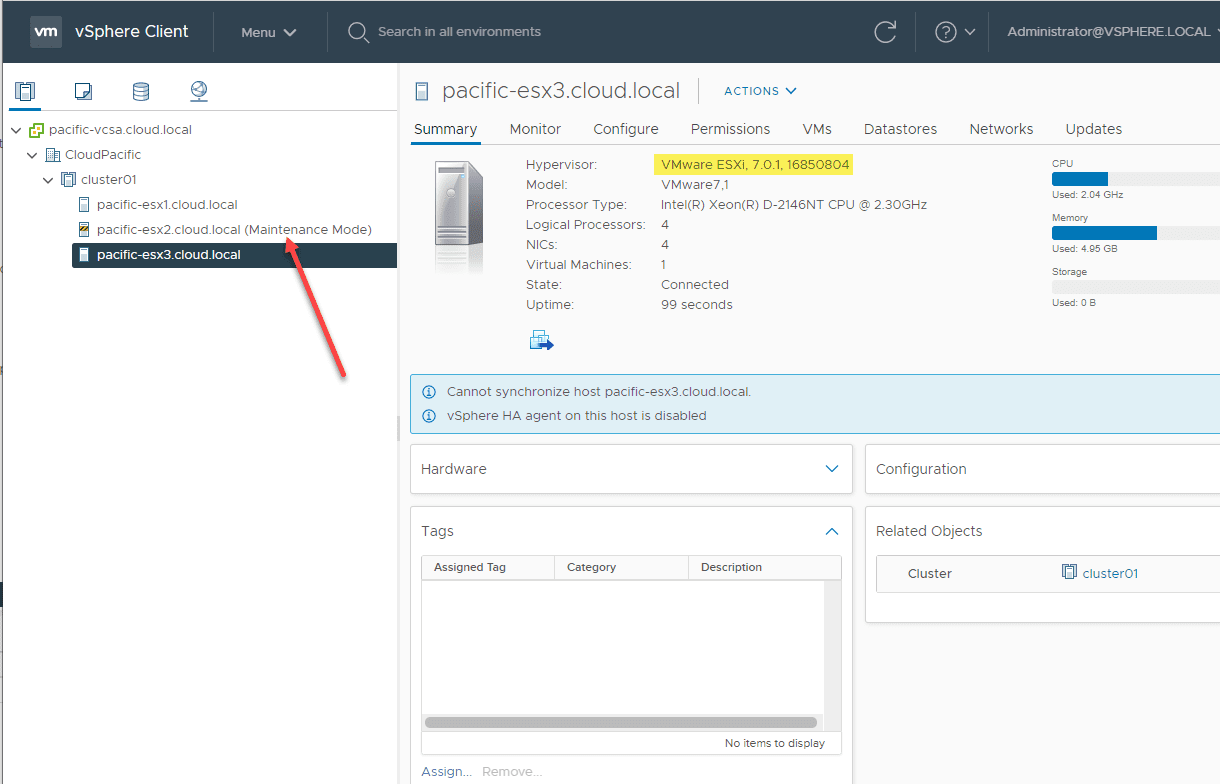
The host is successfully upgrade and the final host is placed into maintenance mode and begins the update.
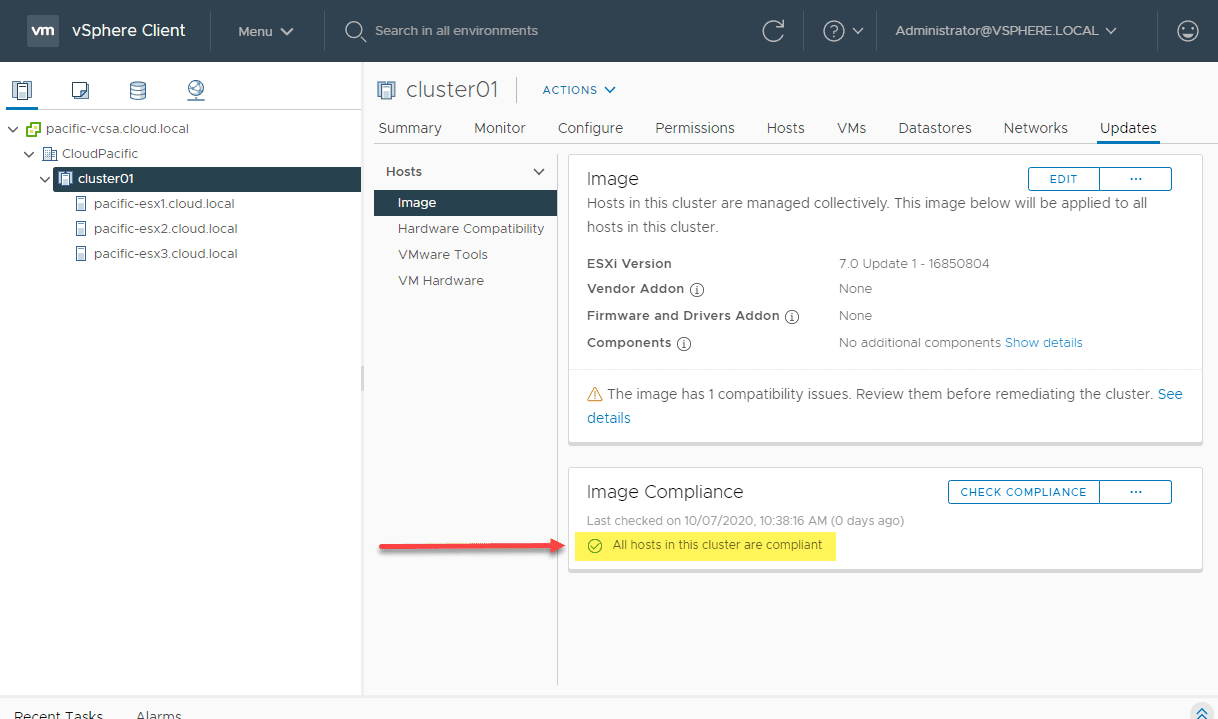
After rebooting, the hosts are now all compliance with the image assigned to the vSphere cluster.
Wrapping Up
The new vSphere Lifecycle Manager provides a really easy way to assign a new image to the vSphere cluster, check the cluster for compliance, and then remediate the cluster based on the assigned image. The process seems more seamless now with the new vSphere Lifecycle Manager than using VUM.
Keep in mind, you can still use VUM for the upgrade to ESXi 7 Update 1. Another consideration to make is that once you turn on vSphere Lifecycle Manager as the lifecycle manager of choice, you can’t go back to VUM. There may be a reason why some might want to stick with VUM, however, as of Update 1, some of the issues that may have prevented some from using it moving forward are not longer issues – NSX-T, etc.
Choosing to Upgrade to ESXi 7 Update 1 using vSphere Lifecycle Manager VLCM provides the easiest way to take advantage of all the new features and benefits afforded to your environment by vSphere 7 Update 1.


