Add iSCSI Shared Storage to VMware ESXi-Arm
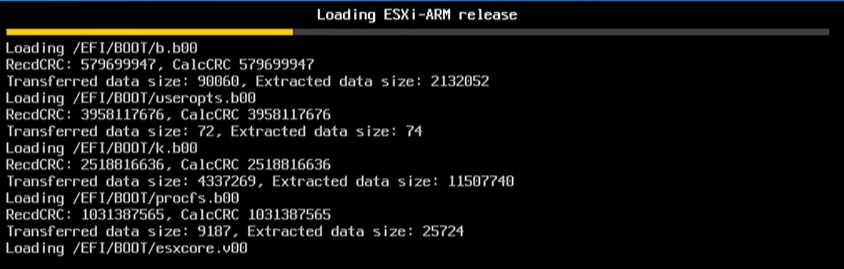
One of the exciting things in the home lab as of late is the ESXi-ARM fling that I have installed on my Raspberry Pi 4 test box. After installing the ESXi-ARM Fling on the Raspberry Pi 4, of course, I wanted to run some workloads, including Ubuntu Arm. As of yet, I don’t have an NVMe to USB enclosure to work with the Raspberry Pi 4 (one coming soon). I wanted to connect VMware ESXi-Arm to iSCSI shared storage and use it as data to run some workloads with ESXi-Arm. Let’s take a look at how to add iSCSI shared storage to VMware ESXi-Arm easily.
Provision TrueNAS or FreeNAS iSCSI Target
In a lab environment, I have been using FreeNAS for years. Not long ago, I decided to provision TrueNAS as well. Both are produced by IX Systems. FreeNAS is the community-supported edition, while TrueNAS is for enterprise systems. To get a better understanding of the differences between the two, check out the comparison post here.
So, with that being said, I actually have both stood up in the home lab and have experimented with both for iSCSI targets for testing and other purposes and both seem to work great. You won’t see a lot of differences between the two, even in the interface. However, I will be showing the steps in TrueNAS.
Loading a virtual machine for TrueNAS and adding disks
Let me briefly detail the TrueNAS VM configuration for installing TrueNAS and adding disks for use as an iSCSI target.
- FreeBSD 11 64-bit virtual machine
- 8 GB of RAM
- Added a 16 GB disk for installing TrueNAS and a 100 GB disk to act as the LUN for the iSCSI target
- Latest TrueNAS ISO downloaded and uploaded to the datastore and mounted to the TrueNAS VM
After installing the TrueNAS distribution, you will need to configure the network settings you want from the VM console. There is a text-based menu that you can use to select network configuration and provide the normal network parameters for use with your TrueNAS VM.
Configuring TrueNAS iSCSI target for ESXi-Arm
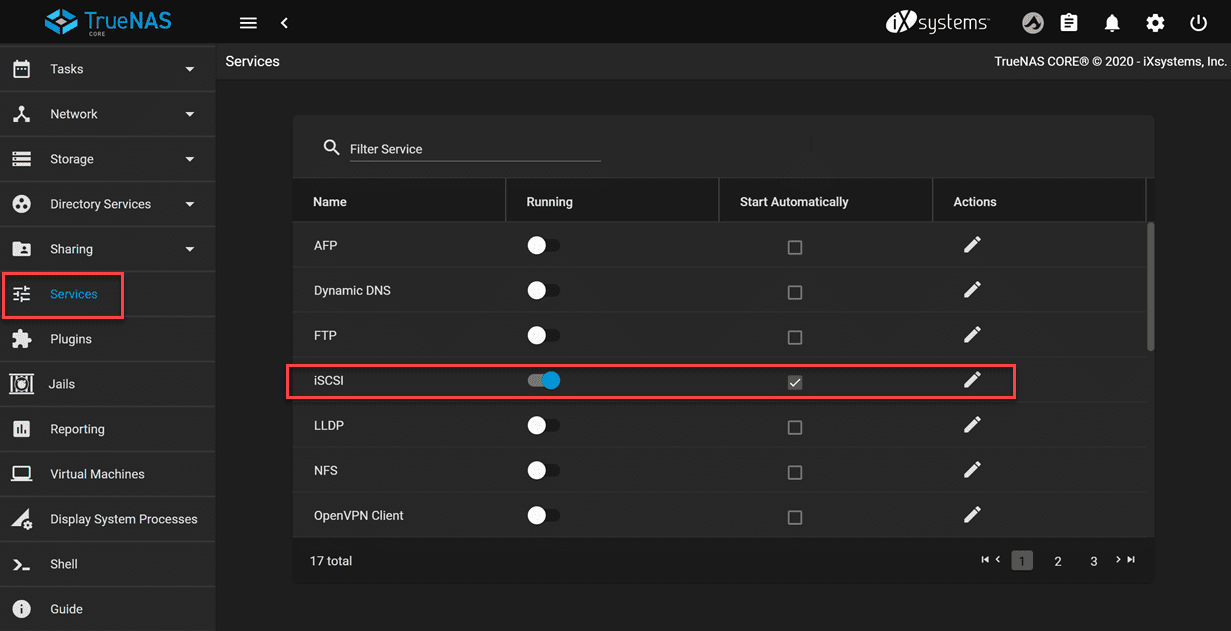
After you have the network configured and you are able to connect to the TrueNAS appliance via a browser pointed to the IP, login, and navigate to the Services menu.
Here you want to flip the toggle for the iSCSI service and set this to start automatically.
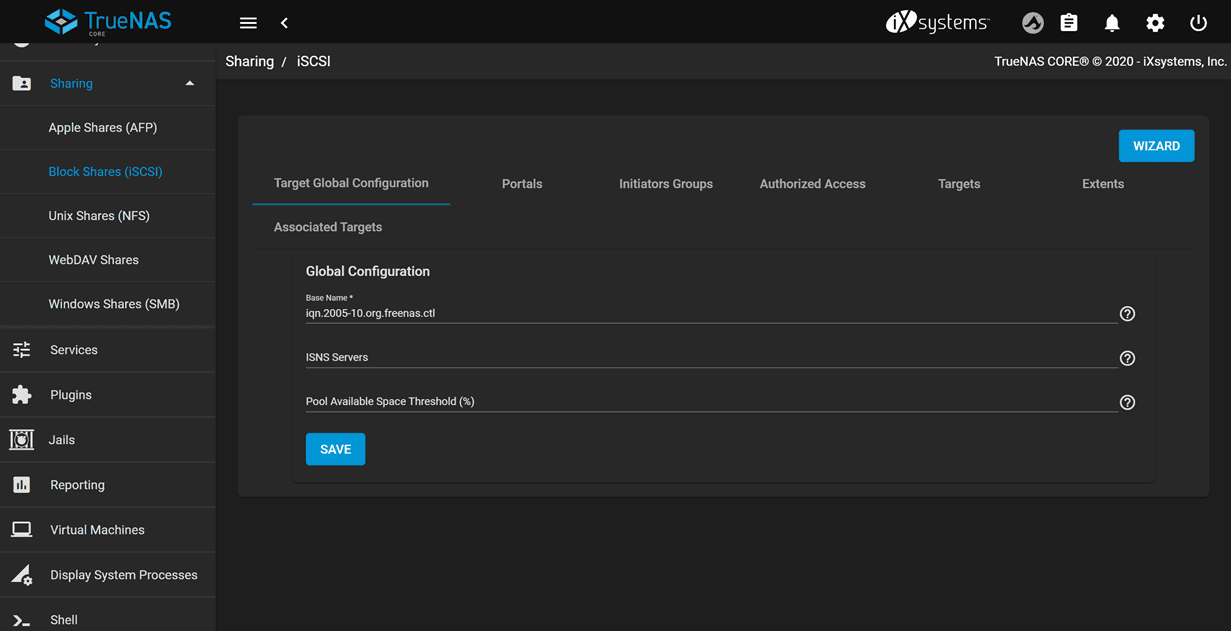
After you have started the iSCSI service, to begin setting up the iSCSI target, navigate to Sharing > Block Services (iSCSI). With TrueNAS, they provide a wizard to set up your iSCSI target, which FreeNAS doesn’t have. However, I found a few settings I wanted to tweak that the wizard didn’t cover. One of which is for the VMFS 6 capability that I will detail below.
You can though go through the wizard and then revisit your LUN to add settings which is what I did.
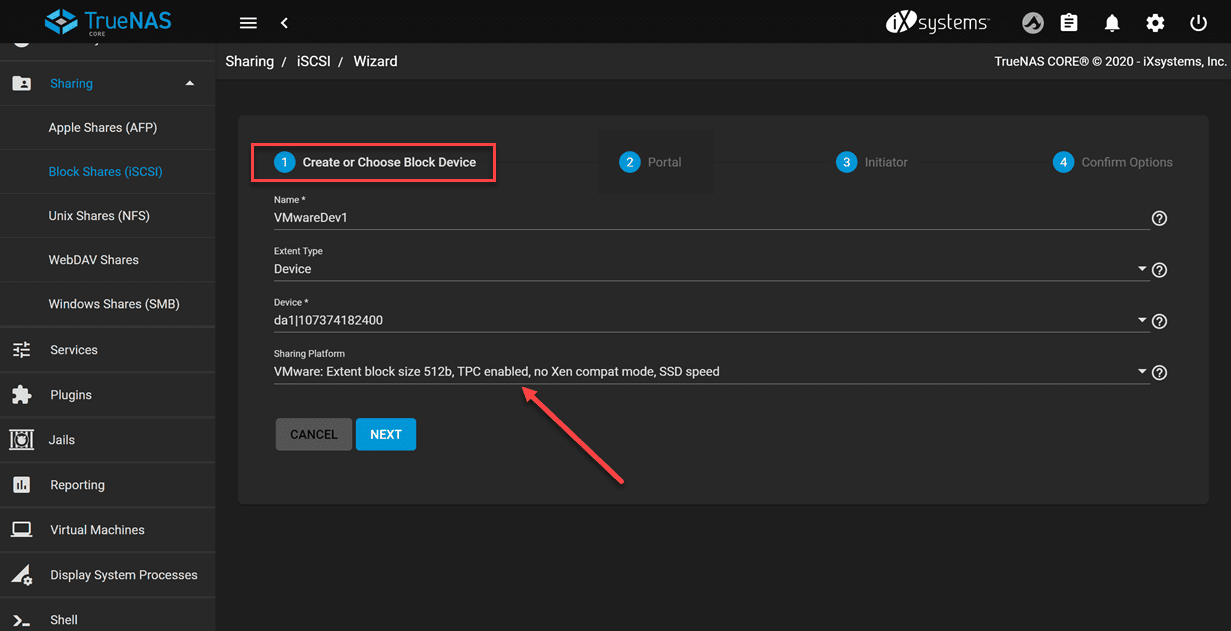
Here, I am configuring the block device. TrueNAS has a VMware option for the Sharing Platform that is preconfigured with settings ideal for VMware, however, not including the setting for VMFS 6.
On the portal configuration page of the wizard, you add a Portal IP address for communication from your ESXi host.
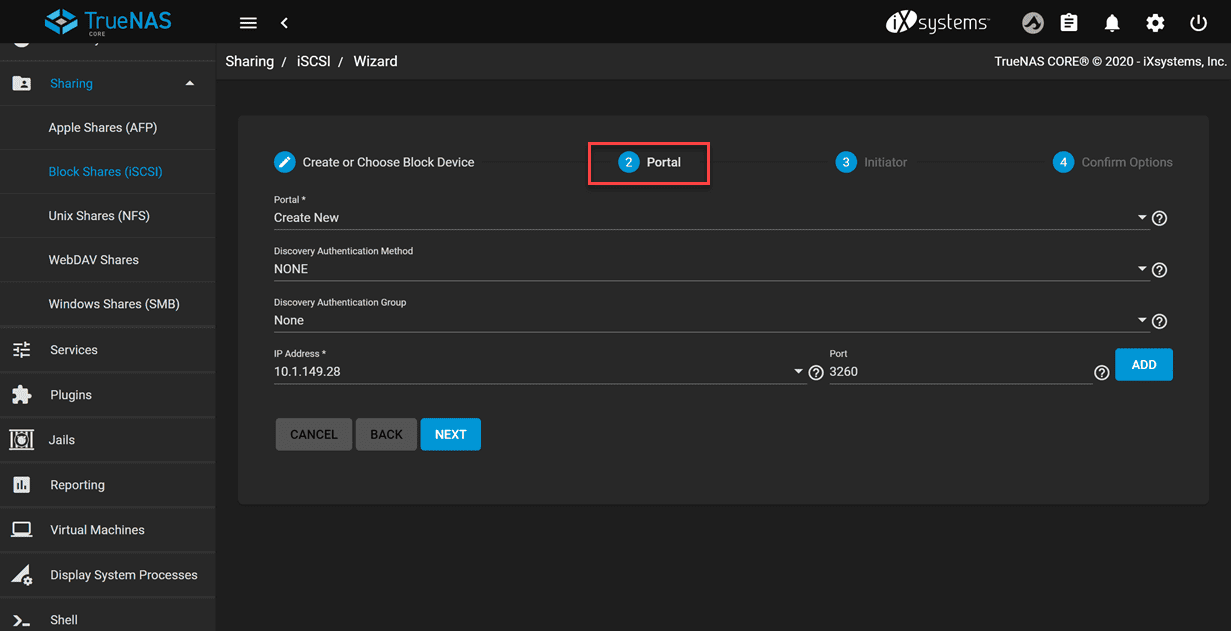
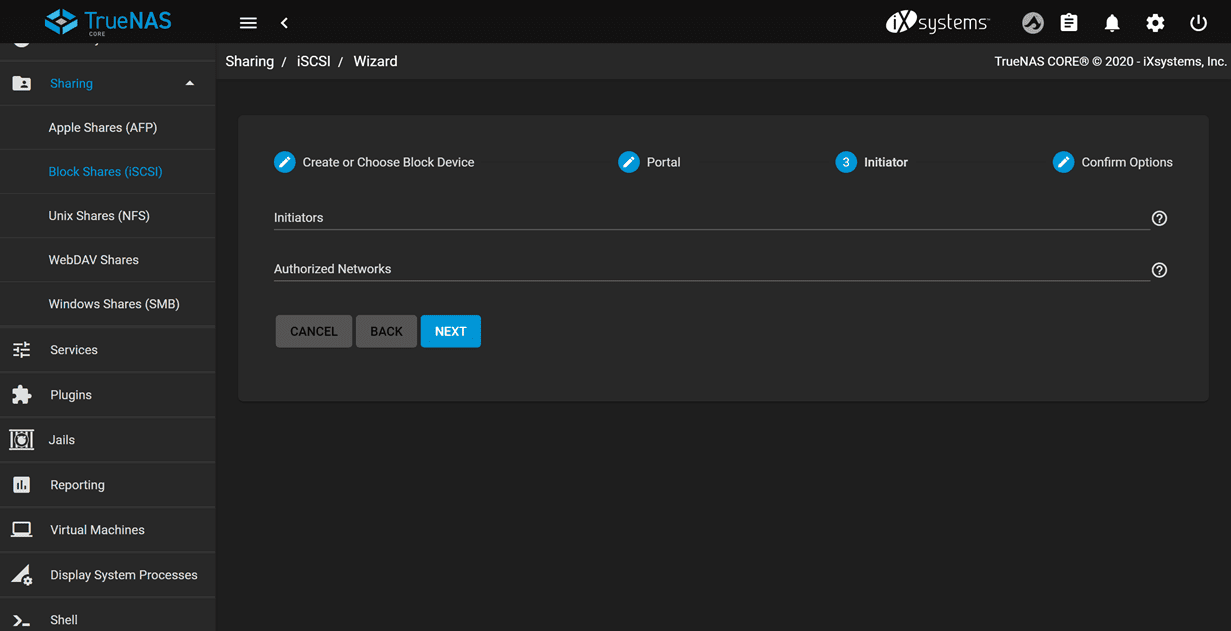
You can configure authorized networks if you want. However, for my lab, I am leaving things wide open.
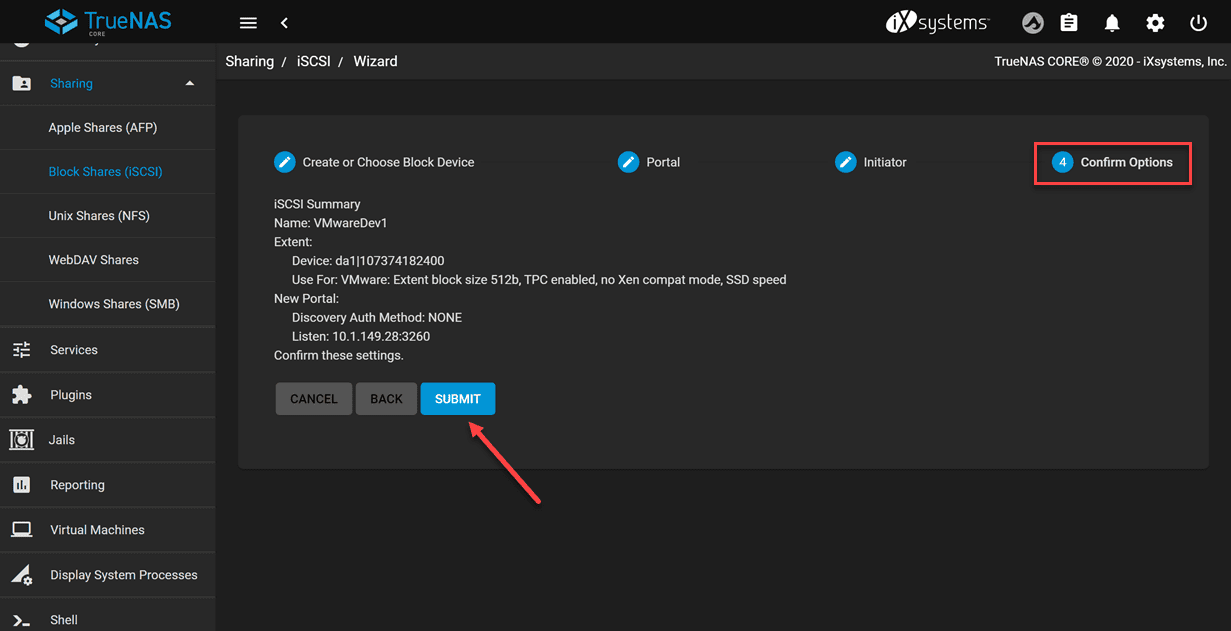
Confirm your options to complete the wizard.
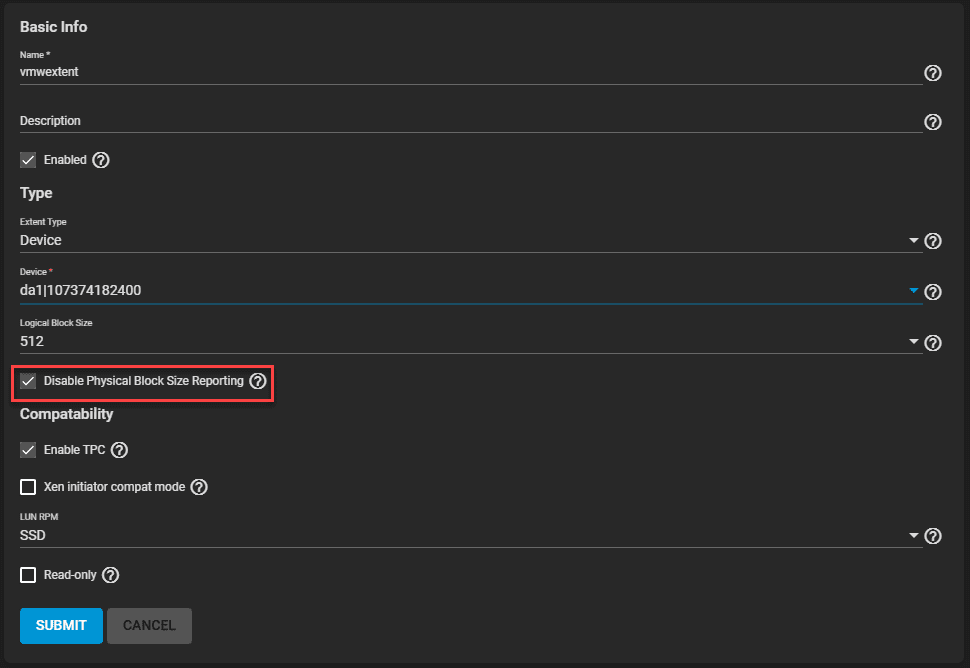
There is a setting here that I want to detail. When I simply went through the wizard, the setting below is not checked for VMware. If you attempt to add storage and format the file system for the LUN with VMFS 6, you will get an error “Unable to format file system” error.
The resolution to this issue is the below setting:
- Disable Physical Block Size Reporting
Add iSCSI Shared Storage to VMware ESXi-Arm
The process to add iSCSI shared storage to VMware ESXi-Arm is no different than any other ESXi host. However, let’s take a run through this as a refresher.
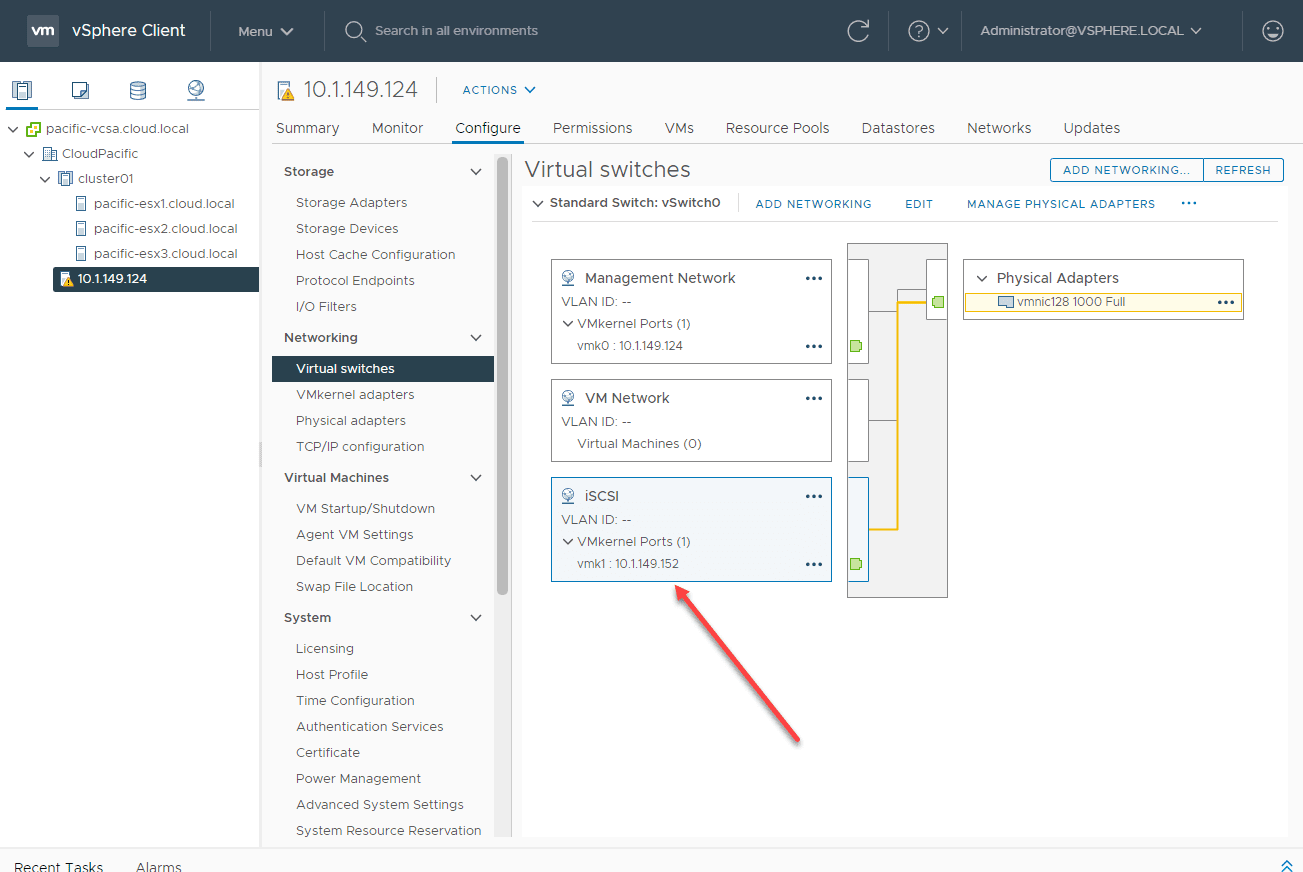
As a note here, I am not setting up MPIO or a separate VLAN for iSCSI traffic as I only have a single NIC in the Raspberry Pi 4, so I am bandwidth limited with the single NIC. So, I am simply adding a separate VMkernel adapter on the same NIC. You will also see I have the management interface on the same network, but I created a separate interface for posterity.
Also, I am not setting up any kind of MPIO since I only have a single adapter on the Raspberry Pi 4 device.
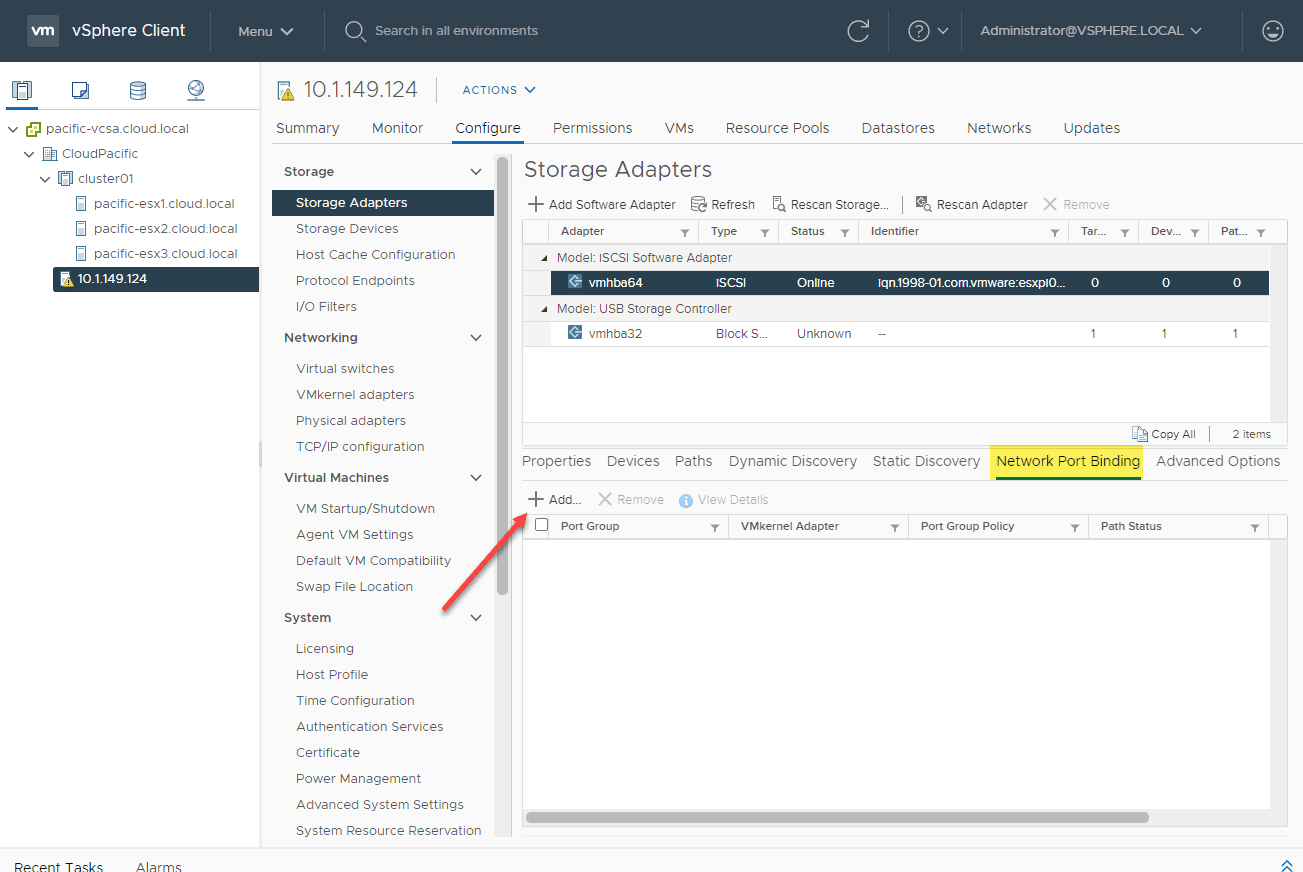
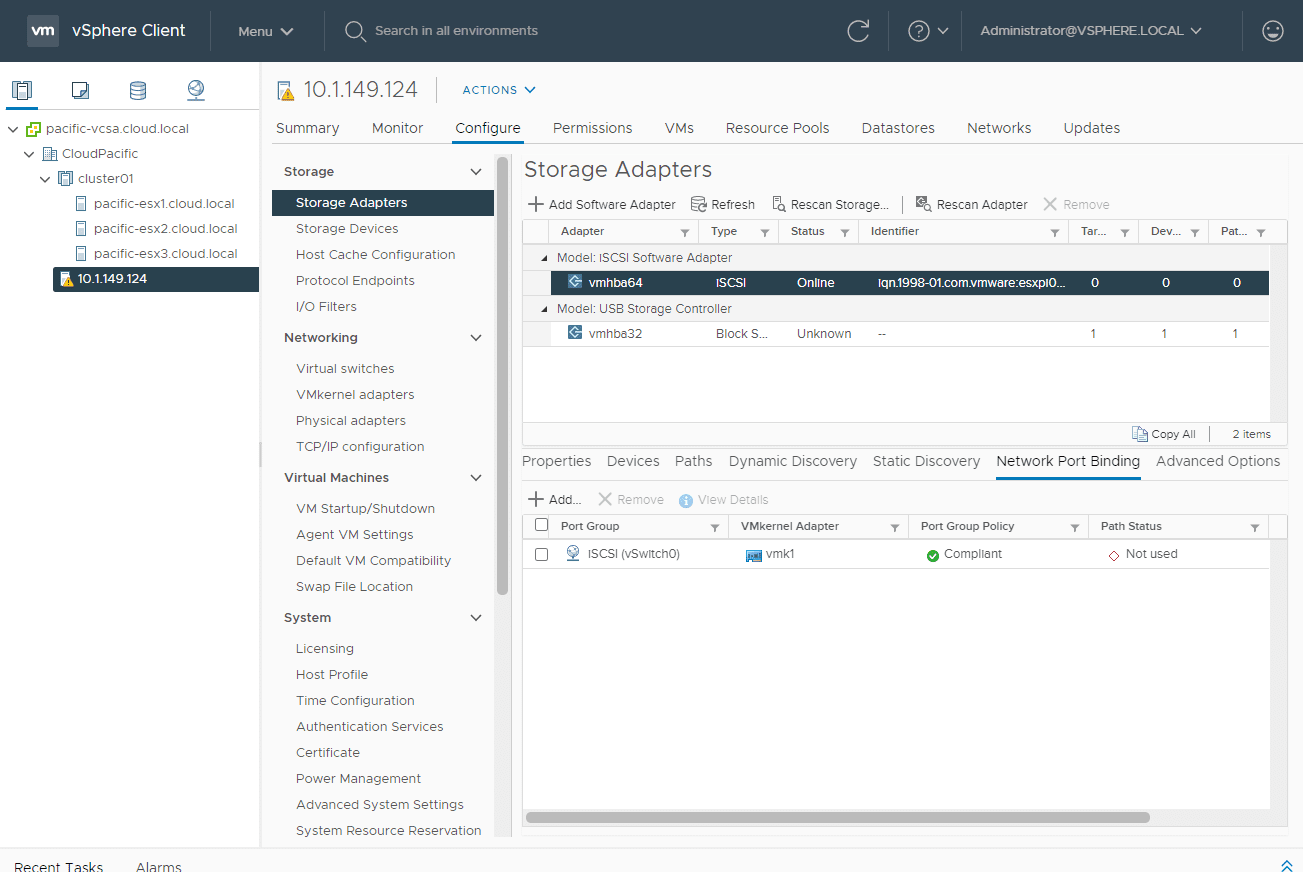
After adding the iSCSI Software adapter, let’s add the Network Port Binding.
Next, choose the VMkernel adapter for the iSCSI binding.
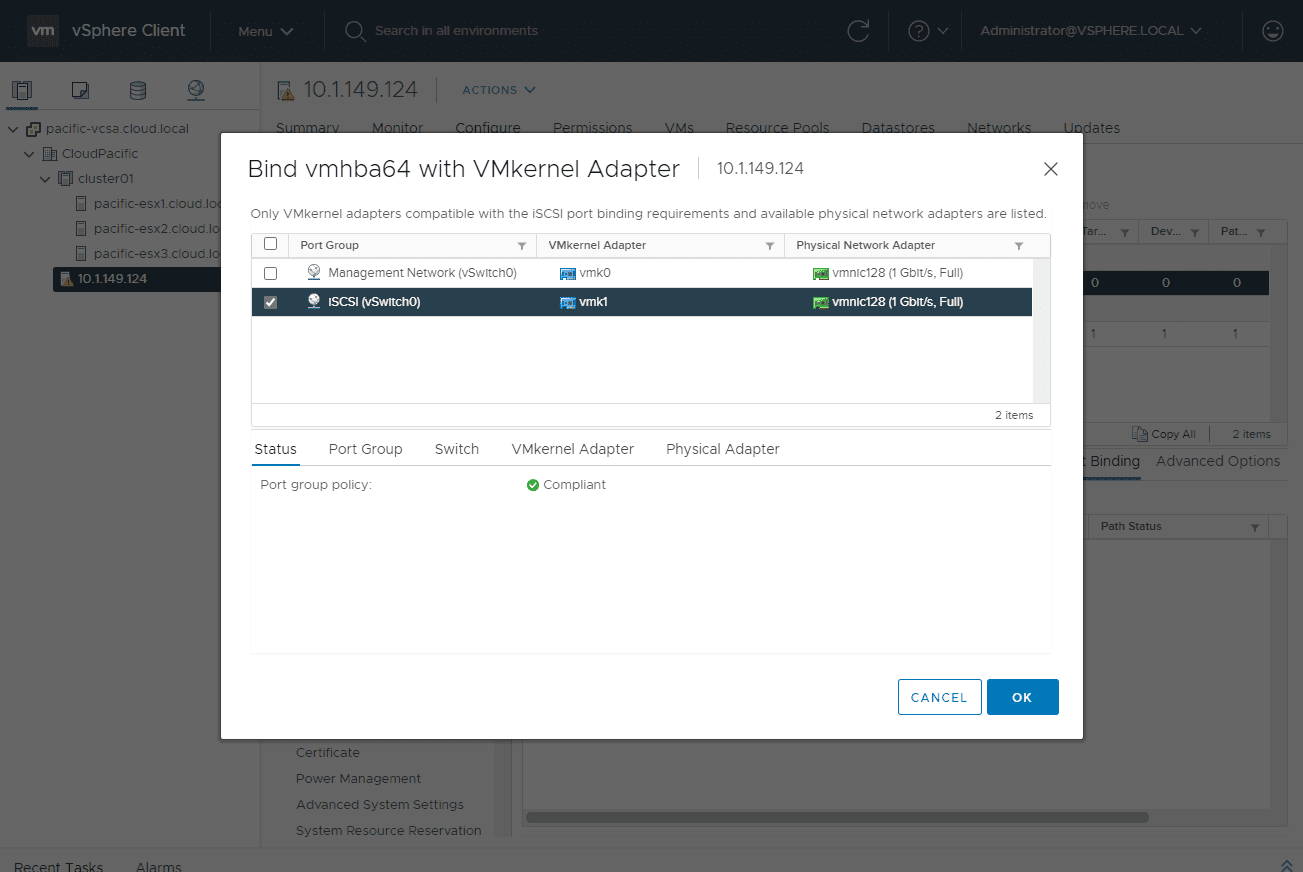
The network port binding is added successfully.
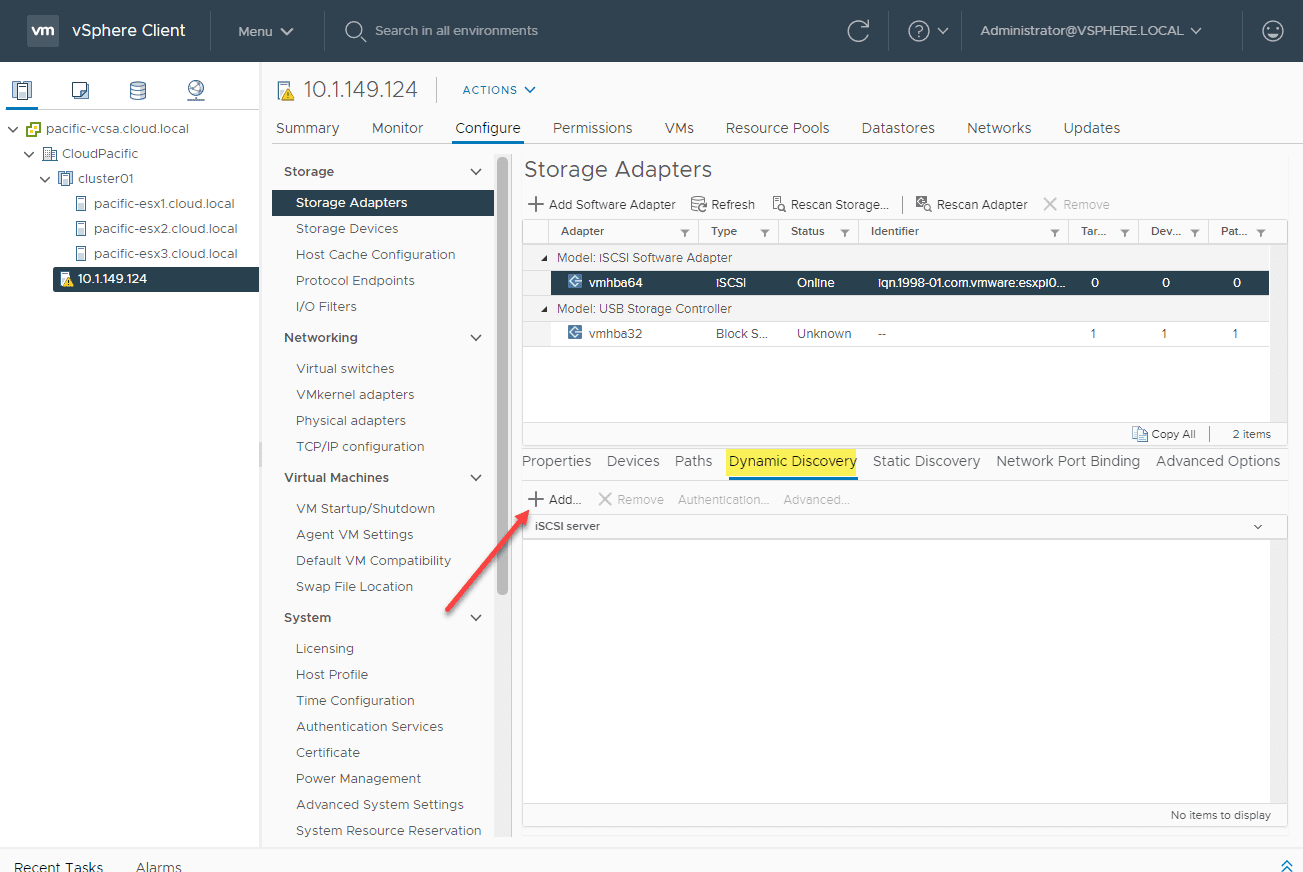
Now, let’s use the Dynamic Discovery to point to the iSCSI target on the TrueNAS installation.
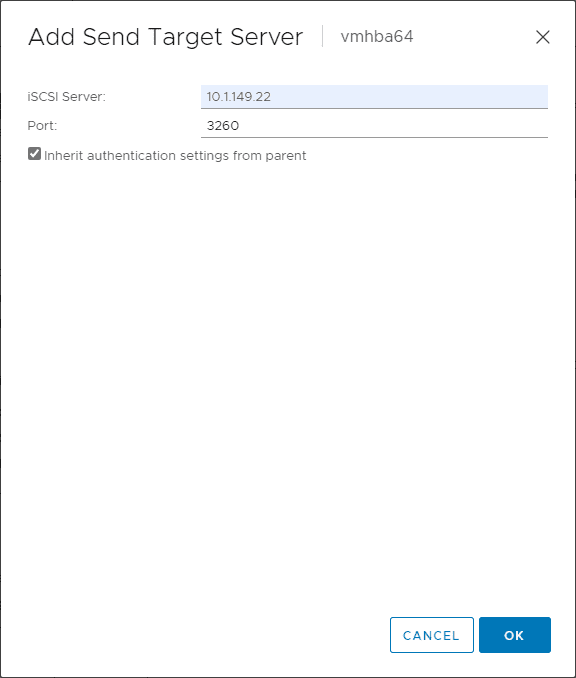
Here, I am adding the TrueNAS iSCSI Portal IP address.
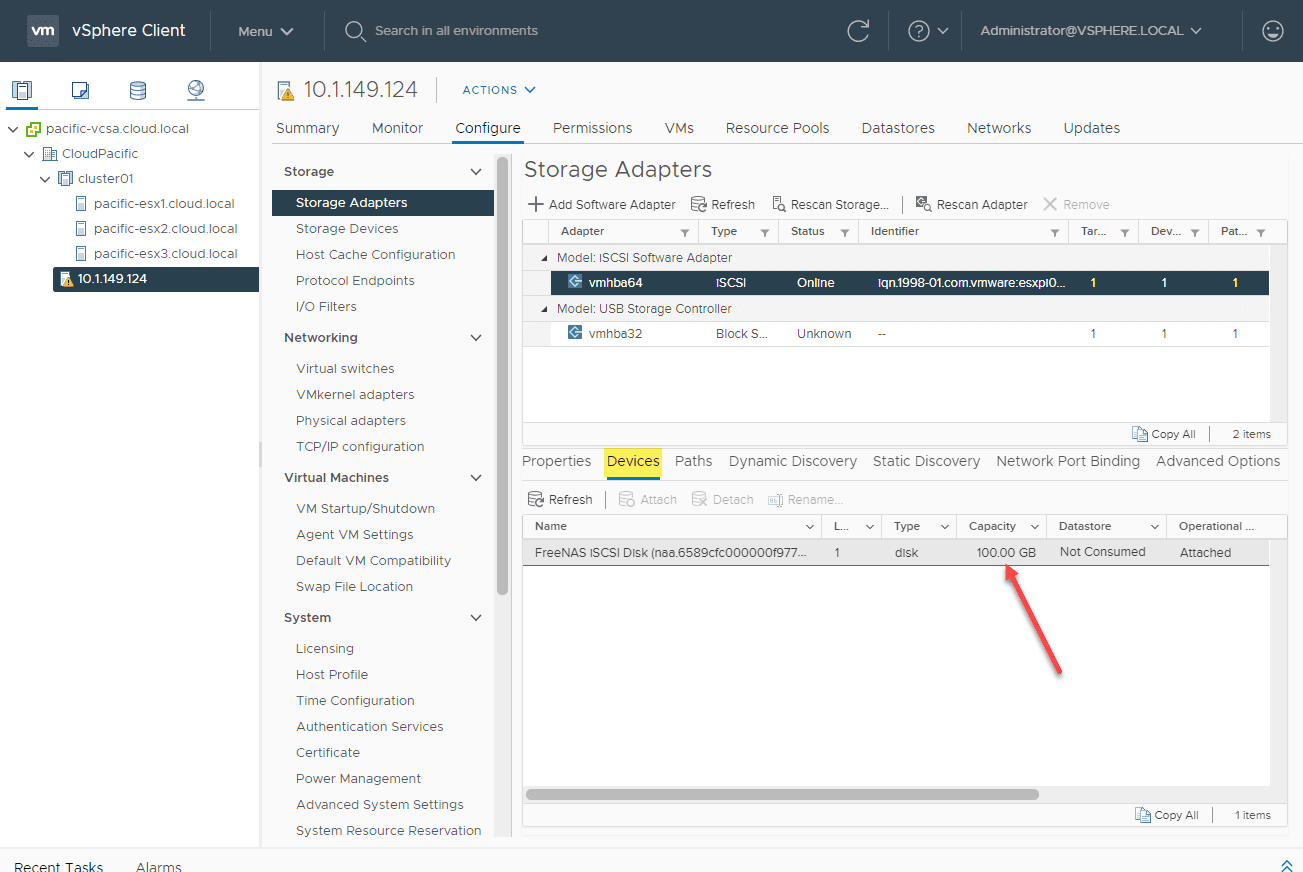
After adding the dynamic discovery IP address, I can now see an Active path to the TrueNAS appliance.
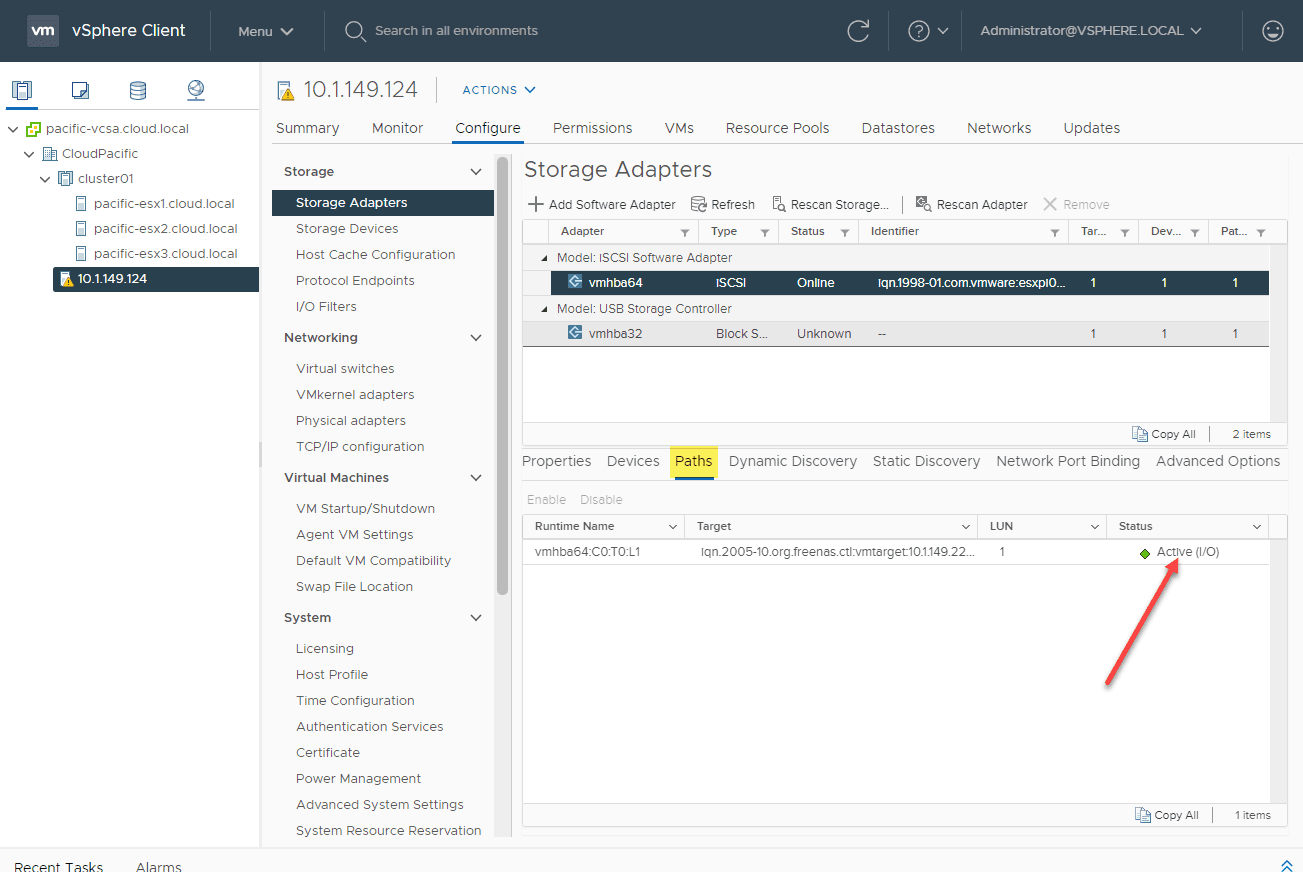
Also, I properly see the TrueNAS device and size displayed.
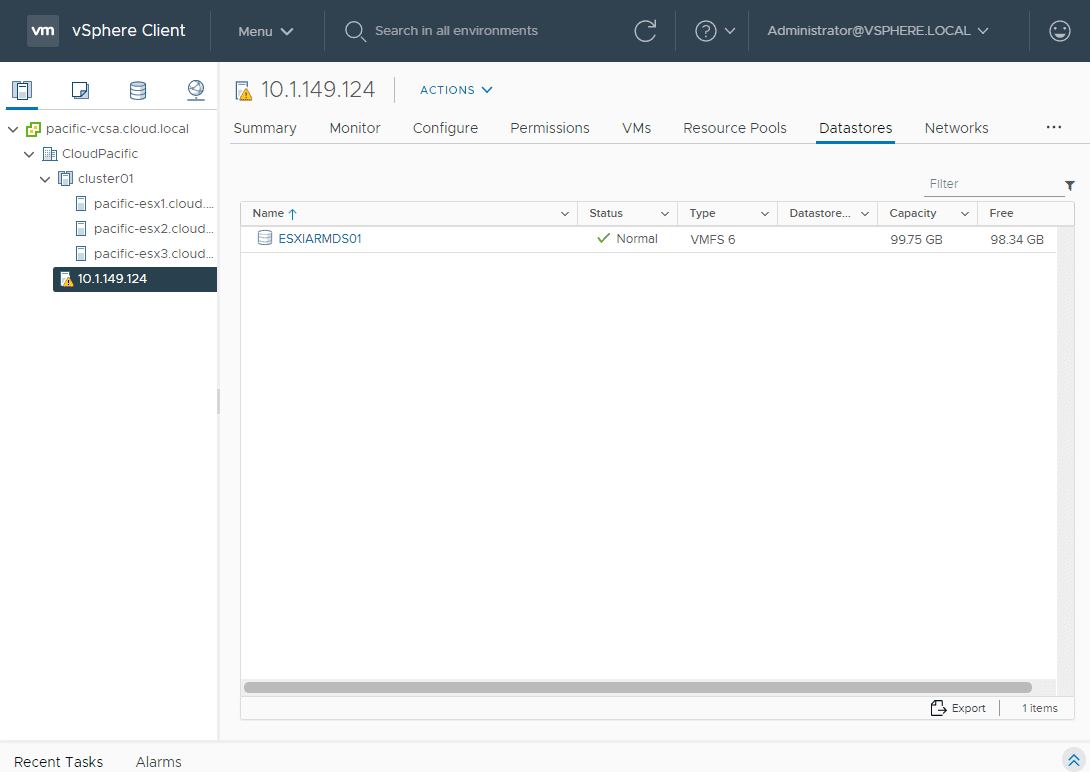
After going through the normal Add storage wizard, I now have an iSCSI datastore assigned to my ESXi-Arm host.
Wrapping Up
As shown, you can easily Add iSCSI Shared Storage to VMware ESXi-Arm installations in the same manner that you have added iSCSI in the past. Using TrueNAS or FreeNAS you can easily present a shared iSCSI target that you can assign to your ESXi-Arm installation for using as shared storage. Stay tuned for seeing the process to install Ubuntu Arm on ESXi-Arm using the iSCSI LUN.