vSAN NFS Share Configuration in VMware vSphere 7.0
VMware vSAN 7.0 has brought forward a powerful set of new features and capabilities that will take HCI in your environment to the next level. VMware vSAN 7.0 is the most capable vSAN to date and it contains really great features that are part of the solution natively. One of those new features to note with VMware vSAN 7.0 is the addition of vSAN file services that provide a native way to provision file services in your environment when needed. In this post we will look at vSAN NFS share configuration in VMware vSphere 7.0 and see how you can configure an NFS v4.1 & v3 file share right from within vSAN itself.
Native File Services Built into vSAN 7.0
When you think about what you typically have to do when you need to have a file share, you generally need to provision some type of storage device, perhaps a SAN. You may also look at standing up another storage device like a NAS or other. Or, you may resort to simply spinning up a virtual machine with a large chunk of storage provisioned to create the file share.
While there is not anything technically wrong with creating file shares in the traditional manner, now with VMware vSAN 7.0, there is a better way. VMware vSAN 7.0 introduces **integrated file services” as part of vSAN 7.0. This means instead of doing all of the above, you have the means to create a native NFS file share on top of vSAN that is managed through your vCenter Server. This provides so many advantages from an operational standpoint.
What are the capabilities of the solution?
- You can provision vSAN cluster capacity for the file share
- It supports NFS v4.1 and v3
- You can configure quotas for file shares
- It can back cloud-native technologies for persistent storage such as for containers and Kubernetes clusters
- You manage it through the normal management interface of vSAN and your vSphere Client UI
Configuring vSAN 7 File Services
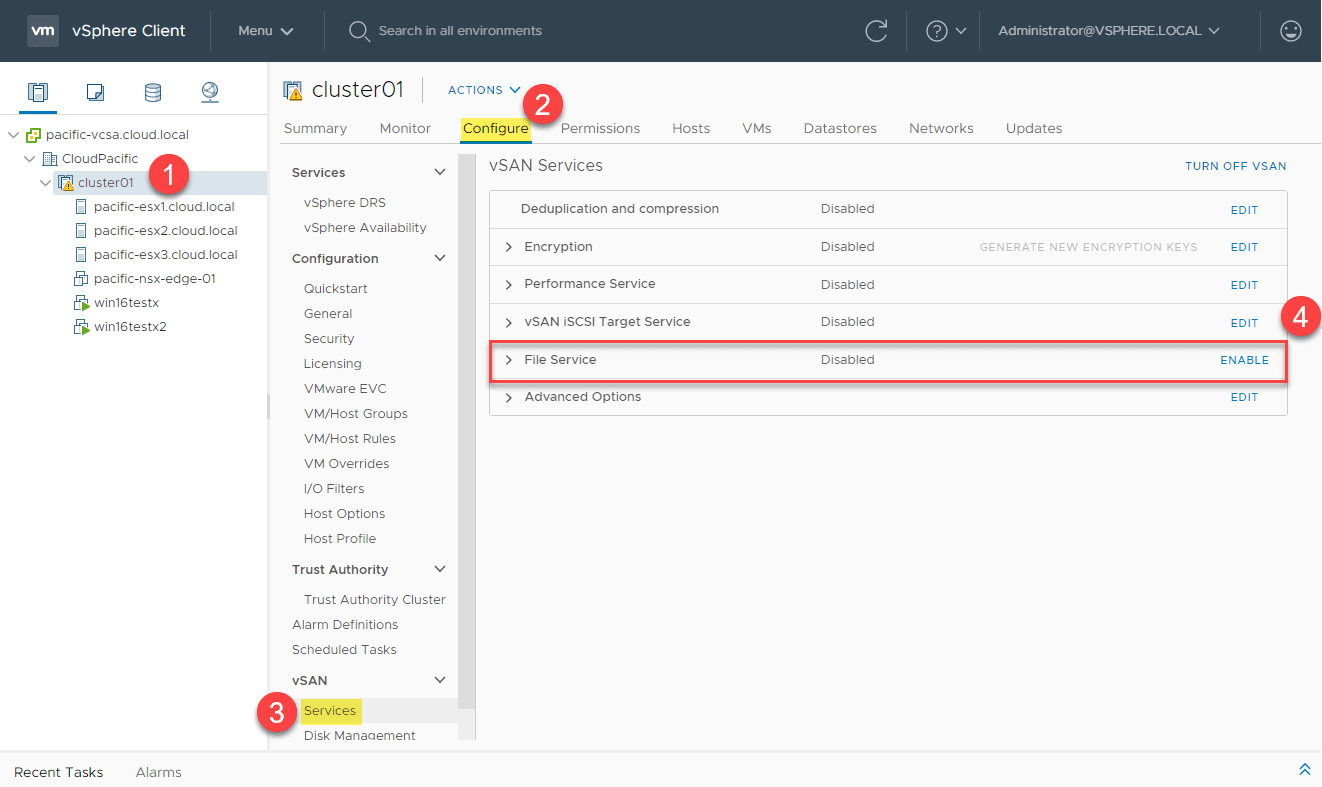
The configuration for getting the vSAN 7 file services provisioned is found under the Configure tab of the vSAN cluster, then vSAN > Services. Then you will see the File Service option. Click Enable.
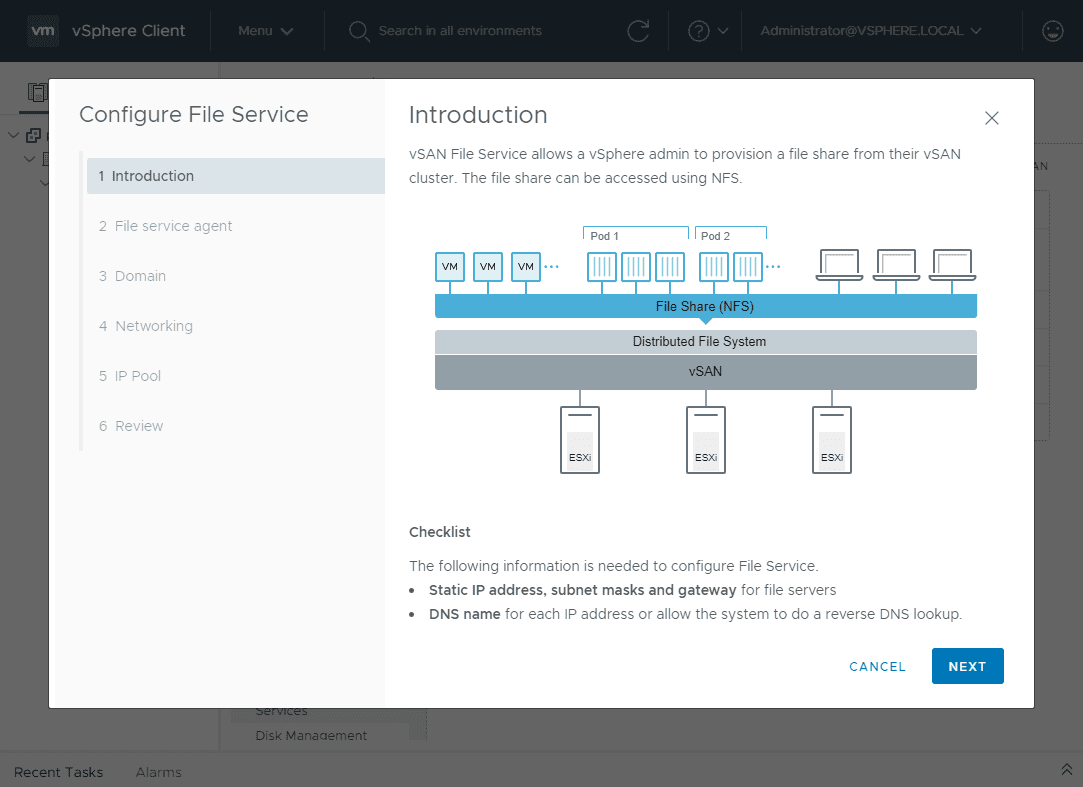
This launches the Configure File Service wizard. The introductory screen pops up with an overview of the vSAN file service.
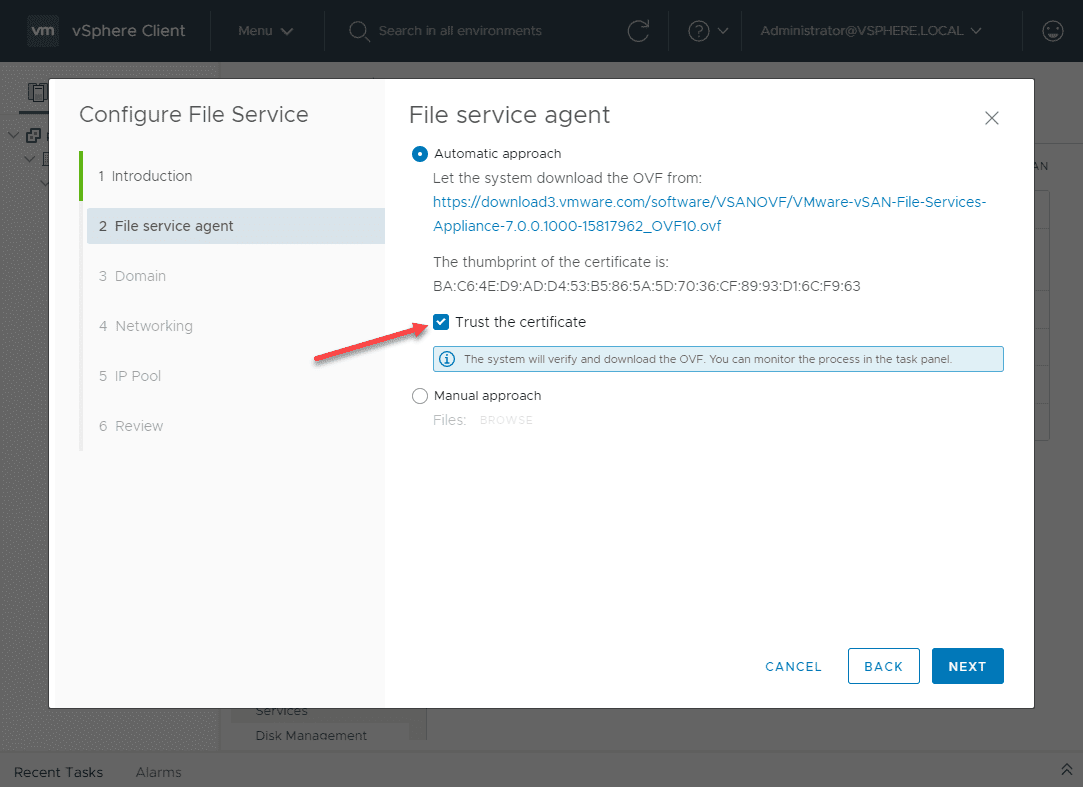
Next, the File service agent configuration allows selecting whether to provision automatically or manually as well as whether or not you want to trust the certificate.
The automatic configuration will automatically download the needed OVF to your vSphere environment for deployment. The manual approach requires you download the OVF and deploy it.
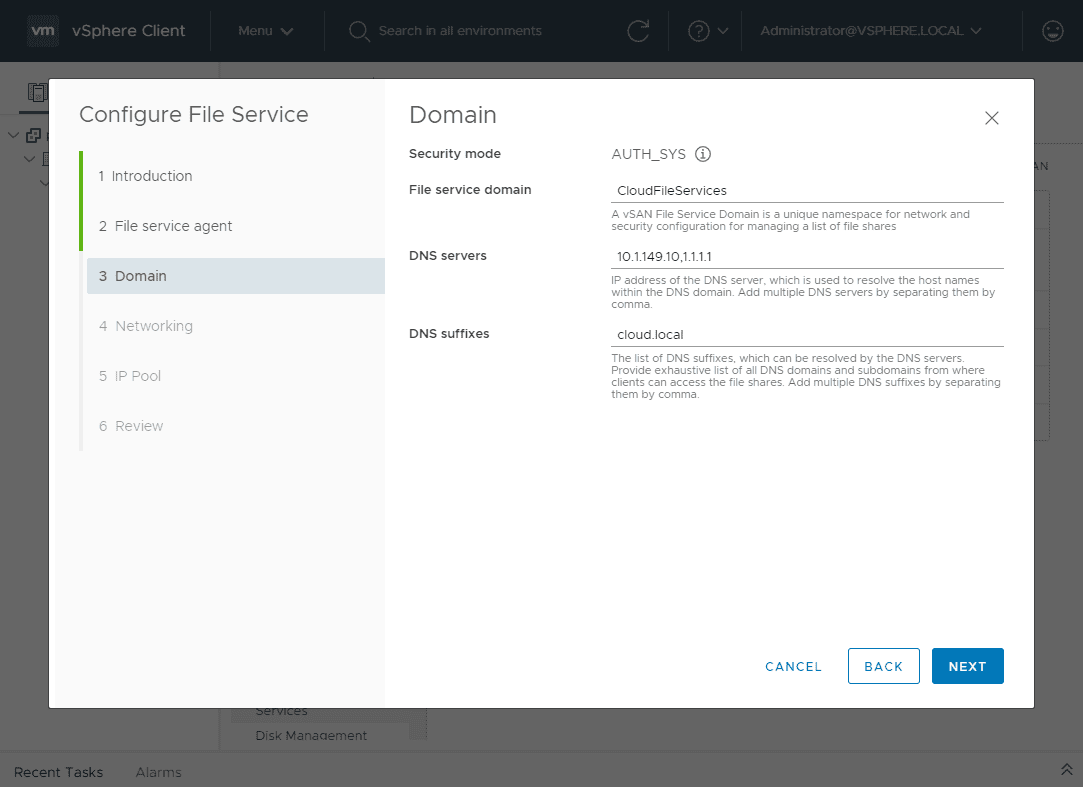
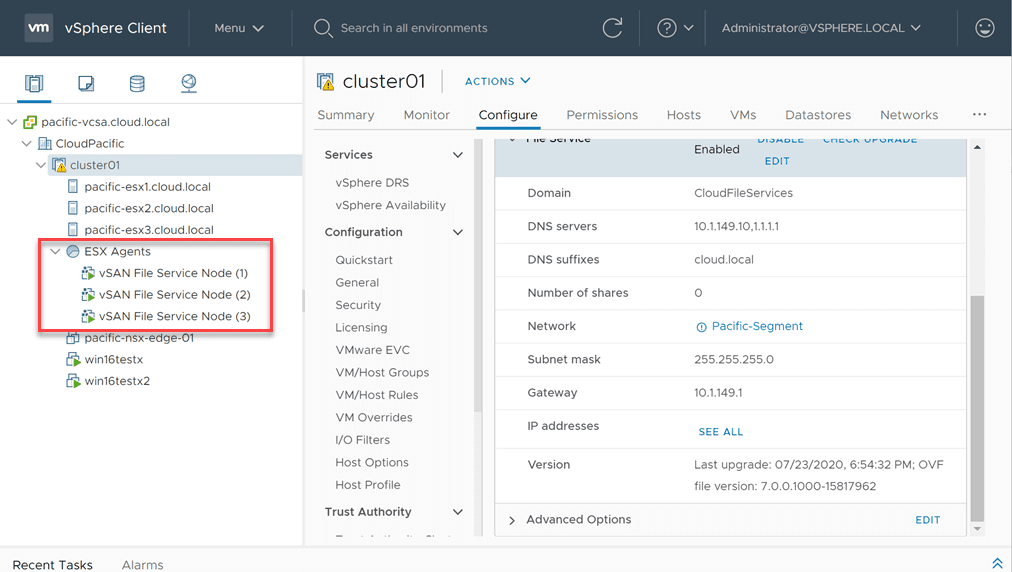
The file services Domain is like a namespace in vSAN. Here you give it a name, enter the DNS server values, and DNS suffixes.
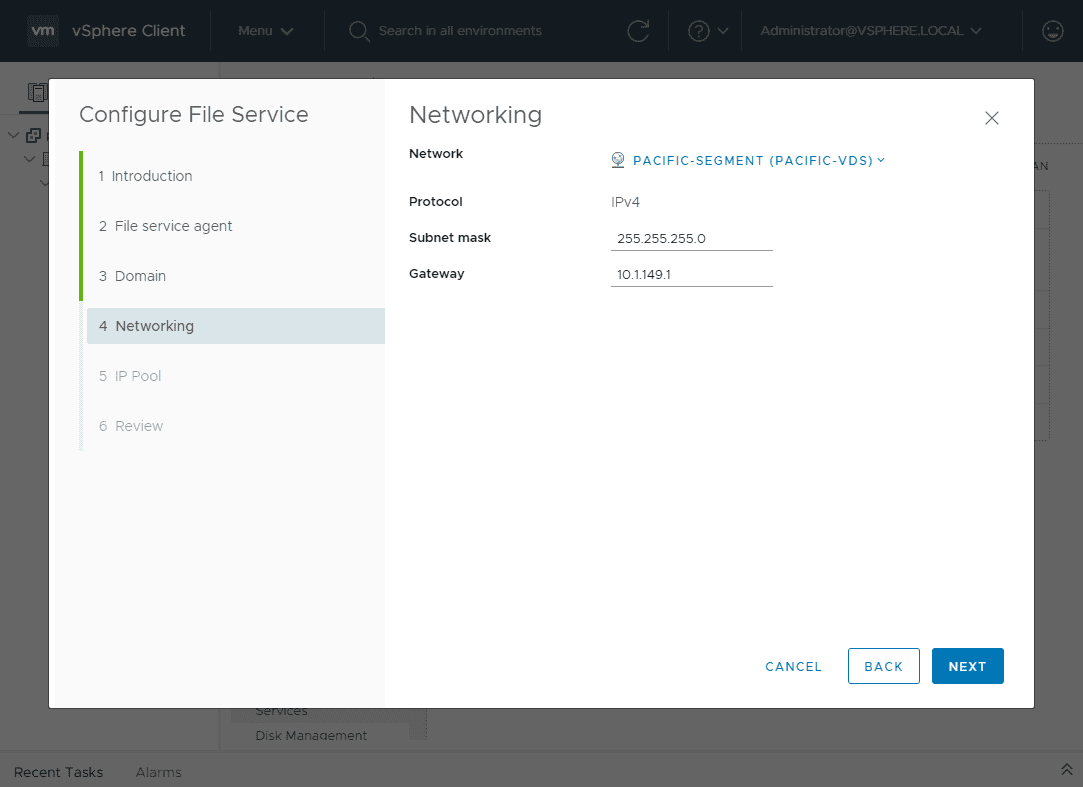
Next, select the networking configuration for your vSAN file services. You will first set the Subnet mask and Gateway.
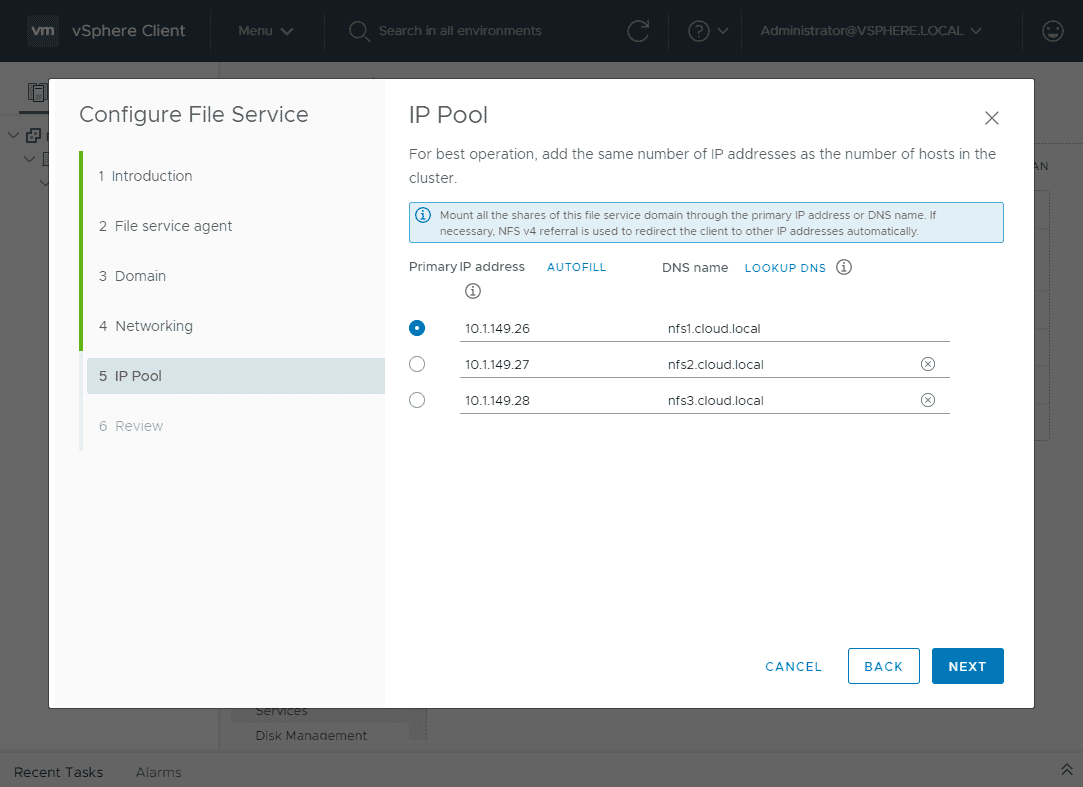
Next, the IP Pool configuration requires that you configure an IP address for each of the ESX agent appliances that will be deployed. Additionally, you will need to configure a DNS name for the appliances.
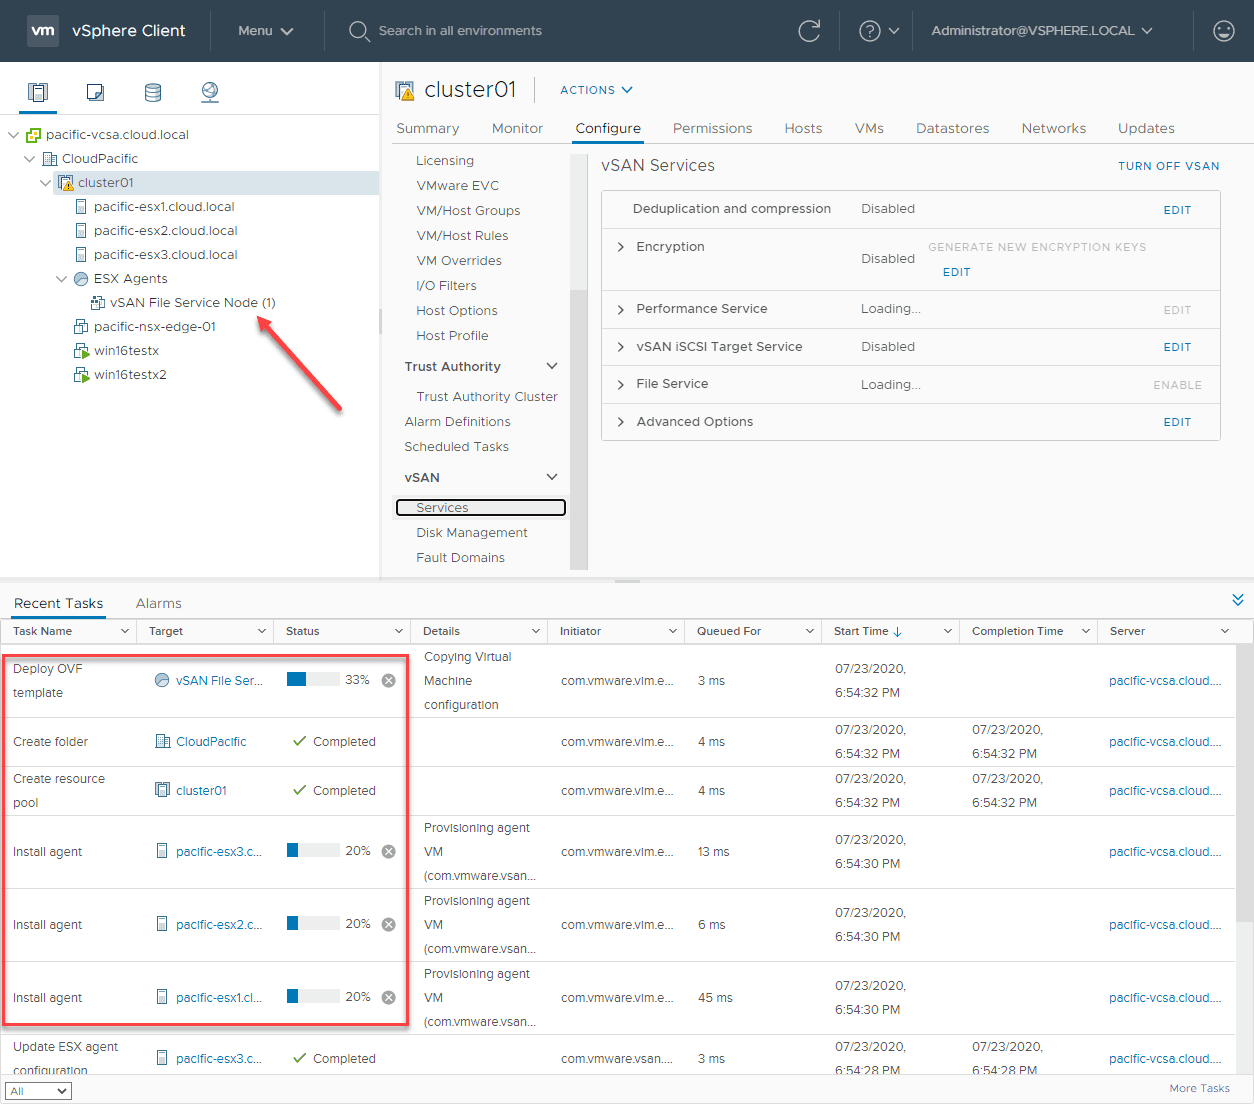
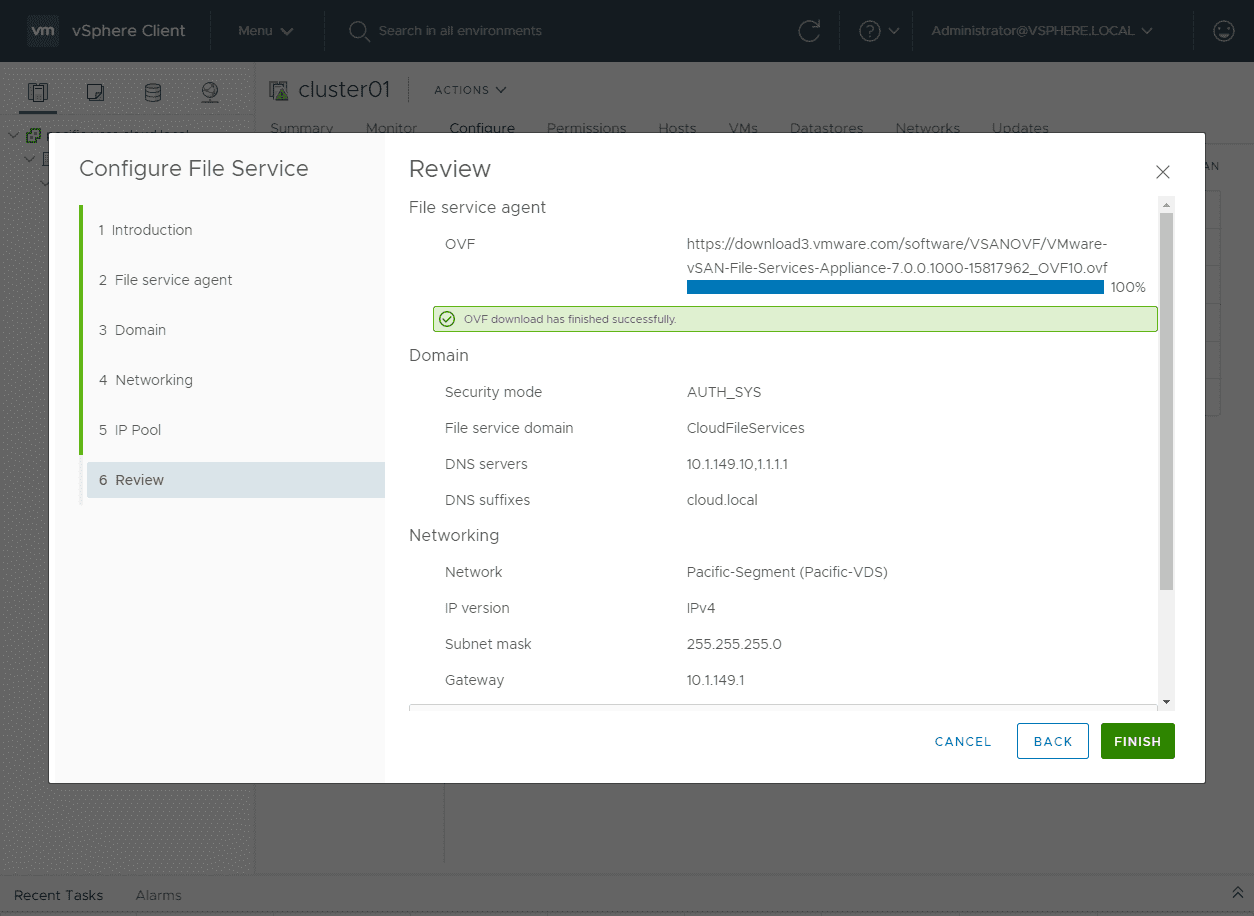
Ready to provision the ESX agents for vSAN file services.
The vCenter Server tasks will kick off and you can monitor this in the recent tasks pane. You will see the vSAN File Services Node appliances deployed under the ESX Agents resource pool.
All three of the agents will be deployed to the environment. Now, we are ready for the vSAN NFS share configuration in VMware vSphere 7.0.
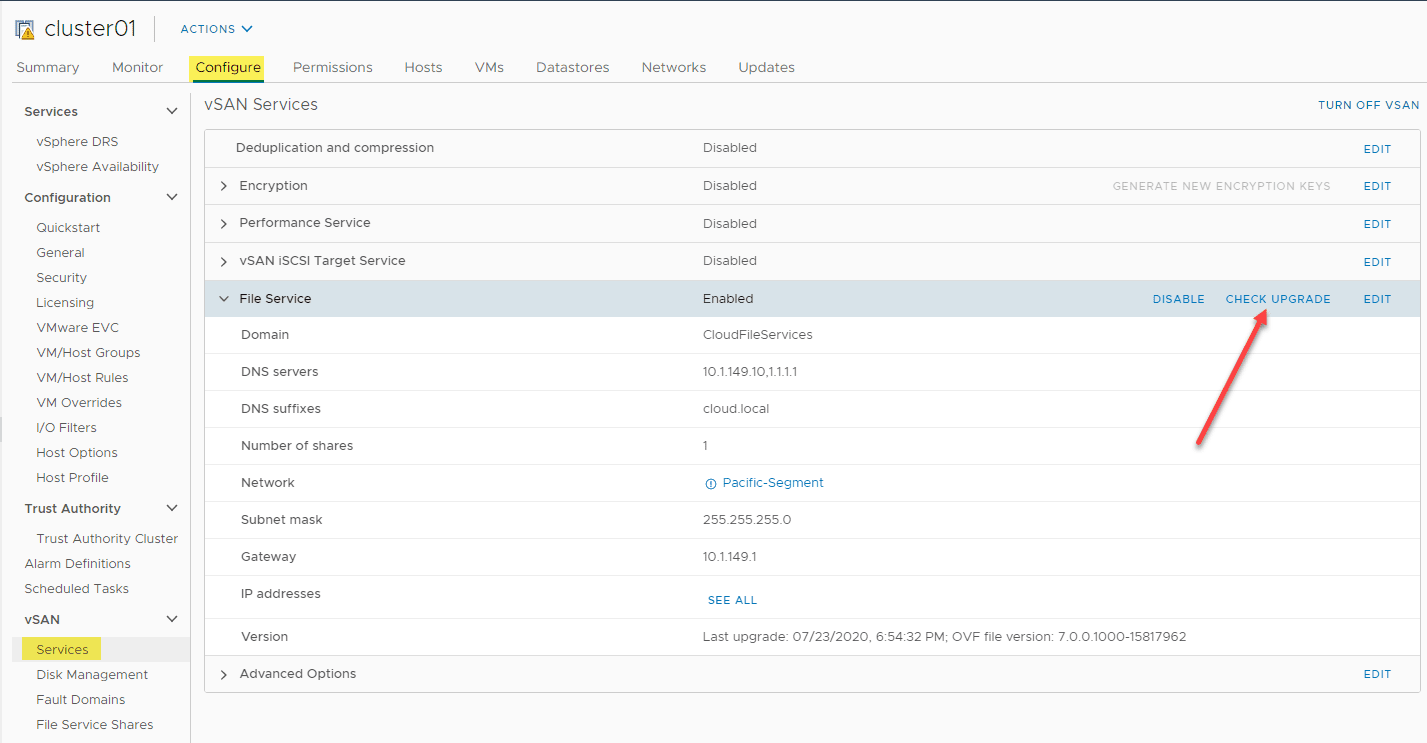
A quick note here about the lifecycle management of the ESX agents that host the file services for the vSAN NFS share. You will note if you navigate back to the Services area, you will see the Check upgrade option.
This allows checking for and pulling down upgraded ESX agents once they become available. The upgrade will perform a rolling upgrade that ensures availability is maintained to the vSAN NFS share.
vSAN NFS Share Configuration in VMware vSphere 7.0
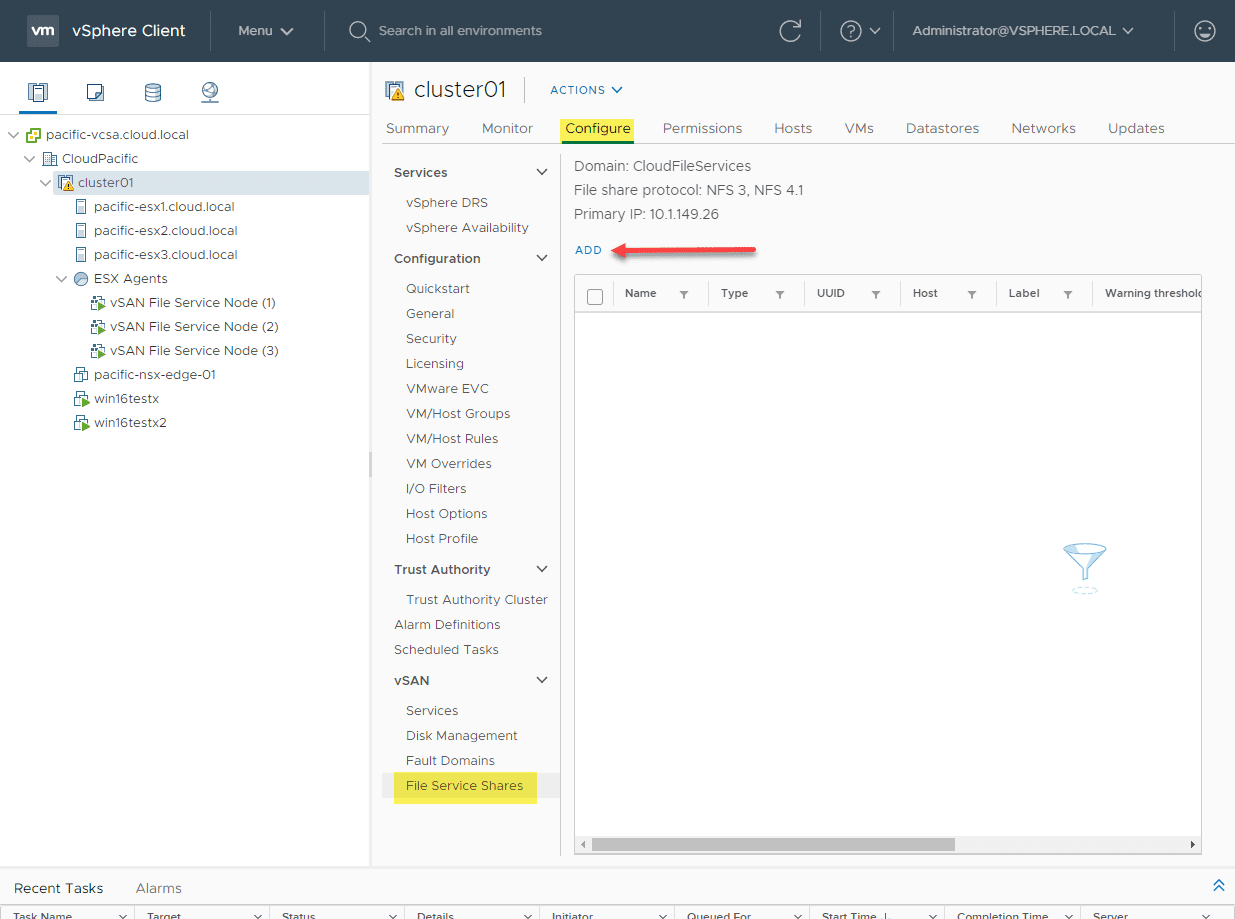
Now we are at the point of vSAN NFS share configuration. To do this, we now have the option under the vSAN configuration for file service shares.
Navigate to the vSAN cluster Configure > vSAN > File Service Shares. Then you click Add to begin the process to add a new vSAN NFS share.
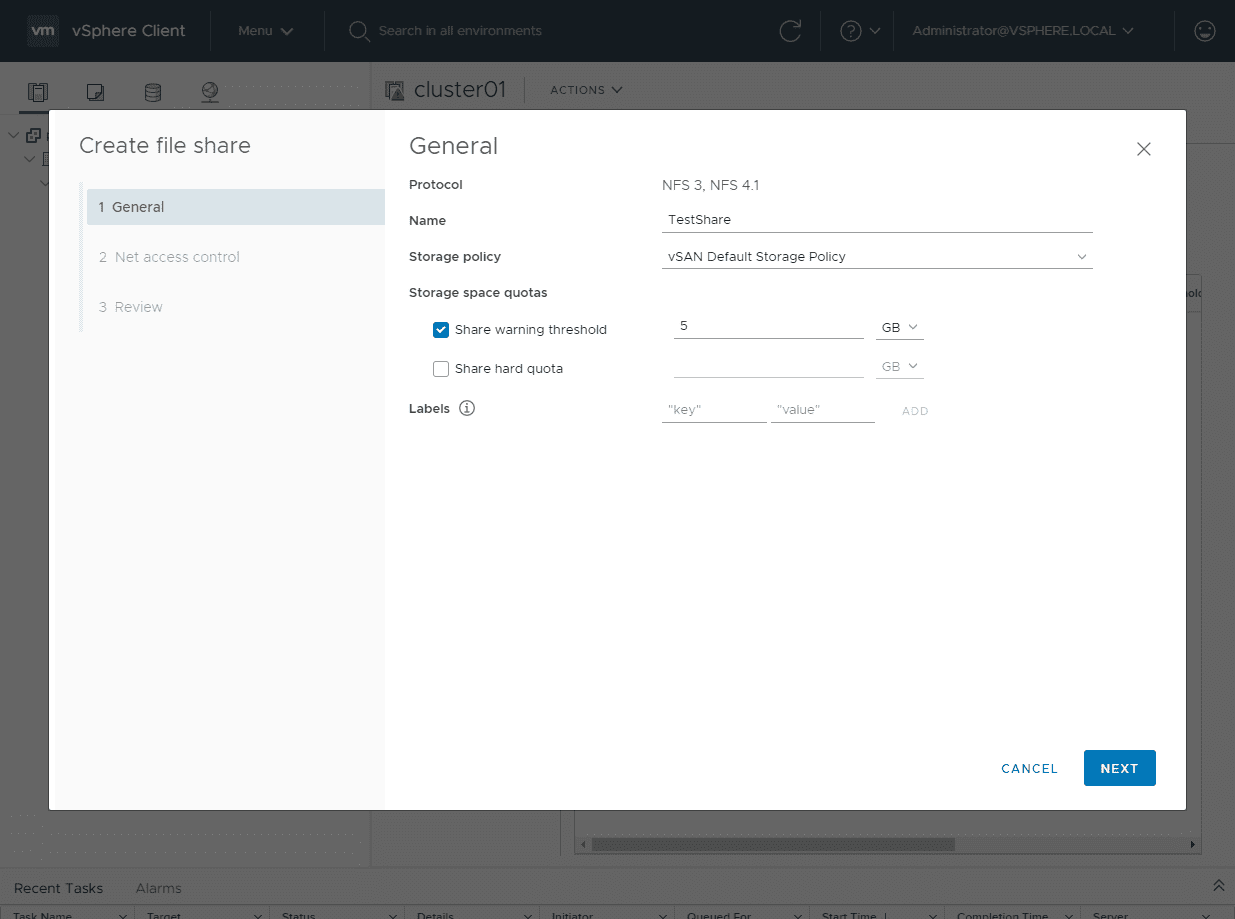
This starts the Create file share wizard. The first thing you do is name the file share. Note here you have your vSAN storage policy backing the file share. This is the power of the NFS share being hosted on vSAN. You now have the advantage of the SPBM policies working for your file share, backed by vSAN.
You can also configure Storage space quotas as well as hard limits and adding labels.
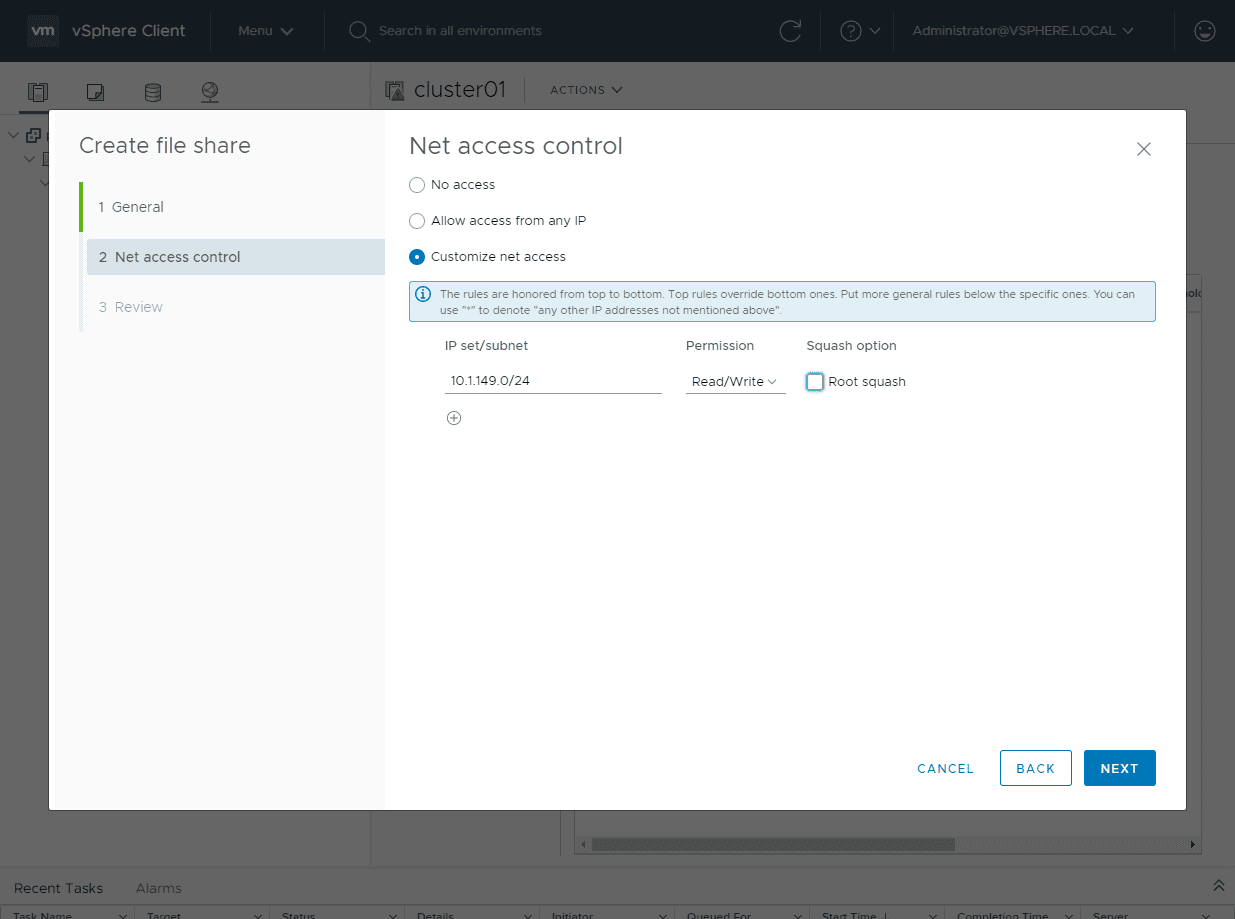
You have granular control at a network level to which clients can access the file share. You can define subnets and restrict the level of access they have to the file share, either read only, or read/write. You can also check the root squash option. What is this?
The Root squash checkbox provides additional security in NFS which essentially squashes permissions of a root user who mounts the share and accesses the files, thus enforcing the permissions defined.
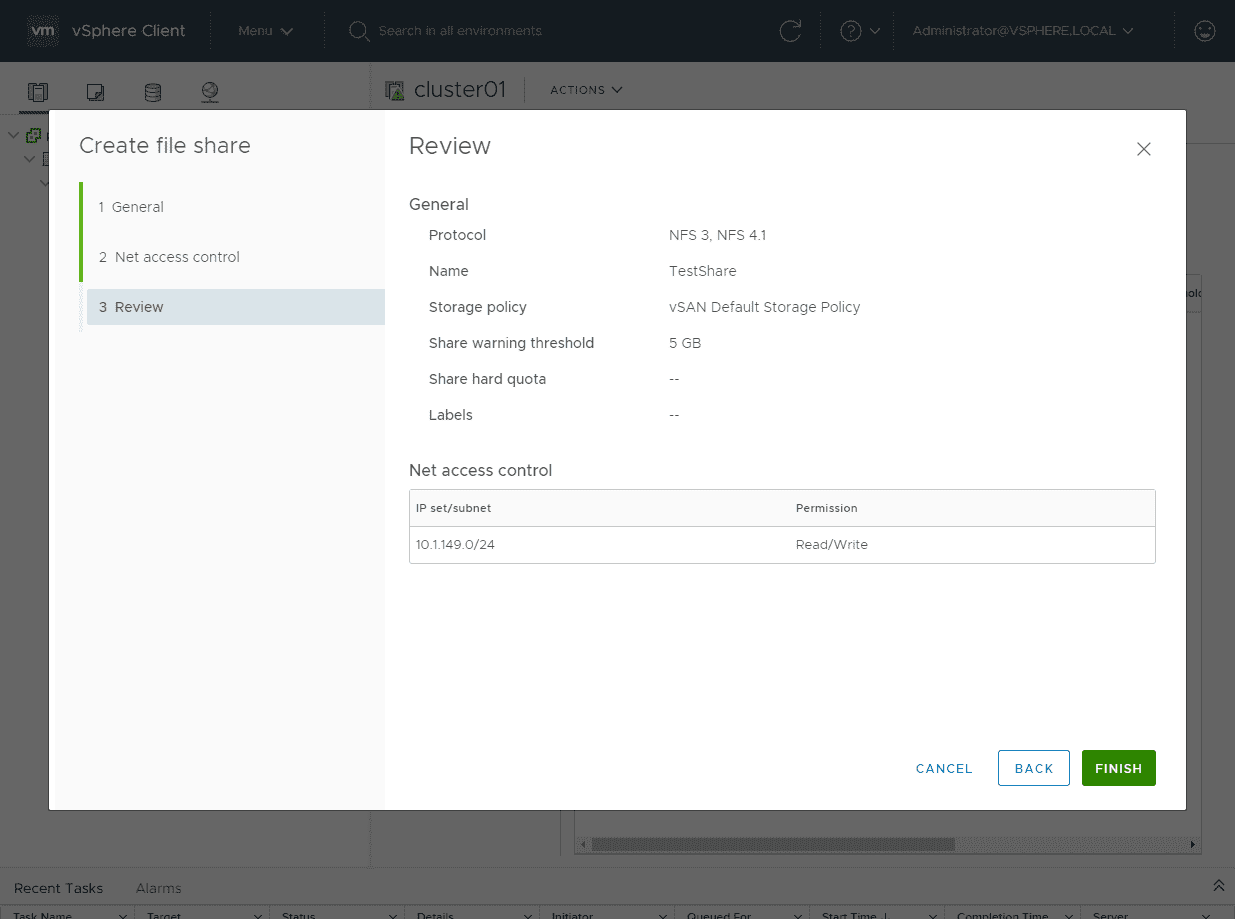
Review the options defined in the create file share wizard and then click Finish.
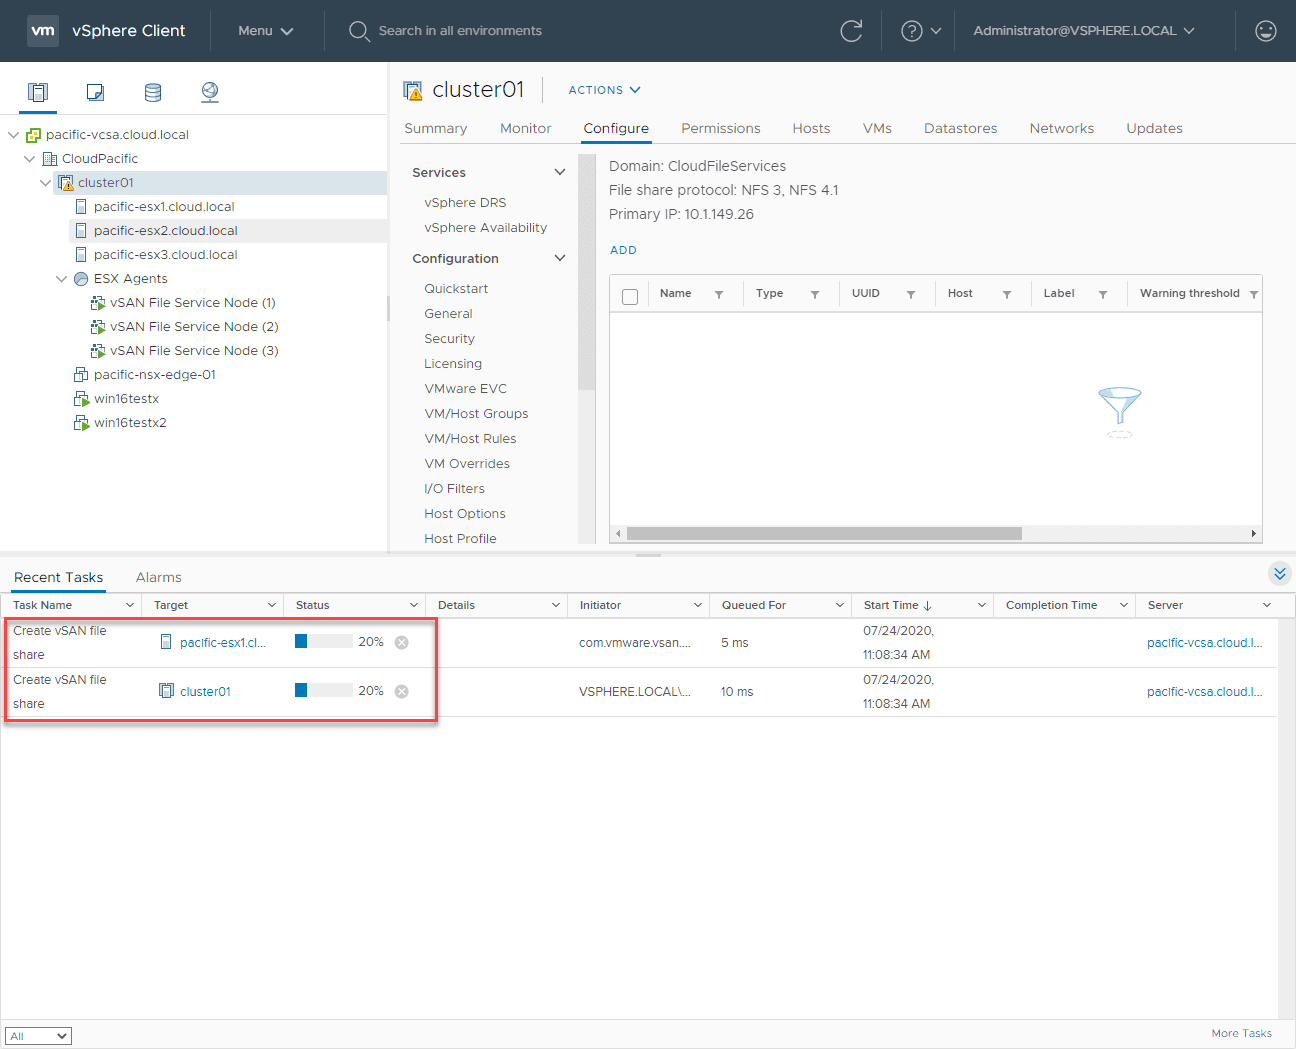
The tasks will kick off to Create vSAN file share.
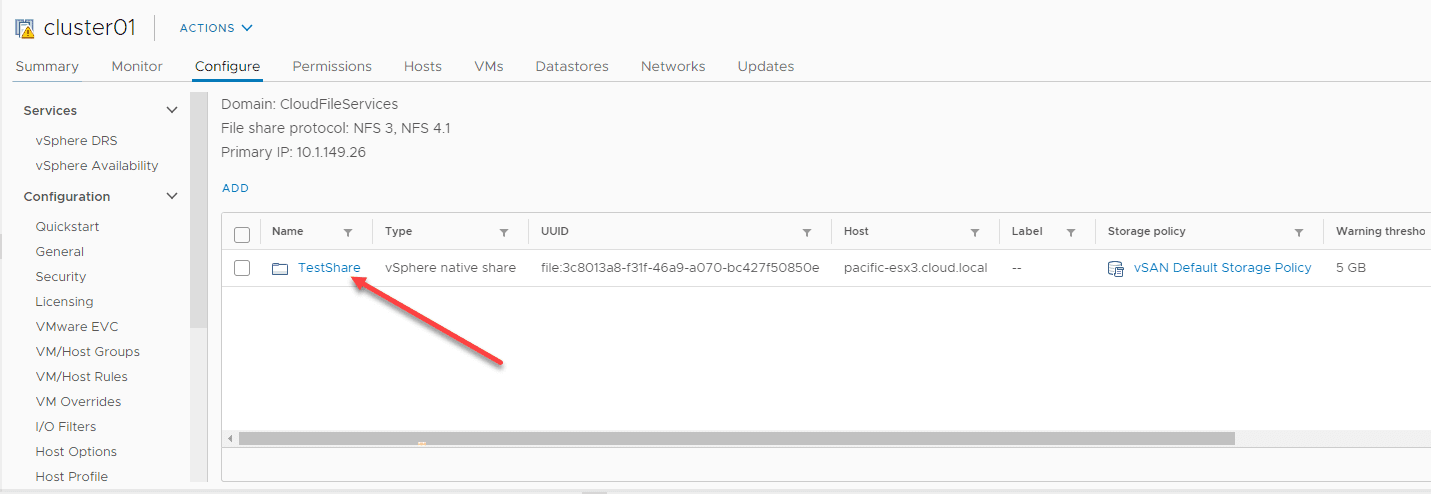
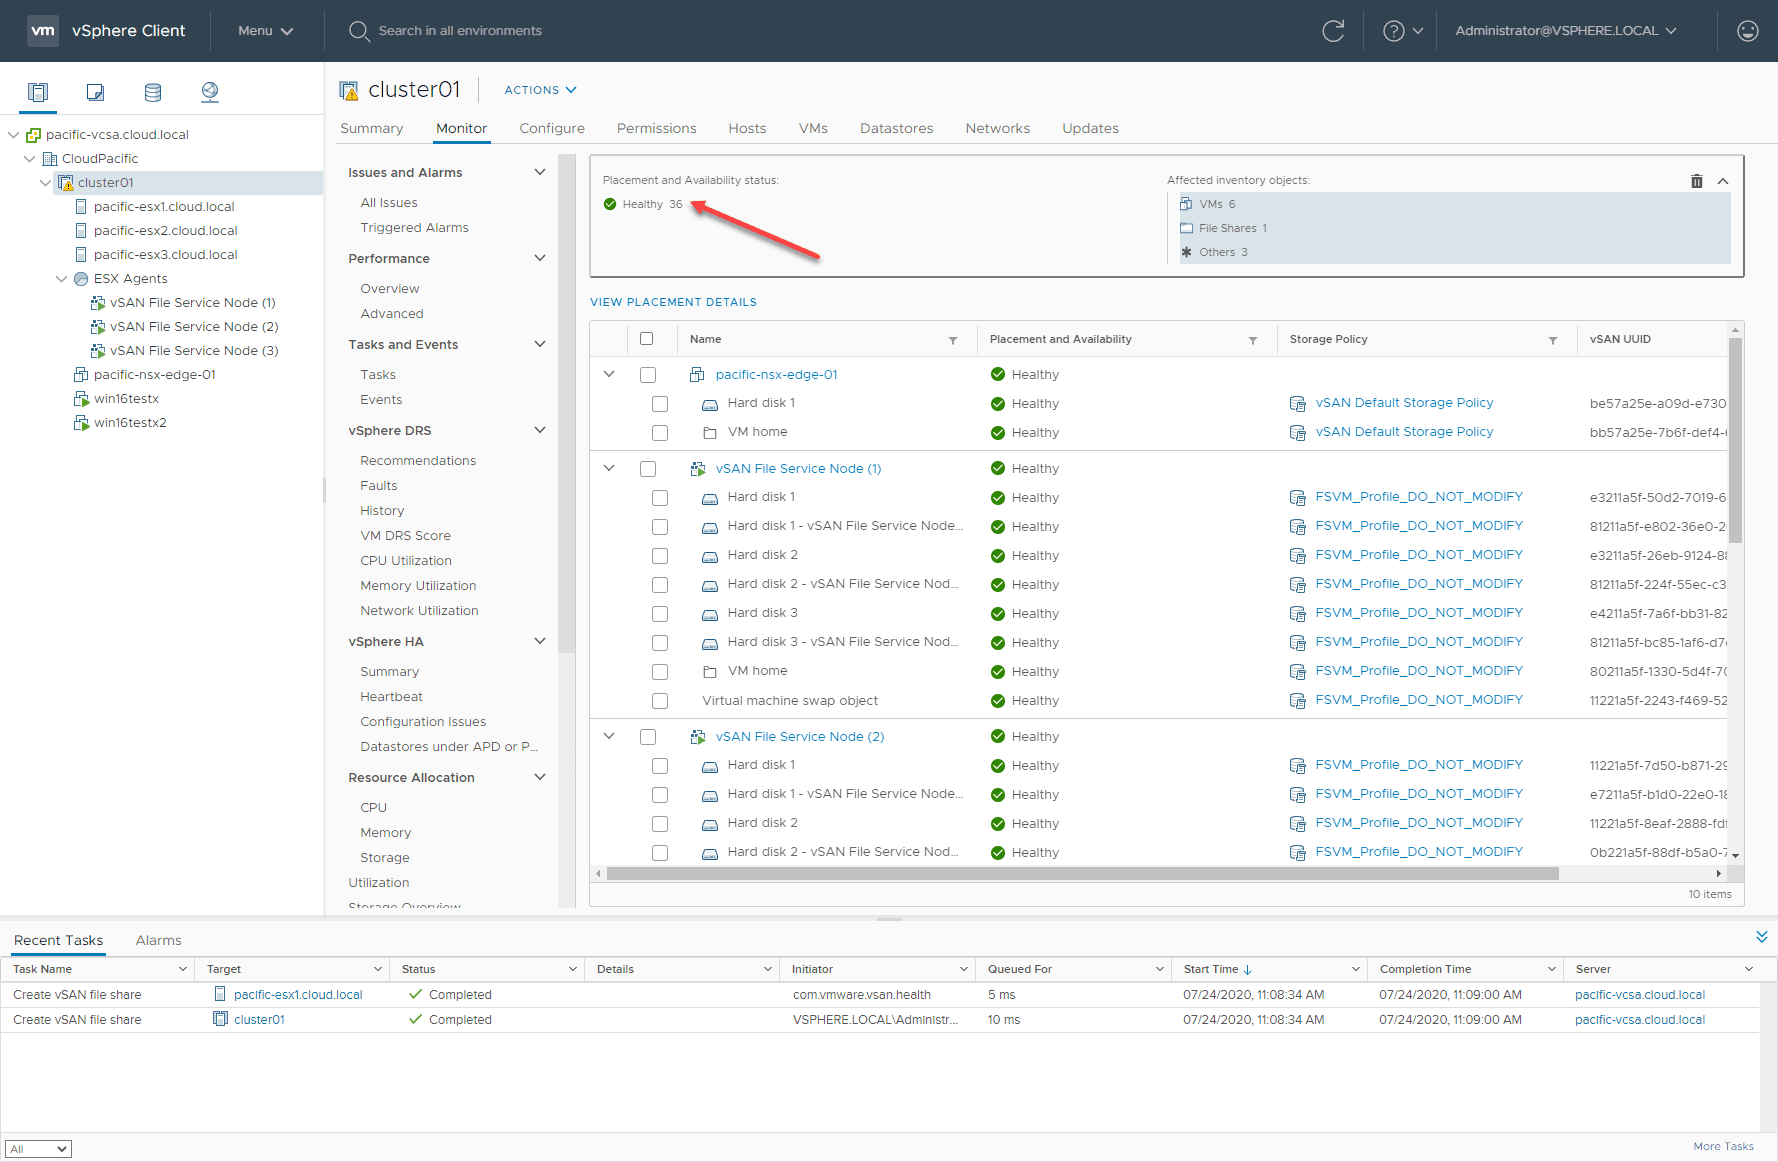
After the tasks complete, you will see your new vSAN NFS share created. You can click on the name of the share to view further details such as placement, etc.
Below, you can see the placement details of the new vSAN NFS share that has been created.
Final Words
The vSAN NFS share configuration in VMware vSphere 7.0 is very straightforward. It is configured on top of the simple workflow that vSAN provides in general.
The ESX agents that provide connectivity to the vSAN NFS share are automatically deployed and configured. They also allow for rolling upgrades so your file services remain available during upgrades.
The new vSAN in VMware vSphere 7 has gotten even more powerful and much more capable, including new features like the file services capability. Now, you can have basic services like file services built on top of the capabilities of your HCI infrastructure powered by vSAN.
Learn more about VMware vSAN here.