VMware vRealize Network Insight Install Guide
If you have a VMware NSX-powered softwared-defined networking infrastructure, you have an incredibly capable platform for delivering next generation networking for your environment. However, understanding how your traffic flows, having vsibiility to the ins and outs of your now “abstracted” networking layer can be difficult without the right tools. VMware vRealize Network Insight is the premeire tool for managing your software-defined networks and security policies. In this post, we will take a look at VMware vRealize Network Insight install guide to see how to get the solution off the ground in your environment.
What can VMware vRealize Network Insight do?
When deploying your software-defined infrastructure and planning out your micro-segmentation strategy, vRealize Network Insight helps to take the guesswork out of how your network flows actually happen. You no longer have to guess what network flows happen for a particular application.
It can also provide visibility for your virtual and physical networks. Overall, it helps to manage, troubleshoot, and secure your network.
Features of vRNI include the follwoing:
- Ability to plan micro-segmentation
- Troubleshoot security on-premises, in the cloud, or in hybrid deployments
- Minimize risk
- Reduce mean time to resolution (MTR) for connectivity issues
- Eliminate network bottlenecks
- Scale across NSX managers
- Ensure compliance
vRealize Network Insight 5.2 Installation Requirements
Below are the documented requirements for installing vRealize Network Insight 5.2.
Platform brick requirements
| Brick Size | Cores requiredfor 2.1 GHz CPU | Cores requiredfor 2.3 GHz CPU | Cores requiredfor 2.6 GHz CPU | RAM | Disk |
|---|---|---|---|---|---|
| Medium | 10 | 9 | 8 | 32 GB | 1 TB |
| Large | 15 | 14 | 12 | 48 GB | 1 TB |
| Extra Large | 20 | 18 | 16 | 64 GB | 2 TB |
Collector brick requirements
| Brick Size | Cores required for 2.1 GHz CPU | Cores required for 2.3 GHz CPU | Cores required for 2.6 GHz CPU | RAM | Disk |
|---|---|---|---|---|---|
| Medium | 5 | 5 | 4 | 12 GB | 200 GB |
| Large | 10 | 9 | 8 | 16 GB | 200 GB |
| Extra Large | 10 | 9 | 8 | 24 GB | 200 GB |
Other Requirements and Considerations
- The maximum time skew between the platform nodes has to be lesser than 30 seconds.
- The availability of the NTP service is critical to system operations. Ensure that you do not reboot the platform node or the collector node when the NTP service is not available.
- When the existing compute resources are completely used by the other processes on the platform, vRealize Network Insight crashes and does not recover automatically. If the services fail to recover, reboot the platform node.
- If the network latency between platform node and upgrade server is greater than 500ms, the vRealize Network Insight upgrade might encounter an error. So, the network latency must be less than 500ms.
- The recommended disk latency for optimal performance is up to 5ms. If the disk latency is greater than 5ms, the system performance degrades.
- The recommended disk IOPS is 7500.
Supported Web Browser
- Google Chrome: The latest two versions.
- Mozilla Firefox: The latest two versions.
Recommendations to Support High Availability
You can customize vSphere HA options to enable vSphere high availability.
- Host Failure – Restart VMs
- Host Isolation– Disabled
- Guest not heartbeating– Disabled
VMware vRealize Network Insight Install Guide
VMware vRealize Network Insight is installed in two parts. These include the following:
- Installing the vRNI platform appliance
- Installing the vRNI collector appliance/proxy
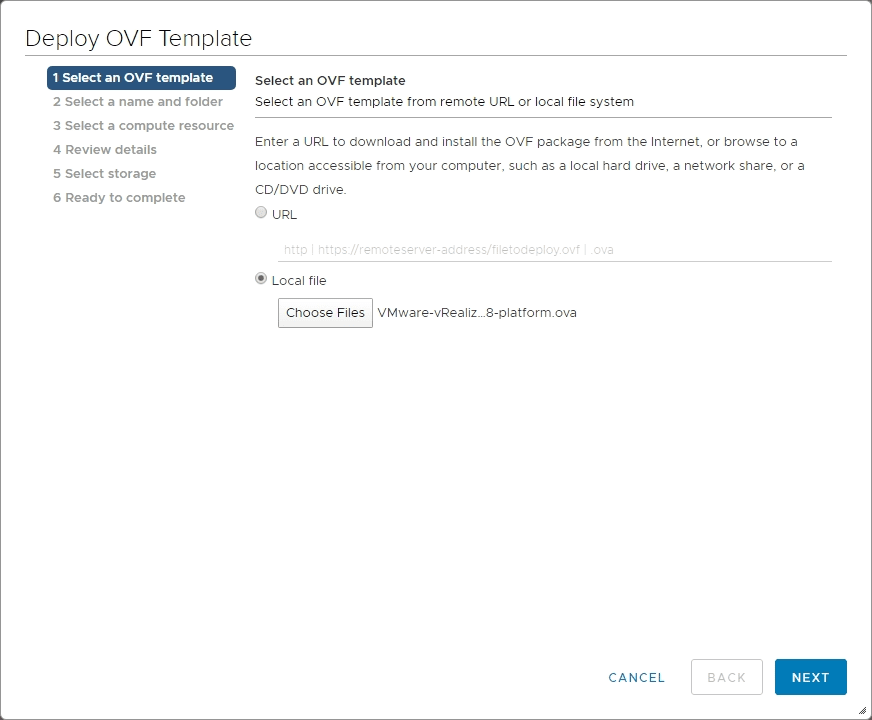
Both components are deployed using the very familiar OVF/OVA deployment process in the vSphere Client. During the process of standing up the platform appliance, you will generate a secret key that will be used in the deployment of the collector VM.
I am not going to show each screenshot of the OVA deployement here as it is standard, however, just showing a few of the highlights and screens to note. Here we are choosing the OVA for the Platform appliance solution.
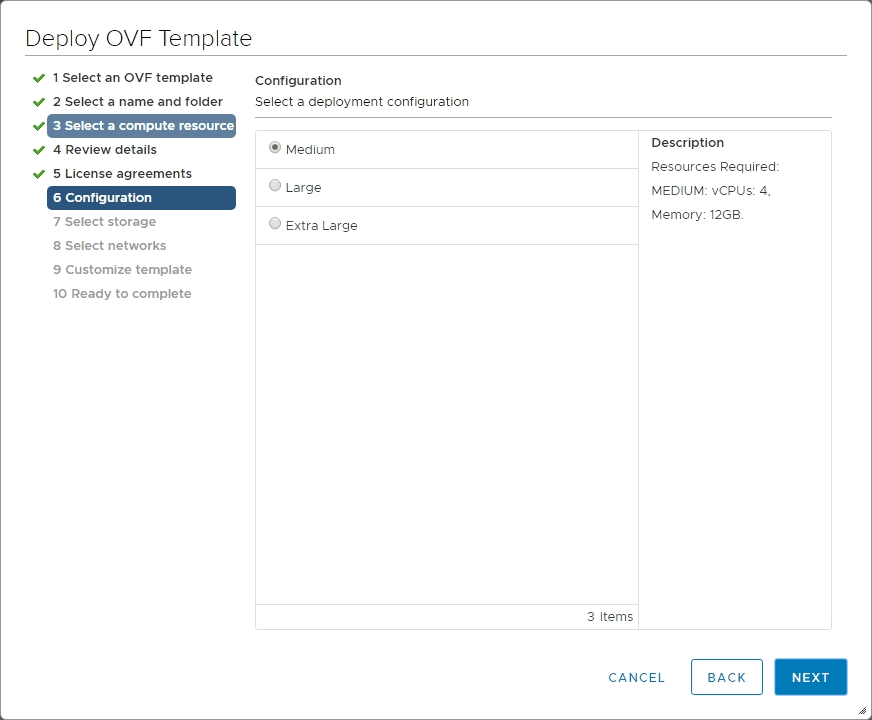
Make note of the size of appliance you would like to deploy. A note here is the vRNI solution is not a lightweight pair of VMs. The Platform appliance, even in the Medium configuration, requires 8 vCPUs and 32GB of memory. The collector requires 4 vCPUs and 12GB of memory.

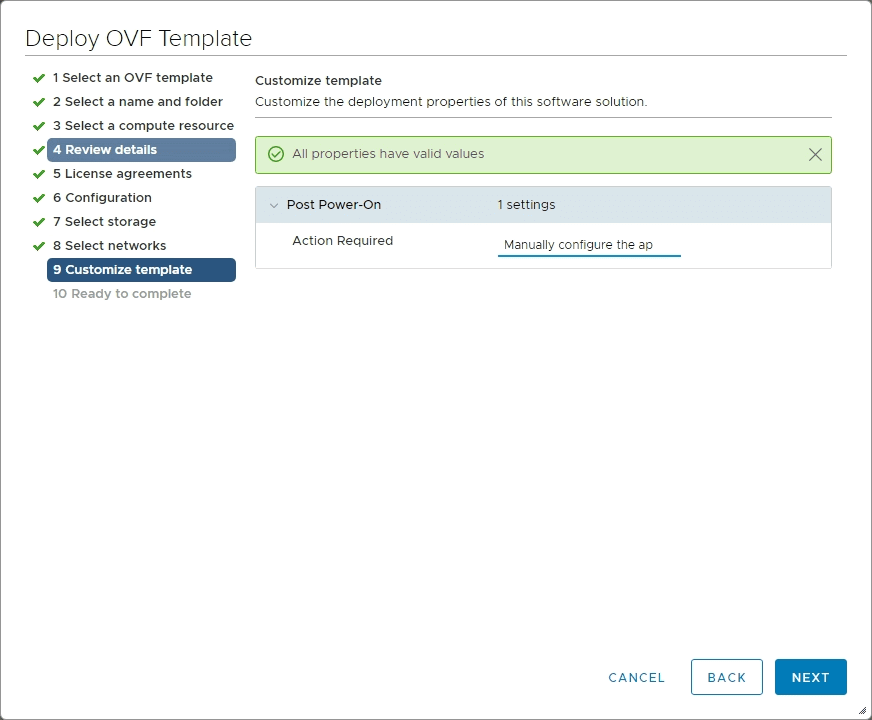
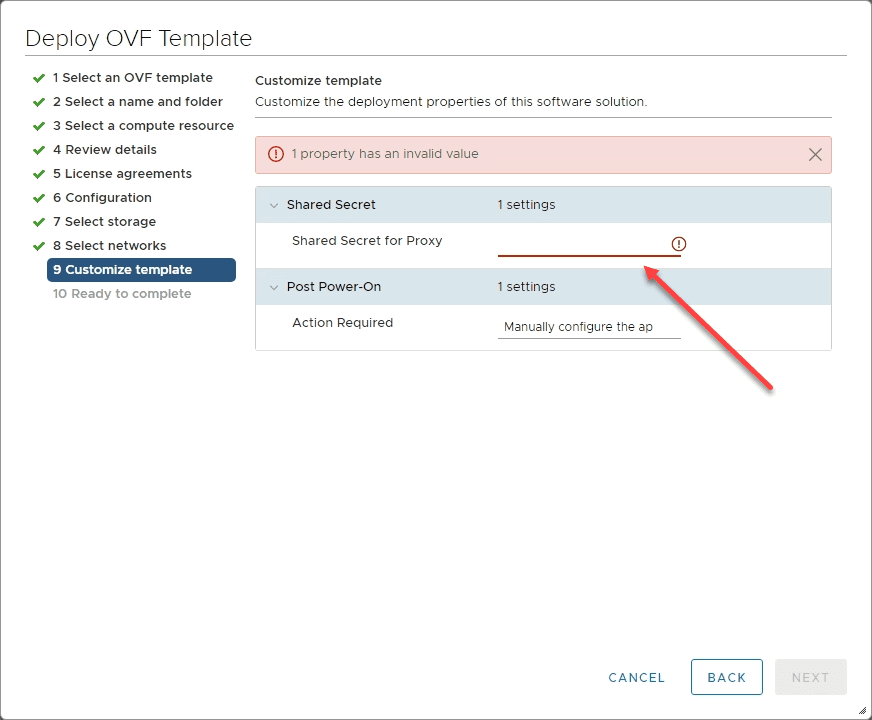
The deployment displays the note that you will need to manually configure the appliance after it is deployed.
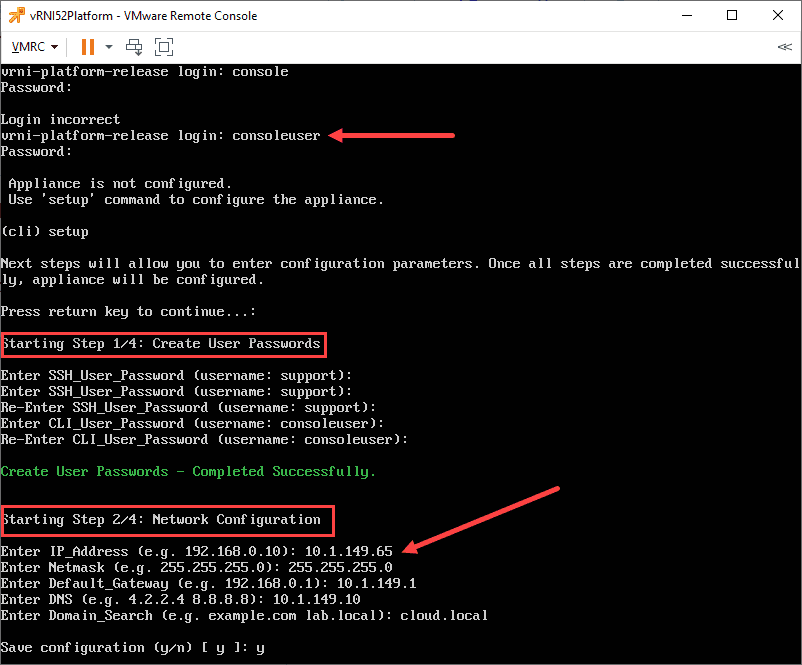
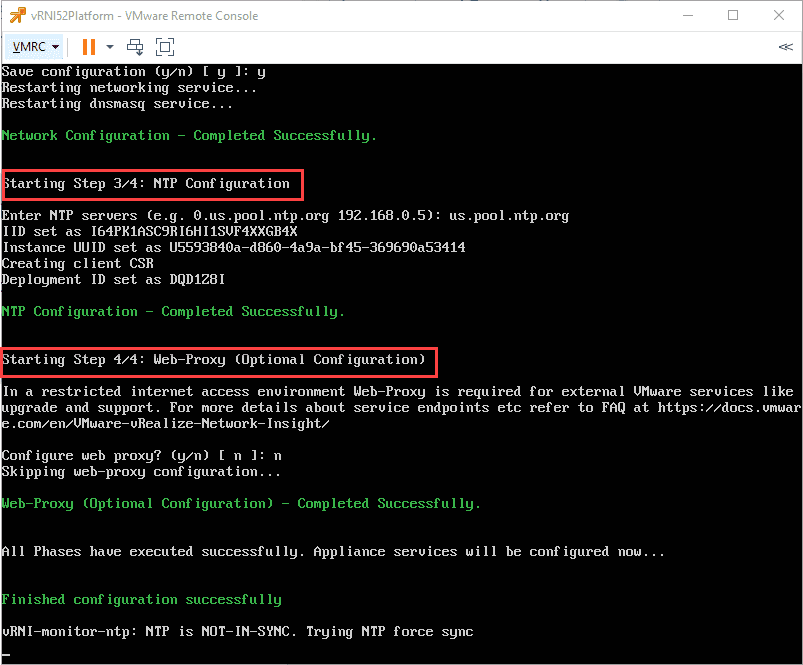
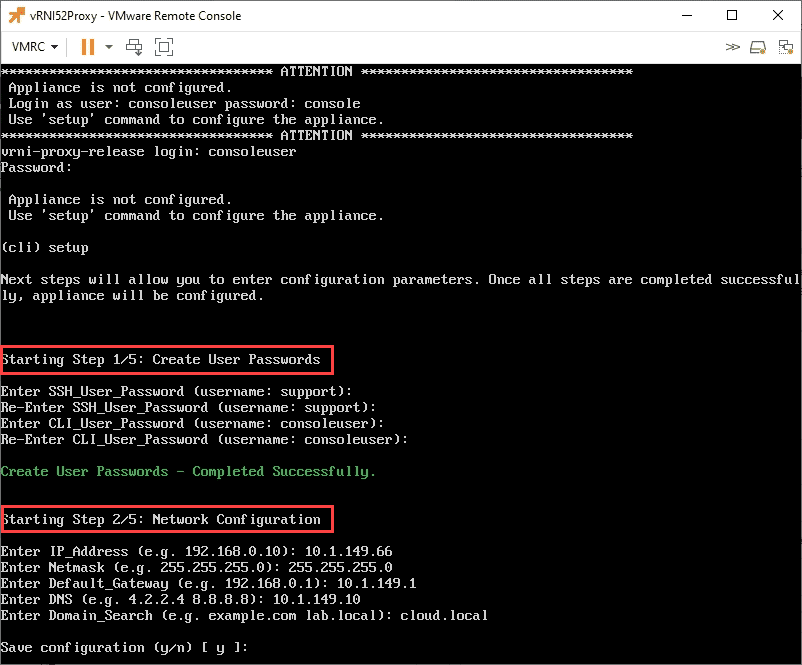
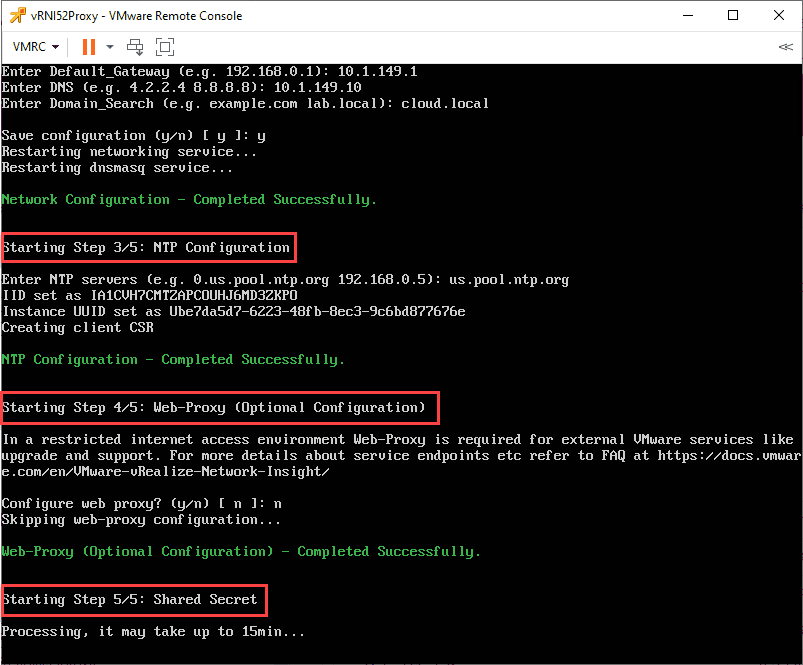
The first part of the configuration of both the Platform and Collector appliances is that you will need to open a console session and run a setup wizard to get some basic configuration on the solution. This includes:
- Setting up user accounts
- Network configuration
- NTP configuration
- Web proxy configuration
You login with consoleuser and the password of console.
Running steps 3 & 4.
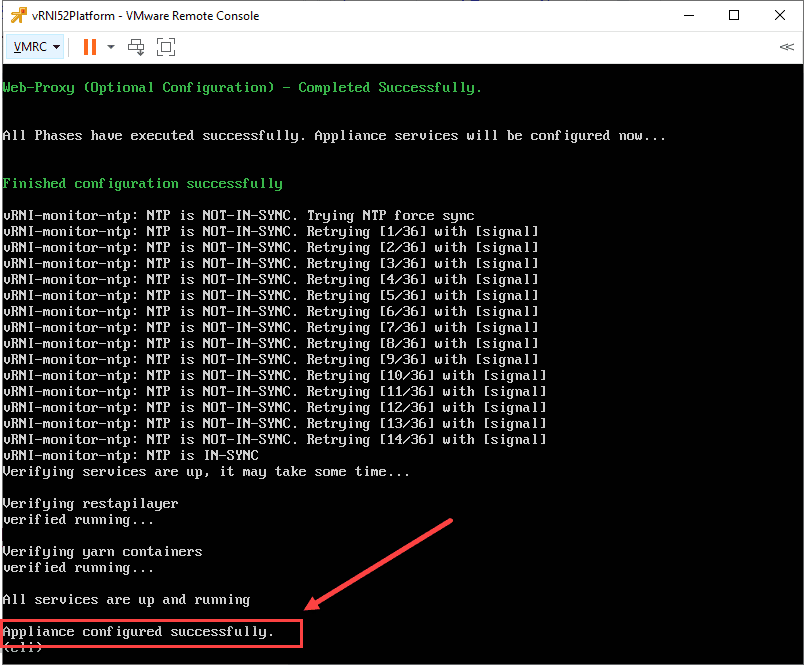
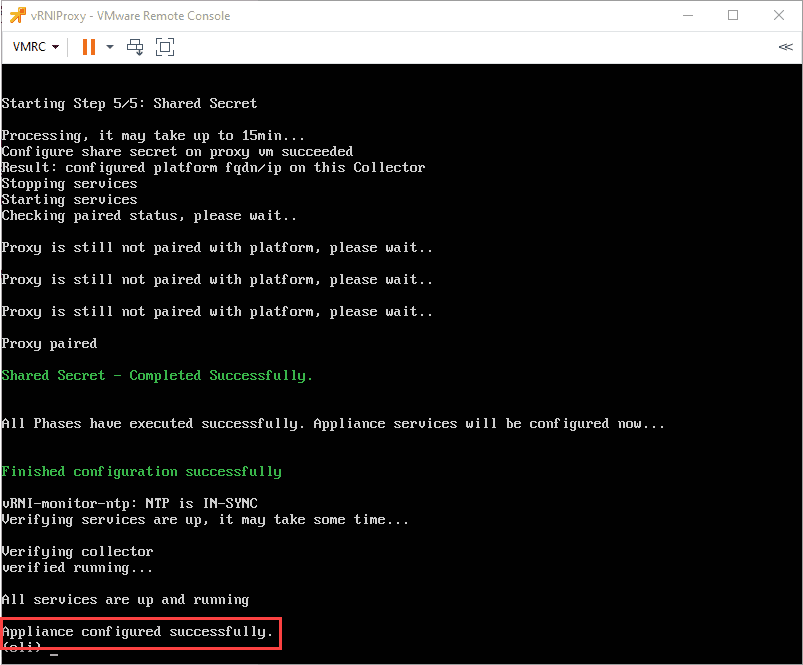
After a few minutes, you should see the Appliance configured successfully message displayed.
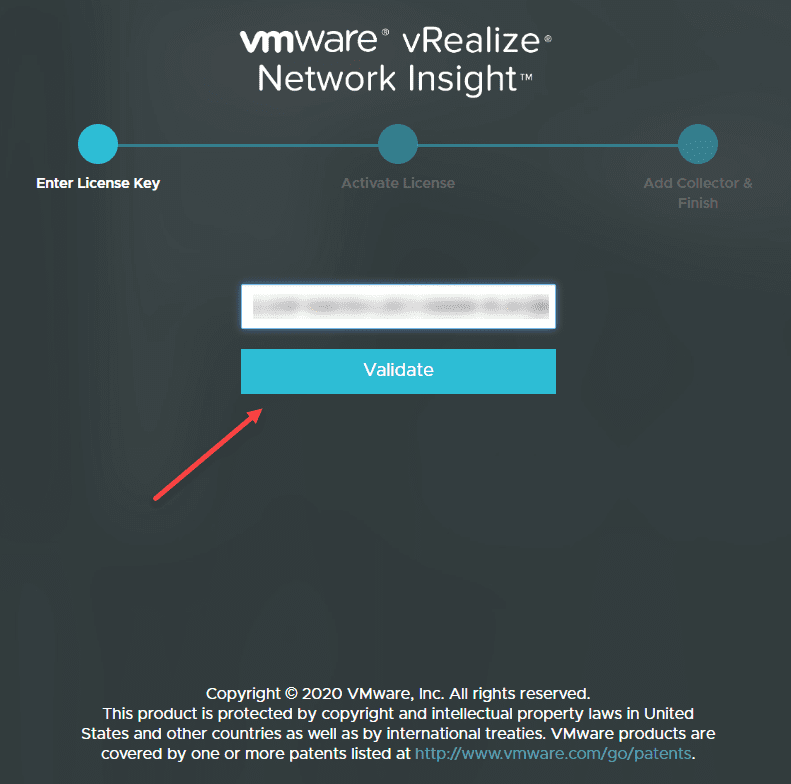
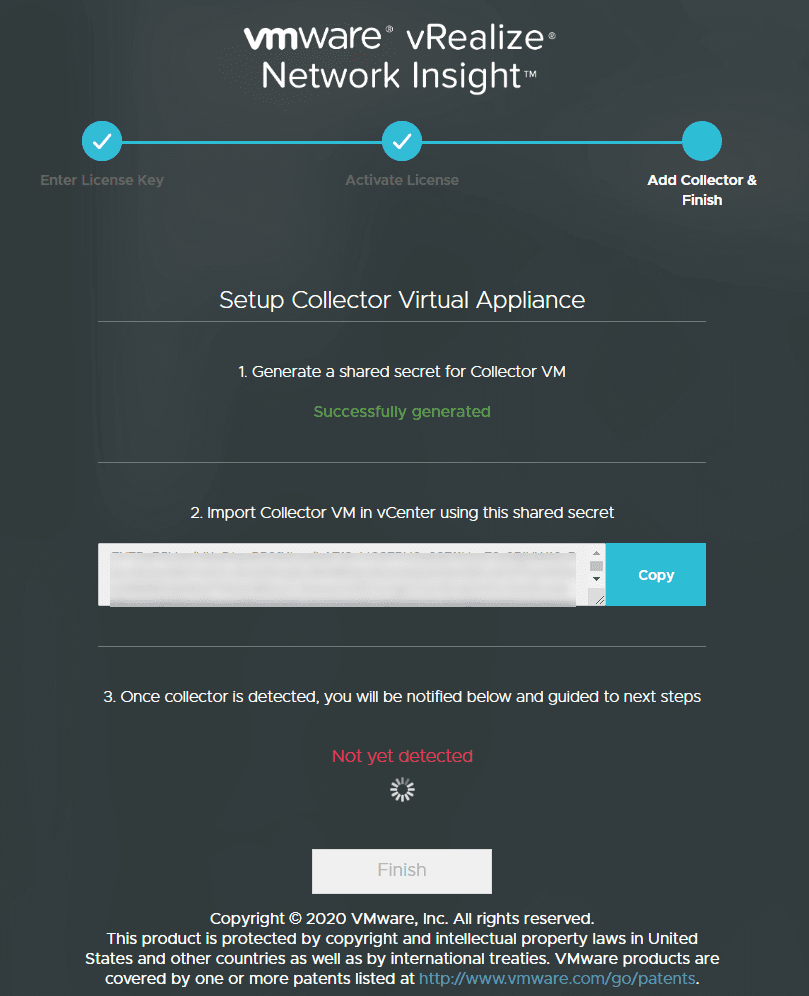
Now, we move on to the browser portion of the configuration. Open your browser and point to the IP you configured during the setup wizard. You will first enter a license key and validate the license.
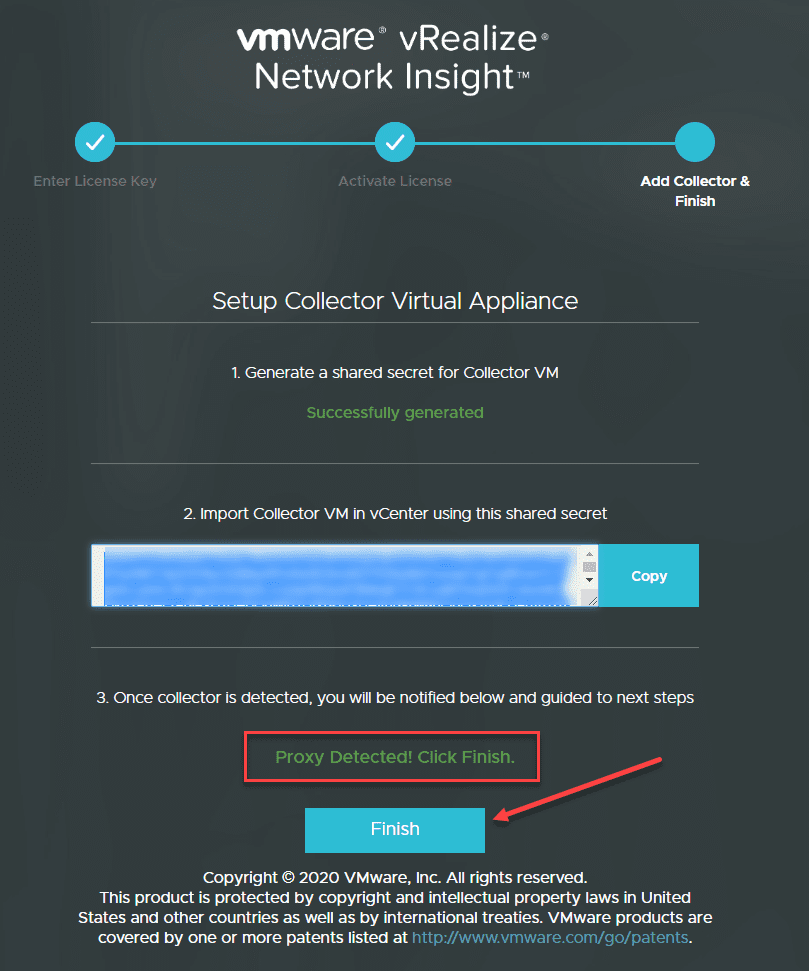
Next, generate a shared secret key for the collector VM.
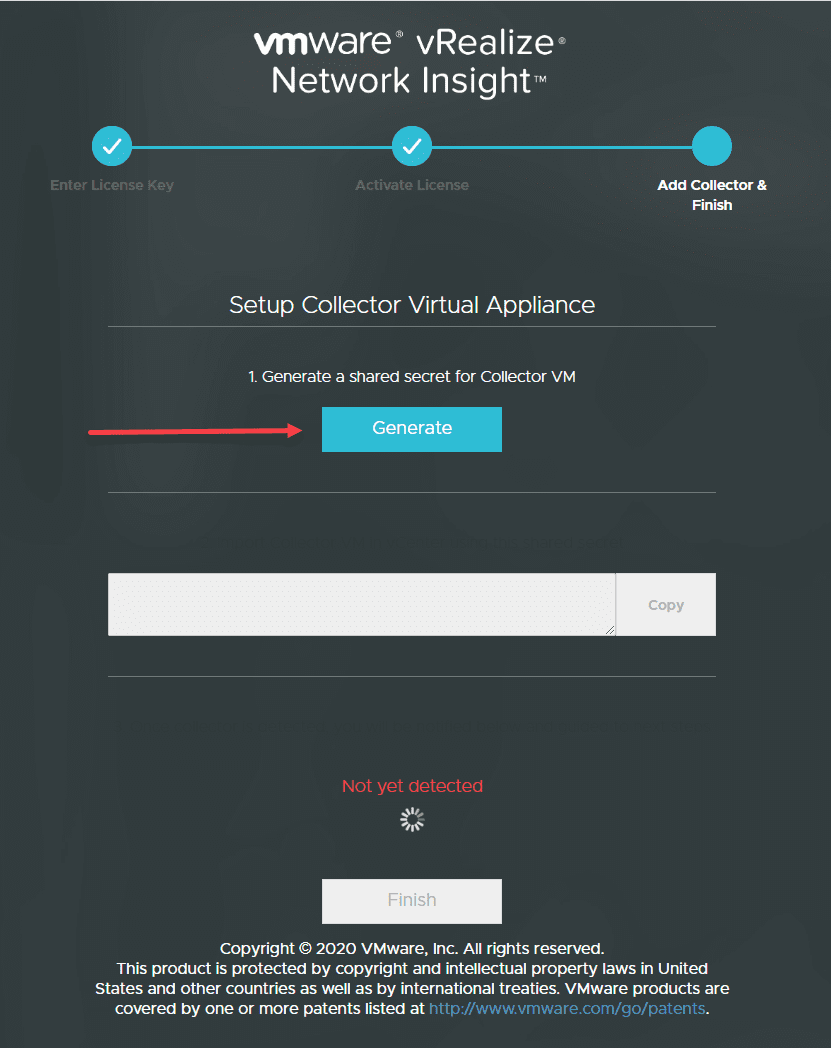
Secret key is generated. Click the Copy button to copy it to the clipboard. You will leave your browser session open as you deploy the collector VM.
Deploying the vRealize Network Insight Collector Appliance
Now that the Platform appliance is deployed, it waits on the Collector/Proxy VM to come online. Below, we are beginning the process to deploy the Collector VM. Note the size requirements.
Paste in the Shared Secret for Proxy that you copied from the web interface of the Platform appliance.
You follow the same process here for the Collector. Open a console session and run the setup wizard. You will configure the same values here including accounts, network, NTP, proxy, and it will automatically configure the connection to the Platform appliance.
Shared secret configuration working…
The connection is successfully made to the Platform appliance. You should see the Appliance configured successfully displayed in the console.
Going back to the web interface of the platform appliance, you should see the Proxy Detected Click Finish. Click Finish.
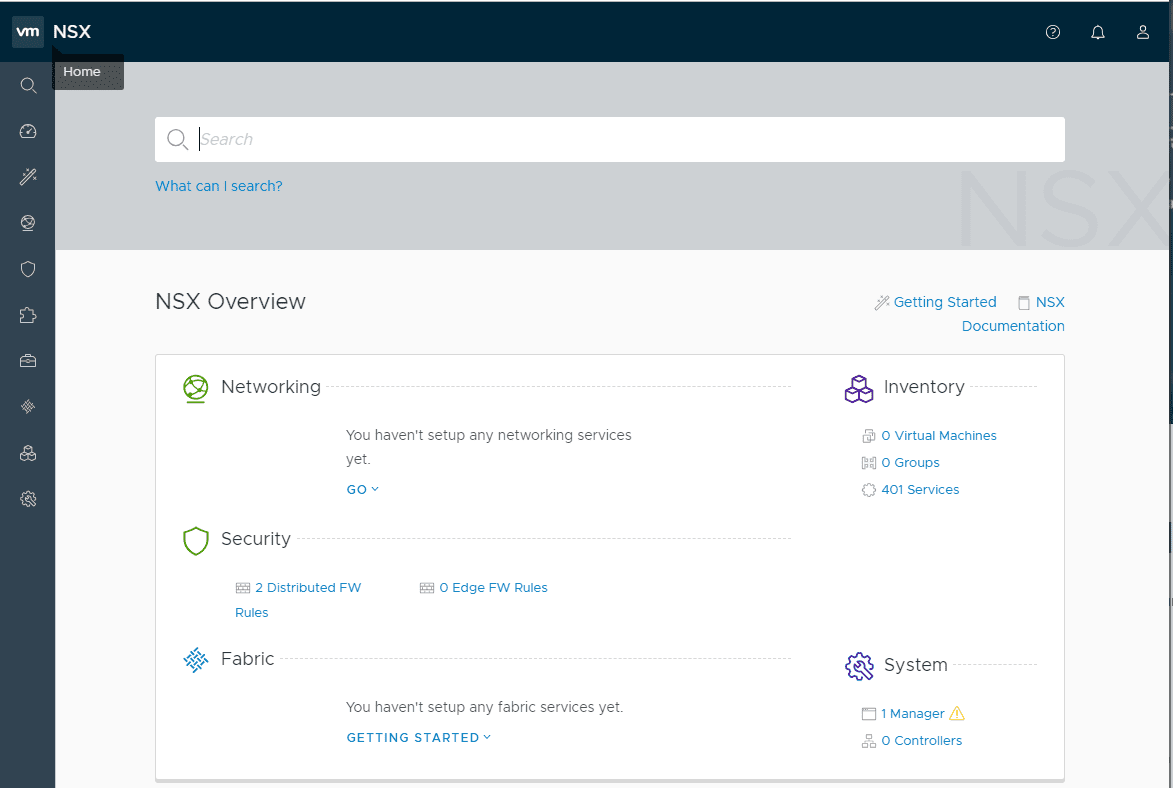
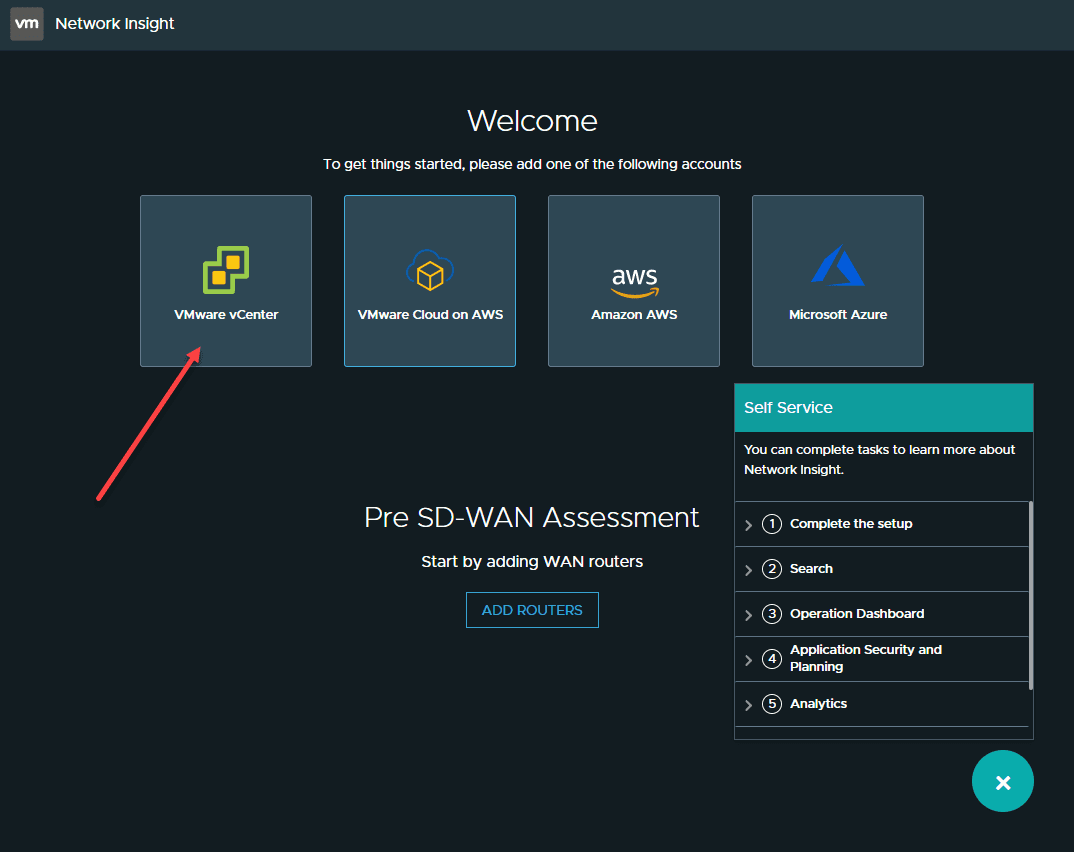
Login to the web interface of the platform appliance. Here, I am setting up a connection to a vCenter Server integrated with an NSX-T environment.
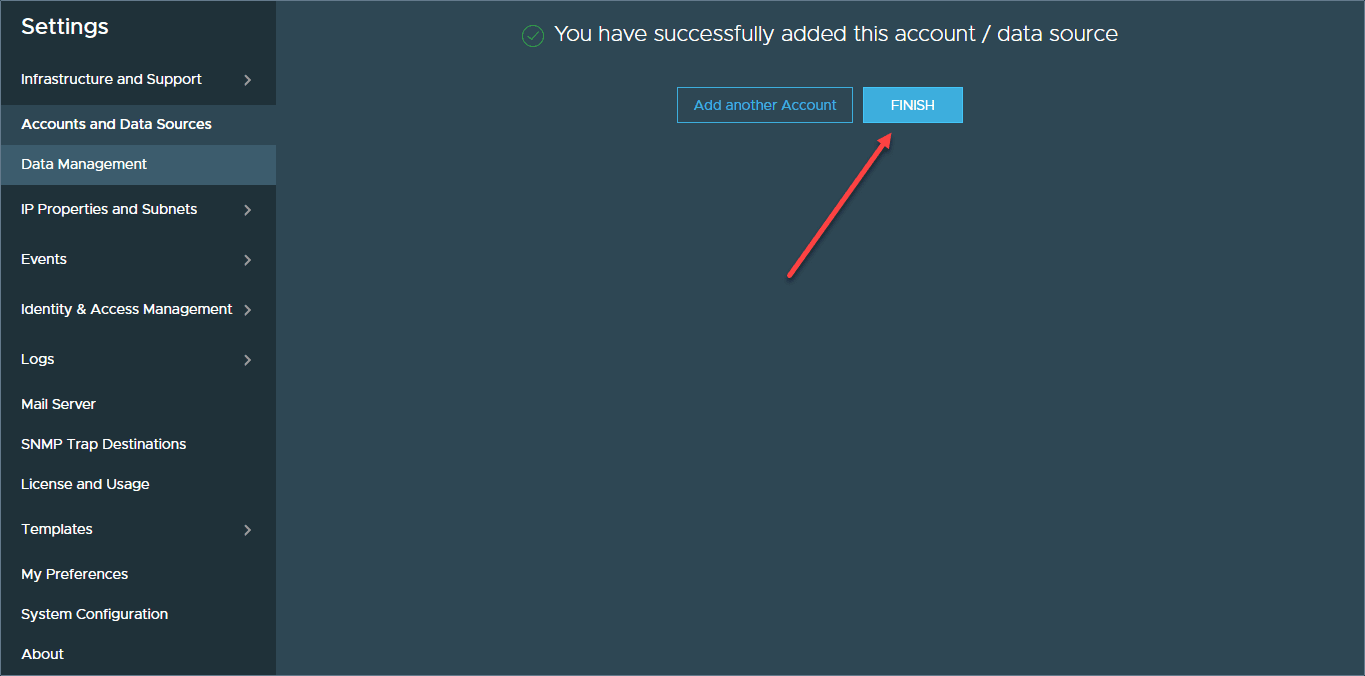
Under the Accounts and Data Sources menu, you will populate the credentials for your connection to vCenter as well as setup NetFlow, VDS and then submit the configuration.
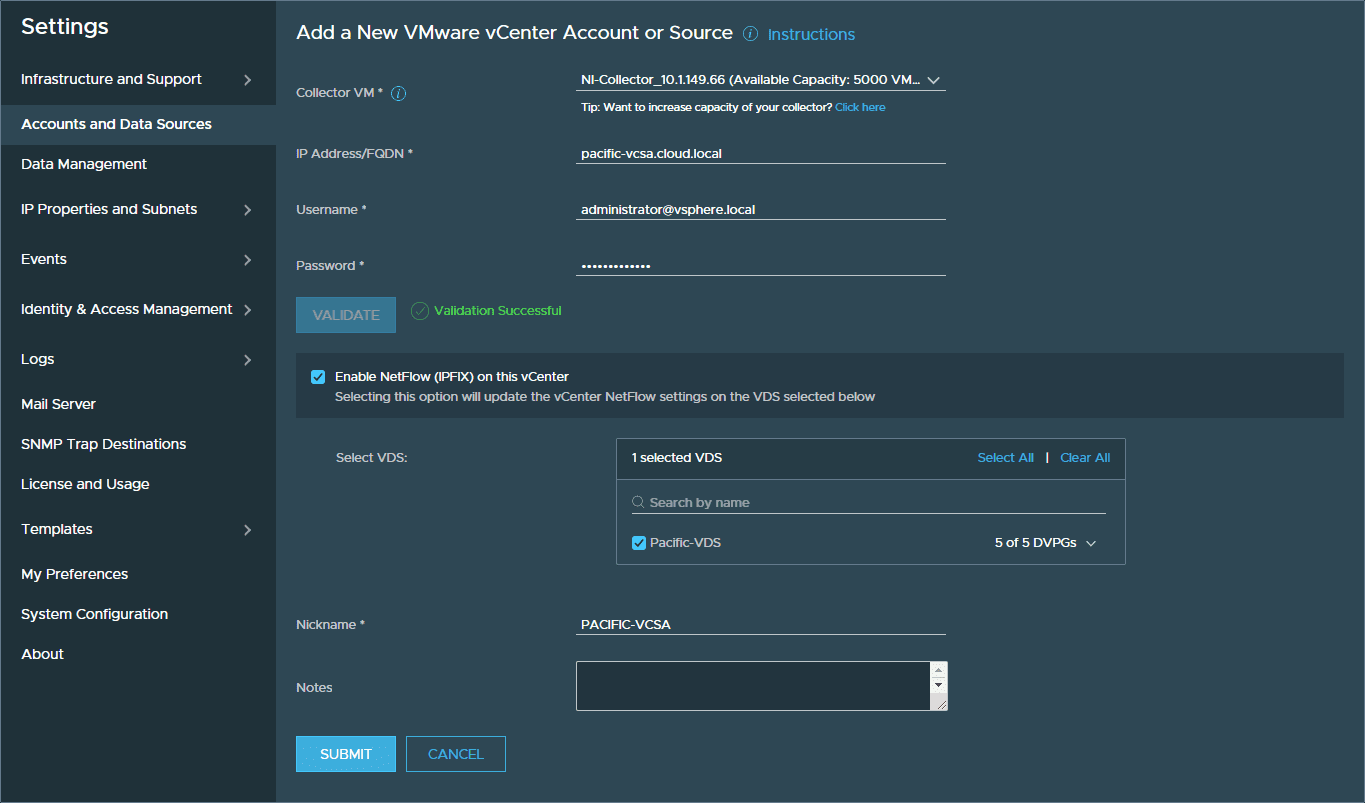
Click Finish.
Wrapping Up
There you have it – VMware vRealize Network Insight Install Guide using vRealize Network Insight 5.2 as a guide for the walk through. The vRNI platform is easily configured with just a bit of time and quickly leads to time to value for your NSX environment.
Stay tuned for more vRNI goodness as I delve deeper into the solution and look at traffic flows, micro-segmentation, security, etc.