With the January 14, 2020 deadline rapidly approaching, getting off Windows Server 2008 and 2008 R2 should be a priority. The End of Life designation will now mean no more security updates or official support from Microsoft.
You can migrate to Azure to receive three more years of extended security updates, however, that may not be aligned with your business needs. What if you simply have a Windows Server 2008 or 2008 R2 member server that you want to “upgrade” to Windows Server 2019? Maybe it is simply a file server hosting some business-critical file shares and you need to retain the hostname, shares, and make sure all the permissions are intact?
Let’s take a look at how to Migrate Windows Server 2008 to 2019 with Storage Migration which is a great way to accomplish this task with Microsoft’s new Storage Migration Service. This is a great tool to use for this purpose as it will help you get up and running on the latest Windows Server 2019 platform in no time.
What is the Storage Migration Service?
The Storage Migration Service in case you have not heard about it makes it extremely easy to migrate from legacy versions of Windows Server to newer versions of the Windows Server and even Linux. It provides a graphical tool that steps you through all the heavy lifting of a server migration.
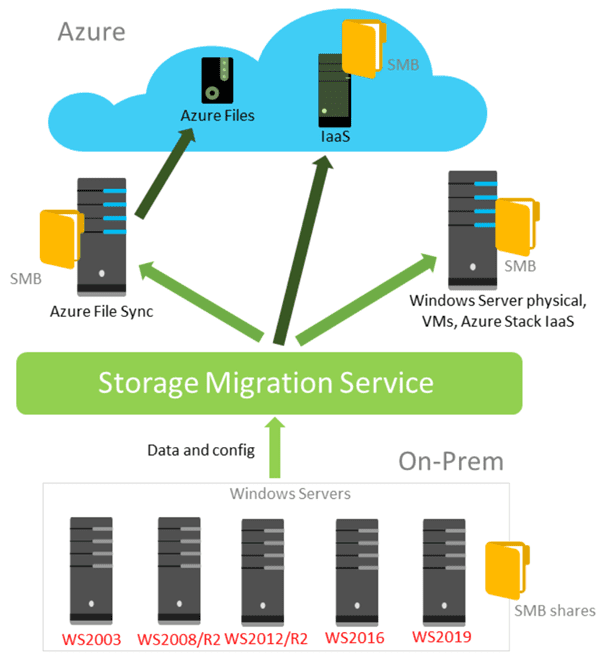
The great thing about the Storage Migration Service is that it inventories data on Windows and Linux servers and then transfers the data to a newer server or even up to Azure VMs. You can even use the Storage Migration Service to transfer the identity of your server so users can access data without any change to login scripts, mapped drives, links, paths, and so on.
You will notice below that Microsoft is supporting migrations all the way back to Server 2003! And, of course, Server 2008 and R2 are supported as a source for the Storage Migration Service process as well.
Storage Migration Service Requirements
Straight from Microsoft – to use Storage Migration Service, you need the following:
- A source server or failover cluster to migrate files and data from
- A destination server running Windows Server 2019 (clustered or standalone) to migrate to. Windows Server 2016 and Windows Server 2012 R2 work as well but are around 50% slower
- An orchestrator server running Windows Server 2019 to manage the migration
If you’re migrating only a few servers and one of the servers is running Windows Server 2019, you can use that as the orchestrator. If you’re migrating more servers, we recommend using a separate orchestrator server. - A PC or server running Windows Admin Center to run the Storage Migration Service user interface, unless you prefer using PowerShell to manage the migration. The Windows Admin Center and Windows Server 2019 version must both be at least version 1809.
Migrate Windows Server 2008 R2 to 2019 with Storage Migration
To get started, you will need to meet the prerequisites above. I have already got a Windows 2008 R2 Server test box up and running as well as a Windows Server 2019 server that will become the target for the migration using Storage Migration.
I am using an intermediary Windows Server 2019 box that is running Windows Admin Center 1910 with the Windows Server Storage Migration Service extension installed.
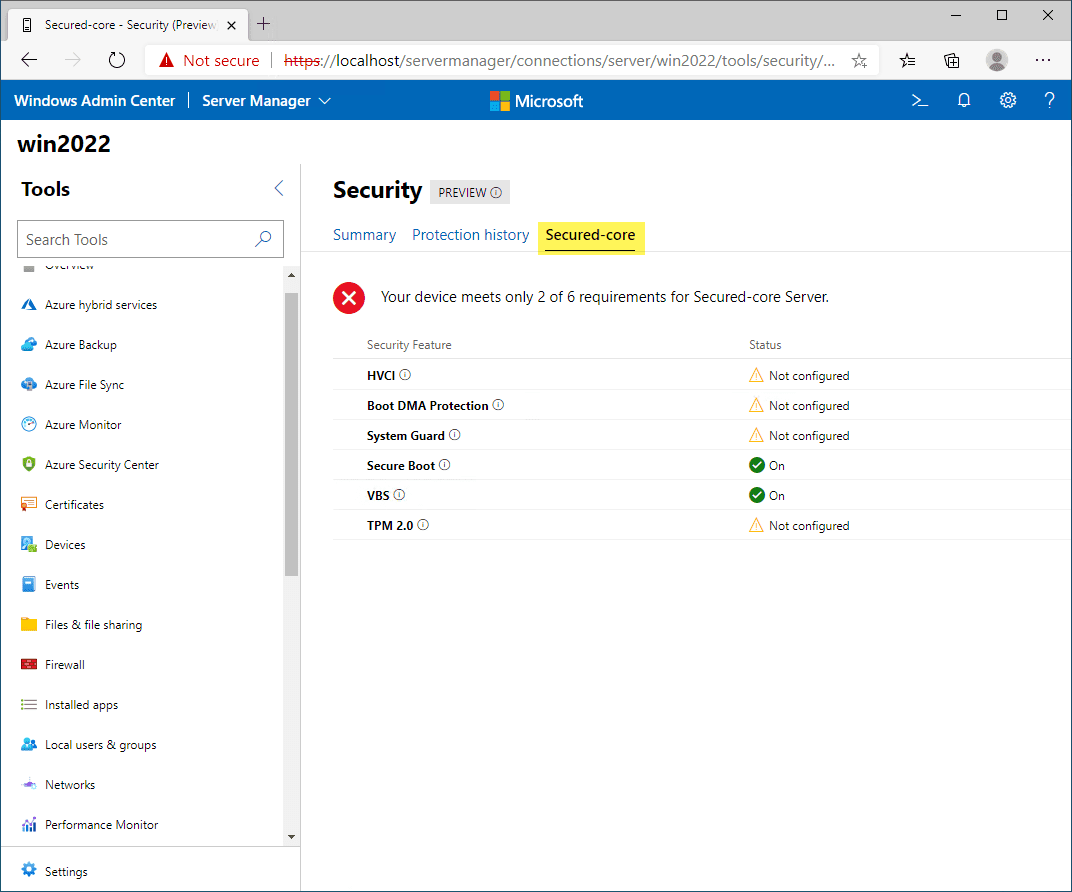
Highlight the service in Available Extensions and then click Install.

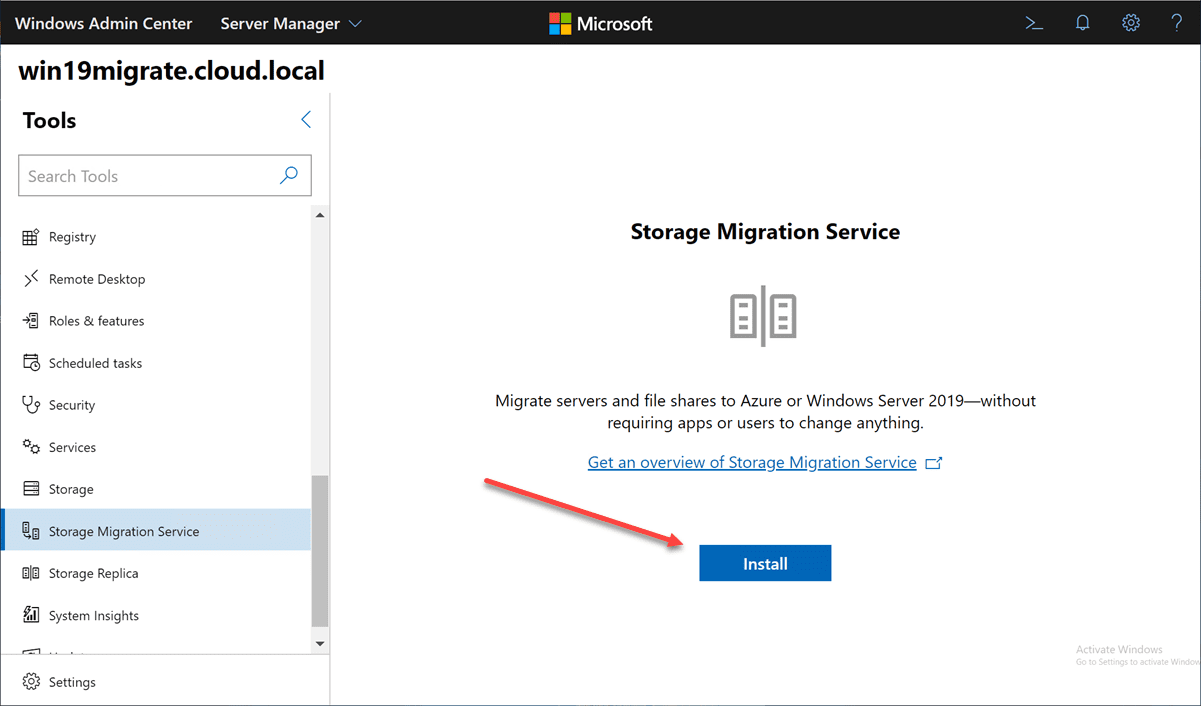
Once you have the extension installed, you navigate to Storage Migration Service and click Install.
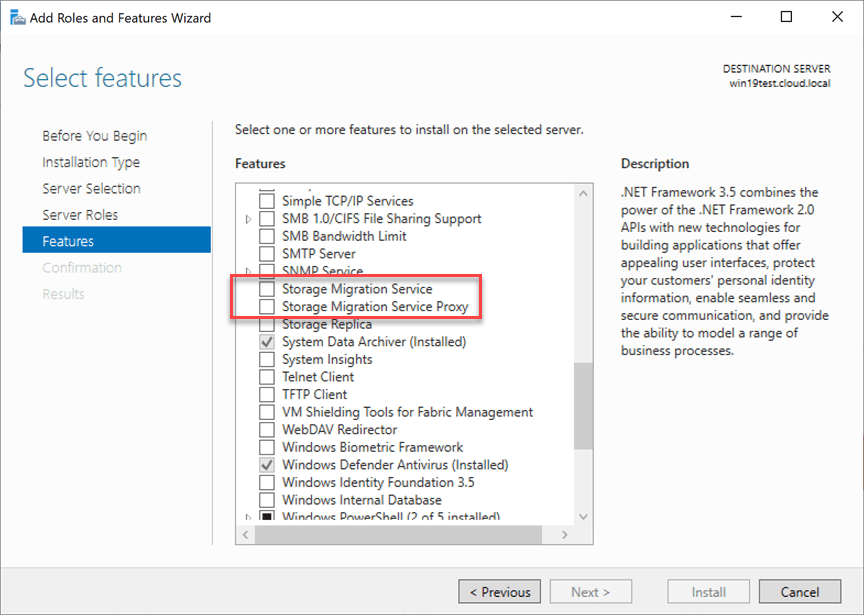
When you click the Install button, the services that get installed behind the scenes are the following:
- Storage Migration Service
- Storage Migration Service Proxy
Windows Admin Center begins setting up Storage Migration Service (installing the Windows features needed).
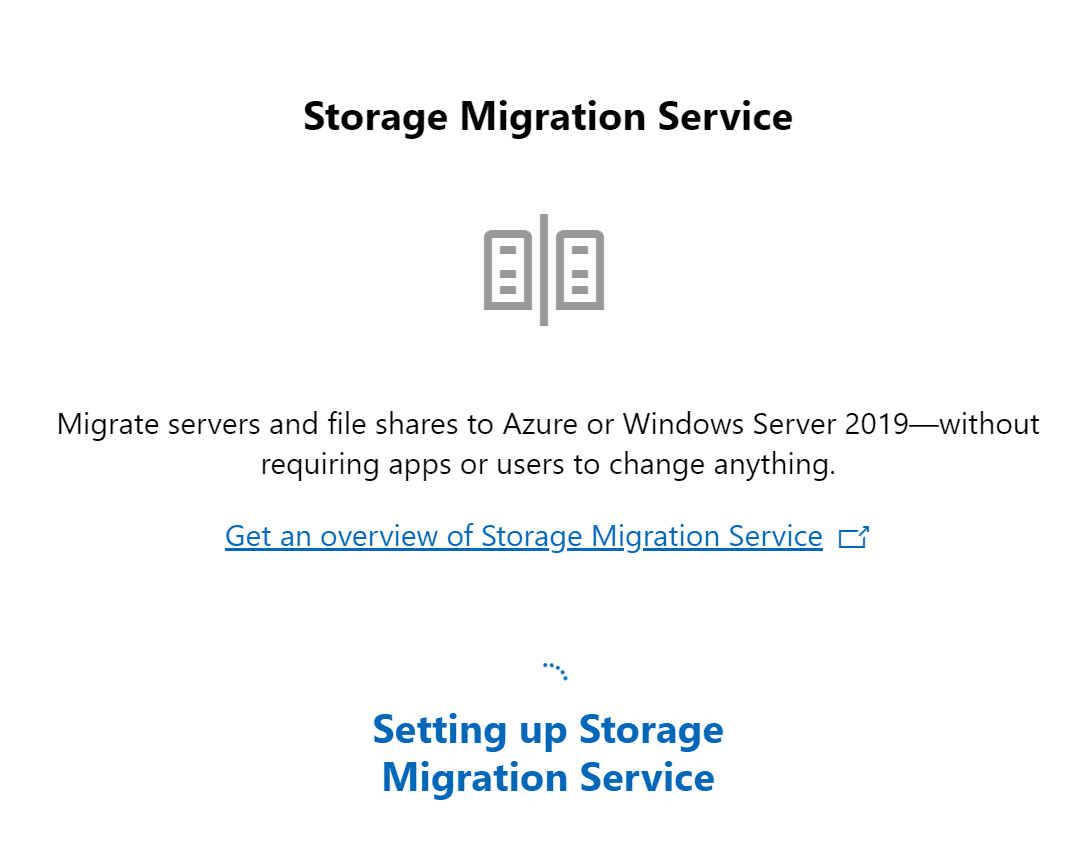
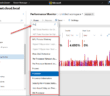
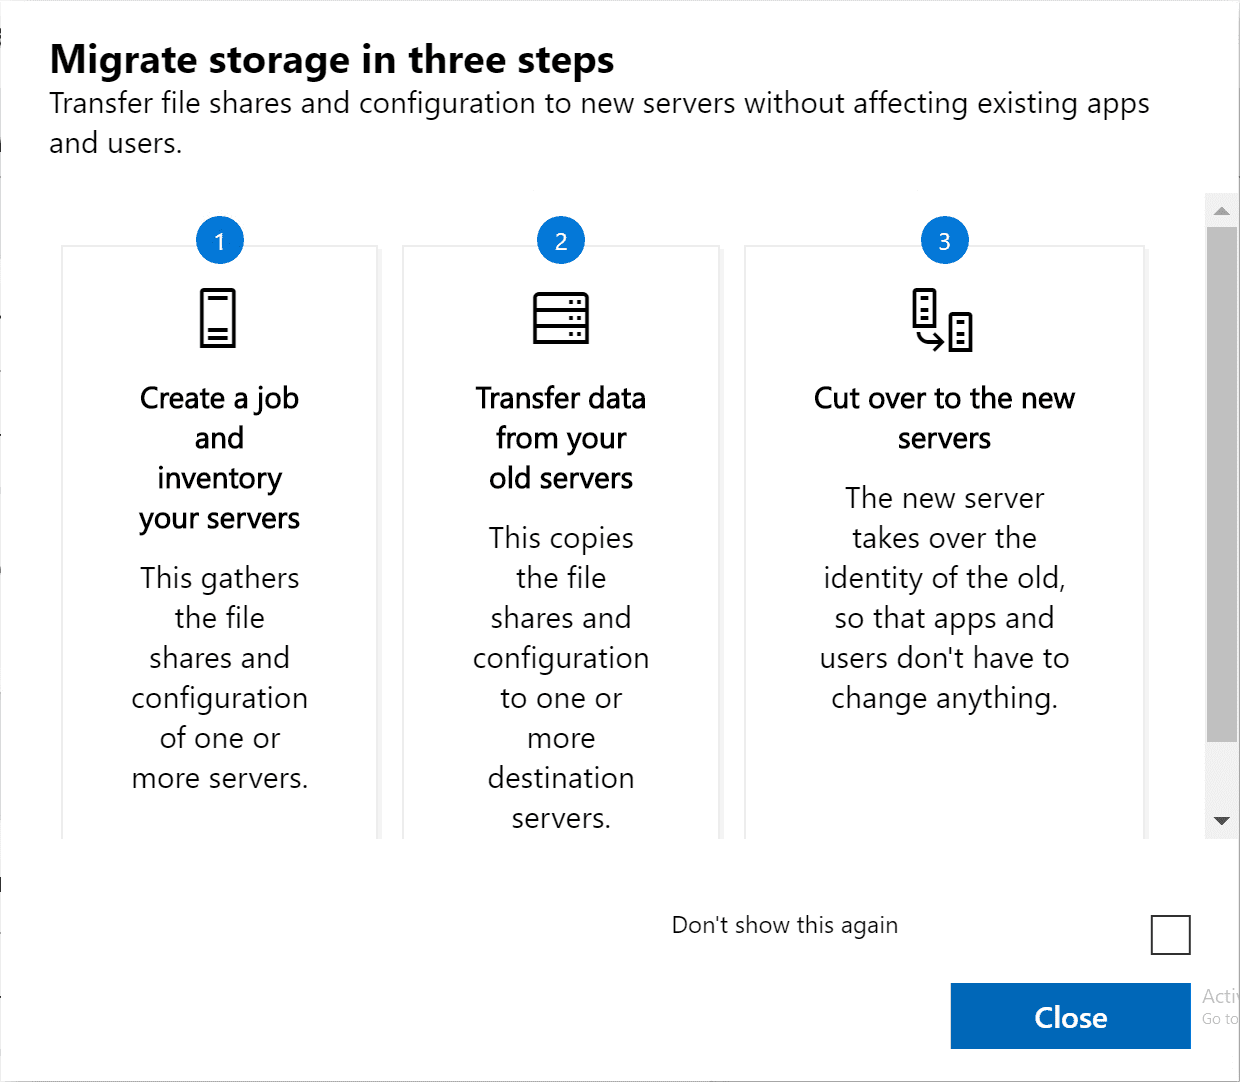
After it is installed, you get a nice overview Window detailing the steps in the Storage Migration Service process.
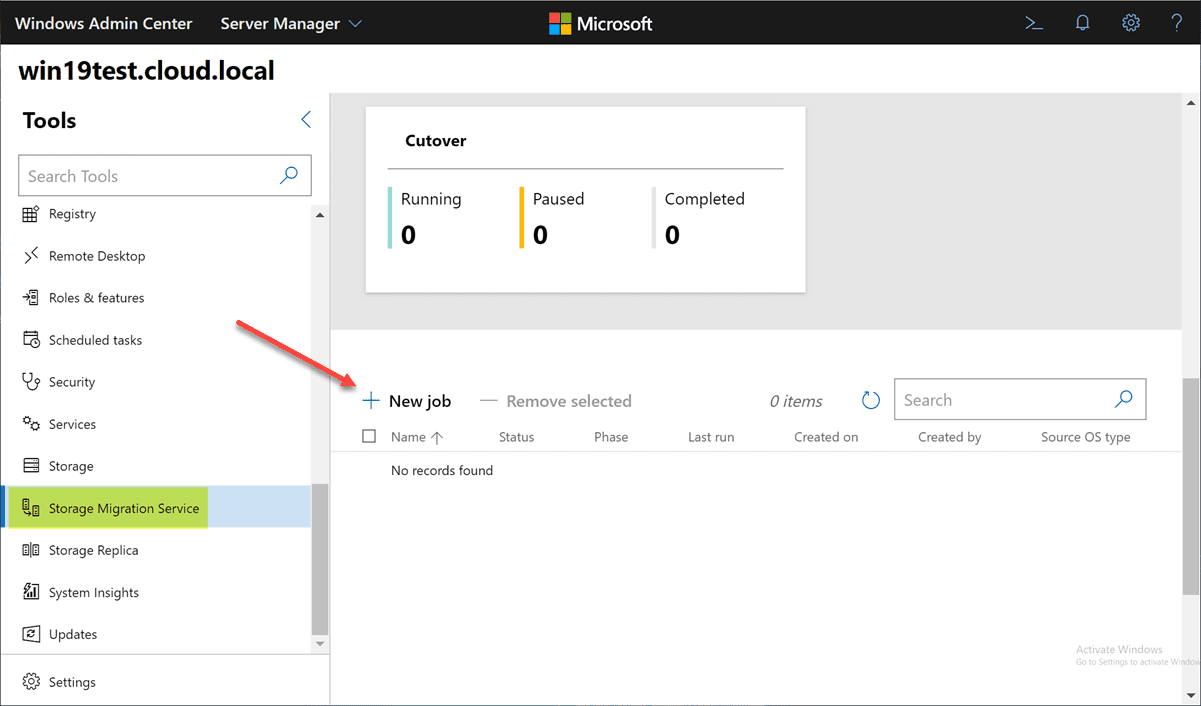
Beginning the Storage Migration of Windows Server 2008 to 2019 by clicking the New Job button.
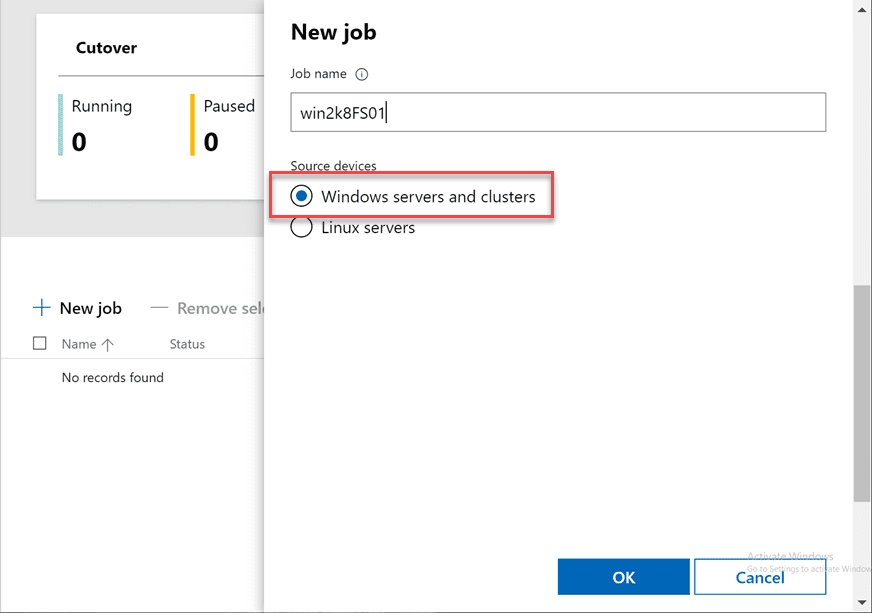
Select the type of server you are going to migrate. Here I am choosing Windows servers and clusters.
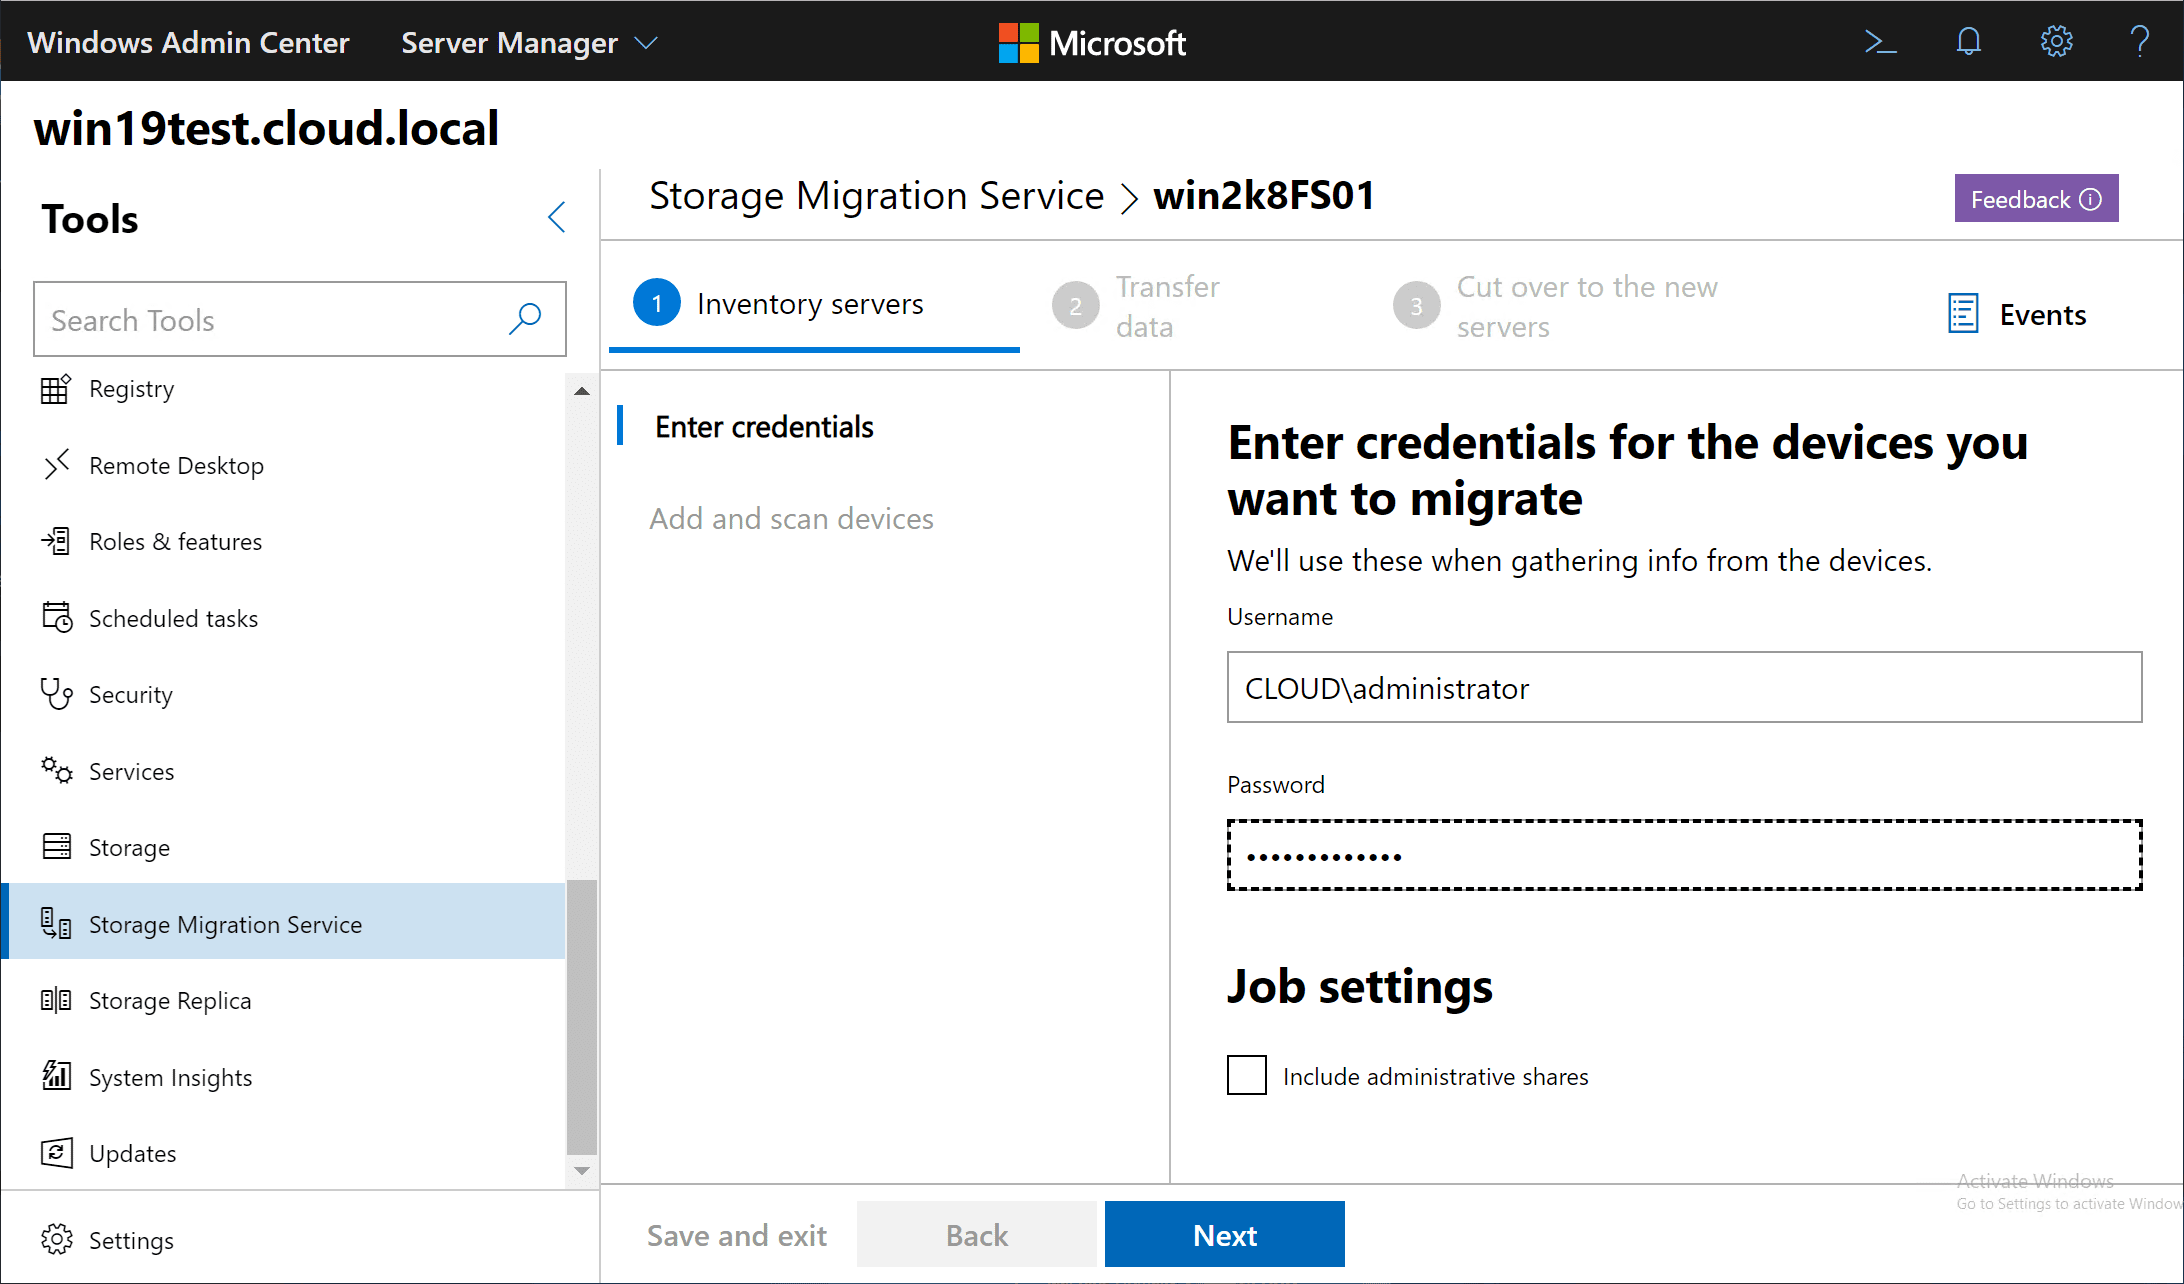
Enter the credentials for the devices you want to migrate.
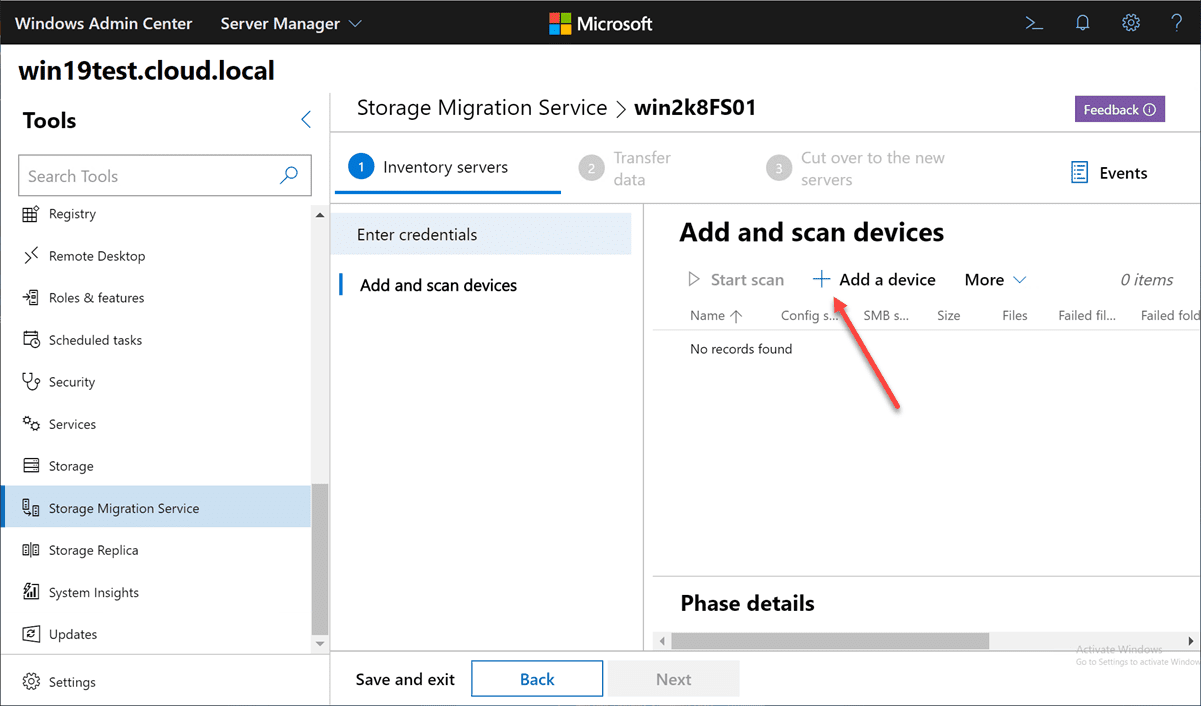
Next, we need to Add a device which equates to entering the name of the Windows Server 2008 R2 server.
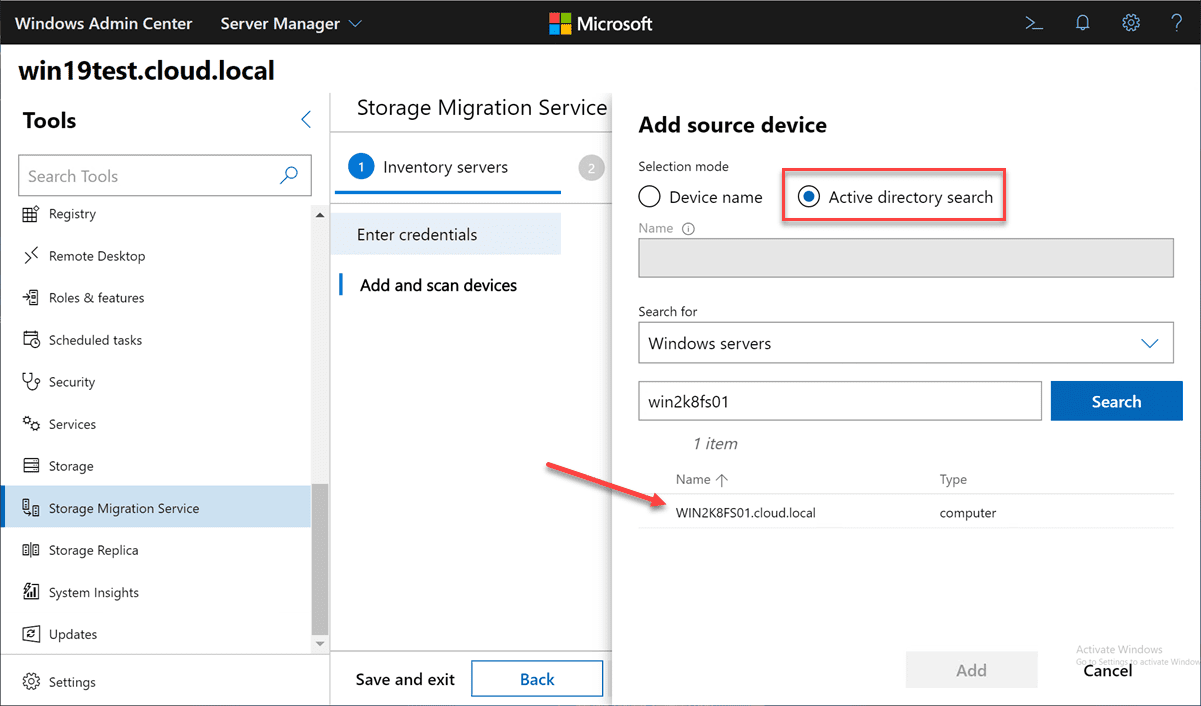
You can also do the Active directory search option. Fill in the NETBIOS name and just click Search. Click the server name returned and then Add.
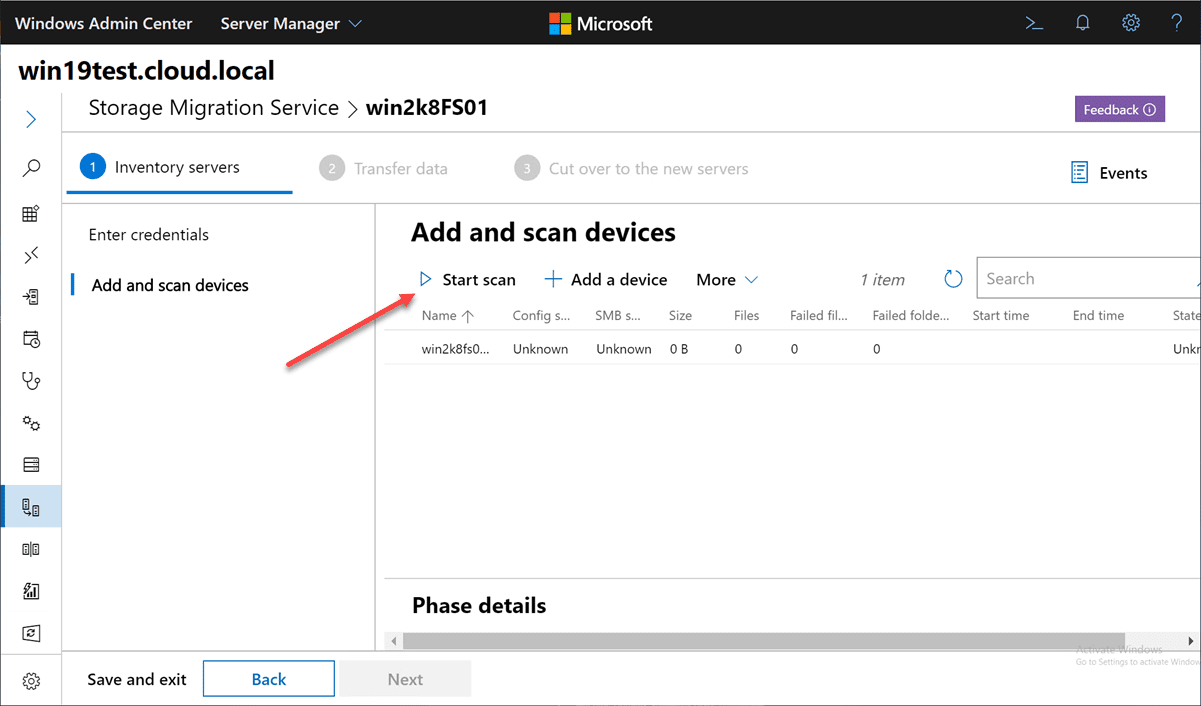
Start a scan of the source Windows Server 2008 server.
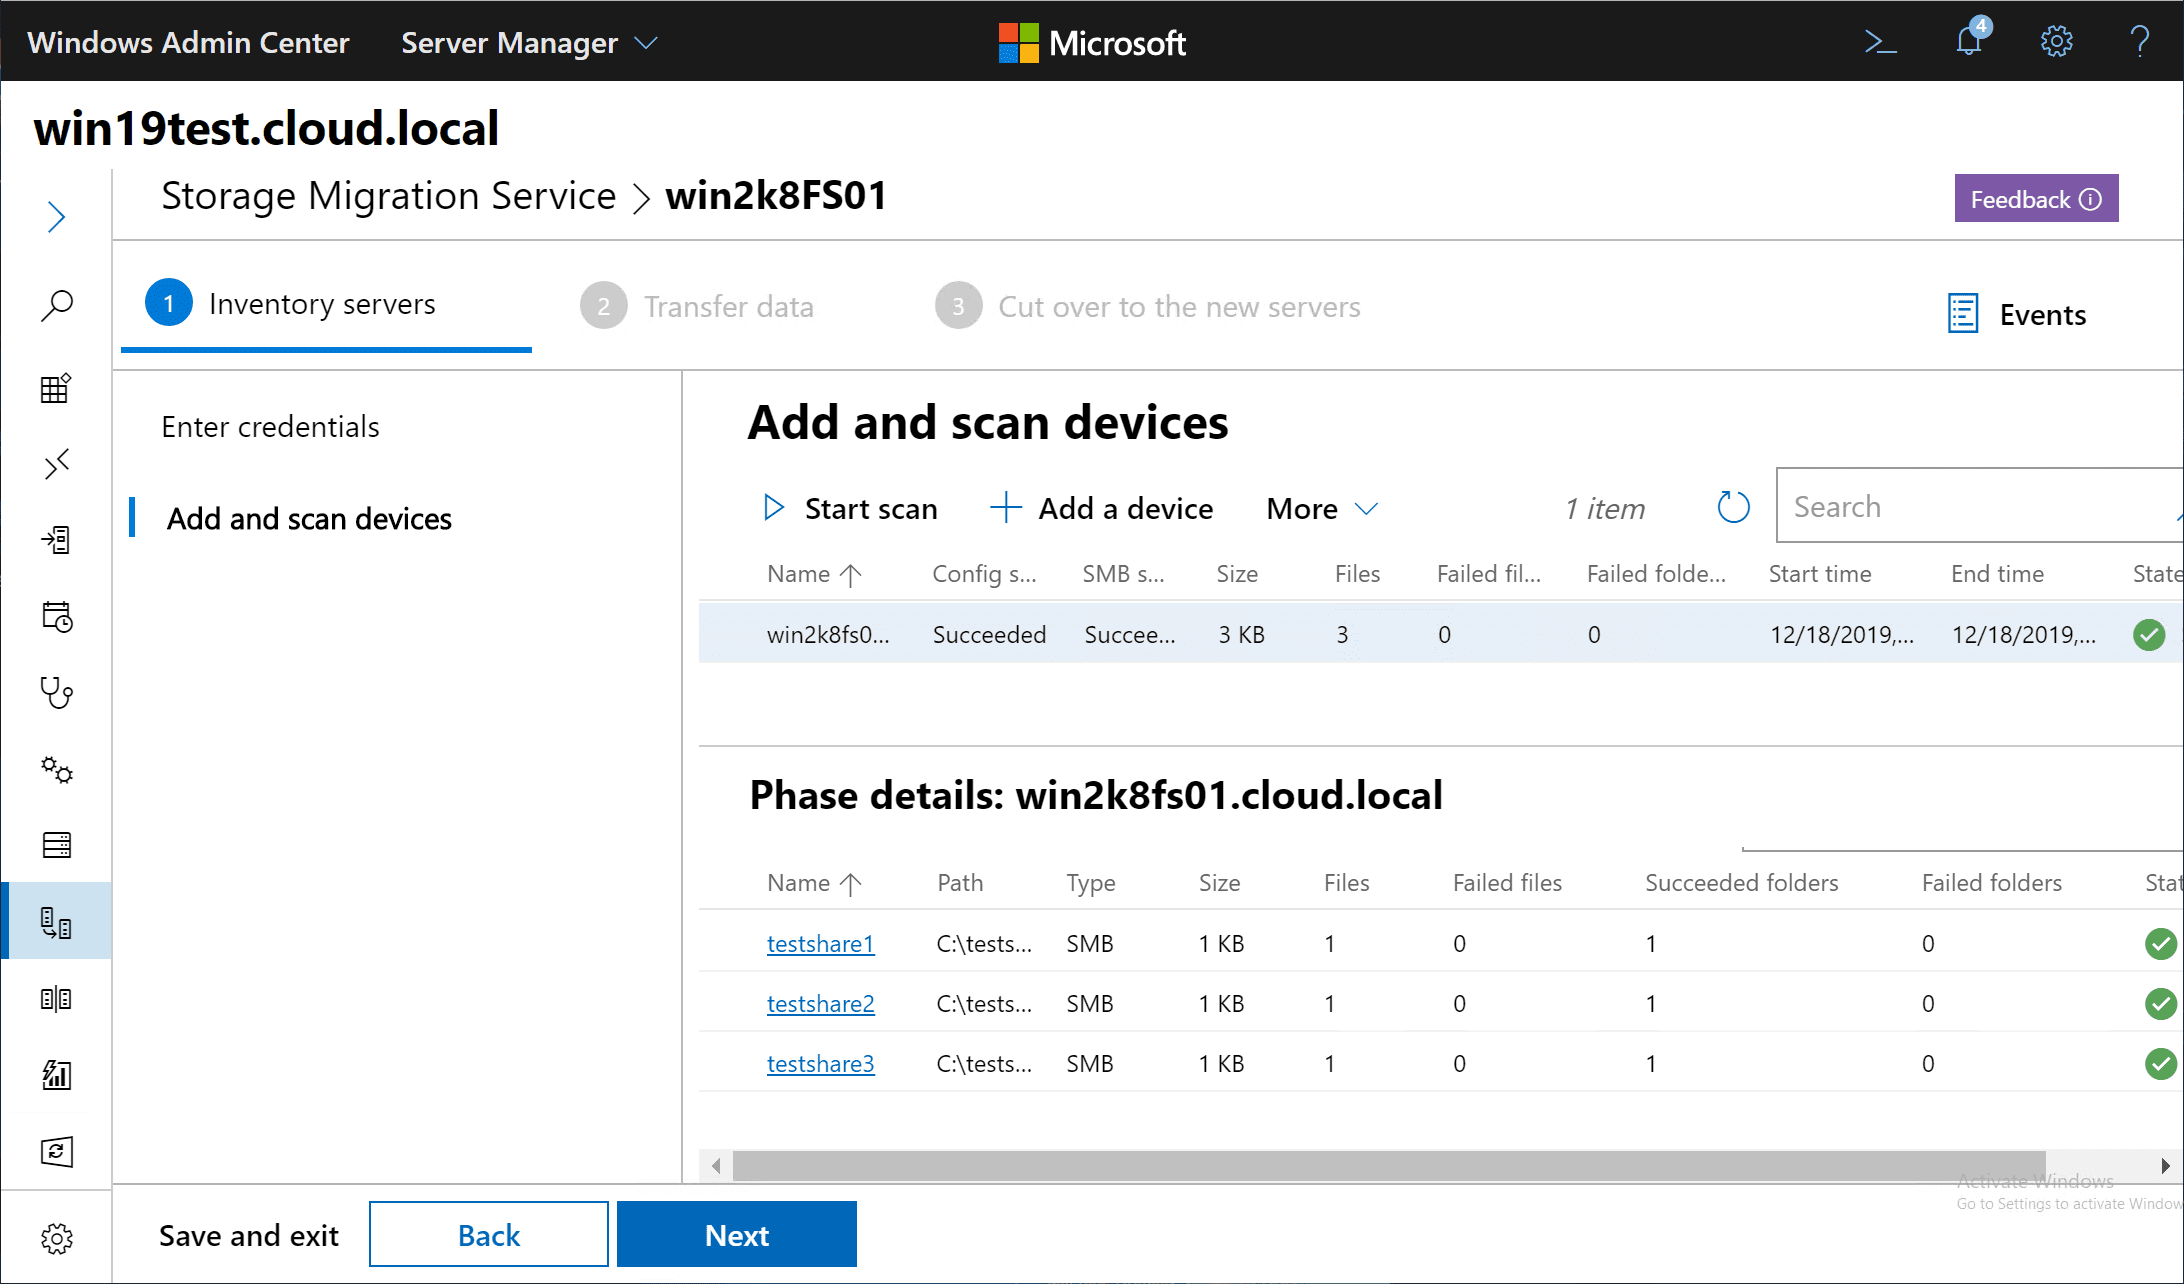
The scan returns the shares and files that were found.
This takes us to the Transfer Data phase. Enter the credentials for the destination devices. Click Next.

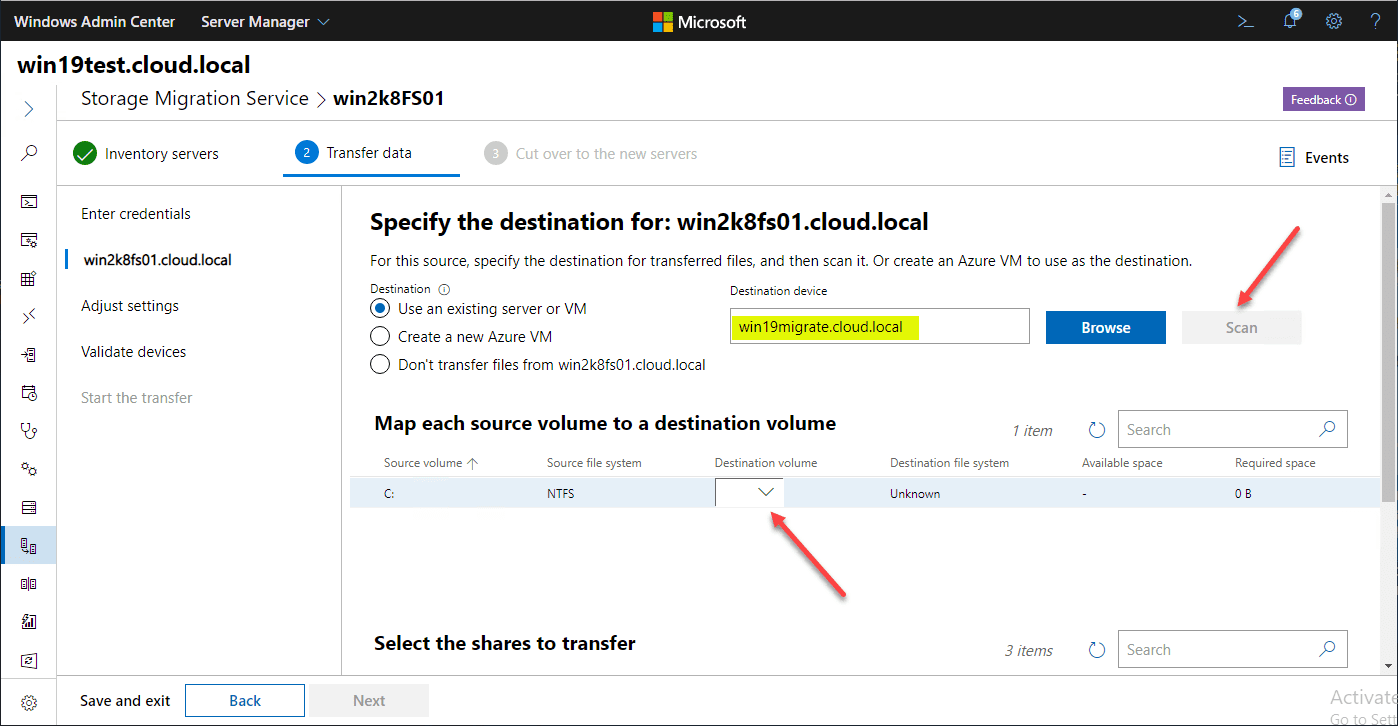
Specify the destination server name. Even though this is going to assume the identity of the Windows Server 2008 machine, you need to give the name of the server as it is currently. Click Scan once you enter the name.
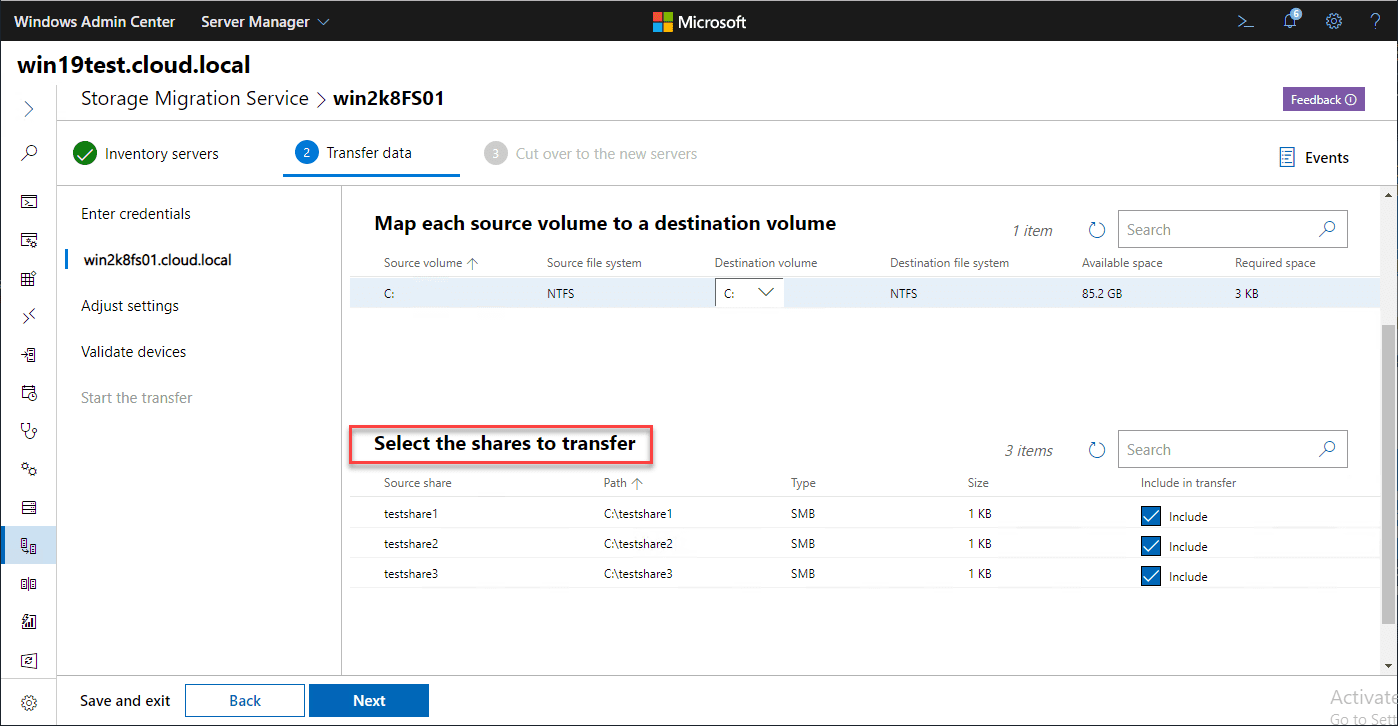
Select or deselect the shares you want to migrate or not migrate.
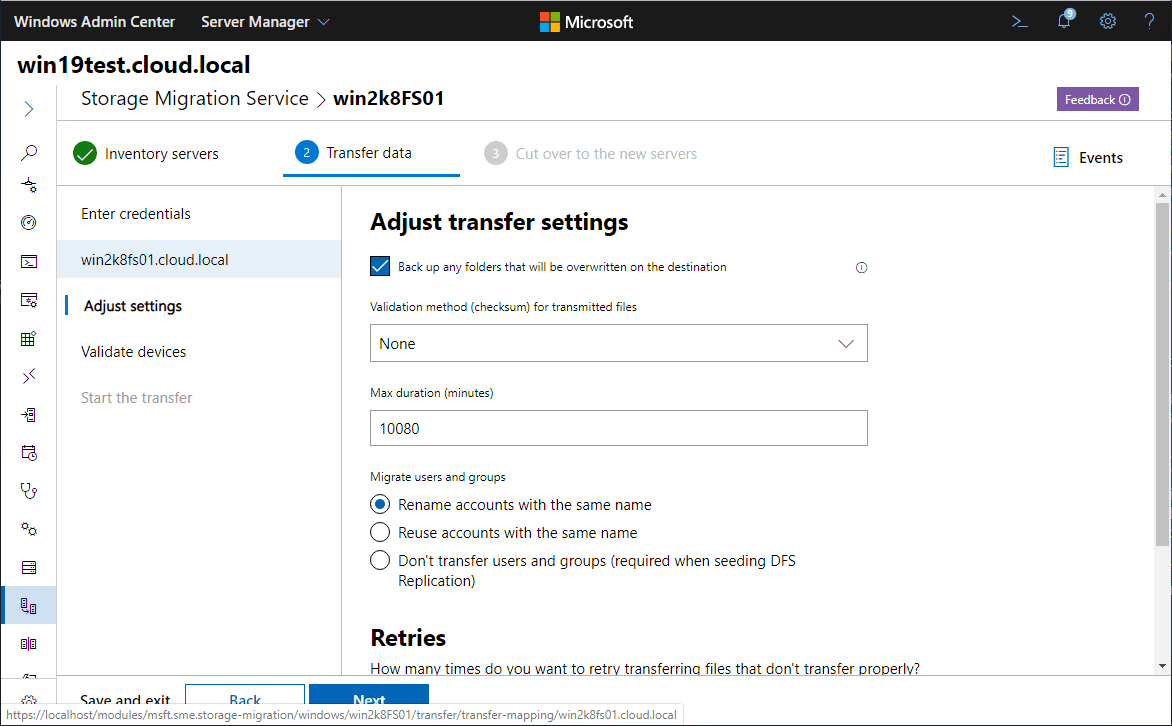
Adjust the transfer settings as needed. You can choose the validation method, duration of transfer, as well as the number of retries you want to tolerate.
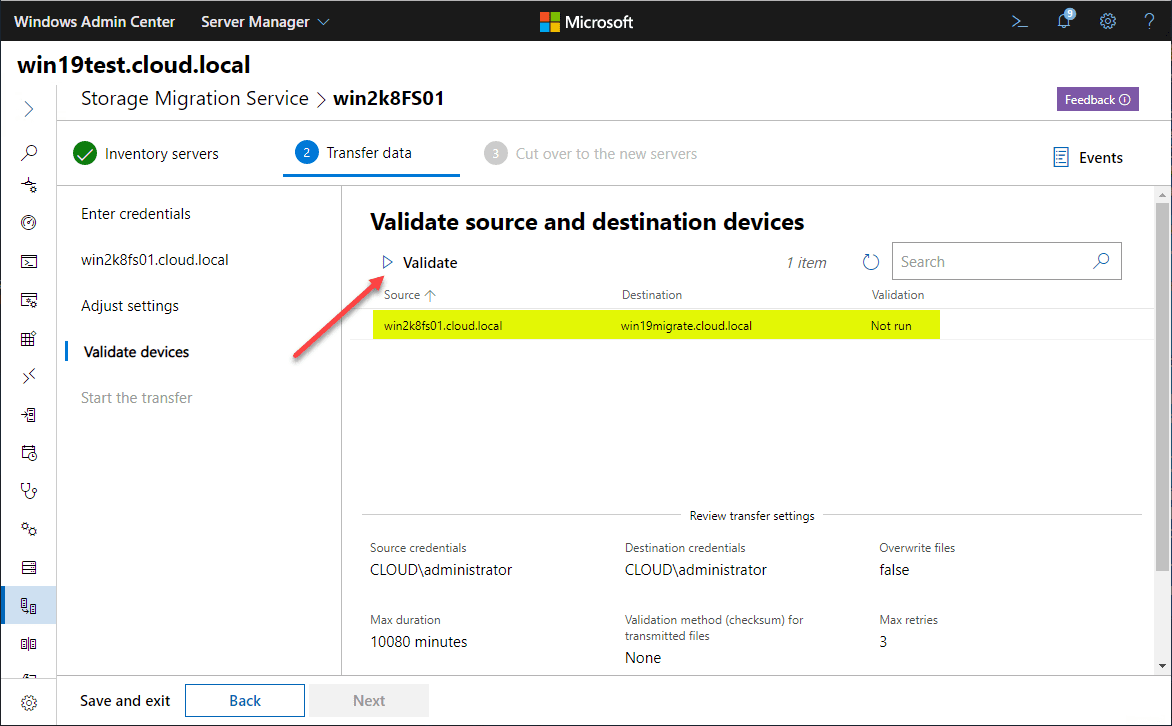
Next, click the Validate button.
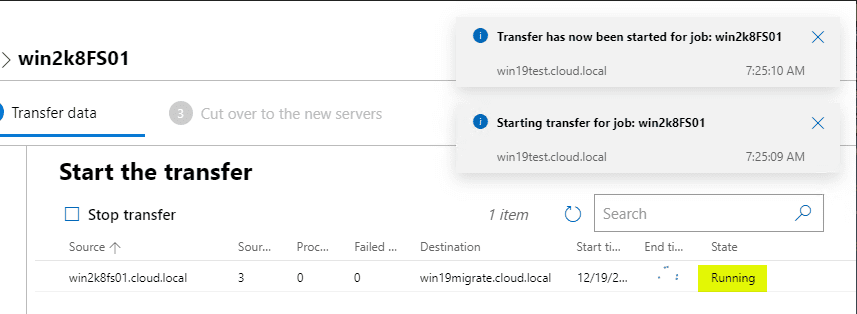
Begin the transfer by clicking the Start transfer button.
I ran into an error similar to what I saw with Windows Server 2003 where files had no size once transferred and the transfer finished with errors.
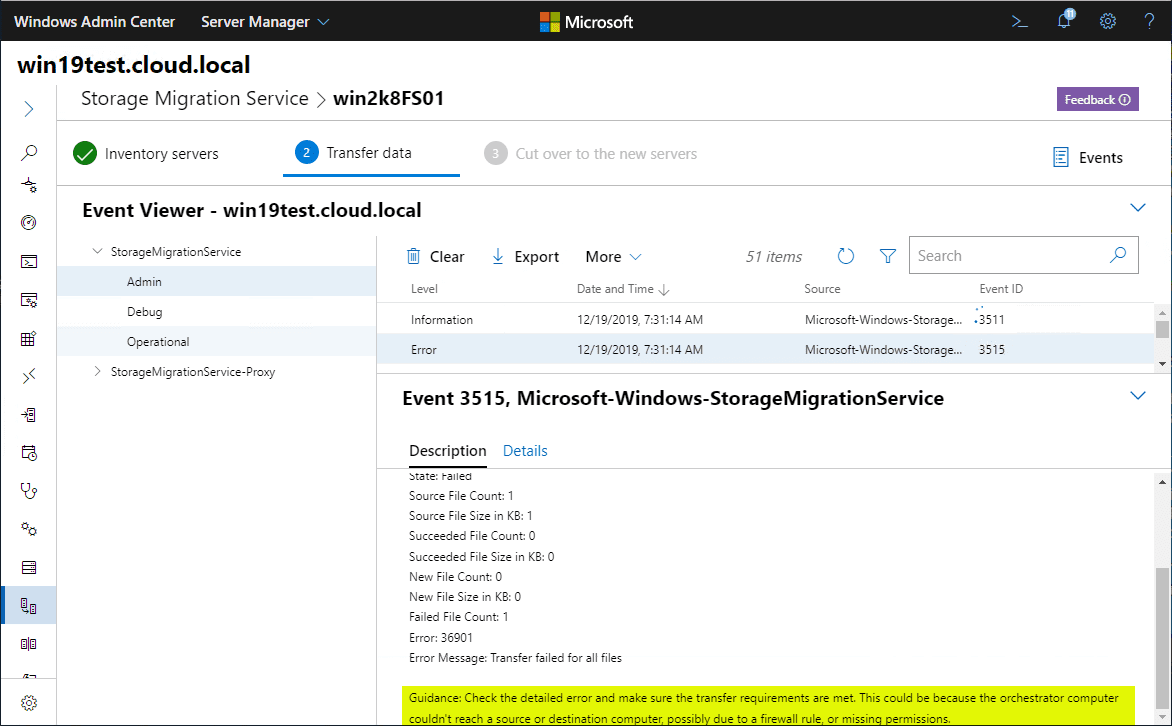
After getting the error, I found the following documented in the Storage Migration Service troubleshooting KB found here: https://docs.microsoft.com/en-us/windows-server/storage/storage-migration-service/known-issues
Error “Couldn’t transfer storage on any of the endpoints” when transferring from Windows Server 2008 R2
When attempting to transfer data from a Windows Server 2008 R2 source computer, no data transfers and you receive error:
Couldn’t transfer storage on any of the endpoints. 0x9044
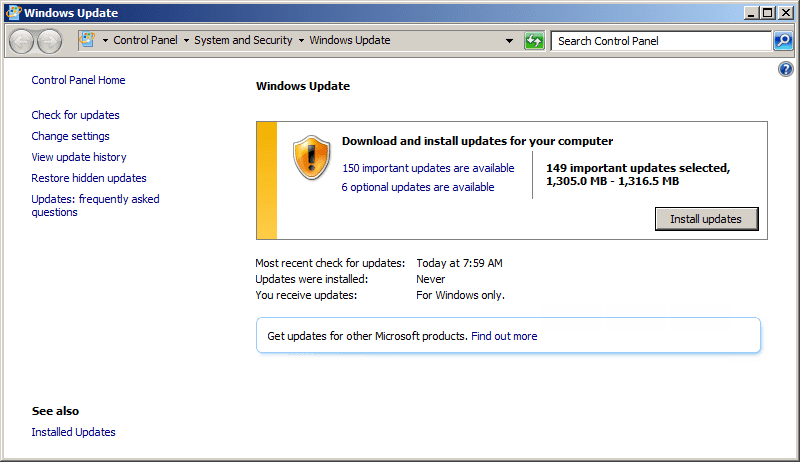
This error is expected if your Windows Server 2008 R2 computer isn’t fully patched with all Critical and Important updates from Windows Update. Irrespective of Storage Migration Service, we always recommend patching a Windows Server 2008 R2 computer for security purposes, as that operating system doesn’t contain the security improvements of newer versions of Windows Server.
So, I ran all the available updates, which were quite a few.
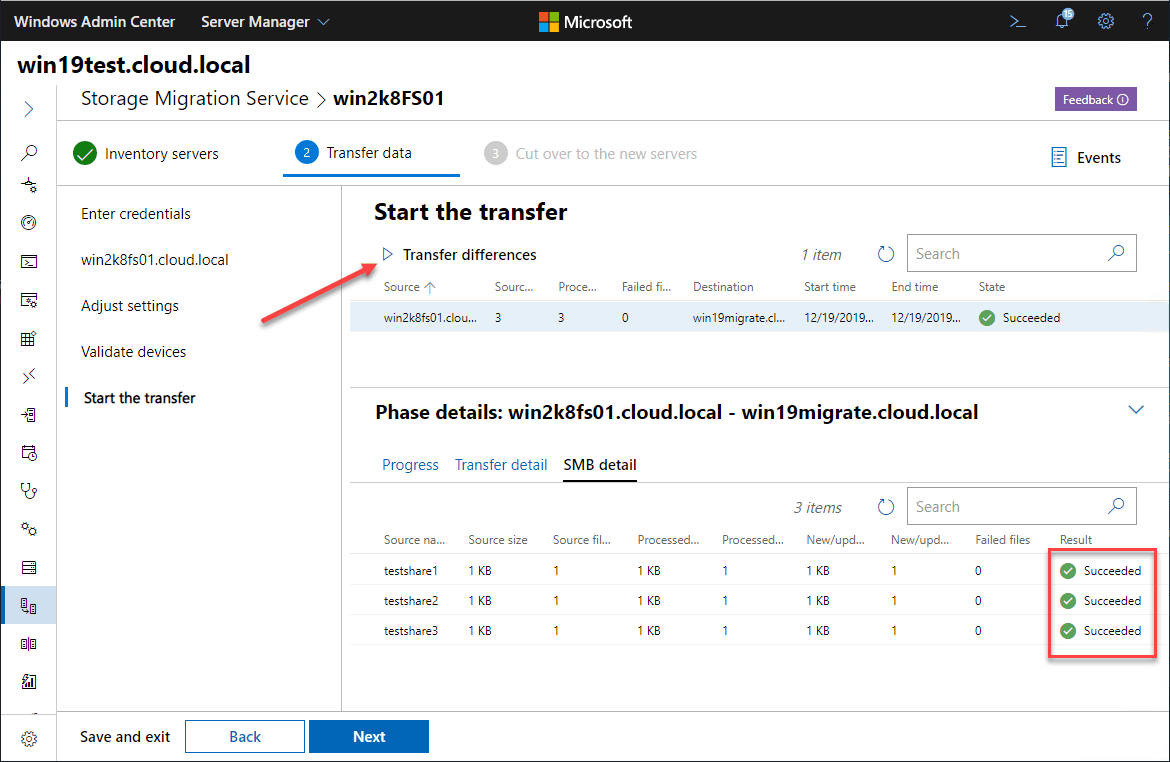
Once you have ran the transfer once, the button changes to Transfer differences. I clicked this button to transfer again. This time it Succeeded!
Now that the data is transferred over, it is just a matter of performing the cutover. This is the process that assumes identity.
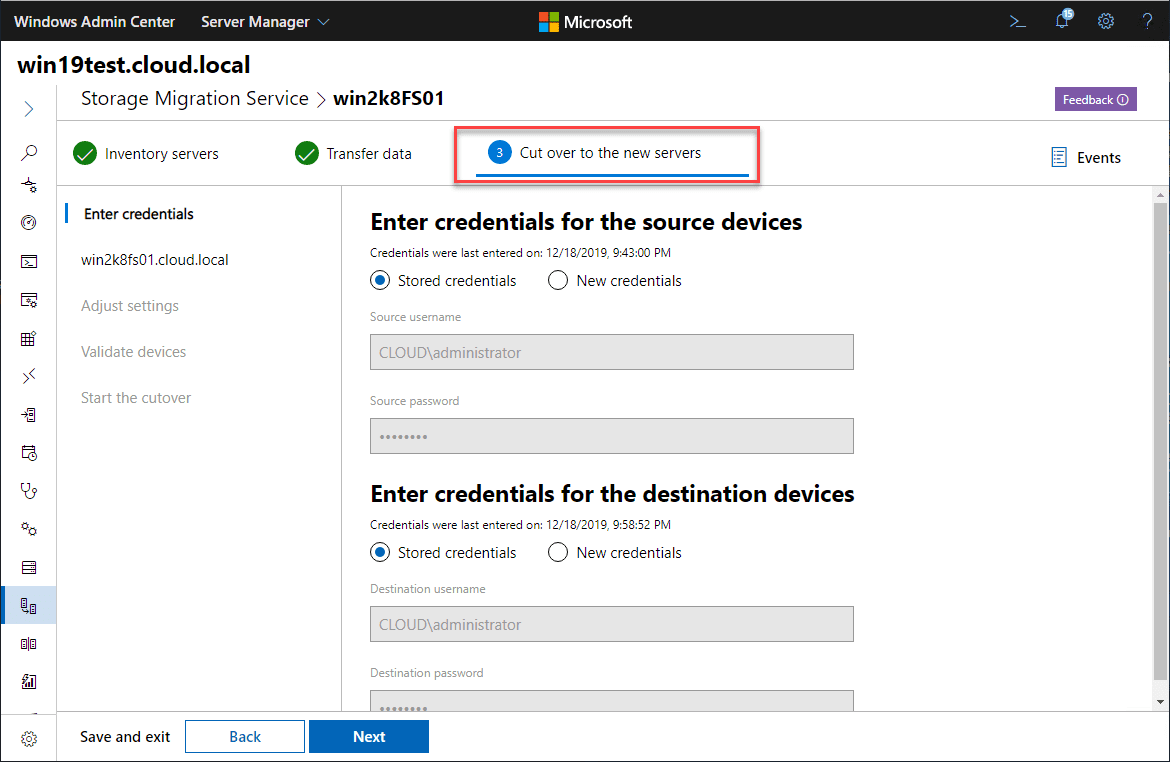
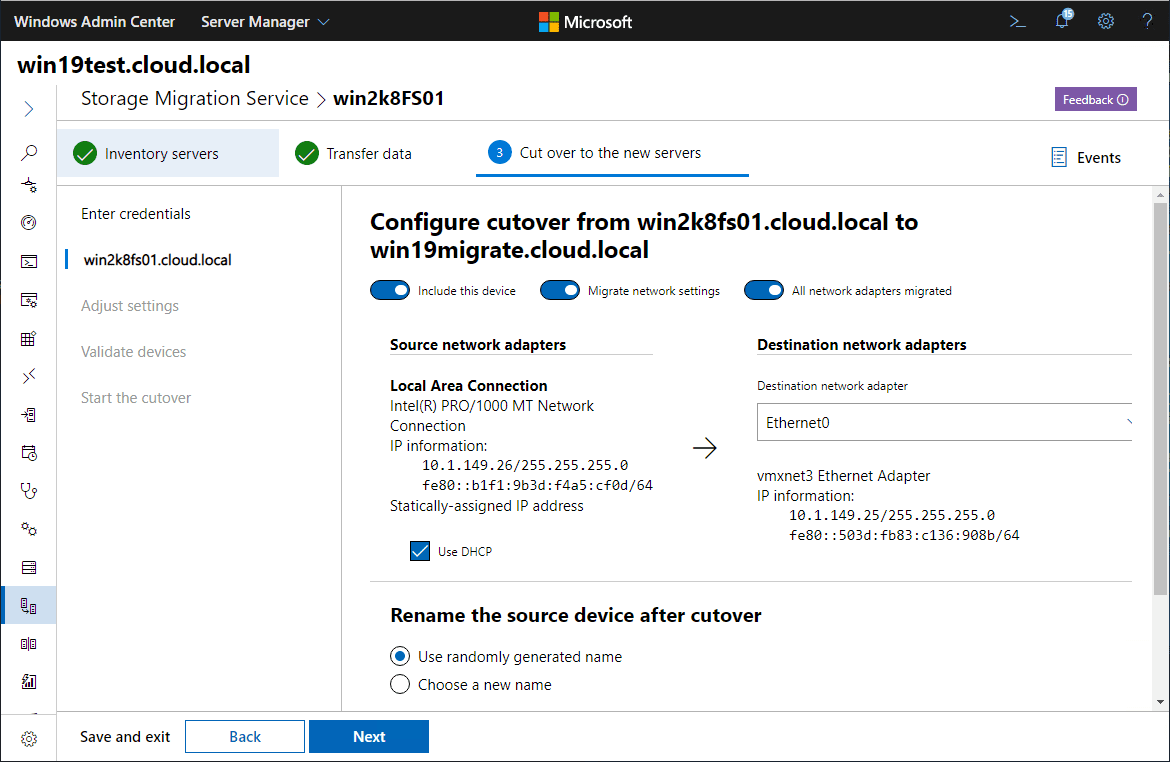
Choose the source and destination network settings as well as how you want the rename of the source Windows Server 2008 R2 server to happen.
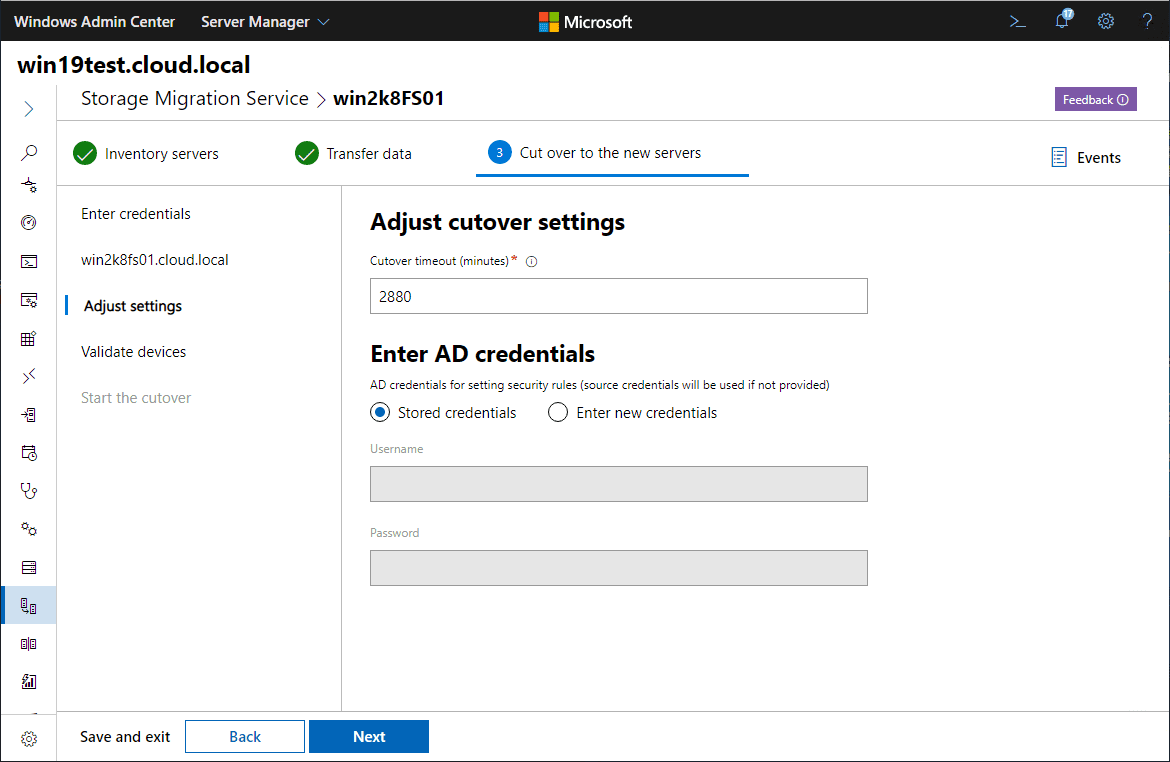
You can adjust timeout settings as well as AD credentials.
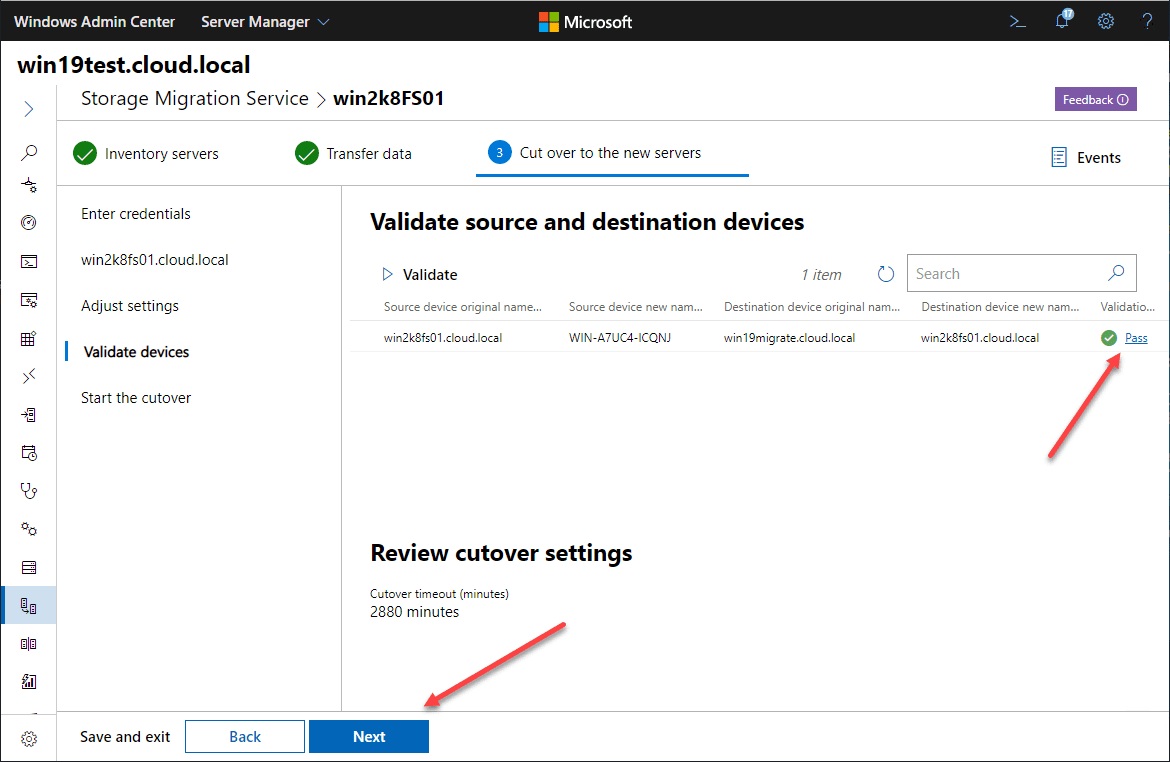
Validate the source and destination computers which in our case is going to migrate Windows Server 2008 R2 to 2019.
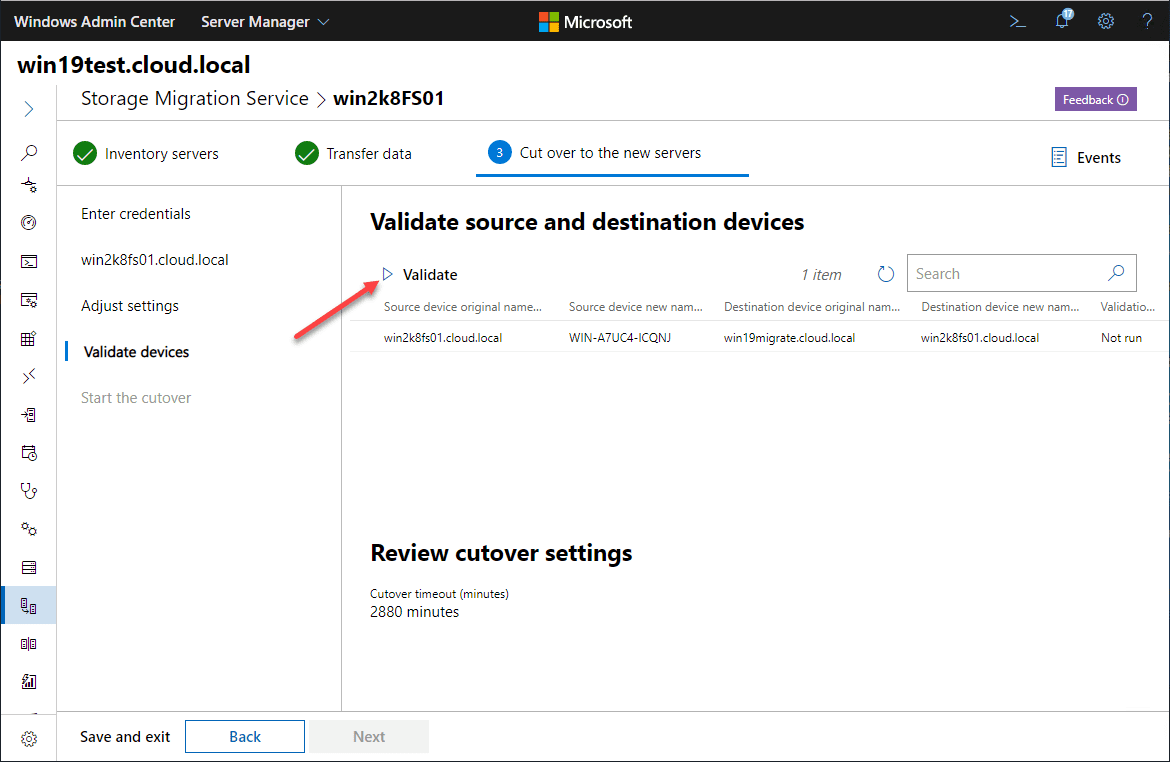
Validation passed, ready to perform the cutover.
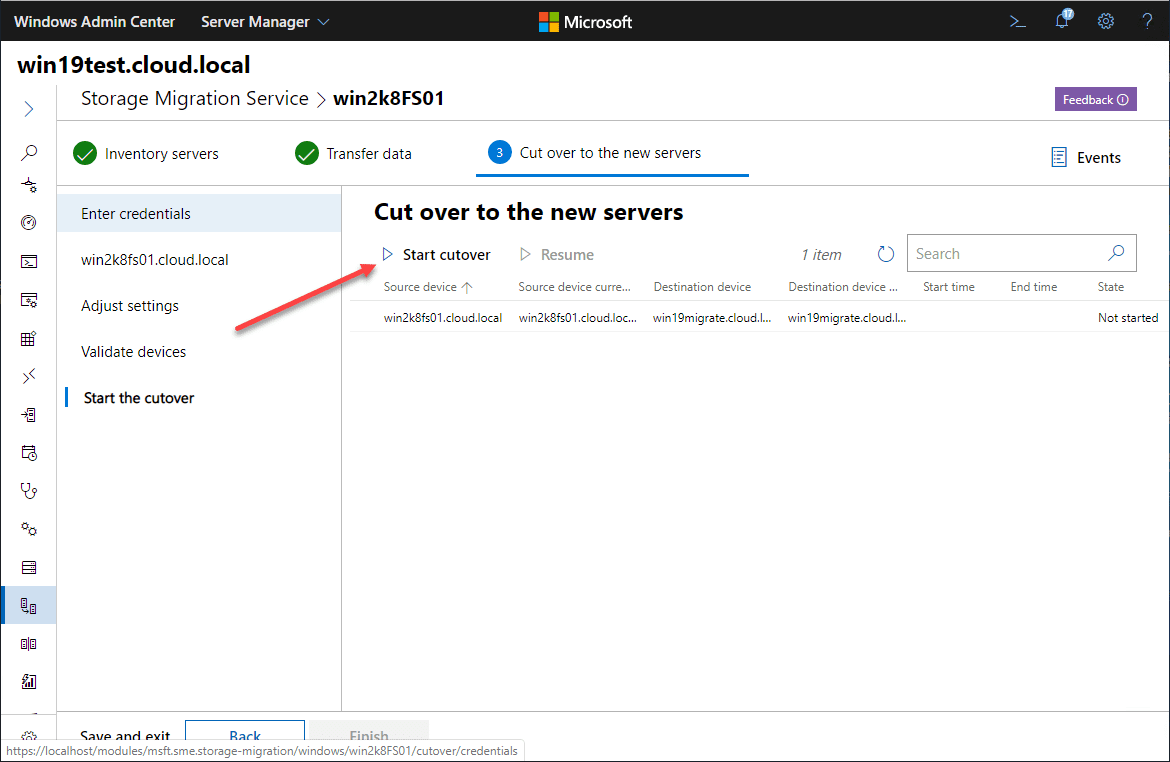
Click the Start cutover button to begin the cutover process.
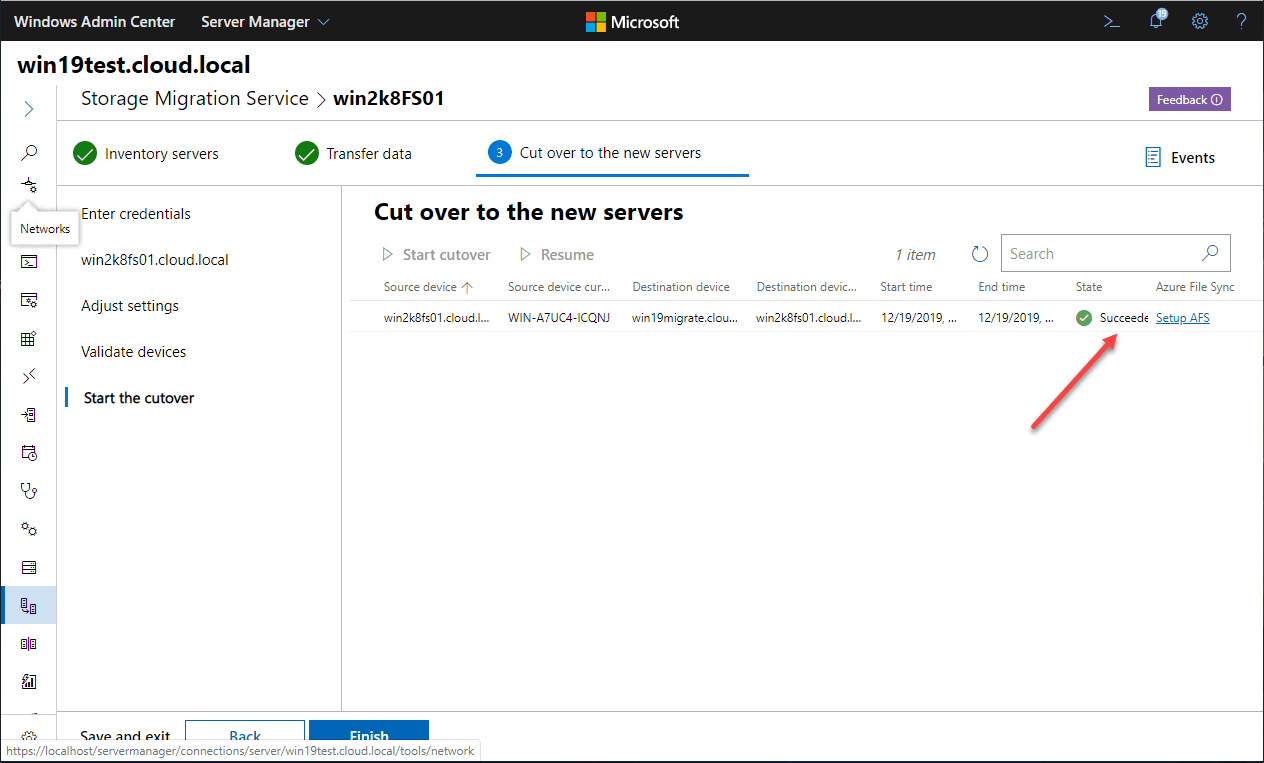
The cutover is successful.
As you can see, we have been able to successfully migration Windows Server 2008 R2 to 2019 using Storage Migration. The name transferred over along with the network settings.
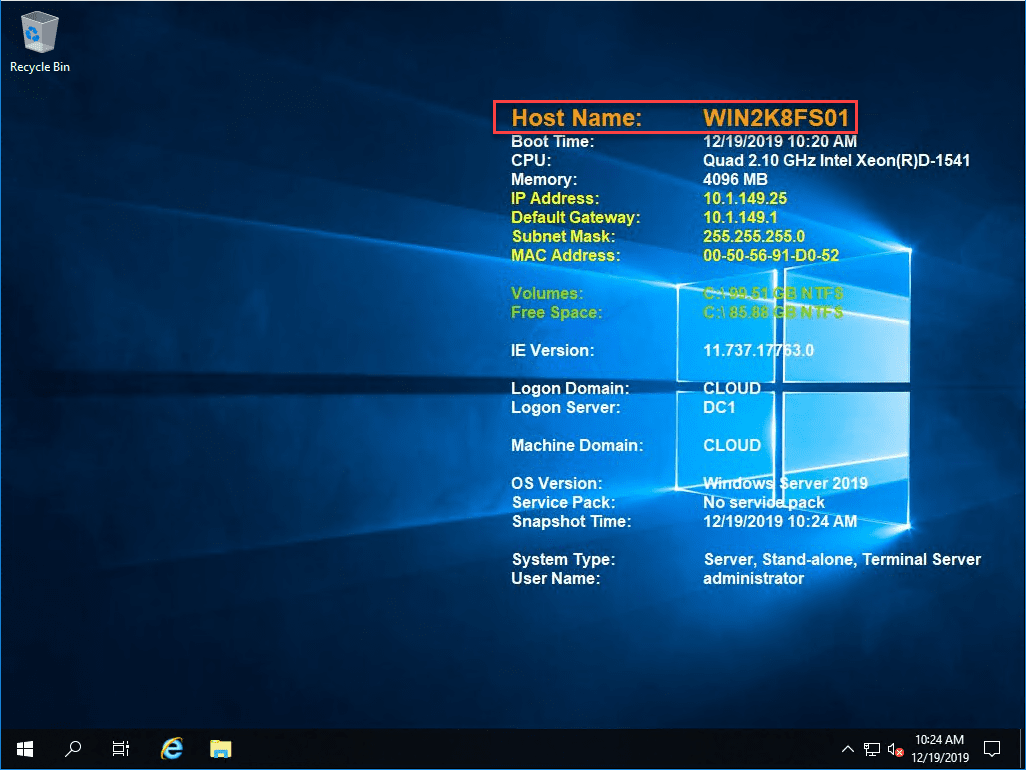
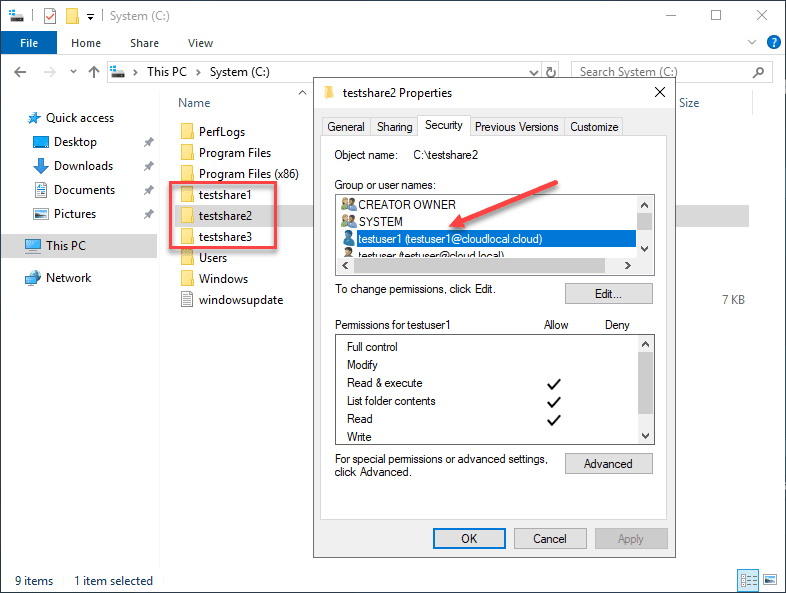
Additionally, I checked the shares and they are intact along with data as well as customized permissions.
Wrapping Up
If you are looking for an easy way to migrate Windows Server 2008 R2 to 2019, Storage Migration Service is a great way to do it. It makes the process as painless as it can be and does all the heavy lifting in the background.
Make sure you have your Windows Server 2008 R2 server updated with the latest updates available before running the migration as this will hopefully prevent you from seeing any errors as I saw before updating.
As January 14, 2020 rapidly approaches, leveraging great tools like the Storage Migration Service found in Windows Admin Center definitely helps to take the pressure off the process of a Windows Server 2008 migration or upgrade.
Google is updating how articles are shown. Don’t miss our leading home lab and tech content, written by humans, by setting Virtualization Howto as a preferred source.
About The Author