Running VMware vSAN in the home lab environment rocks. It has allowed me to effectively have a great HCI solution running commodity hardware with the ability to scale storage as needed. I have been running off a pair of NVMe drives in my two-node configuration for over a year now and have slowly ran short on space. I had another NVMe drive in each of my hosts running as a standalone datastore for other uses, etc. However, after adding a third host for management workloads and standalone datastores, I wanted to reclaim the standalone NVMe storage in each of my vSAN hosts and expand my vSAN storage. Not only will I gain the space benefits but also performance improvements by increasing the number of disks in my capacity disk group. In this post, we will take a look at how to increase VMware vSAN space and performance add disks to disk group to see how easy it is to expand an existing vSAN datastore and add additional physical disks into the disk group.
Considerations to Increase VMware vSAN Space and Performance Add Disks to Disk Group
There are a few things you need to think about with when thinking about increasing VMware vSAN space and performance adding disks to your disk groups. VMware vSAN is very forgiving in adding space to vSAN and the process is extremely painless.
There are two ways that you can expand VMware vSAN space or when you see reduced performance across the vSAN cluster.
- Expand the storage capacity space and performance by adding disks to your capacity disk groups.
- Add an additional vSAN hosts to increase performance and capacity
After you expand cluster capacity you can perform a manual rebalance operation to distribute resouces evenly across the cluster.
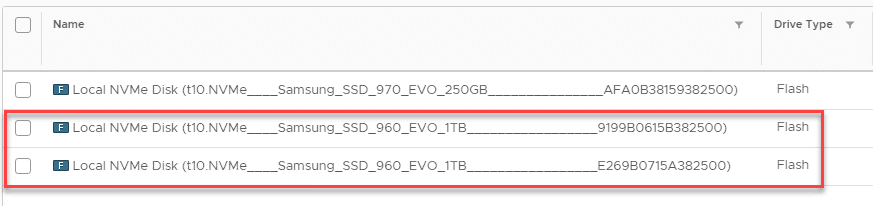
When you add a new physical disk you need to make sure the physical disk type matches the type of disk making up the disk group as it is, either spindles or flash. Additionally, you need to make sure the disk is not claimed by another datastore or any other processes such as scratch, coredump, etc (not likely if you are adding a new disk but may be if you are claiming an existing disk for use with vSAN). I ran into a few issues since I was reclaiming a disk from an existing datastore for use with vSAN.
Removing Claims on Existing Disks to Add Disk to VMware vSAN Disk Group
As mentioned, I wanted to destroy an existing datastore so I could use the physical disk claimed by the datastore for adding a disk to vSAN. For me this involved the following:
- Moving existing VMs off the datastore before deleting it
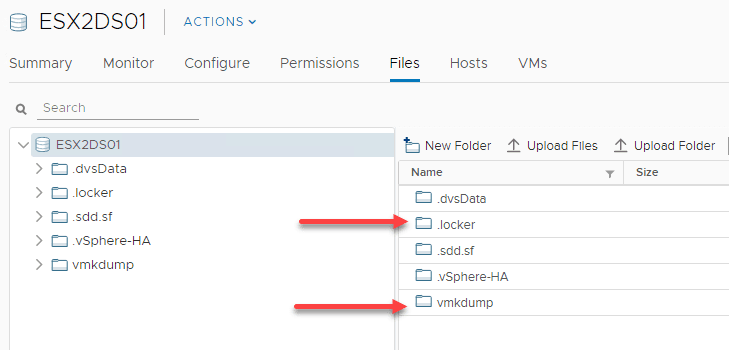
- Deleting the coredump file stored on this datastore
- Changing the scratch location from the datastore to /tmp/scratch

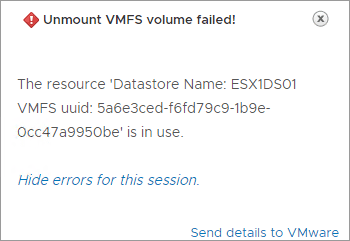
After I moved the existing VMs off the datastore, I simply tried to immediately unmount the datastore, however, receiving the error:

Removing the Scratch Location from the ESXi host
I found a comment posted a long while ago on a blog post by “Henry” providing a great way change the location of the scratch directory without a reboot of the host.
I will give the concise steps here. SSH into the host and run the following:
export NEWSCRATCH="/tmp/scratch"
mkdir -p ${NEWSCRATCH}/{core,var/tmp,log}
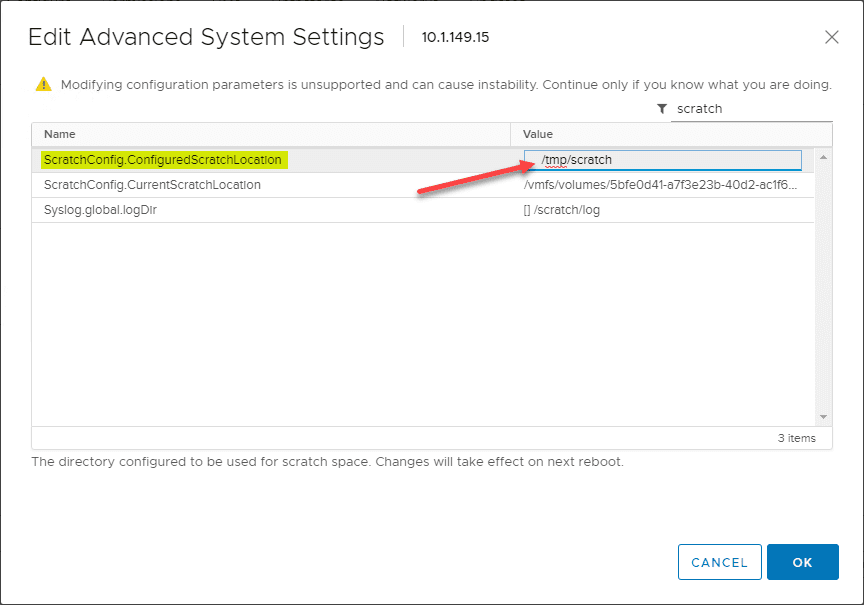
Now go to the web client and change your configured scratch location. This is found under the Configure > System > Advanced System Settings you can filter on the word scratch. Populate the ScratchConfig.ConfiguredScratchLocation value with the value you created in the mkdircommand above.
cat /etc/vmware/locker.conf; echo
# This should show "/tmp/scratch 0"

vim-cmd hostsvc/advopt/view ScratchConfig.ConfiguredScratchLocation
# value should contain "/tmp/scratch"

Repoint current scratch to a new location (still SSH):
– run:
ln -sfnv "${NEWSCRATCH}" "/scratch"

Restart _all_ running services (still SSH) – this may take a lot of time
– run:
( for s in /etc/init.d/*; do echo $s; $s status && $s restart; done )

Check that new location is used (using SSH):
– run:
vim-cmd hostsvc/advopt/view ScratchConfig.CurrentScratchLocation
# value should contain “/tmp/scratch”
Now, you should be able to unmount and delete the old datastore.
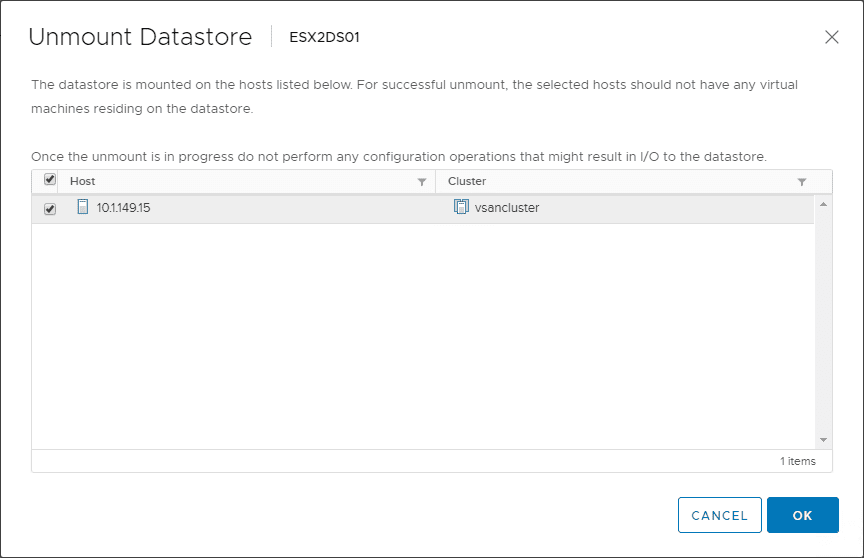
Datastore is unmounted, now it is ready to delete.
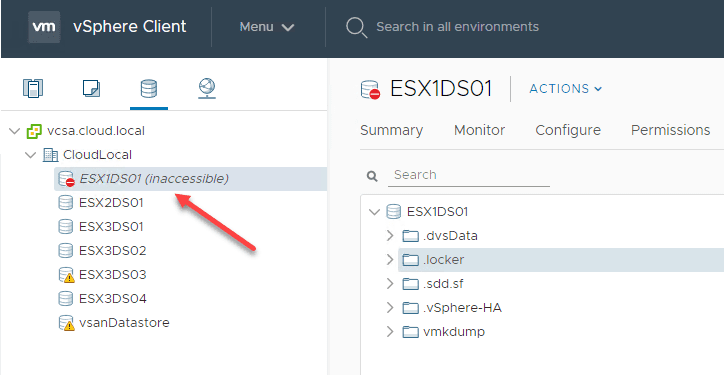
Confirm deletion of the datastore.

Increase VMware vSAN Space and Performance Add Disks to Disk Group
The process to actually increase VMware vSAN space and performance add disks to disk group process is fairly easy. For me, the hard part was just getting the disks freed up to add the vSAN disk group.
Right click the vSAN Cluster > Configure > vSAN > Disk Management then click the little disk symbol with a “+” sign.
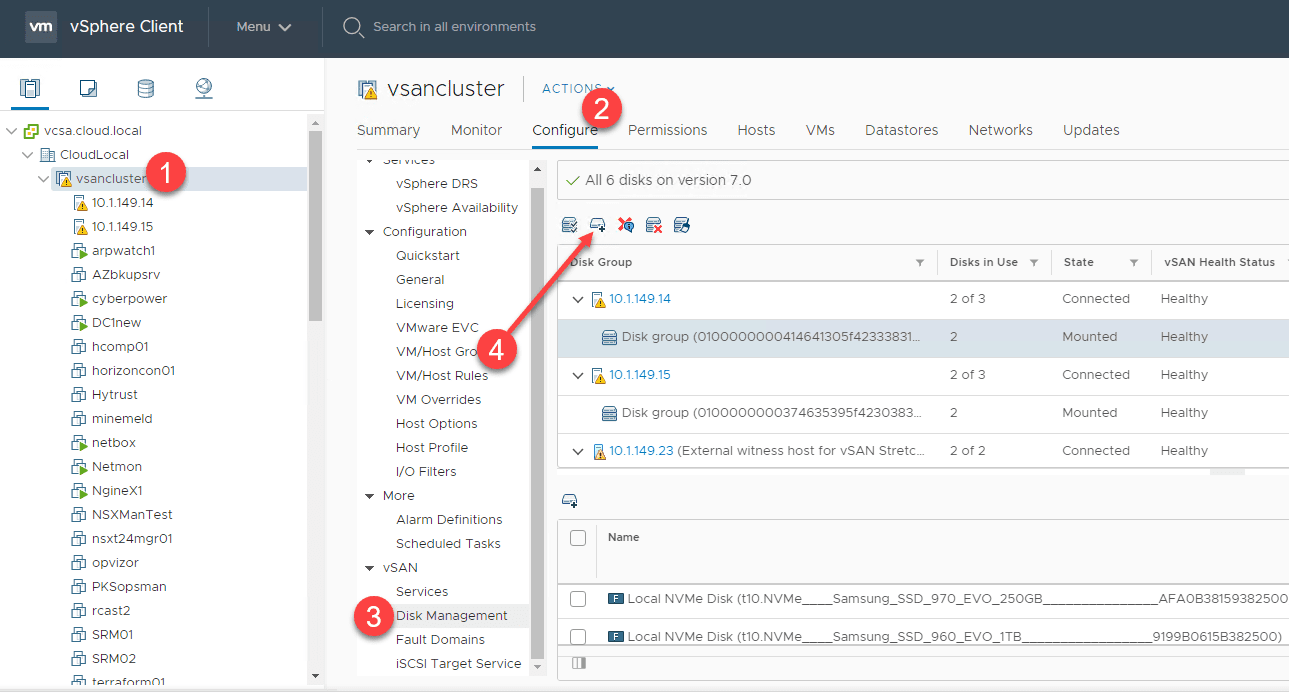
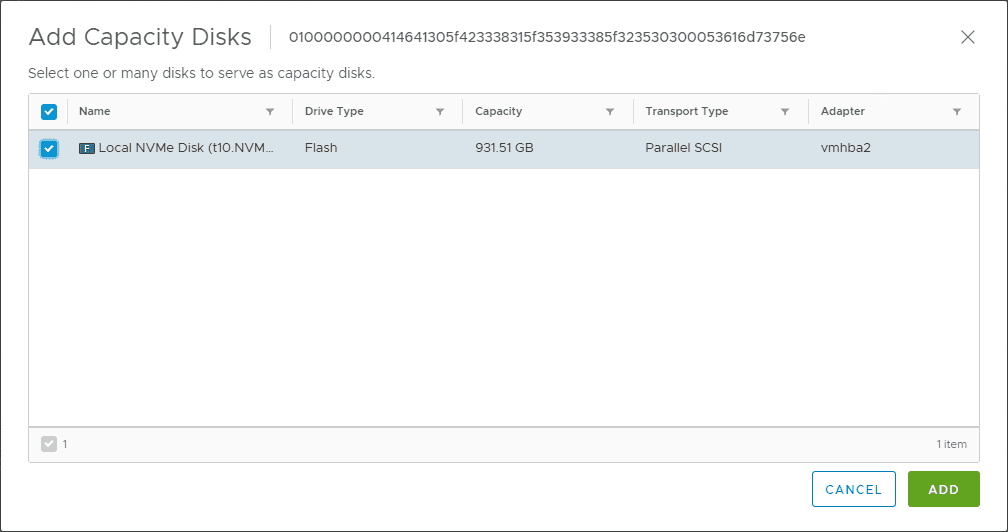
Choose the disk to add to the VMware vSAN disk group. Here I am adding another Samsung NVMe drive to the home lab.
You will see vCenter processes fire off to add the new disk to the disk group.
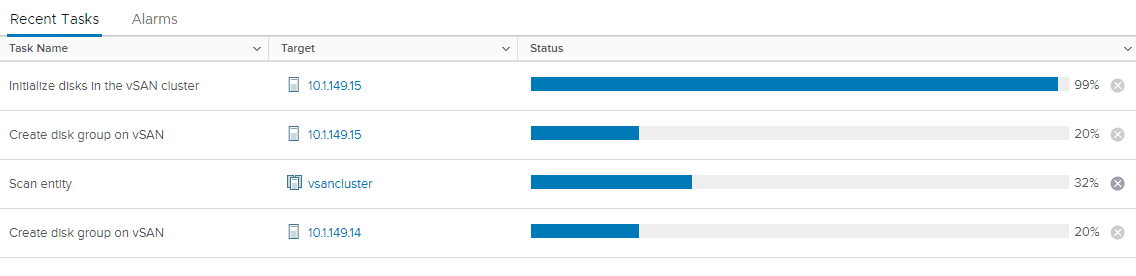
Now, instead of (1) capacity disk, I have (2) in the VMware vSAN disk group.
You may or may not see the automatic disk rebalance operation needed. Depending on how much space was in use on your existing disks, this will either trigger a rebalance or not. The threshold is 80% use on any disk.
As you can see, even with adding the new disks, it isn’t showing a rebalance needed. This is found in the Monitor > vSAN > Health > Cluster > vSAN Disk Balance section.

Wrapping Up
One of the tremendous benefits to VMware vSAN HCI solution is he easy process to scale your storage and performance. To Increase VMware vSAN Space and Performance Add Disks to Disk Group or add additional vSAN hosts to the cluster. It’s that simple. As shown, if you are in a home lab configuration and you have disks you may want to bring into the vSAN environment, you may have to work through a few “in use” challenges to claim the disks for use with VMware vSAN.
More in this topic
Discuss this in the Community
Google is updating how articles are shown. Don’t miss our leading home lab and tech content, written by humans, by setting Virtualization Howto as a preferred source.
About The Author
