Some time ago I posted an article covering the installation of MineMeld which is a community driven threat feed project that was released to the community by Palo Alto. The product is an extremely cool appliance that allows aggregated various threat feeds based on URL lists, IP lists, or domain name lists. The installation is easily accomplished on an Ubuntu installation via a few steps. Check out the post where we covered the installation inside Ubuntu. If you are running a firewall that allows creating dynamic external lists you can then use these lists to have dynamic firewall rules based on the lists that are imported. This is a great way to aggregate real time threat feeds that are pulled from the MineMeld installation and have these imported into a firewall so the intelligence can be used in real time. Let’s take a look at how to Create Dynamic Firewall Rules Based on MineMeld threat feeds.
Create Dynamic Firewall Rules Based on MineMeld Threat Feeds
The follow walk through of the process to add new a new custom miner, processor, and output node to MineMeld is based off my interpretation of the following Palo Alto KB article: https://live.paloaltonetworks.com/t5/MineMeld-Articles/Using-MineMeld-to-Create-a-Custom-Miner/ta-p/227694
Following the KB, the first thing I did was add a new node based on the respective prootypes. The KB has you create a miner, then processor, and then the output node. You need these three components to successfully pull threat feeds down, process and deduplicate them, and then present them as output to the MineMeld web server.
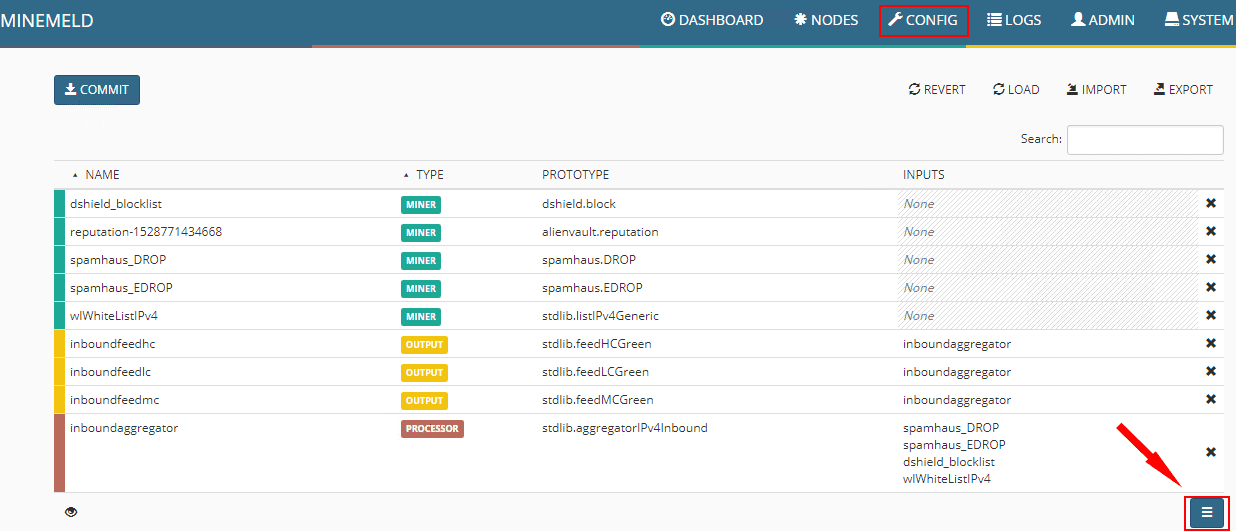
The easiest way to do this is to duplicate or create from the existing Prototypes that are already available in MineMeld. To do that navigate to Config > elipse button
Here we search for “ITcert” which will bring up the Infosec feeds prototype. We will use this prototype to create a new prototype to use to pull Ransomware URL lists.
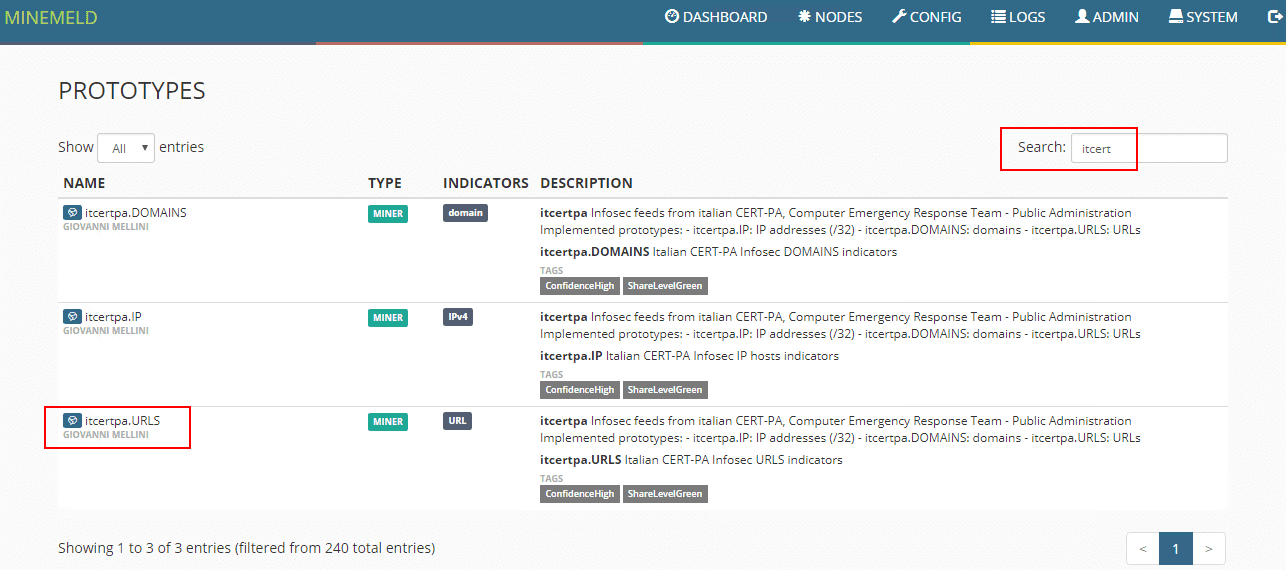
Click the New button.
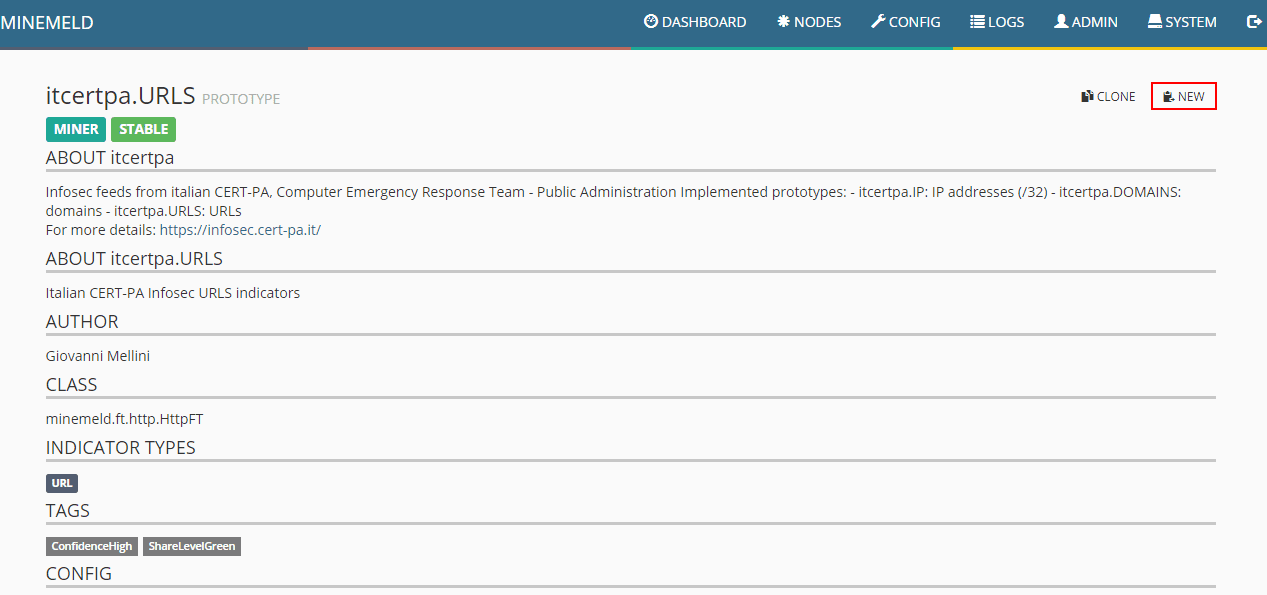
Name the new Prototype and edit the prototype to reflect the following. This will pull the latest URLBL list from the Ransomware tracker feed at ransomwaretracker.abuse.ch. Be sure to update the regex to reflect the below which strips off the http and https.
age_out:
    default: null
    interval: 600
    sudden_death: true
attributes:
    confidence: 80
    direction: inbound
    share_level: green
    type: URL
ignore_regex: ^#
indicator:
    regex: ^(http[s]*://)(.*)
    transform: 2
source_name: itcertpa.URLS
url: https://ransomwaretracker.abuse.ch/downloads/RW_URLBL.txt
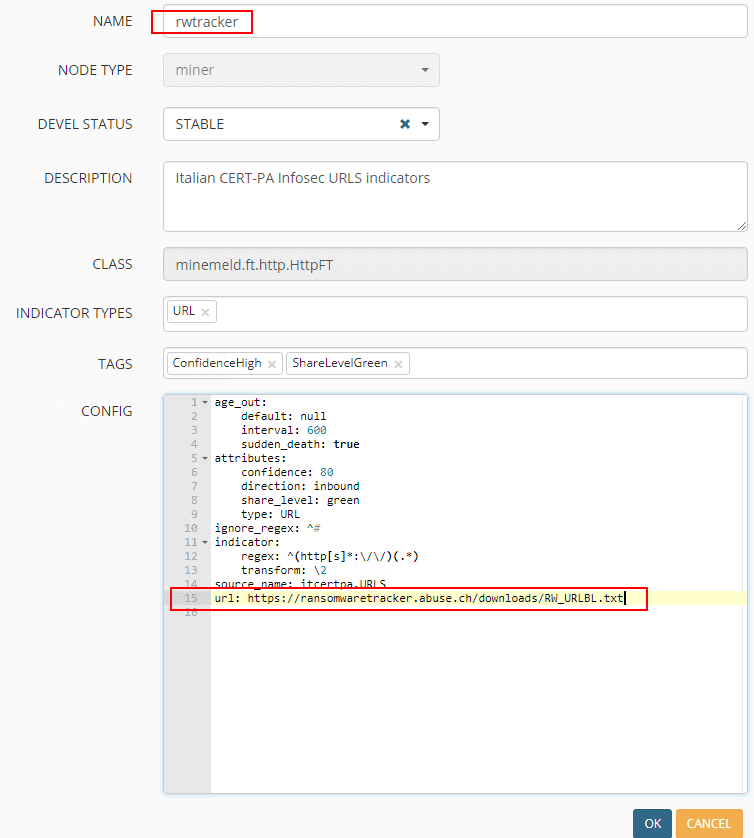 Editing the prototype template for a new miner to pull ransomware URL feeds
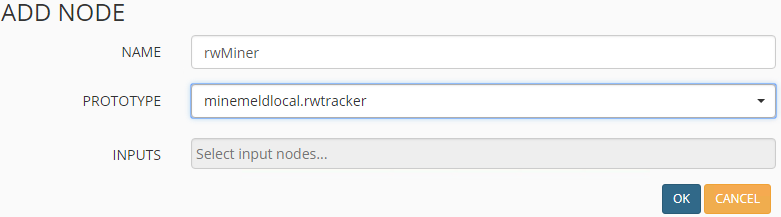
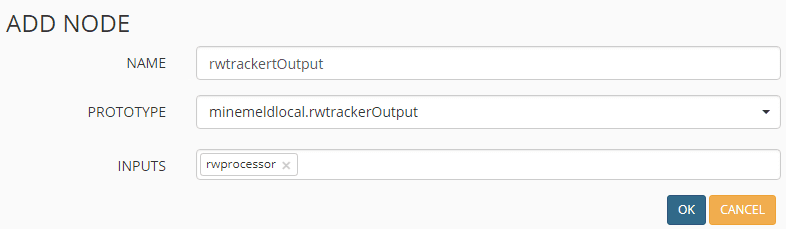
Now that the prototype is created for the miner to match our needs, we actually create the miner from the prototype. To get to the add screen, click the “eye” over on the bottom left hand corner, and then click the “+” button. This will actually allow you to add the node itself.
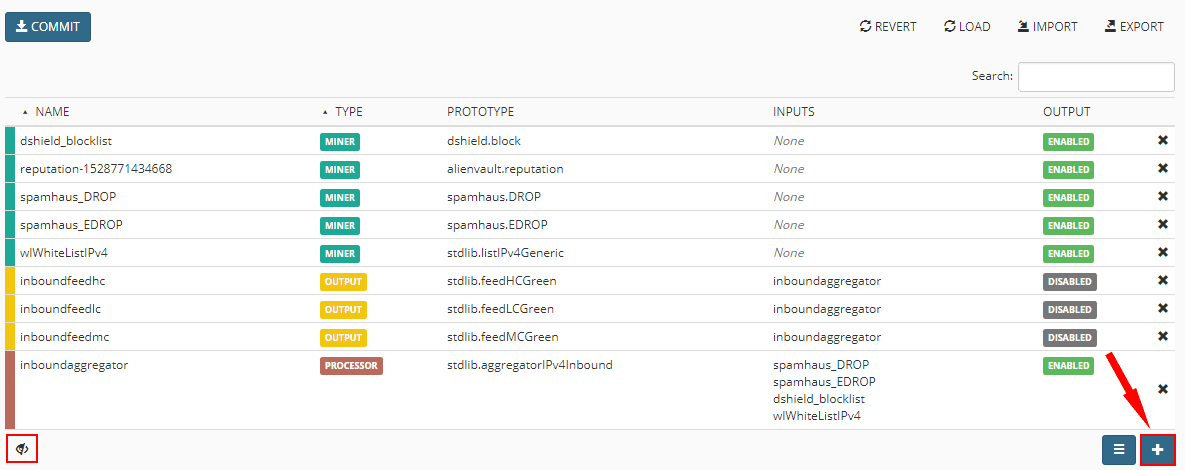
Adding the Miner node to MineMeld. You basically need to just give it a name and choose the Prototype to base it off of.
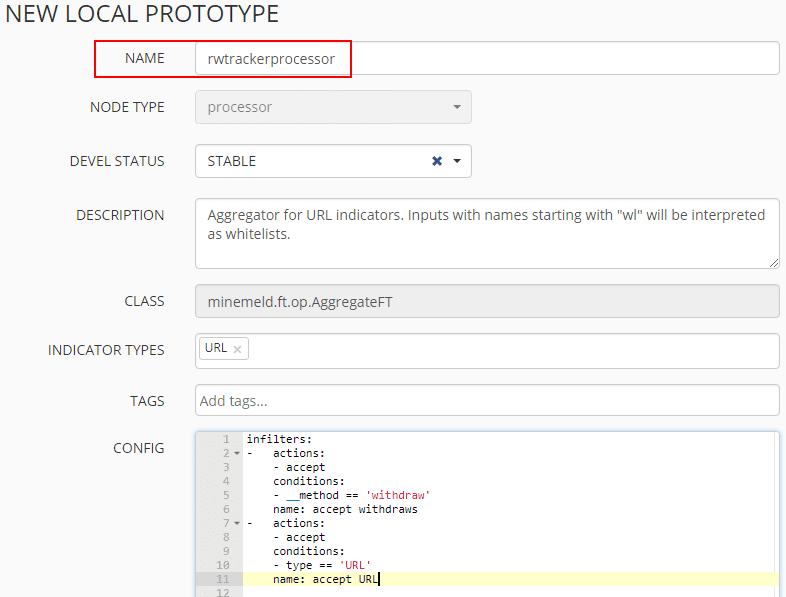
Now that the miner is added, next is the aggregator or processor. This node processes and deduplicates entries among other things. The prototype we will create a new entry from is the stdlib.aggregatorURL entry.

Click the New button and edit it as below. Copy and paste the config listed here:
infilters:
-   actions:
    - accept
    conditions:
    - __method == 'withdraw'
    name: accept withdraws
-   actions:
    - accept
    conditions:
    - type == 'URL'
    name: accept URL
Now that the prototype is added and configured, the aggregator/processor node can be added from that. Name the node, choose the prototype just created and add the Miner node as an input. The drop down will only display the node entries that apply which is helpful.

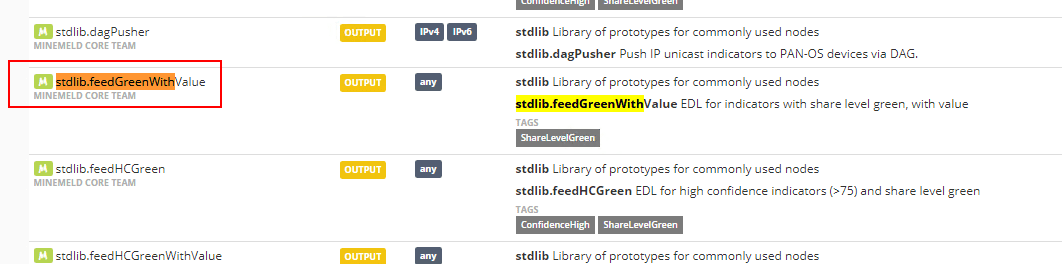
Finally, add the Output prototype that needs to be used. for this, we will use the stdlib.feedGreenWithValue. Choose this entry and click New.
Name the prototype and copy past the config below:
infilters:
-   actions:
    - accept
    conditions:
    - __method == 'withdraw'
    name: accept withdraws
-   actions:
    - accept
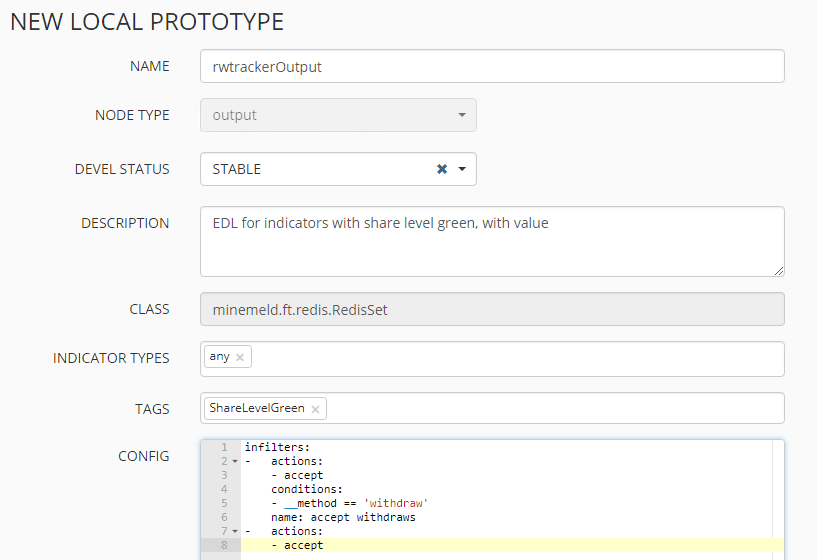 Creating the Output node prototype based on the prototype
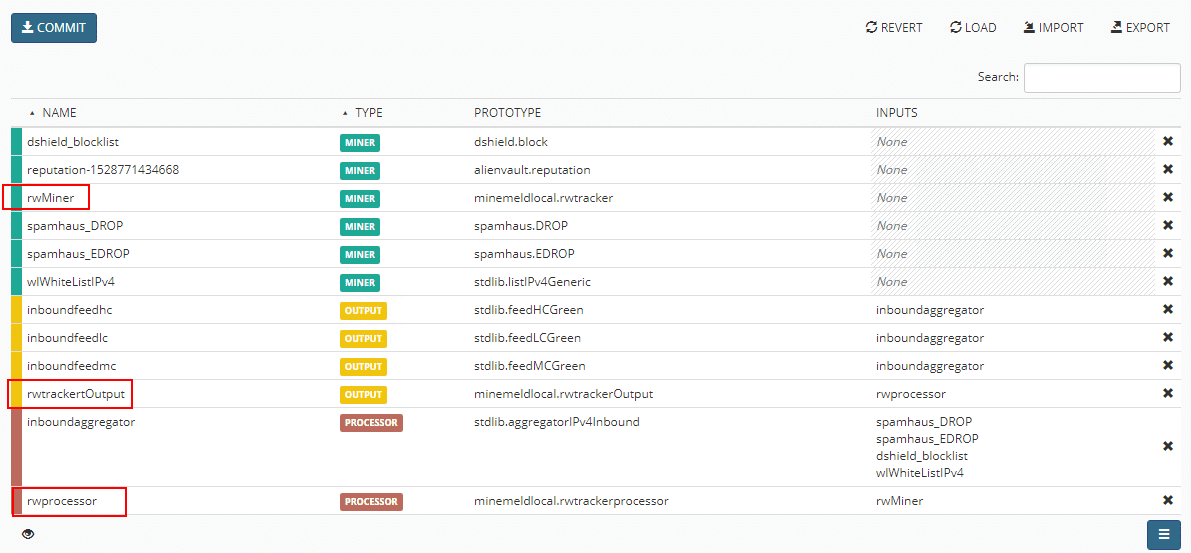
Once again, add the appropriate node based on the newly created prototype. Then add the aggregator/processor node that was just added as the input for the Output node.
Now that all three nodes have been added, verify they are displaying and click the Commit button in the upper left hand corner.
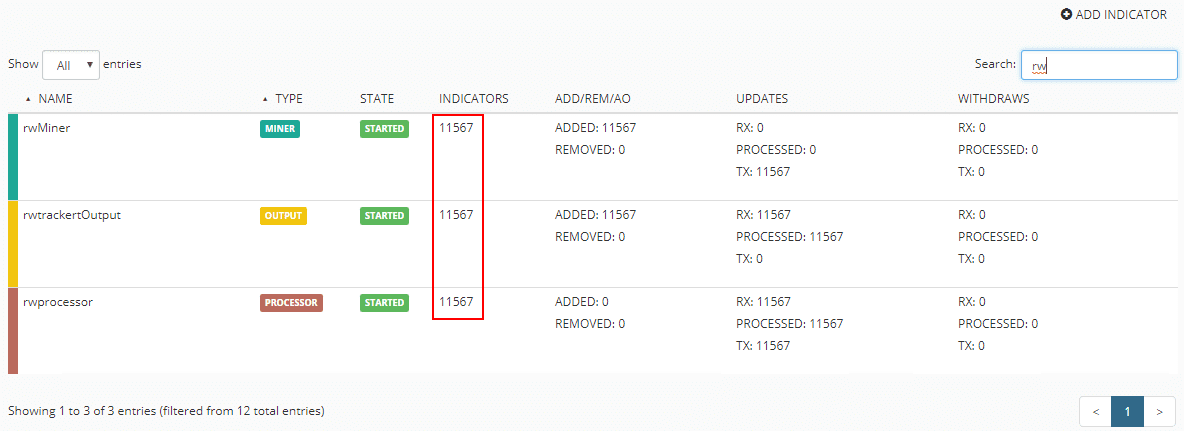
Under the nodes screen, the indicators column should reflect the entries pulled from the feed in MineMeld.
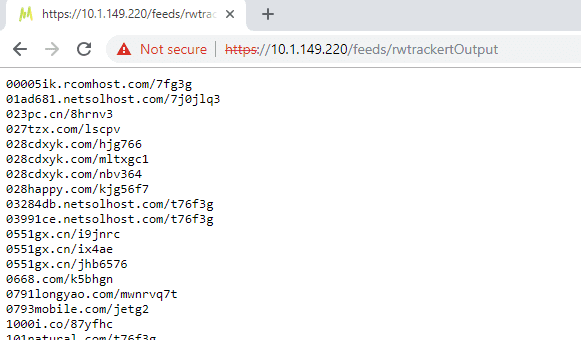
If you navigate to the feed URL which is found by clicking on the Output properties, you should see a list of URLs without the prefixes, etc.
Certificates
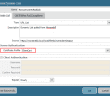
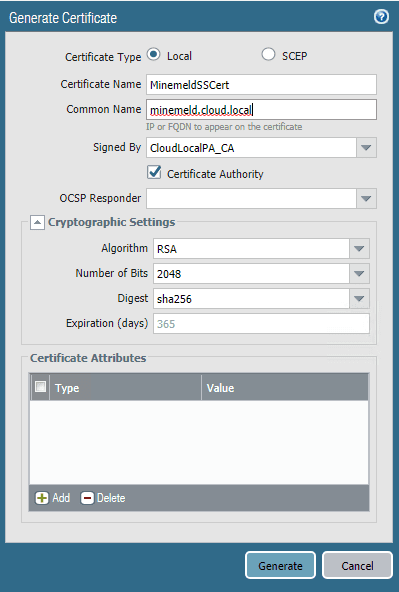
In order for the Palo Alto firewall to talk correctly to the MineMeld appliance, there are two ways this can be accomplished from a certificate standpoint. You can download and use the GoDaddy certificate that is used on the MineMeld installation, which is downloadable from Palo Alto, or you can use the Palo Alto itself as the CA, which I have done, and import that certificate into the MineMeld appliance. Below, we are adding a cert for exporting to the MineMeld installation. Be sure to choose Certificate Authority to make the PA authoritative for the cert.
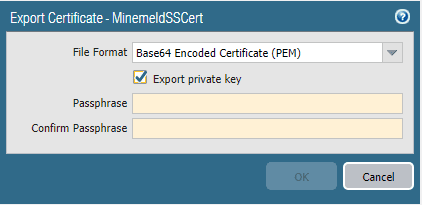
Choose to export the certificate from the Palo Alto.
The following link explains how to import this onto the MineMeld appliance.
- https://live.paloaltonetworks.com/t5/MineMeld-Articles/How-to-Generate-New-MineMeld-HTTPS-Cert/ta-p/101331
- ***Note*** I ran into some issues with the instructions here as there are some typos and problems with the instructions. I was able to work my way through the errors however pretty intuitively.
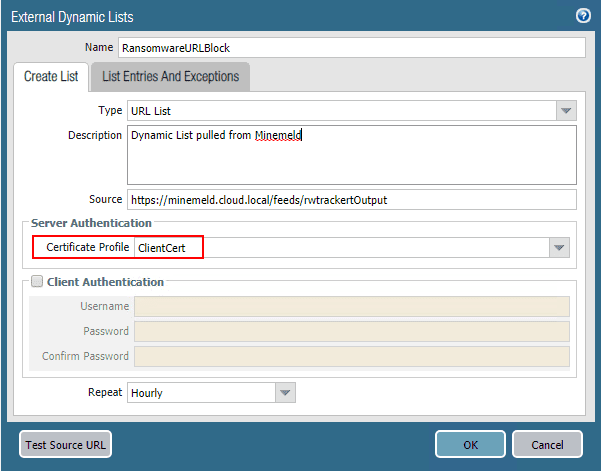
Now for the whole reason we did all of this – Creating the External Dynamic List on the Palo Alto. To create a new External Dynamic List, navigate to Objects > External Dynamic Lists and click the Add button. Here there are a couple of items to note, the source URL which is the feed URL on the MineMeld appliance. Also, the Certificate Profile which is the CA certificate profile if you are using the PA as a CA, or the imported GoDaddy cert if you followed the instructions listed in the link above.
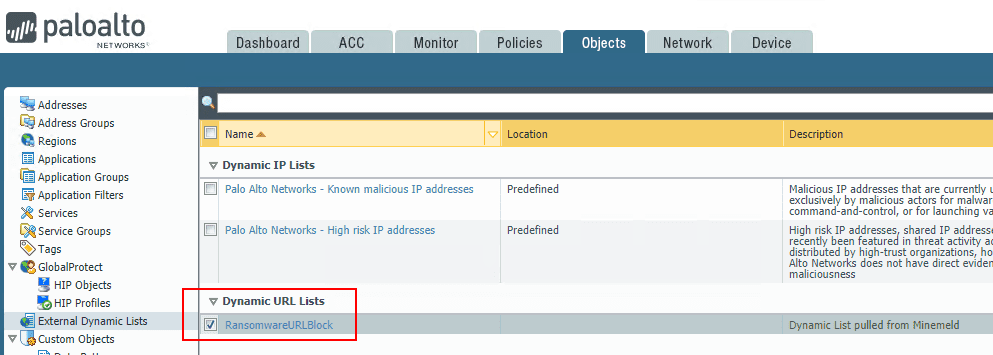
You now have a Dynamic URL list that can be used in Palo Alto security policies.
Thoughts
The process to use MineMeld to Create Firewall Rules Based on MineMeld threat feeds is somewhat involved, but easily accomplished once you understand the workflow presented from the MineMeld perspective. Once the feed is configured on the MineMeld appliance, the hard work is basically finished at that point. It is then a matter of creating the External Dynamic Lists on the Palo Alto that utilize the threat feeds presented by the MineMeld appliance. Stay tuned for further tinkering around with MineMeld and the Palo Alto External Dynamic Lists.
Google is updating how articles are shown. Don’t miss our leading home lab and tech content, written by humans, by setting Virtualization Howto as a preferred source.
About The Author