Replacing VMware vSAN Cache Disk and Resyncing vSAN Objects

In the previous post, VMware vSAN Home Lab Hardware Failure and Resiliency, I covered my first hardware failure in my vSAN home lab environment. The environment has been up and running now for around a year on an all flash, NVMe-based disk configuration. Of course, these are commodity drives purchased from Amazon, so not enterprise-grade hardware by any stretch. As covered, I was well pleased with how vSAN handled the failure and the resiliency of the solution. After ordering a replacement NVMe drive for the cache disk that failed, I replaced the drive and was ready to go with bringing the vSAN environment back to a healthy state. In this post, we will take a look at replacing VMware vSAN cache disk steps and resyncing vSAN objects.
Removing the Dead vSAN Cache Disk
A quick overview of my vSAN environment:
- VMware vSphere 6.7 Update 1
- 2-node stretched cluster with witness appliance
- All NVMe storage (cache and capacity) using commodity Samsung EVO drives
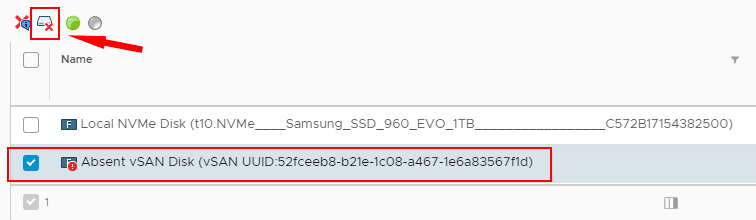
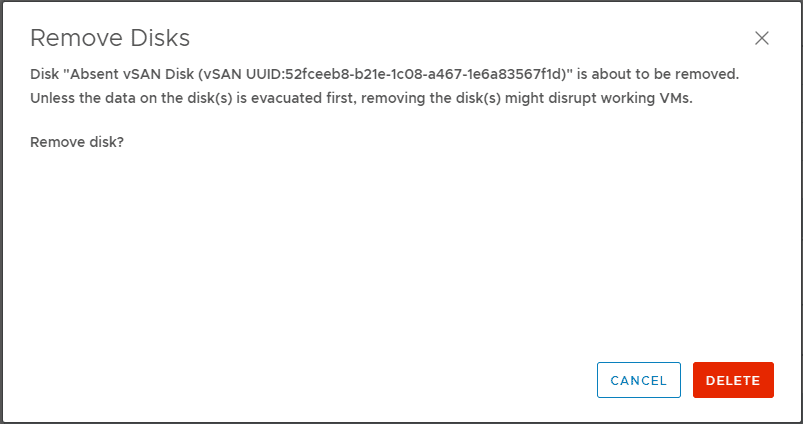
After the failure, the first thing I did was Google around on steps to replace vSAN disks to try to find a good step-by-step walk through or guidance directly from VMware, which I found in the VMware KB Remove Disk Groups or Devices from vSAN. This provides a good basic overview of the process involved and a few points to note, that I covered in the previous post, including removing the cache disk removes the disk group in general, etc. Just a quick look again at this process, I have already posted these images in the previous post, but as a quick refresher of the steps taken, this is how I removed the dead drive. I found many posts stating what seemed like the obvious, but you don’t want to physically remove the device before you remove it from vSAN. So, this is what I did.
Replacing VMware vSAN Cache Disk and Resyncing vSAN Objects
Now that the dead cache drive was removed from the vSAN configuration, I powered off the host and removed the dead drive, installed a new Samsung 970 250 GB NVMe drive, along with another 1 TB 970 for a standalone datastore, powered the server back up and was ready to bring vSAN back to a healthy state.
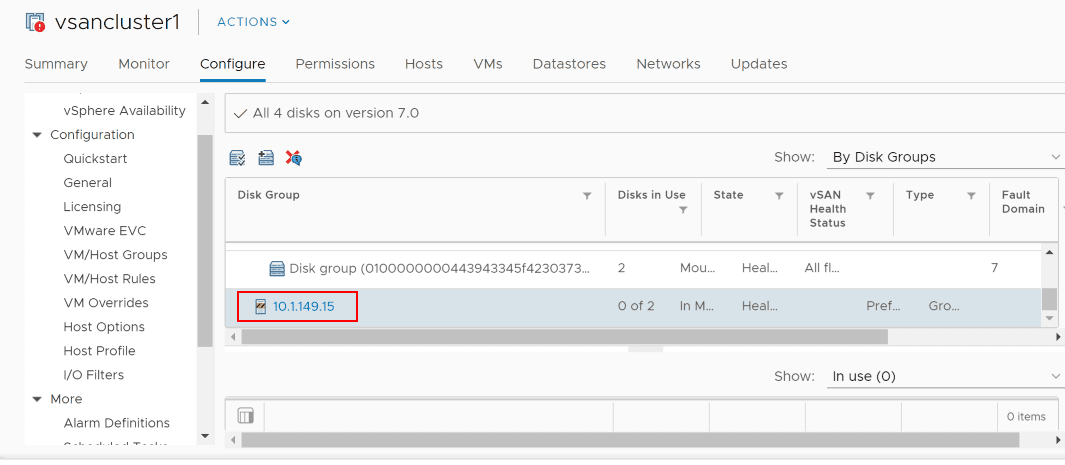
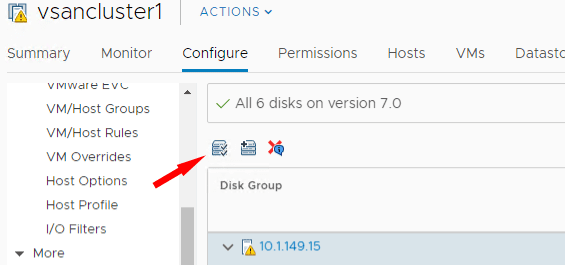
Now, we simply need to claim the disks to be used by vSAN. To do that highlight your vSAN enabled cluster and navigate to Configure > vSAN > Disk Management, select the particular host you want to claim disks for, and click the “Claim unused disks for vSAN” button which is the first button with the check marks.
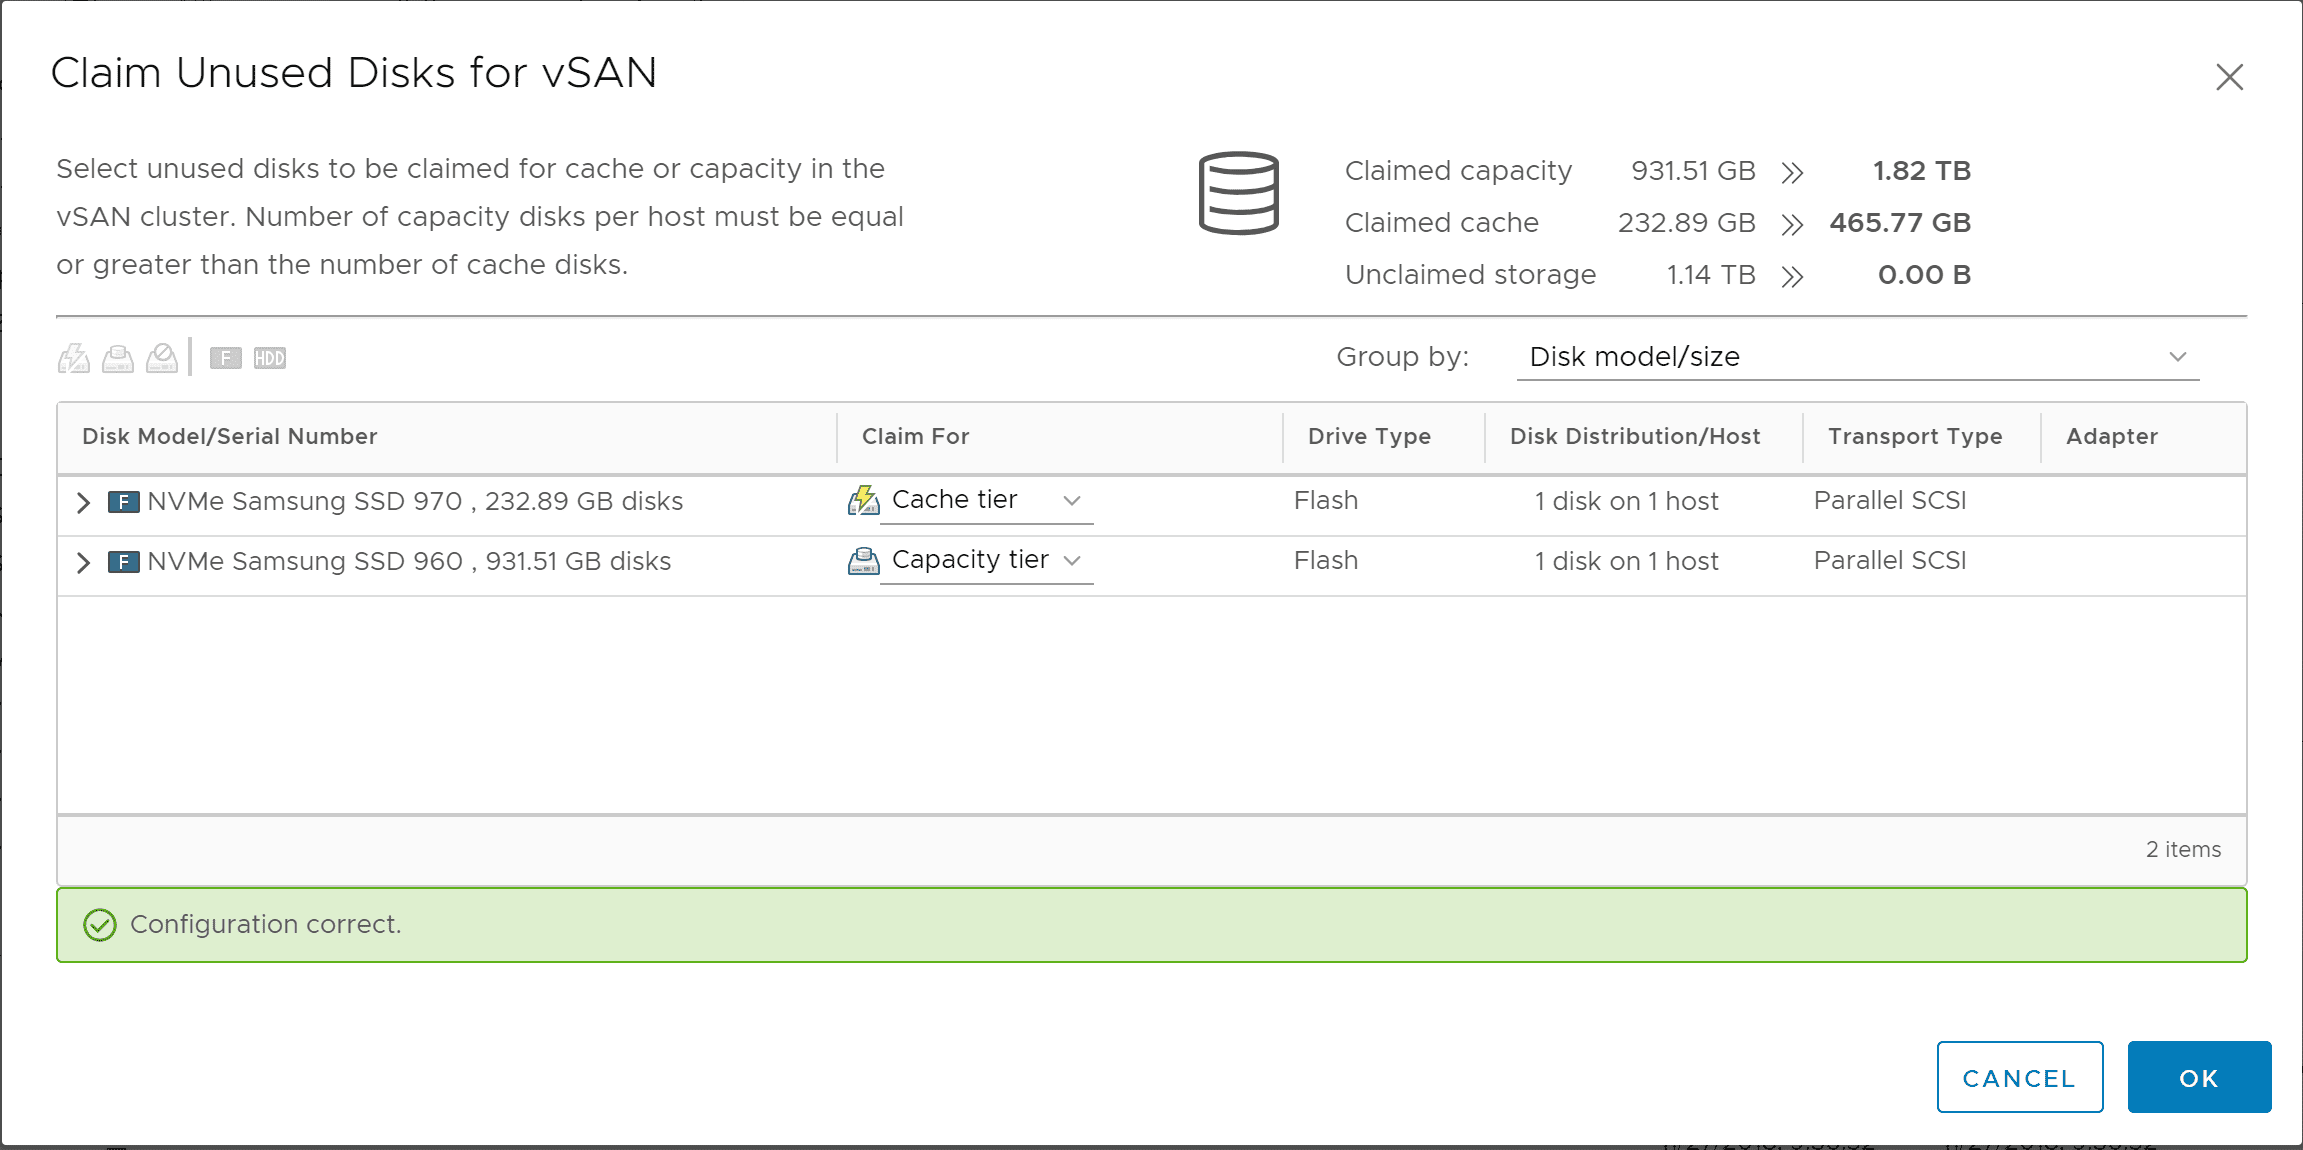
I now have a healthy cache disk displaying in the Claim Unused Disks for vSAN dialog. Select which drive(s) to use for the cache tier and which drive(s) to use for the capacity tier.

Resyncing the vSAN Objects
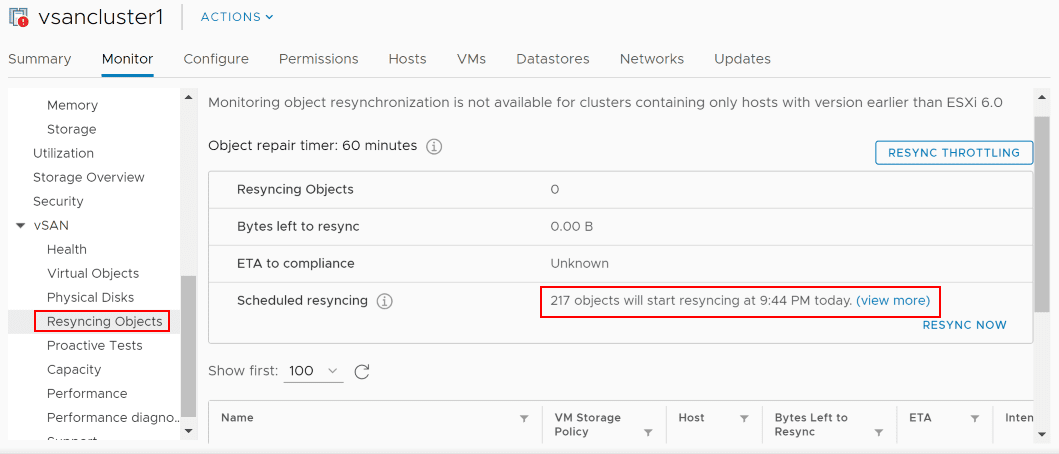
Now that disks have been claimed again on the host, the objects need to be resynced. This will happen automatically. However, you can also kick this off manually as well in the Resyncing Objects menu. As you can see below, I have 217 objects that need to be resynced. You can also click the Resync Now button to manually initiate the process.
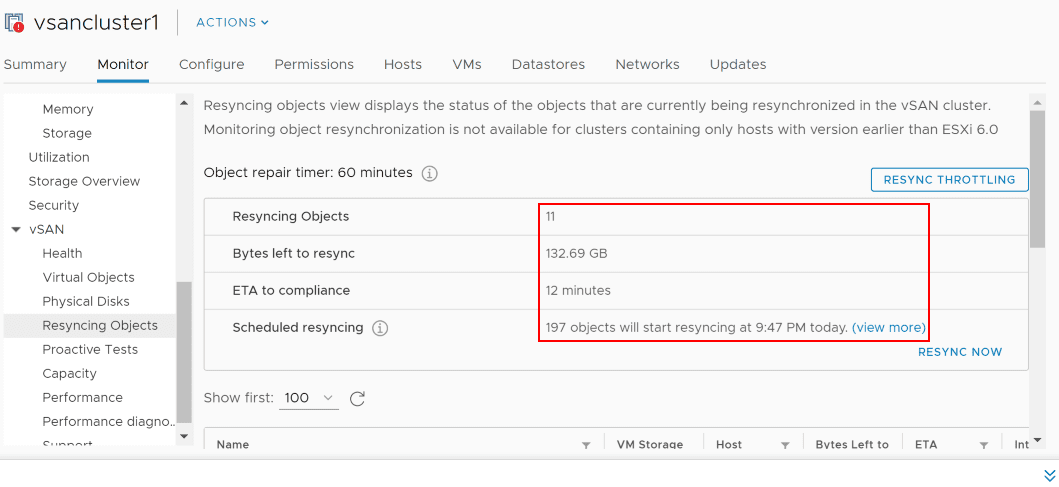
As the process gets underway to Resync the vSAN objects, you will see the Resyncing Objects, Bytes left to resync, and ETA to compliance all adjust accordingly as the data is calculated and as the Resyncing operation progresses.
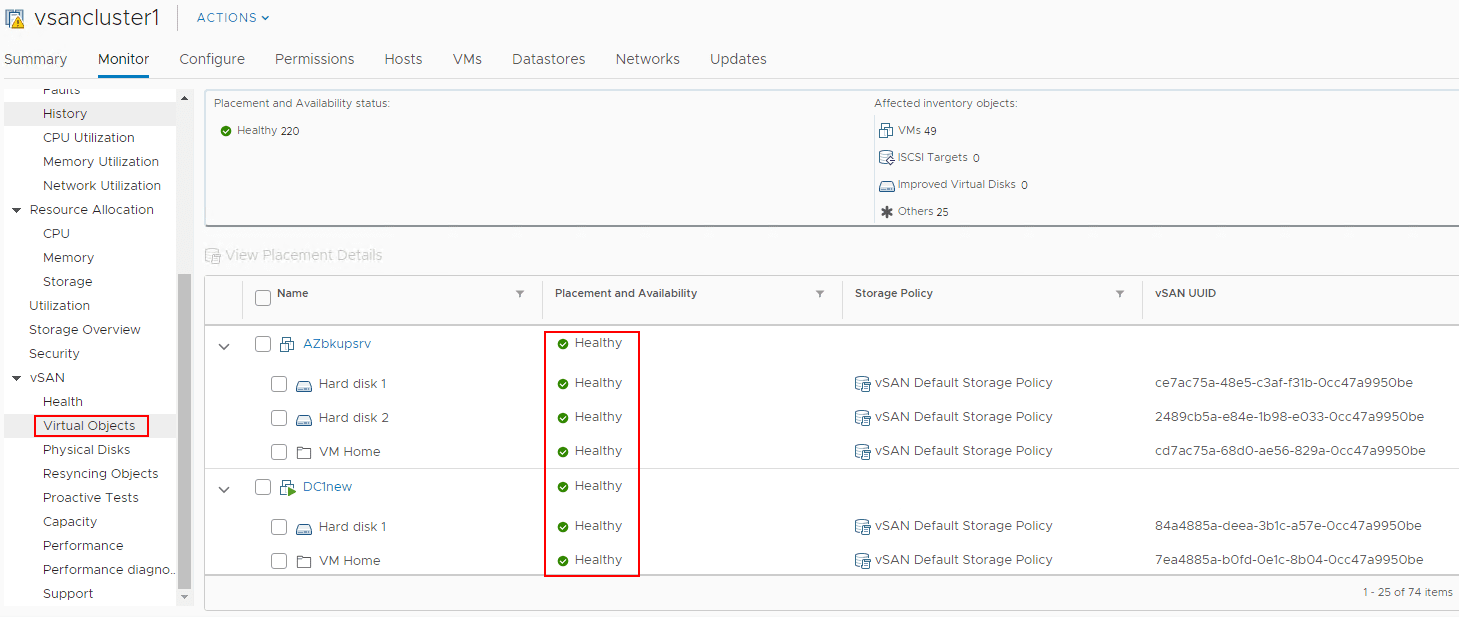
A different view of the data. Under the Virtual Objects dashboard, you can see the Placement and Availability status showing the Reduced availability count and the Healthy count.
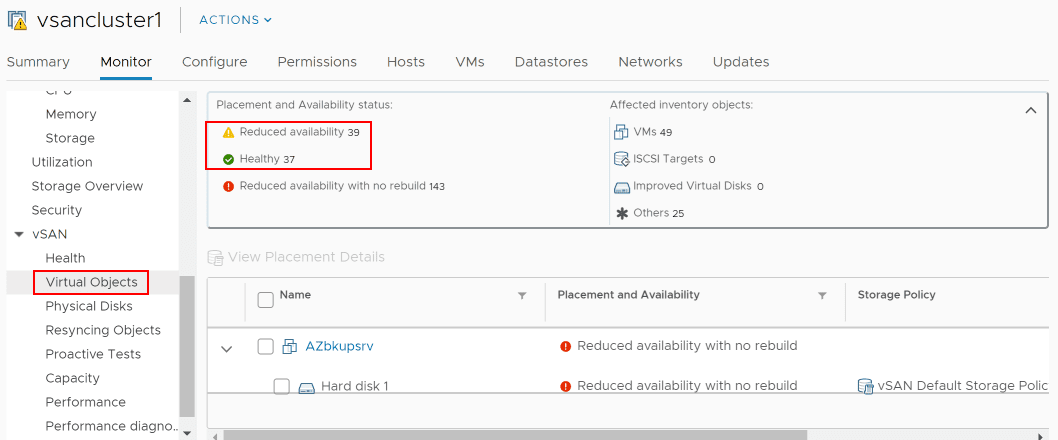
Virtual Objects shows healthy vs reduced availability objects in the vSphere client. As the data is calculated in the home lab environment, the Resyncing Objects count has gone up considerably as well as the Bytes left to resync, and the ETA to compliance.
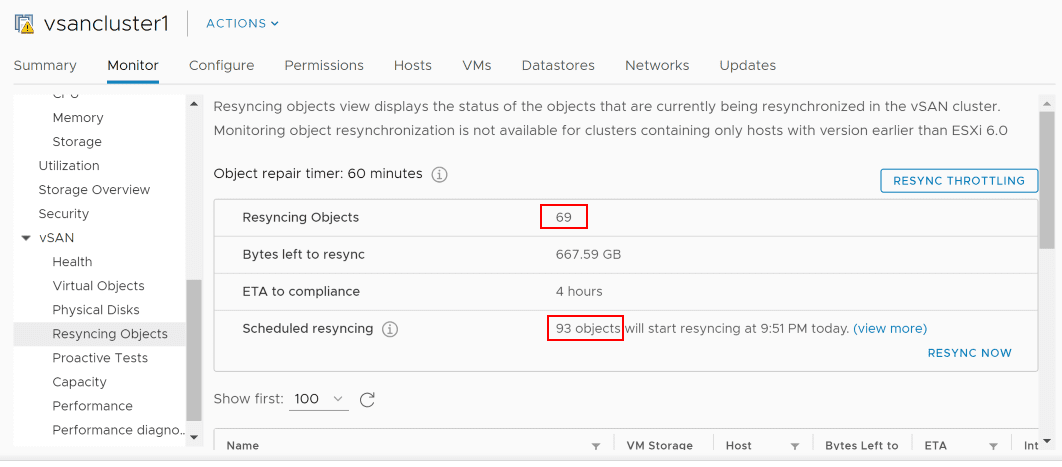
The vSphere client provides a powerful little tool when it comes to Resyning objects. In a production environment, you may want to even further reduce the impact to production performance with the Resyncing operations. The Resync Throttling control allows throttling the Resync operation. You can see the option Enable throttling for resyncing objects traffic and adjust the slider to define the threshold.

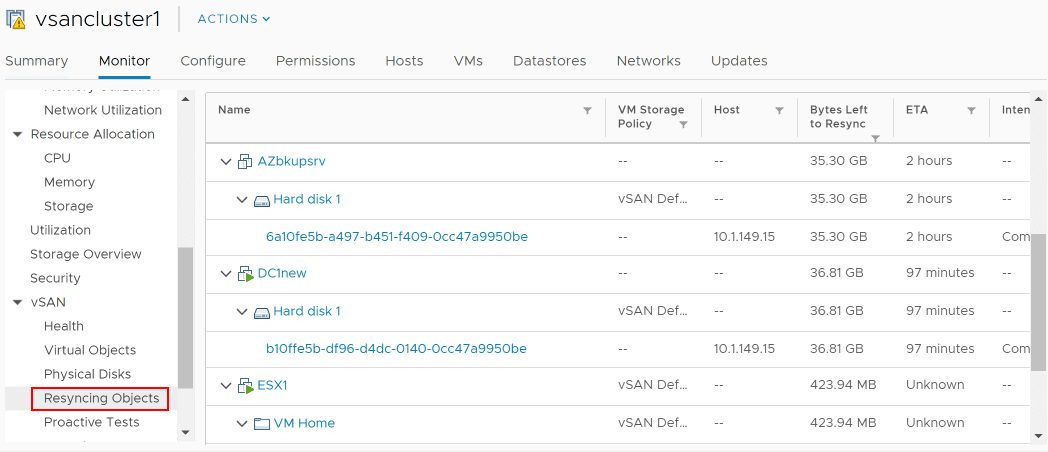
Another interesting view and visibility that the vSAN Resyncing Objects dashboard gives is displaying the individual virtual machines and the Bytes Left to Resync and ETA which allows granularly seeing the times left and data to be copied for specific VMs and their respective VMDKs.
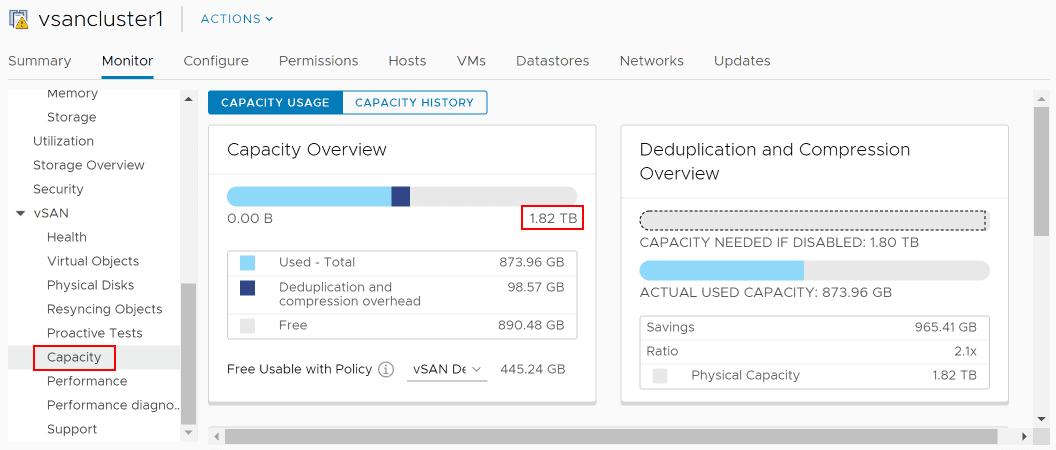
Under the Capacity dashboard for vSAN, my home lab capacity for the vSAN datastore has now returned to the previous 1.82 TB configured (with deduplication and compression).
After allowing the Resyncing Objects operation to run to completion, the VMs are now all listed as Healthy.
I have to say the entire process used in replacing VMware vSAN Cache Disk and Resyncing vSAN Objects was easy, intuitive, and informative. The overall process to change out the dead vSAN cache drive and allow the vSAN objects to resync once a new cache drive was installed, disks claimed for the vSAN, and resync the objects was a breeze
Takeaways
The home lab environment running vSAN has performed extremely well for me in my testing on an all NVMe configuration. Using commodity hardware, this is the first failure I have had in a year of running the configuration 24×7 with no downtime. I have bashed on this environment pretty well also as it gets hit just about everyday with new VMs provisioned, tore down, appliances deployed, etc. Replacing VMware vSAN Cache Disk and Resyncing vSAN Objects process was super simple and I love the visibility that VMware gives to the underlying vSAN processes such as the Resync operation right within the vSphere client. You are left with no guesswork on what is going on with the underlying infrastructure.