What is VMware vRNI and How to Install?
VMware vRNI provides a powerful solution that augments a VMware NSX installation. It includes but is not limited to the following features.
- VMware vRNI provides many powerful tools including but not limited to the following:
- Pre-deployment planning that includes tools to deploy VMware NSX more efficiently including microsegmentation planning as well.
- VMware NSX monitoring and troubleshooting allowing the gathering of analytics across both the virtual overlay and physical layers of the underlay network.
- Performance tuning – With the gathered analytics, this allows for the network performance optimizations across the various layers.
- Microsegmentation planning and insights – includes planning and various views of microsegmentation security that allows for managing and scaling NSX security and flows
The installation process for VMware vRNI is a two-step process that includes:
- Deploying VMware vRNI platform appliance
- Deploying VMware vRNI proxy appliance
Let’s take a look at each of these steps to deploy VMware vRNI.
Deploying VMware vRNI Platform Appliance
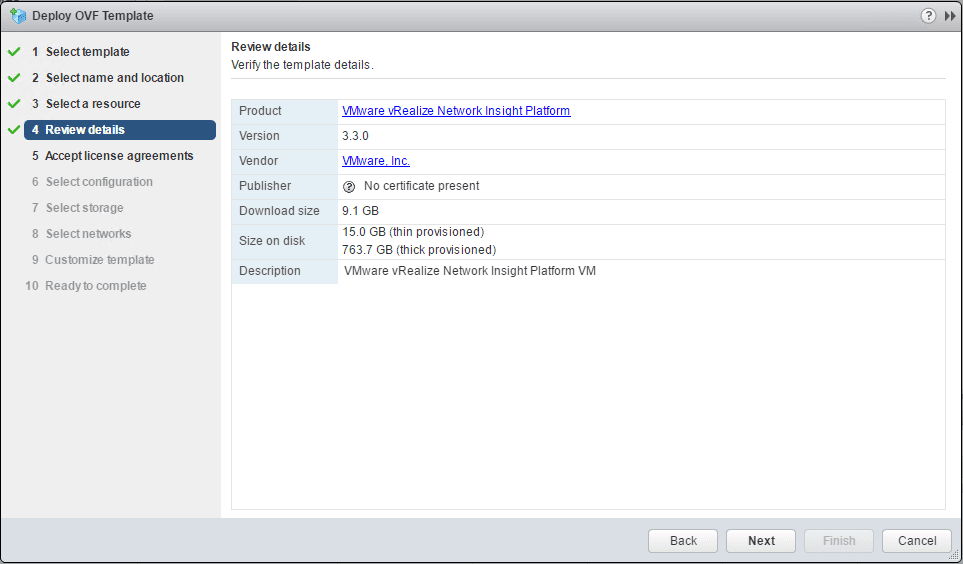
For the purposes of this lab, I am installing VMware vRNI version 3.3.0.1487914671. Deploying both OVA appliances are very straightforward and similar to any OVA deployment. However, there is a key detail with deploying the proxy appliance as we need to obtain a shared secret key to plugin to the OVA deployment of the proxy appliance. We get the shared key from the platform appliance after it has booted and we login to the web interface to continue the setup. We pickup below after the first few screens.
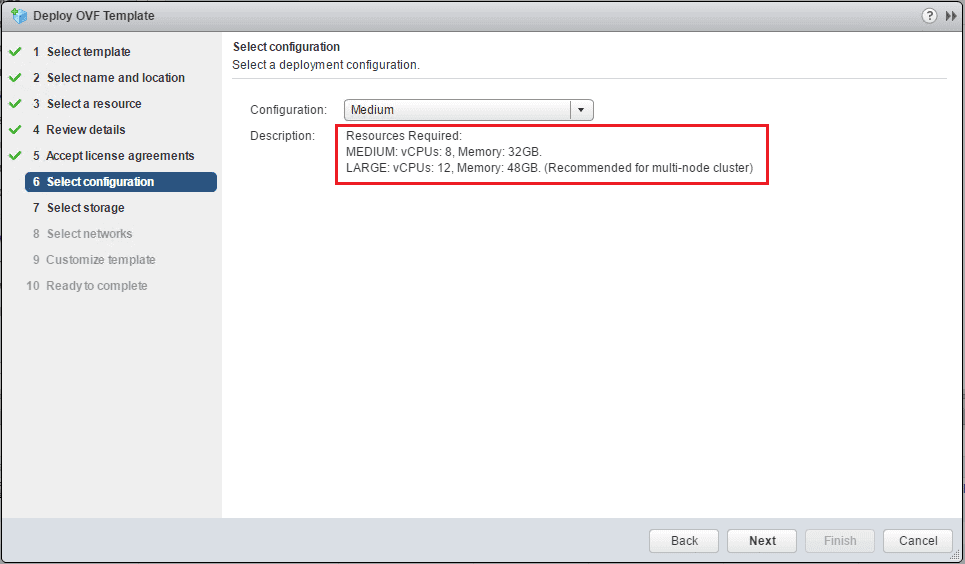
Notice on step 6 – Select configuration that the requirements for the platform appliance are huge! Interestingly, there is no small configuration but only a medium and large configuration. If you are deploying this into a lab, make sure you have the resources required for the installation.
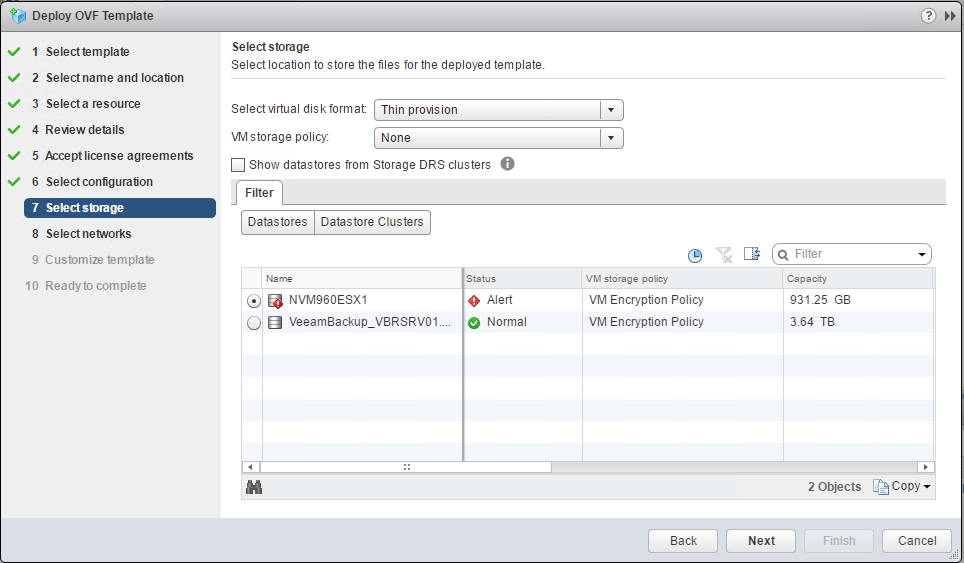
Here I am thin provisioning since we are deploying into a lab environment.
Step 8 has us select the destination network.

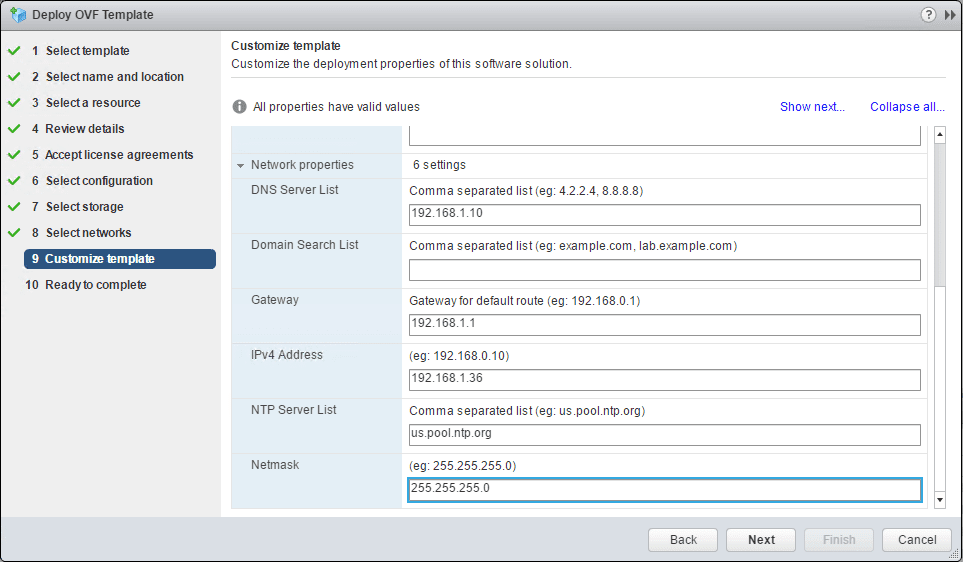
Before completing, we populate the IP address information for the appliance.
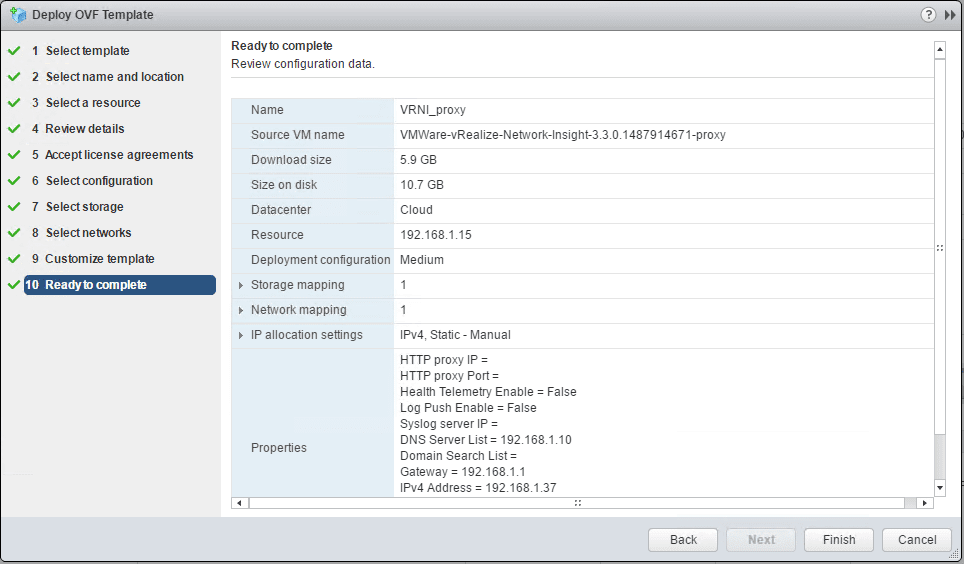
Ready to deploy.

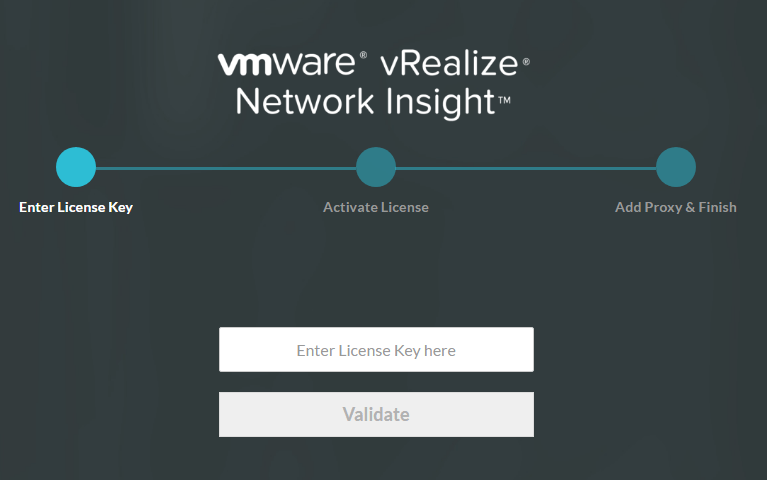
After the appliance has been deployed and it is booted, we then login to the web interface of the IP address we setup during the deployment process. https://<your platform appliance IP>
The first thing we are required to do before we go any further is to provide a license key.
Once we have entered our license key, we can now begin the setup of our vRNI proxy shared secret key. As you can see below, we have a Generate button that we can click and have the setup generate a very strong key for us automatically.
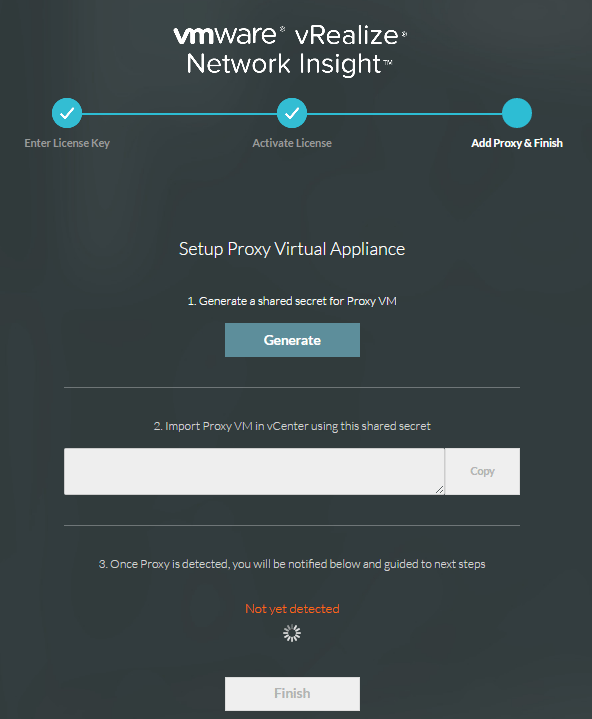
Once we click the generate button, we have a key generated that we can copy and use for the proxy installation. Also we notice the message Not yet detected for the proxy appliance.

At this point, we can leave the setup process on the platform appliance browser session open. We will come back to it after the proxy appliance has been deployed.
Deploying VMware vRNI Proxy Appliance
Now that we have deployed the platform appliance and we have generated the shared secret key, we are ready to deploy our proxy appliance. We deploy the OVA file in the standard way. We are skipping ahead over a few of the standard OVA deployment screens here. Again on step 6 – Select configuration, we can see the requirements of the proxy appliance. While not nearly as beefy as the platform appliance, it is still rather hefty.

Skipping ahead again to step 9 – Customize template, here is where we especially need to pay attention. Along with the fields for customizing the network settings, we have a field called Shared Secret. We paste in the key we generated from the platform appliance here.

Finally, we finish the OVA deployment and deploy the proxy appliance.
After the proxy appliance boots and a couple of minutes pass, you should see the message on your original browser setup screen from the platform appliance say Proxy Detected! Click Finish.
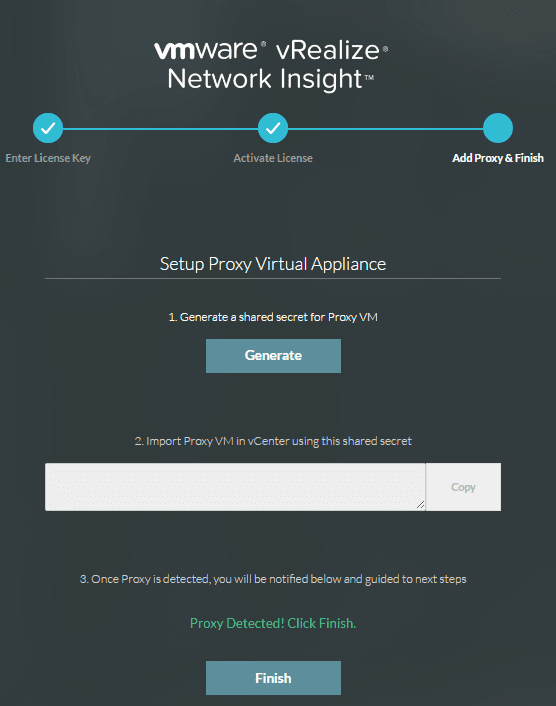
After clicking Finish, we will be down to the last bit of configuration of our vRNI environment.
Final Configuration
After the proxy is detected, we can now login to our platform appliance web interface. The default credentials are admin@local with a password of admin.

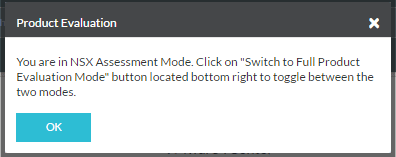
Once logged in, we get a message about the product evaluation mode and how to switch between full product and evaluation mode.
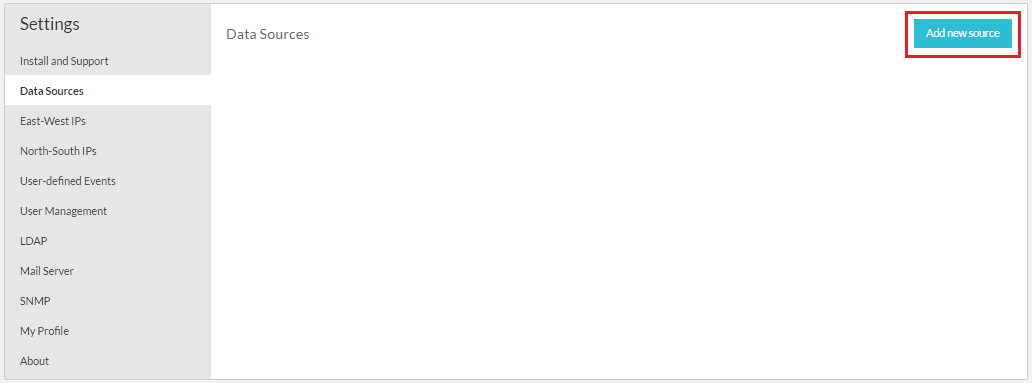
Now we need to Add Data Source so we can start pulling data and analytics from vCenter.

Click the Add new source button.
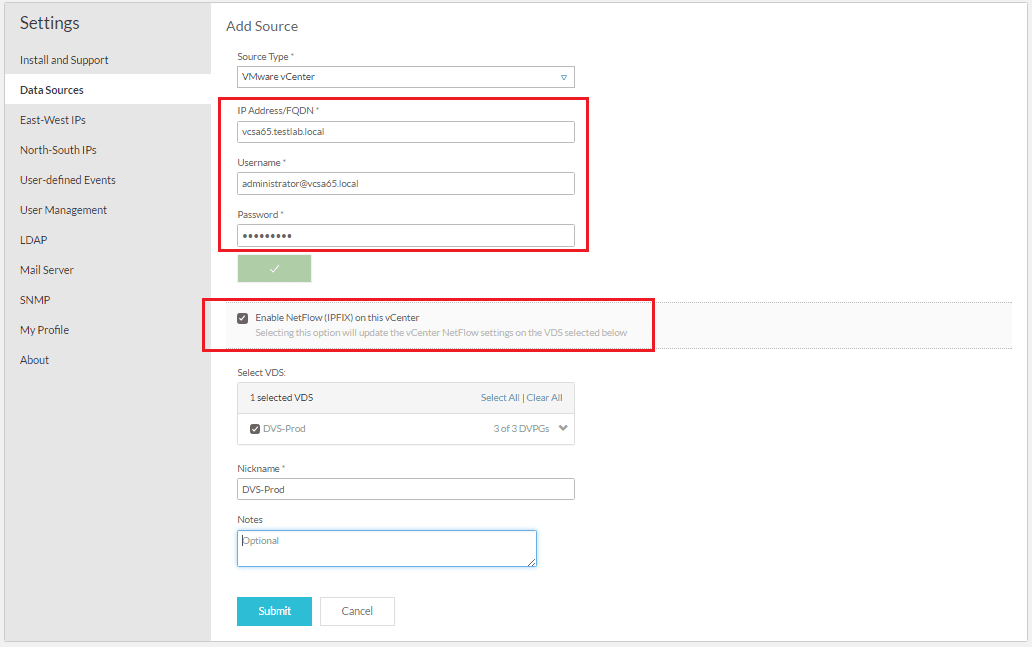
Here, we populate our vCenter information including user credentials and selecting our netflow settings which includes selecting distributed switches to listen on.
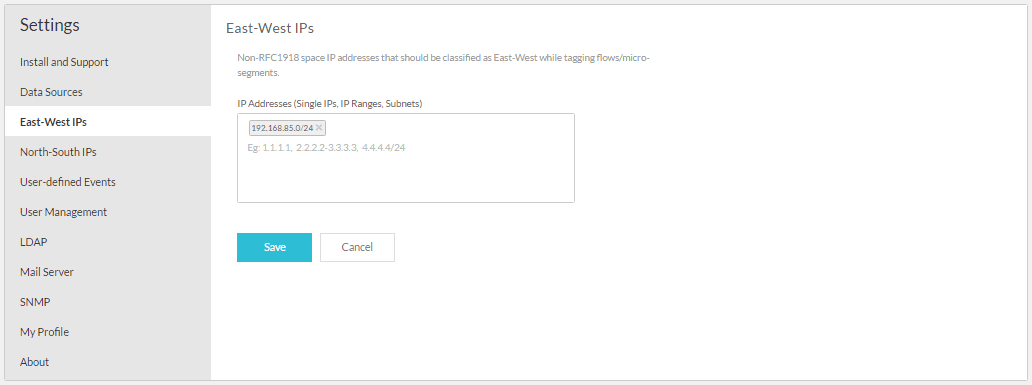
Next, we define East-West IPs.
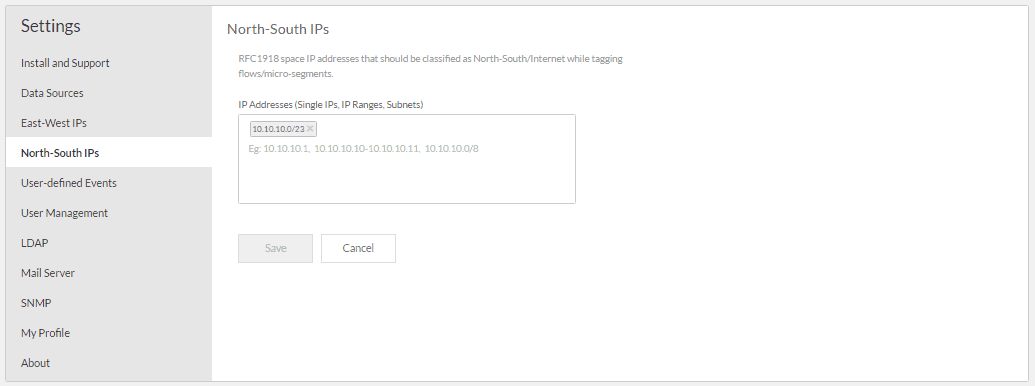
North-South IPs definitions are next.
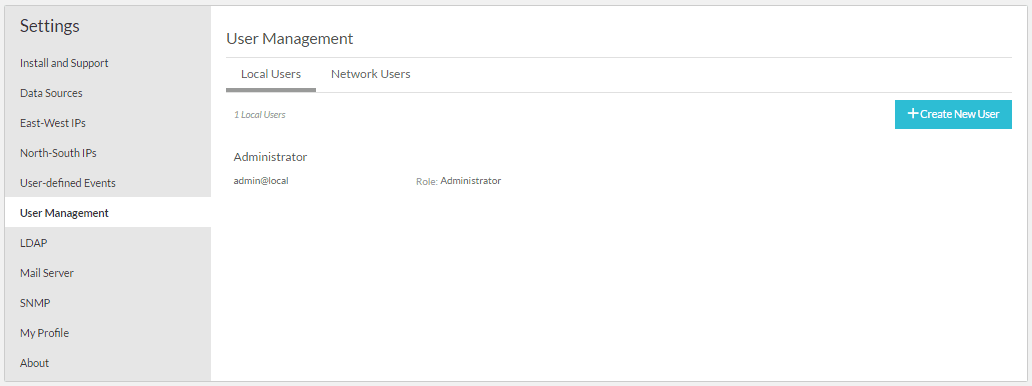
Just buzzing down through the menus on the setup screen, there are several things we can configure specific to our environment. Just as an example, we can change the default account password, etc.
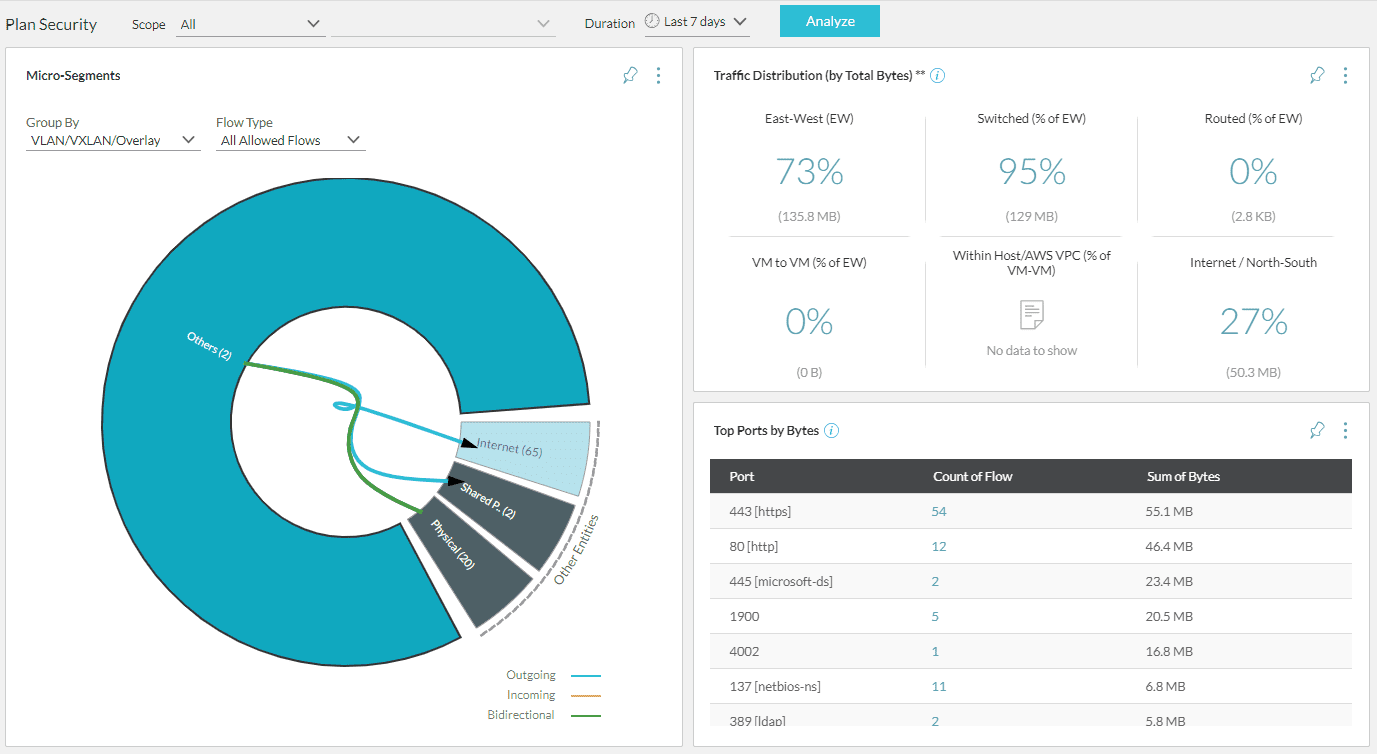
After a while, the vRNI appliance should start gathering data from our vSphere environment. As you can see below, we have VMs that have been recognized, networks, etc.
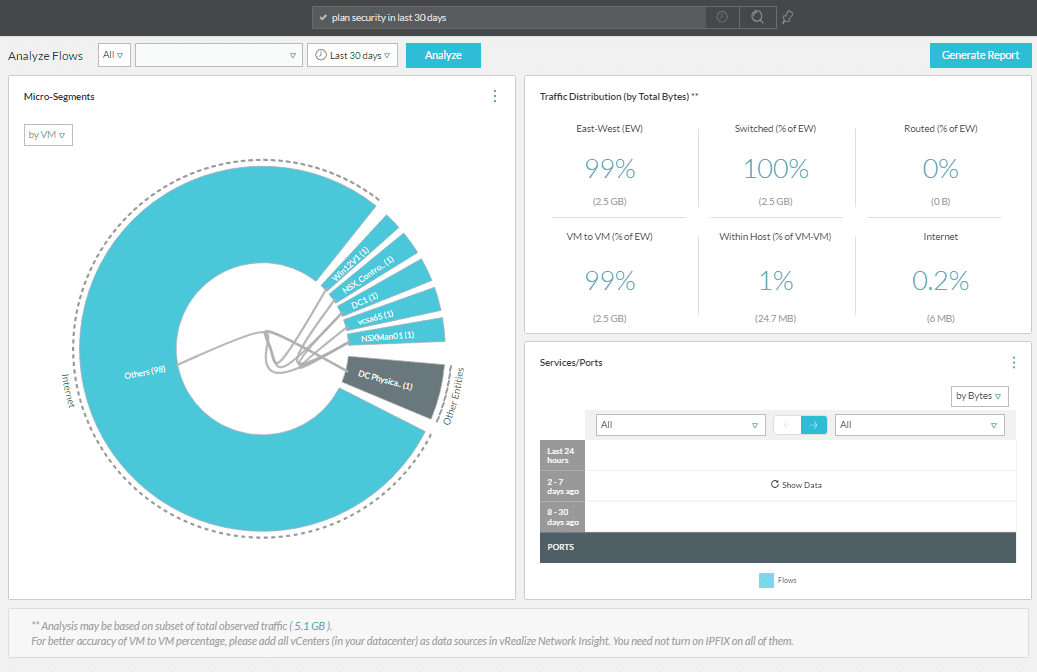
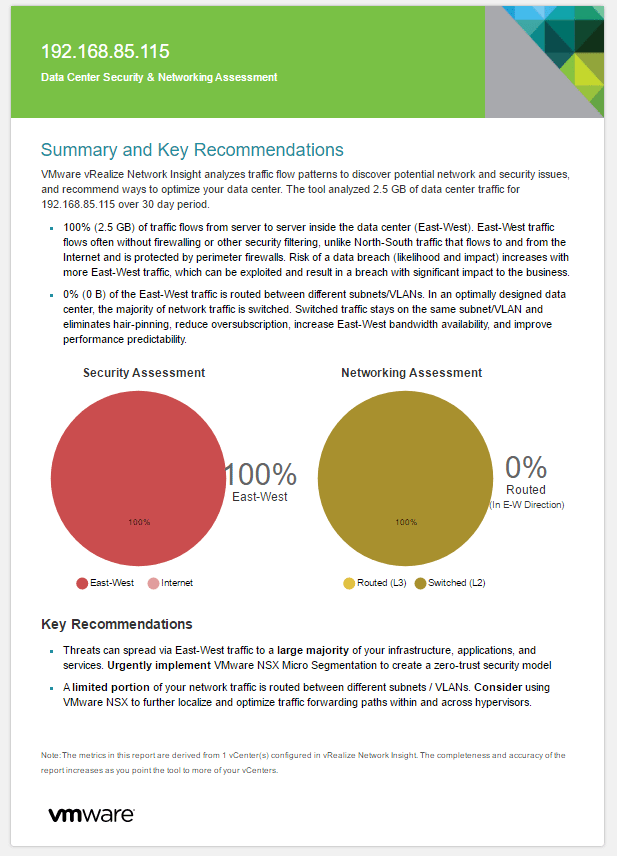
Clicking the Generate Report button in the dashboard, generates a really handy assessment of the environment including recommendations. This is just a snippet of the report I had generated. As you can see there is a wealth of information already starting to be gathered.
Thoughts
Hopefully the topic of what is VMware vRNI and how to install it has been helpful to any who may have been unfamiliar with the product. VMware vRNI greatly augments the insights into VMware NSX and the traffic flows therein. If you are running VMware NSX, it is definitely recommended to give vRNI a test drive in your environment to see the insights and analytics that you benefit from using the product. Reporting is also a great feature of vRNI and it operates with not only virtual network flows but also physical network devices.
More in this topic
Discuss this in the Community
Google is updating how articles are shown. Don’t miss our leading home lab and tech content, written by humans, by setting Virtualization Howto as a preferred source.
About The Author
