Setting up Hyper-V replication allows you to replicate a virtual machine from one Hyper-V environment over to another. The nice things about replication in the Microsoft Hyper-V hypervisor world is that there is no appliance to have to setup or other plugin you have to have to make this work. It is included in the box. Let’s take a look at how to setup Windows Server 2016 Hyper-V VM replication and the steps involved with getting this to work.
Setup Windows Server 2016 Hyper-V VM Replication
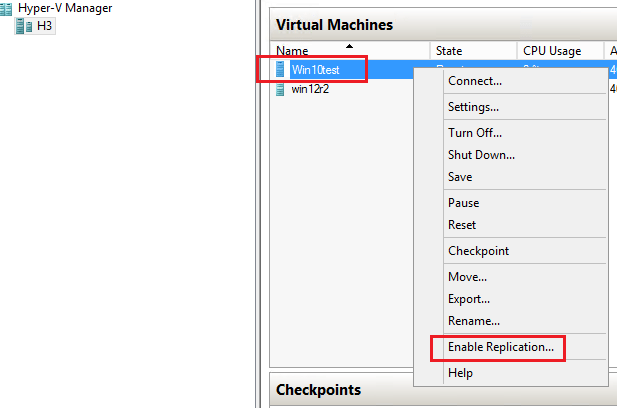
In order to begin setting up Windows Server 2016 Hyper-V Replication, simply right click on the virtual machine you wish to replicate and choose Enable Replication.
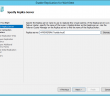
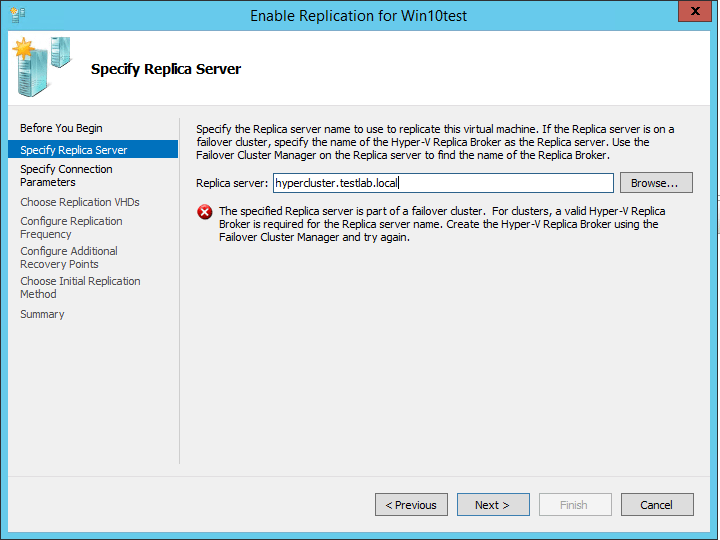
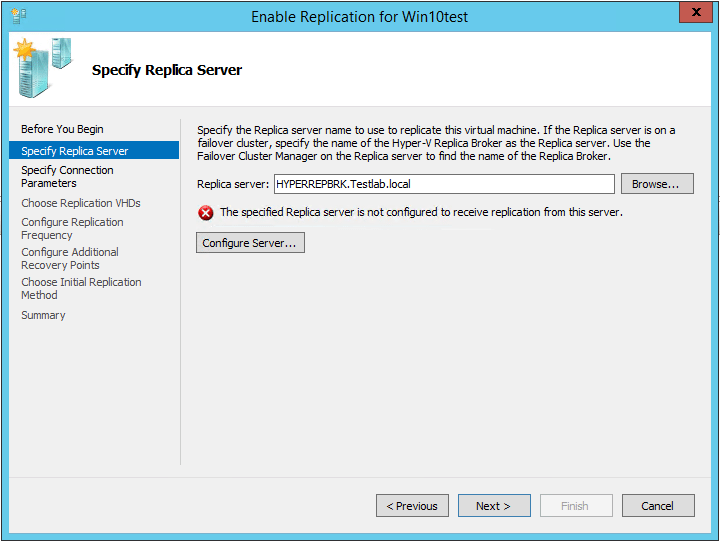
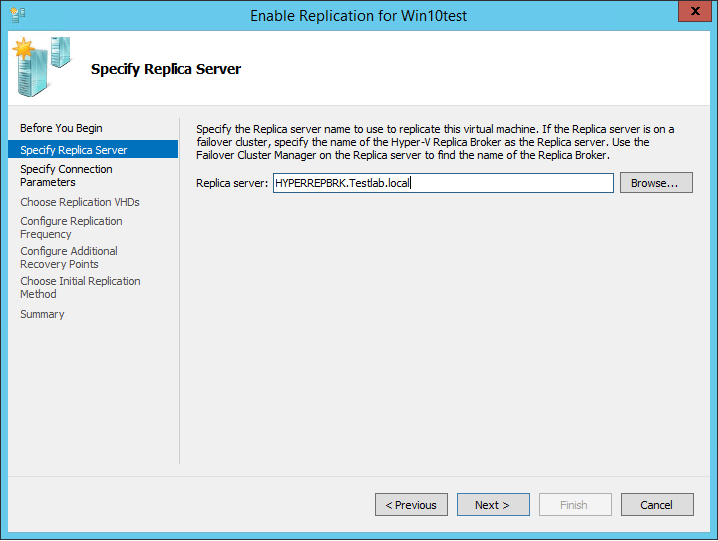
The Enable Replication wizard begins. A little background to my lab enviroment. I have a standalone Windows Server 2016 Hyper-V host running a couple of virtual machines that I want to replicate to a Windows Server 2016 Hyper-V cluster. When you replicate to a cluster, you have to specify the name of the Hyper-V Replica Broker server. This is a special role that you have to configure on your cluster server. So we need to do that first if replicating to a cluster. Notice the error we get pointing to the cluster without the replica broker role installed.
Setting up the Replica Broker
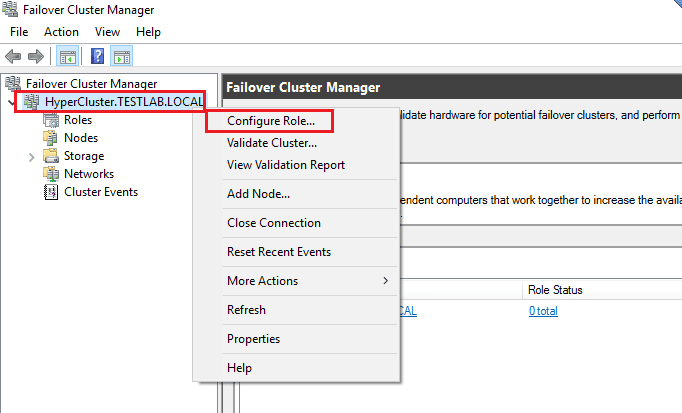
To setup the Replica Broker, we need to go to the Failover Cluster Manager for the Windows Server 2016 Hyper-V cluster. Right-click your cluster and select Configure Role.
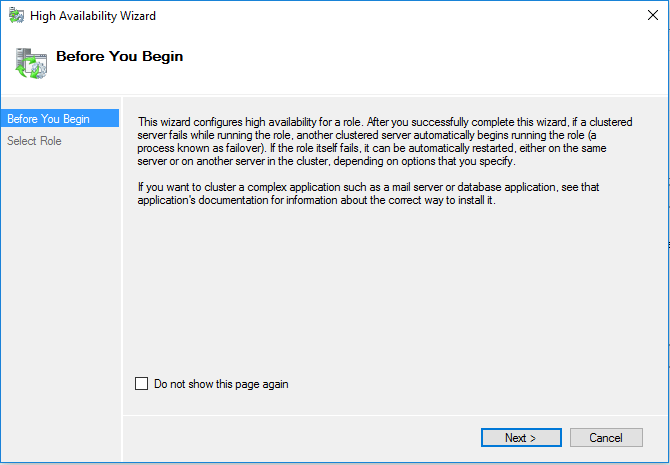
The High Availability Wizard begins.
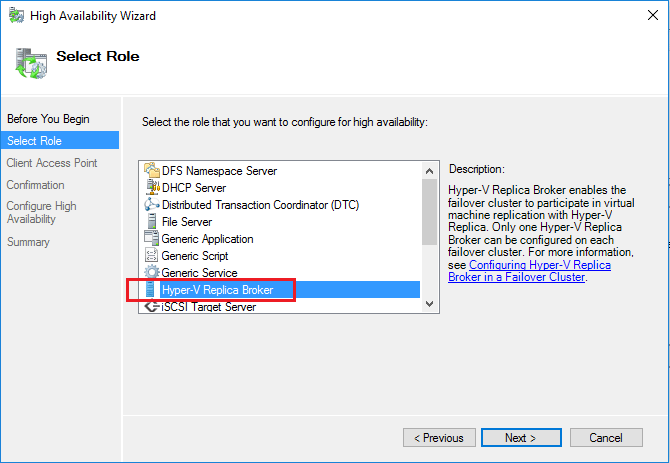
Next, we select the Hyper-V Replica Broker server.
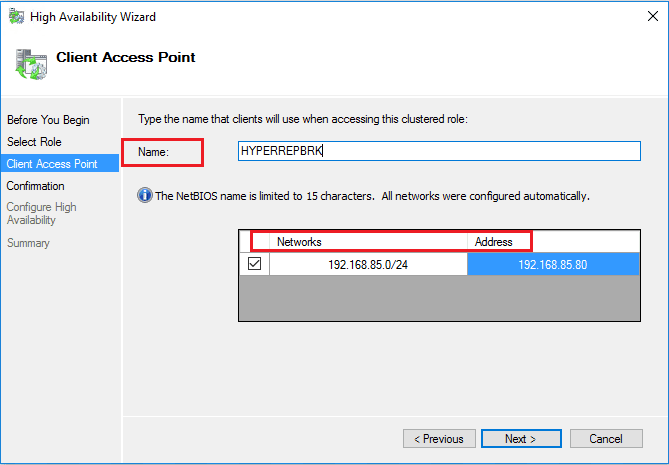
Select a name for the Replica Broker. This will be a network name that is added to our cluster. You need to also define an unused IP address for the network name.
Once this is done, the computer object is added to Active Directory for the replica broker network name.
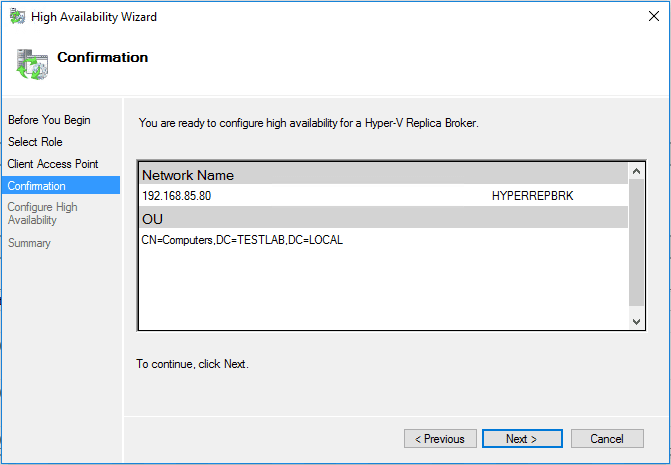
We then finalize the configuration of the role.

Now, we should have a Replica Broker name that we can use in the replication wizard.
Configuring VM Replication

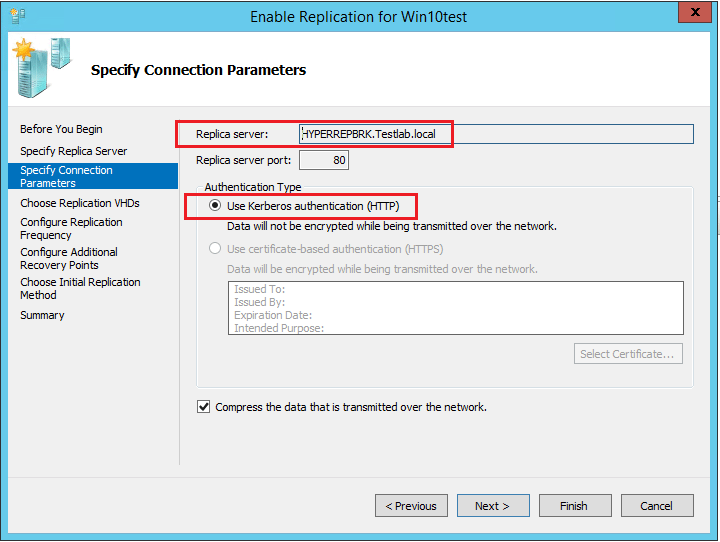
We receive another error of sorts in that we have not allowed the Replica server to receive the replication. We can click the Configure Server… button which will launch the configuration of the receiving cluster for us.
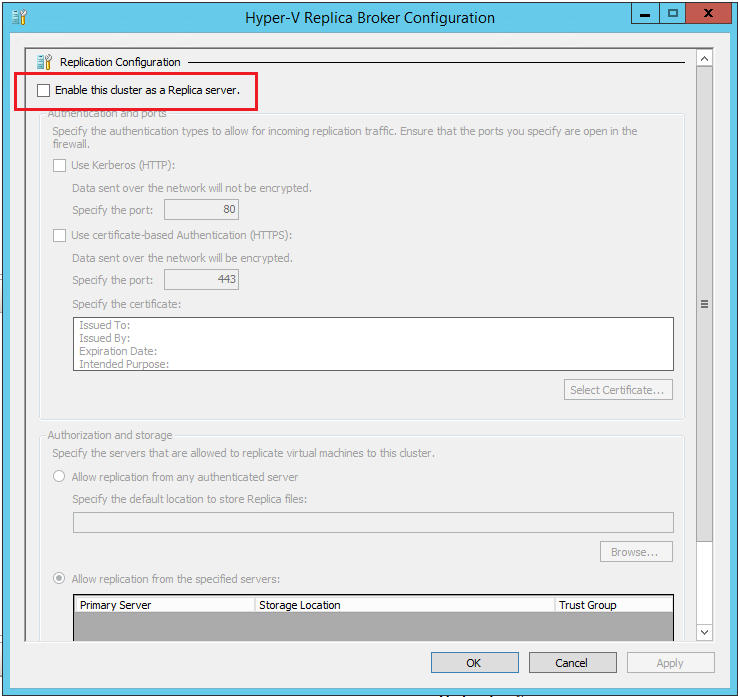
Check the Enable this cluster as a Replica server.
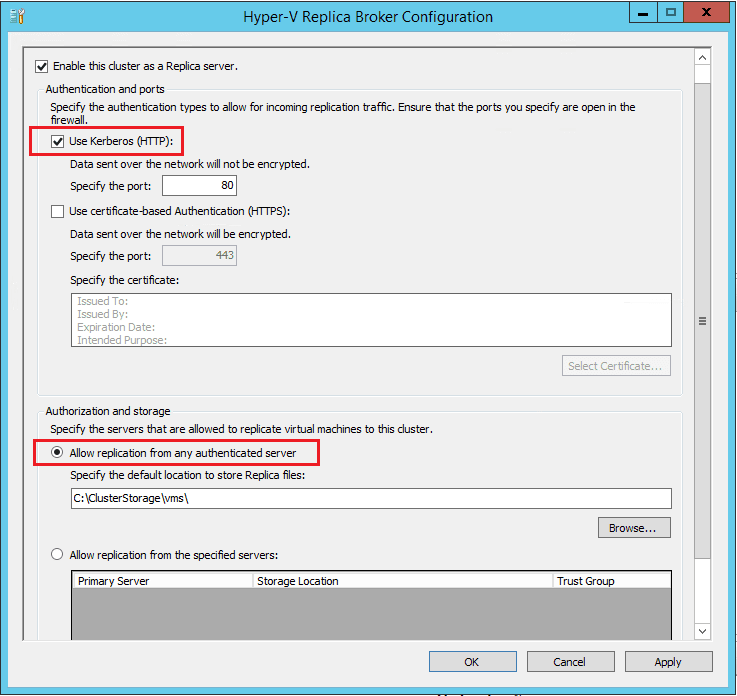
Also, we need to check the Use Kerberos (HTTP) check box. Note, I am using this in a lab environment to quickly get replication up and going. However, for stronger security, use certificate-based authentication (HTTPS).
We also select Allow replication from any authenticated server for quick replication provisioning. For best security though, use the Allow replication from the specified servers for granular control.
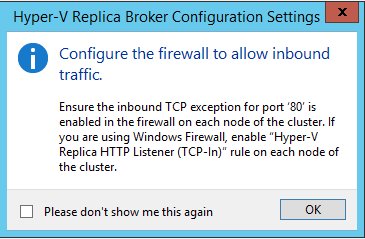
We get a note about the Windows firewall that we need to configure the firewall to allow inbound traffic.
Now we are taken back to the specify replica server wizard. Notice now we have no warnings/errors pointing to the replica broker name.
To align with our configuration of the broker server, we select Use Kerberos authentication (HTTP).
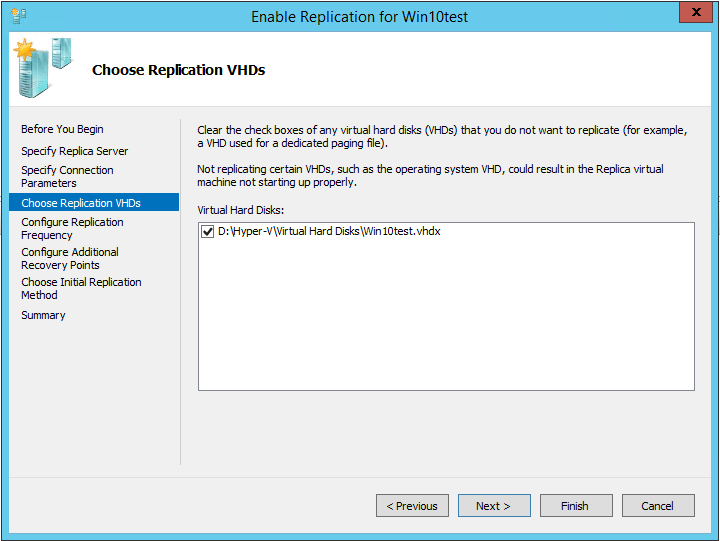
Next, we can select specific vhdx files for the virtual machine. I only have one vhdx file so it is selected by default.
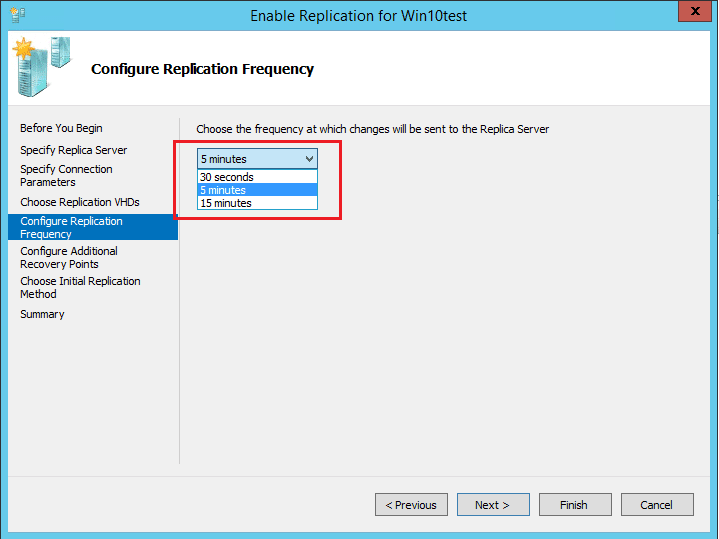
We can select the replication frequency on the next page. We have the option of 30 seconds, 5 minutes, or 15 minutes.
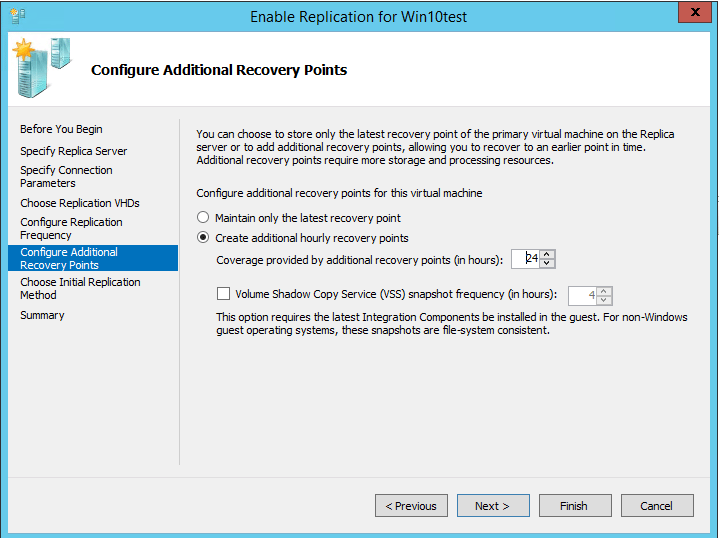
You can choose to maintain only the latest recovery point, or create additional hourly recovery points and select a number of recovery points if we choose. There are other VSS options here we can select as well.
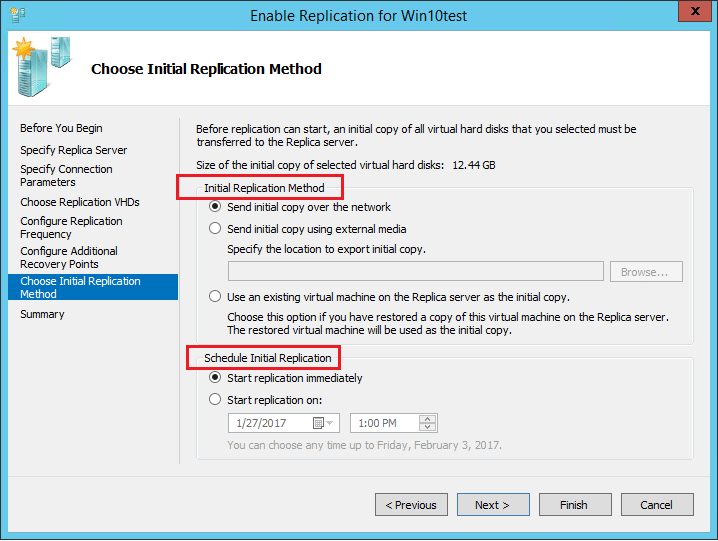
For the initial replication Method we can choose to seed the drive with external media which would be desirable over slow links, or we can choose to send initial copy over the network if we are on the same LAN or have a network carved out for this. We can also choose to schedule the replication period or simply start it immediately.
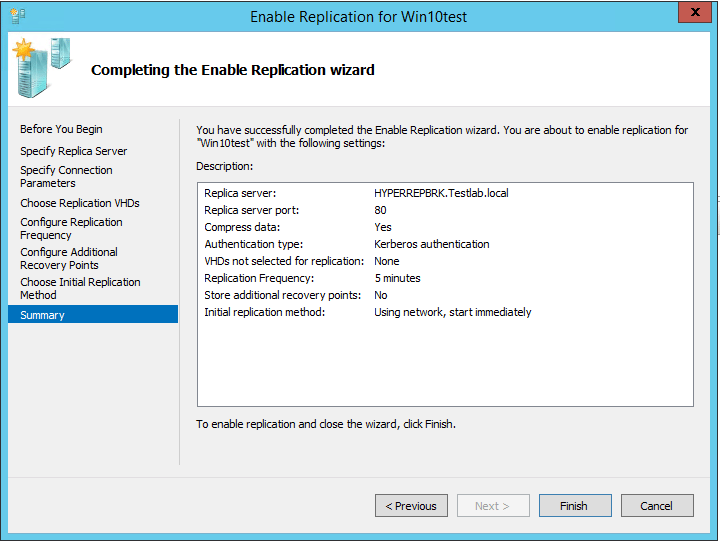
Finally, we get to the summary screen showing our configuration choices.
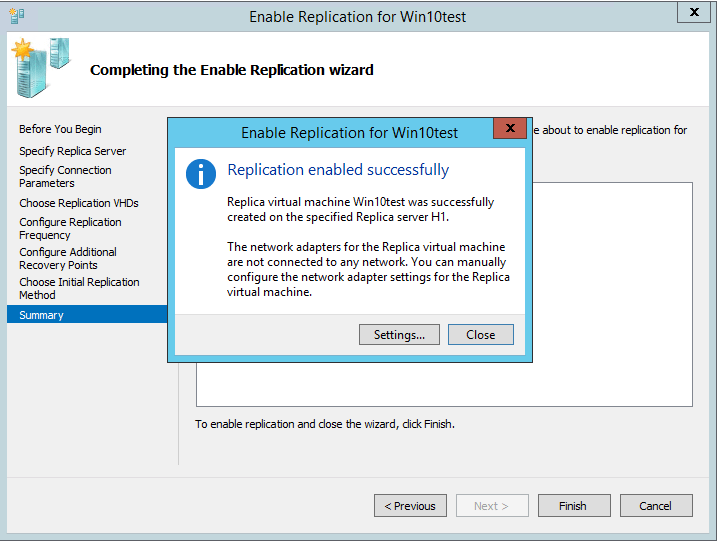
Replication is enabled successfully.
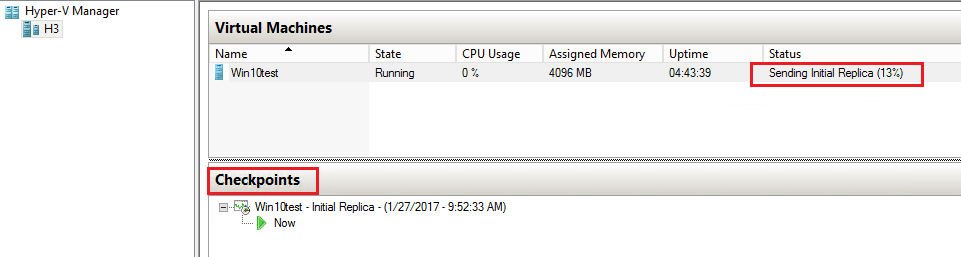
Going back to Hyper-V Manager of the standalone host we are replicating from we can see that a checkpoint has been created and we see the status of Sending Initial Replication and the percentage of the transfer that has been completed.
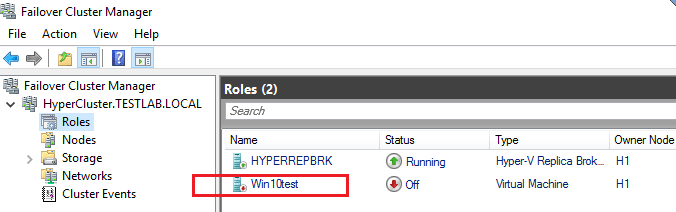
On the target side of the replication, in our Failover Cluster Manager we see the Win10test VM that was replicated from our standalone host has been created.
Thoughts
Windows Server 2016 Hyper-V has taken Hyper-V to new heights with functionality and it is certainly a serious player in the virtualization space. Replication is one of the things that I really like compared with other hypervisors in that it is builtin the box – no appliances or other add-ons. So if you are looking to Setup Windows Server 2016 Hyper-V VM Replication it is simply a matter of completing the wizards as we have looked at above.
More in this topic

Google is updating how articles are shown. Don’t miss our leading home lab and tech content, written by humans, by setting Virtualization Howto as a preferred source.
About The Author
