I was excited recently to get my hands on a Cisco Meraki MR18 and wanted to share with you all some thoughts and opinions of the product after having installed, configured, and worked with it for a few days. The cloud features of the Meraki ecosystem are very impressive. Cisco Meraki has positioned itself as a leader in cloud managed devices and being able to manage and see devices, data, and clients from anywhere in the world as long as you have Internet connectivity is superb. So let’s take a look at the nitty gritty details of the Cisco Meraki MR18 install review.
Cisco Meraki MR18 install review
The first step for getting up and running with any Meraki device is to add the device into your cloud inventory. If you have not done so already, you will need to create an account and then Add Devices to your inventory. To do that, you simply go to your console, click on the Organization link and then under the Configure heading choose the Add devices option.
Also, I might mention, there are firewall ports that need configured so the cloud configuration and sync can work properly. Those ports can be found here. I had started to configure my MR18 and noticed that the configuration was not syncing, only to remember I had scoped the exceptions I had allowed before only to the IP of the MS220-8P. After adding the exception for the AP as well, it started to work as expected.
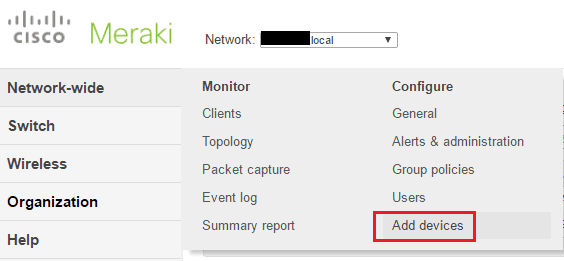
This will present with a dialog box for you to enter in either the serial number or order number.

After adding the MR18 into my inventory, I now have the Wireless option where there is a plethora of options under both the Monitor and Configure columns. Let’s look at the Configure >> SSIDs.
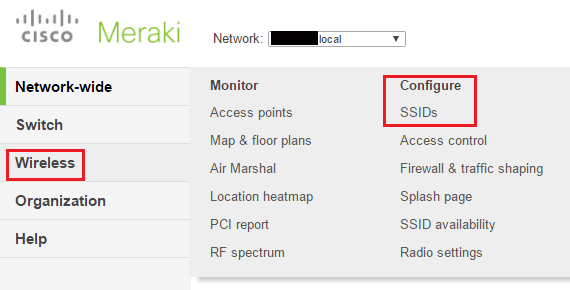
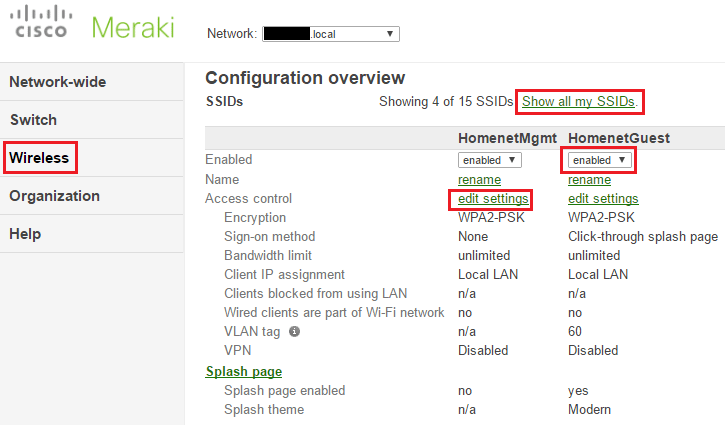
As you can see below, by default it will show (4) of the (15) SSIDs. Notice under each SSID, you have the edit settings and enabled or disabled options.
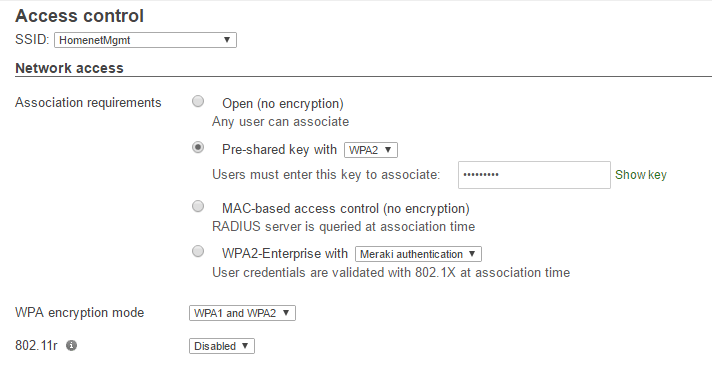
Under the Access Control section of the SSIDs configuration, you have quite a few options here that you would expect of any enterprise capable AP including WPA2, MAC/RADIUS, WPA2-Enterprise, etc.
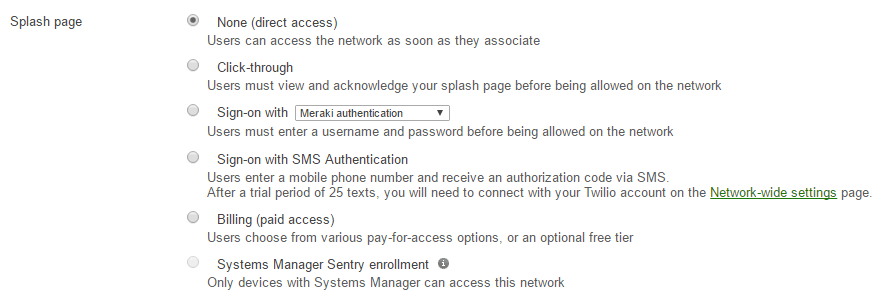
You can also create a captive portal with a Splash page. You can easily set this up with the click of a radio button. Super nice feature – quick and easy. With many wireless AP systems setting up captive portals can be extremely difficult
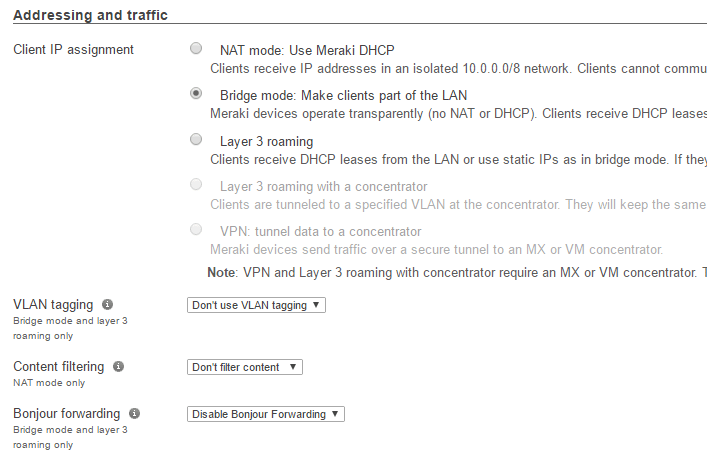
Here we have control over how the AP addresses clients. In NAT mode, the Meraki AP will run DHCP and hand out addresses to the clients in the 10.0.0.0/8 range. If you already have a DHCP server on your network and want to keep IP address management centralized there, you can choose Bridge mode. There is also Layer 3 roaming with many of the same characteristics of Bridge mode but allows the same IP address to follow the client roams between APs.
Also, under the addressing and traffic section, you can setup VLAN tagging.
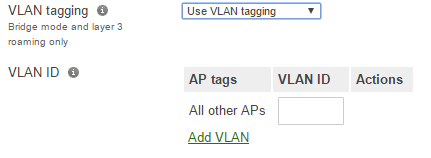
If you select Use VLAN tagging you can add the VLAN ID that you want to be associated with the particular SSID.
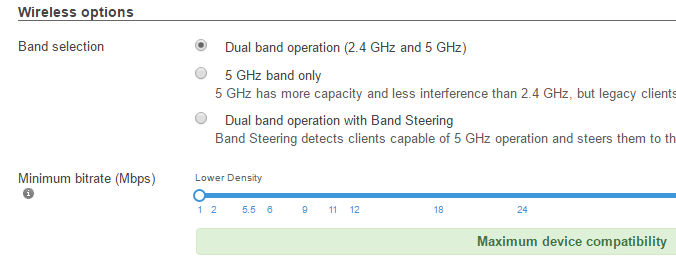
The wireless options section allows you to control the wireless bands the AP will operate on. By default, it is in dual band operation and would be suitable for most.
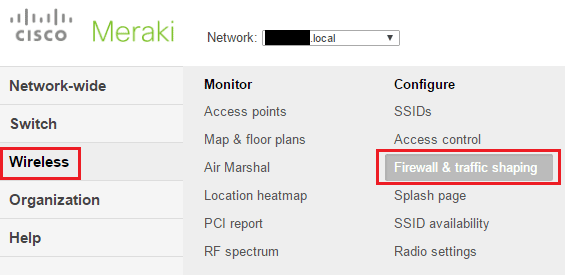
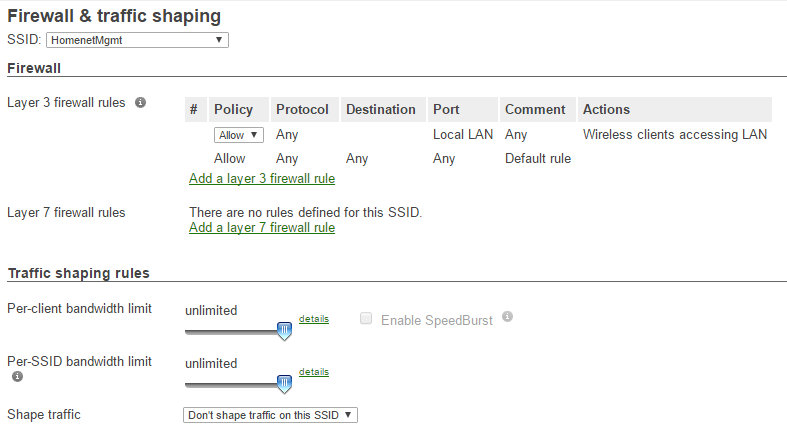
 To control firewall rules and traffic shaping along with bandwidth management, navigate to the Wireless >> Configure >> Firewall & traffic shaping option.
You can see some of the options right off the bat with the Firewall & traffic shaping options.
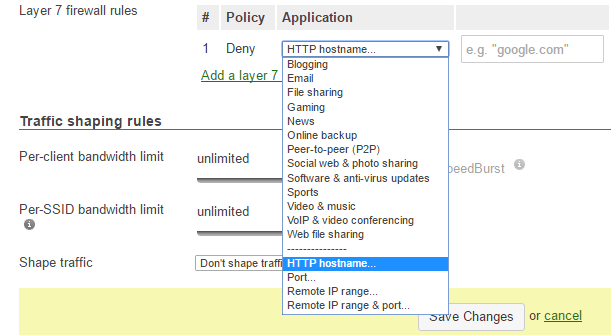
Here I have clicked on the Add a layer 3 firewall rule and the Add a layer 7 firewall rule so you can see some of the options there.

Under the Layer 7 firewall rules, you can see there is a wide range of Application options that can be configured to deny traffic if needed.
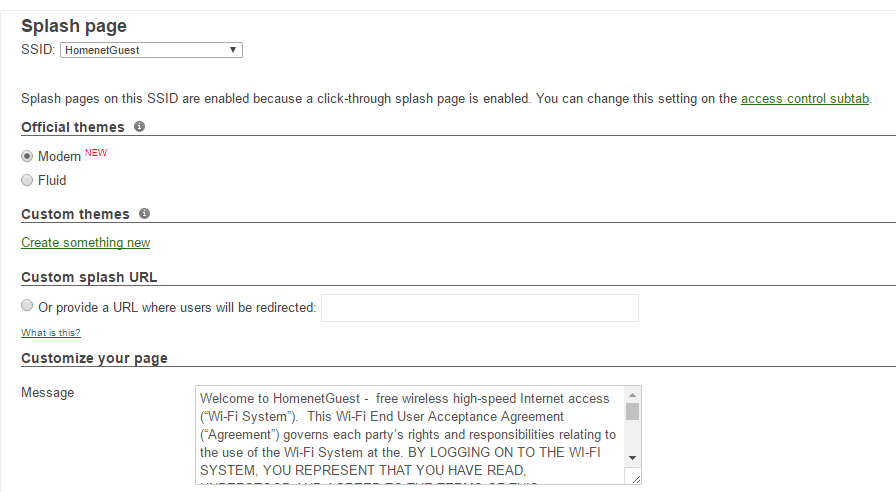
The Splash page options for the SSIDs also have quite a few of configurables here. Anything from the theme of the captive portal including custom themes, as well as an area to customize the page message.
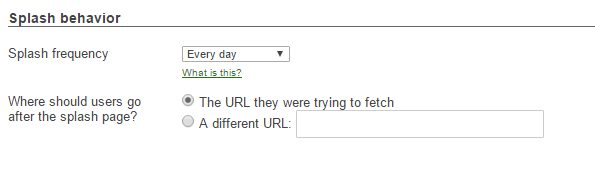
Under Splash behavior, you can control the splash frequency as well as redirect users to a specific website if needed after they agree.
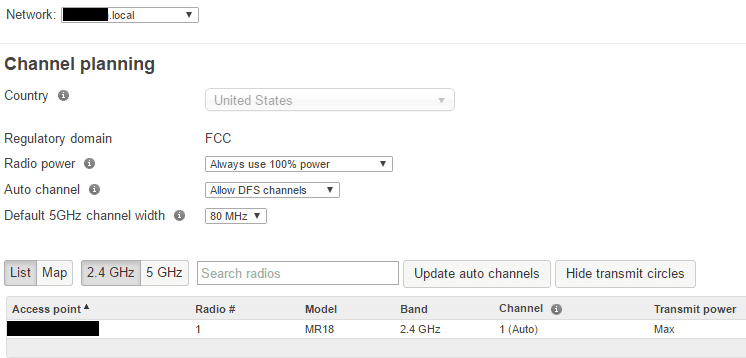
Under Wireless >> Configure >> Radio settings there are more options and information for configuration.
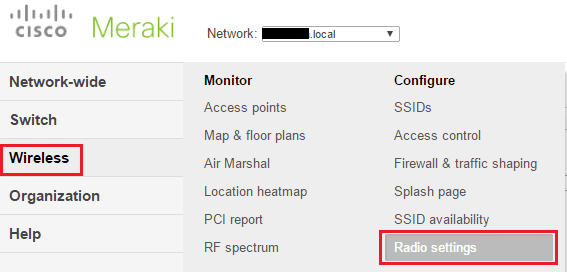
In the channel planning section, you can specify power settings as well as set regulatory domains for international use.
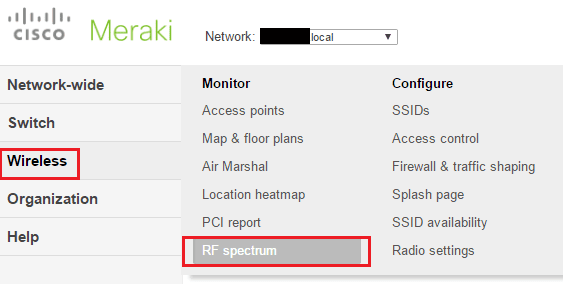
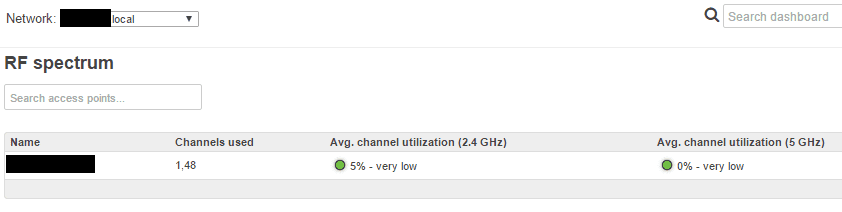
The RF Spectrum option under Wireless >> Monitor allows you to see channel utilization for both bands.
Performance and Review
So far the performance with the MR18 has been good. I have to say however, I was a little on the disappointed side with the range of the unit as far as signal strength. I have a Mikrotik RB951G-2hnd which I can position upstairs in my house and have full bars even downstairs. In the same position with the MR18, I have noticeably weaker signal strength. However, I am still experimenting with the position of the MR18 and will post any updates with findings I have.
As far as features and ease of configuration, it is hard to beat the Meraki cloud management console. I find that most everything is fairly intuitive and you don’t have to jump through hoops in order to configure functionality which is nice. The wireless features you get cover most everything you could imagine needing to do with an AP and then some.
The Meraki firmware updates are handled automatically and to have that ease of control over upgrades is really nice. All in all this is a great AP in my findings so far in this Cisco Meraki mr18 install review and will most likely suit any environment looking for a general purpose enterprise AP.
Google is updating how articles are shown. Don’t miss our leading home lab and tech content, written by humans, by setting Virtualization Howto as a preferred source.
About The Author