Recently, I picked up a Mikrotik RB951G-2hnd for an additional AP to play around with in the lab and to eventually replace an aging Netgear SOHO router/AP that currently only handles wireless access traffic and doesn’t do any routing. I have used Mikrotik APs and really love the power and configurable options in the RouterOS software. You simply won’t find a more customizable router/AP out there to suite your needs if you like to configure and tinker. Mikrotik documentation is getting better, but knowing how to do something with Mikrotik equipment has always been the pain felt with their products. However, most of the time, you can find what you need on forums and such.
A topic that you see many ask about how to configure, is multiple virtual APs and VLANs. If you topology consists of a public wifi network as well as a private/admin network, setting up multiple APs with VLAN tagging makes sense. Let me preface this configuration howto with this statement – there are a lot of ways to accomplish the same objective. Especially with the flexibility RouterOS gives you along with the plethora of configuration options, there are multiple solutions. There of course are always best practices, but I will show a couple of ways to configure RouterOS for traffic flow with multiple virtual APs and VLAN tagging.
For the sake of this post, we are configuring the RB951G as an access point only. Routing and DHCP are taking place upstream. Also, it is assumed that you are plugging the Mikrotik AP into an upstream switch with the appropriate VLANs untagged/tagged.
Configuring VLANs as their own interface
The first option to configure multiple virtual APs and VLANs is to create VLANs as their own interface then use bridges to tie the VLAN interfaces together with the appropriate virtual AP/LAN interface. So the tagging is done via the VLAN interfaces not the virtual AP. Let’s take a look at how this looks in Winbox.
VLAN interfaces
So let me explain something I have seen as a mistake when passing VLANs from the Mikrotik AP. For the sake of simplicity in our example here, we have a “private” VLAN and a “public” VLAN. You might think that you need to create (2) VLAN interfaces in RouterOS to handle both VLANs and we would if the upstream switch “untagged” VLAN ID is different than either two. In most simple network topologies however, the admin VLAN ID is the untagged ID of the upstream switch so we can simply leave these frames untagged coming from the Mikrotik. For many this untagged VLAN config on most switches is VLAN 1 which is not best practice for security, however, in many networks we find that VLAN 1 is usually left as the default admin VLAN. So untagged frames are in fact on VLAN 1 in that case.
So in RouterOS, if we are utilizing the untagged VLAN for connectivity to the private/admin side, we only need to create one VLAN interface to tag only the public side traffic for the correct network. The untagged private virtual AP would get its VLAN membership from the untagged VLAN on the upstream switch. We would in fact break things if we pulled double duty and tried to tag the frames from the Mikrotik and then also have the upstream switch trying to tag egress traffic as well – it wouldn’t work and traffic wouldn’t pass.
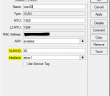
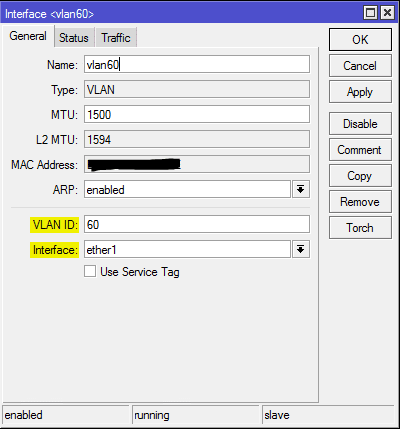
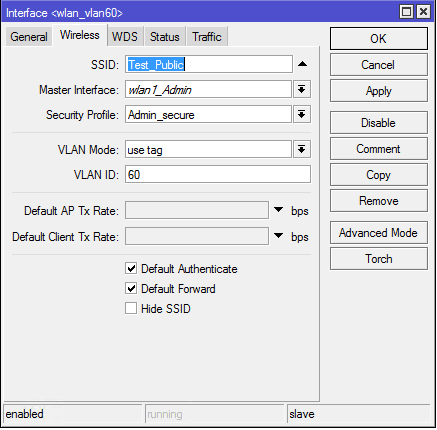
Navigate to Interfaces in Winbox and create a new VLAN interface. In the example below, we have created a new VLAN 60 interface bound to Ether1 interface on the Mikrotik RB951G as this is the “WAN” port or trunk port that will connect to the upstream switch.
Virtual AP setup
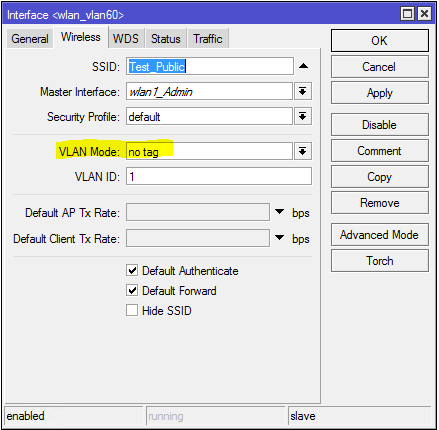
On the virtual AP side, we have the standard AP or wlan1 by default and then we will configure one virtual AP for the public side. Notice below that we have the VLAN mode left set at no tag. The private side wlan1_Admin VLAN config looks the same with no tag set as the VLAN mode option.
Bridge Setup
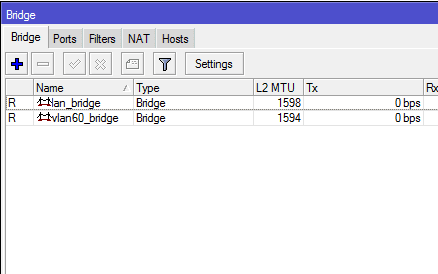
For the bridge setup, we need (2) bridges to carry traffic from both VLANs. Name your bridges as intuitively as you can as it makes life easier to identify things down the road. Below we have:
- lan_bridge – carries admin traffic
- vlan60_bridge – carries public traffic
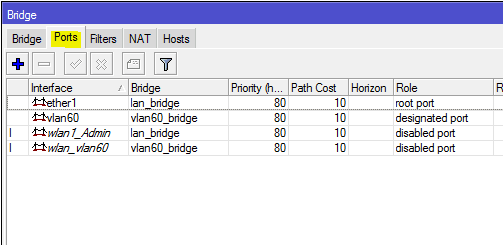
Now we need to add our ports to the bridges created above:
- ether1 and wlan1_Admin are both added to the lan_bridge to connect the two
- vlan60 and wlan_vlan60 are both added to the vlan60_bridge to connect the two
At this point, you should be able to correctly get a DHCP address assigned when connecting to the wlan1_Admin side as well as the public side. Keep in mind that all the other infrastructure involved to pass DHCP traffic must be in place
- Scopes need to be set for both networks
- Router options need set so the appropriate address is handed out from the correct pool
- Switchport that your Mikrotik AP is plugged into needs to be tagged with all the VLANs that you want to pass traffic for
Simplified Configuration
So above there are a few moving parts to make sure that VLAN traffic we want tagged on the correct virtual AP is setup correctly. Let’s take a look at a simplified approach to accomplishing the same thing that allows us to drop one of the bridges in favor of having the virtual AP tag the traffic itself, which makes more sense.
Virtual AP setup
In the simpler setup, we have no standalone VLAN interface that we have created. The VLAN tagging will get done by the virtual AP.
So we can see the difference already below. The virtual AP takes care of the VLAN tagging itself.
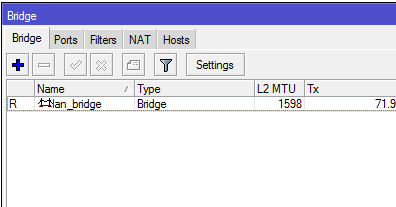
Bridge Setup:
Using the single lan_bridge and no vlan60_bridge, we can bridge everything together on the single bridge – wlan1, vlan60_wlan, and ether1. Now our bridge setup is simple, one lan_bridge.
Now we can bridge ether1, wlan1_Admin, and wlan_vlan60 together in the ports tab
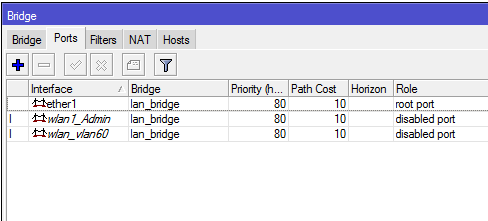
Traffic that is tagged by the Public wlan will pass to ether1 which is uplinked into a port tagged with the Public VLAN along with the private/admin VLAN. Untagged frames from our wlan1_Admin get tagged by uplink port. So traffic is directed correctly.
Final Thoughts
Once you get the hang of configuring Mikrotik with Winbox or even from the command line it is fairly simple to start making progress with your configs. Hopefully, the above information will point you in the right direction on getting your VLAN/virtual AP configuration hammered out.
Google is updating how articles are shown. Don’t miss our leading home lab and tech content, written by humans, by setting Virtualization Howto as a preferred source.
About The Author

Hi Lee,
Is this same for controlled APs as well or is there any other ways to implements this on CAPs?