TinyPilot: Raspberry Pi KVM over IP Solution Review
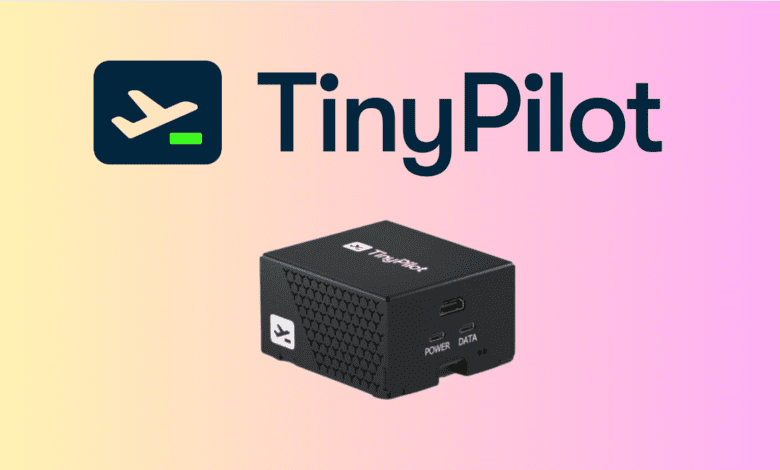
In remote server management, the KVM over IP solution has always been a go-to for professionals worldwide. Among these solutions, the TinyPilot Voyager has been making waves due to its compact design, high performance, and value for money. This blog post will overview the TinyPilot Voyager 2a, a Raspberry Pi 4-based KVM over IP device, and why it might fit your professional environment or home lab perfectly. Michael Lynch, the founder of TinyPilot, was kind enough to send me a sample unit to play around with, and this post is a result of my thoughts and impressions of working with the unit.
Table of contents
- What is a KVM?
- The problem with enterprise IP KVMs
- What Is the TinyPilot Voyager?
- Features of the TinyPilot Voyager
- Specifications and Requirements
- Recent Updates and Improvements
- Connecting the TinyPilot with your Server/PC
- Using the TinyPilot and the interface
- Video overview
- Wrapping up
- Other links you may like
What is a KVM?
A KVM is a “keyboard video mouse” device that allows you to have console access to your servers/PCs. It eliminates the need to attach a keyboard, monitor, and mouse to multiple computers. Instead, you have a single set of those, and the KVM switches the inputs between the computers.
IP KVMs allow you “out of band” access to your target computer since they allow you to access the computer’s console session remotely connected. So you can do things like access BIOS settings, or watch the boot screen before the operating system loads, things you can’t do remote into the operating system, using something like RDP, SSH, etc.
The problem with enterprise IP KVMs
I have used many IP KVMs over the years, and some solid products are out there. However, IP KVMs tend to be extremely expensive, and many use proprietary display plugins based on Java. The problem with these is they get antiquated and deprecated, and browsers stop supporting them. Certificates on the devices deprecate, etc.
Once you lose the support of the KVM manufacturer, you get into an unsupported state where you have to keep around some system that runs antiquated software versions, plugins, etc., which can be a tremendous security risk.
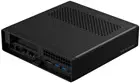
What Is the TinyPilot Voyager?
The Tiny Pilot Voyager is a pre-packaged, Raspberry Pi 4-based solution allowing remote KVM functionality to be added to all devices, even “non-enterprise” clients. This device is designed for all scenarios and professional environments, such as offices, data centers, and server rooms. The quiet and compact form factor of the TinyPilot makes it a great fit in these settings.
One thing to note about the TinyPilot KVM is a professional take on open-source KVM solutions built on top of Raspberry Pis. It will control one device with all the features enabled natively. So one TinyPilot per device. However, Michael has a page dedicated to “chaining” the TinyPilot with other HDMI KVMs to have the TinyPilot manage multiple servers.
Look at the official guidance for ideas on HDMI KVMs that may work: KVM compatibility · tiny-pilot/tinypilot Wiki · GitHub.
Features of the TinyPilot Voyager
The TinyPilot Voyager Raspberry Pi KVM has impressive features that enhance its functionality and usability. These features include:
Full plug ‘n play functionality: There’s no need for software installation.
High-resolution video capture: It captures video at 1920×1080 resolution at 24 frames per second with less than 200 milliseconds of latency. You can output from VGA to HDMI using an HDMI adapter.
Keyboard and mouse input forwarding: Control your remote computer as if you were there.
Pure HTML5 interface: No client software is needed beyond a web browser.
Remote audio: Hear audio from the remote computer locally.
24 FPS video with <200ms latency
Virtual media mounting and booting from virtual storage: Mount and boot from ISO files and other virtual storage media, using the TinyPilot USB dongle of sorts that connects to the data port on the TinyPilot and enables you to mount boot images on the target machine remotely.
Wake on LAN: Wake up your remote computer from sleep or off mode.
Secure connection: It uses password authentication and secure TLS/HTTPS connections.
Specifications and Requirements
The TinyPilot Voyager features a Toshiba T358743 HDMI capture chip, a Quad-core 1.5GHz ARM CPU, 2 GB of RAM, and 32 GB of storage. It supports active Power over Ethernet (PoE) and has an ultra-quiet 13,200 RPM fan. The device comes with the TinyPilot Pro software, a USB-C power plug, a USB-C to USB-A cable, detailed documentation, and quick start instructions.
To use the TinyPilot Voyager with your server, you’ll need a display output port on your server, a USB port, an HDMI cable, and an Ethernet cable.
Recent Updates and Improvements
In January 2023, TinyPilot released an update introducing full support for H.264 video streaming. This change has significantly improved the image quality while reducing bandwidth consumption. The introduction of H.264 over WebRTC has made interactions more responsive, with keystrokes appearing more quickly on the remote computer’s screen and mouse movements tracking the cursor more closely.
TinyPilot Voyager 2a
The TinyPilot Voyager 2a is TinyPilot’s newest professional-grade KVM over IP device. It’s based on a Raspberry Pi 4 and offers a range of features, including new OS improvements:
Fully plug ‘n play functionality – no software installation is required
Video capture at 1920×1080 resolution at 24 frames per second with under 200 milliseconds of latency
Forwarding of keyboard and mouse input
A pure HTML5 interface, which means no client software is needed beyond a browser
Remote audio locally
The ability to mount virtual media, boot from virtual storage, and wake on LAN
Password authentication and a secure TLS/HTTPS connection
The ability to paste text from the clipboard, use fullscreen mode, and save remote screenshots
Connecting the TinyPilot with your Server/PC
I won’t reinvent the wheel here and repost what Michael has already posted, but if you want a good walkthrough of how to hook up the TinyPilot, check out the written walkthrough here:
Voyager 2a Quick Start Instructions | TinyPilot (tinypilotkvm.com)
Using the TinyPilot and the interface
I found hooking up my TinyPilot unit to one of my Supermicro servers was a breeze and all the included dongles and cables hooked right up as expected. Below, I hooked into an XCP-ng server I had running in the lab and had no issues pulling up video, keystrokes were responsive, and everything worked as I would expect from a professional-grade KVM.
Also, it is all native HTML5, so there are no annoying plugins and other Java crap to deal with!
Web interface menus
Let’s have a look at the available menus in the interface. On the System menu, you have the following:
Security – Configure an interface password, allow SSH, etc
Virtual Media – Configure virtual media
Update – Update your TinyPilot
Hostname – Set the hostname of the device
Video Settings – Configure your video settings
Export Settings – Export your configuration settings
Logs – Gather logs for troubleshooting, etc
Power – Reboot or shut down your Tiny pilot
Next we have the Action menu. Here you can:
Paste – Paste something from the clipboard
Screenshot – Take a screenshot
Wake on LAN – Send the WOL packet to your endpoint
Keyboard Shortcuts – CTRL+ALT+DELETE
View menu contains the following:
Cursor – Choose cursor options
Show Keyboard – Show the on-screen keyboard or not
Enable Key History – Keep up with history
Full Screen – Enter full screen mode
Finally we have the Help menu that has:
About
Technical Support
FAQ
Booting from virtual storage
One of the really interesting things I wanted to try was the virtual media option to see how things would go to add virtual media, boot from it, and use it to reload an operating system. I first uploaded a Proxmox 7.4.1.ISO that I had downloaded. Remember, this could be any ISO, including Linux, Windows, etc.
The experience with the TinyPilot was a breeze. I have worked with Supermicro IPMI connections, and these have Virtual Media as well, but it isn’t even close to as seamless as the TinyPilot. I have run into numerous errors when working with the Virtual Media feature in the SMCI IPMI connections for no reason. However, again, none of that with the TinyPilot. It just worked.
Navigate to System > Virtual Media > Add Disk Image. You can add from a URL so it pulls directly down or you can point to a file on your local computer. Select the ISO, then select Mount.
When you reboot your Server/PC you should see an option for TinyPilot. Simple!
Cool stuff, the server boots from the ISO image loaded via the Virtual Media option.
TinyPilot Upgrades
TinyPilot is easy to upgrade the software for easy lifecycle management. Under System > Update, you can kick off an update of the TinyPilot software. So, you can keep your unit easily upgraded. No booting from a MicroSD card or some other cumbersome upgrade process which is excellent.
Video overview
Wrapping up
The TinyPilot Voyager solution is an excellent way to have a cost-effective Raspberry Pi KVM that won’t break the bank, and you can pair it with an HDMI KVM to control multiple computers/servers in your home lab.
Its compact design, impressive feature set, and recent updates make it an excellent choice in the market. Whether you’re managing an office network, a data center, or a server room, the TinyPilot Voyager’s professional-grade features and performance may be the perfect fit for your environment. Thumbs up!
You can visit the official TinyPilot site to learn more or order here: The Modern, Open-Source KVM over IP | TinyPilot (tinypilotkvm.com).


That’s a bad name for a KVM solution. There already is a Raspberry Pi based marine autopilot named Tinypilot. For which the name is much more appropriate too.