
Kubeadm is a command line tool for managing and configuring Kubernetes clusters for development or production. This guide will look at the top kubeadm commands to manage your Kubernetes cluster and what you need to know.
1. Installing Kubeadm
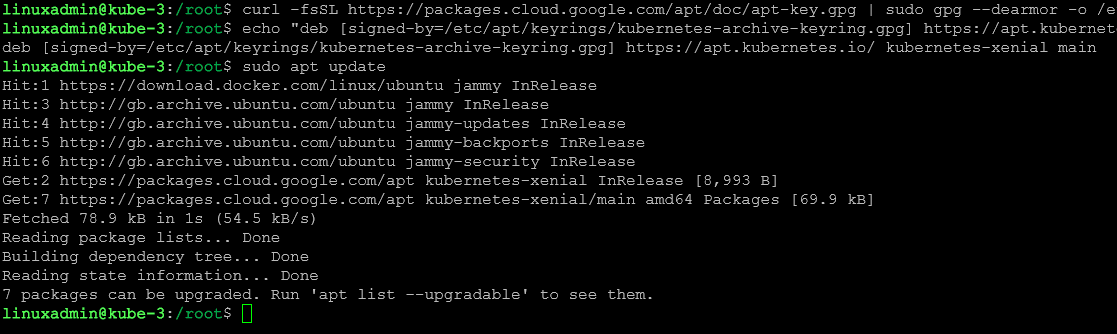
Before we look at the commands we can use with kubeadm, how do we install it? First, we need to add the Kubernetes apt repository before we can install kubeadm and setup Kubernetes cluster nodes.
To add the default apt repository in Ubuntu hosts run the commands below. Keep in mind you can also automate your deployment with something like Terraform.
##Pull down the GPG key
curl -fsSL https://packages.cloud.google.com/apt/doc/apt-key.gpg | sudo gpg --dearmor -o /etc/apt/keyrings/kubernetes-archive-keyring.gpg

##Add the key to your sources.list
echo "deb [signed-by=/etc/apt/keyrings/kubernetes-archive-keyring.gpg] https://apt.kubernetes.io/ kubernetes-xenial main" | sudo tee /etc/apt/sources.list.d/kubernetes.list

##Update the apt package index
sudo apt-get update
Below, I am running the kubeadm commands on Ubuntu VMs, AMD64 platform implementation in the lab for reference. Also, I have created a linuxadmin user for authentication outside of root with sudo privileges and using that for SSH.
Then, to install both kubeadm kubelet and kubectl, we can use the following command:
sudo apt-get install -y kubeadm kubelet kubectl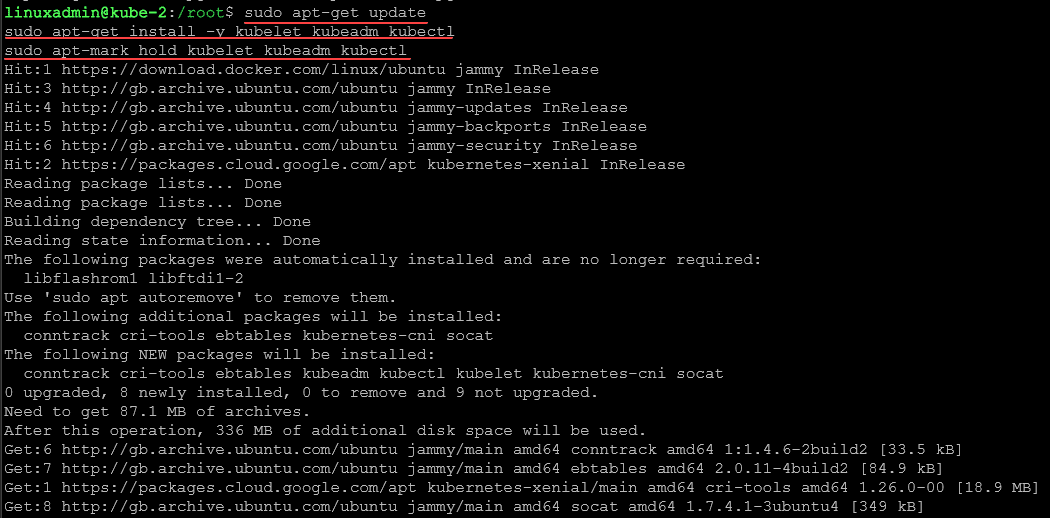
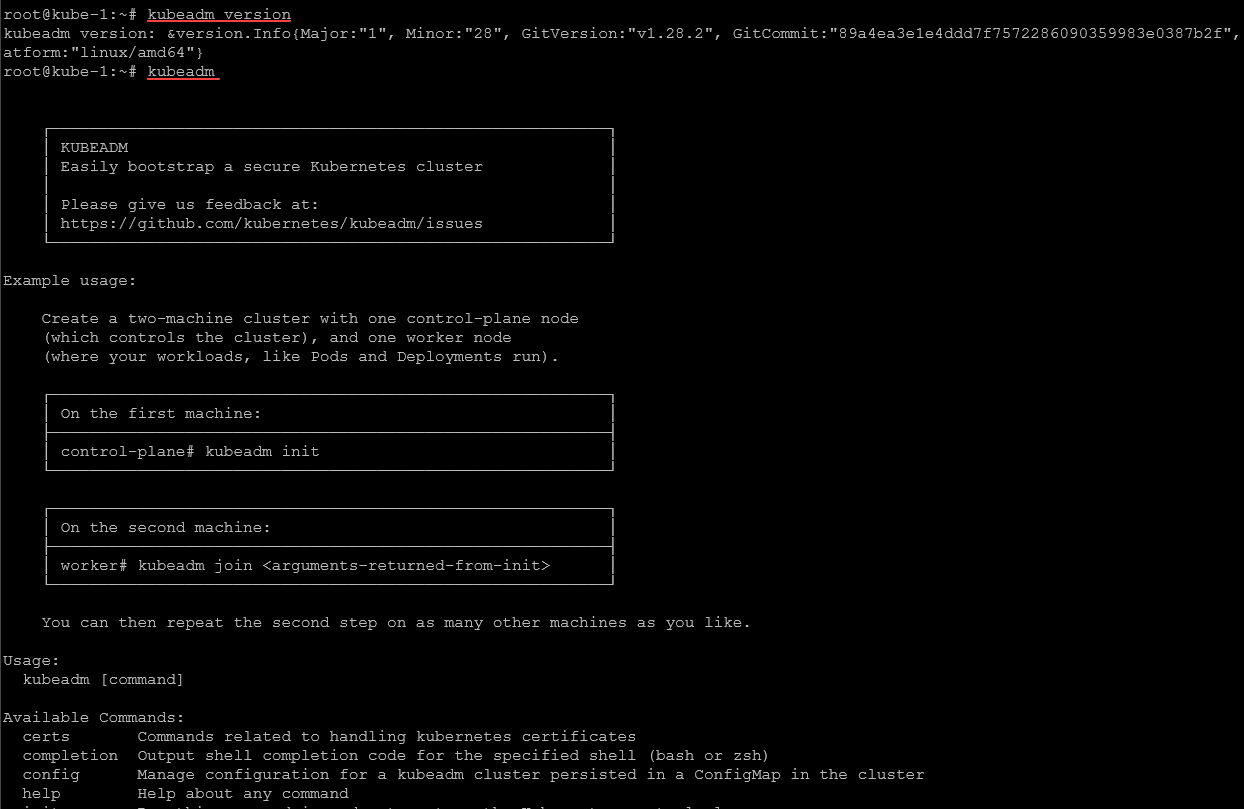
You can check your kubeadm version afterwards with the command:
kubeadm versionYou can also just run the kubeadm command by itself to see some examples in the output.
2. Kubeadm clusters initialization and configuration:
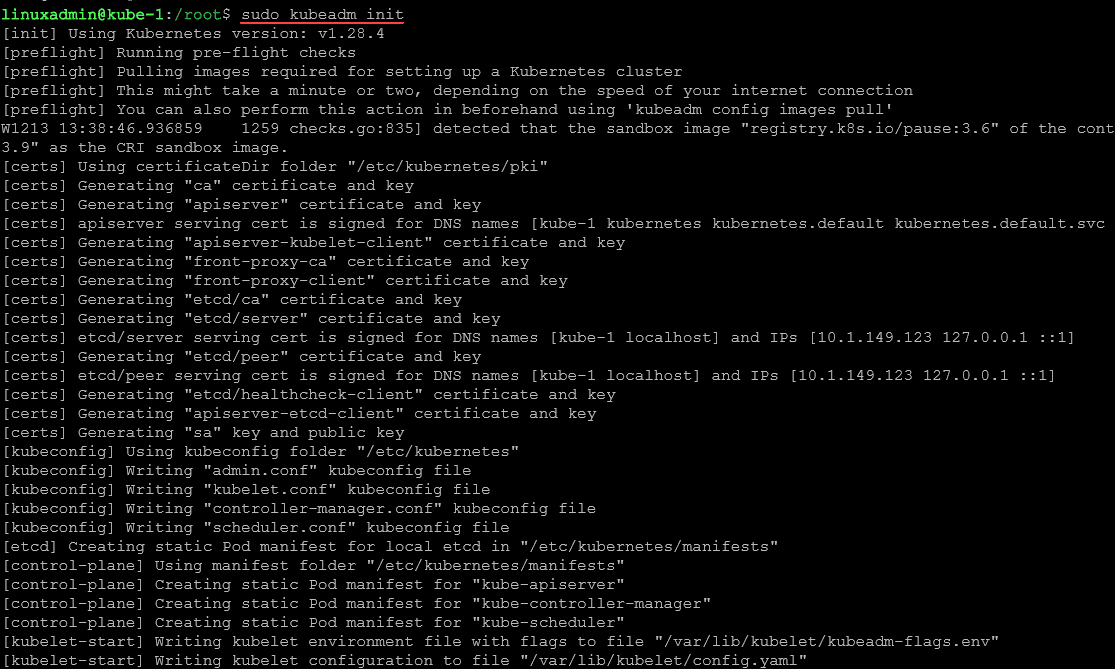
One of the first commands we will look at is the kubeadm init command. Using this command, we can create a Kubernetes cluster using kubeadm for cluster setup. Keep in mind there are prerequisites, dependencies, and other addons before you can run the command such as installing containerd (container runtimes) for new versions of Kubernetes. Docker containers (Docker engine) were used in early Kubernetes releases. Developers can use CRICTL command line tools to access these.
kubeadm init: This command initializes a Kubernetes control-plane node, and it bootstraps the cluster scheduler, which is the minimum nodes in a Kubernetes cluster. It performs checks beforehand and installs components like the kube-controller-manager, Kubernetes API server, etcd, and kubelet (all the master node components), and generates essential certificates and configuration files and sets up the private network for the pods.
Make sure you have firewall exceptions on your Kubernetes hosts for traffic if needed if you are using iptables, network policy, or something else if your hosts are in a different location separated with network devices. There are a number of ports needed.
Keep in mind you will still need to install a container network solution like the Calico network plugin (CNI). For example, you could use the following command with arguments to spin up your Kubernetes cluster. Note the pod network IP address range and control plane designation. You can use other command line flags like using bootstrap tokens.–enable-bootstrap-token-auth
When you run kubeadm, it runs prechecks to flush out errors before creating the cluster.
kubeadm init --pod-network-cidr=10.244.0.0/16 --control-plane-endpoint=10.1.149.123Below, you can see the initialization process runs a series of commands and pulls down the Kubernetes image required, TLS cert configuration based on DNS names for the network interface, coredns, front-proxy client and many other actions.
3. Adding worker nodes
To add a worker node to your cluster, you’ll first need to generate a token on your control plane node using the kubeadm token command:
kubeadm token create --print-join-commandThis command creates the token and prints the complete kubeadm join command. You can use the token more than once, if you have two worker nodes or others, all the nodes can use the same token.

kubeadm join command: This command adds worker nodes to the existing cluster. It retrieves the necessary join token and configuration information from the control plane node and configures the worker node to participate in the cluster. It will need full network connectivity to the control plane node (master node).
kubeadm join --token <token> --discovery-token-ca-cert-hash sha256:<hash> 192.168.1.10:6443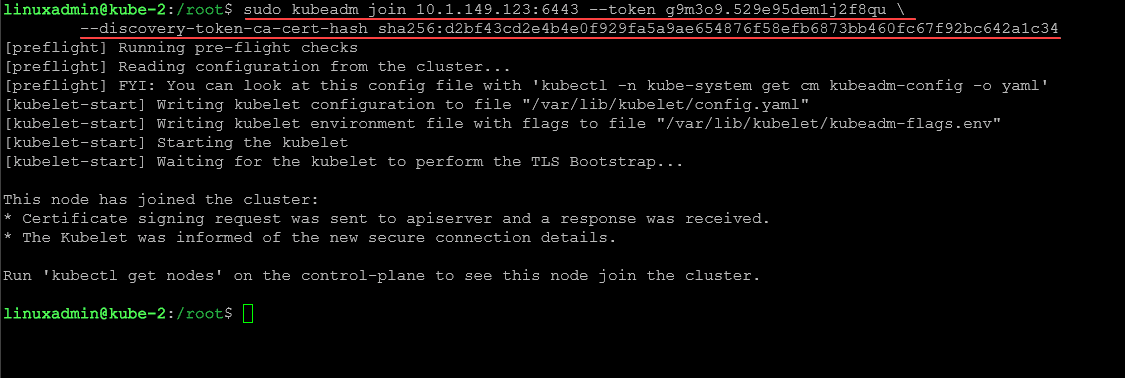
After you create the cluster, you can create a test app using something like a simple installation of Nginx pod and configmap in order to validate the design and backend of your cluster and have users test. Keep in mind, you can use other apps as well. You can expose the app with a nodeport configuration or ingress proxy.
4. Upgrading your Kubernetes cluster
Performing lifecycle maintenance on your Kubernetes cluster is an important part of Kubernetes cluster management. One feature of Kubeadm is it includes a command to check for updates to your Kubernetes cluster and perform those upgrades.
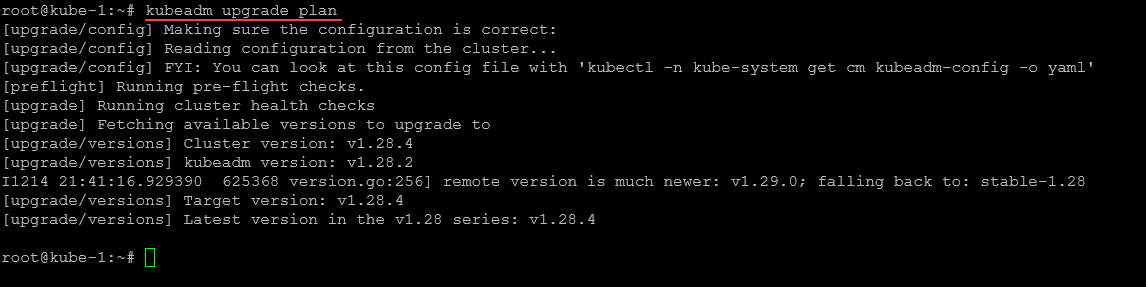
To check your cluster for upgrades, use the command:
kubeadm upgrade planAs you can see below, it checks the configuration, reads the configuration from the cluster, runs a pre-flight check, health checks and checks the current version and available versions.
Applying the upgrade
After you have checked for upgrades, you can apply the upgrades using the kubeadm command:
kubeadm upgrade apply v1.28.xThis command upgrades your control plane components to the version you tell it. Replace v1.28.x with the desired Kubernetes version.
As a note, you will need to make sure you have the newer version of kubeadm first, before you upgrade your Kubernetes cluster server version:

5. Creating a Highly Available Cluster
Initializing the First Control Plane Node
kubeadm init --control-plane-endpoint "LOAD_BALANCER_DNS:LOAD_BALANCER_PORT" --upload-certsThis command is used when setting up a highly available Kubernetes cluster. The –control-plane-endpoint is used to specify a shared endpoint for all control-plane nodes, typically a load balancer networking solution housing the IPs. The –upload-certs flag is used for sharing certificates between control-plane nodes.
Adding Additional Control Plane Nodes
kubeadm join [LOAD_BALANCER_DNS:LOAD_BALANCER_PORT] --token [token] --discovery-token-ca-cert-hash sha256:[hash] --control-plane --certificate-key [certificateKey]After initializing the first control plane node, this command is used to add additional control plane nodes to your cluster for high availability. Keep in mind, that you need to have a persistent storage volume to ensure your containerized workloads are highly available from a storage perspective.
6. Resetting the Cluster
The process to reset the cluster is a simple command with kubeadm.
kubeadm resetUse this command to remove all Kubernetes components installed by kubeadm. It’s a useful step for starting over or cleaning up if you have an issue or errors. This is a great tool for lab environments where you want to reset the cluster and if you forgot to take a snapshot on your Kubernetes cluster host virtual machines and you have an error state.

Combining Kubeadm and Kubectl for Effective Cluster Management
Kubeadm is mainly used when setting up and managing the infrastructure of a Kubernetes cluster. Another tool, kubectl, is the tool used for working with your cluster once these are created and day to day tasks.
Knowing how these work together is extremely important. To use the kubectl command you will need to have your kubeconfig file configured to connect to your Kubernetes cluster, on your control plane node or a workstation. The kubeconfig file contains the credentials (token secrets) to connect to the cluster.
You can also access the Kubernetes API with a kubectl proxy. Kubectl proxy is a utility that enables access to the Kubernetes API server from within a cluster, from a pod, or another location outside the cluster.
Verifying Cluster Status
Once your Kubernetes cluster is initialized with kubeadm, the first step is to check the status of your nodes:
kubectl get nodesThis command lists all nodes in the cluster and shows their status, confirming that they are connected and operational.
Getting service information
This command gives you information about services deployed in your cluster.
kubectl get svcGetting namespace information
This command gives you information about namespaces deployed in your cluster.
kubectl get nsDeploying Applications
With your cluster up and running, deploying applications can be accomplished with kubectl. You can use the command below to install configurations like an ingress controller.
kubectl apply -f [application-config.yaml]This command deploys an application using a configuration file, which specifies the deployment details, including replicas, labels, and resource requirements.
Monitoring Cluster Resources
To monitor the resources and workloads running on your cluster:
kubectl top nodes
kubectl top pods
These commands provide real-time metrics on the usage of CPU and memory at both the node and pod levels.
Managing Pods and Deployments
Here are the commands you can use for basic tasks and creating things inside your Kubernetes clusters, deleting, etc.
kubectl get pods kubectl create -f [pod-config.yaml] kubectl delete pod [pod-name]These commands allow you to manage the pods within your cluster, ensuring smooth application operations.
Accessing Logs for Troubleshooting
When troubleshooting issues within your cluster you can take a look at logging with the command:
kubectl logs [pod-name]This command retrieves logs from a specific pod, crucial for diagnosing issues or monitoring application behavior.
Executing Commands in a Container
To run commands inside a container within your Kubernetes cluster:
kubectl exec -it [pod-name] -- [command]This command is really good for debugging and working with your applications directly.
Together, kubeadm and kubectl are going to cover a lot of daily Kubernetes cluster management tasks. kubeadm takes care of the initial setup, network configurations, and node management, and then kubectl is the go to tool for day-to-day management, resource monitoring, and other tasks.
Wrapping up
Kubeadm is definitely a tool to know and learn and work with in the home lab to hone your skills. It is an easy tool to use to provision your Kubernetes clusters. When you use it together with the kubectl command, you can cover the majority of tasks that you need to do day to day with Kubernetes.
More in this topic


Discuss this in the Community
Google is updating how articles are shown. Don’t miss our leading home lab and tech content, written by humans, by setting Virtualization Howto as a preferred source.
About The Author
