If you are looking for a Kubernetes IDE solution that provides a graphical interface for interacting with your Kubernetes clusters, you may have stumbled onto Lens, an excellent product from Mirantis. Many have wondered about the future of the product since Mirantis released Lens Pro in July of 2022. However, you may not know the Lens project was born from an open-source solution called Openlens that is free to download and install. Let’s look at the Openlens Kubernetes IDE.
OpenLens Video Overview
Take a look at my video overview of the Openlens IDE solution:
What is Openlens Kubernetes IDE?
The Openlens Kubernetes IDE is the open-source code project under MIT license, from which Lens desktop originates as a branch. It is a development tool for Kubernetes environments and containerized projects. Cloud-native ecosystem pioneers got together and formed the project, and it is readily available from the Openlens repository on Github.
When you Google Kubernetes IDE, you will likely land on the Lens project in one respect or another or see a reference to it. It is catching on among those who work with Kubernetes.
It is essentially the Lens IDE without the proprietary components. The latest version of Openlens aligns with the latest version of the Lens IDE binary. However, there is no official binary you can download from Open lens. Instead, the source code is readily available, allowing you to compile the latest source code and produce your own binary of the solution.
Like the Lens IDE, Openlens allows radically improving productivity with Kubernetes clusters in your environment with great tools to interact with your clusters.
Openlens is a mirror copy of the graphical user interface of what you see when you download and run the Lens IDE desktop.
The Lens IDE still has a free version called Lens Personal edition that is free to use for individuals. However, you do have to sign up with a Lens ID and receive a personal license key when you download the binary for the solution.
Tools for Kubernetes
It seems like everyone is getting into the Kubernetes tools game these days and you will see myriads of new solutions that provide visibility into Kubernetes. Kubernetes is the de facto orchestration engine for microservices architecture and infrastructure. It provides many features like automation, load balancing, high availability, scalability, helm package manager, ingress controllers, monitoring, management, scalable networking, logging, secrets management for credentials, and many other resources for the enterprise.
However, it is filled with complexity, and Kubernetes operators use tools like lens and Openlens provides the means for troubleshooting your Kubernetes deployment and just keeping an eye overall on the environment.
Openlens vs. Lens desktop
Many may wonder about the differences between running the Openlens solution vs. now running Lens Desktop, as they both appear identical at first glance. Since the introduction of the Lens Prod solution back in July 2022, Lens has been going after the corporate market and looking to add additional pay-for features that are certainly compelling.
Let’s compare the free version of Lens (not OpenLens) and the personal license of Lens Desktop with the Pro version. What do you get with the Pro version not included with the Personal license?
You can download and install Lens Desktop for Windows, Linux, and macOS (including Apple silicon).
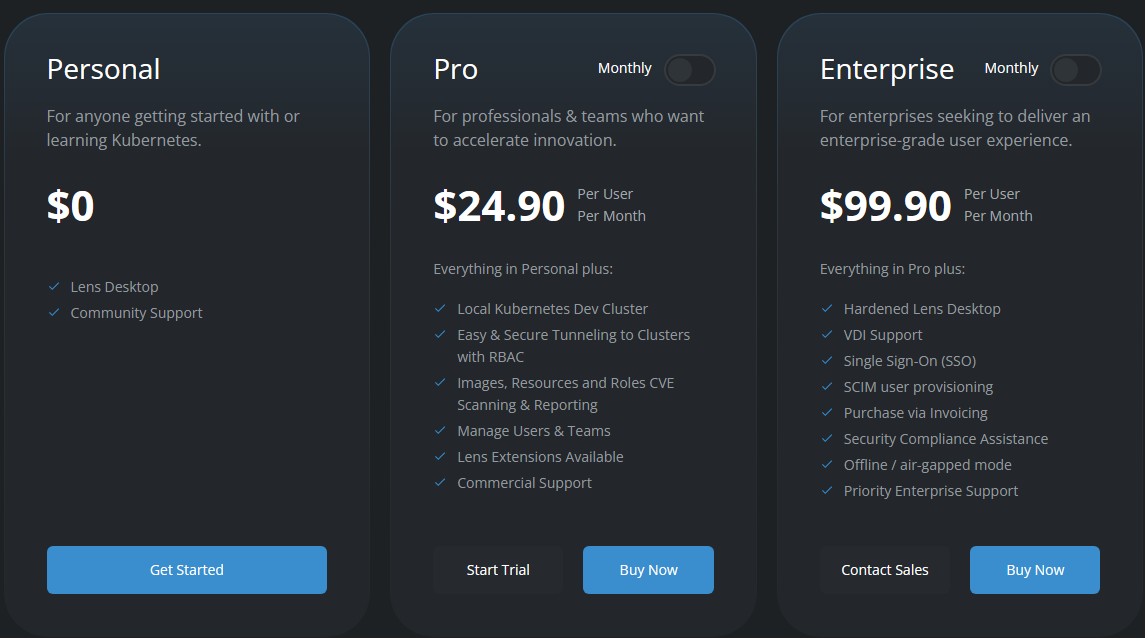
Lens Desktop free vs paid
Lens Personal – For companies to be eligible for the Lens Personal license, they need to have revenue of $10M or less. The Lens Desktop solution and access to the Community Forums & Slack are included with this license.
Lens Pro – This is a $24.90/month license or yearly license cost that includes: Lens Kubernetes Dev Cluster, Easy & Secure tunnelling to clusters with RBAC, images, resources, and roles CVE scanning & reporting, Lens Extensions Available, commercial support and other features.
Below is a view of the comparison on the Lens site between the Personal and Pro versions of the product and their costs. As you can see, you can select between monthly or annual billing for the Pro version in the official comparison link below: Lens ID (k8slens.dev)
***Updated 3.22.2024***
Below is the newest pricing for Lens.
Openlens
Openlens is essentially equivalent to the Lens Personal license without any collaboration features or vulnerability scanning built into the solution, as these are included with the paid features of Lens Pro.
The Openlens distribution is the equivalent of the Lens Personal solution without the paid features. If you want the cleanest non-commercialized or proprietary components for users, then Openlens is the way to go. However, as noted earlier, you will have to build the binaries yourself or rely on others who have compiled the code and posted to Github repository locations to obtain the installer as these are published.
Download Openlens
For some who are not inclined to try to figure out how to build and make the binaries and install the components themselves after they create the binary, it may be a deal breaker to have to rely on untrusted repos to pull down the packages and build the binaries for the Openlens project. It may be a barrier to using Openlens.
However, as mentioned, there are public repos out there where developers with more experience making and publishing files have already compiled the source code, such as the page here where you can download the Openlens binaries:
This is a binary build repository that provides binaries for the OpenLens project. A couple of things to note from the developer:
- This repository exclusively offers signed binaries without modifying the source code of the OpenLens repository. For any software-related inquiries or issues concerning OpenLens or the Lens Integrated Development Environment (IDE), please visit the Lens repository to report an issue.
- Extensions: As of version 6.3.0, certain extensions have been omitted from Lens. To add these widely utilized extensions, enter @alebcay/openlens-node-pod-menu on the Extensions page found within the OpenLens menu for automatic installation. Should you encounter an issue where the extension appears to enable and disable repeatedly, simply restart OpenLens and activate it from the Extensions page. For more information, refer to the provided sources.
One thing to note, these are not signed binaries, so you may see security warnings with the installation of the Openlens app.
Install Openlens
After downloading the latest binary from the link above, installing Openlens is straightforward. Once you download the Openlens installation, it is a simple installer to get up and running.
Follow the prompts for the installation options.

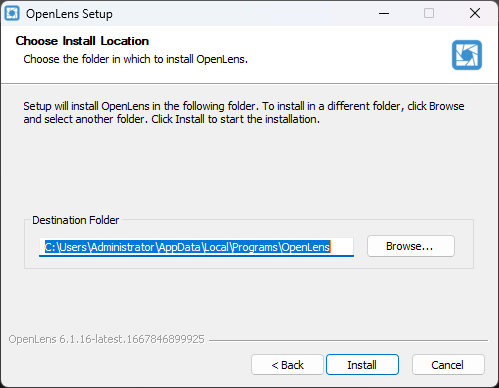
Choose the install location.
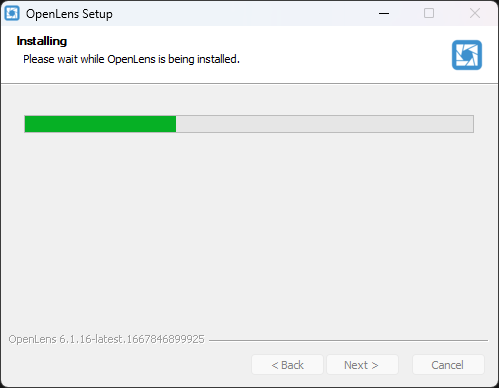
Installer begins.
After finishing the installation, you can launch Openlens.
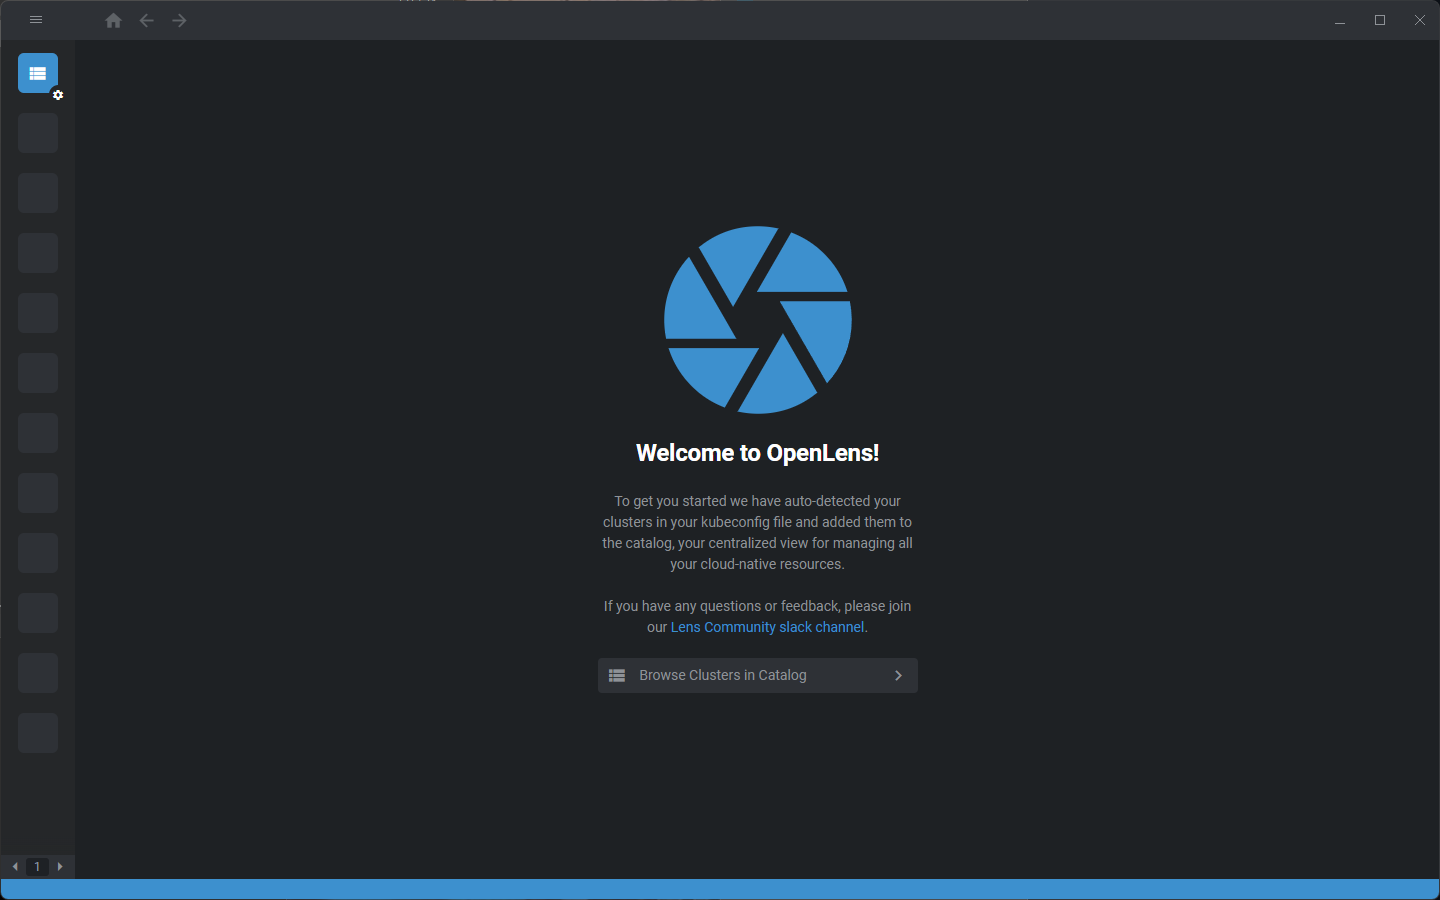
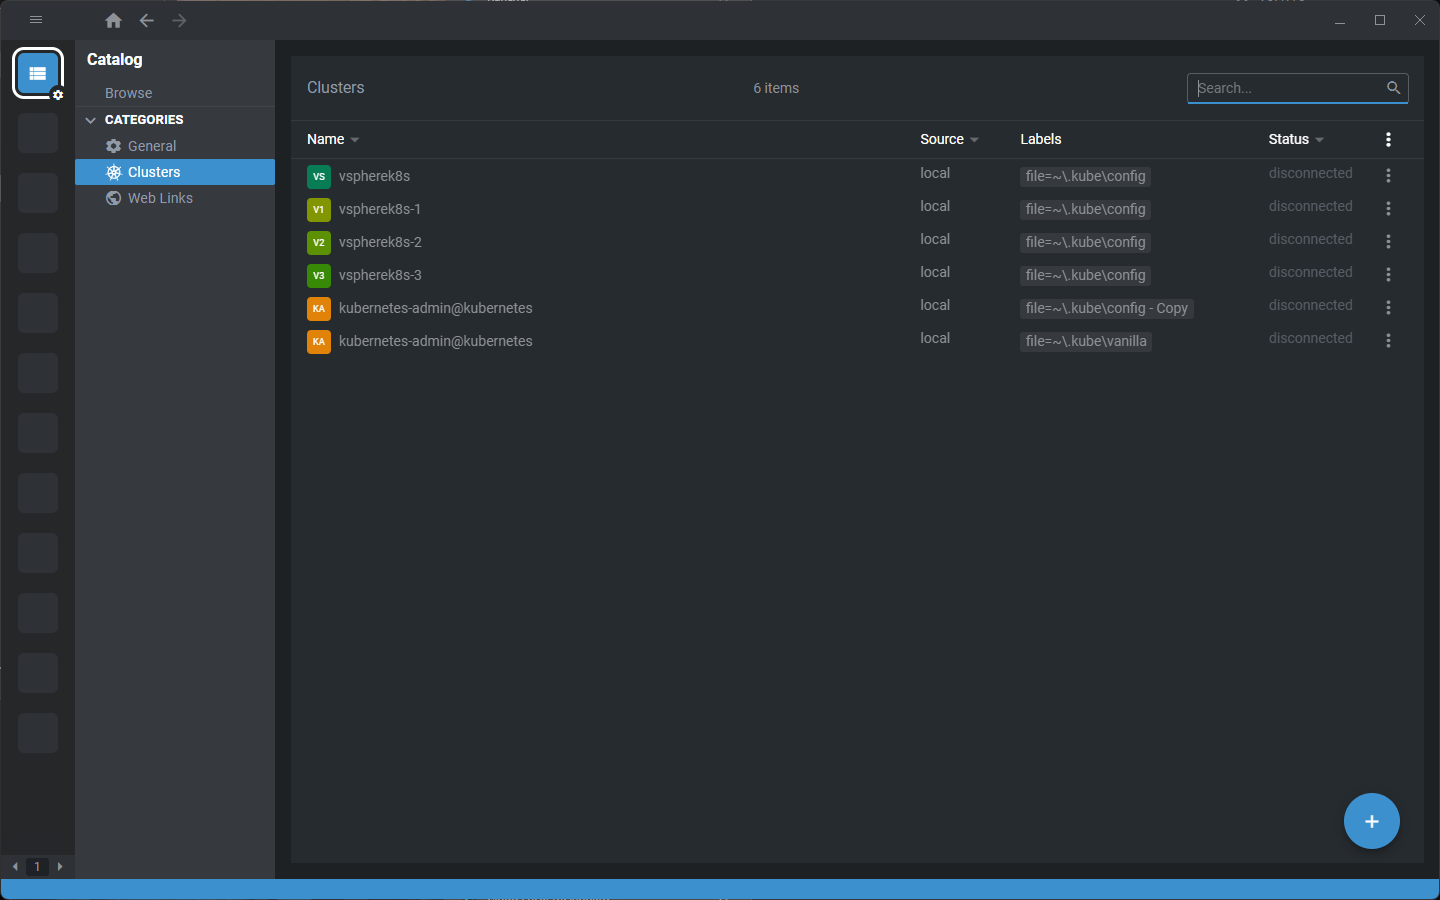
Unlike launching Lens Desktop, you won’t see the prompt to upgrade to Pro, etc. Like Lens Pro, it reads from your computer’s available Kube config files.
Below, it displays a list of kube config files found as an example.
Using Openlens
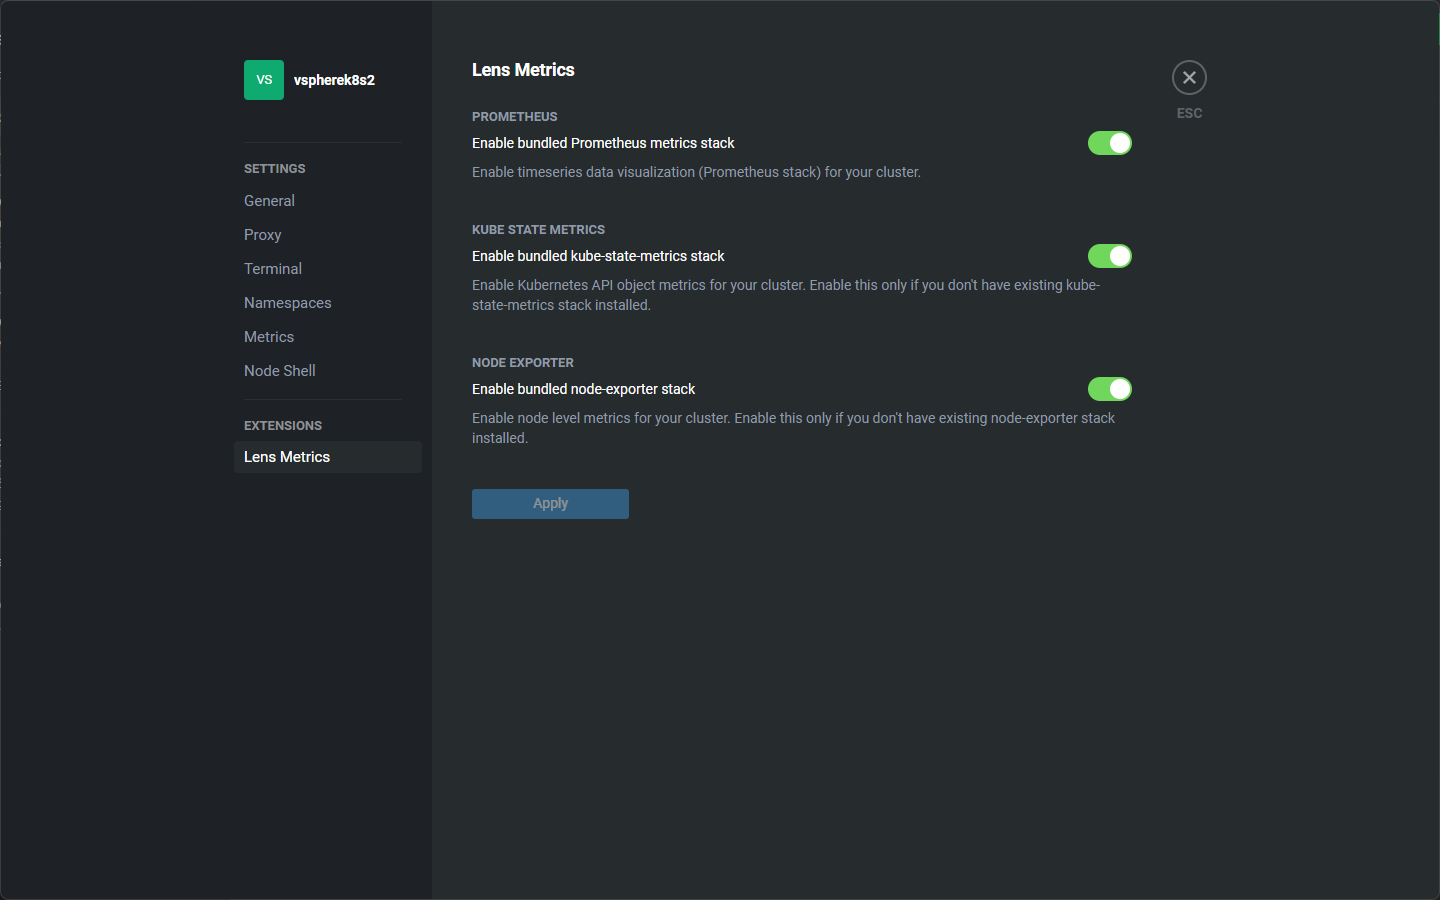
Let’s look at a few screens from the Openlens installation and a few configuration items. When you first install Openlens or Lens, you will need to install the Prometheus stack included with the solution to start pulling metrics information from your Kubernetes clusters.
They make this easy. Underneath the settings for your Kubernetes cluster once you are attached, you will see the Lens Metrics entry. Here you can simply toggle the metrics integrations, and Openlens will automatically install the components needed.
Installing the Openlens metrics
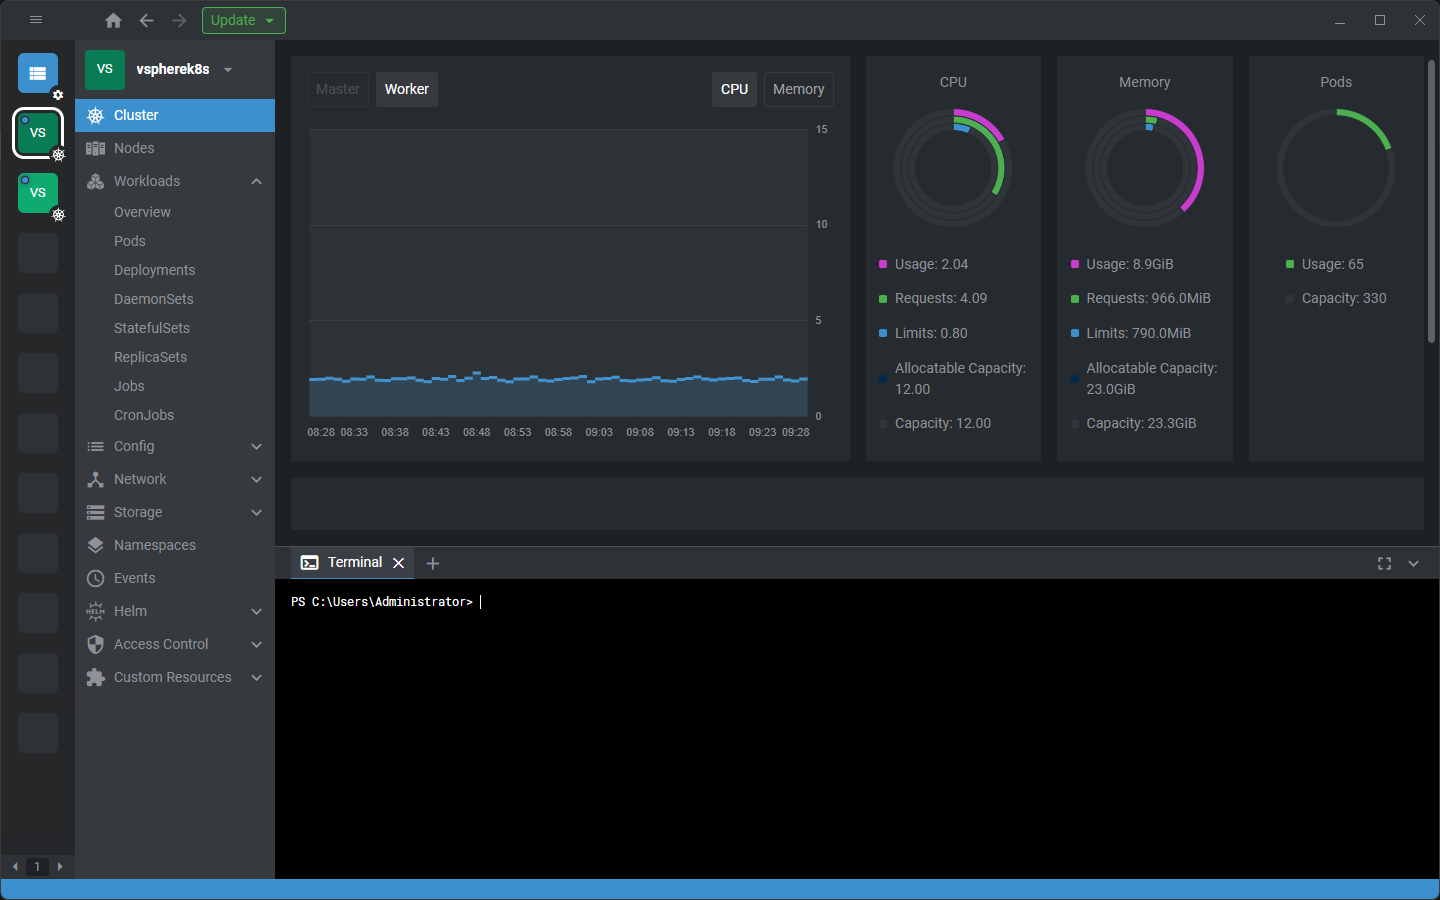
After installing the components of the metric and waiting a few minutes, I had metrics information displaying in the Cluster dashboard.
Viewing Kubernetes cluster information after installing metrics
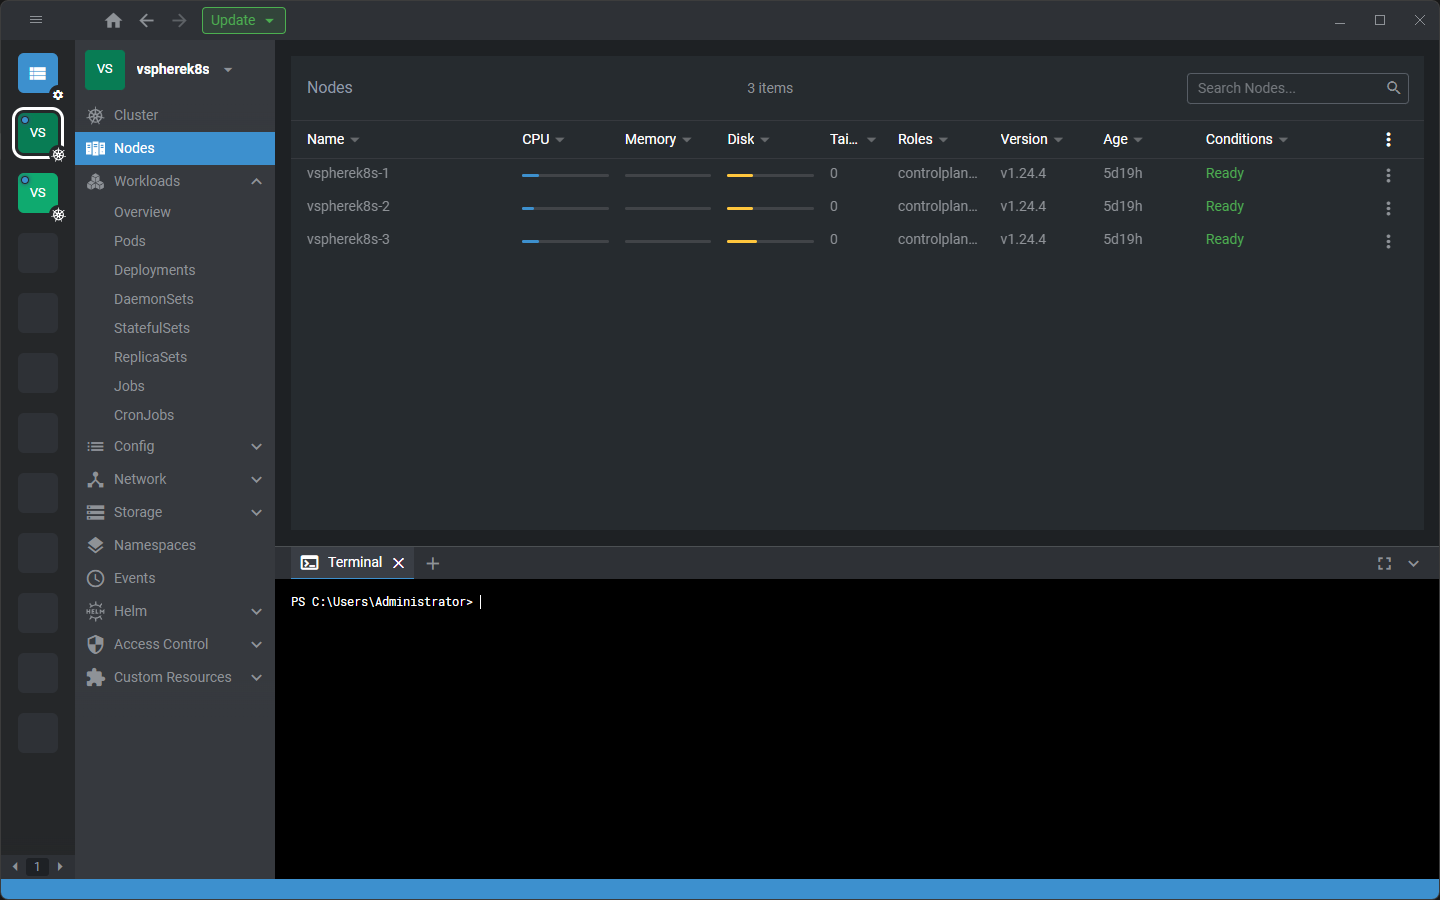
Clicking the Nodes menu displays the Kubernetes nodes and the metrics information for these.
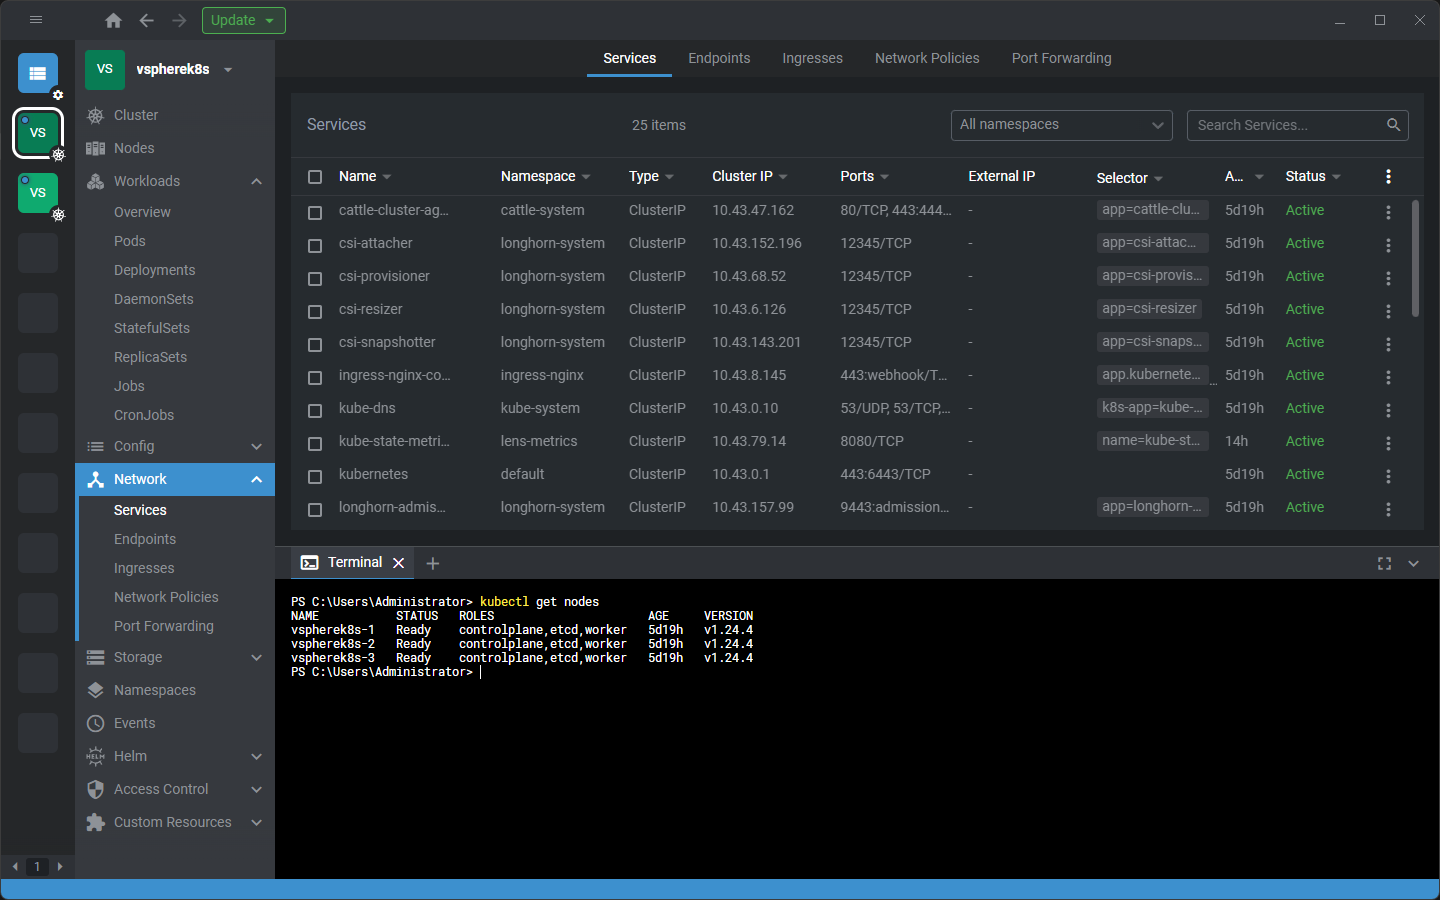
Viewing network services with Openlens
Under the Network > Services node, you will see the network information, including external IP addresses along with Cluster IPs.
If you notice below too, you will see the Terminal open. One of the really cool things about Openlens and Lens is they allow you to launch a terminal to that specific cluster based on your kube config, without having to change that out between sessions. It reads the .kube directory and enumerates all config files you have there and simply uses these to attach to your specific cluster you are working with.
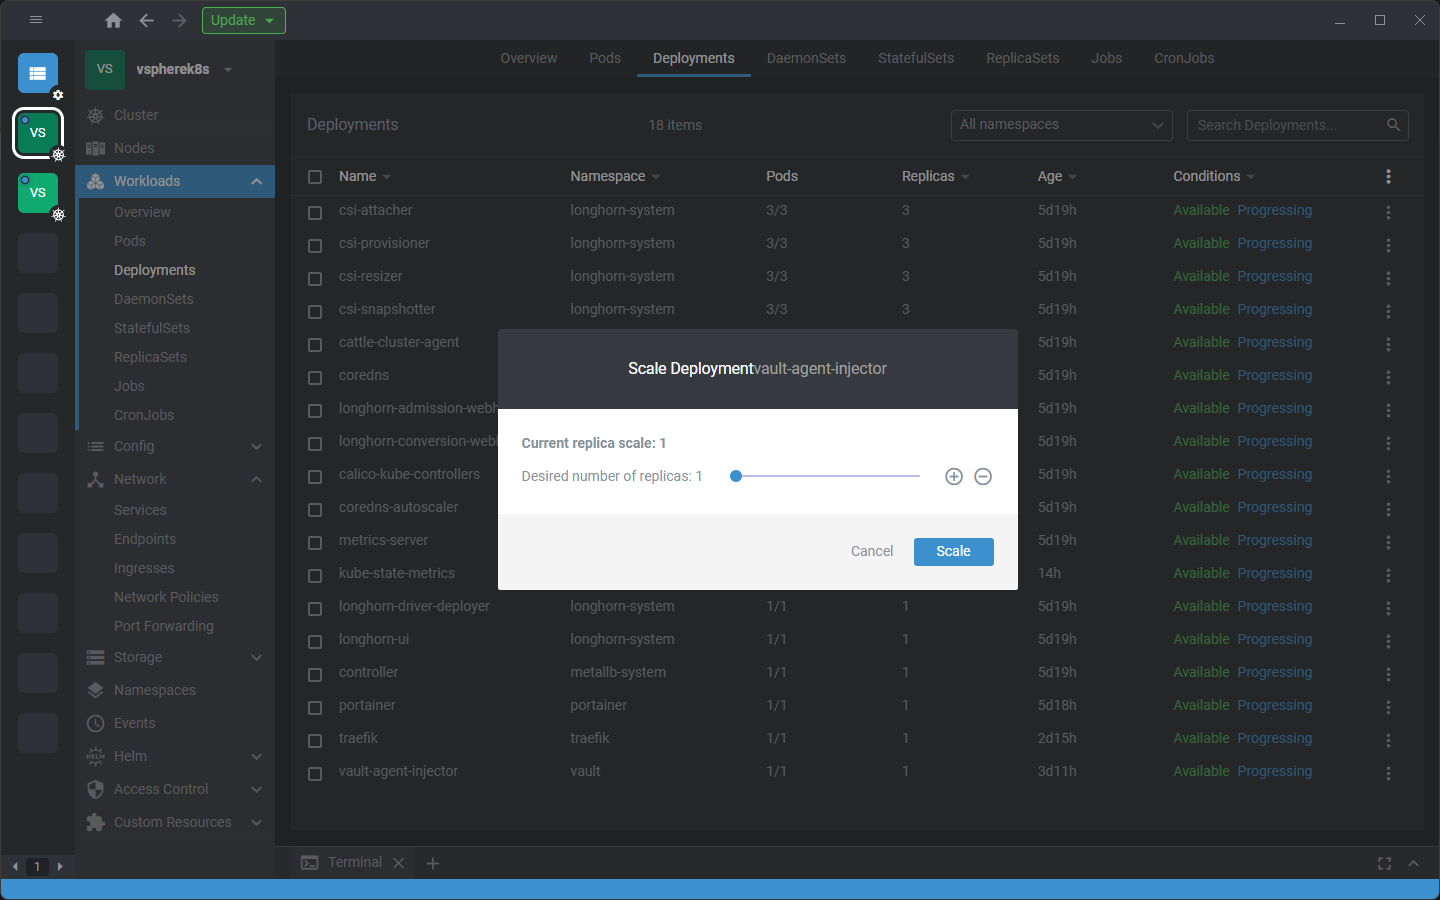
Viewing your Kubernetes Pods with Openlens
Looking at Pods in all namespaces.

From the Openlens GUI, you can easily perform configurations such as scaling deployments, etc.
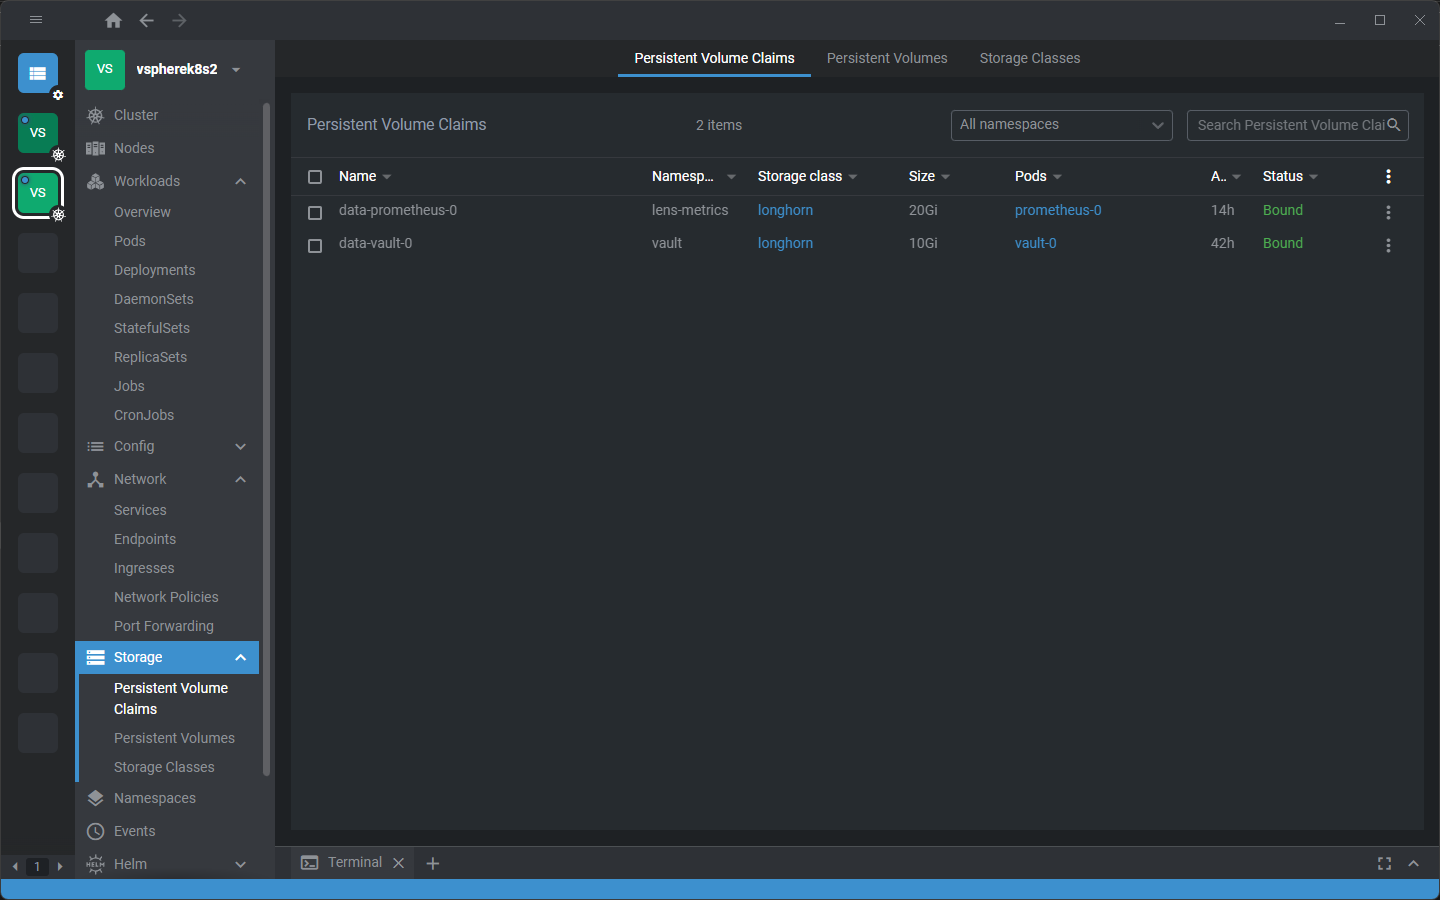
Viewing persistent volumes, persistent volume claims and other storage details
Easily see and work with persistent volume claims, persistent volumes, and storage classes.
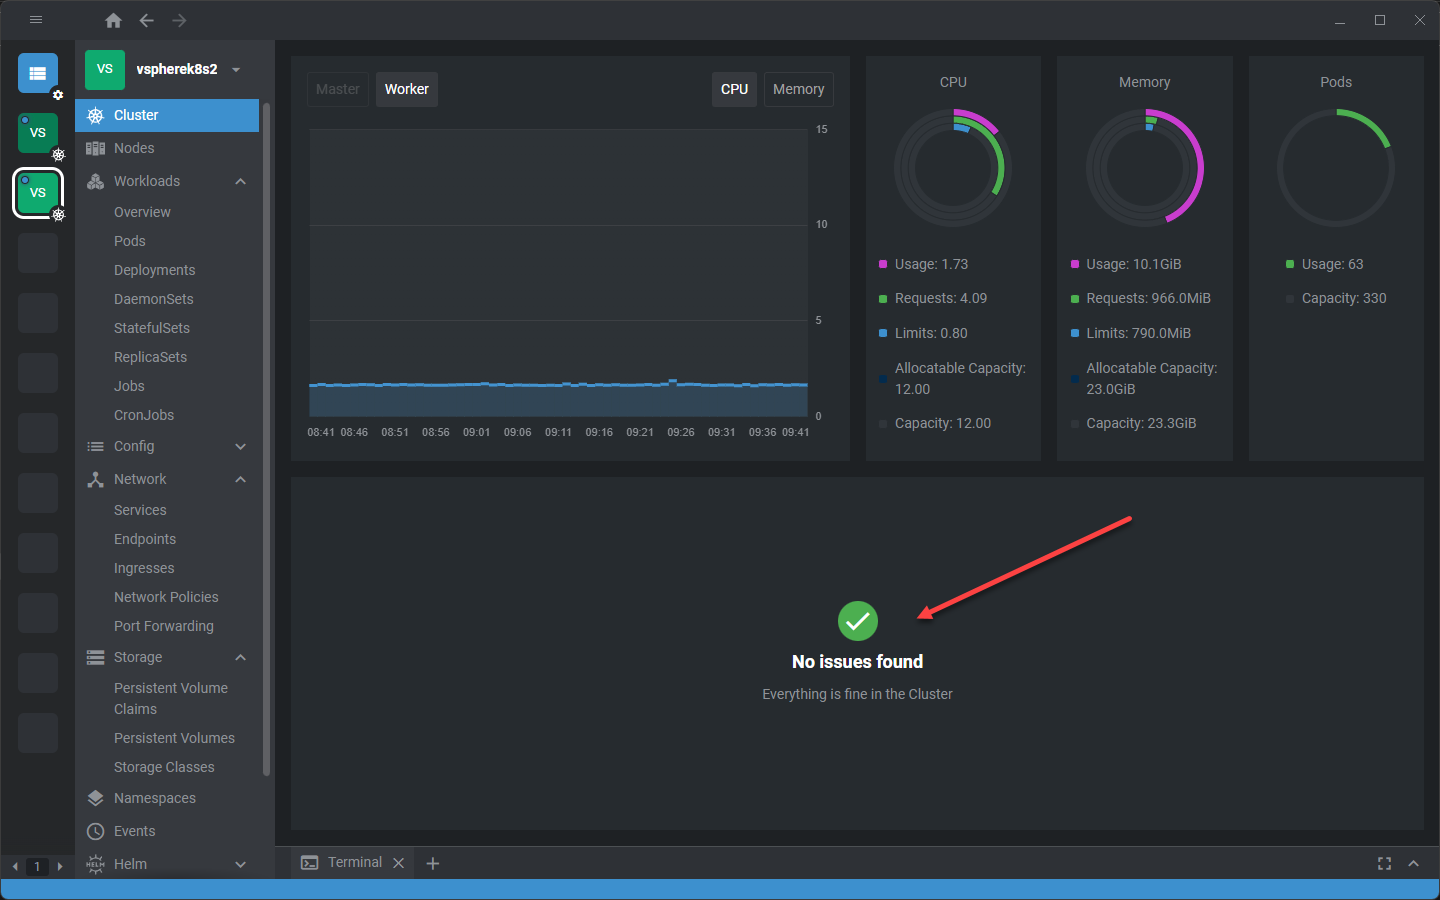
Openlens lets you quickly see any issues in your Kubernetes environment on the Cluster dashboard, making it easy to spot problems.
Openlens FAQs
Yes, the Openlens project is free and open source and allows anyone to compile and build their own files for installation on their specific device. There are also repositories where users have posted versions of the code already compiled for convenience. It will be up to the end-users discretion whether they want to trust these sources.
Essentially yes. The Lens solution was born from Openlens, the open-source project from which Lens came. However, some feel better about using the completely open-source solution without any productivity components added to the Lens application or without the nags to upgrade to Lens Pro. However, the Openlens project will not include vulnerability scanning and other collaboration features built into Lens.
These are on par with one another, in my opinion. I don’t think there would necessarily be a compelling reason to choose Lens Personal over Openlens. Also, you don’t have to sign up with Lens and get the personal license which is still required with their free version.
Open lens must be compiled and you have to create a file to use the solution. There are free git repository locations out there where users have already compiled Openlens and have it easily available for download.
Wrapping Up
Openlens is a great alternative to the Lens Personal solution. However, if you are looking for more advanced enterprise features, such as vulnerability scanning, collaboration with team members, etc, then Lens Pro is the way to go and offers features that will likely never be included in the Openlens offering or Lens Personal.
Google is updating how articles are shown. Don’t miss our leading home lab and tech content, written by humans, by setting Virtualization Howto as a preferred source.
About The Author