In case you haven’t heard, the latest release of Portainer includes an excellent new feature that allows fully automated provisioning of Microk8s Kubernetes onto existing nodes you have running in your environment. Along with this feature, Portainer 2.18 contains other improvements to enhance your container management experience. We’ll look at the process to automatically install Microk8s using Portainer on Ubuntu 22.04 servers, offering you a seamless way to handle Kubernetes locally. As a bonus, we will look at LoadBalancers and ingress.
What is Portainer?
Portainer is an open-source tool for managing containerized applications with security in mind. It provides a user-friendly interface where you can access Portainer and quickly deploys applications, manages multiple environments, and enables users to control everything from one place. In my honest opinion, if you are going to run a local Kubernetes in your data center or home lab, Portainer is an excellent tool to help manage your environment. And, as we will see, it can even provision your Kubernetes cluster for you.
Check out Portainer here:
Here are some of the key features of Portainer:
Simple Management Interface
Portainer provides an intuitive web-based user interface to manage your Docker containers, images, networks, and volumes.
Multi-Environment Support
It’s not limited to managing just one Docker daemon environment. With Portainer, you can manage multiple Docker environments, whether they are located on the same host or spread across several different hosts.
Application Templates
Portainer includes the application templates concept, making it easy to deploy complex applications.
User Management
Portainer has a built-in user management and authentication system that helps you control who can do what in each Docker environment.
Support for Docker Swarm and Kubernetes
Portainer helps manage Docker environments and supports Docker Swarm and Kubernetes, making it a versatile tool for container orchestration platforms.
Registry Manager
It allows you to browse Docker registries and Docker Hub, giving you an easy interface to manage and deploy images.
Easy to Deploy
Portainer itself is easy to deploy; it can be up and running in your environment with a single Docker command.
Portainer agent
Allows you to connect Portainer and manage multiple Docker environments from a single dashboard
GUI-based
While you can certainly use the Kubernetes command line tool, kubectl, Portainer eliminates the need to interact at a low level to control and manage your Kubernetes cluster resources. Now with 2.18.2, you can set up your Microk8s config without the command line. Portainer does all the heavy lifting for you.
Portainer simplifies container management in various environments, including Docker, Docker Swarm, Kubernetes, and Azure ACI. It’s an excellent tool for both beginners looking to get started with containerization and experts who need to manage complex deployments.
What’s New in Portainer 2.18?
Portainer 2.18 has several new features and improvements designed to optimize your work with Docker and Kubernetes.
Improved page load performance: Portainer 2.18 promises a faster UI, thanks to numerous changes to the interface that boost load times and streamline API calls.
MicroK8s cluster creation: This feature enables the provisioning and configuration of a MicroK8s Kubernetes cluster directly onto fresh machines from the Portainer interface. This simplifies the setup process significantly, requiring only SSH access to the servers.
Expanded annotation support: The new version expands support for adding Kubernetes annotations to various resource types through the UI, making configuration easier and more efficient.
Kubernetes services view: Portainer 2.18 introduces a new Services page for Kubernetes environments, providing detailed visibility into the services deployed on your cluster.
Edge Agent Standard and Async: This release further develops the Edge Agent functionality, offering standard and asynchronous deployment options to better suit your specific needs.
Expanded snapshot functionality: The snapshot feature for asynchronous Edge Agents has been enhanced, allowing you to browse more of your environment from the snapshot, including container status, volume, image, and stack listing.
mTLS specific certificate support: Now, you can choose a specific set of certificates for mTLS use, separate from the one used for Portainer itself. This is particularly useful when you have separate domains for access to Portainer and for your Edge Agent communications.
How the New Portainer Feature is a Game Changer
Portainer 2.18’s integration with MicroK8s represents a significant leap forward. This new feature allows users running Portainer Business Edition (EE) to create a MicroK8s Kubernetes cluster on existing machines with your favorite Linux distribution, maximizing resource utilization while still providing the benefits of Kubernetes.
By integrating the simplicity of MicroK8s with the robust management capabilities of Portainer, deploying and managing Kubernetes applications becomes a seamless, intuitive process (batteries included, so to speak).
You can use a solution Kubespray or K3sup as well. These are super effective and great tools. However, if you want a GUI approach Portainer is the way to go.
What is Microk8s?
As for MicroK8s, it is a lightweight, zero-ops, and fully conformant Kubernetes that’s perfect for developer workstations, edge device, and IoT. It’s a barebones upstream Kubernetes that installs on your workstation and comes with many addons that can be easily enabled or disabled according to your needs. These include the Kubernetes Dashboard, DNS, and other additional services.
It is easily installed using the snap install microk8s classic command in Ubuntu, etc.
Underlying container technology
MicroK8s, like other Kubernetes distributions, uses a container runtime to run containers. By default, MicroK8s used Docker as its container runtime, but since the major version 1.14 it switched to containerd, another popular container runtime that’s a bit more lightweight than Docker.
Difference in containerd
While Docker and containerd serve the same essential function—running containers—they do so in slightly different ways. Docker includes additional features, like its image-building system and command-line interface, which aren’t strictly necessary for running containers in a Kubernetes context. Containerd is a bit more stripped-down and focused just on running containers, which can make it more efficient in some cases.
So while you can use Docker with MicroK8s if you want to, by default, it uses containerd. It’s also worth noting that even though Docker isn’t the default container runtime for MicroK8s, Docker images will still run without any issues on MicroK8s.
System Requirements
MicroK8s runs on most Linux distributions and Windows or macOS using VMs. But for this case, we are focusing on Ubuntu 22.04.
Minimum of 20GB disk space, 4GB memory, and 2 CPU cores for MicroK8s setup.
Stable internet connection to download necessary software and packages.
User with sudo privileges for installation and configuration.
It’s important to note that MicroK8s has its own container runtime, containerd, and doesn’t use Docker by default. However, Docker images can still be used with MicroK8s.
Software Requirements and Prerequisites
Aside from the system requirements above for MicroK8s, to run Portainer, you should have the following software installed and configured on your Ubuntu 22.04 system:
Docker: Docker is a prerequisite for running Portainer if you are running it on a standalone host or in Docker swarm. You’ll need to install it if it’s not already installed on your system. Docker provides the containerization platform on which Portainer runs.
Sudo User: You should have a user account with sudo privileges. This is necessary for performing administrative tasks during the installation process.
Stable Internet Connection: A stable internet connection is required to download the necessary software packages for the installation.
Updated System: Your Ubuntu system should be updated to the latest packages. You can update all existing packages on your system by executing the following commands in the terminal:
$ sudo apt update -y $ sudo apt upgrade -yAfter all updates are installed, reboot your system.
Installation of Necessary Dependencies: Install the necessary dependencies for Microk8s by running the following command:
$ sudo apt install -y curl wget apt-transport-https
The new Portainer feature is a Business Edition feature. However, Portainer generously allows you to have a free (5) node license to run Business Edition in your environment, like a home lab. They also sell a reasonable home and student license if you need to manage more hosts.
Portainer Install Microk8s Automatically on your existing nodes
Let’s look at the installation instructions to use Portainer to install and manage your Microk8s Kubernetes environment. You can run Portainer in a standalone Docker environment and manage/create your Microk8s Kubernetes environment. So, you don’t have to be running a Portainer pod in Kubernetes to interact with Kubernetes.
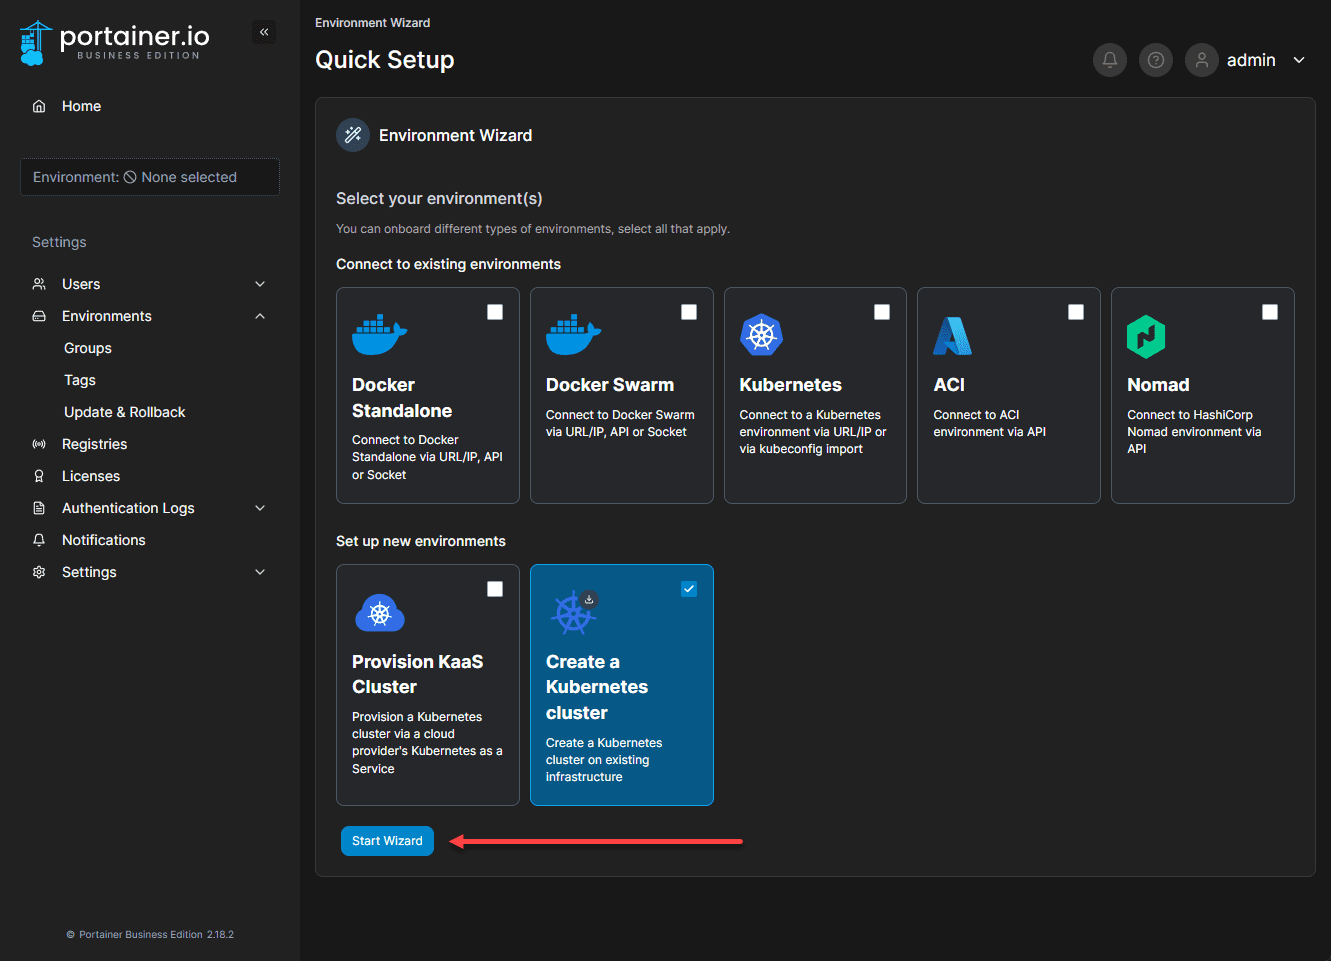
To begin the process of allowing Portainer to manage all the moving parts of the Microk8s install, go to Environment and begin adding an environment. Here we are selecting the create a Kubernetes cluster.
- To level set I have (3) Ubuntu 22.04 VM instances running in my virtualized host system – These have been fully patched, but have not be installed with any type of container runtime, etc.
Create a Kubernetes cluster
Go to Environments and you will see the option in Business Edition to Create a Kubernetes cluster.
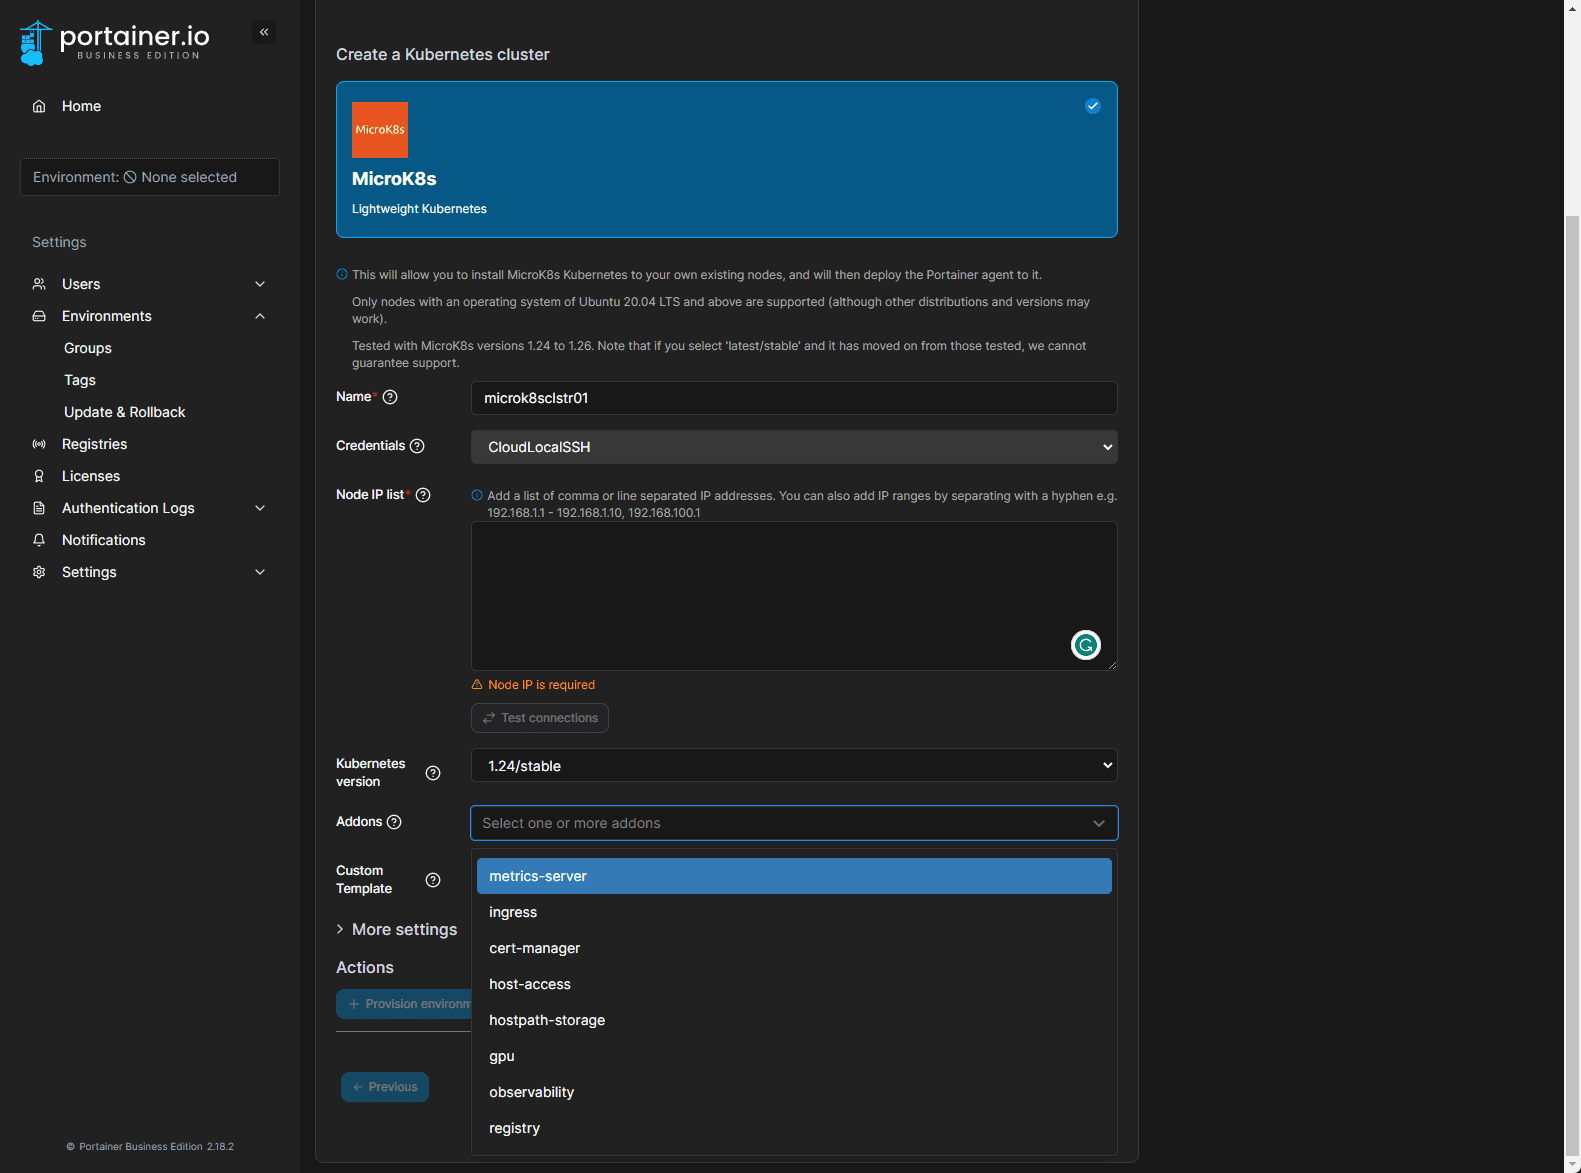
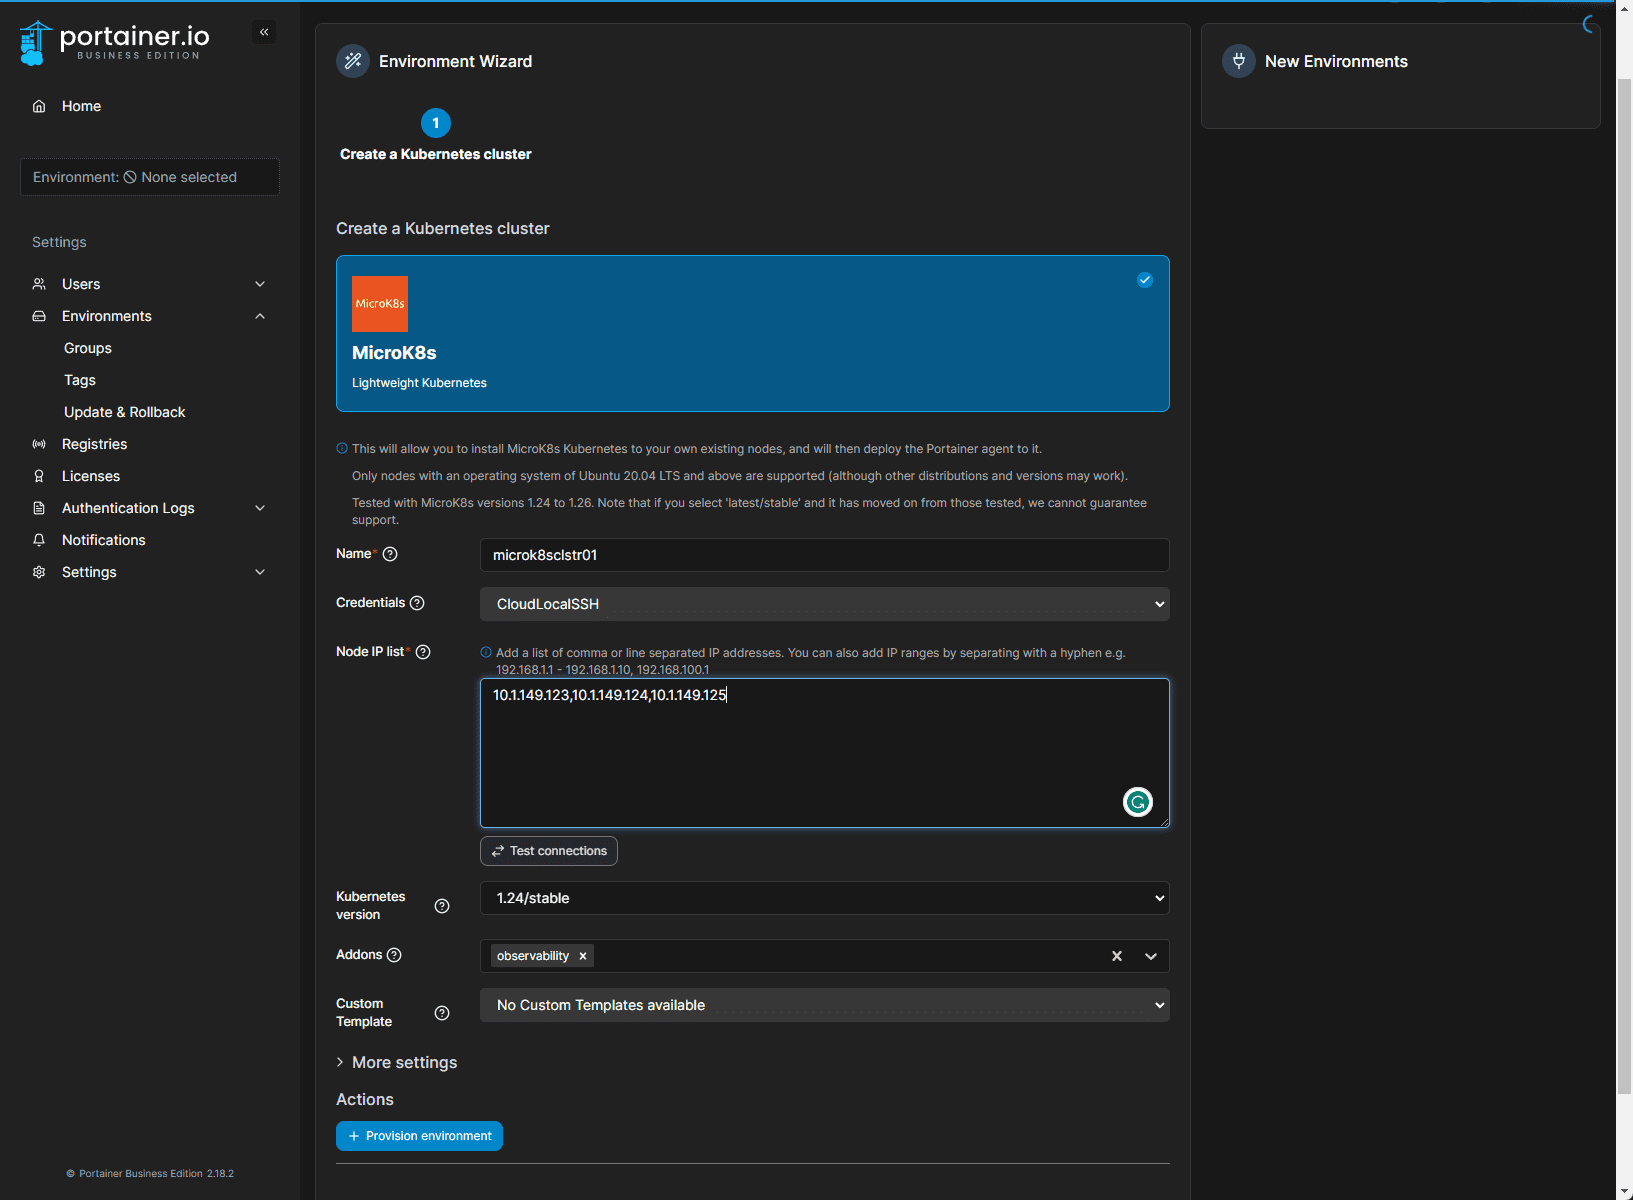
Saving your SSH password or key and starting the deployment
Choose how you will connect to your existing vanilla nodes using SSH password or private key (recommended). You then tell Portainer the IPs to the nodes, and you can also add things like observability as well or other customized templates. Let’s look at an example of creating a new cluster and the details involved.
Adding the target IP addresses of the nodes.
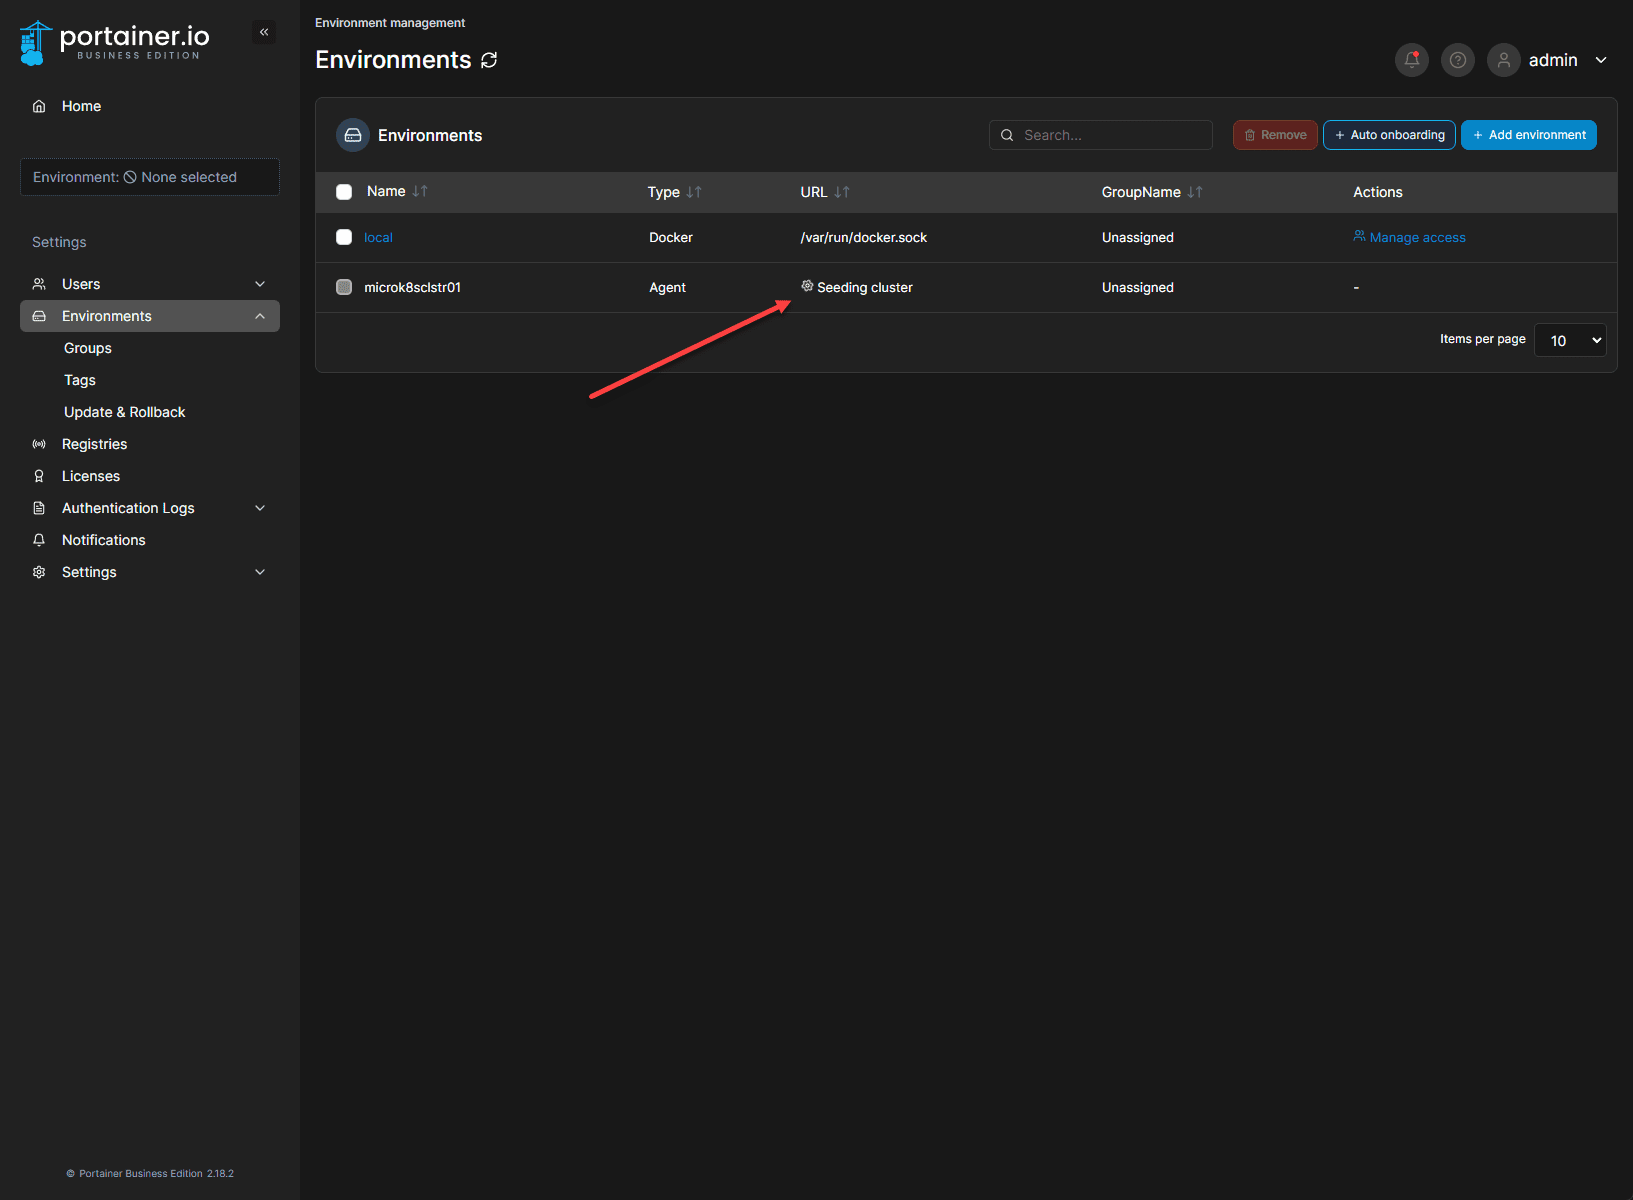
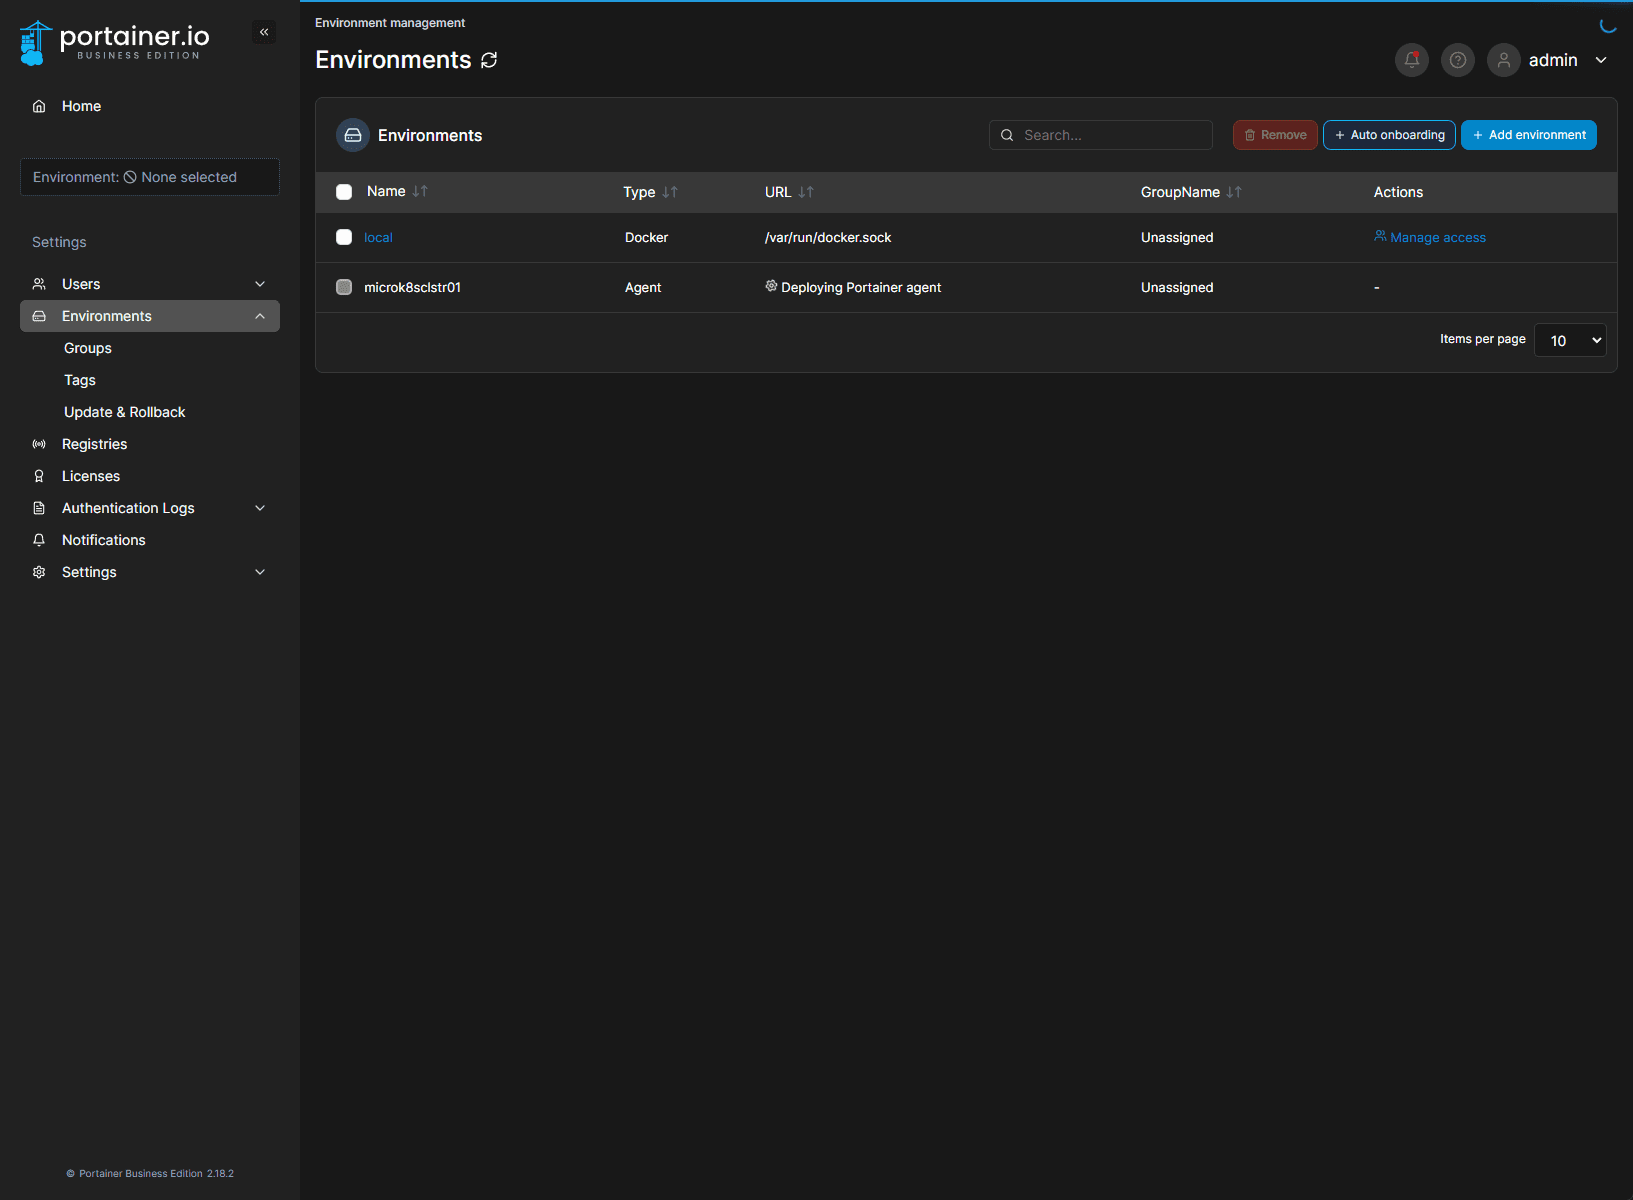
Monitoring the deployment
The deployment begins.
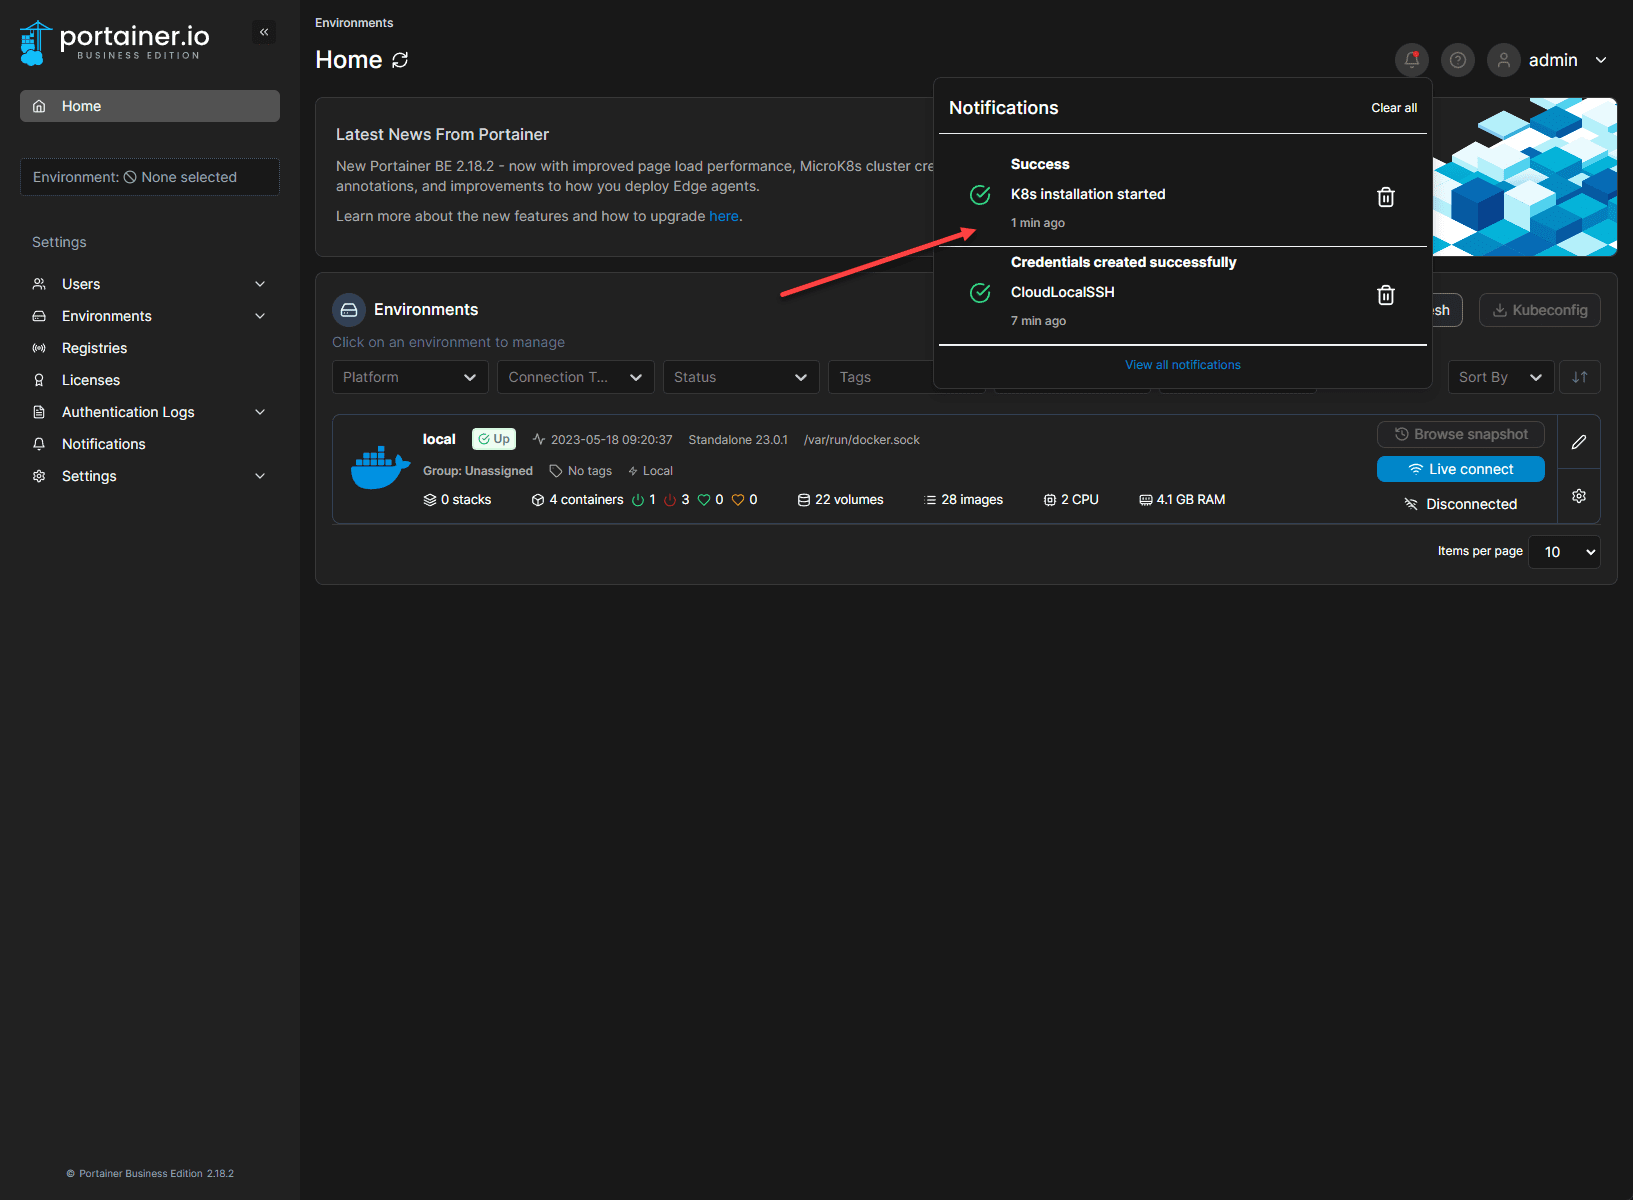
You can monitor the progress of the tasks from the environments menu.
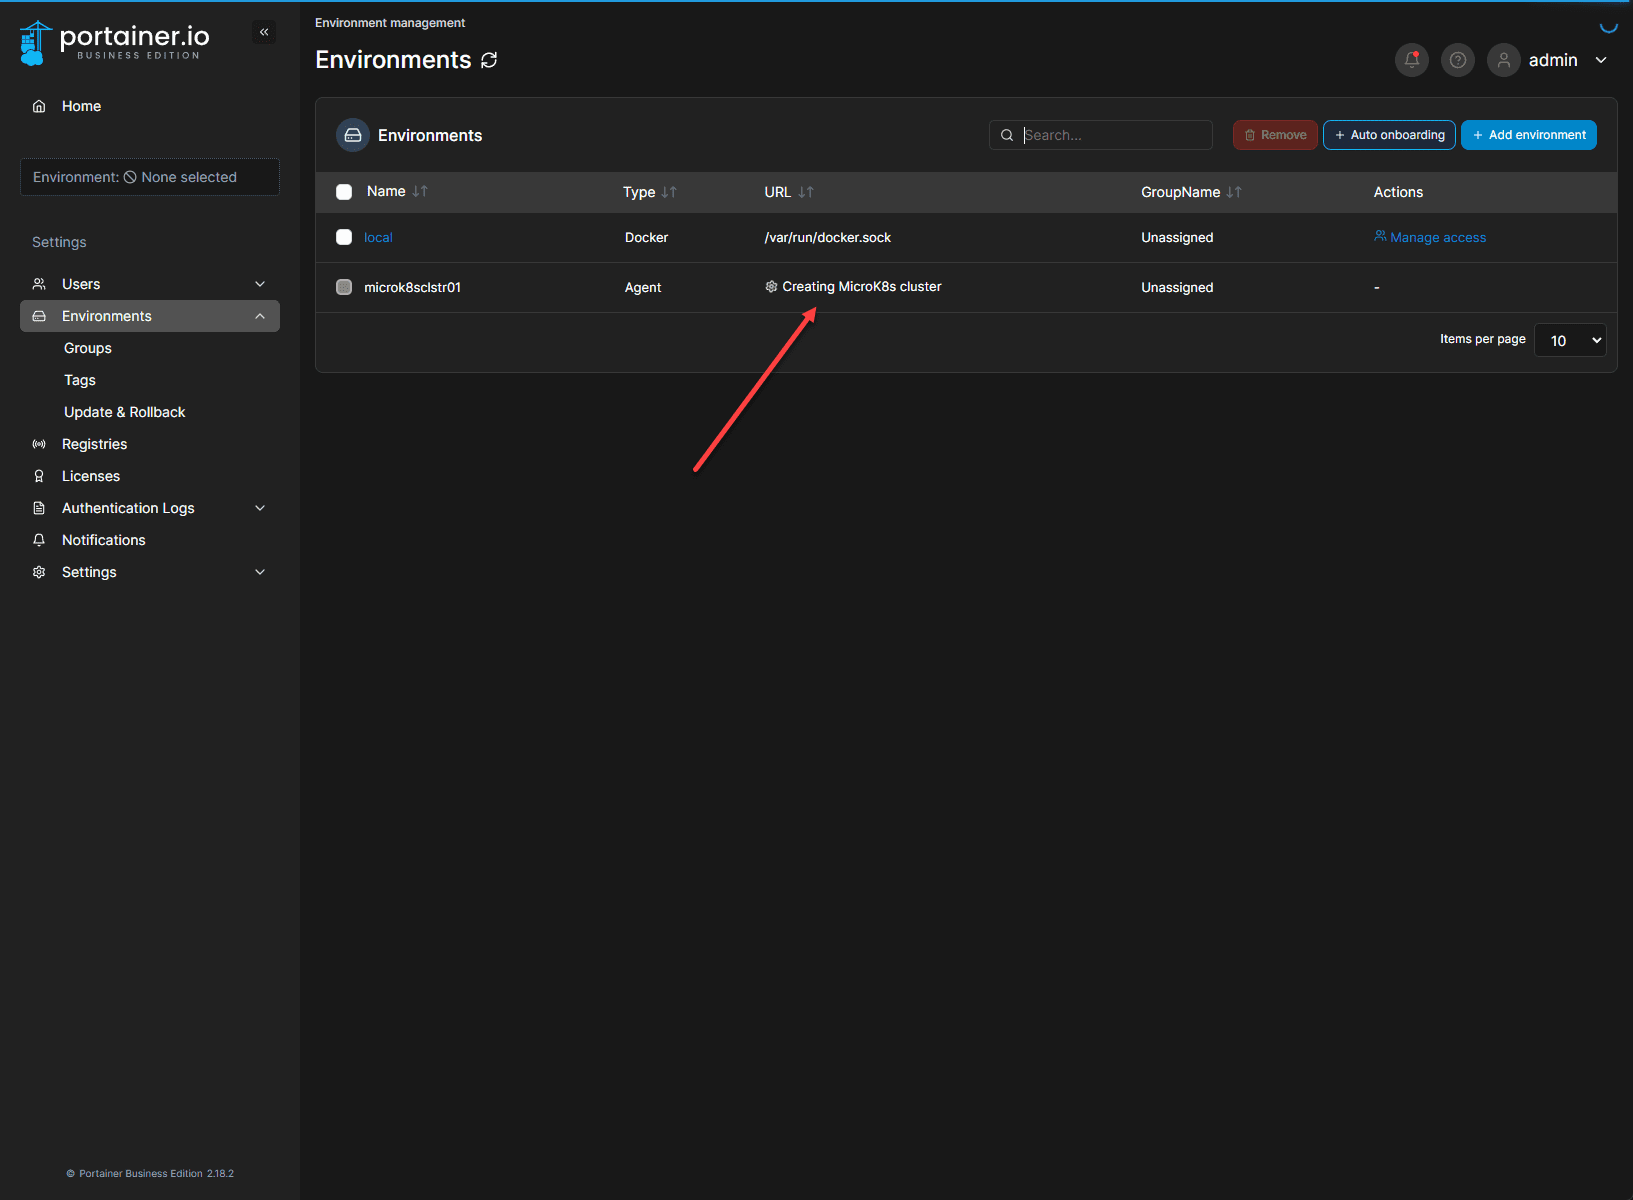
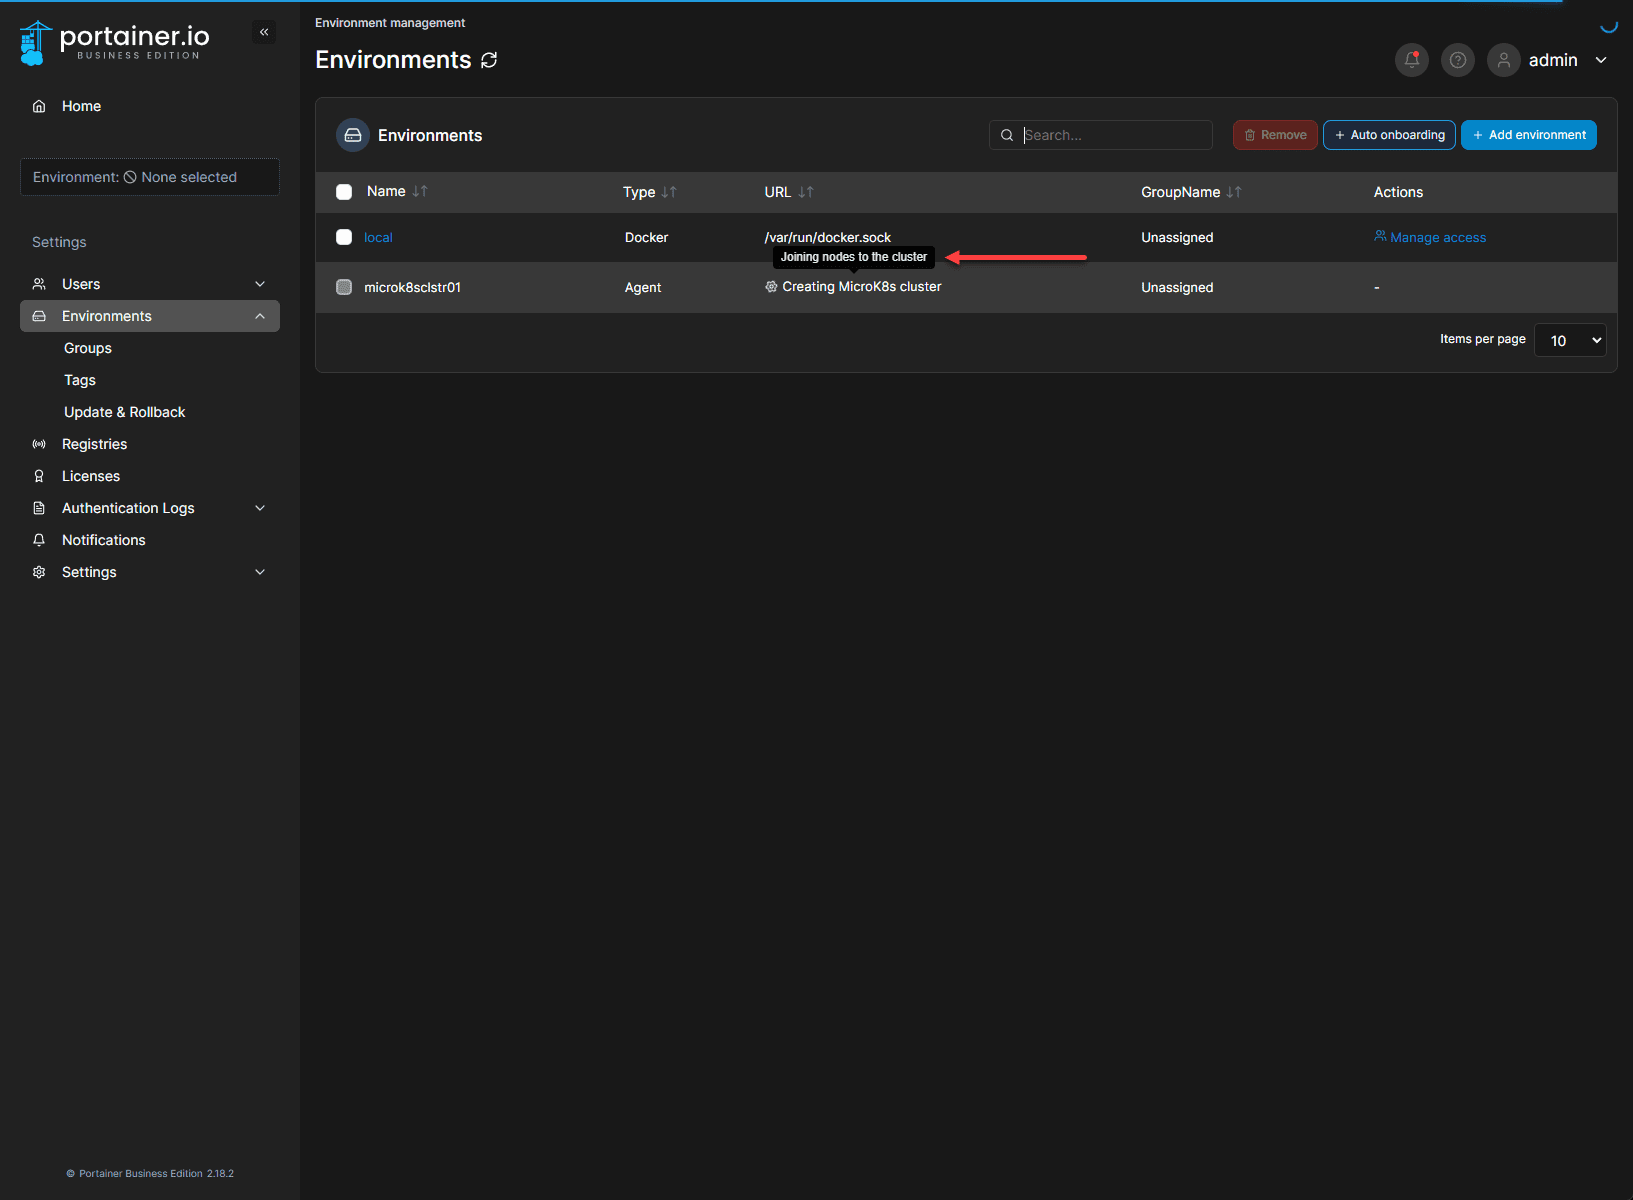
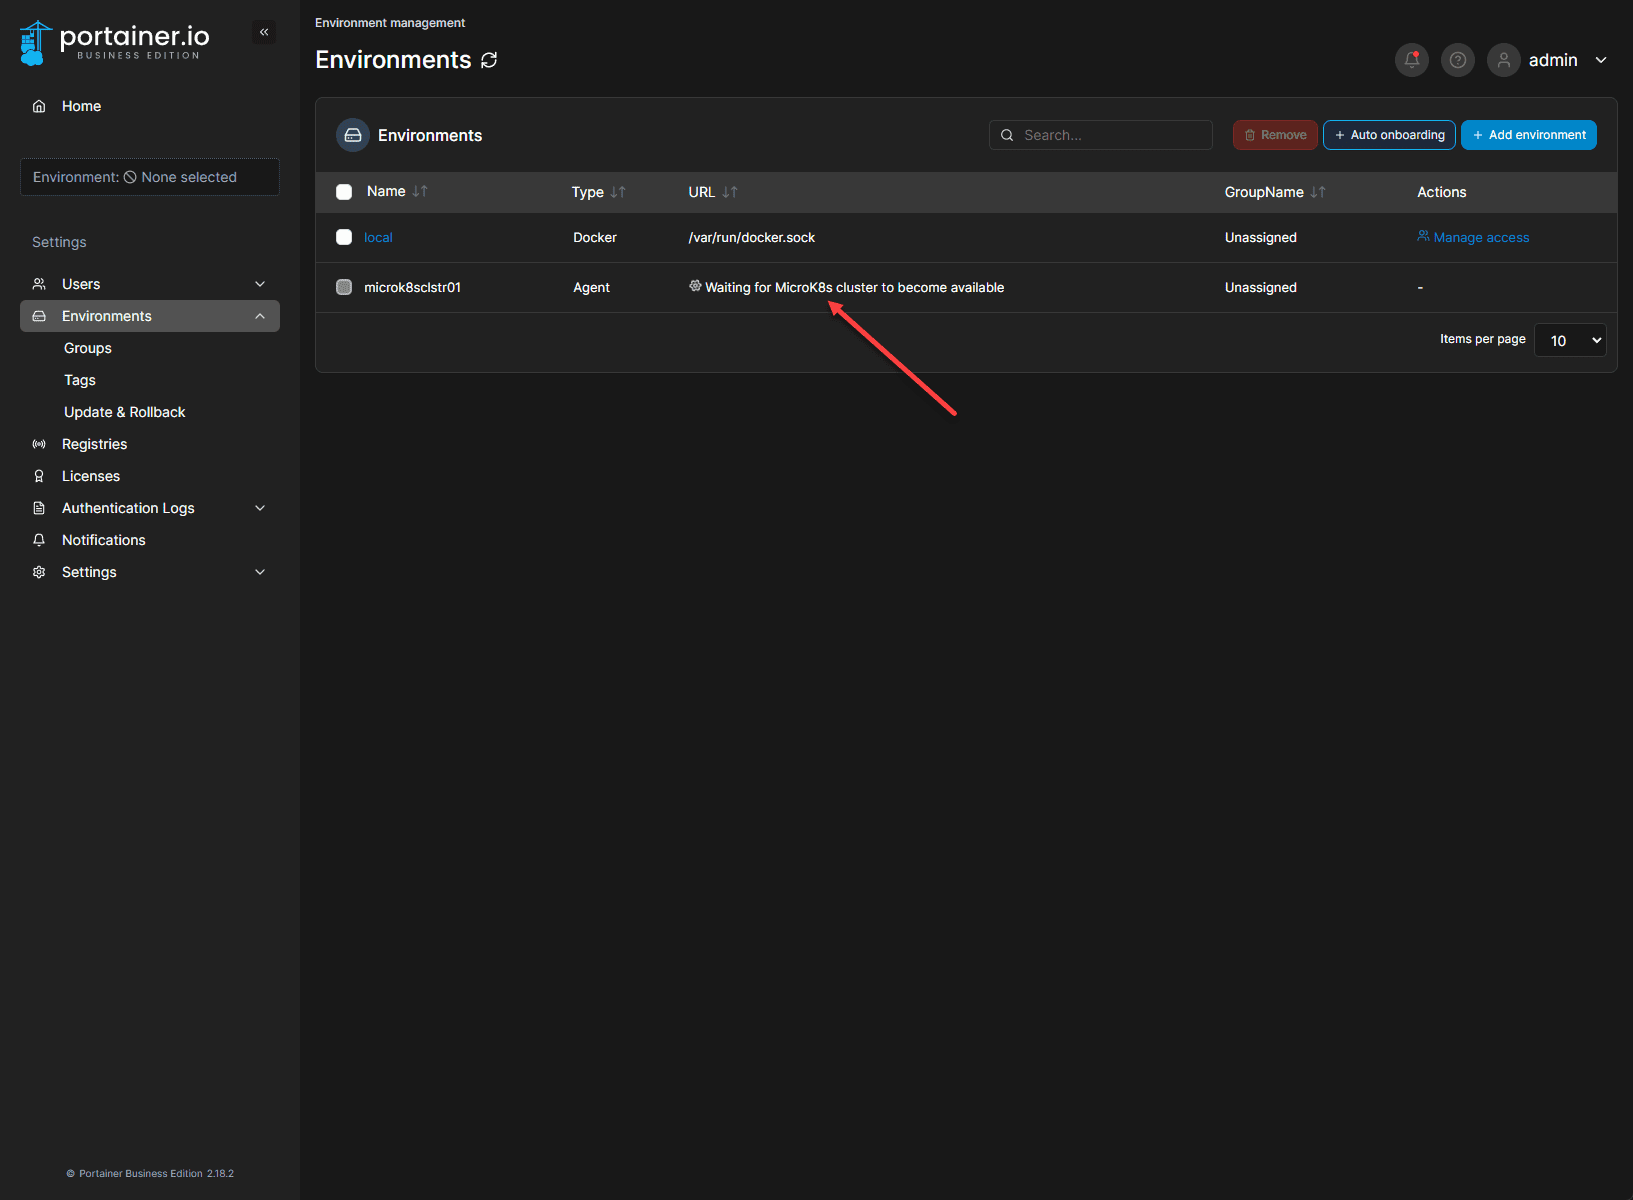
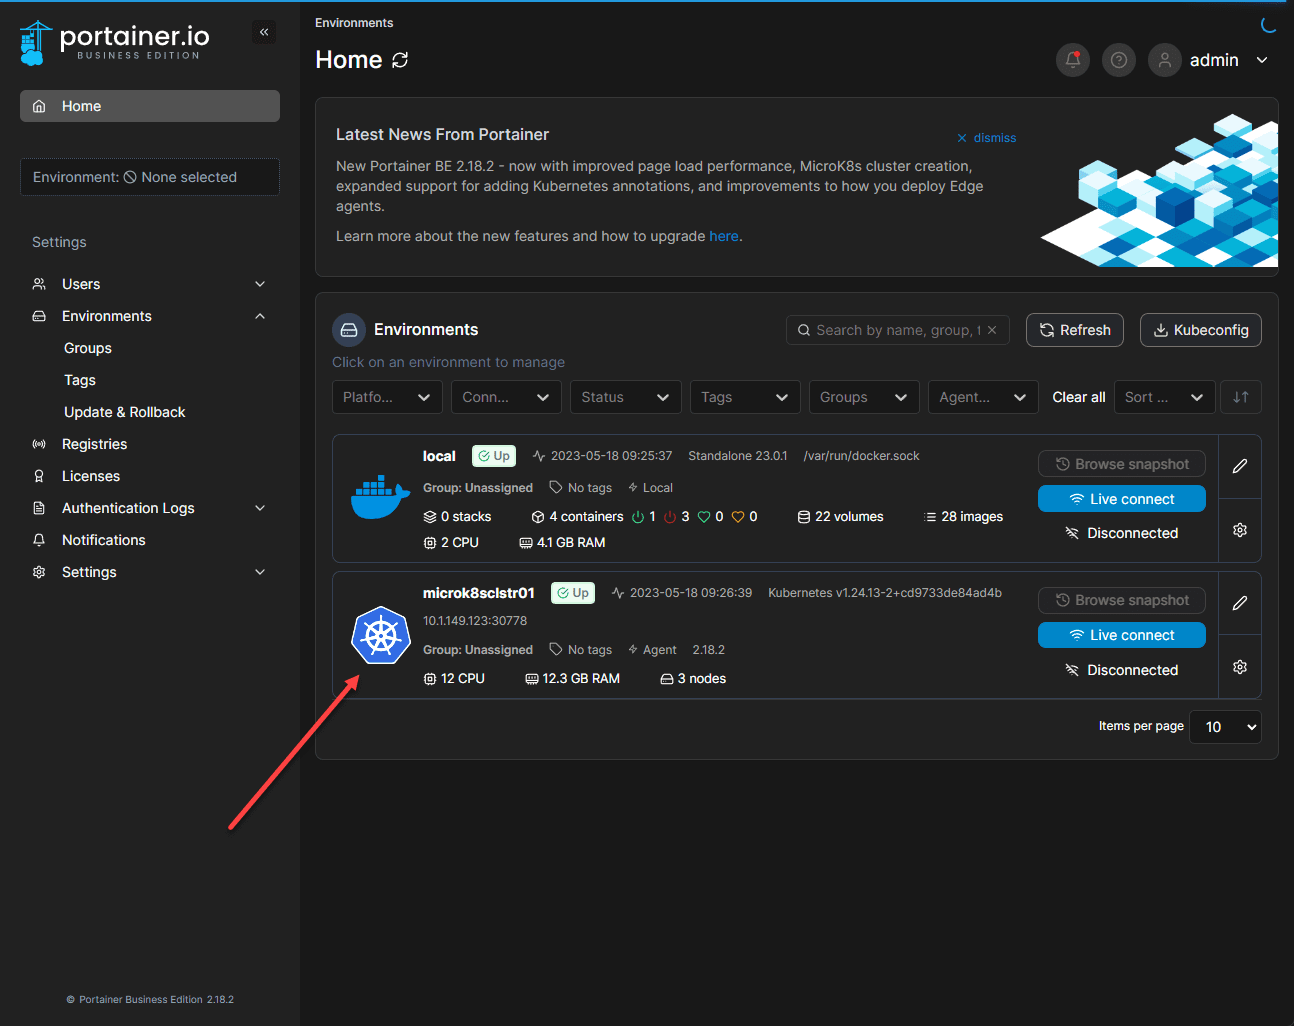
Microk8s cluster is now listed in your environments
Once you have Microk8s installed, you will see the cluster has been created and it listed in the Portainer Dashboard.
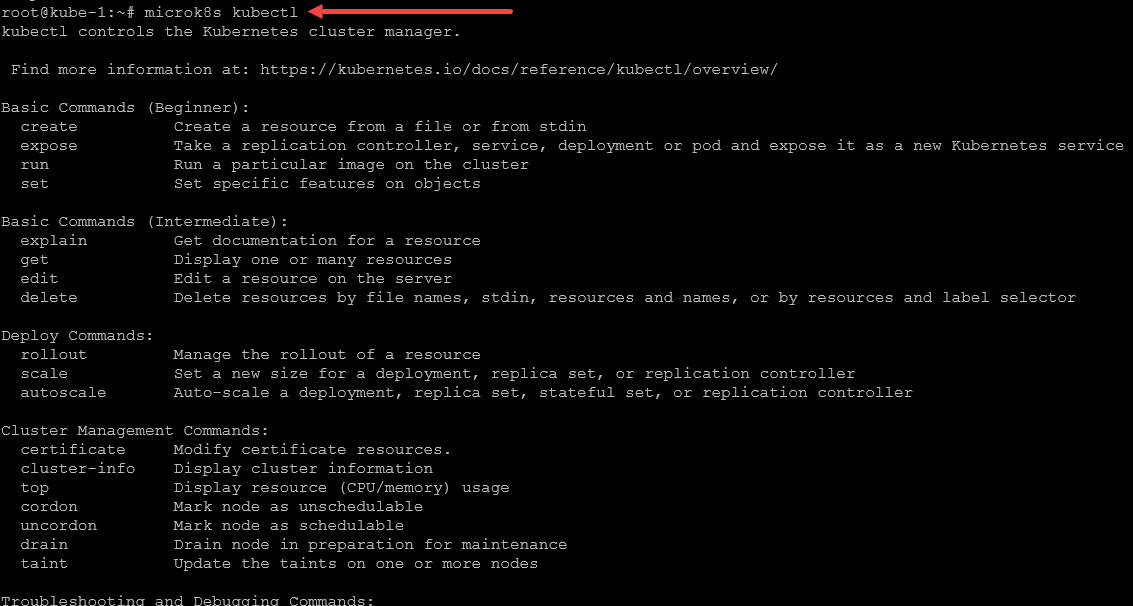
Microk8s kubectl
You can easily pull up a kubectl command prompt and interact with your new cluster from the command line to look at your Kubernetes nodes and pods.
Note the following result of a kubectl get nodes command. You can get the same information using the microk8s kubectl get nodes directly from one of your Microk8s nodes.
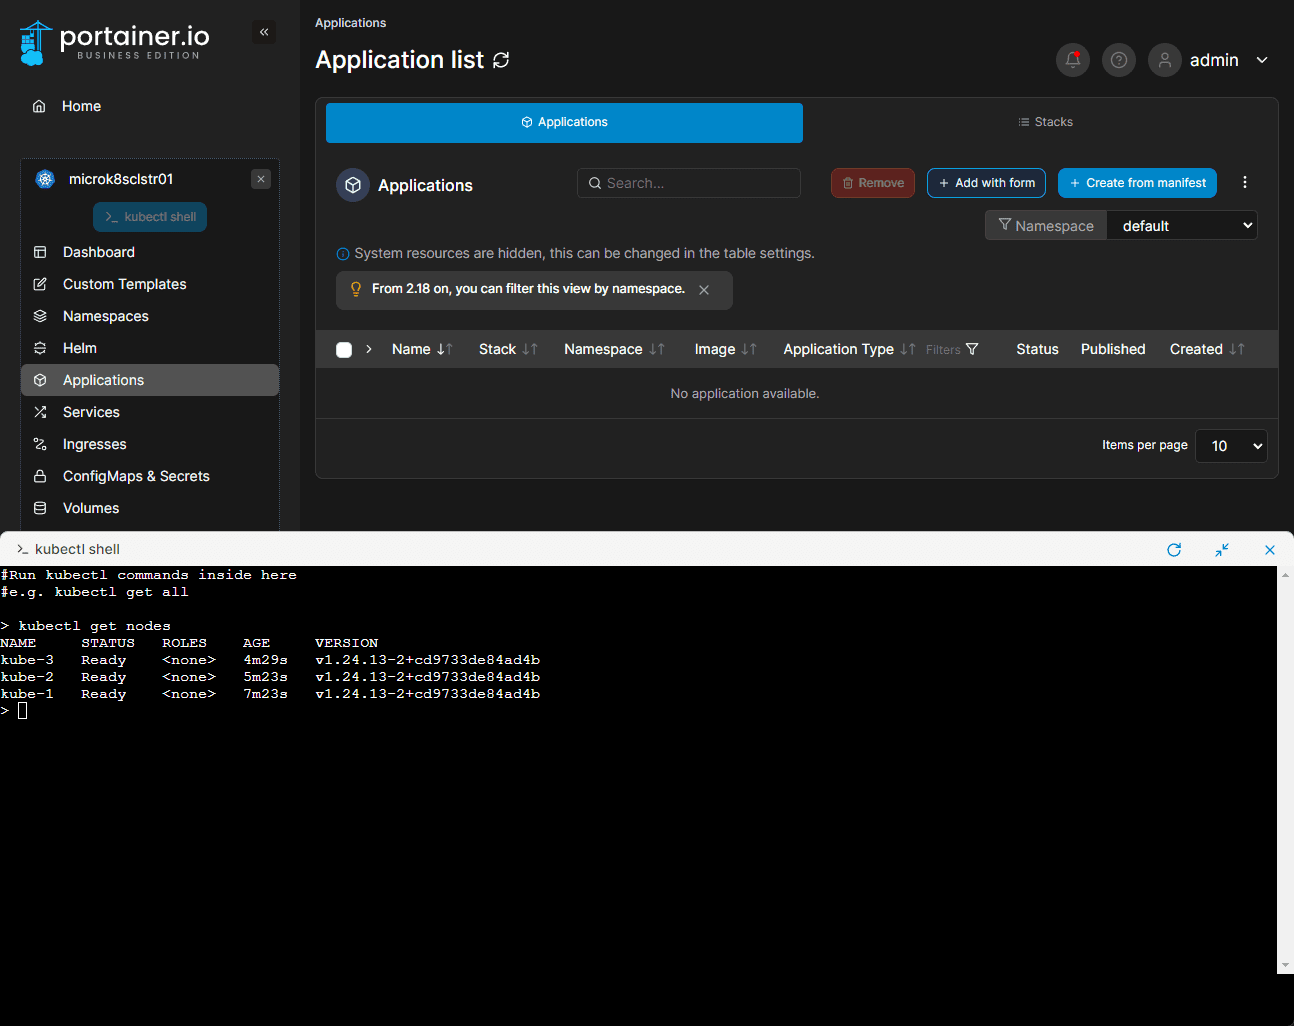
Running the commands directly on the cluster

Adding a Loadbalancer
The Kubernetes LoadBalancer provides external IP connectivity. Microk8s allows easily enabling the MetalLB loadbalancer which works hand in hand with your Traefik or another ingress controller.
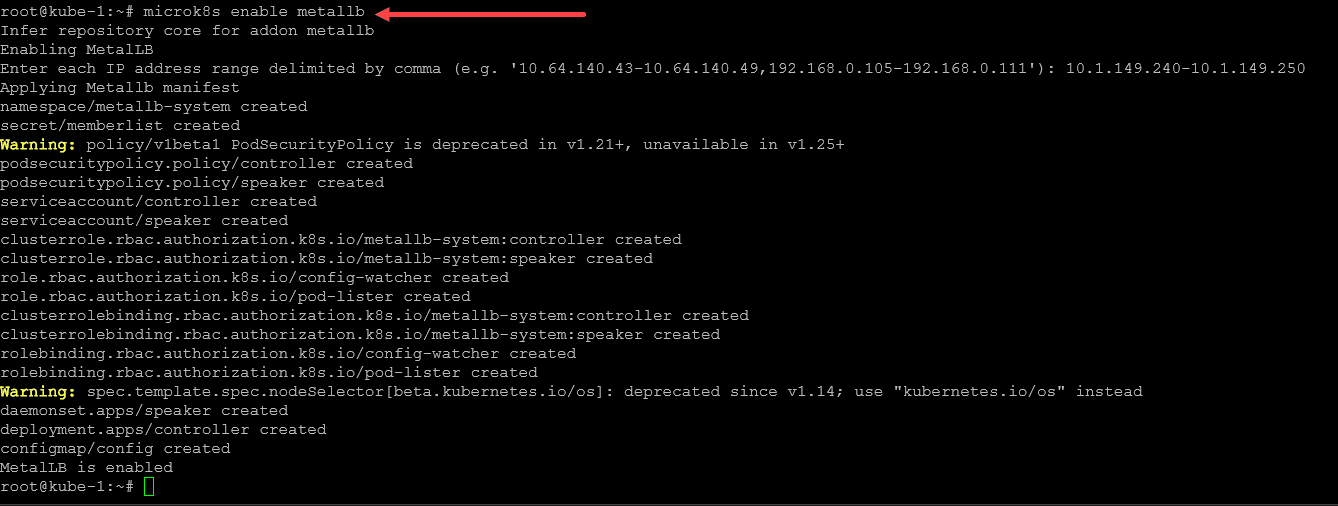
The LoadBalancer provides the external IP for your Traefik or other ingress controller or other services you want to have accessible from outside the Kubernetes cluster.
Installing an Ingress Controller
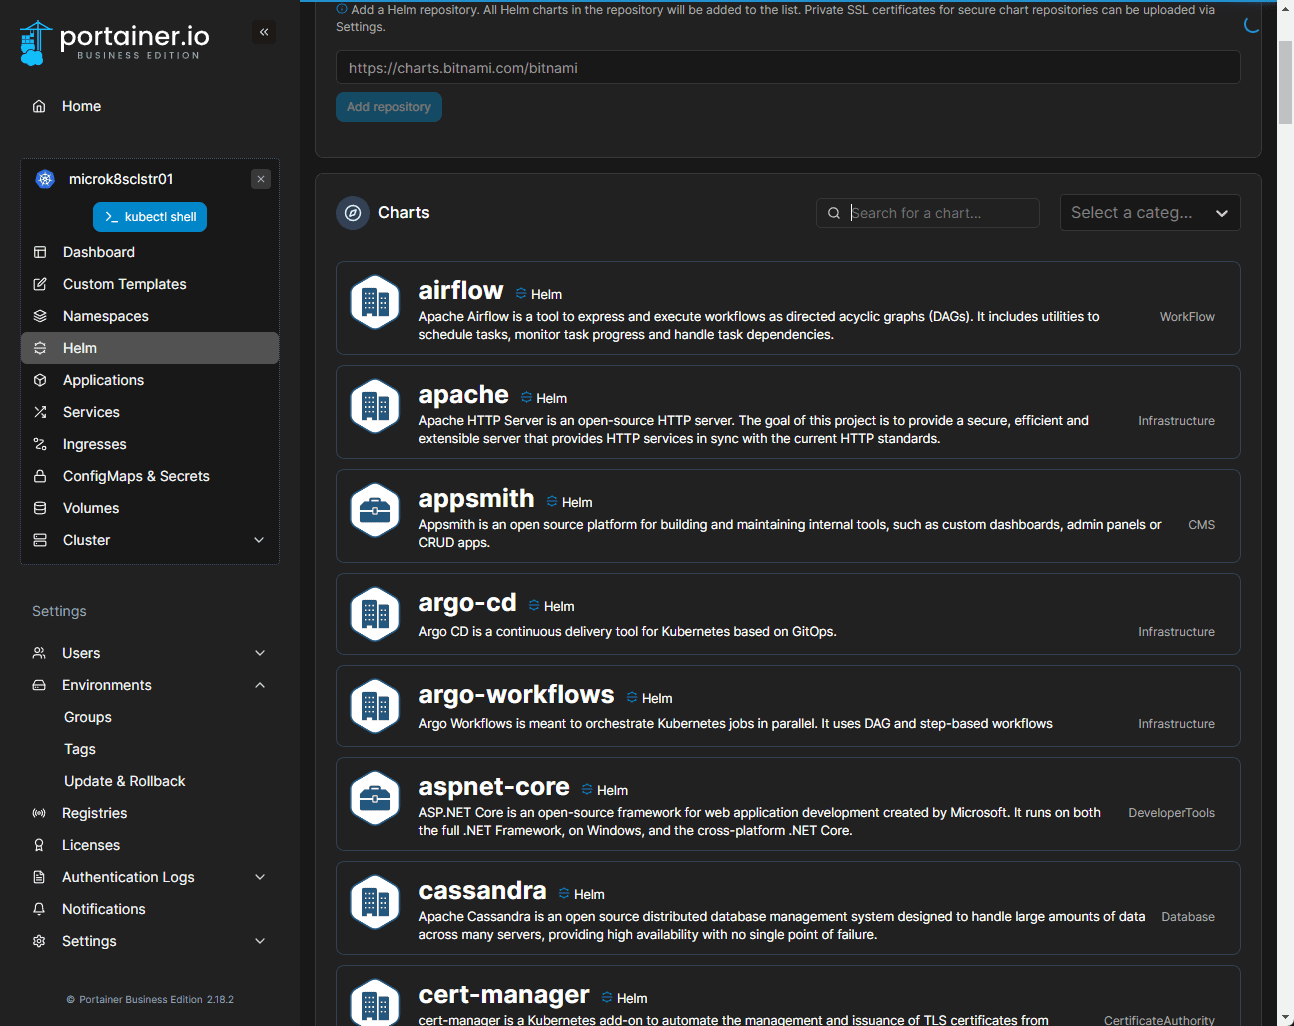
One of the really cool things about Portainer is it allows you to install an ingress controller like Traefik easily. Below, I have added the Traefik Helm repo and am ready to install the chart using Portainer.
Portainer helm catalog
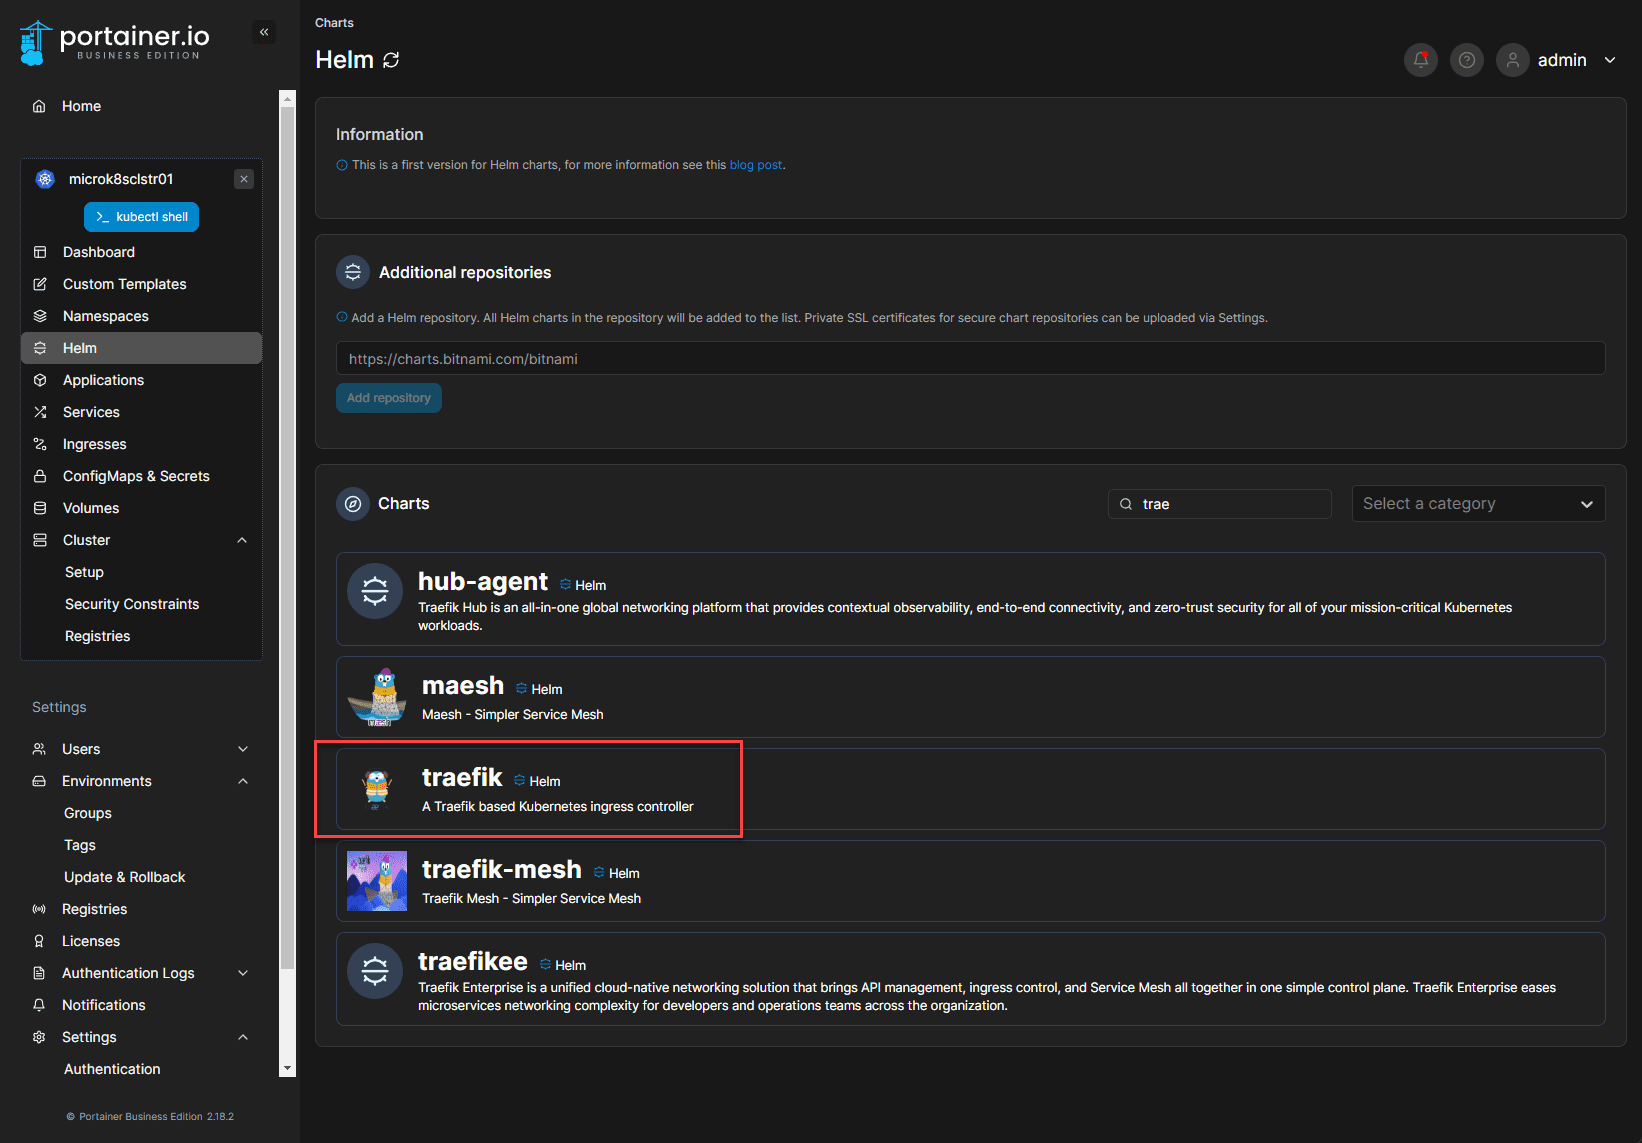
Adding the Traefik repository and installing
You can add the Traefik helm chart and then you will see Traefik available for installation.
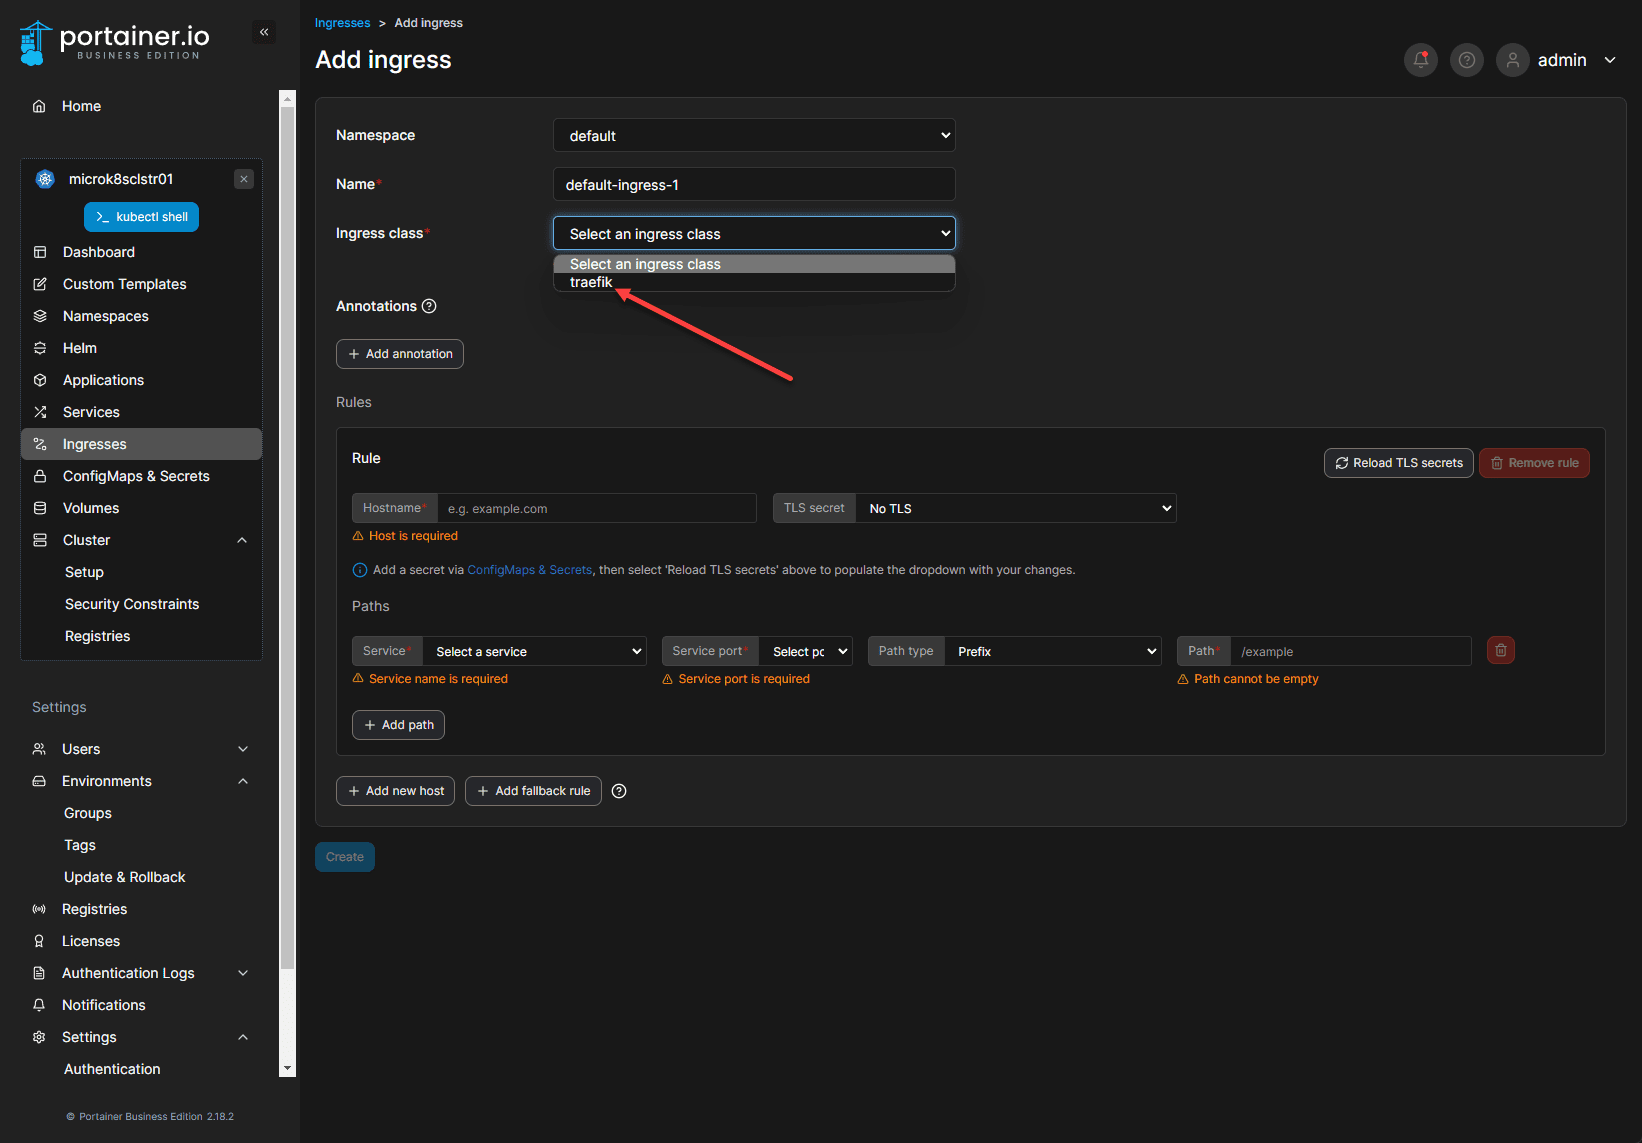
Configuring the ingress class
Once you have installed Traefik, it will be available as an ingress class when creating a new ingress.
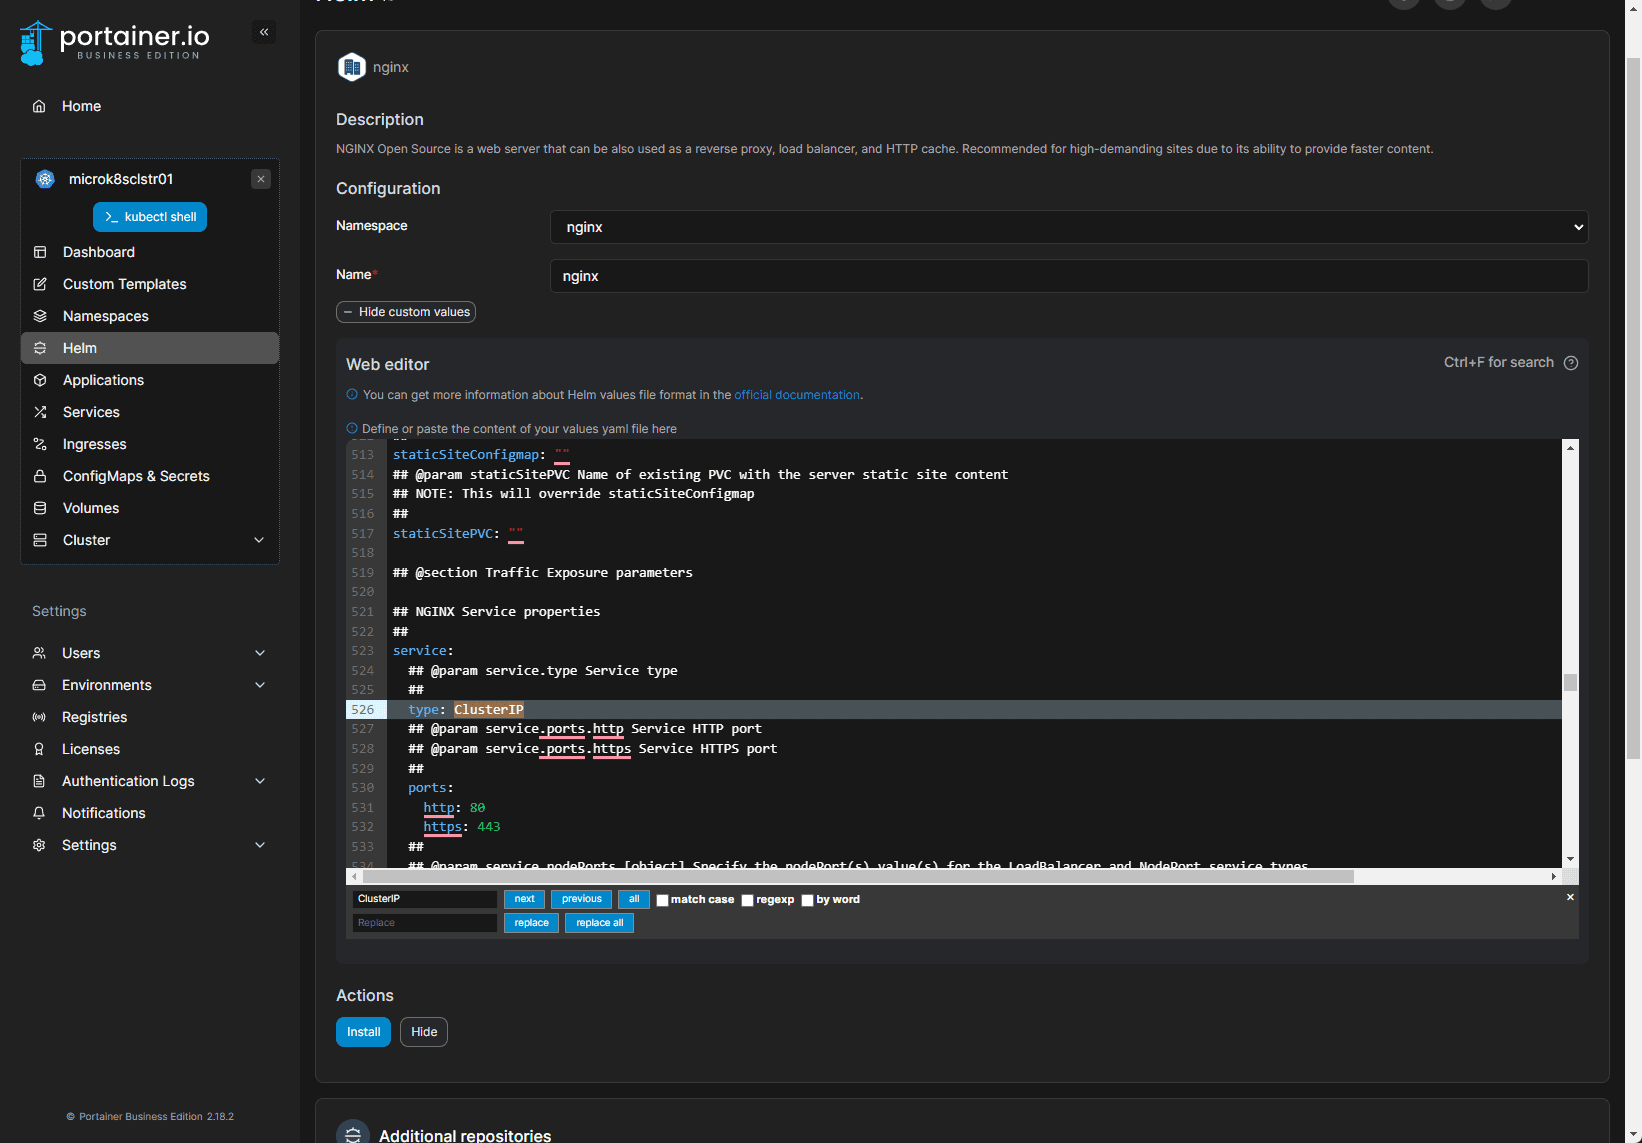
Installing NGINX with ClusterIP
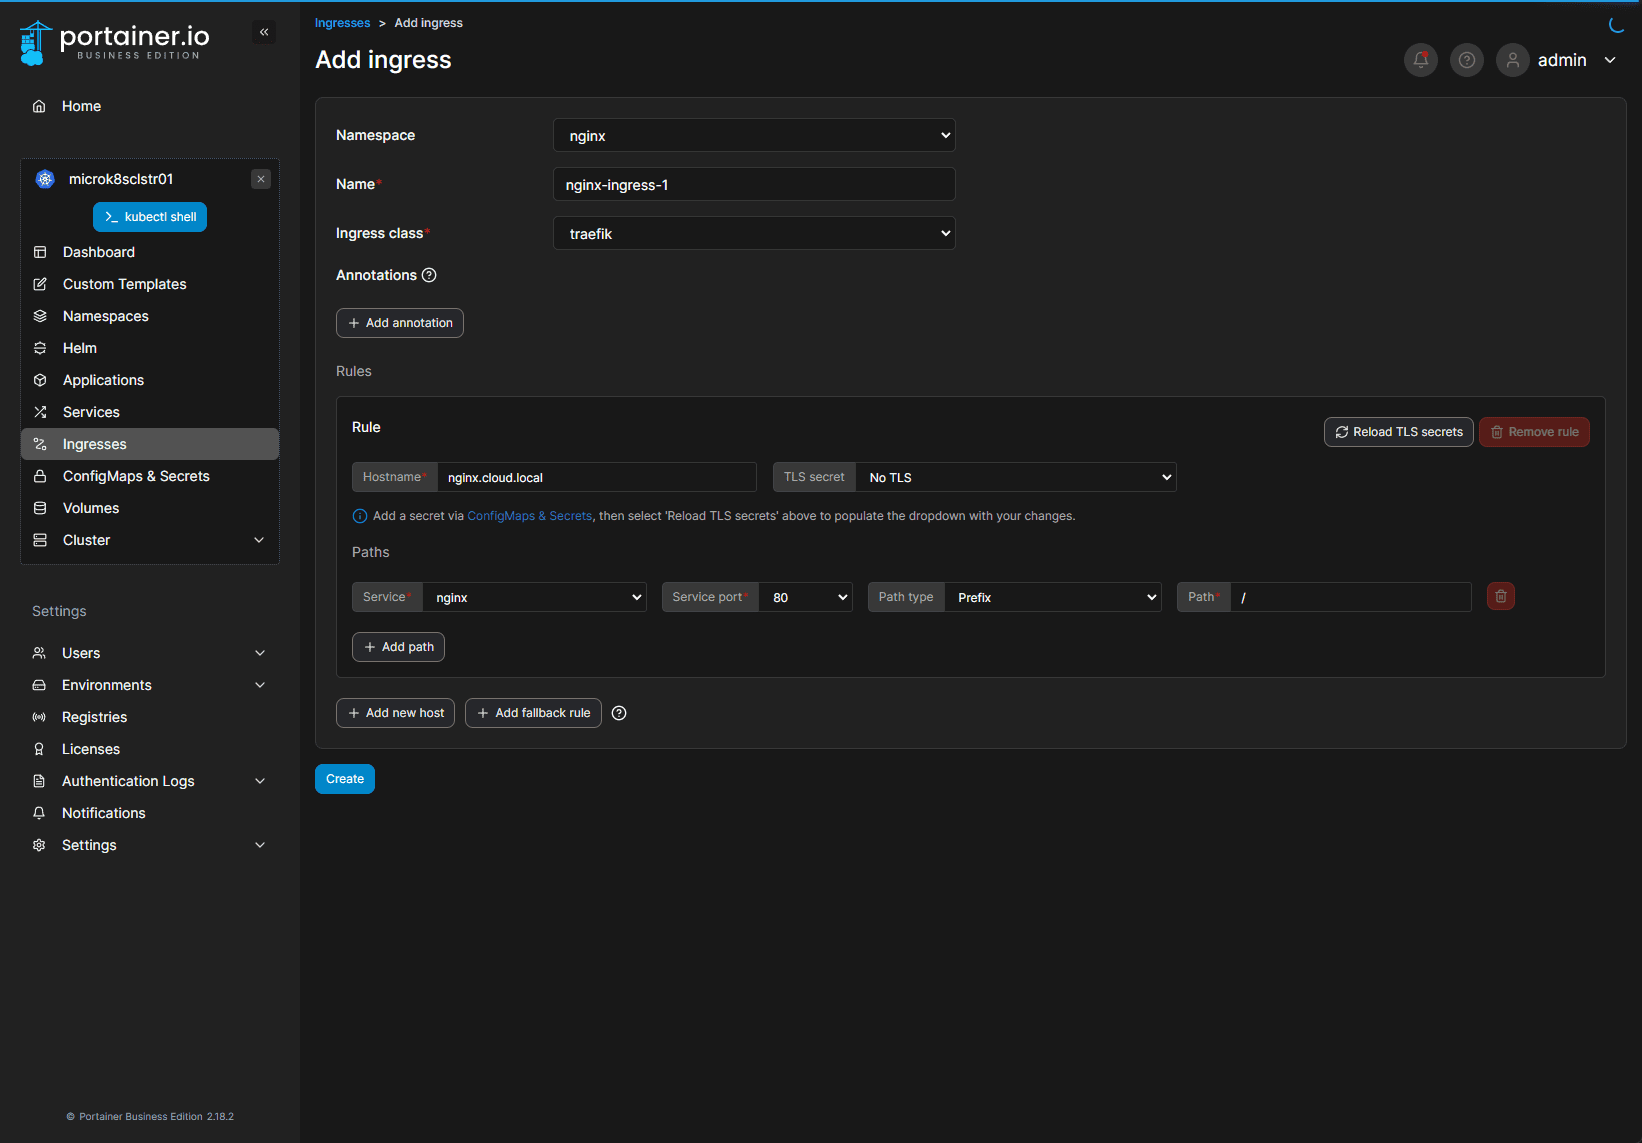
I installed a simple Nginx application and set the service to ClusterIP. The Ingress depends on the configured service being set as a ClusterIP, since the external IP address will come from the load balancer that is servicing Traefik.
Adding an Ingress Service using Traefik to Nginx
Adding the service to allow connecting to Nginx. So Traefik > gets external IP > Ingress rule answers to the hostname provided, and Traefik routes the incoming traffic to the appropriate backend Kubernetes service.
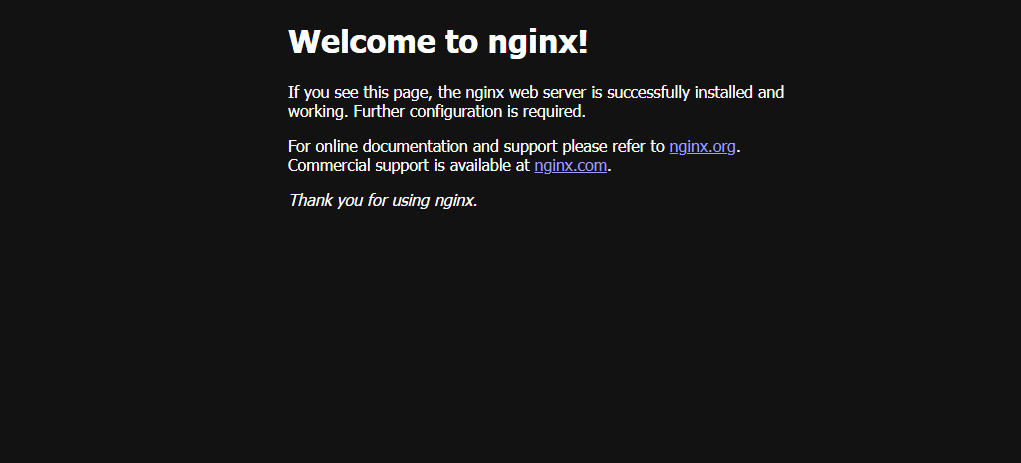
Testing connectivity to NGINX
You must configure an external IP address for your ingress controller to get to your internal pod (using MetalLB). This is accomplished by configuring the LoadBalancer as described above.
Wrapping up
I am really excited about this new Portainer functionality. With this new feature, Portainer has made provisioning a Kubernetes cluster running using Microk8s a point-and-click process, as they have made working with Docker. In addition, working with Ingress configuration in Portainer is much easier than applying YAML files with kubectl.
We also delved into the other new features of Portainer 2.18 and the step-by-step process of installing Microk8s on Ubuntu 22.04. These new enhancements bring better efficiency and performance, making managing Docker environments and Kubernetes clusters more intuitive for beginners and easier for even seasoned Kubernetes admins.
More in this topic

Discuss this in the Community
Google is updating how articles are shown. Don’t miss our leading home lab and tech content, written by humans, by setting Virtualization Howto as a preferred source.
About The Author

Well done, great guide. I have just rebuild my existing MicroK8s cluster after the master failed (using MicroSD now upgraded to SSD) using this method which has saved me loads of times and portainers GUI is great.