Proxmox add disk storage space – NVMe drive

Proxmox and NVMe storage is a great combination for the home lab or production environments. NVMe drives have gotten extremely inexpensive and you can buy large drives for low cost. However, how do you add an NVMe drive to Proxmox disk storage space?
Table of contents
Why add disk space to Proxmox?
You may need more hard disk space for a storage drive for virtual machines, containers, images, etc.
You may already have Proxmox installed on one disk and need to add storage to have more local storage. This process is as simple as adding a drive to Proxmox.
NVMe disks are cheap and great for adding speedy virtualization storage to your Proxmox host.

Add the physical drive to your Proxmox host
The first step is, of course, adding the new drive to your Proxmox host. Most current hosts (mini PCs and servers) have a hard drive M.2 slot for NVMe storage. Once added, we can begin the process to provision the storage.
Get the NVMe Drive ready
Before adding storage space to your Proxmox server, you must get the new disk ready. This involves installing necessary tools, creating a new partition table, and setting up the primary partition.
Install Parted:
To begin, install the parted utility on your Proxmox server. Select Shell in the web interface to launch the command shell. This tool is used working with your block devices and creating, managing, and destroying partitions. To install Parted, run the following command:
apt install parted
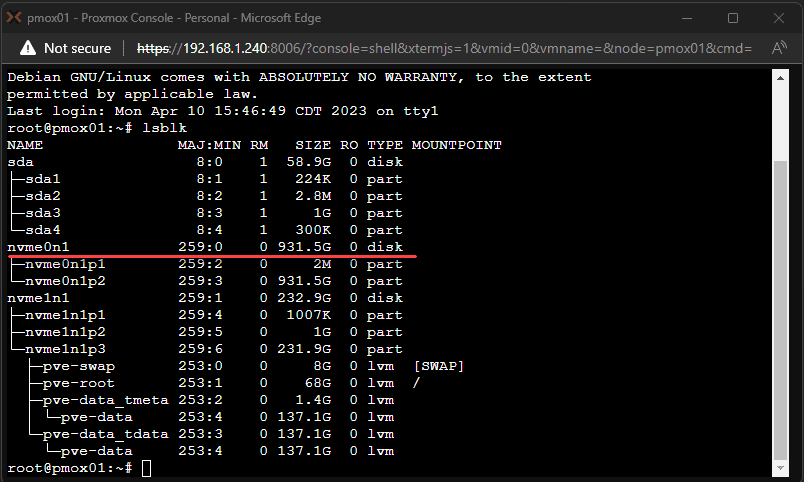
List block devices:
Next, we can use the lsblk command to pinpoint the new NVMe drive we want to add to our Proxmox installation. For example, the drive may appear as dev/nvme0n1. You will see the normal disks such as dev sda dev sda1.
Create a new partition table:
Once you have pinpointed the new disk, you can create a new partition table. Run the following command to create a type GPT partition table on the new NVMe drive:
parted /dev/nvme0n1 mklabel gpt
Creating the Primary Partition
With the new admin-prepared disk that is ready to go for storage, the next step you need as an admin is to create the primary partition on the NVMe drive. The partition will actually store the data.
Create a primary partition
Run this command to create the partition we need on the NVMe drive.
parted /dev/nvme0n1 mkpart primary ext4 0% 100%
With this command we are creating a new primary ext4 partition that will span across the entire NVMe drive and will remove existing partitions which is a destructive process. So be careful and ensure this is what you would like to do.
Format the partition:
Next, format the new partition with the ext4 filesystem:
mkfs.ext4 /dev/nvme0n1p1Name the storage for your data
You can name the storage something intuitive using the command:
mkfs.ext4 -L vmstorage /dev/nvmeOn1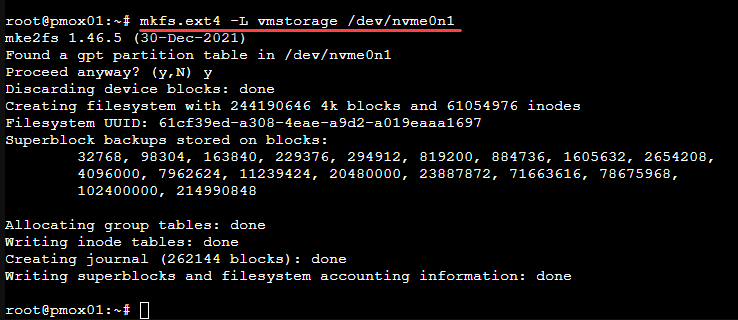
Mounting the New Partition
Now that we have the primary partition created, you must now mount it to a mount point on your Proxmox server.
Create a new directory:
First, create a new directory to serve as the mount point for the new partition. For example:
mkdir /mnt/vmstorageEdit the /etc/fstab file:
Next, edit the /etc/fstab file to ensure the new partition will auto mount upon reboot. Open the file with a text editor like Nano:
nano /etc/fstab
Add the following line to the file, replacing /dev/nvme0n1p1 with the appropriate device identifier for your NVMe drive:
LABEL=vmstorage /mnt/vmstorage ext4 defaults 0 2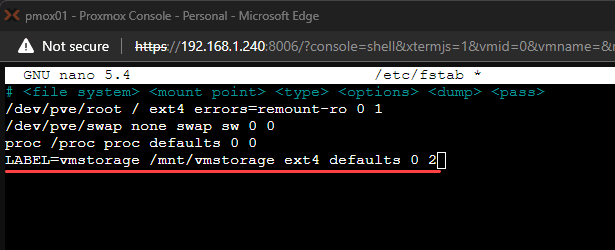
Save the changes and exit the text editor.
Mount the new partition:
Finally, mount the new partition to the mount point:
mount /mnt/vmstorageAdding Storage Space to Proxmox
Now that the new partition is mounted, you can add it as storage space in the Proxmox web interface.
1. Browse out to your Proxmox web interface and login.
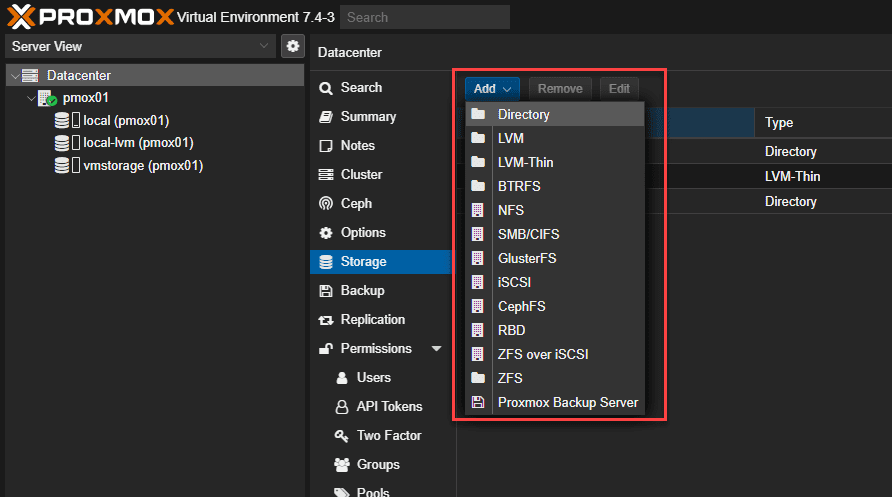
2. Go in the interface to the “Datacenter” tab and click on “Storage.”
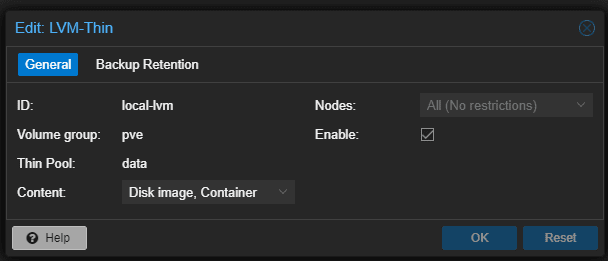
3. Click on the “Add” button. Then you will want to “Directory” from the dropdown menu. There will be a few options including lvm thin, think provisioning, volume group and others.
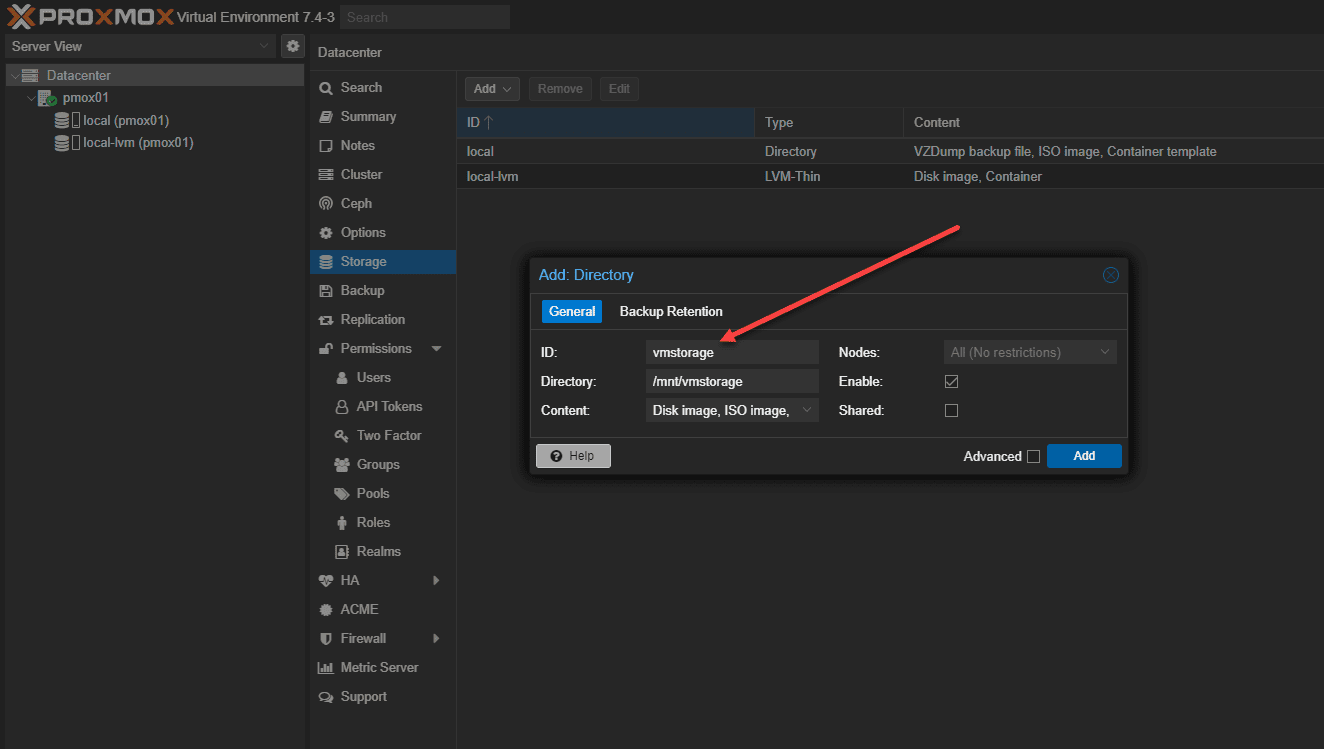
4. Enter what it wants as a new unique ID value for the new storage. Then set the “Directory” field to the folder mount point you created earlier (e.g., /mnt/nvme-storage). Finally, you just need to create and select the content types like “Disk image,” “Container template,” or “Backup.” Click “Add” to save the configuration.
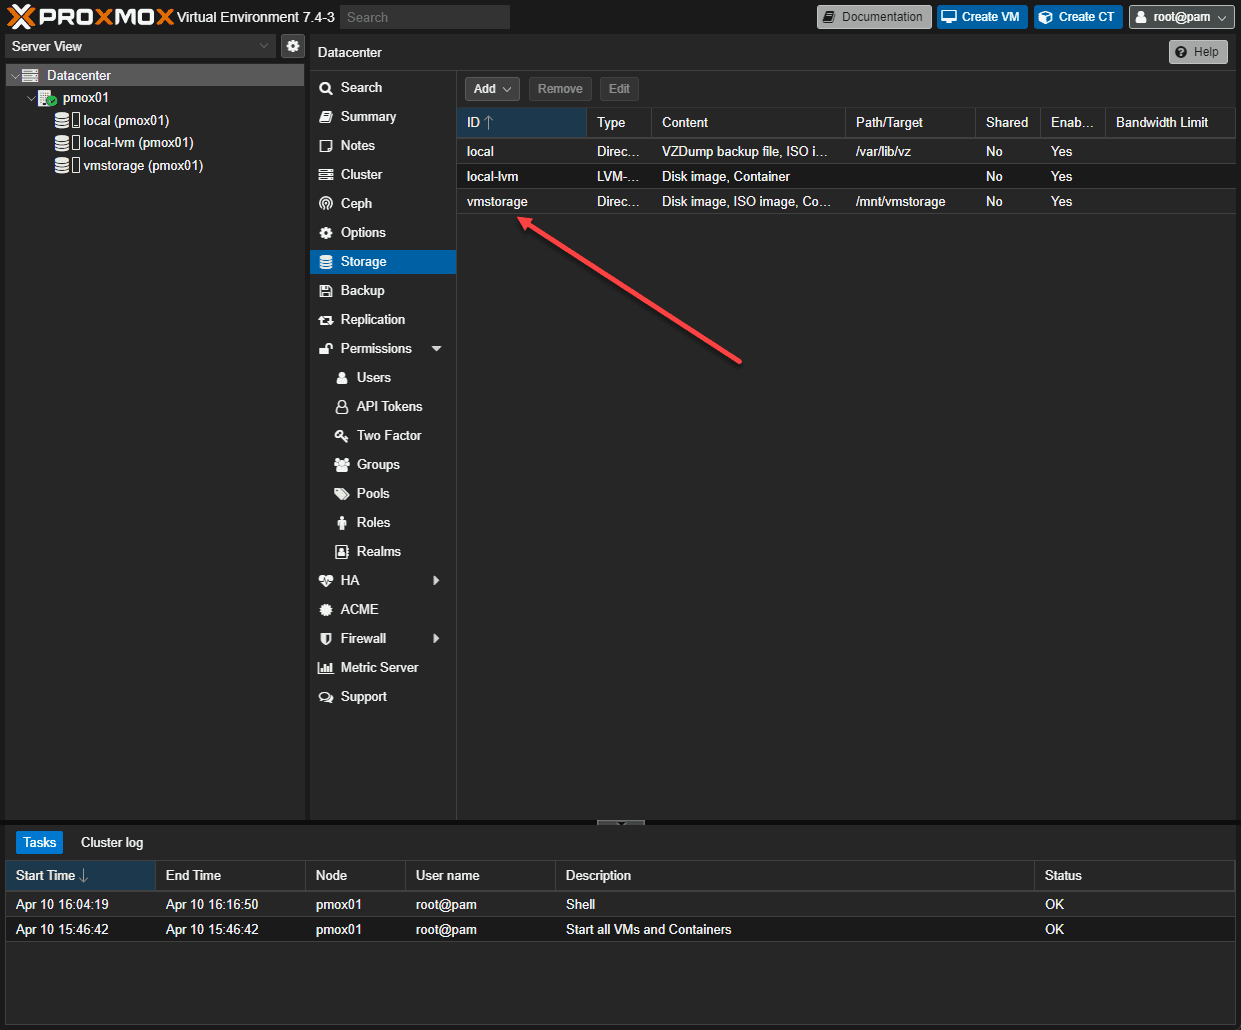
5. The new storage space will now be available in the Proxmox web interface for virtual machines and containers.
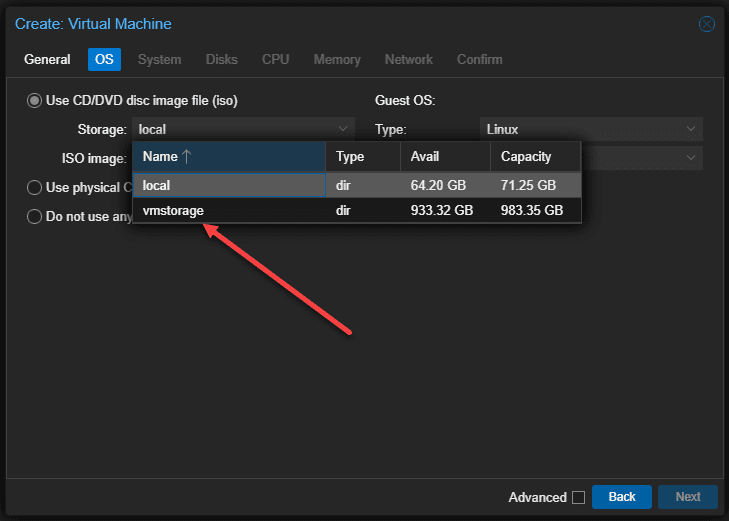
Now, when you create a new virtual machine or container you will see the storage available to select in the storage drop down.
Wrapping up
Combining NVMe storage with Proxmox will make for a very fast virtualization environment. As we have seen, the process to add an NVMe drive to your Proxmox VE host isn’t too difficult. We just need to run a few commands from the Linux Bash command shell and we are good to.


Thanks for this tutorial!
I think there’s a typo: “mkfs.ext4 -L vmstorage /dev/nvmeOn1” -> mkfs.ext4 -L vmstorage /dev/nvmeOn1p1
Cheers
Erik
Must be:
mkfs.ext4 -L vmstorage /dev/nvme0n1p1
Thank you Enteneller, Brandon.
great tutorial, it worked perfect
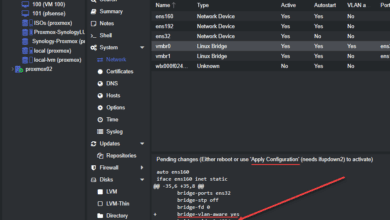
one thing is not clear for me – why (in “Add the following line to the file” when editing /etc/fstab file) the example line is not the same as the screenshot below.
And – after editing fstab – i also had to execute systemctl daemon-reload because my system was asking me to do that. Don’t know if its really necessary
Krzysiek,
Thank you for your comment and also thank you for pointing out the screenshot as well. I have updated the post to reflect the screenshot.
Brandon