Configure VMware vSphere with Tanzu Workload Management

In the previous post, I took a look at how to Install HAProxy in VMware vSphere with Tanzu Kubernetes. This is a prerequisite step in configuring the Workload Management configuration with vSphere networking. With vSphere 7 Update 1, you can now use native vSphere networking for VMware Tanzu configuration. In this post, I will show you how to step through the Workload Management configuration wizard and see how this is done.
Prerequisites for Tanzu with vSphere Networking
There were a few little things that I ran into when attempting to step through the Workload Management. Note the following things when enabling workload management:
- Your cluster cannot be enabled for vSphere Lifecycle Management
- You need to have DRS enabled
- You need to have a vSphere Distributed Switch (vDS) created
Configure VMware vSphere with Tanzu Workload Management
Let’s see what the wizard looks like and how the various components of the Workload management configuration are setup with the wizard. A note here, you will need to have the HAProxy appliance running at this point.
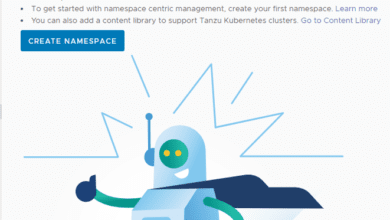
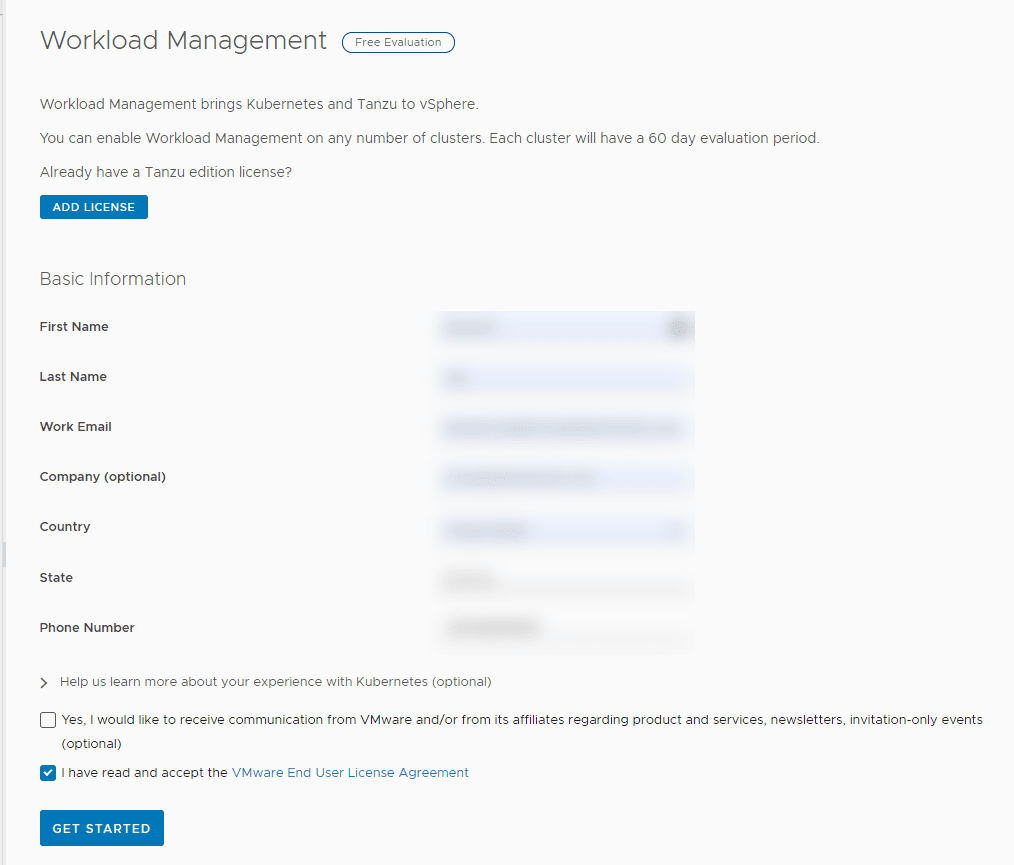
I am using the free evaluation with Workload Management. Just fill in the information and agree to the EULA to get started. You will have a 60 day evaluation period to try out workload management with vSphere with Tanzu.
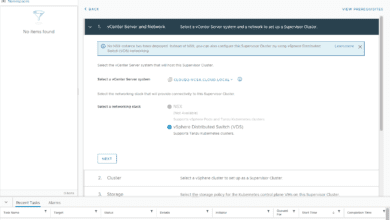
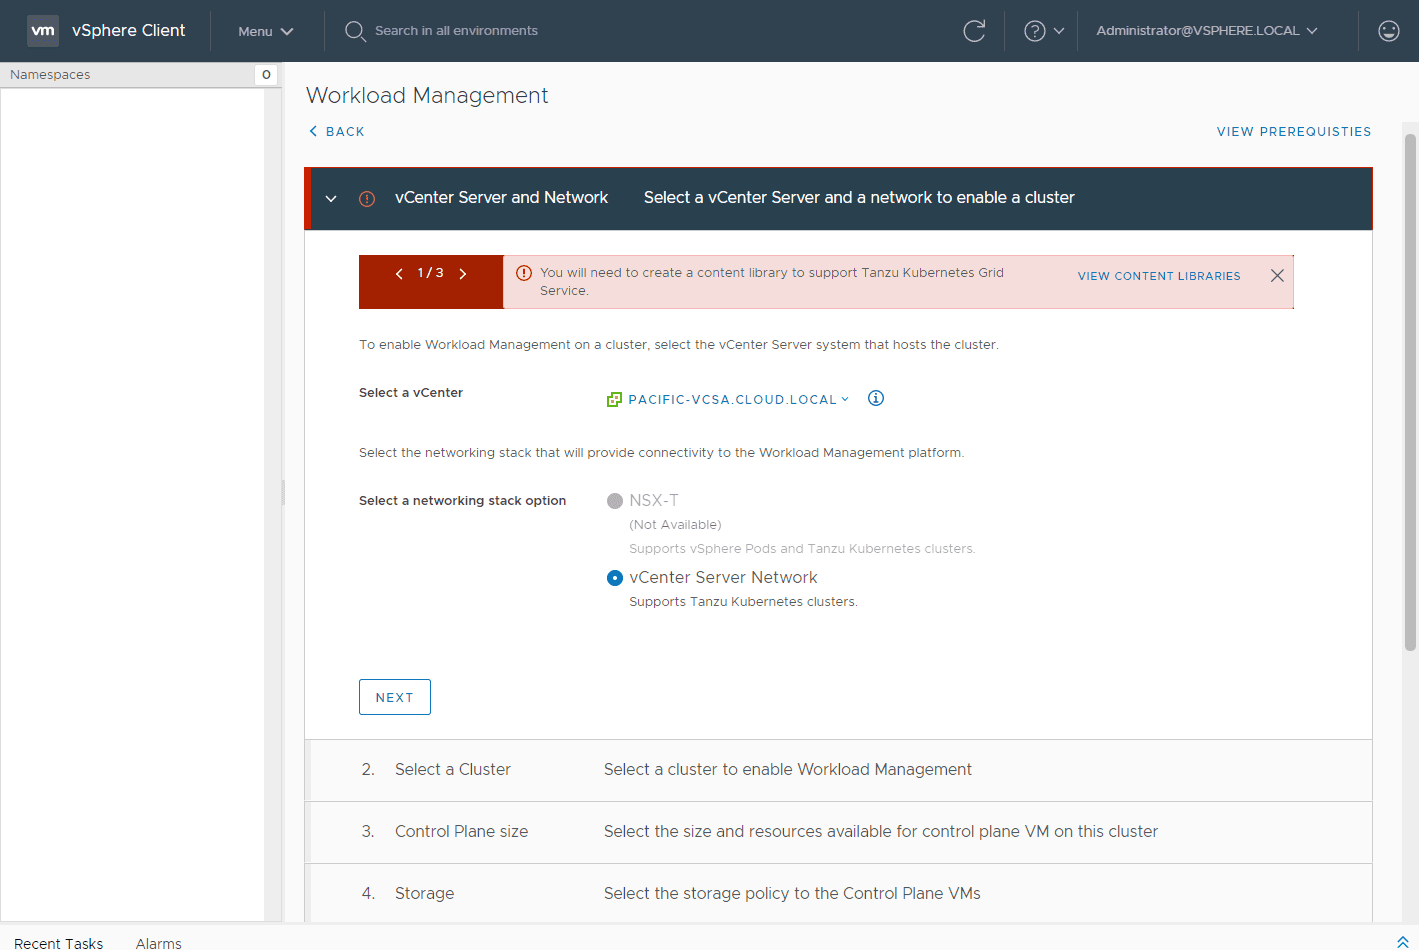
As you notice below, I am being directed to create the content library which is one of the prerequisites for enabling workload management. Choose your vCenter Server as well as the networking option. Here I am choosing the vCenter server Network.
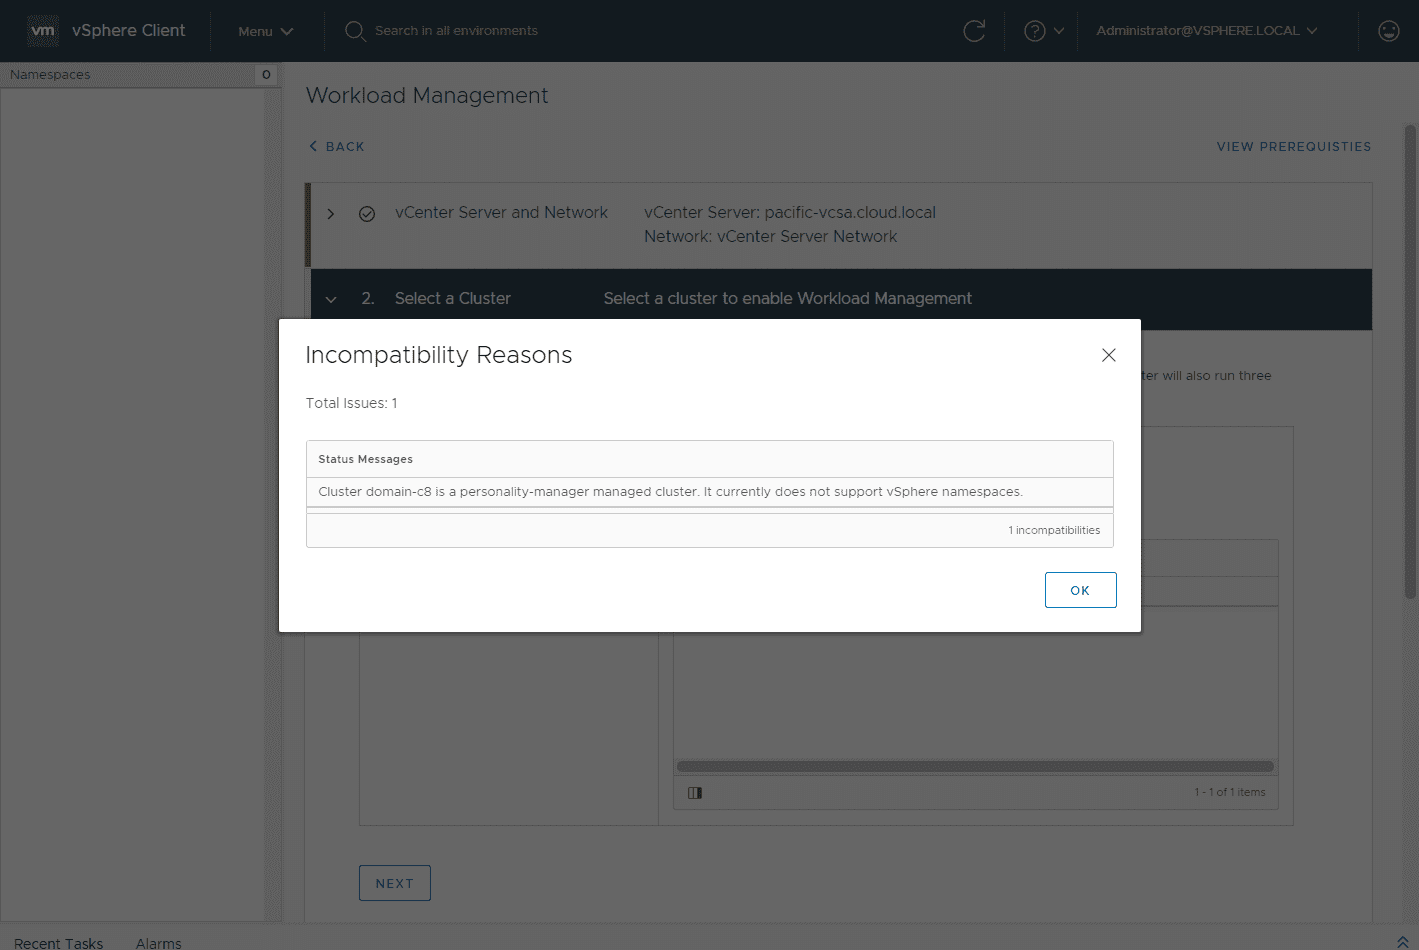
Choose the cluster name which should show up in the Compatible clusters list. You will need to make sure you have a cluster that is not managed by vLCM and also make sure you have DRS enabled.
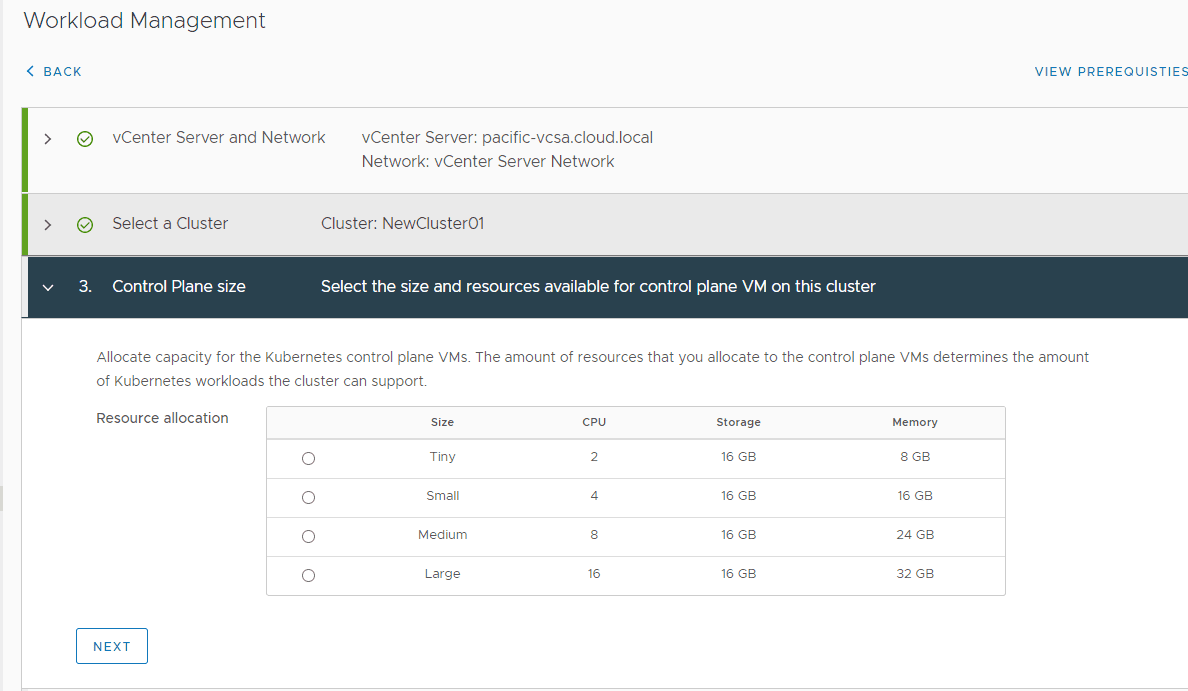
Choose the control plane size for the cluster. Here you are allocating capacity for the Kubernetes control plane VMs. The amount of resources that you allocate to the control plane VMs determines the amount of Kubernetes workloads the cluster can support.
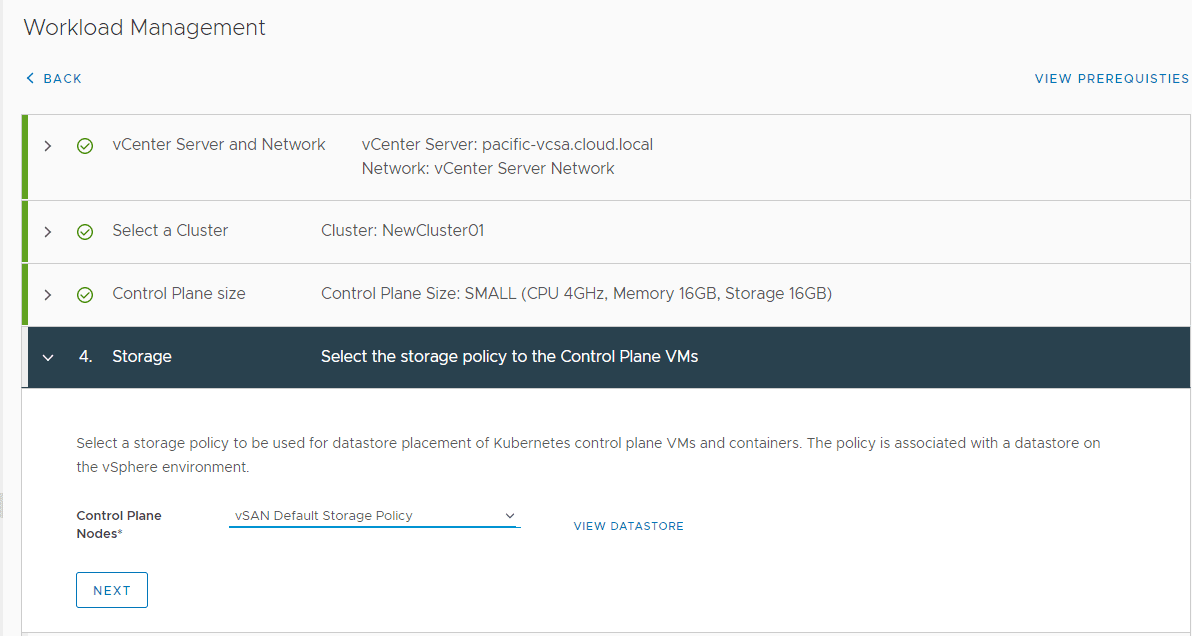
Choose the storage policy for the Control Plane VMs. This is used in the placement of Kubernetes control plane VMs and containers.
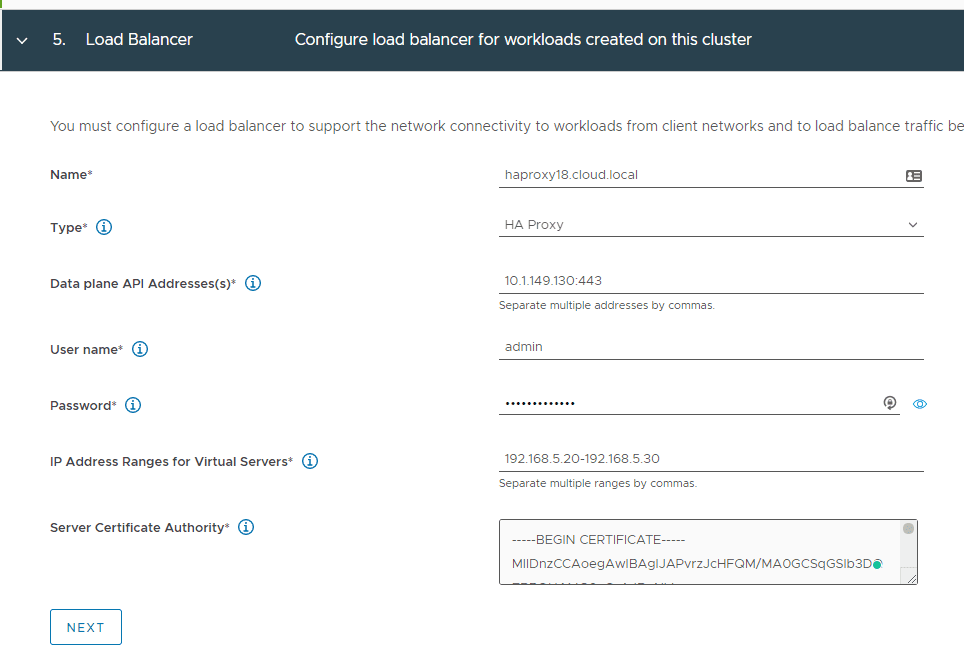
Point the install to the load balancer which is the HAproxy. Fill in the details here for configuration. In case you are wondering where you get the Server Certificate Authority.
- SSH to the HAProxy VM as root and copy /etc/haproxy/ca.crt to the Server Certificate Authority.
- This is the certificate in PEM format that has signed or is a trusted root of the server certificate that the Data Plane API presents. Do not use escape lines in the n format.
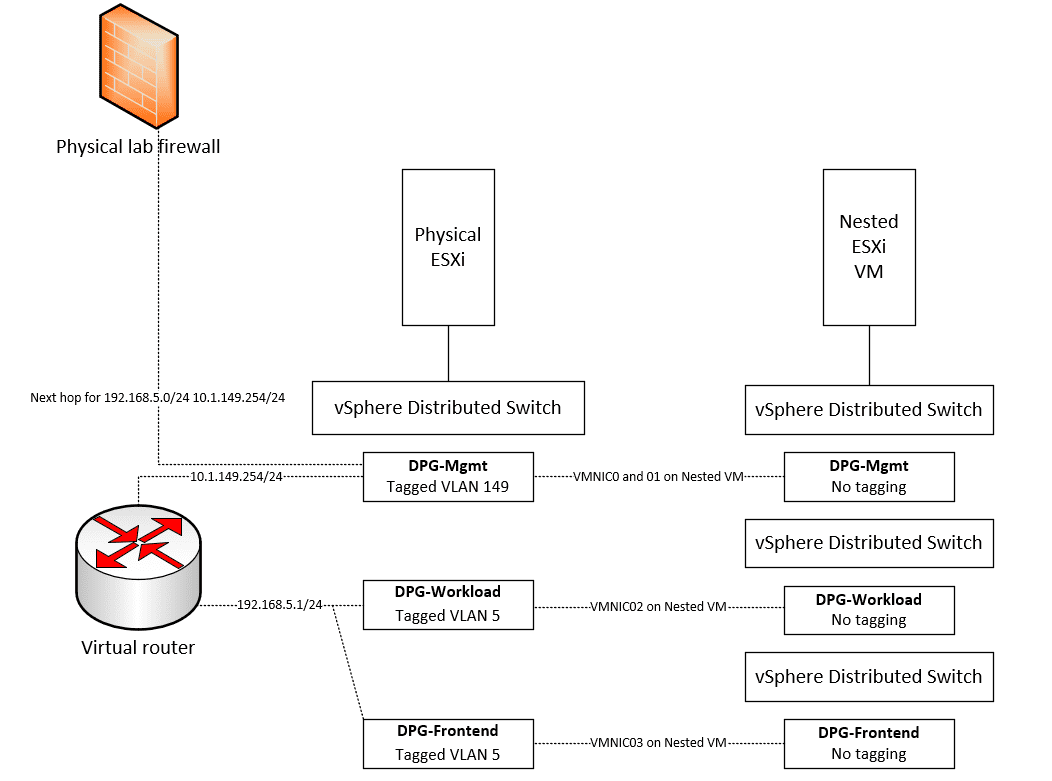
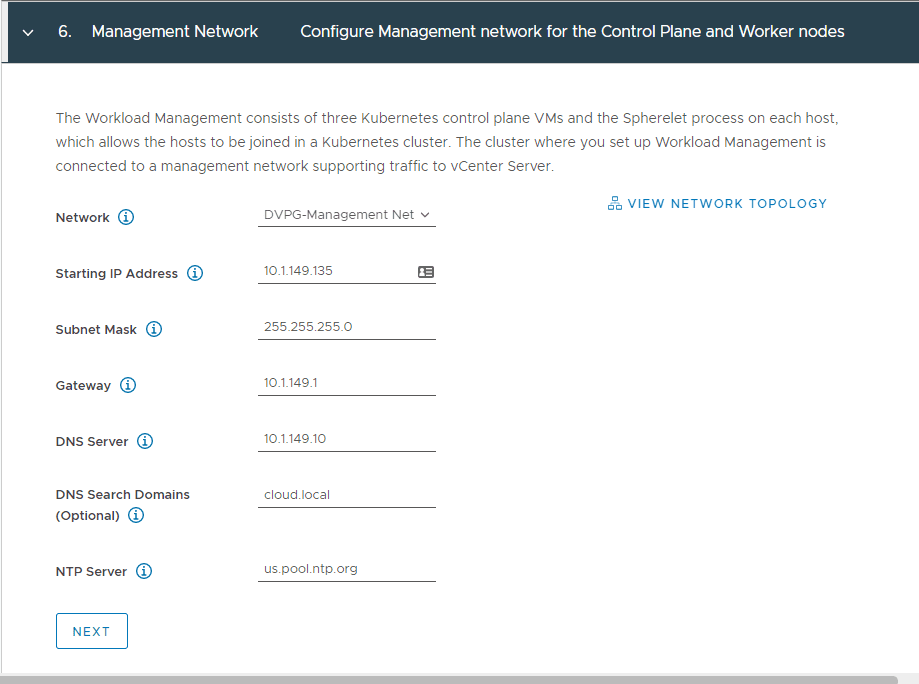
Configure the management network for the control plane and worker nodes. As noted the Workload management consists of three Kubernetes control plane VMs and the Spherelet process on each host that allows the hosts to be joined in a Kubernetes cluster. The cluster where you set up the Workload Management is connected to a management network supporting traffic to vCenter Server. You will need to make sure you have access to a management VMkernel port on the ESXi hosts.
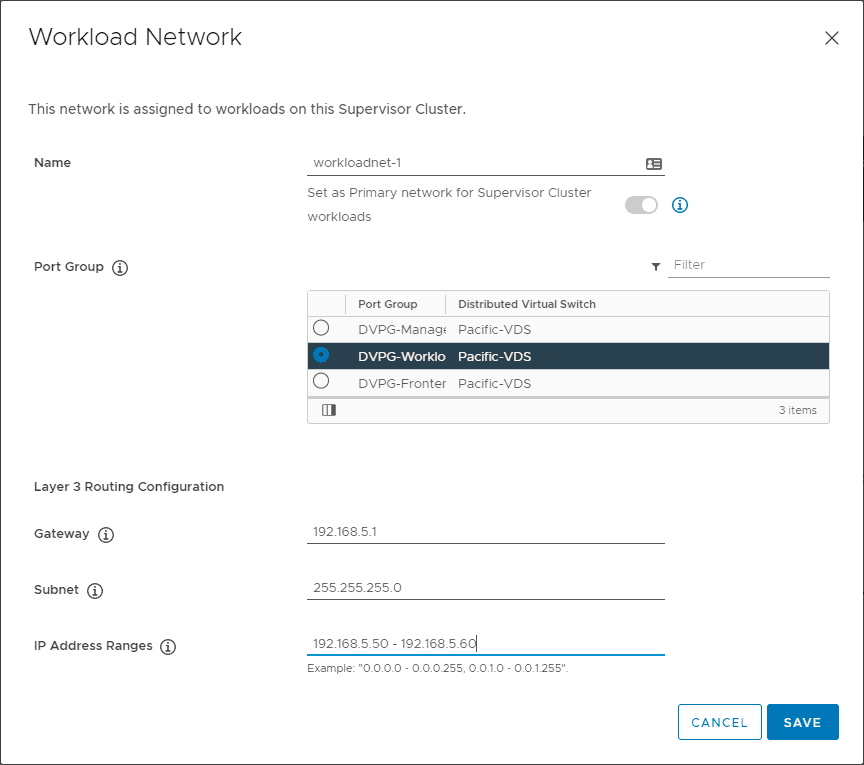
Add a workload network. This is the network that is assigned to workloads on this supervisor cluster.
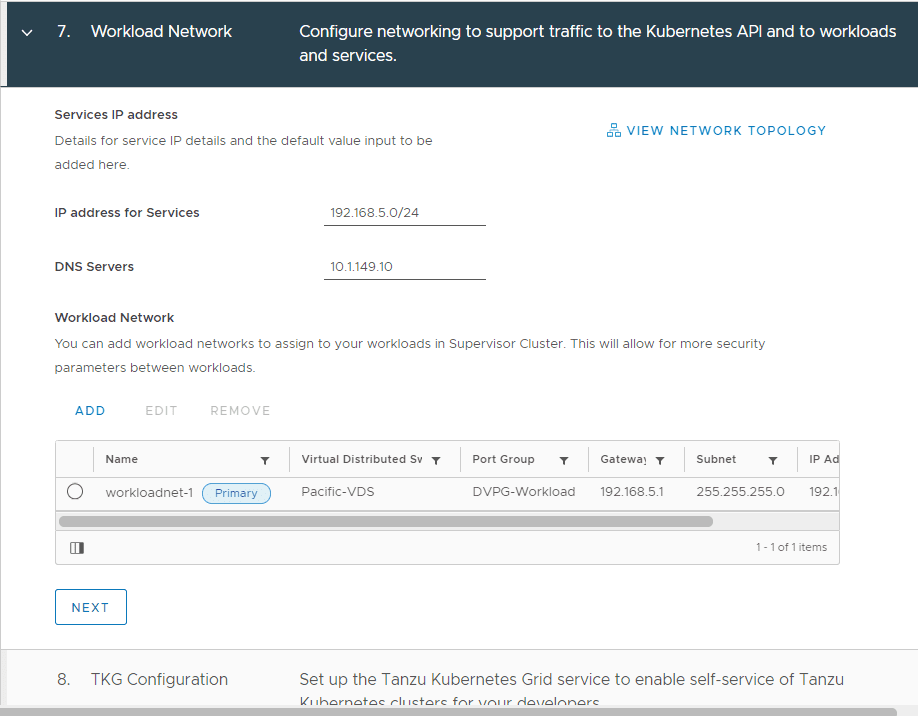
Configure the IP address for services, DNS servers, and workload network that was shown above.
Next, add a content library if you do not already have one configured.
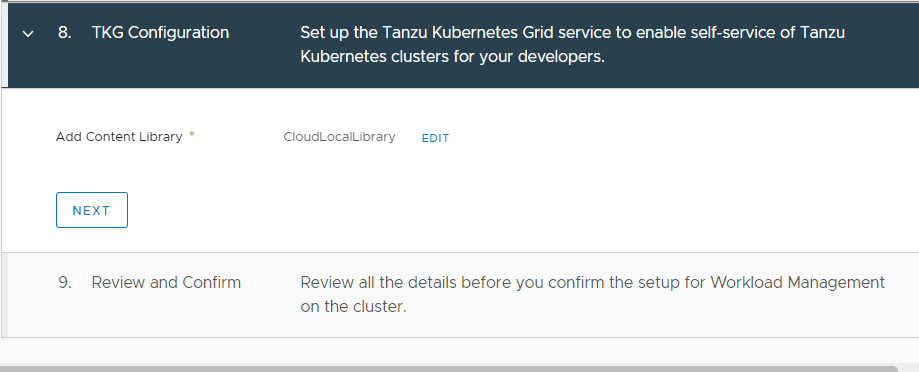
Review the details and configure the setup for the workload management on the cluster.

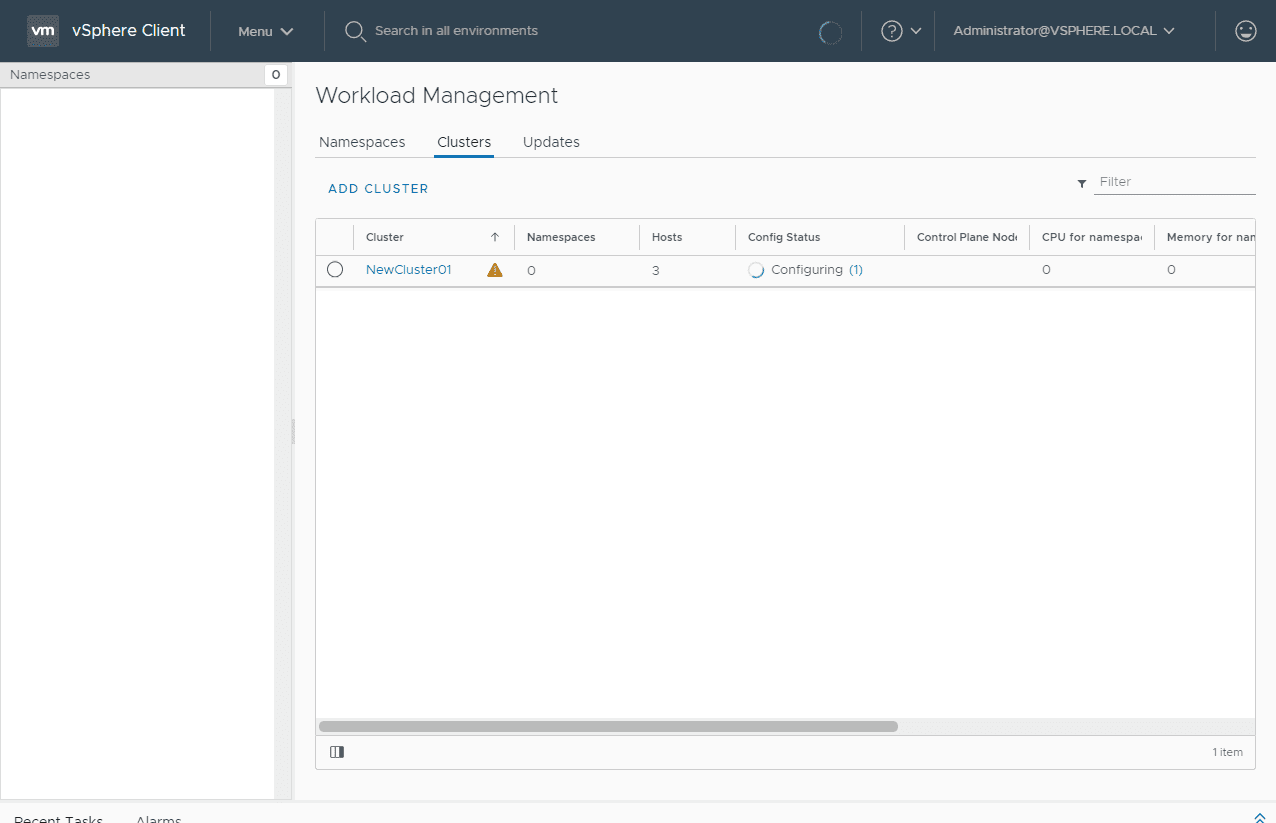
The configuration begins.
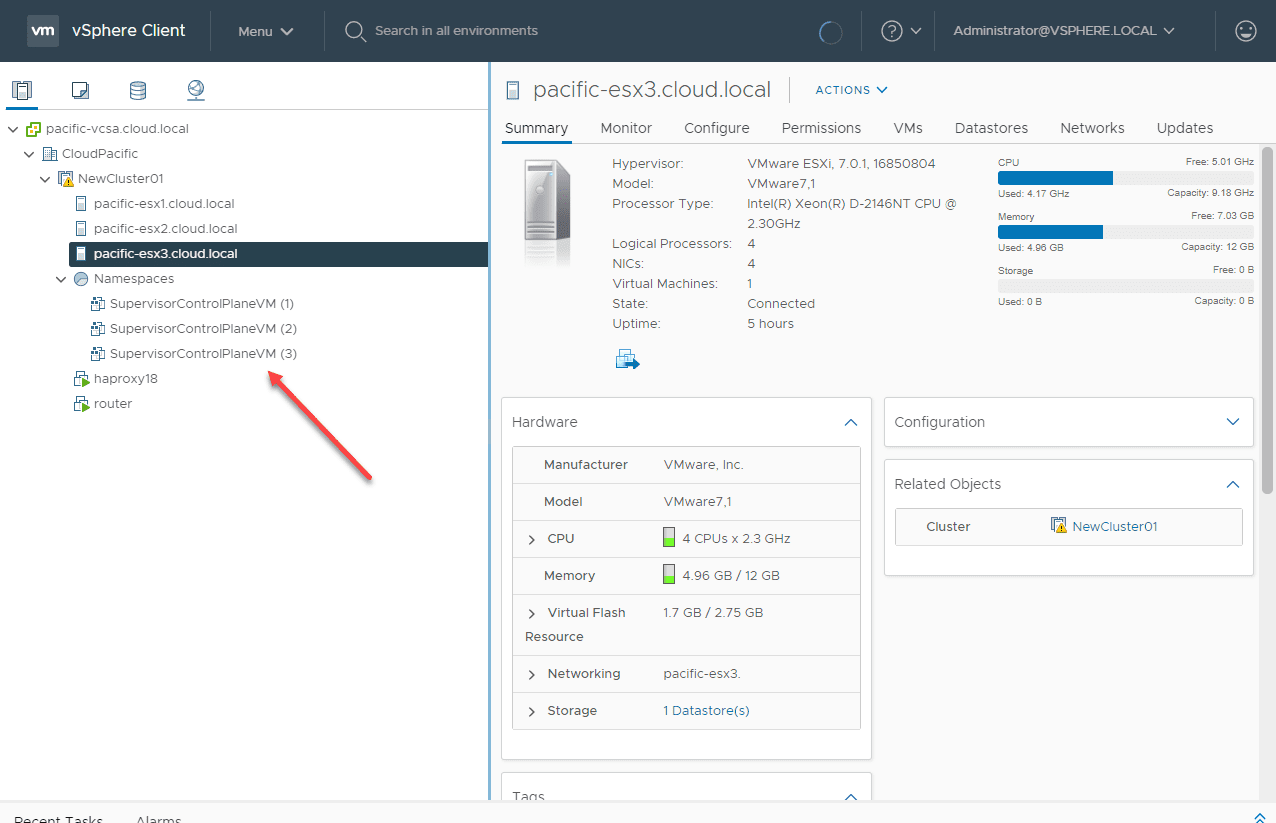
You can see the Supervisor Control Plane VMs that are provisioned.
Wrapping Up
The process to Configure VMware vSphere with Tanzu Workload Management with the Workload Management wizard is pretty straightforward. After you have the HAProxy VM in place for load balancing, the rest of the process basically involves getting your networks configured and addressing setup for the control plane VMs and other resources.
Keep the prerequisites in mind before you begin the workload management wizard as this will safe you some time in the long run. I didn’t really do my homework beforehand on the first go around and ran into issues mainly with prerequisites not being in place as needed. Other than that, VMware has made Kubernetes easy to consume with the new capabilities of vSphere with Tanzu. Now, on to creating Namespaces.