We have covered the functionality before of the Avago LSI StorCLI utility and its capabilities in controlling and interacting with Avago LSI RAID controllers. Just about anything you can do from the RAID BIOS can be done from the StorCLI. Actually, I don’t know of anything you can’t do from the StorCLI, but keep in mind you may run into some functionality that may be limited as I haven’t performed a direct comparison. Let’s detail the ability of the StorCLI to take a look at RAID controller BBU status and interact with the battery as well as controlling RAID cache policy on virtual disks. In this post we will take a look at how to Change BBU and RAID Cache Settings with Avago LSI StorCLI.
Change BBU and RAID Cache Settings with Avago LSI StorCLI
If you are not sure about how to get the StorCLI utility installed on your VMware ESXi server, take a look at the post here which describes the process. As we mention there, the nice thing about StorCLI that I like is that it does not require a reboot. Especially if you are running a standalone host in a lab environment, etc, it is great not to have to find a maintenance window to power everything down and reboot.
Why is knowing about the BBU and looking at the cache settings important? Well, there are a couple of reasons. The first and foremost is the BBU serves the purpose of being able to keep power to the controller long enough to finish out any disk operations if there is a sudden loss of power. This helps to ensure there is no data corruption. The second reason is that generally, most RAID controllers are set by default to “write back” with a BBU installed and “write through” without one. Usually “write through” equates to terrible performance. So, we want to make sure we have the BBU installed for the integrity of our data as well as performance. Pretty important reasons!
Use StorCLI to see BBU Settings
The first thing we want to take a look at are a few BBU specific commands that enable us to get the status of our BBU or even see if one is installed without having to pop the top cover. If we want to get the status and detailed status of our BBU, we can run the following commands:
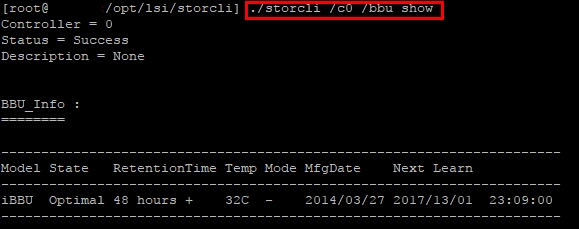
./storcli /cX /bbu /show
./storcli /cX /bbu /show all
Below we see the status of our BBU is optimal and also see the next learn cycle.
Below, an example of a RAID controller installed without a BBU.
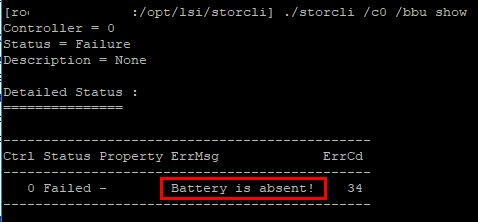
./storcli /cX /bbu show status
The show status command gives the same output from what I can tell as the show all command including current condition, firmware status, etc.
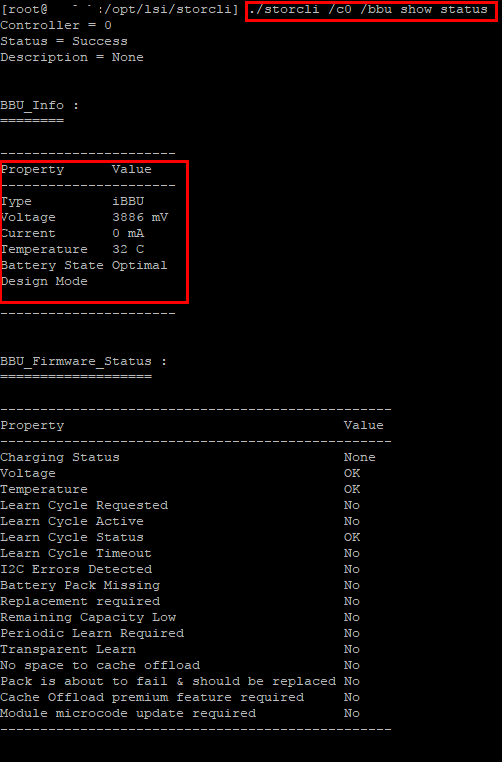
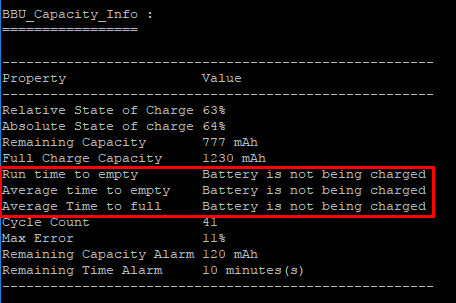
Below we see an issue with a BBU not charging. This can be see with the show status command.
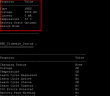
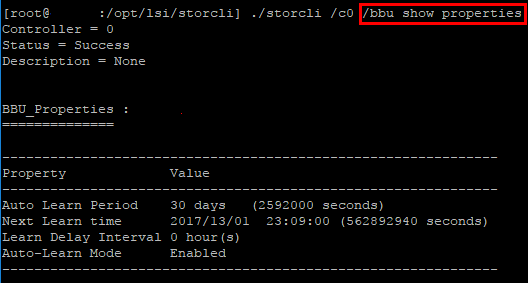
./storcli /cX /bbu /show properties
The properties command shows the next learn period, time, and delay interval as well as the learn mode.
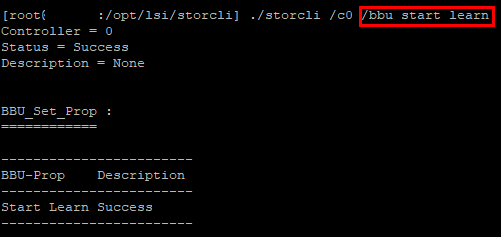
./storcli /cX /bbu start learn
Using the start learn command, we can start a manual learn cycle.
Use Avago StorCLI to view and configure RAID cache policy
The StorCLI command is also powerful from a RAID cache policy perspective. Considering the state of your BBU, we can also alter the cache policy. Most controllers will revert to RWTD which is read ahead, write through when a battery is not detected. This will result in very poor performance.
To see the properties of our virtual drive we can issue the general command:
./storcli /cX show all
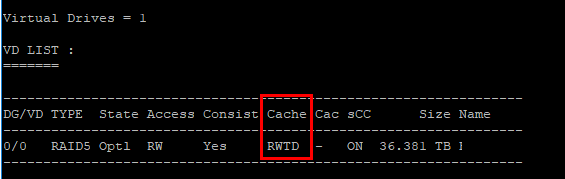
One section of the returned information is the Virtual Drives listing. Look for the Cache section and the value that is populated. As mentioned, below we have the RWTD policy set.
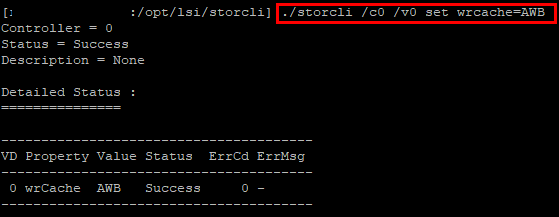
We can manually set the policy to “Read Ahead Write Back” which performs much better by using the following:
./storcli /cX /vX set wrcache=AWB
If you don’t have a battery installed, definitely use this command assuming the risk that results from running no battery. However, if not a production host, we can easily gain back the performance of write back mode without running a battery.
Thoughts
Hopefully, the look at how to Change BBU and RAID Cache Settings with Avago LSI StorCLI has shown some of the potential of this little utility that can be extremely helpful when using ESXi hosts in a lab environment to be able to control RAID settings of an Avago LSI card without having to reboot your server. The StorCLI utility is readily available for download via the Avago support site here.
Google is updating how articles are shown. Don’t miss our leading home lab and tech content, written by humans, by setting Virtualization Howto as a preferred source.
About The Author