Automate and Repurpose Old PCs into Thin Client VDI
In many enterprise environments that may have aging desktop hardware and who are looking to transition to a VDI solution for end users, there are often difficult fiscal decisions that come to light when thinking of replacing hardware across the board. However, if that hardware could be repurposed so that it doesn’t have to be replaced and bridge the gap between physical hardware and virtual desktop infrastructure, that is a much better outcome. A company called Praim offers a powerful solution in this space. In case you have not heard of Praim, they are a well-established company located in Italy who bring over 30 years of experience to the table in technology integration. Praim’s focus is on bringing uniformity and simplicity to the workplace. Recently, I had the opportunity to take Praim products for a test drive – ThinMan and ThinOX4PC. Both of these products provide excellent solutions to problems faced in the desktop virtualization world. Let’s take a look at ThinOX4PC and ThinMan that allow us to automate and repurpose old PCs into thin client VDI terminals.
Automate and Repurpose Old PCs into Thin Client VDI
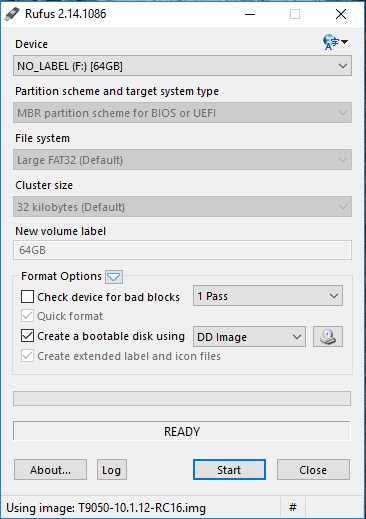
The ThinOX4PC is a product that essentially turns an older PC or laptop into a thin client that can be used with any number of VDI technologies including but not limited to Citrix, Remote Desktop Client, VMware Horizon View, and others essentially allowing us to automate and repurpose old PCs into Thin Client VDI terminals. ThinOX4PC can be booted a couple of ways – either with a USB boot disk, or by installing ThinOX4PC on the physical disk of workstation/PC. For testing and POC, the USB boot disk is a great way to kick the tires with ThinOX4PC and this is the method we are using for the purposes of the post. The process to create the USB disk is super easy with Rufus. Simply create a bootable disk using the DD image format provided by Praim for ThinOX4PC.
The ThinOX4PC environment boots into a customized Linux boot environment with the Praim configuration utilities loaded. The USB boot disk will initiate a DHCP request to pull an IP address for network connectivity. A note here about drivers – The ThinOX4PC boot environment works with different network ethernet cards (Intel, Realtek, Broadcom) and Intel and AMD video cards (Nvidia cards are not supported at the moment).
Once booted into the environment, you can launch the configuration utility that looks like a “gear” icon in the lower left hand corner of the desktop. From here you can change the system configuration parameters of the ThinOX4PC environment.
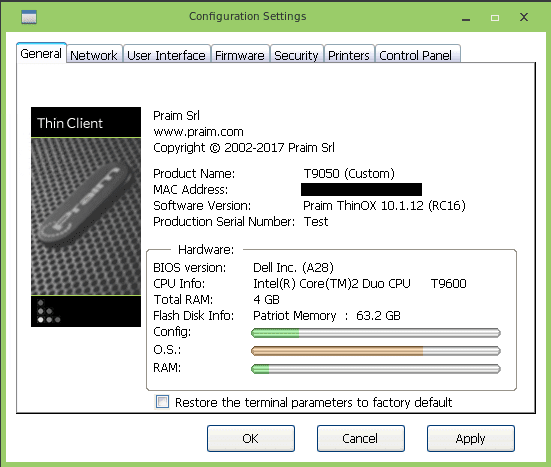
The configuration utility General screen shows the general information about the hardware.
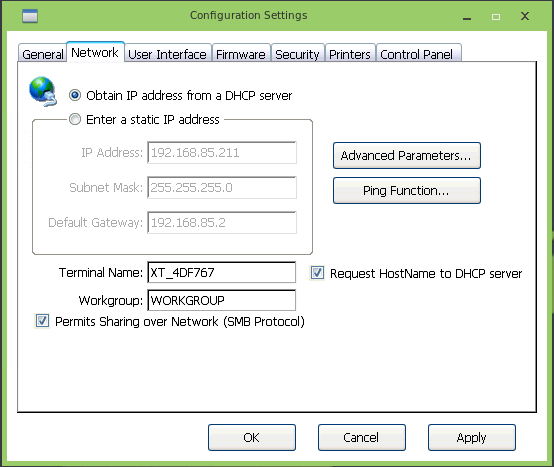
The network configuration screen allows configuration of network parameters – either DHCP or manual configuration of the IP address as well as the terminal name.
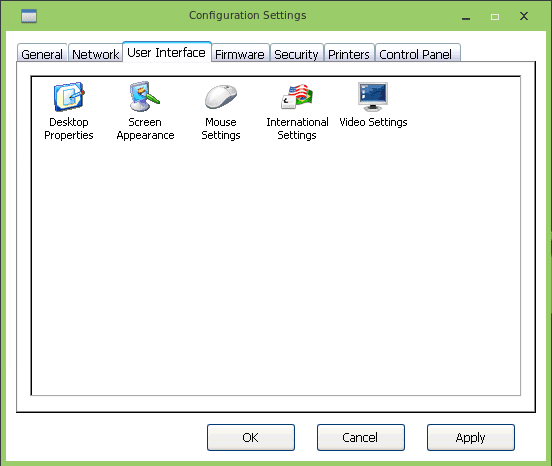
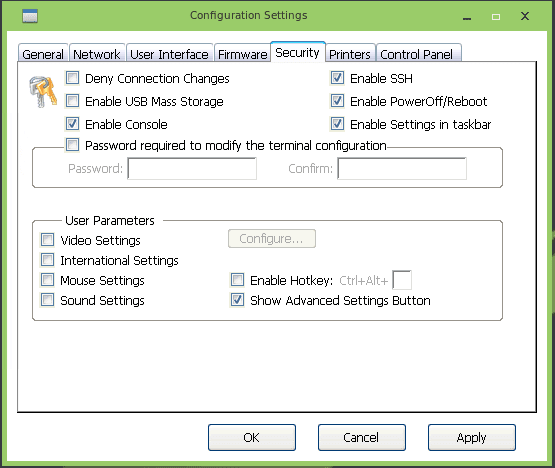
Below are the other screens from the configuration utility including user interface and security configuration.
Establishing a connection to your VDI environment
In this lab using ThinOX4PC, we are going to establish a connection to a VMware Horizon View 7.1 environment. The ThinOX4PC environment provides a connection manager utility that easily allows you to establish connectivity to your VDI environment of choice.
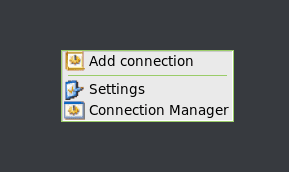
You can access this by right clicking anywhere on the desktop in the ThinOX4PC environment which will display the options for the connection manager or a quick shortcut to Add connection. Below we choose Connection Manager.
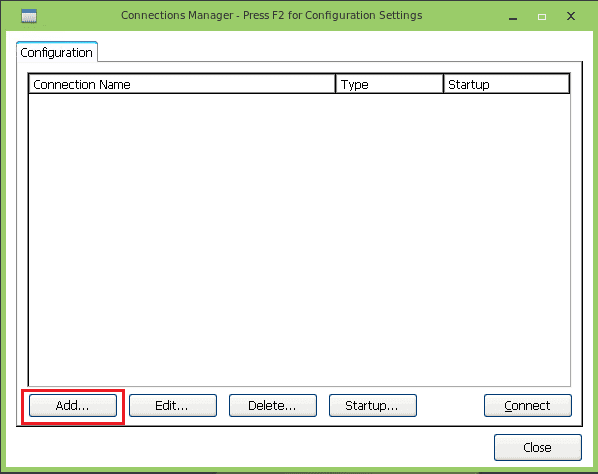
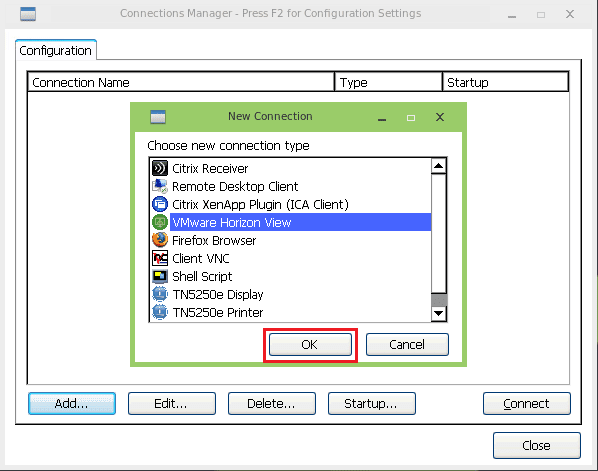
When the connection manager launches, we can choose to Add a connection.
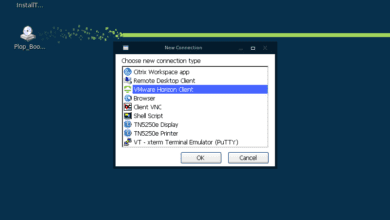
When we choose to Add a connection, we receive a box that shows the wide range of options we have for a new connection type. We will choose VMware Horizon View to connect to our Horizon 7.1 lab environment. Once selected, click OK.
We get a number of options to configure with our VMware Horizon View environment. We can name our session as well as configure the address of the View Server which is our VMware View Connection Server address.
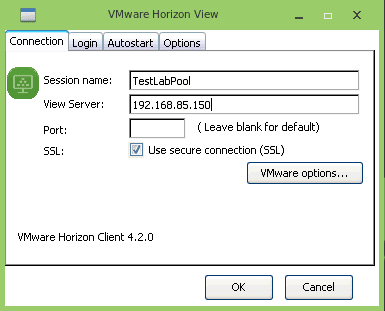
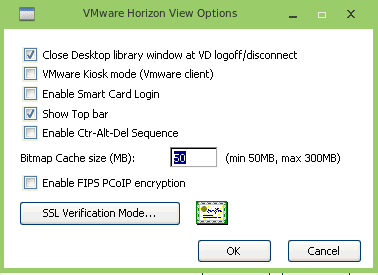
If we choose the VMware options button in the box above, we get even more options for our View connection.
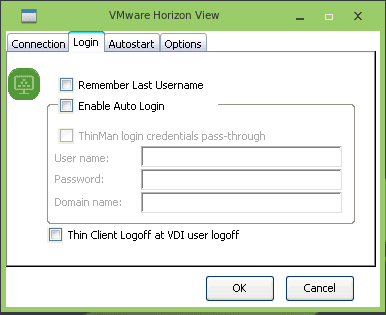
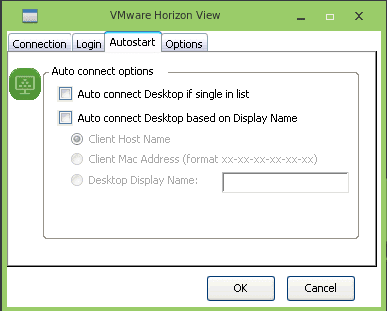
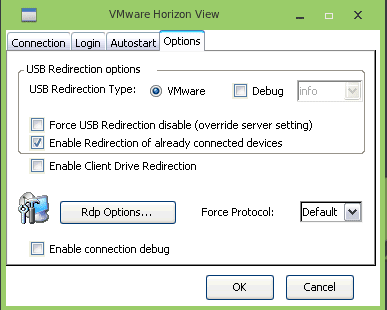
Also, we have options for Login, Autostart, and Options we can configure, shown below.
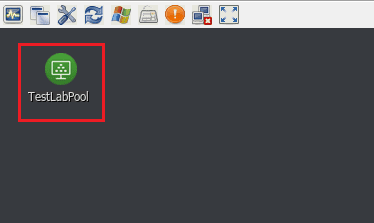
Once we click OK, the connection is created on the ThinOX4PC desktop. We can double click the name of our connection and we will be taken to the VMware Horizon View connection window.
The ThinOX4PC environment is super easy and very intuitive to navigate as well as setup connectivity to your VDI environment. The boot environment for me on the older Dell laptop I used for testing, worked flawlessly. The real key and power however to the ThinOX4PC environment is the management application which is ThinMan.
ThinMan
ThinMan is a Praim graphical software tool designed to perform management and monitoring of remote thin client devices connected to the network. Think of ThinMan as the management piece that allows us to automate and repurpose Old PCs into Thin Client VDI terminals. ThinMan interacts with remote devices such as those booted with ThinOX4PC, allowing management and other operations. These include remote connections, remote assistance and other special functions.
ThinMan also allows for the configuration of both user and device profiles and policies that can automate configuration of the ThinOX4PC environment as well as enforce authentication requirements for the ThinOX4PC boot environment to use an identity source such as Microsoft’s Active Directory.
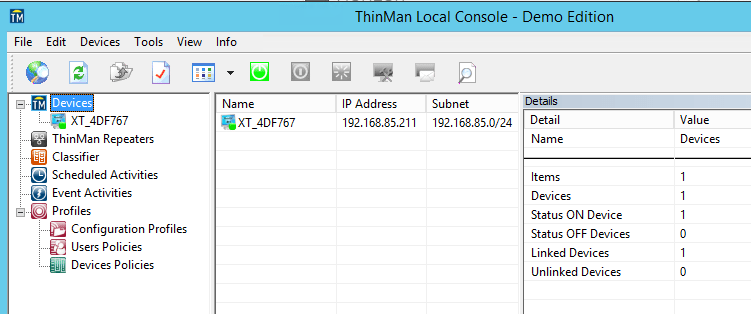
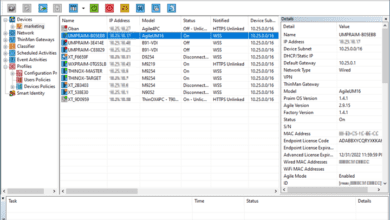
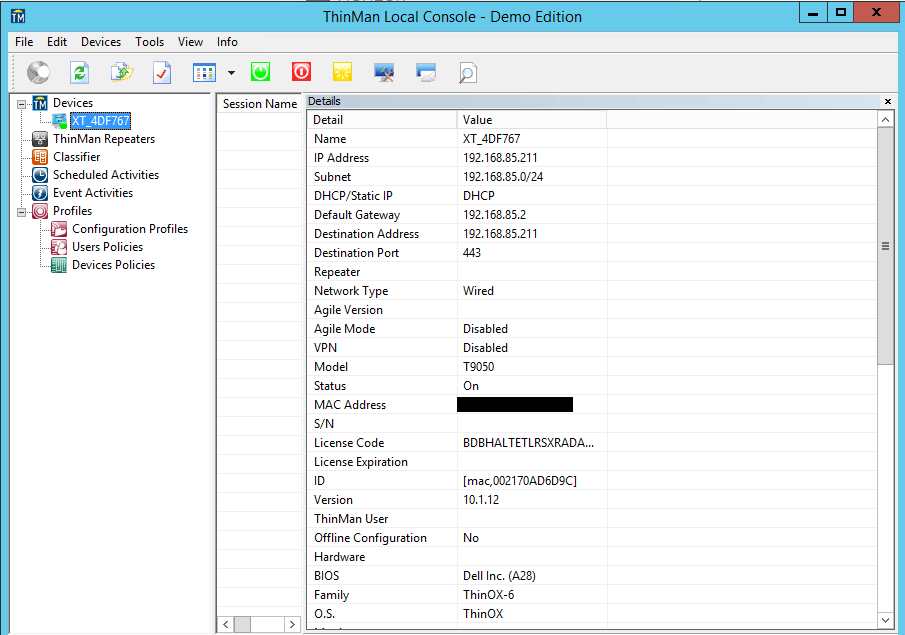
Using ThinMan, you can gain a wealth of information about the connected devices including IP Address information, Model, license, user information, BIOS version, and much more.
Profile Management
With Profile Manager, you can dynamically manage user and device policies as well as configuration profiles. You can create groups of devices, single devices, or certain devices with classification rules applied. Also, the configuration profiles can be based on a single user that is logged on to the device.
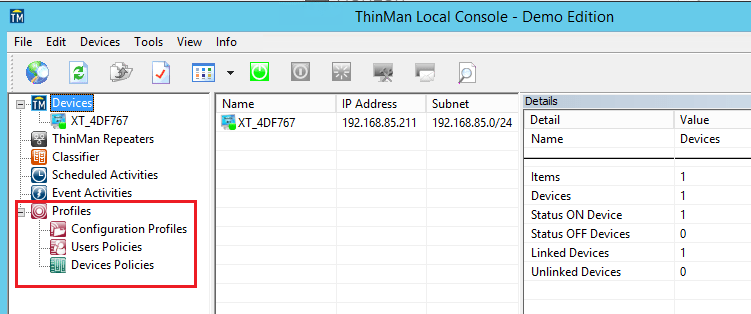
The Profile management capabilities of ThinMan allows for bolstering security as well as automating deployment configuration for both users and devices.
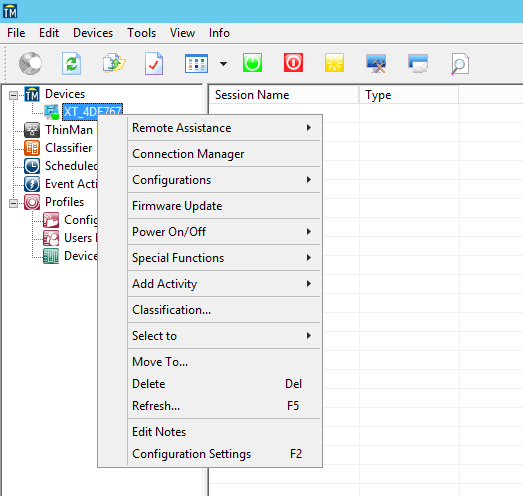
Device Information, Remote Assistance
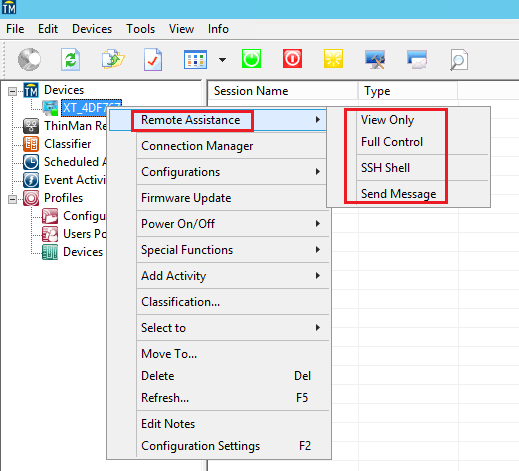
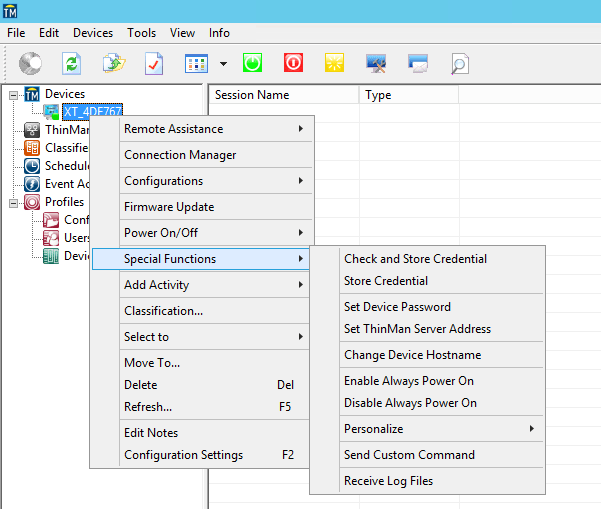
If you right click the device you see under your Devices, you get a context menu of available options. Notice you have such options as Remote Assistance, firmware update, power on/off, special functions, configuration settings, and others.
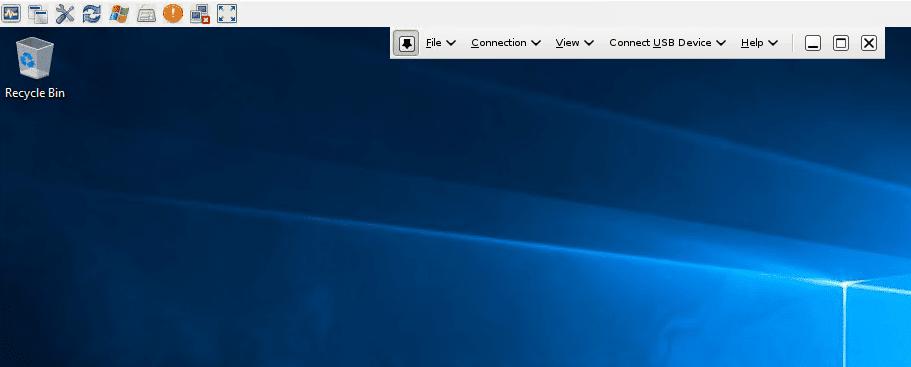
Looking just briefly at the Remote Assistance we can use this functionality to shadow the remote client if we want or take control. Just a note here, this is the means the screenshots have been captured of the ThinOX4PC environment in the post.
Below is a Remote Assistance session of the ThinOX4PC environment after we had connected to a Windows 10 VMware Horizion View VM. Note the controls at the top left of the remote assistance screen. The buttons allow for various actions including sending the following:
- Send CTRL+ALT+DEL
Toggle Fullscreen mode
Send Start
Show connection options
Send Custom key
Under the Special Functions menu, we see several other configurables that can be set for the environment.
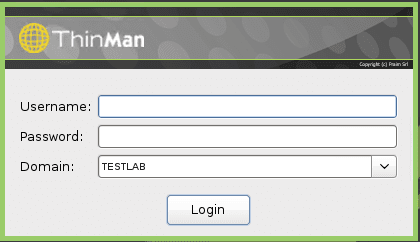
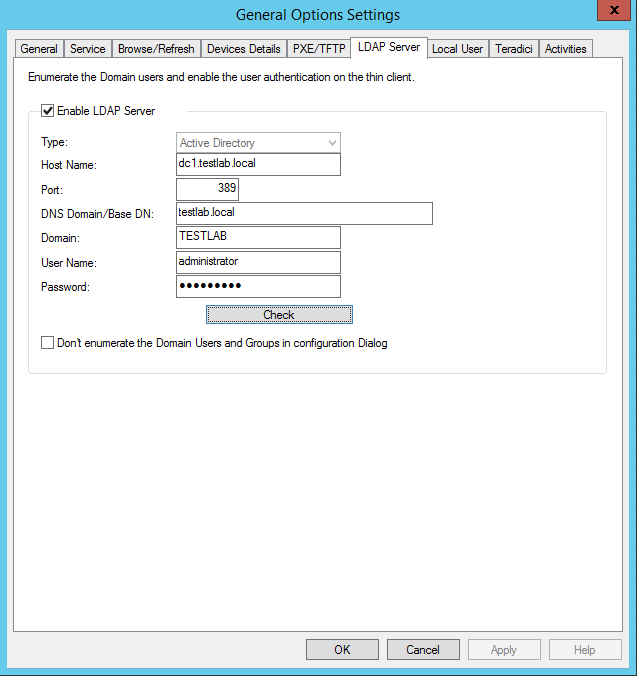
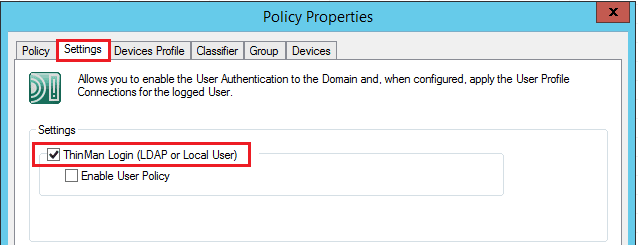
One of the really nice things you can do with ThinMan is setup authentication options for the boot environment. You can point ThinMan to an LDAP server for Active Directory logins. This is found under Tools >> General Options. Once you have LDAP configured to point to your identity source, we can then enforce sign on for either users or devices.
Now we can create a new device or user policy to use our authentication for the environment. Below, I have created a test device policy that sets the LDAP setting for user authentication to the domain.
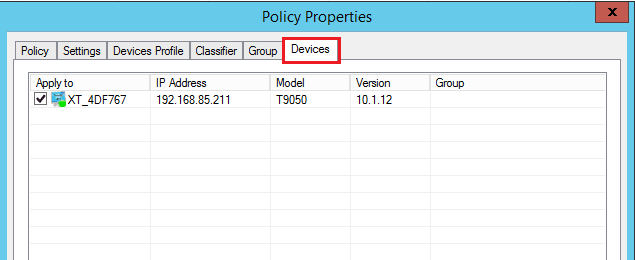
Under the devices tab, we can select which devices receive the policy.
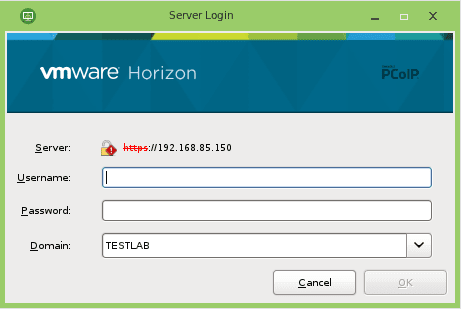
Now, when we boot into the ThinOX4PC environment, we are first prompted for a login before we can enter into the environment to launch our connections. As you can see below, we are being prompted for our domain credentials we setup in the LDAP configuration above.
This provides a great way to not only apply policy but also to secure our ThinOX4PC environment so that only users who authenticate to our identity source are able to gain access even to the thin client environment which in turn has access to the VDI environment.
Thoughts
The solutions for providing a powerful thin client environment as well as a management solution for thin clients has certainly been achieved by Praim. I was thoroughly impressed by how easy, intuitive, and solid the ThinOX4PC and ThinMan products were in testing. If you are looking for a great way to automate and repurpose old PCs into thin client VDI terminals capable of connecting to your VDI environment, be sure to checkout Praim ThinOX4PC. For configuration, management, and deployment of your ThinOX4PC environment, ThinMan is a powerful and capable management platform to bring the solution full circle. Be sure and checkout demos of both products at Praim.