GNS3 has definitely matured as a product and offers tremendous functionality especially if you look at the cross vendor platform support that it offers. I definitely prefer the interface of GNS3 over other products such as VIRL. VIRL is maturing and getting there as a product, but the VM Maestro interface leaves a lot to be desired. Anyways, without getting into a quick review of the differences between the different products, I wanted to write up a quick post on how to setup GNS3 VM VMware ESXi installation. I had recently refamiliarized myself with GNS3 and it has changed a good amount since the last time I had used it.
One of the bigger changes lately is the use of the GNS3 VM instead of the IOU VM that has replaced this functionality moving forward. However, I found the documentation a bit all over the place when it came to setting up the GNS3 VM so I wanted to quickly encapsulate what I did to get it up and running in my ESXi lab environment.
Setup GNS3 VM VMware ESXi
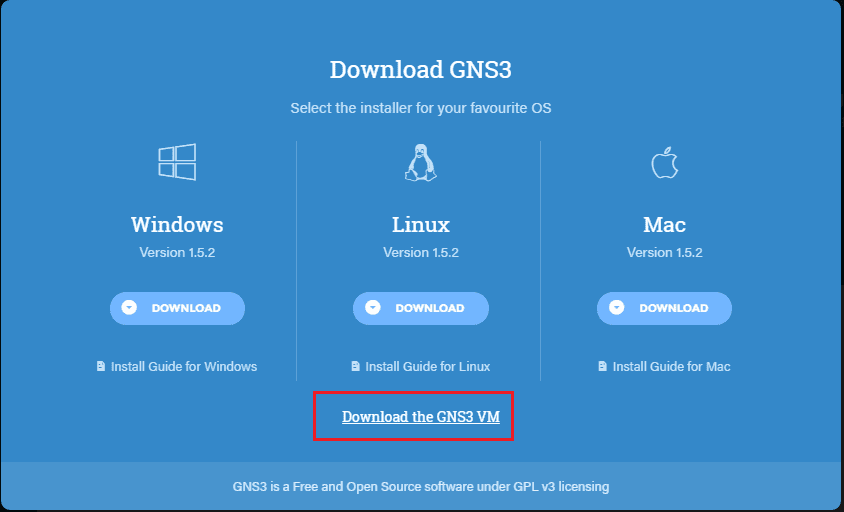
Navigate to the GNS3 official website and download the OVA template for VMware ESXi. You will need to create a free account if you have not done so already. Notice the Download the GNS3 VM link at the bottom.
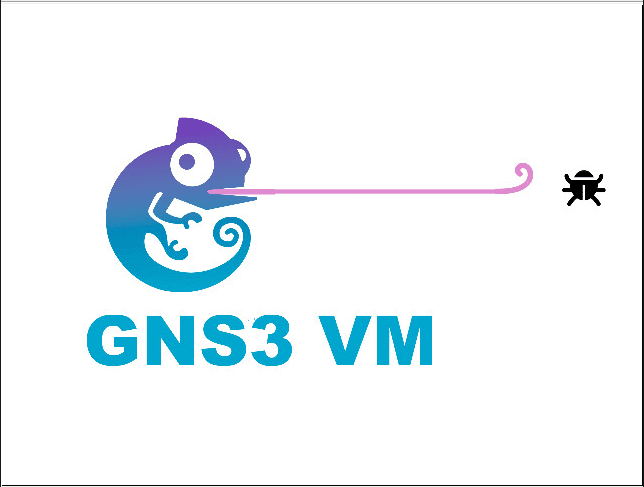
Once you have downloaded the OVA template, you will deploy this in the normal means of deploying an OVA file in vCenter. Either using the WebUI or vCenter client, deploy the template. The VM boots for the first time. I love the extending tongue of the GNS3 logo to show boot progress.
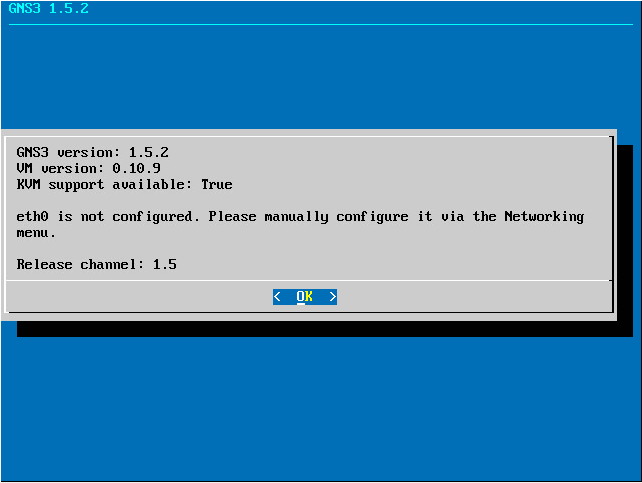
Upon the first boot, you may be prompted to configure the network settings. In this particular lab environment, I didn’t have a DHCP server running, so the ethernet adapter wasn’t able to pull an IP address as you can see below. By default it is set to DHCP.
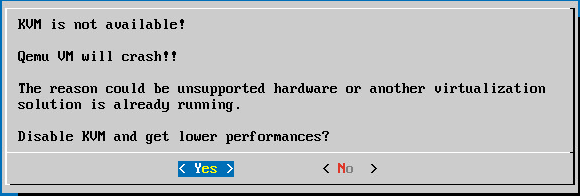
Also, since the VM uses KVM, so you must enable nested virtualization or you will receive the error message below.
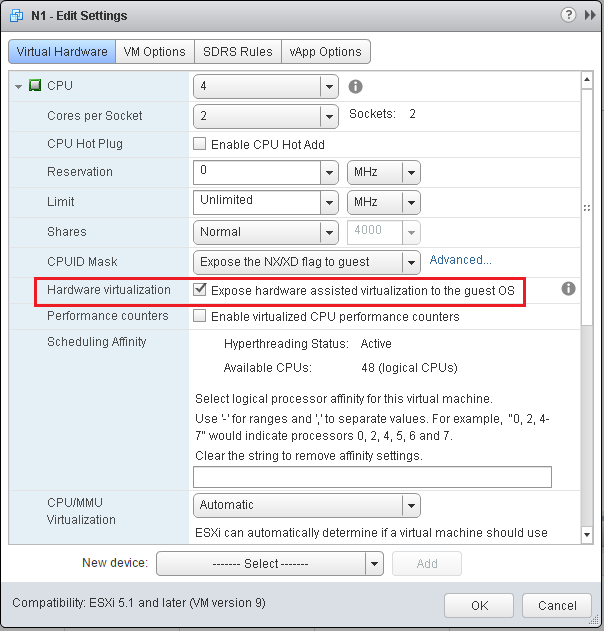
To enable nested virtualization capabilities on the GNS3 VM, open the WebUI in vCenter and in the Edit Settings dialog box under the CPU, you will see the option for Hardware virtualization. Place a check in the Expose hardware assisted virtualization to the guest OS. This must be done when the VM is powered off.
Now, when you boot, you should not see the error. Now we will configure the Networking of the GNS3 VM. Select the Networking – Configure networking settings option in the menu.

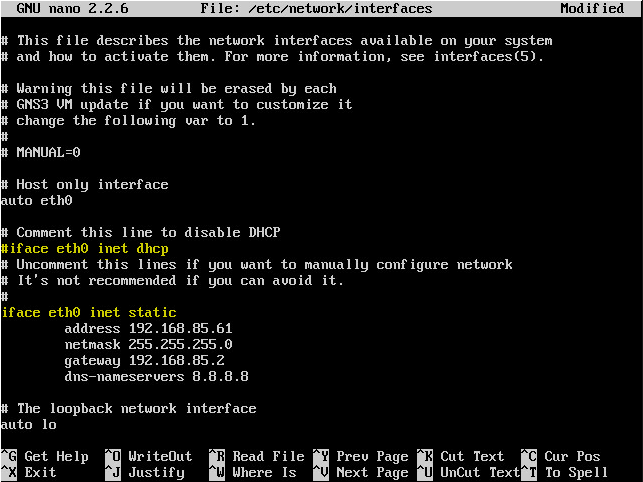
This will open the low level edit of the /etc/network/interfaces file where you can edit your network settings. To disable DHCP and set a static IP address, comment/uncomment out the following:
- iface eth0 inet dhcp
- iface eth0 inet static
As you can see below, I commented out the DHCP line and then uncommented the static line and set my IP address parameters in that section.
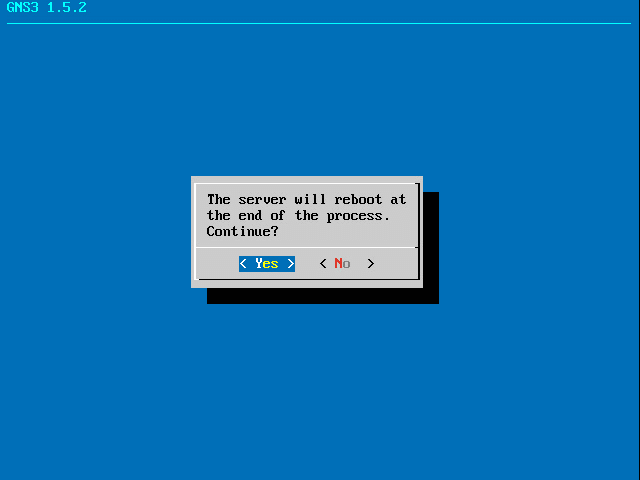
After you save the file, you will be prompted to reboot to instantiate the network changes you have made.
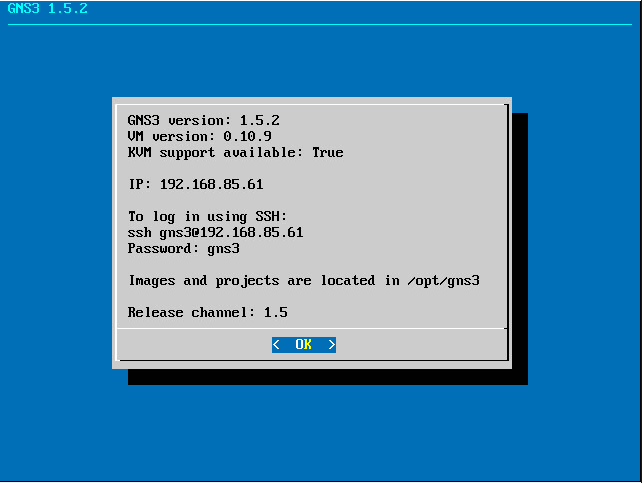
As you can see when you boot the VM, you should see your new IP address configured.
Thoughts
GNS3 has come a long way and is certainly in my humble opinion the best network lab software you can use due to the wide range of vendors that it can simulate as well as the ease of use of the interface. Add to the fact, that you can even use your VIRL images in the new GNS3 VM, it becomes a swiss army knife of capabilities. In the next post, I will show how to upgrade/install your GNS3 Windows installation as well as how to install appliances from the marketplace and import your VIRL images. As we have show in this setup GNS3 VM VMware ESXi post, the process to get up and running with the new GNS3 VM is painless and easy.
Google is updating how articles are shown. Don’t miss our leading home lab and tech content, written by humans, by setting Virtualization Howto as a preferred source.
About The Author