How to Install Kubernetes in Ubuntu 22.04 with Kubeadm

In this guide, we will install Kubernetes in Ubuntu 22.04 from scratch using the kubeadm command.
Table of contents
- 1. Update your Ubuntu 22.04 hosts
- 2. Setup your hostnames and resolution
- 3. System Settings for Kubernetes
- 4. Installing Containerd container runtime
- 5. Setting Up Kubernetes Repositories
- 6. Installing Kubernetes Components
- 7. Initialize Kubernetes Cluster
- 8. Joining Worker Nodes to the Master
- 9. Configuring the Pod Network
- 10. Verifying the Kubernetes Installation
- Create a test deployment
1. Update your Ubuntu 22.04 hosts
I have (3) Ubuntu 22.04 hosts installed as Kubernetes hosts in the cluster running as virtual machines in place running in my VMware virtualization infrastructure. They are configured with 4 CPUs and 8 GB of RAM, and 40 GB of disk space for the lab. Each host has an Internet connection to pull down packages. Also, I have created a linuxadmin user and added to sudoers file for access in the example environment.
To update your Ubuntu 22.04 Kubernetes hosts as part of the requirements:
sudo apt-get update && sudo apt-get upgrade -y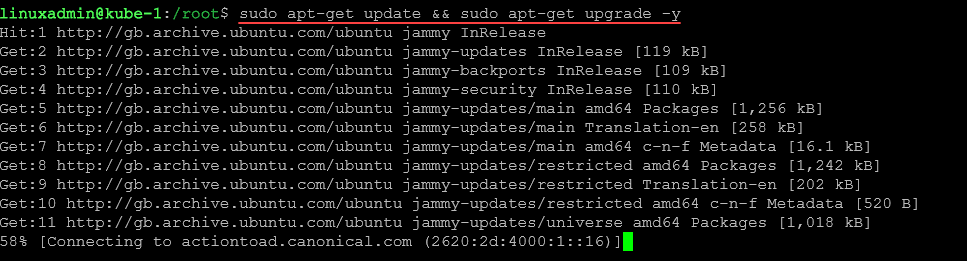
2. Setup your hostnames and resolution
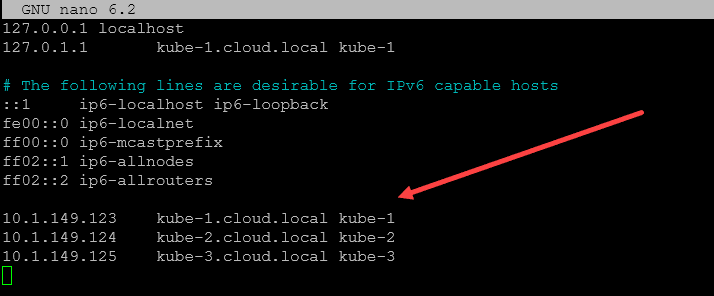
Host names need configured. I have the following configured in my Ubuntu hosts, host file hostname config:
10.1.149.123 kube-1.cloud.local
10.1.149.124 kube-2.cloud.local
10.1.149.125 kube-3.cloud.local
Below, I have added the entries to the hosts files for each Kubernetes cluster nodes. You can also use proper DNS configuration for name resolution.
3. System Settings for Kubernetes
Kubernetes requires specific kernel parameters and system settings on Ubuntu 22.04. This section will guide you through optimizing these settings, such as disabling swap and adjusting kernel parameters using sudo sysctl.
Disable swap file
There are a couple of commands we can run to ensure the swap file is disabled.
sudo swapoff -a
sudo sed -i '/ swap / s/^\(.*\)$/#\1/g' /etc/fstab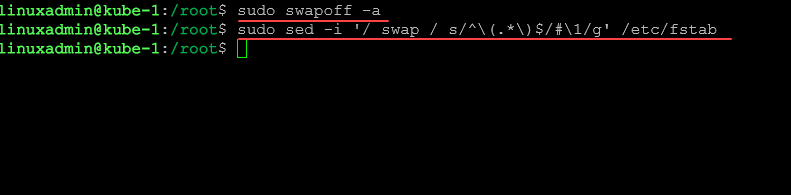
Kernel parameters
We need to add the following two sets of kernel parameters as prerequisites on our Kubernetes cluster hosts. Why? If we don’t do the following, we will see something like the error:
[ERROR FileContent--proc-sys-net-bridge-bridge-nf-call-iptables]: /proc/sys/net/bridge/bridge-nf-call-iptables does not exist
    [ERROR FileContent--proc-sys-net-ipv4-ip_forward]: /proc/sys/net/ipv4/ip_forward contents are not set to 1
So, we need to run the first set of system parameters below.
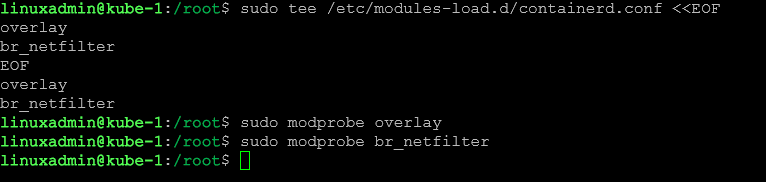
sudo tee /etc/modules-load.d/containerd.conf <<EOF
overlay
br_netfilter
EOF

##Run after the above command
sudo modprobe overlay
sudo modprobe br_netfilter
Running the above commands
Next, we need to run the following commands:
sudo tee /etc/sysctl.d/kube.conf <<EOT
net.bridge.bridge-nf-call-ip6tables = 1
net.bridge.bridge-nf-call-iptables = 1
net.ipv4.ip_forward = 1
EOT
Now we need to run the following command to apply the changes to the system:
sudo sysctl --system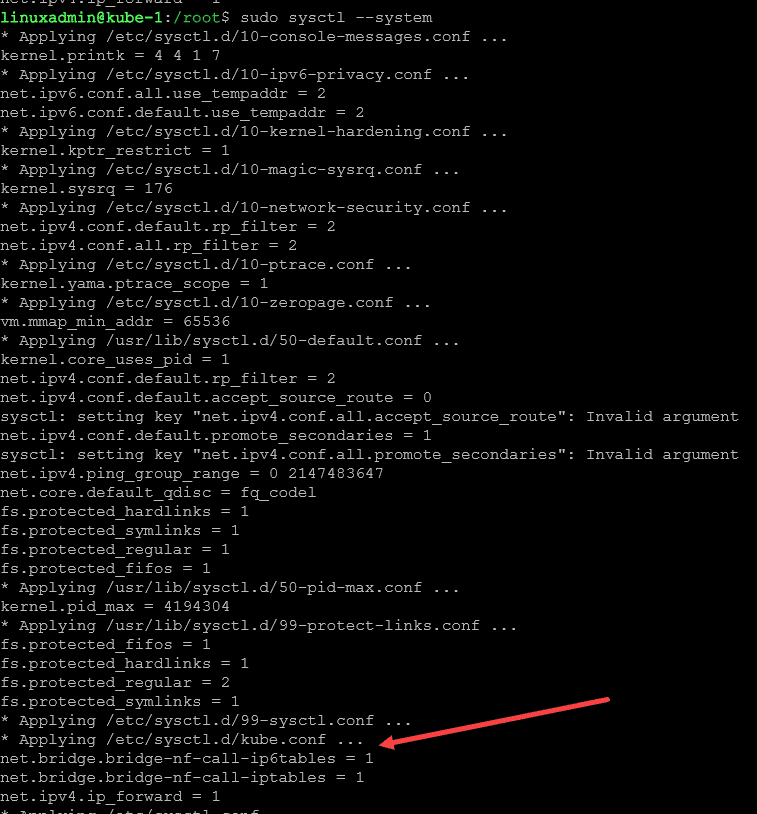
4. Installing Containerd container runtime
For modern versions of Kubernetes, we need to install the containerd runtime, and not Docker. Let’s get containerd installed.
First, we need to setup Docker’s apt repository:
sudo apt-get update
sudo apt-get install ca-certificates curl gnupg
sudo install -m 0755 -d /etc/apt/keyrings
curl -fsSL https://download.docker.com/linux/ubuntu/gpg | sudo gpg --dearmor -o /etc/apt/keyrings/docker.gpg
sudo chmod a+r /etc/apt/keyrings/docker.gpg

# Add the repository to Apt sources:
echo \
"deb [arch=$(dpkg --print-architecture) signed-by=/etc/apt/keyrings/docker.gpg] https://download.docker.com/linux/ubuntu \
$(. /etc/os-release && echo "$VERSION_CODENAME") stable" | \
sudo tee /etc/apt/sources.list.d/docker.list > /dev/null
sudo apt-get update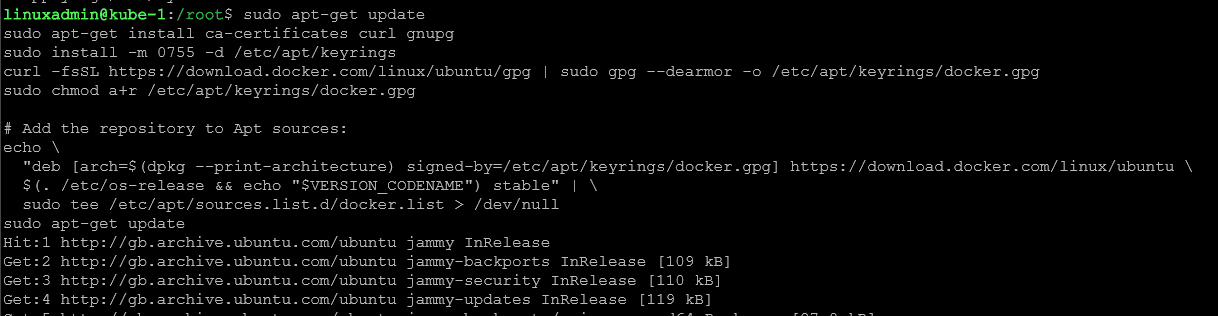
Next, we need to install the containerd runtime:
sudo apt install containerd.io -y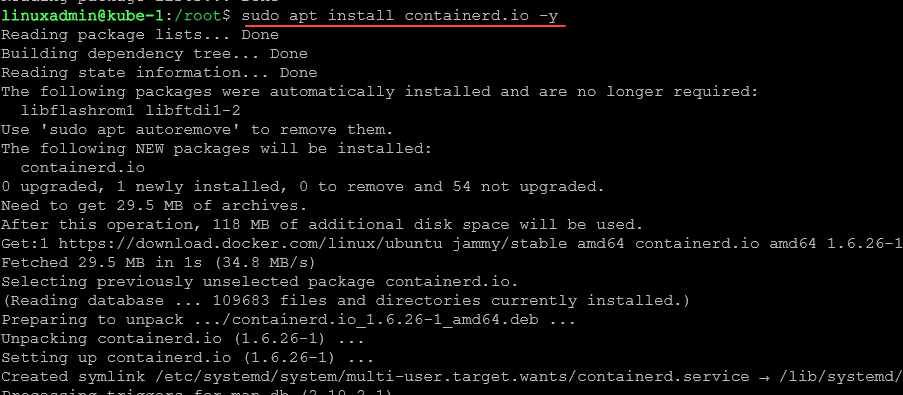
Next, we need to configure the system so it starts using systemd as cgroup.
containerd config default | sudo tee /etc/containerd/config.toml >/dev/null 2>&1
sudo sed -i 's/SystemdCgroup \= false/SystemdCgroup \= true/g' /etc/containerd/config.toml
Finally, we need to setup the service to start automatically and check to make sure it is running:
sudo systemctl restart containerd
sudo systemctl enable containerd
sudo systemctl status containerd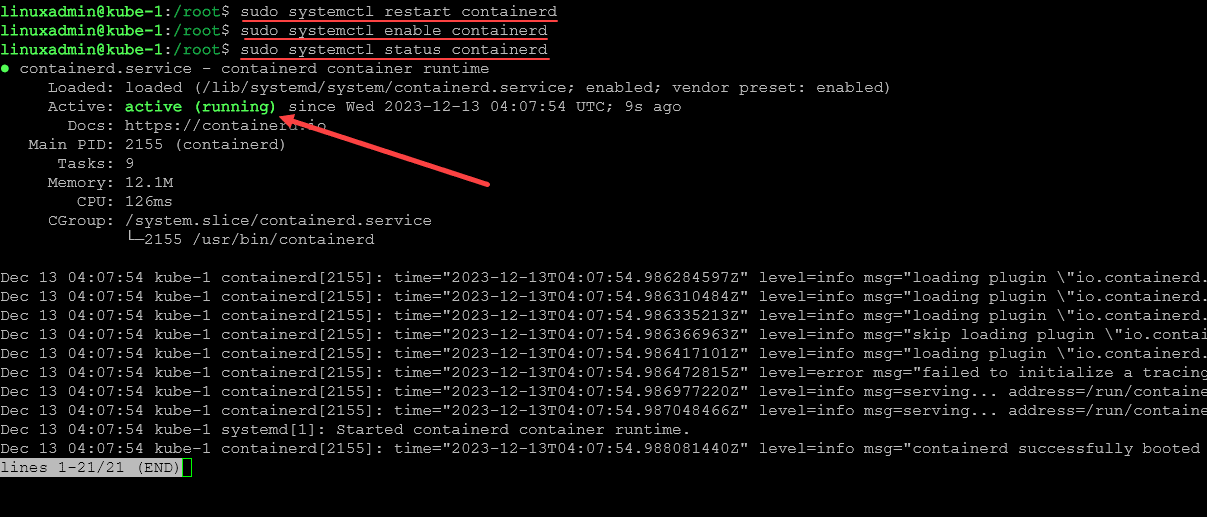
5. Setting Up Kubernetes Repositories
Kubernetes requires certain apt repositories to be added to your Ubuntu 22.04 system. To configure the Kubernetes repositories needed, we will run the following commands:
##Pull down the GPG key
curl -fsSL https://packages.cloud.google.com/apt/doc/apt-key.gpg | sudo gpg --dearmor -o /etc/apt/keyrings/kubernetes-archive-keyring.gpg

##Add the key to your sources.list
echo "deb [signed-by=/etc/apt/keyrings/kubernetes-archive-keyring.gpg] https://apt.kubernetes.io/ kubernetes-xenial main" | sudo tee /etc/apt/sources.list.d/kubernetes.list

##Update the apt package index
sudo apt-get update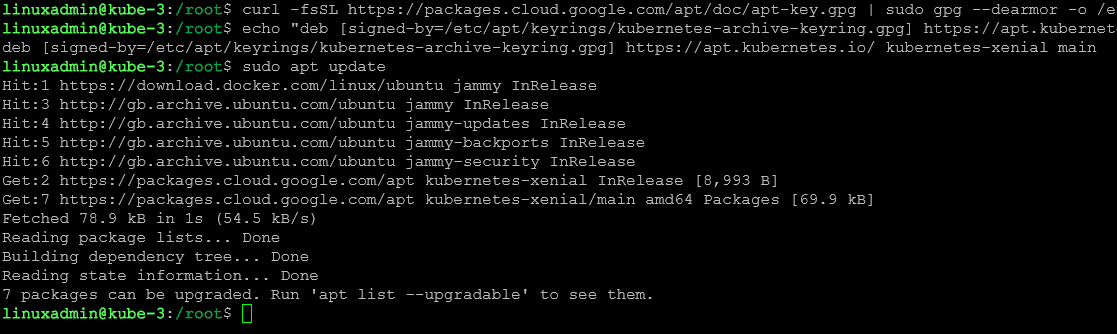
6. Installing Kubernetes Components
Once your Ubuntu 22.04 system is prepared, and the apt repository is set, it’s time to install Kubernetes packages such as kubectl, kubeadm, and kubelet configuration.
sudo apt-get update
sudo apt-get install -y kubelet kubeadm kubectl
sudo apt-mark hold kubelet kubeadm kubectl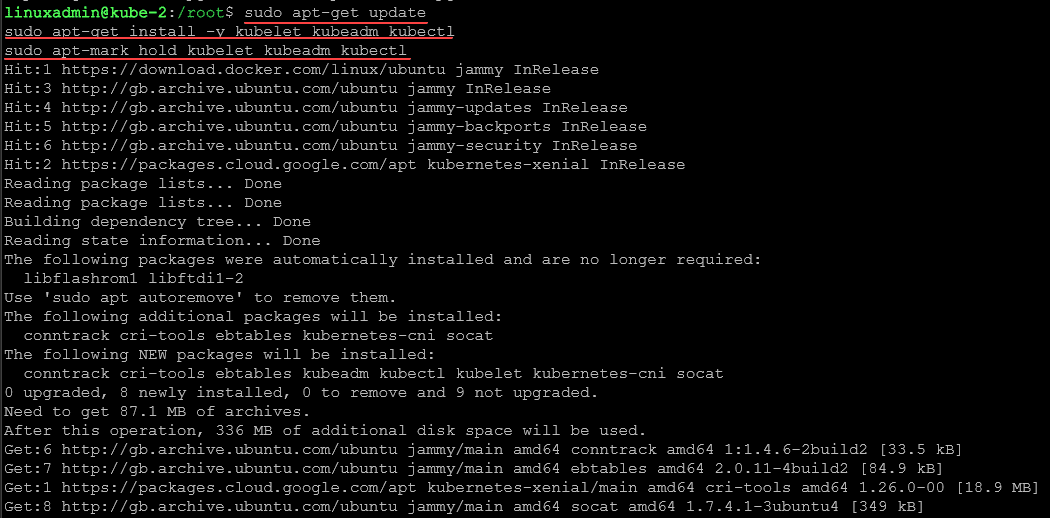
At the end of the command running, we can see the packages are put on hold.

7. Initialize Kubernetes Cluster
The initialization of a Kubernetes cluster on Ubuntu 22.04 involves running the below command to initialize the Kubernetes cluster on our control plane node. This installs things like the kube-controller-manager, API, etcd storage, and other services.sudo kubeadm init
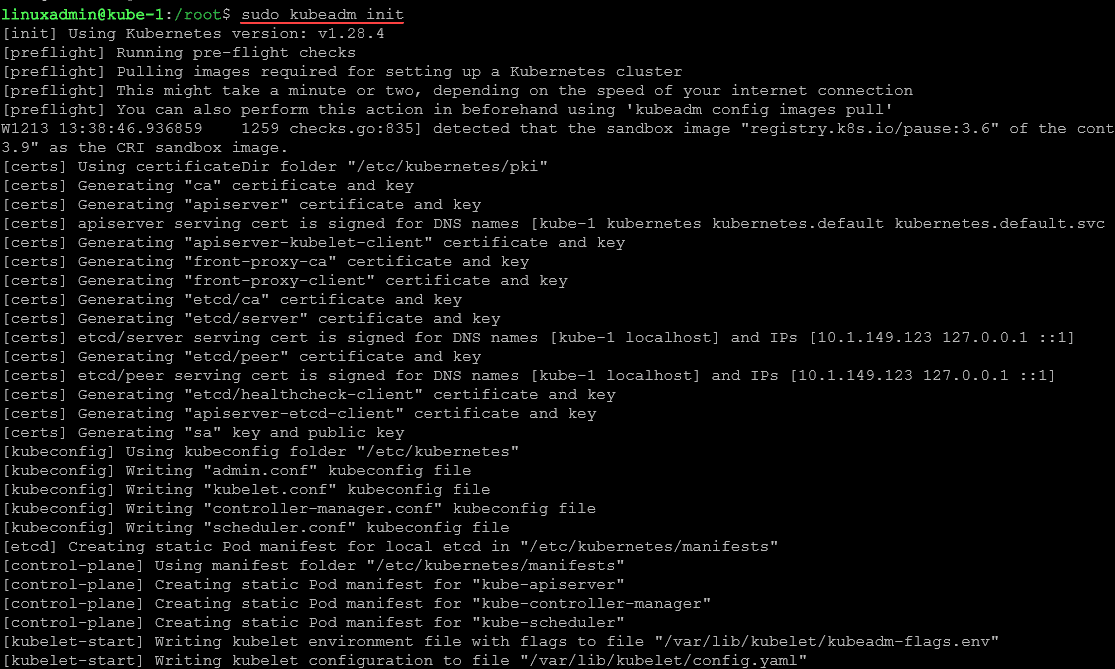
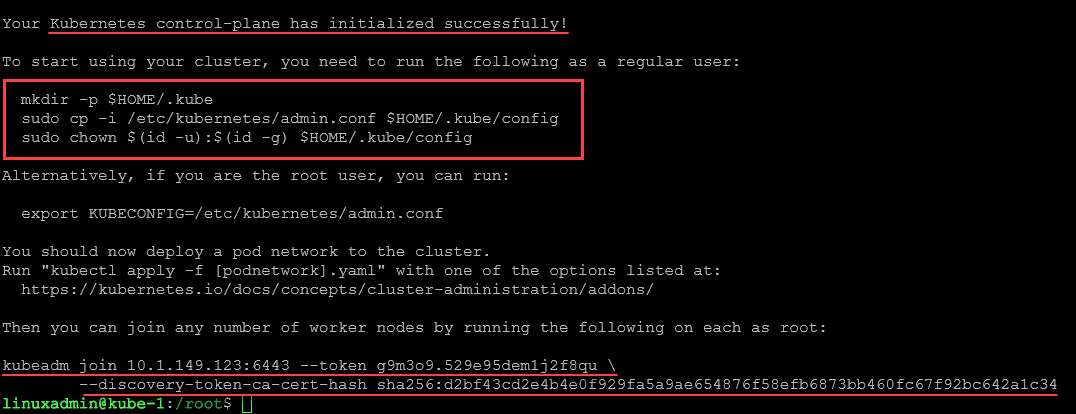
After a few moments, you should see the Kubernetes cluster has initialized successfully. As noted by the output, you can also run the command to pull images beforehand:sudo kubeadm config images
The output to the command will give you the directive on copying the kubeconfig file to your $HOME directory. That command is the following:
mkdir -p $HOME/.kube
sudo cp -i /etc/kubernetes/admin.conf $HOME/.kube/config
sudo chown $(id -u):$(id -g) $HOME/.kube/config
In the output, we also see the join command that we can use on our worker nodes.
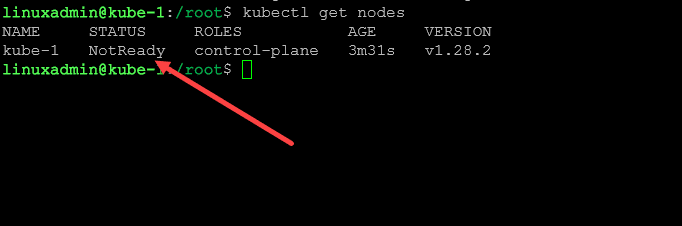
Below, we are copying the kubeconfig file.

The STATUS is showing as NotReady. We still need to install the container networking.
Multiple control plane nodes
You can also have multiple control plane nodes in your cluster. This ensures you have multiple master nodes for high availability.
Take a look at the official documentation here for high availability clusters: Creating Highly Available Clusters with kubeadm | Kubernetes. Keep in mind this will be a more complex deployment, requiring load balancing, etc.
8. Joining Worker Nodes to the Master
After initializing the control plane on the master node, you’ll need to join the worker nodes to your Kubernetes cluster. Since we have multiple worker nodes, we will use the kubeadm join command on each worker node below (note this join command will be different for everyone, including your IP and cluster token CA certificate hash. We join worker nodes with the command:
kubeadm join 10.1.149.123:6443 --token g9m3o9.529e95dem1j2f8qu \
--discovery-token-ca-cert-hash sha256:d2bf43cd2e4b4e0f929fa5a9ae654876f58efb6873bb460fc67f92bc642a1c34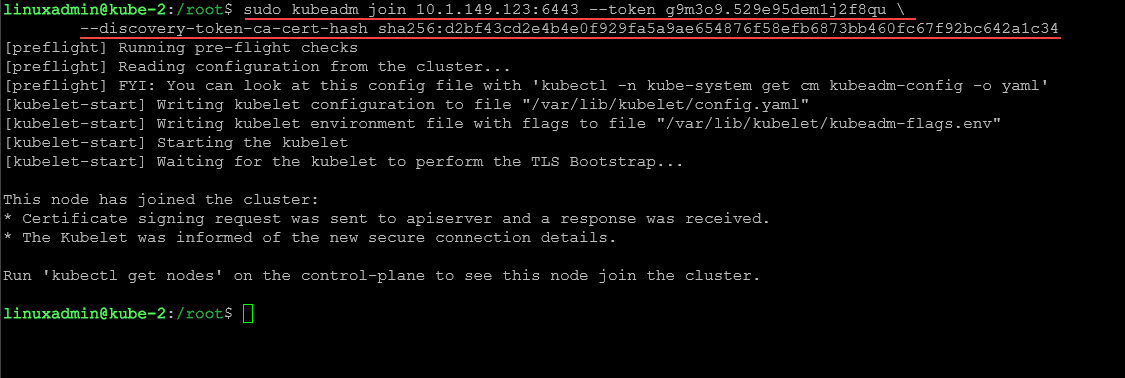
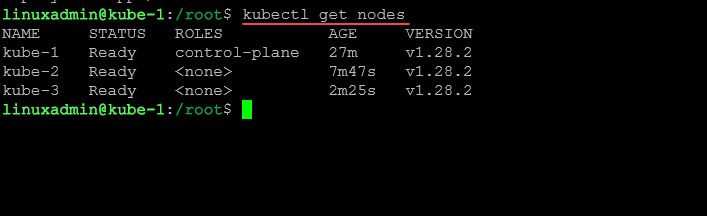
Now, after we add worker nodes, let’s check the status of the cluster:
kubectl get nodes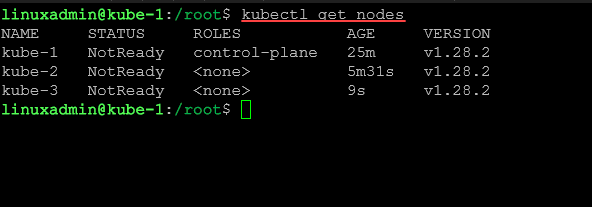
9. Configuring the Pod Network
For Kubernetes nodes to communicate we need to setup a pod network overlay (pod-network). As mentioned above, this is the reason for the NotReady status for the nodes. Calico is a network overlay of choice for Kubernetes. To install Calico for network communication, we can run the following command on our master node:
kubectl apply -f https://docs.projectcalico.org/manifests/calico.yaml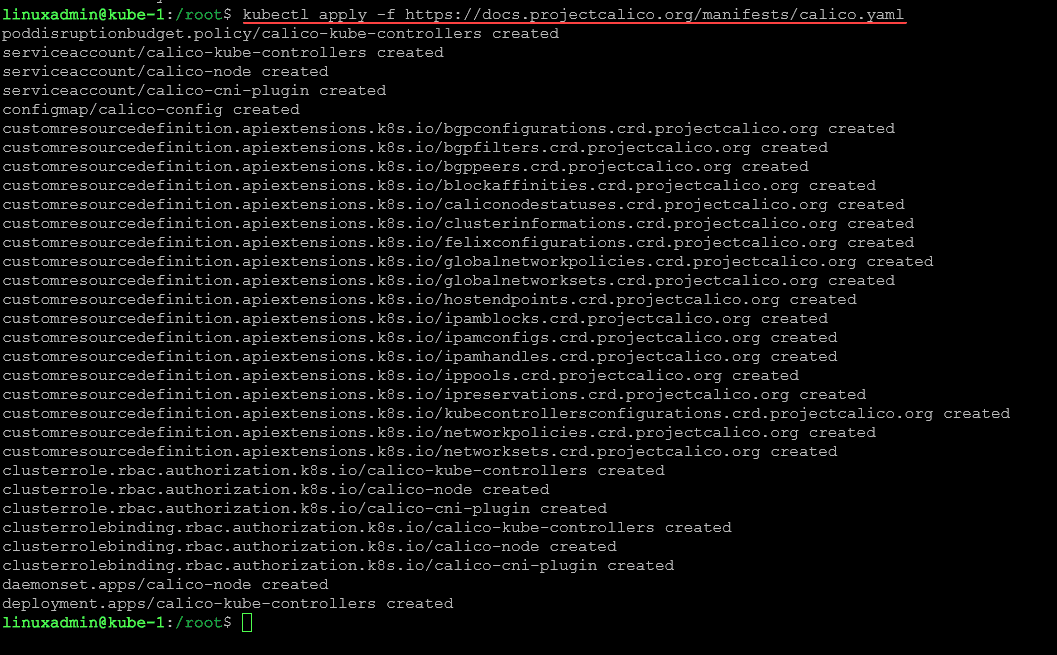
After we install Calico, we can check the status of the cluster again and we see the nodes now have the Ready status. We are now ready for our containerized applications.
10. Verifying the Kubernetes Installation
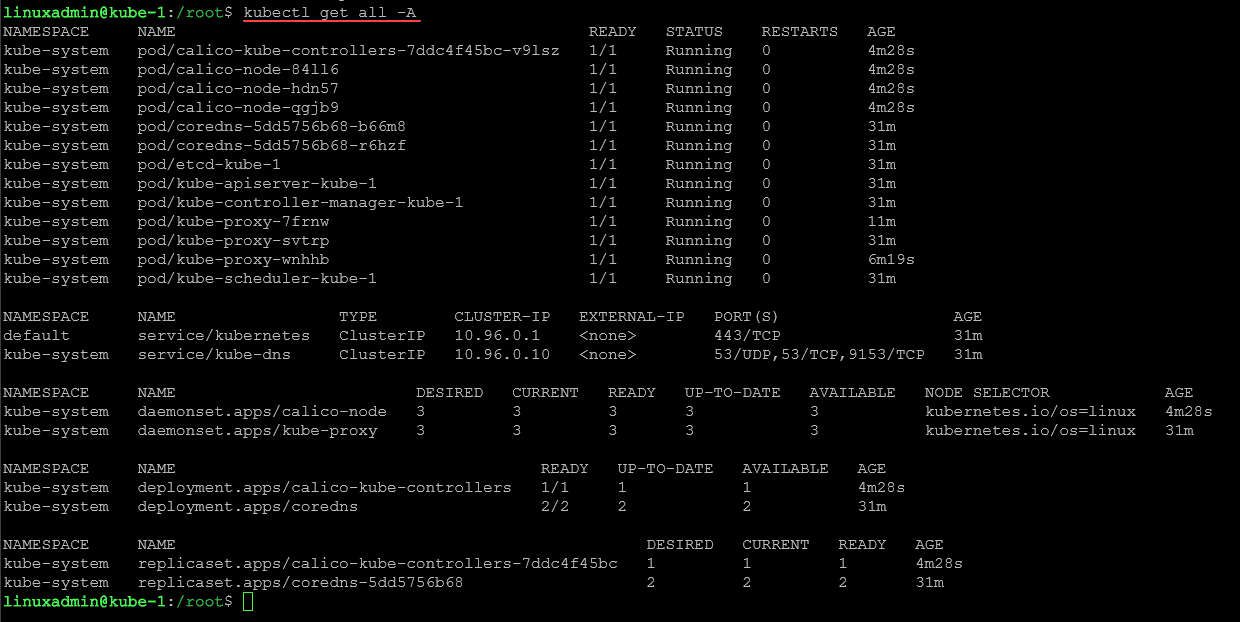
After completing the setup, let’s look at a few more things to verify the Kubernetes installation on Ubuntu 22.04. We can check out all resources on the cluster using the command:
kubectl get all -ABelow, we see each namespace and the pods for:
- calico
- coredns
- apiserver
- kube-proxy
Create a test deployment
Finally, let’s create a test deployment with the Nginx application.
kubectl create deploy nginx --image nginx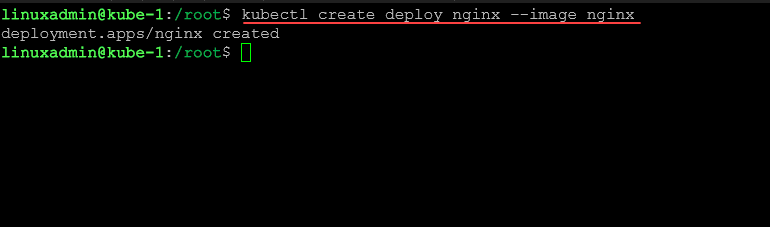
We can get the deployment using:
kubectl get deployment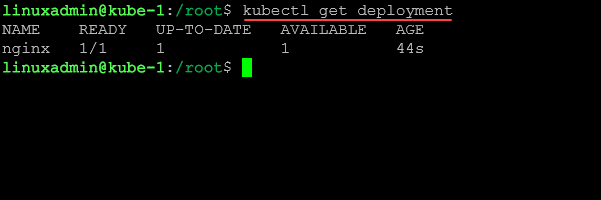
Wrapping up
We have looked at a tutorial for spinning up a Kubernetes cluster in Ubuntu 22.04 using kubeadm. Running Kubernetes is the way to efficiently run production containerized workloads. You can also easily spin up applications using helm once you have your Kubernetes cluster running. Keep in mind that you will want to give attention to monitoring for your cluster and app pods to ensure these are performing and functioning as expected.


Great article! But Google return 404 on https://apt.kubernetes.io/kubernetes-xenial request.
This poblem was solved using this command on pt5:
##Pull down the GPG key
curl -fsSL https://pkgs.k8s.io/core:/stable:/v1.29/deb/Release.key | sudo gpg –dearmor -o /etc/apt/keyrings/kubernetes-apt-keyring.gpg
##Add the key to your sources.list
echo ‘deb [signed-by=/etc/apt/keyrings/kubernetes-apt-keyring.gpg] https://pkgs.k8s.io/core:/stable:/v1.29/deb/ /’ | sudo tee /etc/apt/sources.list.d/kubernetes.list
Evgeny,
Thank you for the comment! I will take a look at the steps and make adjustments in there if needed.
Brandon
Hello Brandon,
Great article, I started learning k8s recently and your articles and videos have been very helpful.
I see that you use containerd as the container runtime, but I’m looking to use cri-o, would the steps be the same except of step 4, and install cri-o instead of containerd?
Also, is it a requirement to always install a CNI, like calico?
Thanks!