


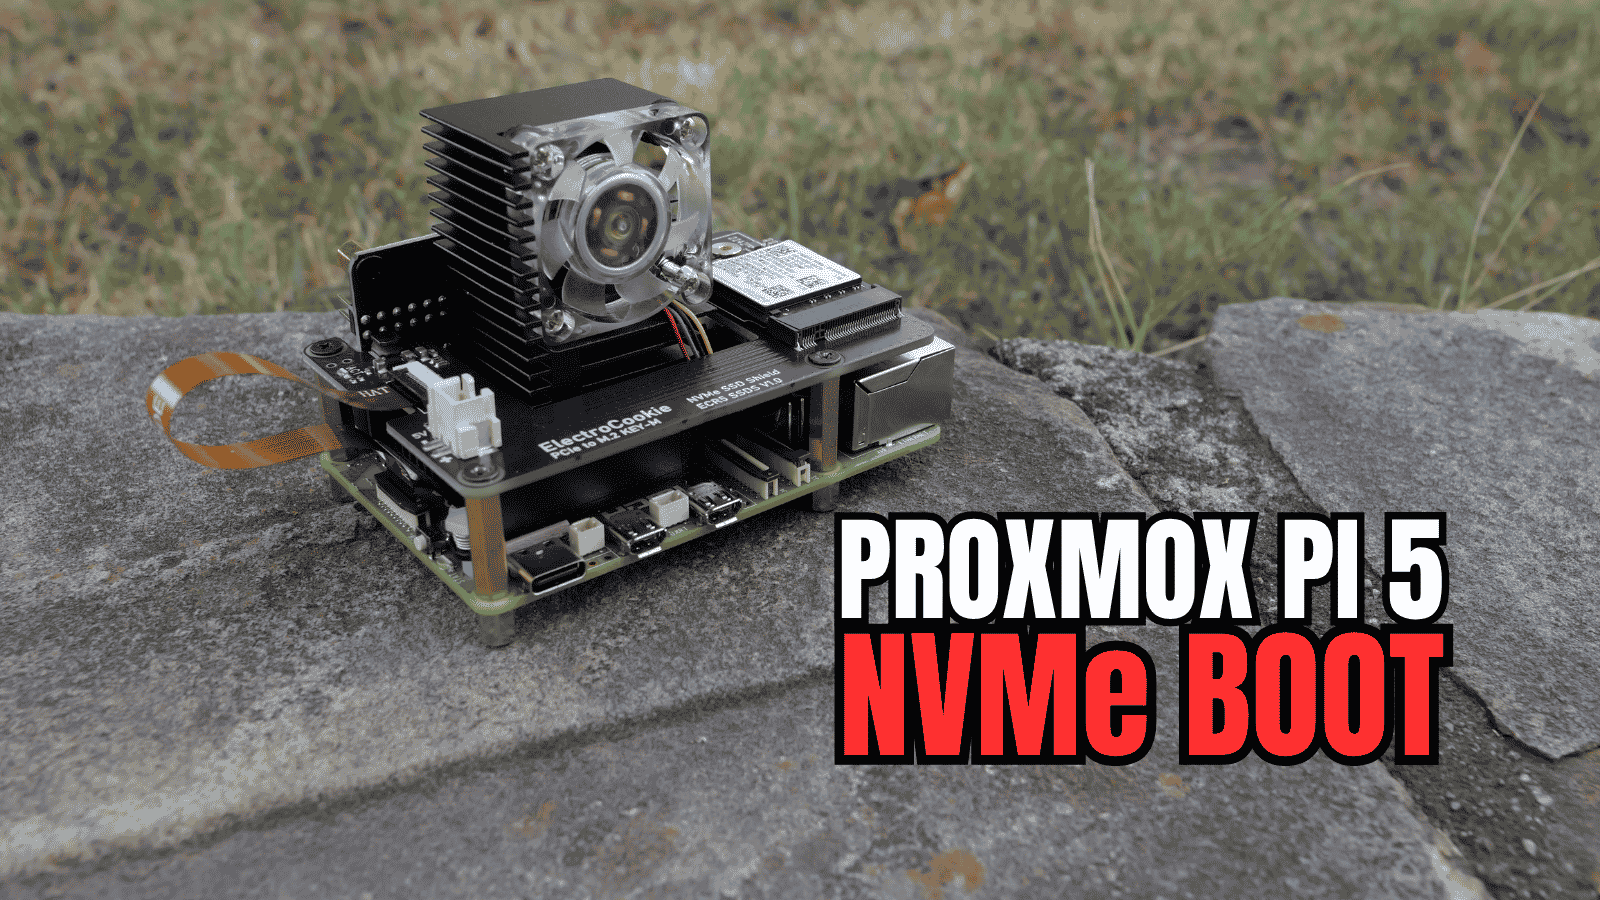
If you have been following my blog lately, I recently installed the announced Proxmox AR64 build on my Raspberry Pi 5 8GB in the home lab. However, with that setup, as I detailed, the onboard NIC didn’t work and I used NVMe that was attached via the USB 3.0 port on the back which didn’t perform that great storage-wise. So I decided to order an NVMe hat and run NVMe natively along with some other adventures. This wasn’t without hurdles though that I will detail below. Check it out.
The NVMe hat
So, as I mentioned in my Proxmox ARM64 post, I was using the Electrocookie case for the Pi 5 so I wanted to have an NVMe hat that would work with that case and CPU cooler. So I ordered this one:
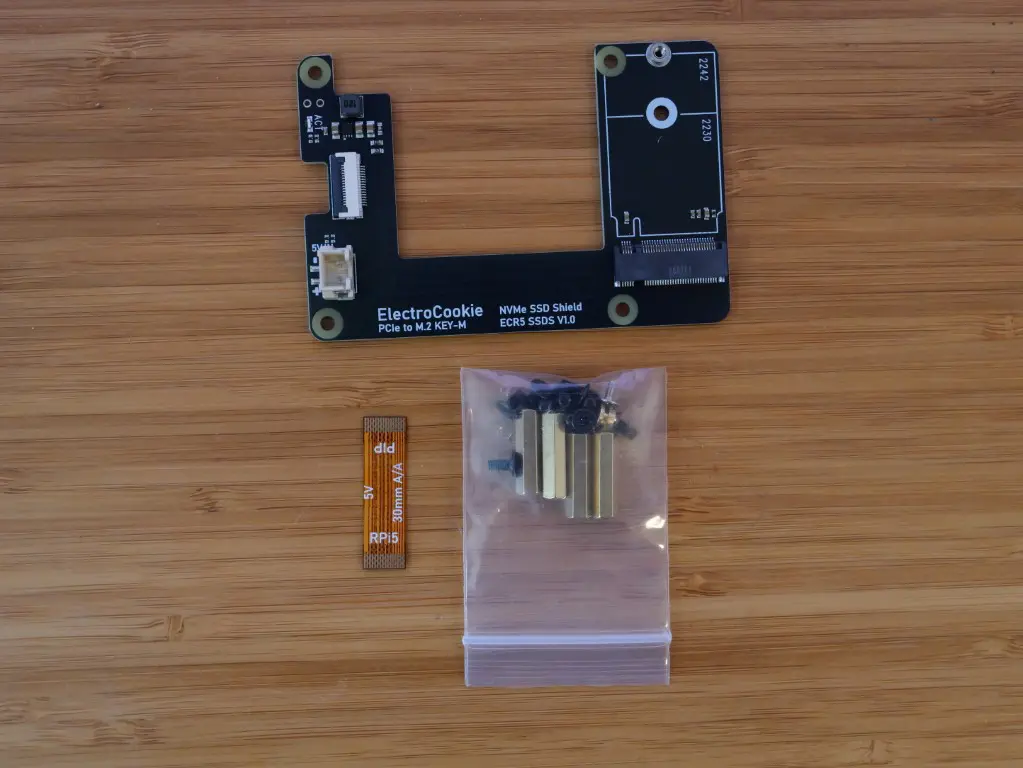
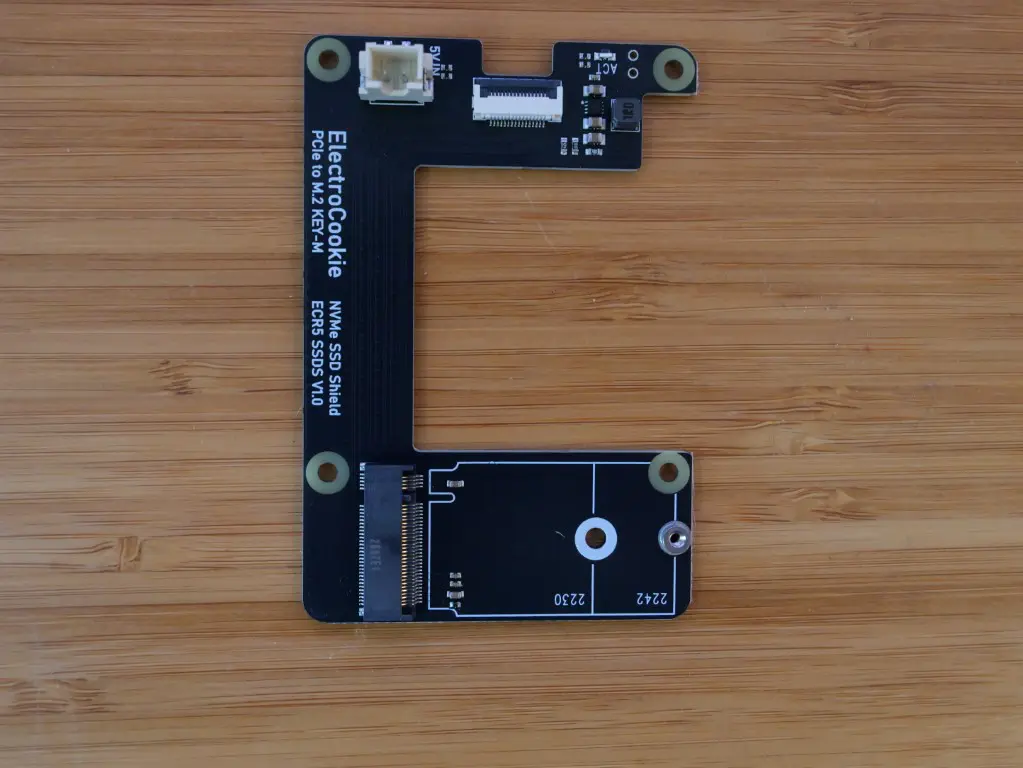
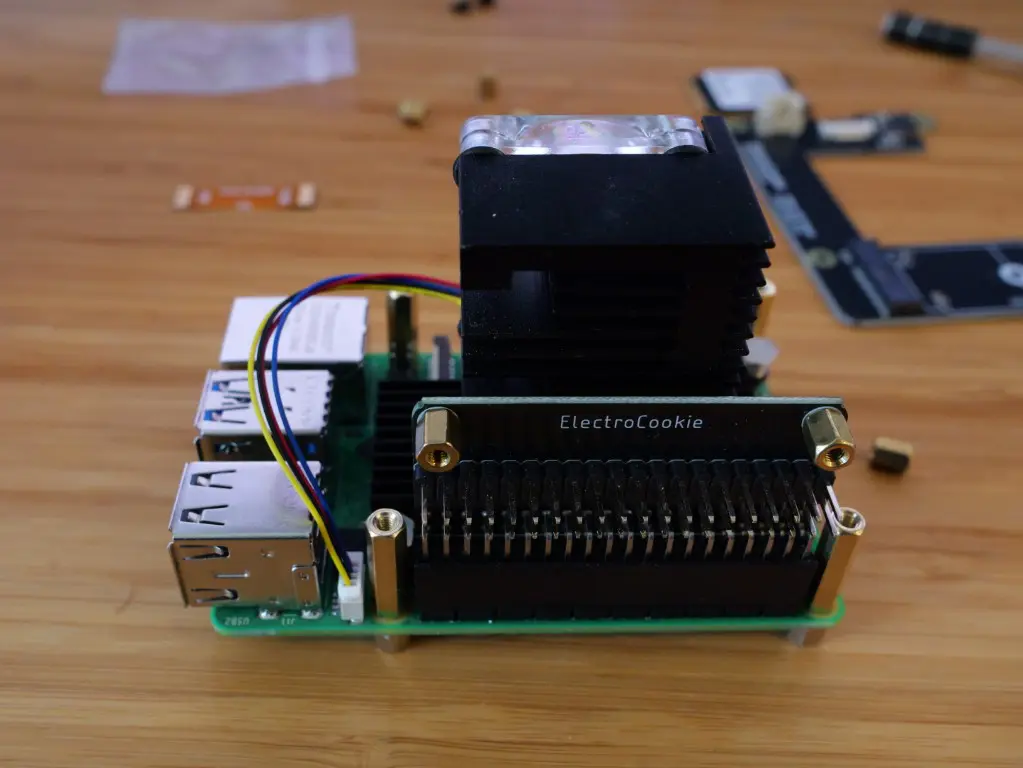
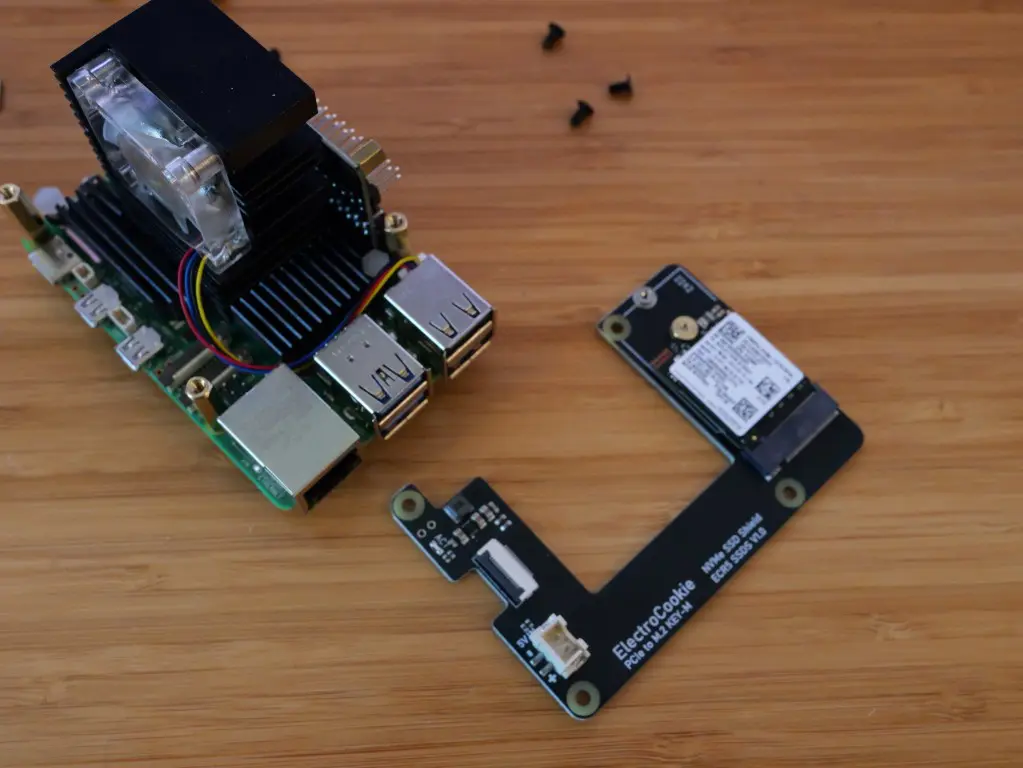
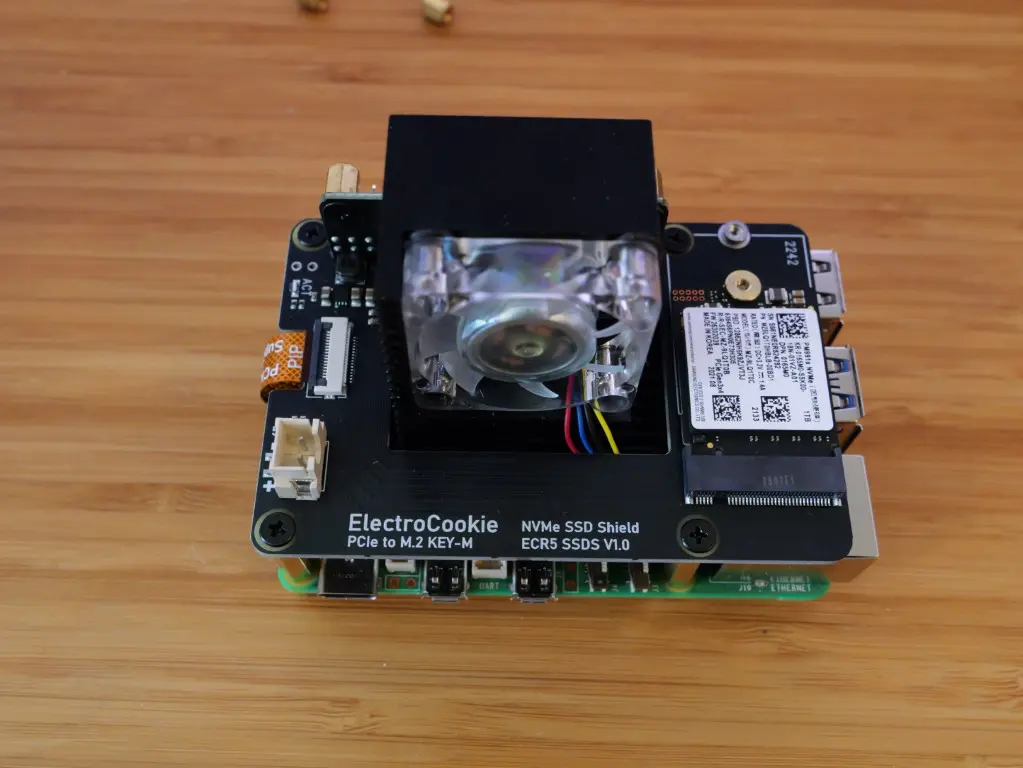
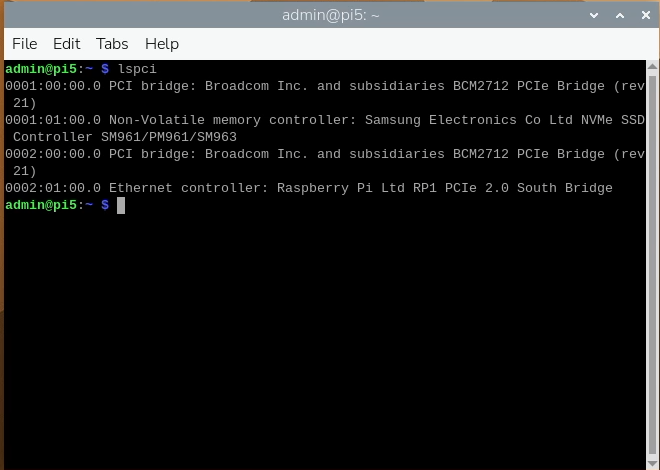
To make sure it was working first, I imaged over the Raspberry Pi OS desktop installation and ran a few commands to make sure I could see the hardware, and I could! Good start.
Why I didn’t just use the Proxmox Arm64 installer
So was I able to use the native Proxmox ARM64 installer? Well, that is what I started out with. The installer works on the Raspberry Pi 5 using the UEFI environment that I had shown in the previous post. But, I ran into hardware support issues trying to get the NVMe drive to be recognized in the environment. Also, the onboard network adapter wasn’t recognized.

My initial plan was to just boot off USB and then have the NVMe drive attached using the hat and use that as storage for my VMs, LXCs, etc.
When I tried this and it didn’t work and couldn’t get the NVMe drive to show up, someone had left a comment on the first article. They suggested starting with Raspberry Pi OS Lite and then installing the Proxmox packages on top of it. So this is what I tried next. That turned out to be the key idea that ultimately gave the foundation of what worked.
The Raspberry Pi OS has all of the Pi-specific drivers, firmware, and other things that are supported and work. Drivers already being in place means the on-board NIC works also which is something that DIDN’T work on the native Proxmox ARM64 install
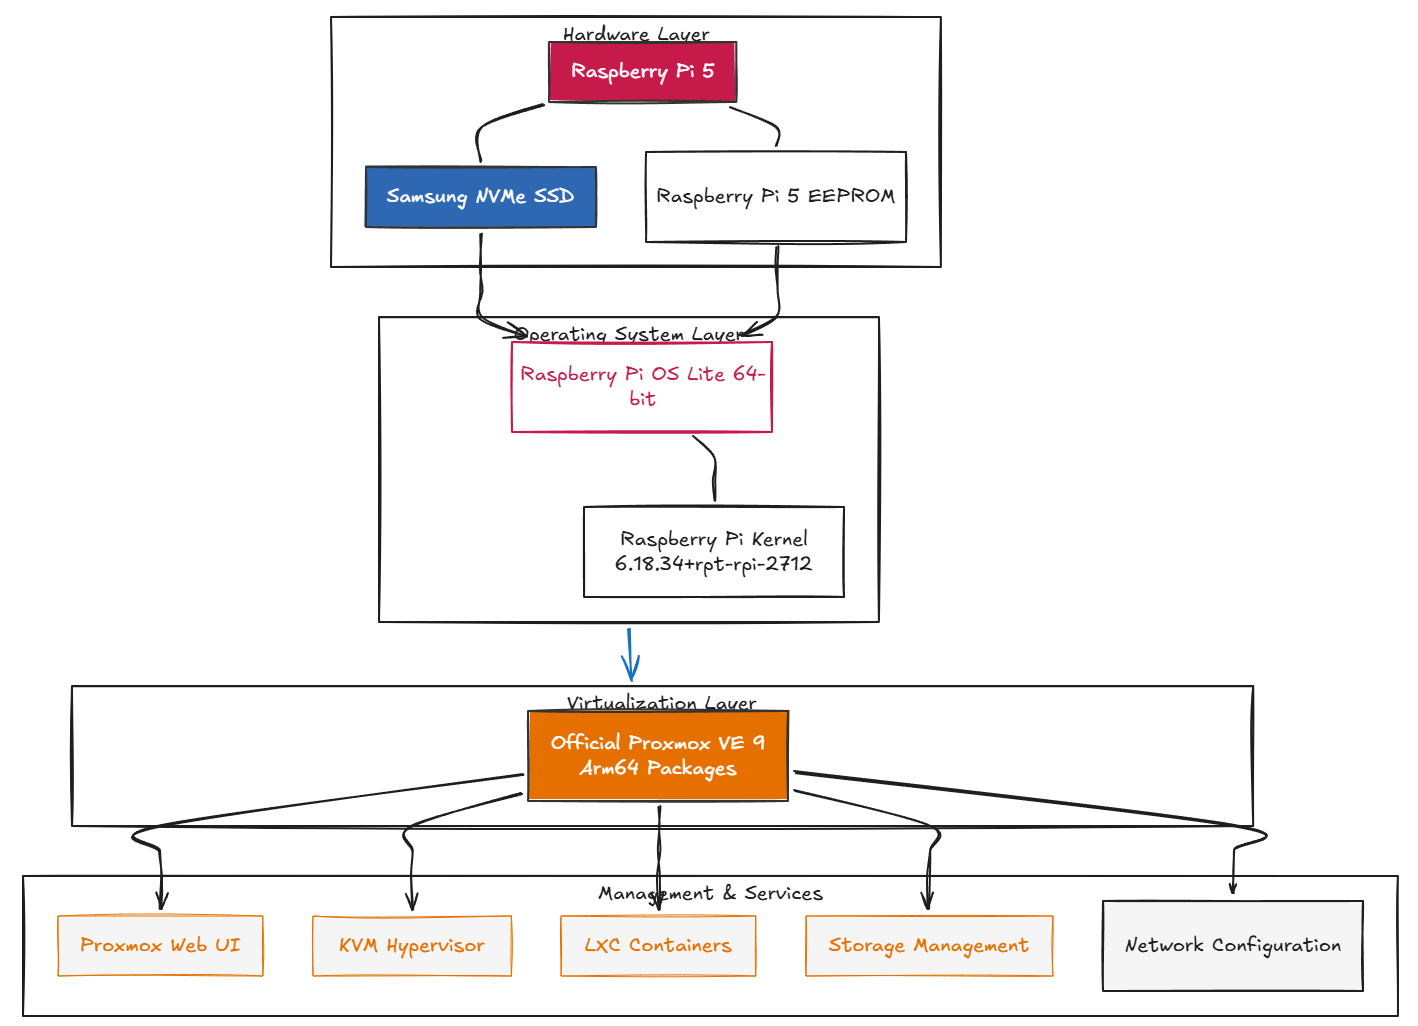
The architecture I ended up with looks like this:
The PCIe settings that made the NVMe work in Raspberry Pi OS Lite
I found that just “out of the box” the NVMe drive didn’t show up when I imaged over the Raspberry Pi OS Lite installation. I had to first enable the Pi 5 external PCIe interface in the file here:
/boot/firmware/config.txtThe I put in just the following:
dtparam=pciex1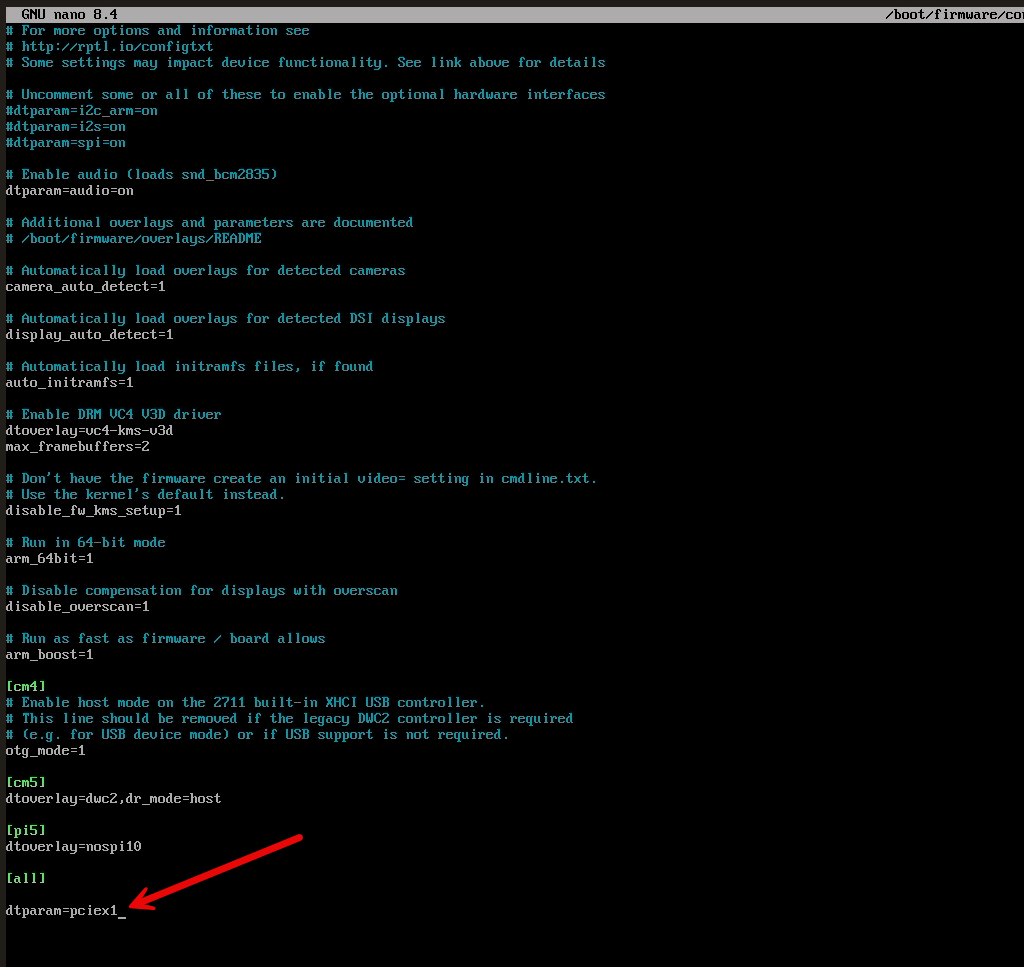
But I found that wasn’t enough and was getting a “link down” on the NVMe drive. What finally made it work for me was adding the parameter to make it a PCIe Gen 2 device:
dtparam=pciex1_gen=2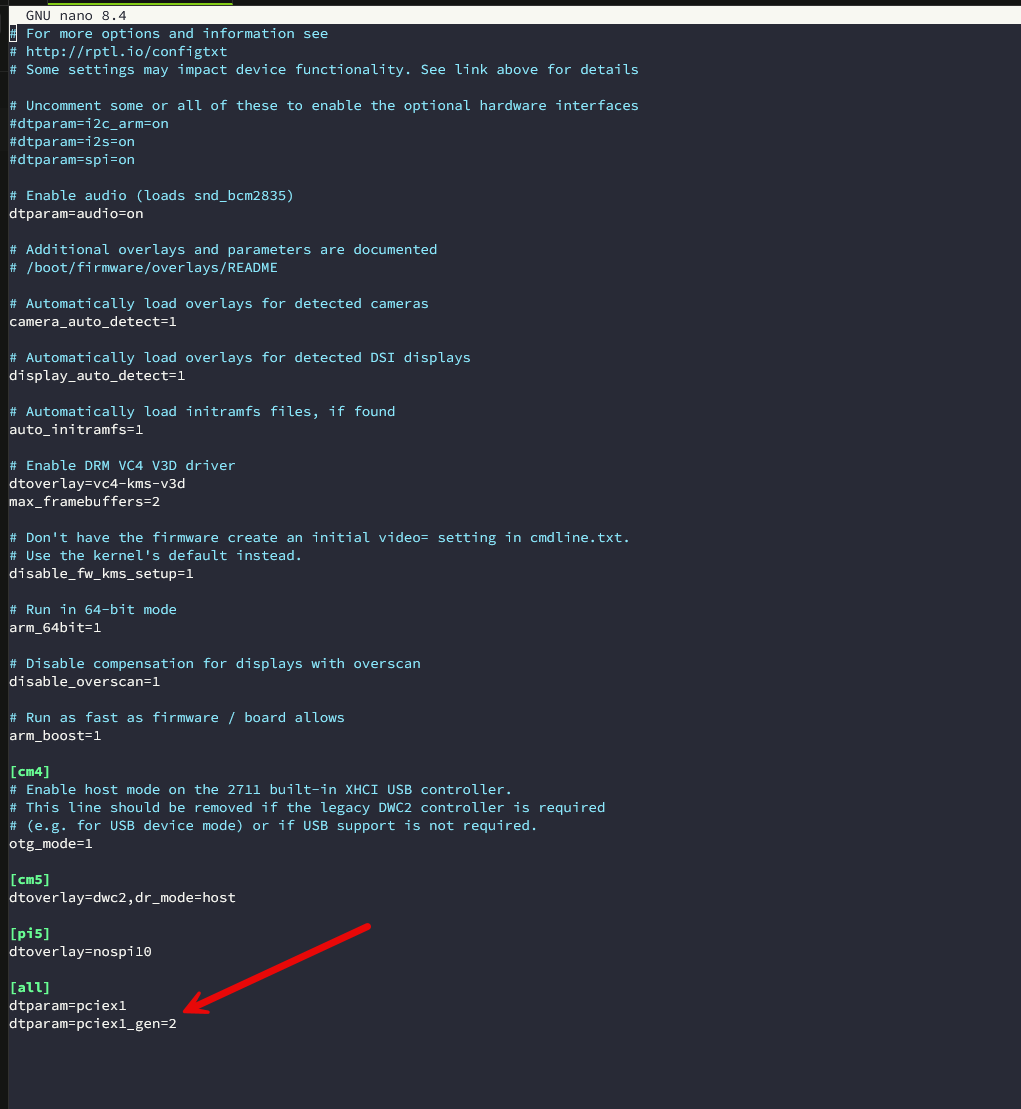
After I did a complete power-off and boot, I checked again:
dmesg | grep-i pcieThis time I got:
brcm-pcie 1000110000.pcie: link up, 5.0 GT/s PCIe x1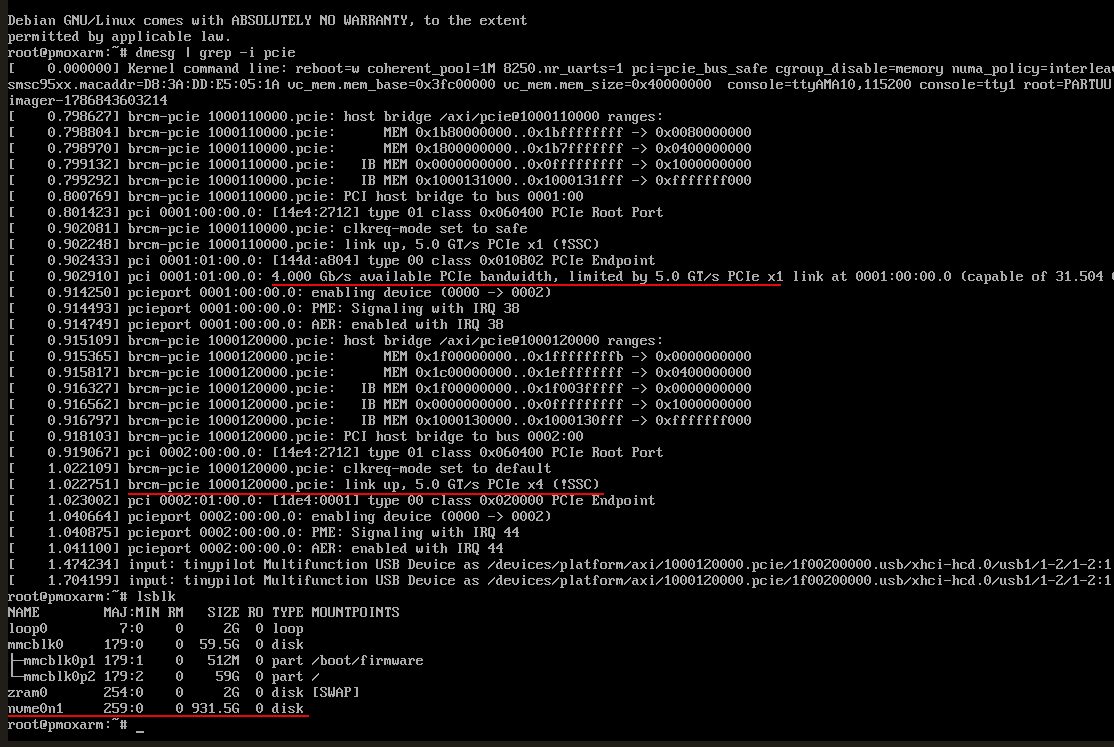
To test the performance, I installed hdparm and tested:
apt install hdparm -y
hdparm -Tt /dev/nvme0n1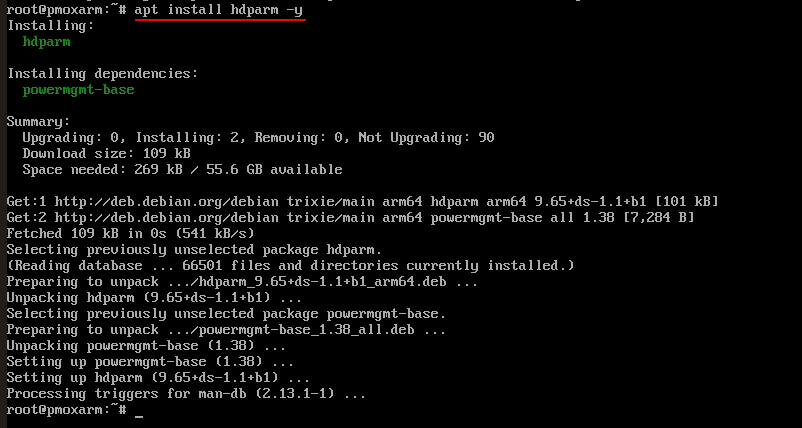
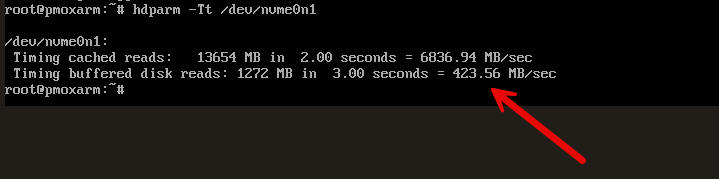
So I got:
Timing buffered disk reads: 1272 MB in 3.00 seconds = 423.56 MB/secThat is a pretty good result and expected for PCIe Gen 2 x1 when you think about it, the theoretical link rate is 5 GT/s. So, this reading is right on the money.
Installing Raspberry Pi OS directly on the NVMe
So I knew the NVMe drive was now solid. But, I didn’t want to have Proxmox installed on the microSD card booting from there. So, what I did next was used the Raspberry Pi Imager to write the Raspberry Pi OS Lite 64-bit version directly to my NVMe drive.
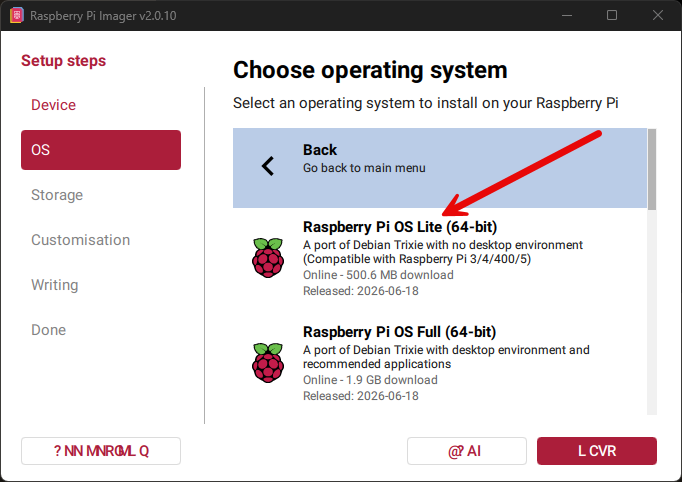
Also before I booted the NVMe drive, I wanted to make sure I had the config.txt setup like I knew it needed to be to work. So I added the same parameters:
[all]
dtparam=pciex1
dtparam=pciex1_gen=2
But, I found that it wouldn’t boot initially from the NVMe drive.
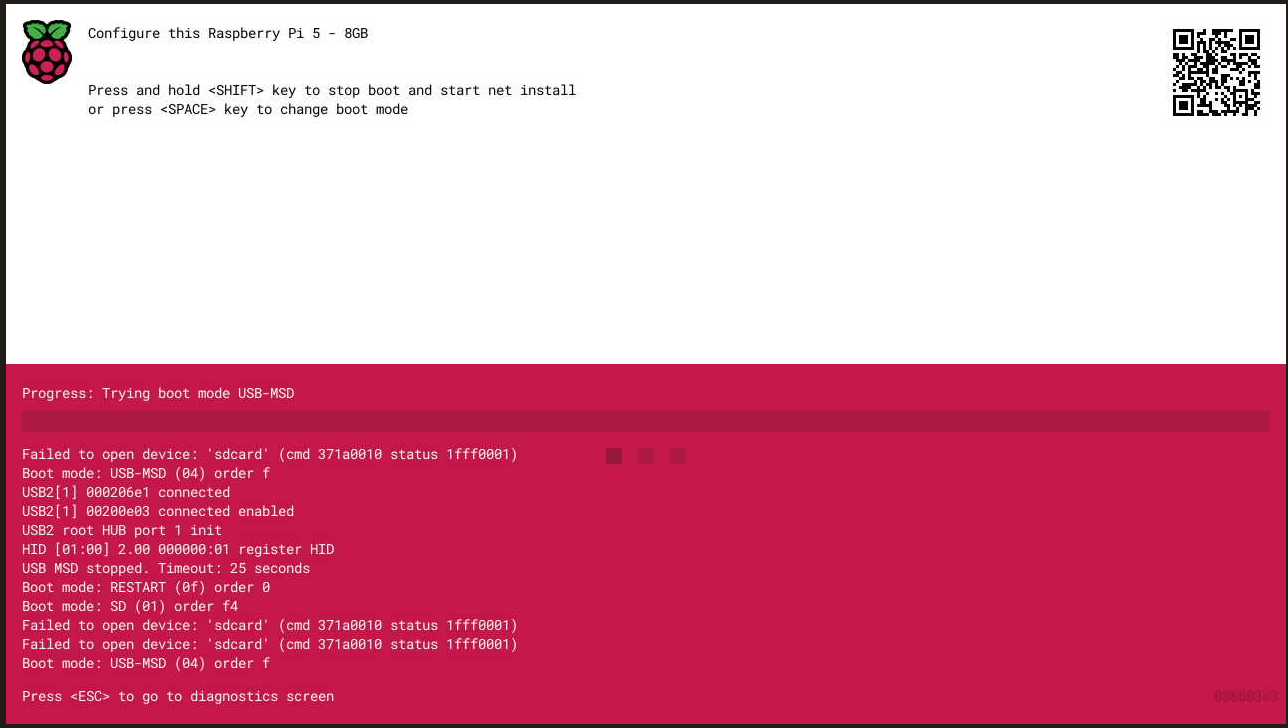
So, I plugged the microSD card back in and looked at the EEPROM boot config with the command:
rpi-eeprom-configThe important line is this one:
BOOT_ORDER=Raspberry Pi uses boot “6” for NVMe, and the boot order is read from right to left. When I looked it had a “4” instead of a 6. So I changed it to this:
BOOT_ORDER=0xf461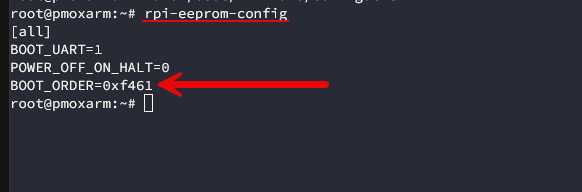
That allows the Pi to try SD, NVMe, USB mass storage, and then repeat that sequence. After I updated the eeprom config I shutdown the Pi 5 and then removed the microSD card. Then I powered back on and it booted directly from NVMe!
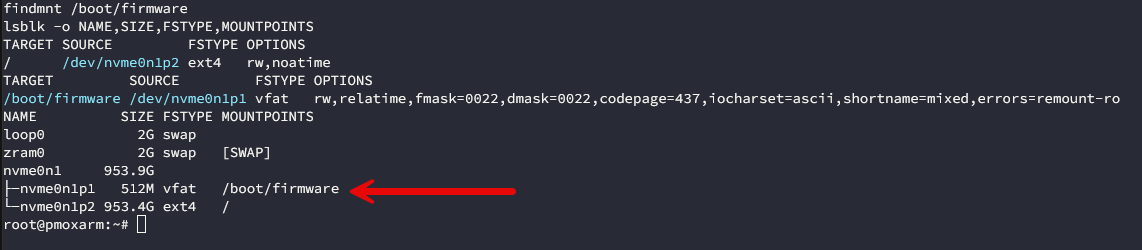
I verified that with:
findmnt /
findmnt /boot/firmware
lsblk -o NAME,SIZE,FSTYPE,MOUNTPOINTS
My output showed:
Adding the official Proxmox Arm64 repository
Proxmox’s official Arm64 release is available through package repositories in addition to the bare-metal installer. That gave me the path I needed.
I first installed the basic prerequisites:
apt update
apt install wget ca-certificates gnupg -y
Then I downloaded the Proxmox Trixie archive key:
wget -O /usr/share/keyrings/proxmox-archive-keyring.gpg \
https://enterprise.proxmox.com/debian/proxmox-archive-keyring-trixie.gpg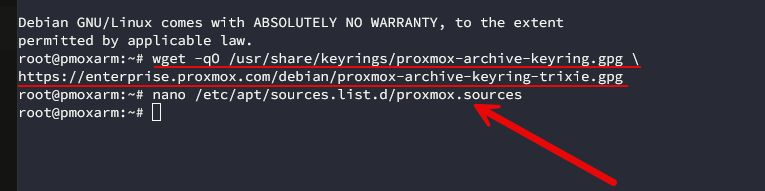
Next I created:
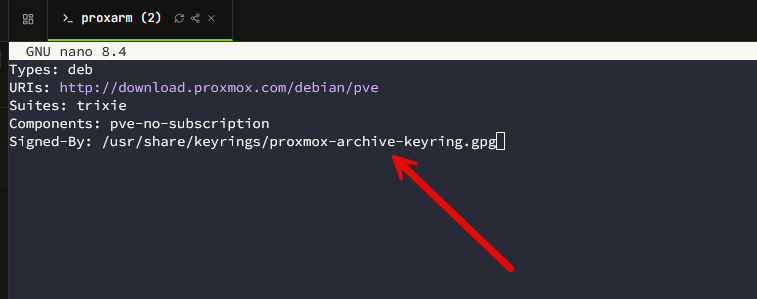
nano /etc/apt/sources.list.d/proxmox.sourcesThis is what I placed in that file:
Types: deb
URIs: http://download.proxmox.com/debian/pve
Suites: trixie
Components: pve-no-subscription
Signed-By: /usr/share/keyrings/proxmox-archive-keyring.gpg
Then you run:
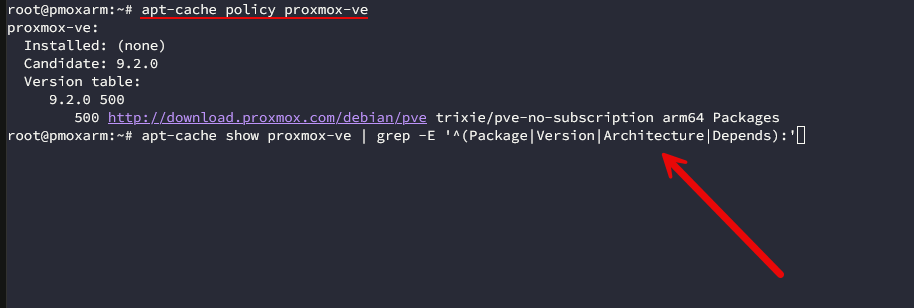
apt updateAt that point APT could see the official Arm64 Proxmox VE packages.
Why I did not install the proxmox-ve metapackage
This was one of the most important discoveries in the entire process.
Normally you might just run this command at this point:
apt install proxmox-veBut I didn’t and I am glad that I didn’t do that. I simulated the install with the below to make sure that nothing would get uninstalled that I had manually installed with all of this process to get things working:
apt -s install proxmox-veThe dependency tree wanted to install:
proxmox-default-kernel
proxmox-kernel-7.0
It also wanted to remove several firmware packages from my Raspberry Pi OS environment.
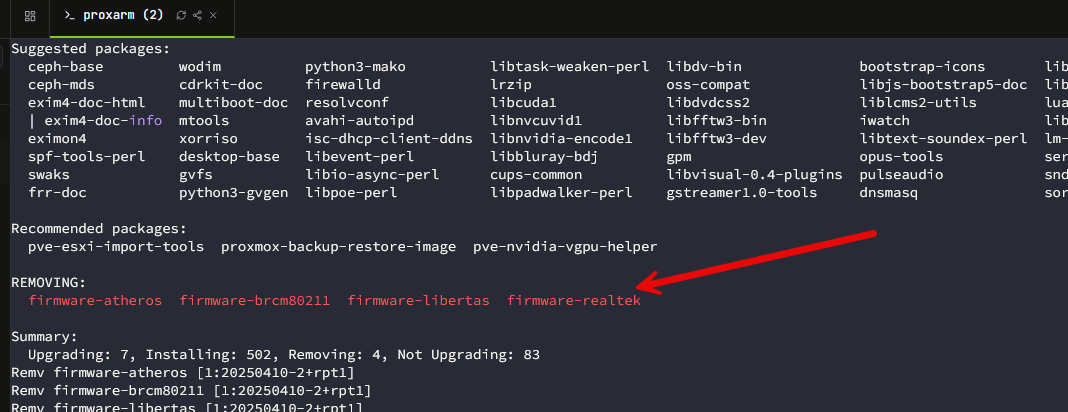
That wasn’t what I wanted.
The whole reason this installation method works is that we are keeping the Raspberry Pi kernel and hardware environment. Replacing it with the standard Proxmox kernel would defeat the purpose of what I was trying to accomplish and things would break.
The solution was to add the “–no-install-recommends” flag:
apt --no-install-recommends install \
  pve-manager \
  pve-qemu-kvm \
  qemu-server \
  pve-container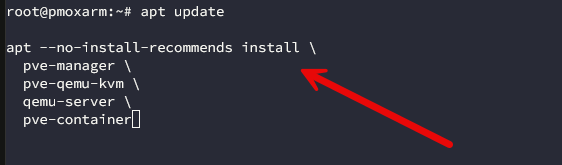
During installation, Postfix asked for its configuration type. For this home lab host I selected:
Local onlyIt defaults to highlighting the “Internet Site” but select Local only.
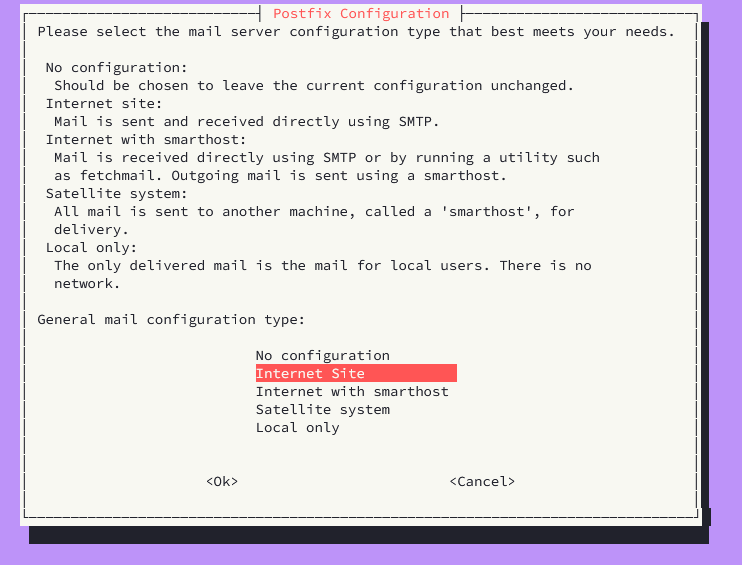
The installation generated a few Postfix warnings, but they weren’t fatal and the Proxmox packages continued installing.
Fixing hostname resolution for Proxmox
After installation, I ran into another issue that is easy to miss.
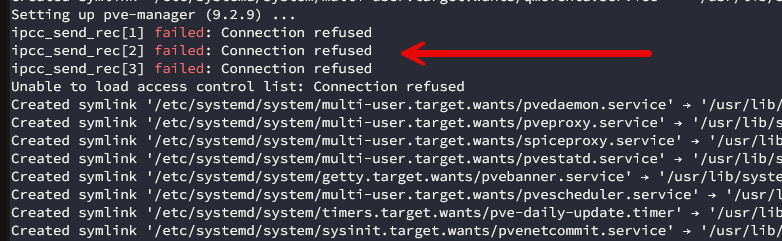
Several Proxmox services produced errors similar to:
ipcc_send_rec[1] failed: Connection refused
Unable to load access control list: Connection refused
The underlying problem was hostname resolution.
My Pi was called:
pmoxarmbut Raspberry Pi OS had generated the following in the /etc/hosts file when I took a look at it out of the box:
127.0.1.1 pmoxarm pmoxarmProxmox though expects the node hostname to be something other than the loopback IP address. My real address was:
10.1.149.150so I needed this instead:
10.1.149.150 pmoxarmThe first thing I did was corrected the /etc/hosts file manually and then I restarted services:
systemctl restart pve-cluster
systemctl status pve-cluster --no-pager -l
Proxmox started successfully and resolved the hostname to the LAN address and the pmxcfs (Proxmox cluster file system) started.
Making the hosts file fix survive a reboot
There was one last little problem I needed to figure out. When I decided to test and make sure my changes persisted after a reboot, when I took a look at the services after rebooting using this systemctl command:
systemctl is-active \
  pve-cluster \
  pvedaemon \
  pveproxy \
  pvestatd
I saw that a couple of the services had failed.
failed
active
active
failed
I ran this journalctl command:
journalctl -u pve-cluster -b --no-pager -n 100Unable to resolve node name 'pmoxarm' to a non-loopback IP addressSo I figured out this is actually coming from this template:
/etc/cloud/templates/hosts.debian.tmplThe default template contained this below:
127.0.1.1 {{fqdn}} {{hostname}}I changed that to my static management IP:
10.1.149.150 {{fqdn}} {{hostname}}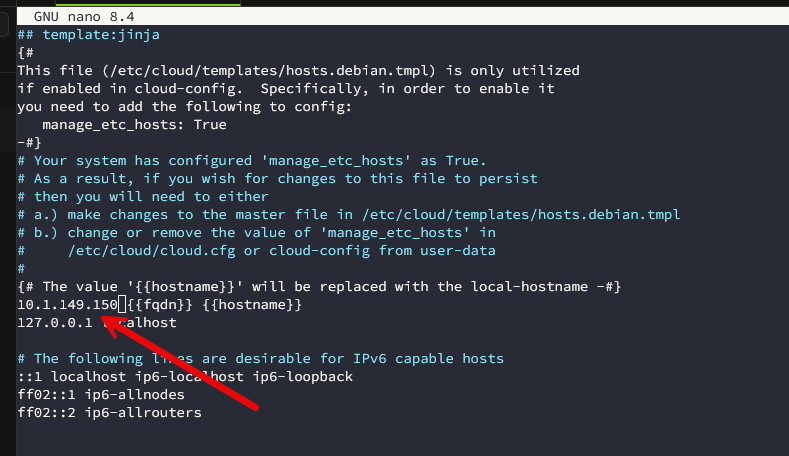
I then regenerated the hosts file:
cloud-init single --name update_etc_hosts --frequency alwaysand verified:
getent hosts pmoxarmAfter that I reset and restarted the failed services:
systemctl reset-failed pve-cluster pvestatd
systemctl restart pve-cluster
systemctl restart pvestatd
Finally:
systemctl is-active \
  pve-cluster \
  pvedaemon \
  pveproxy \
  pvestatd
returned four healthy services.
Getting the Proxmox web interface running
With hostname resolution issue fixed, I restarted the main management services for Proxmox:
systemctl restart pvedaemon
systemctl restart pveproxy
systemctl restart pvestatd
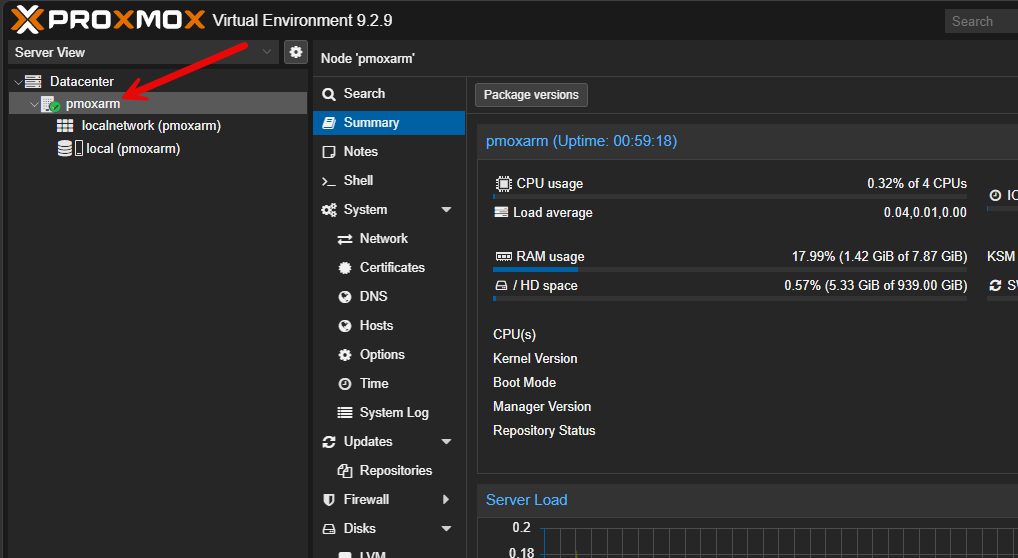
I was able to connect to the web interface. But I noticed the host status was a “?” mark. This turned out to be that I needed to restart:
systemctl restart pvestatd
systemctl status pvestatd --no-pager -l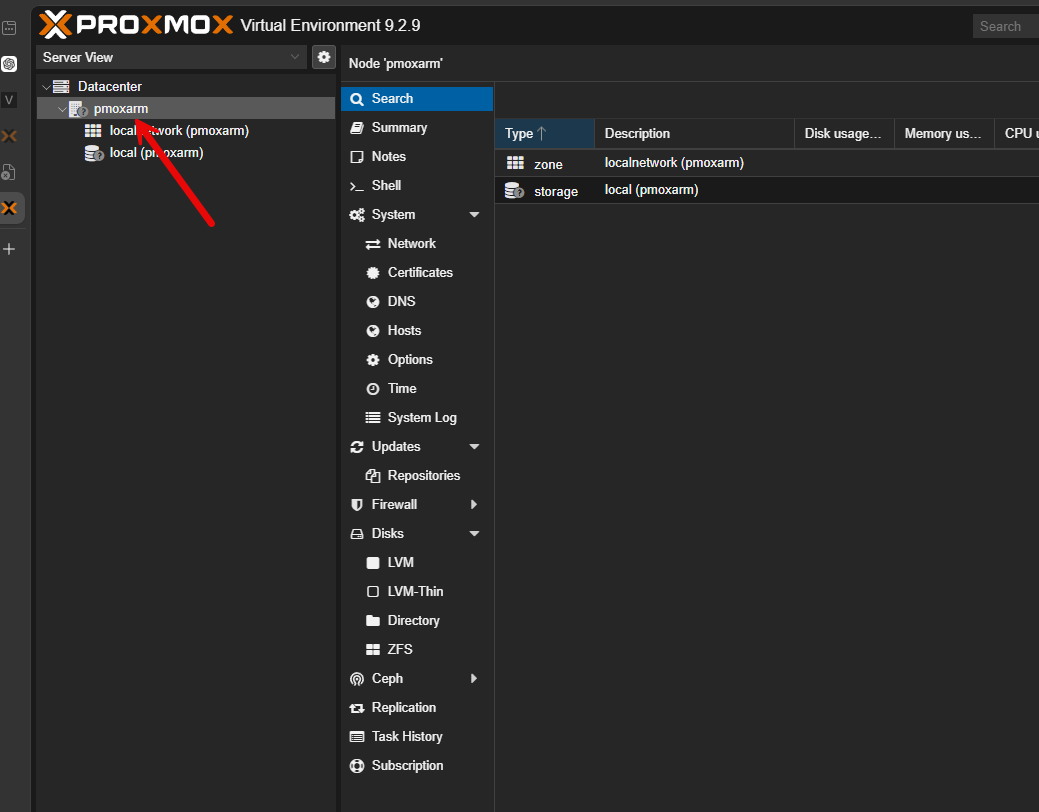
Then it turned green and started working.
A pveversion warning
One thing that I noticed that when I checked the pve version using the command below, it gave me a weird notice about the pveversion not being correctly installed:
pveversion -v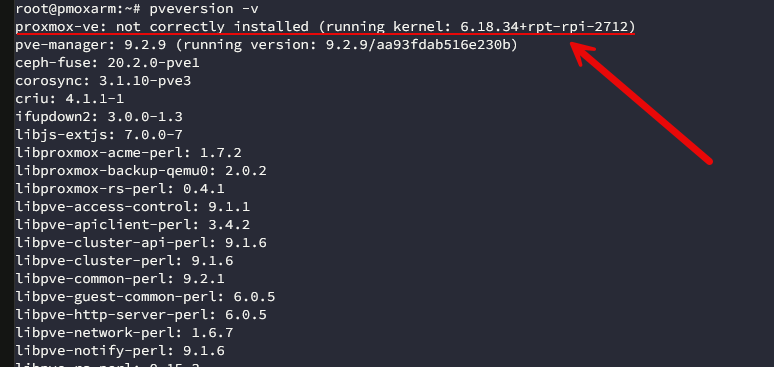
proxmox-ve: not correctly installed(running kernel: 6.18.34+rpt-rpi-2712)But, as I did some digging into this, it looks like it is expected with my installation and what I had to do to get things working. I intentionally did not install the proxmox-ve metapackage or the Proxmox default kernel due to the mods I needed to make to keep things recognized with the NVMe drive.
The PVE components I installed were installed included:
pve-manager
pve-cluster
pve-container
pve-qemu-kvm
qemu-server
pve-firewall
pve-ha-manager
lxc-pve
Long story short, this isn’t a warning that I necessarily need to “fix” on this Pi build. Installing the metapackage would cause the kernel dependency to be installed and this would cause me issues with my NVMe drive and hardware config.
I did one last final reboot test to make sure the changes and everything working correctly persisted after I rebooted and they did.
Updates
One of the last things I was curious about since I am carefully trying not to overwrite changes that I needed to make everything work is what happens when I apply updates for Proxmox through the web GUI? Specifically I know I want to avoid these:
proxmox-ve
proxmox-default-kernel
proxmox-kernel-*
I would suggest that you run a simulation of your apt upgrade using:
apt -s full-upgradeAfter simulating the run, and not really seeing anything worrisome, I went ahead with the update.
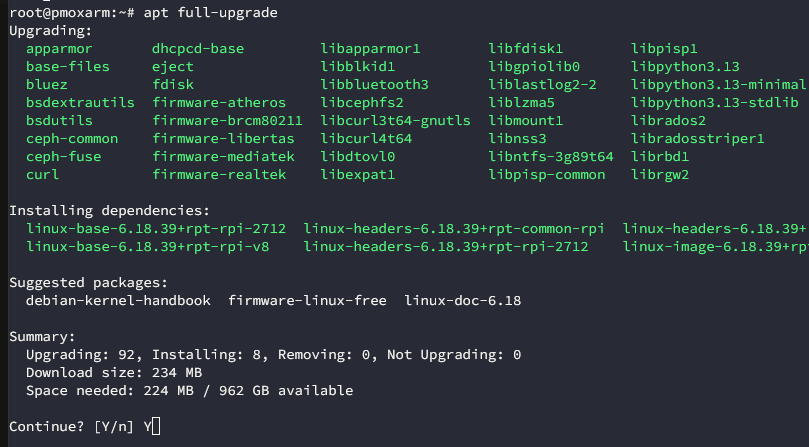
After the update, everything booted and was fine. I would still take this care on each update cycle just to make sure.
Wrapping up
Hopefully, this walkthrough and detailed steps I took to get the new Proxmox VE ARM64 packages on a Raspberry Pi and use NVMe boot and an onboard NIC will help someone else as this is I think a much better solution hardware-wise than running the Proxmox ARM64 ISO on a Raspberry Pi since the network isn’t recognized and you will be dealing with NVMe connected via USB. What about you? Have you tried an installation of Proxmox on a Raspberry Pi as of yet? Let me know in the comments.
More in this topic




Google is updating how articles are shown. Don’t miss our leading home lab and tech content, written by humans, by setting Virtualization Howto as a preferred source.
About The Author

Wow, this is great. I don’t have a RP5, but I bought an Orange Pi 5, which comes with a native NVME port. I tried Armbian instead of the Orange Pi OS and been having difficulty getting the NVME detected.
While this is a different device, some of the steps may be helpful as soon as I can get around to working on it again.
Being able to run Proxmox on top of a low power SBC would be such a great way to have better isolation and experiment while having lower power draw than miniPC or DIY server.
I have two questions:
1. Can I request that you do a walkthrough of this process for an Orange Pi 5?
2. What is the overhead like and what can realistically run with the processing power of SBCs of this class?
Thanks.
Home_labber,
Thank you for the comment! I actually don’t have access to an Orange Pi 5 to test with, but I would imagine the steps would have to be similar. I think little nodes running on these SBCs could be great for things like backup DNS servers or some other service that you want to have an “extra” of outside your main rack or cluster. I think this opens up a lot of possibilities honestly for running some LXCs with various services in the home lab. From what I can tell, there isn’t much overhead with this. The Pi 5 hat is definitely the way to go with NVMe for performance reasons.
Brandon