
I have been playing around lately with the GPU passthrough functionality in Proxmox and looking at the best ways to run AI workloads in Proxmox. Virtual machine passthrough is a great way to run something like Ollama. However, I wanted to experiment with GPU passthrough in an LXC container. Let’s look at Proxmox LXC container GPU passthrough configuration and see how this can be configured for use to run AI workloads like Ollama instead of using a virtual machine.
Why Use GPU Passthrough in LXC Containers?
GPU passthrough is the way in Proxmox that you can access the GPU that is physically installed in the host from a virtual machine or LXC container. This provides access to the GPU directly from these virtualized resources. It will allow you to have nearly native GPU performance for workloads like the following:
- AI workloads like Ollama
- Running a physical card in a workstation that is virtualized
- Video decoding or encoding for workloads like Jellyfin
- Remote desktop acceleration
LXC containers are more lightweight than full VMs and start up much faster and they are just easier to work with. LXC containers also offer GPU passthrough in addition to Proxmox VMs.
The passthrough process with LXC containers though is a little more tricky but not terribly challenging if you have the right steps to work with, which is why I am providing this guide!
You must choose between VM passthrough and LXC passthrough
In my tinkering with GPU passthrough in Proxmox, you must choose between either running VM passthrough or LXC passthrough. The reason for this is the steps needed to setup each of these methods conflict with one another and your LXC passthrough would be broken by implementing VM passthrough.
Why is this? Well, you have to do several things to ensure VM passthrough, including blacklisting NVIDIA drivers, etc. This will break LXC container passthrough since it needs the host to see the driver correctly and know about the GPU.
Cleaning up and reverting if you have already implemented VM passthrough in Proxmox
You will need to backtrack a bit if you have already implemented VM passthrough and “undo” some of those changes.
1. Undo the VFIO binding
Edit /etc/modprobe.d/vfio.conf and either:
Remove or comment out your line defining the vfio bindings (below is an example):
# options vfio-pci ids=10de:1c03,10de:10f1 disable_vga=1Then regenerate initramfs:
update-initramfs -u -k all2. Remove the NVIDIA driver blacklist
Edit or delete /etc/modprobe.d/blacklist-nvidia.conf
Alternatively, comment out all the blacklist lines:
# blacklist nouveau
# blacklist nvidia
# blacklist nvidiafb
# blacklist rivafb
Then run:
update-initramfs -u -k all3. Reboot
You must reboot your Proxmox host for this to take effect.
Prerequisites
There are a few prerequisites that you need to be aware of for getting Proxmox GPU passthrough working with LXC containers. Note the following:
- A Proxmox VE host (preferably 7.x or 8.x)
- An NVIDIA GPU or compatible AMD GPU installed and visible in the host
- GPU drivers from NVIDIA for the Proxmox host
- An unprivileged or privileged LXC container created
⚠️ Important Note: LXC containers, especially unprivileged ones, have more restricted access to host devices than VMs. Privileged containers offer easier device passthrough but are less secure.
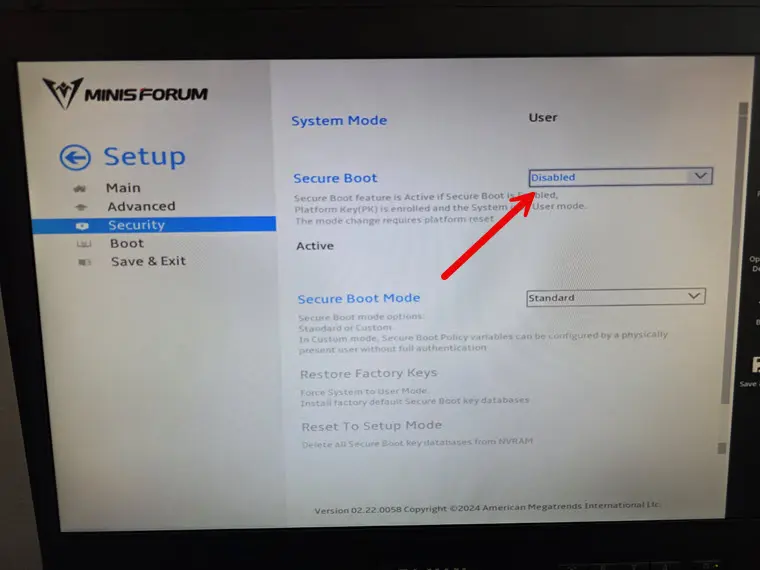
Step 1: Disable secure boot
I found that if you have secure boot enabled, you will see a message about signing the driver:
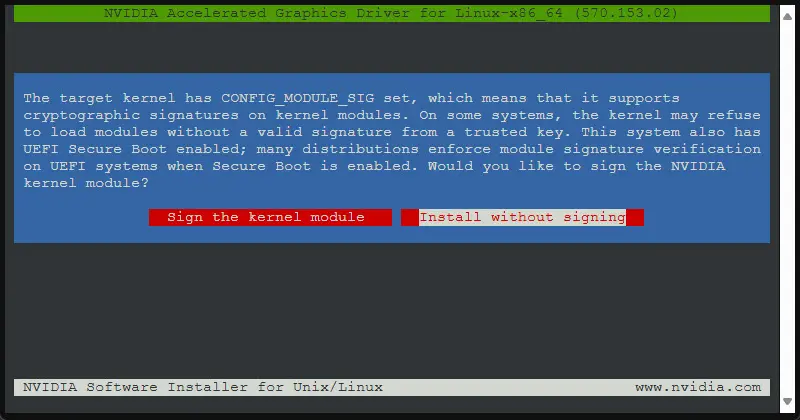
If you select to sign the kernel module, it will ask you for a keypair. So, easiest way around this is to disable secure boot:
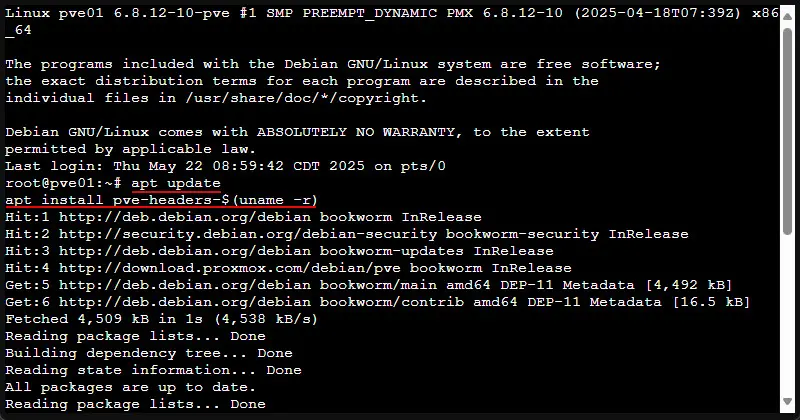
Step 2: Install Proxmox prerequisites
You will need to install some build prereqs for the driver install to work:
apt install build-essential software-properties-common make -y
update-initramfs -u
Also, install the Proxmox PVE headers:
Step 2: Install GPU drivers on the Proxmox host
As a juxtaposition to getting passthrough to work in a VM, an LXC container needs to have the GPU properly installed from a driver perspective on the Proxmox host.
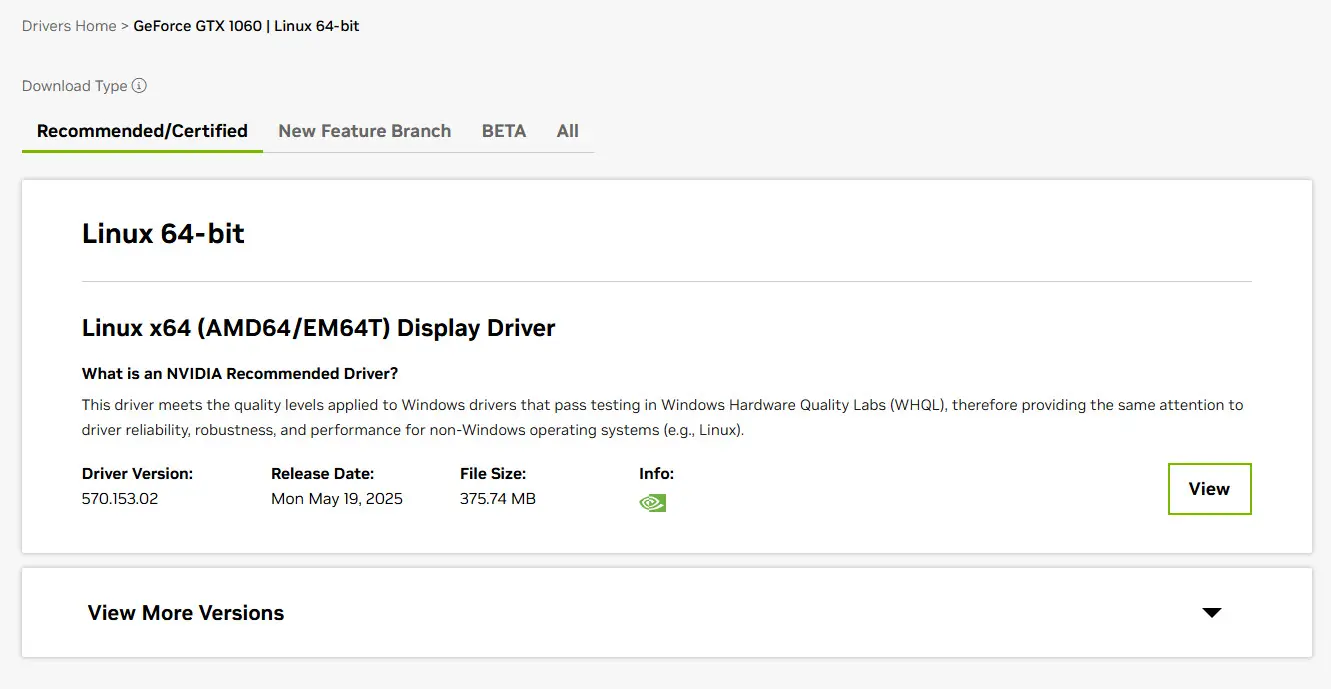
For NVIDIA you can pull this from the apt repos like below (keep in mind this may not be the latest driver):
apt update
apt install -y nvidia-driver
For AMD:
apt update
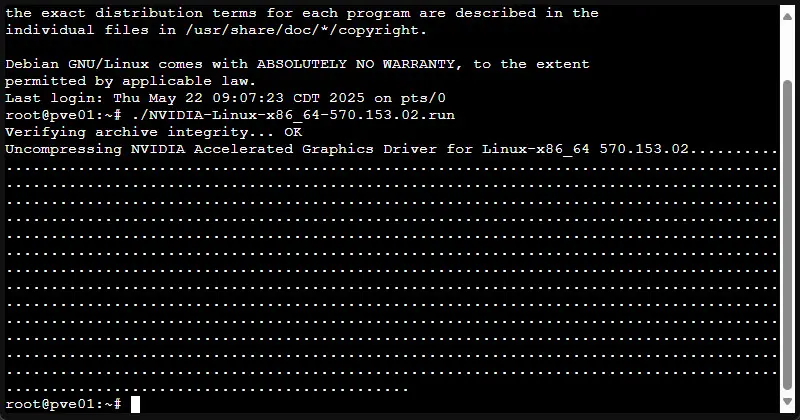
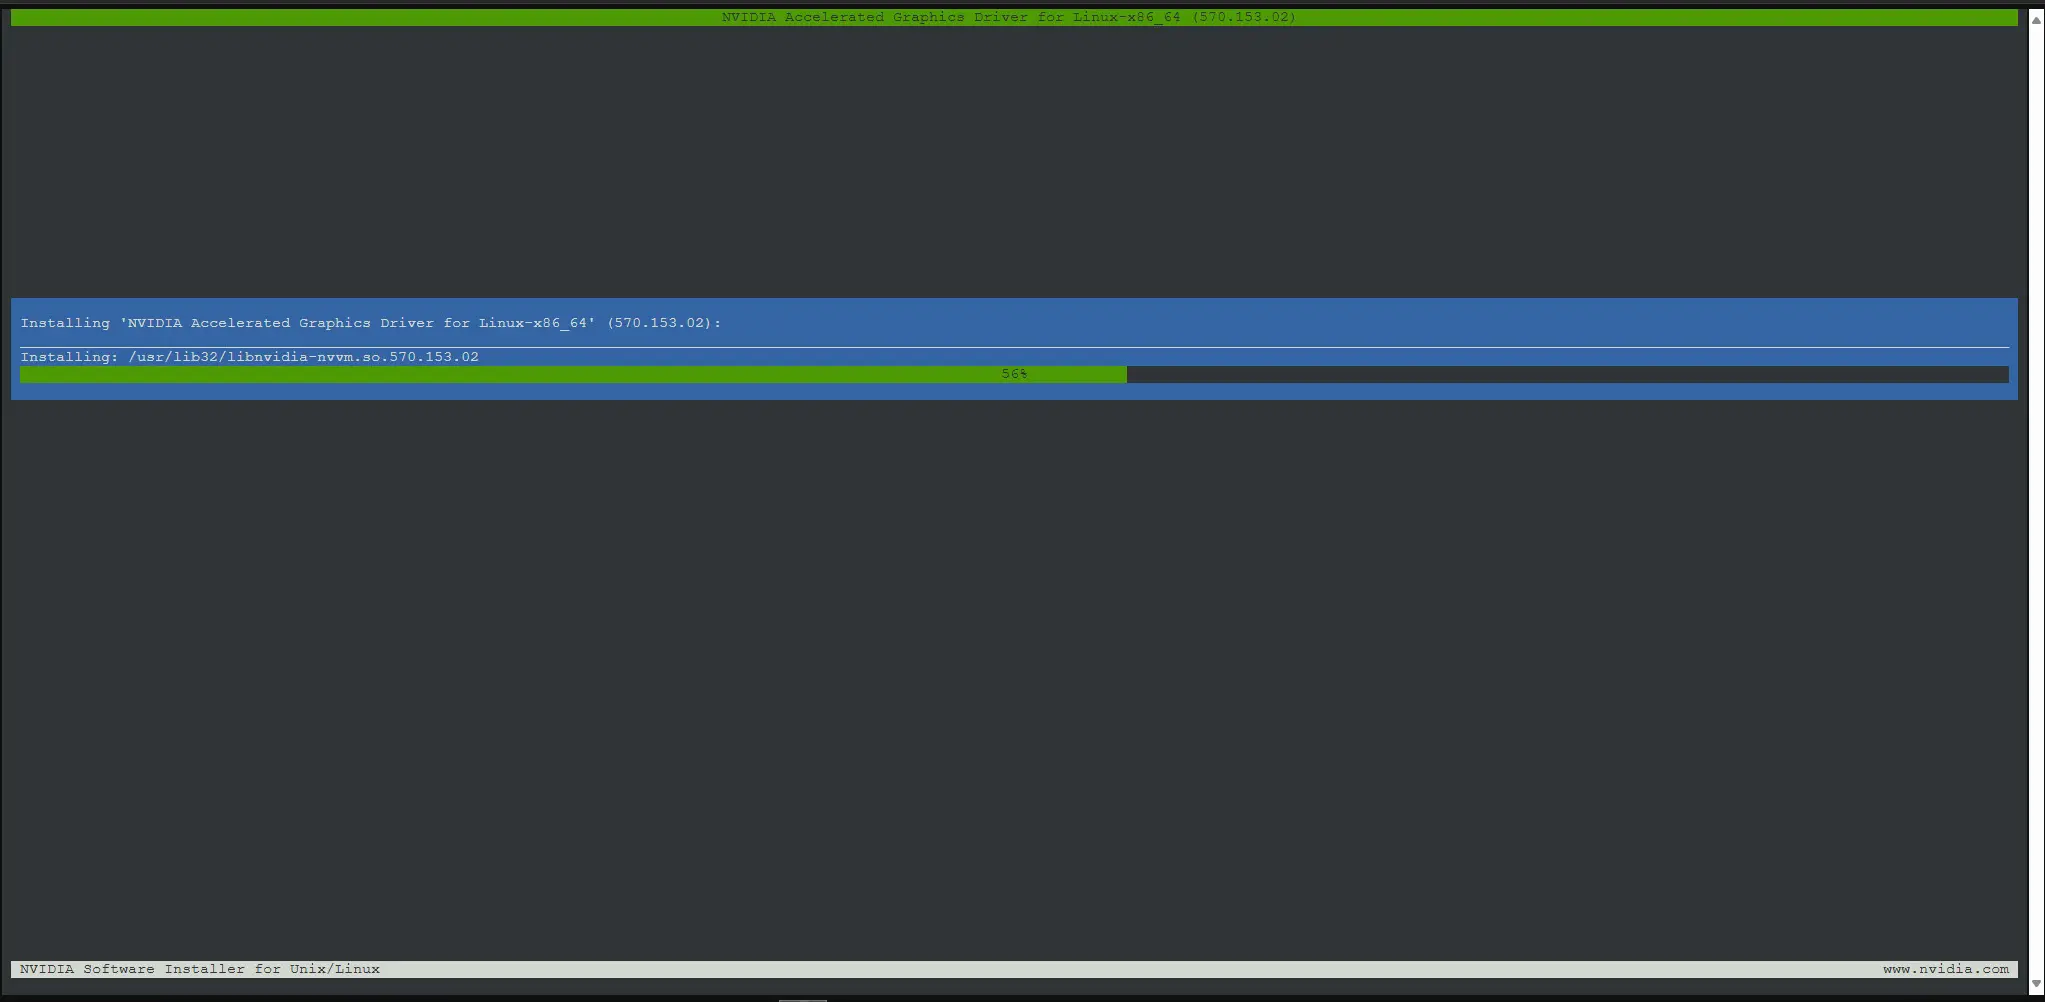
apt install -y firmware-amd-graphicsOr, what I did was visit the NVIDIA driver download page and downloaded the latest available for my card that I am testing with. Copy your downloaded file to your Proxmox host, to the root directory is fine.
Once you have the driver downloaded, you need to copy this to your Proxmox host, to the root directory is fine. We need to set the execute bit on the file:
chmod +x NVI*Then you just need to run the file on your Proxmox host:
./NVIDIA* then TAB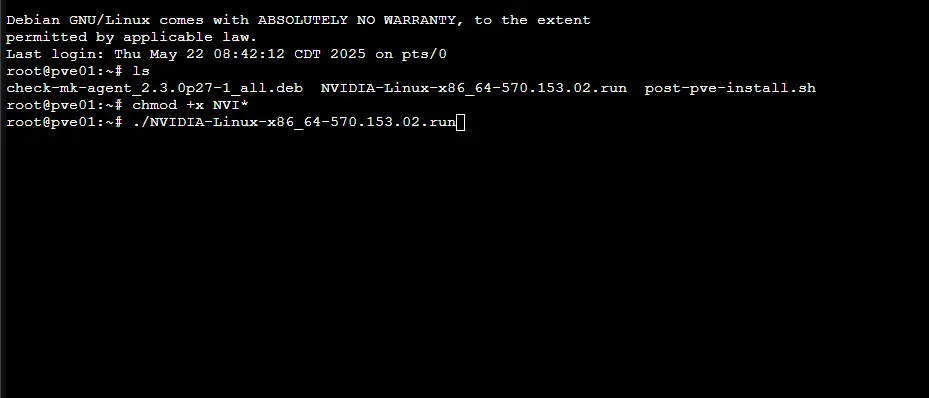
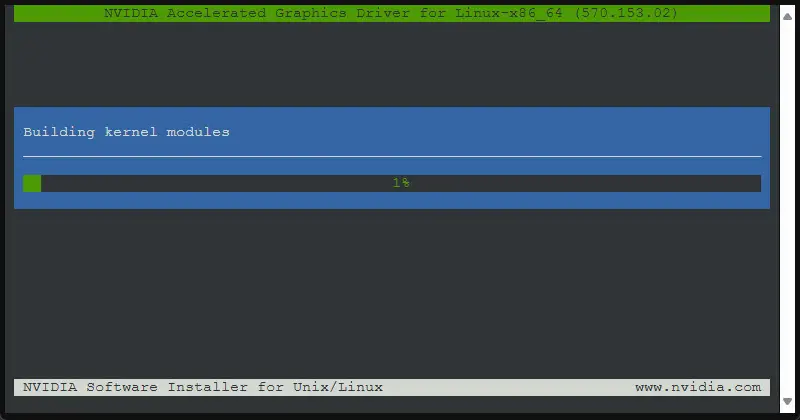
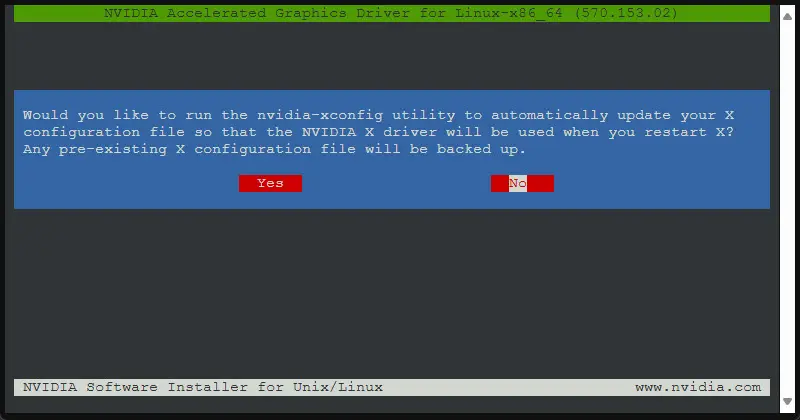
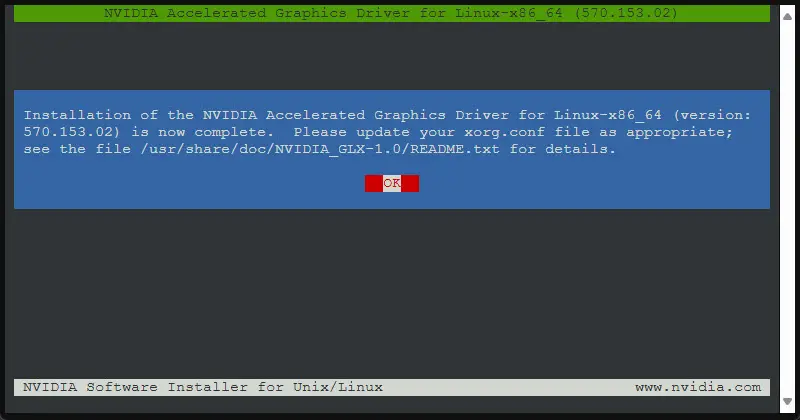
Next, follow the wizard prompts:

Checking that the driver is installed
Once installed, reboot the host and verify the driver is working by running the following command. Yo ushould see your card listed and metrics pulled from the card.
nvidia-smi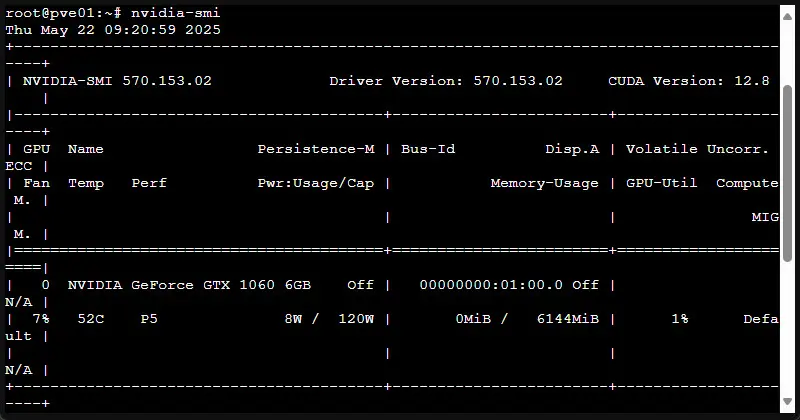
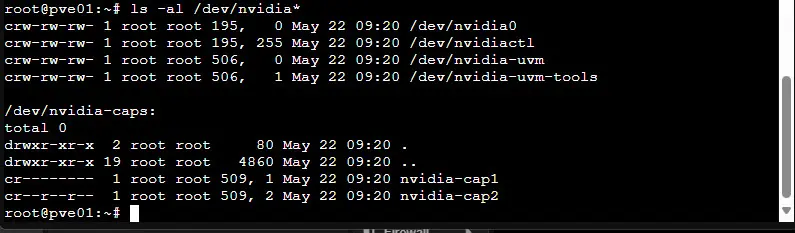
Step 3: Identify the GPU devices
Use the following command to identify the devices that we need to pass through:
ls -al /dev/nvidia*These will look something like the following:
- /dev/nvidia0
- /dev/nvidiactl
- /dev/nvidia-uvm
- /dev/nvidia-uvm-tools
- /dev/nvidia-caps/nvidia-cap1
- /dev/nvidia-caps/nvidia-cap2
Step 4: Add the passthrough devices:
Now, we can add the passthrough devices to our LXC container. On Resources screen, navigate to Add > Device Passthrough. Then add these devices one-by-one.

Enter the device name/path as you see below.
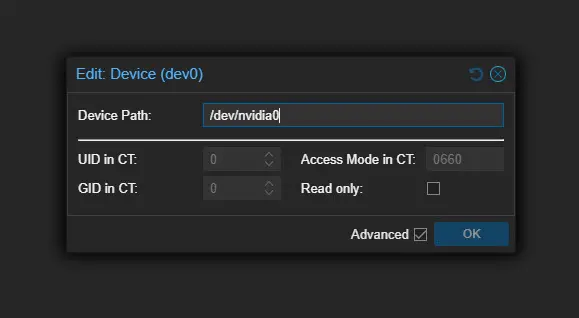
One-by-one these have been added.

Step 5: Install the drivers inside the NVIDIA drivers in the Proxmox LXC container
Now, we can install the same file that we installed on our Proxmox VE host inside the LXC container (make sure the LXC container is powered on before doing this):
pct push <your LXC container ID> <nvidia file name> /root/<name of the file in your container>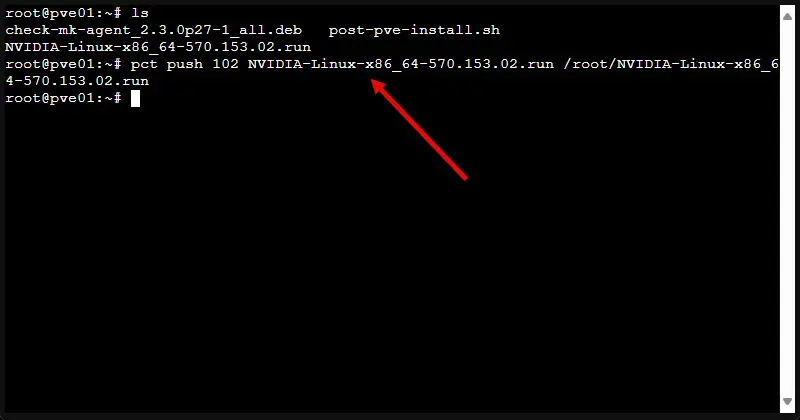
Run this file now in the LXC container:
./NVI* --no-kernel-module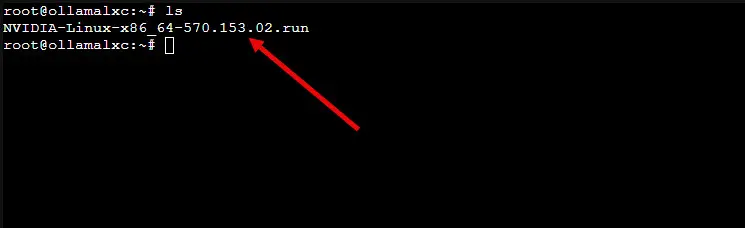
Go through the same wizard as you did on your Proxmox VE Server host:
Step 6: Do you need the NVIDIA container toolkit?
This is a good question and one we can answer by what your plans are inside the LXC container. If you are just going to run your app natively inside the LXC environment without Docker, you don’t need to installed it.
However, if you plan on running Docker inside the LXC container and spinning up your applications that way, like Ollama as a Docker container, then, yes you will need to install it. You can install it with the following command:
apt update
apt install -y nvidia-cuda-toolkit nvidia-container-toolkit
To test the GPU inside the container:
nvidia-smi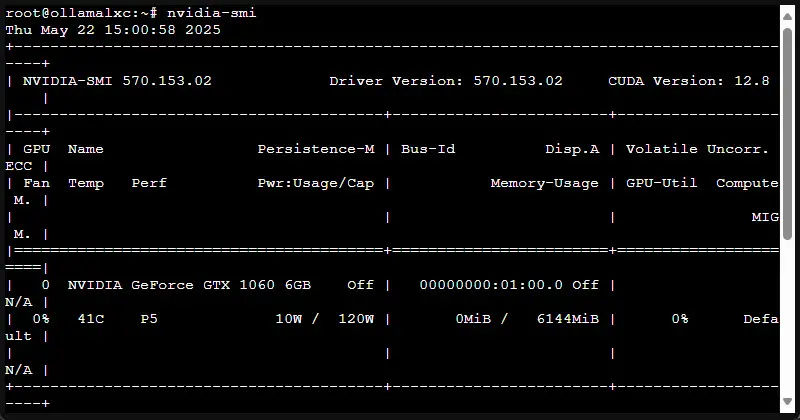
If everything is configured correctly, you should see the GPU info.
Step 7: Test your GPU application
For testing GPU passthrough in Proxmox with LXC containers, you can simply point an OpenWebUI environment to your new LXC container that has GPU passthrough enabled.
Install Ollama in your LXC container that has the GPU passed through:
You can now install Ollama in the LXC container with the simple install script below:
curl -fsSL https://ollama.com/install.sh | shThen, just point your OpenWebUI container to your Ollama instance (the IP in the string below for OLLAMA_BASE_URL is the address of my LXC container.
docker run -d -p 3000:8080 --add-host=host.docker.internal:host-gateway -e OLLAMA_BASE_URL=http://10.3.33.251:11434 -v open-webui:/app/backend/data --name open-webui --restart always ghcr.io/open-webui/open-webui:mainAdditional notes about container security with LXC privileged containers
Privileged containers can access hardware more easily. However, this comes at the cost of possible isolation challenges from the host. Unprivileged containers are more secure but can be complex when dealing with /dev files.
For production or shared environments, it is best to consider keeping sensitive workloads in VMs or Kubernetes pods with GPU device plugins for better isolation.
Pros and Cons of LXC GPU Passthrough
| Pros | Cons |
|---|---|
| Lightweight with faster boot times | More complex to configure than VM passthrough |
| Lower overhead and near-native speed | Less secure if using privileged containers |
| Better suited for specific workloads | Driver compatibility issues can happen |
| Ideal for single-purpose GPU apps | Troubleshooting device access can be trickier |
When to use VMs instead of LXC container
If you need to have the most isolation that you can get for your application, virtual machines still make the most sense. Proxmox configuration for virtual machine GPU passthrough is very straightforward (well relatively speaking) and can be done with a few steps.
Wrapping Up
It has been quite an adventure the last few days looking at AI workloads in Proxmox and seeing how best to spin these up. Proxmox is a great platform for running your AI workloads. And, thankfully, we can spin up GPU passthrough in LXC containers as well as virtual machines. Keep in mind that you won’t be able to do both. You will need to either passthrough GPU to a VM or have it configured to passthrough to LXC containers. If there is a trick I am missing here to have both, please let me know in the comments. Also, let me know what you guys are running mostly in your home lab environments for GPU passthrough – virtual machines, or LXC containers?
Google is updating how articles are shown. Don’t miss our leading home lab and tech content, written by humans, by setting Virtualization Howto as a preferred source.
About The Author


Good guide, but I had to add “–no-kernel-module” to the end of the “./NVIDIA-Linux-x86_64-xxx.xxx.xx.run” command when installing the driver within the LXC, so the whole command was “./NVIDIA-Linux-x86_64-xxx.xxx.xx.run –no-kernel-module” for me.
Also, dont forget to add this bit. Its missing where you are getting the kernel headers
echo “deb http://download.proxmox.com/debian/pve bookworm pve-no-subscription” >> /etc/apt/sources.list
rm /etc/apt/sources.list.d/pve-enterprise.list
Nuno,
Yes great point. You will need to either have an enterprise subscription or pivot to the no-subscription repos.
Brandon
What a very useful article this is. All the details covered and worked first time for me to enable hardware encoding on my emby LXC.
David that is awesome! Glad the article was helpful!
Brandon
Wow, thank you Brandon for the step by step, it sounds like a laborious process. after going through it do you think it was a better option to use and LXC over a VM for AI workloads? I am just about to start the same journey and want to plan out which path to take.
I have the same question as well. I’ve been playing around with Open Web UI and Ollama for a couple of months now. I deployed OWUI and Ollama in a container using Docker Compose. I’ve read that VMware adds more overhead, so I am thinking of ripping off VMware and installing Proxmox 9. But doing my research before taking the plunge.
vGonzilla, thanks for the comment! I wouldn’t buy that there is more overhead with VMware. Despite hating the way Broadcom has done things, I think VMware ESXi is still the best hypervisor out there in terms of all out features. The overhead, like Proxmox is somewhere in the neighborhood of 1% or less, so on modern hardware, you won’t really see any different. So just mentioning this to say that I would ditch VMware for other reasons now, but not really performance as an issue.
Brandon
Calum,
All in all, either option has advantages and disadvantages. I think I might prefer the option of having the card accessible from the host and then pass through to an LXC. This way I can use it for other workloads in the future if I want. If you want to pass it through to a VM, you have to basically tell Proxmox it can’t use the GPU and then pass it through to the VM. So, you are a bit more tied to the VM, instead of an LXC container. Does that make sense? Either way it works well, but I am digging the LXC approach I think most of all – small footprint and ability to pivot to something else more easily.
Brandon
Really great post! This would have taken me hours to understand by myself. This guide is far from being replaces by AI. Thank you Brandon for the great guide and I hope to find more of your posts in the future!
Miroslav,
Thank you so much for your kind words! I appreciate you seeing the value in human-written content and guides that I go through myself. Thank you again!
Brandon
Hi Brandon. do you have the same process for Intel instead of Nvidia or AMD by chance?
Hey Wayne,
Great to have your comment here. You are meaning for Intel graphics card just to make sure I understand?
Brandon
Thank you for the detailed guide, it looks very promising.
Unfortunately, can’t use it straight for PVE9, and it relies on Debian 13, which no longer carries software-properties-common package.
Discussion here: https://github.com/wimpysworld/deb-get/issues/1215
@Alex
I will see what I can find out on this front. Might be a show stopper at least until support is released there for GPU passthrough on PVE 9, but hopefully there is a way to get there. Will keep you updated here.
Thank you. I tried to follow your guide skipping that package, and things mostly worked.
There was another unrelated issue with the latest PVE9 kernel (6.17) that nvidia drivers don’t work with, but pinning 6.14 makes them happy.
I’m at “nvidia-smi” step right now, so sounds like it should work.
Ok, I followed the rest of the steps, and it seems to work, I was testing with Jellyfin’s hardware encoding.
The only difference, I have, is that I installed host drivers from debian repository, and then downloaded matching version directly into LXC.
Alex,
Very nice, thank you for sharing what worked here! I will update the blog and reference your comment here for Proxmox VE 9.1. Thanks again!
Brandon
I would love to know how to pass through my AMD TPU.