With the recent news about VMware Workstation Pro being free for personal use, it opens up a lot of doors for using the software as a home lab platform and to play around with various hypervisors, etc. Installing Proxmox in VMware Workstation Pro will allow those who are new to the platform to have a way to get more familiar with the hypervisor and play around with its features and capabilities. Let’s look at how to install Proxmox Virtual Environment in VMware Workstation in this step-by-step guide.
Table of contents
VMWare Workstation Pro is now Free!
In case you missed it, VMware Workstation Pro is now free for personal use. Check out my blog post covering the topic here: Proxmox New Import Wizard for Migrating VMware ESXi VMs.
You can also watch my YouTube video covering the topic and showing how you can download the binaries for free from Broadcom/VMware.
Installing Proxmox in VMware Workstation
The first step to installing Proxmox in VMware Workstation is setting up the virtual machine in VMware Workstation. Let’s walk through that process.
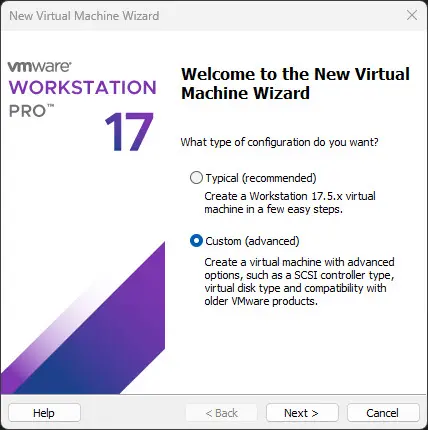
In VMware Workstation Pro, click on File > New Virtual Machine and the below wizard will launch.Here we are going to create a custom virtual machine for the Proxmox VE host.
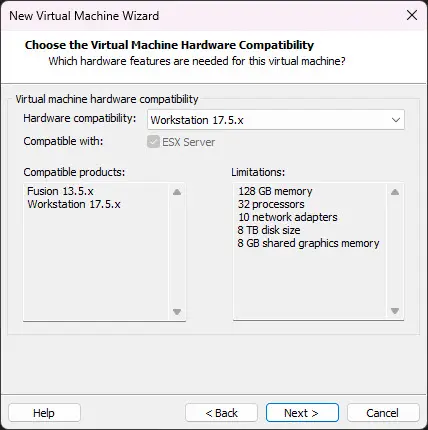
Set the hardware compatibility version for the new Proxmox VM. I am leaving at the latest version.
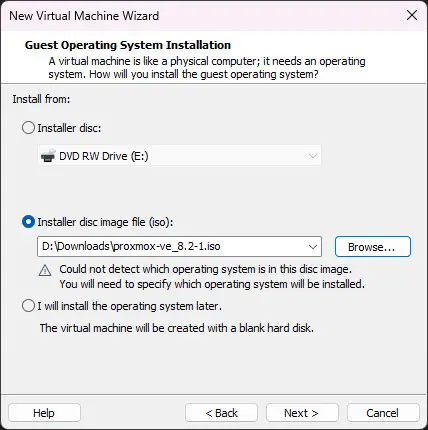
You will need to have the Proxmox virtual environment ISO image downloaded ahead of time. Once you download the ISO image, you can point to the ISO on this screen. Click Browse and select the ISO. Then click Next.
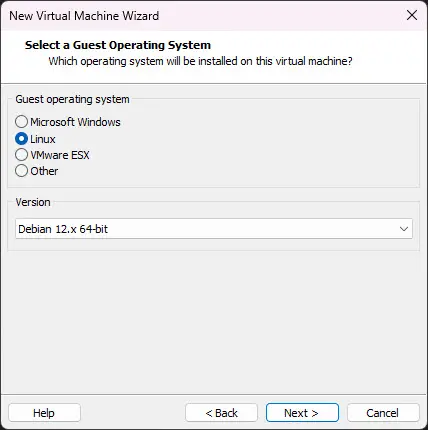
One the guest operating system screen, select Linux and then under the version, select Debian 12.x 64-bit.
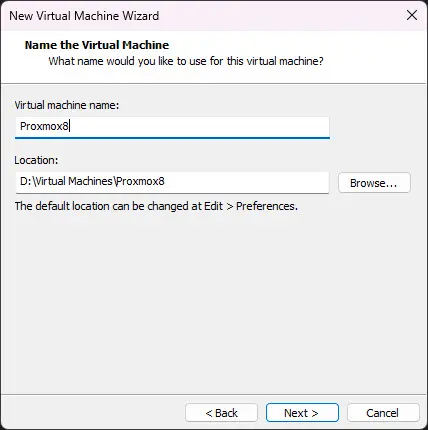
Next, name your new Proxmox virtual machine and set the location where the VM files will be stored.
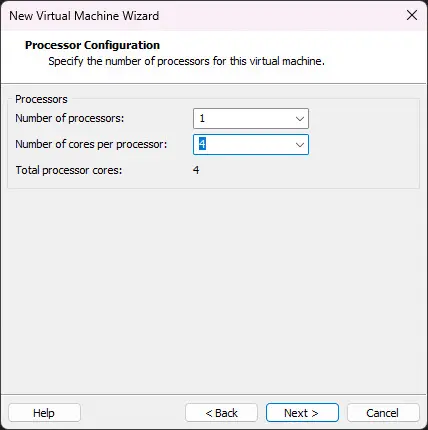
Set your desired processor count on the processor configuration screen.
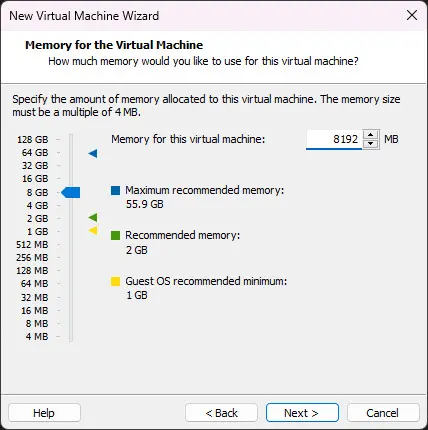
Set the system memory for the new virtual machine.
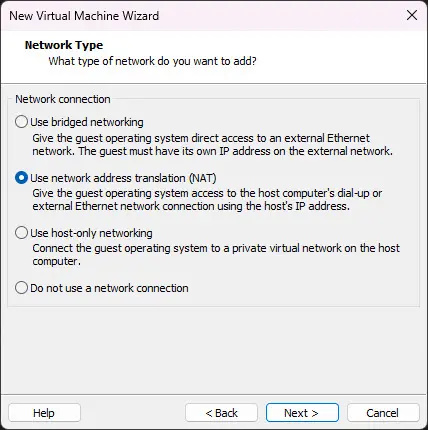
Select the network type for your Proxmox VM. One pesky thing I don’t like about the VMware Workstation wizard is that it doesn’t allow you to choose a Custom network type from this screen. Instead, I am just leaving set to NAT and then will customize below.
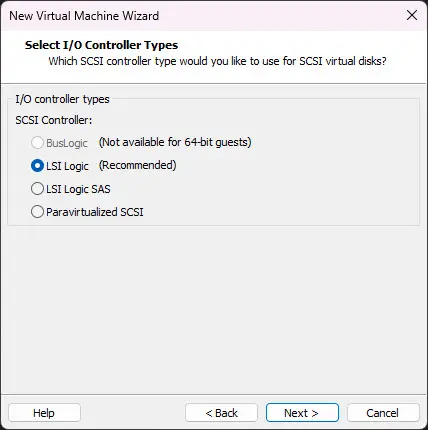
for the I/O controller type, select LSI Logic.
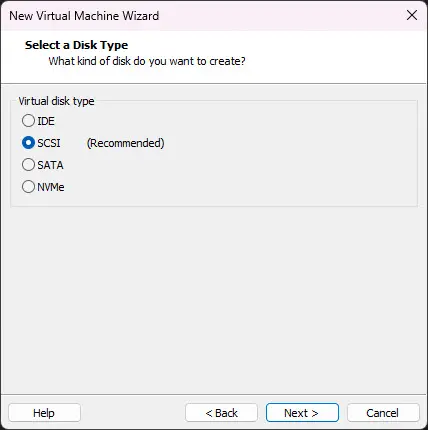
For the disk type, select SCSI.
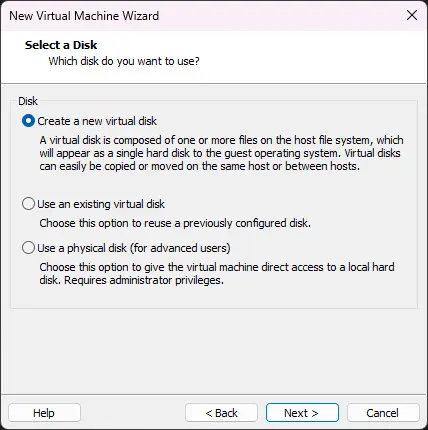
On the select a disk screen, you can choose to create a new virtual disk.
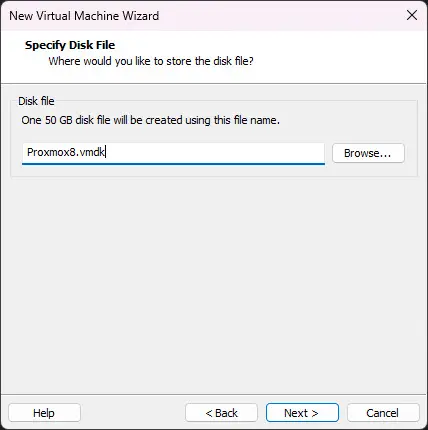
Name the new VMDK. By default it will just take the name of the VM you configured earlier.
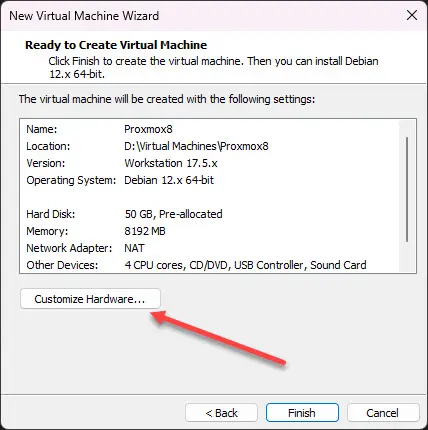
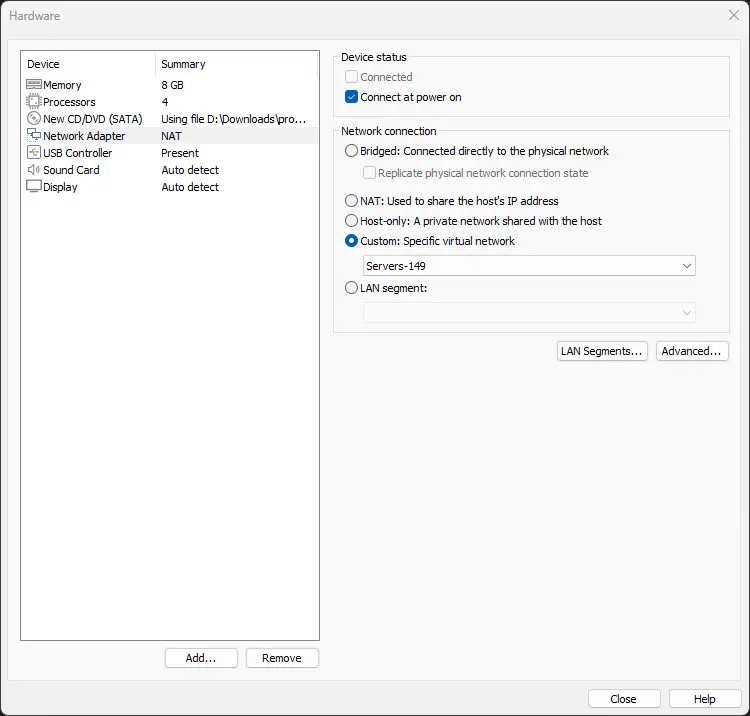
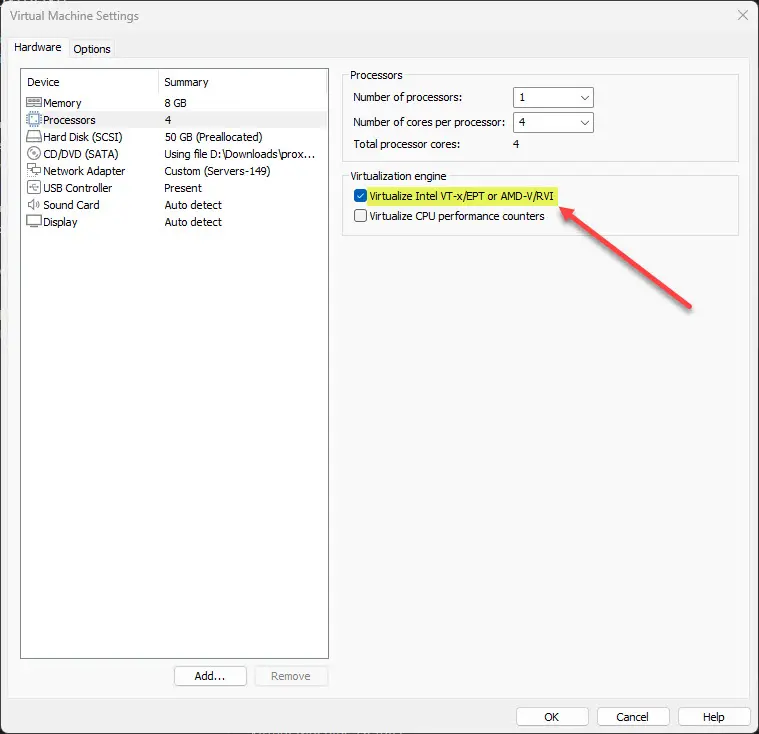
Now, on the Ready to Create Virtual Machine screen, I select Customize Hardware. For me, there are two things I need to do, change the network and enable nested virtualization. If you want to leave the default network configuration and one of the options earlier is good for your environment, you just need to enable nested virtualization as we will see.
Here, I am changing to my servers VLAN for the home lab.
Next, you need to enable nested virtualization. This amounts to clicking the Processors option and then selecting Virtualize Intel VT-x/EPT or AMD-V/RVI under the Virtualization engine.
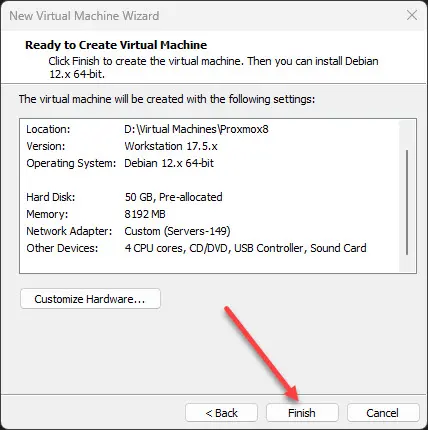
Once you have the options configured and click OK above, it will return you to the Ready to Create Virtual Machine screen. Click Finish.
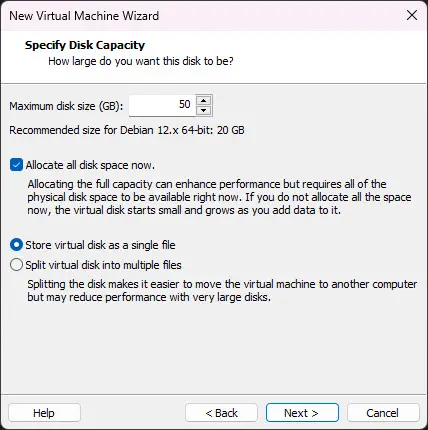
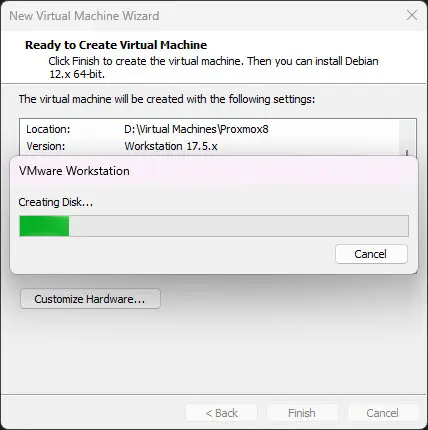
If you selected to preallocate the disk as I did above, it will begin this process.
Proxmox installation GUI
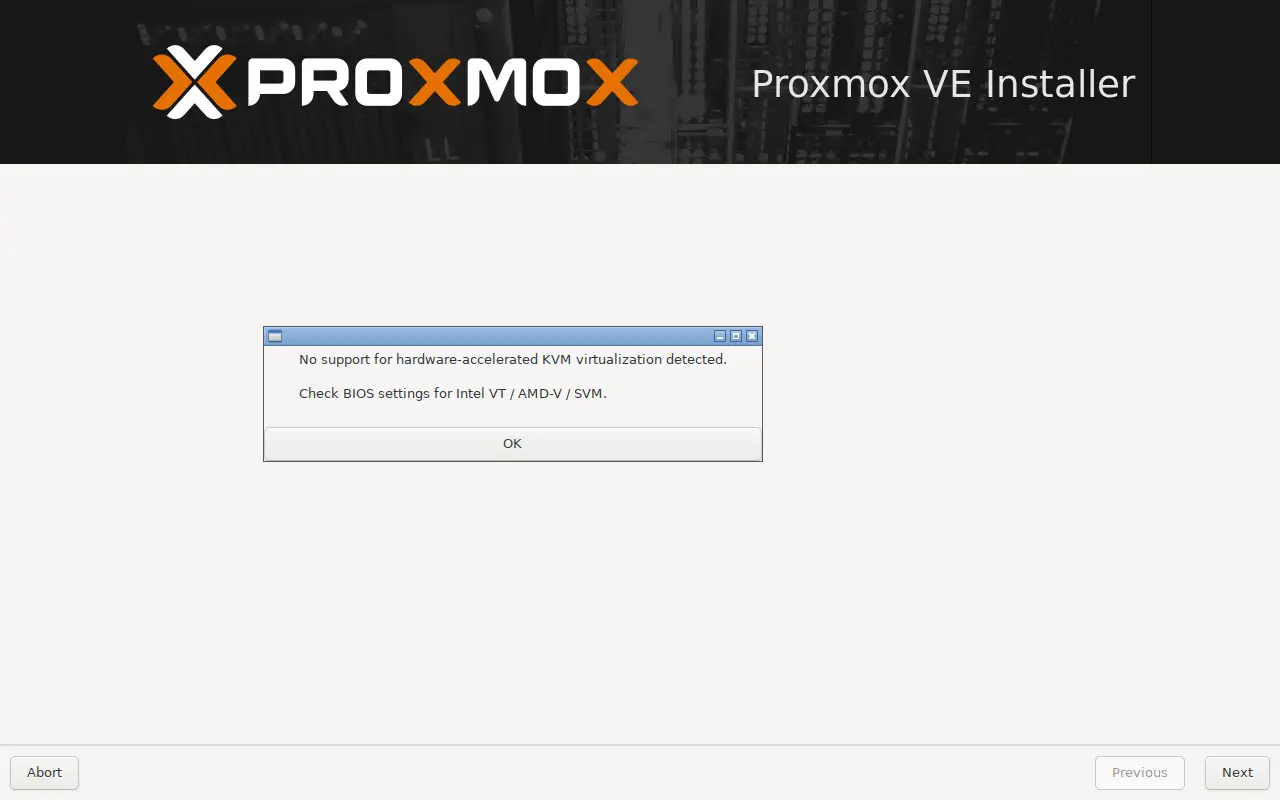
Once the disk is created and the machine creation finishes, power on the new Proxmox virtual machine. If you didn’t enable nested virtualization as shown above, you will see the below error. You will need to power off, enable nested virtualization, and then power back on.
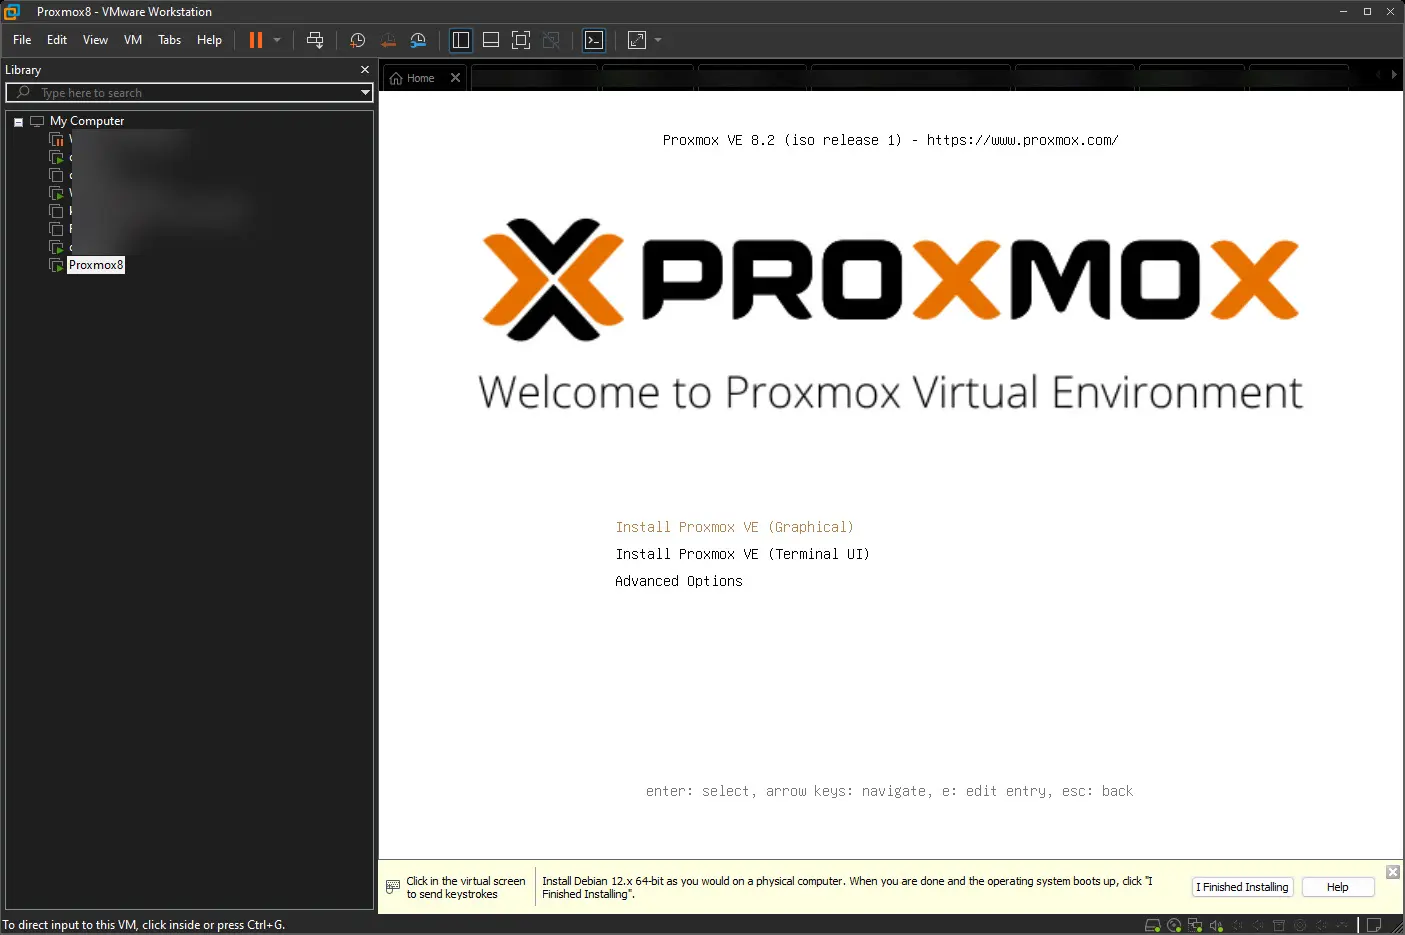
After powering on, you should get to the installation screen. Here we select Install Proxmox VE (Graphical).
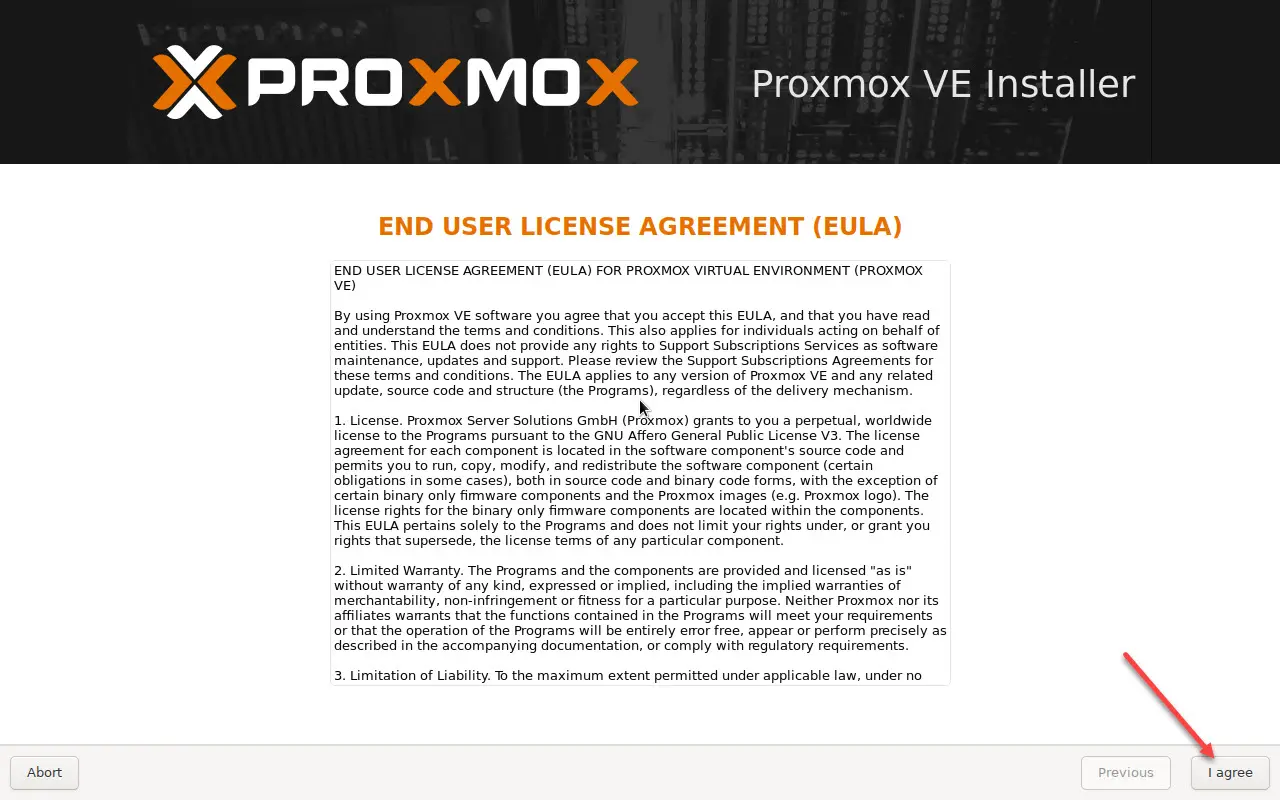
Accept the EULA for the installation by clicking I agree.
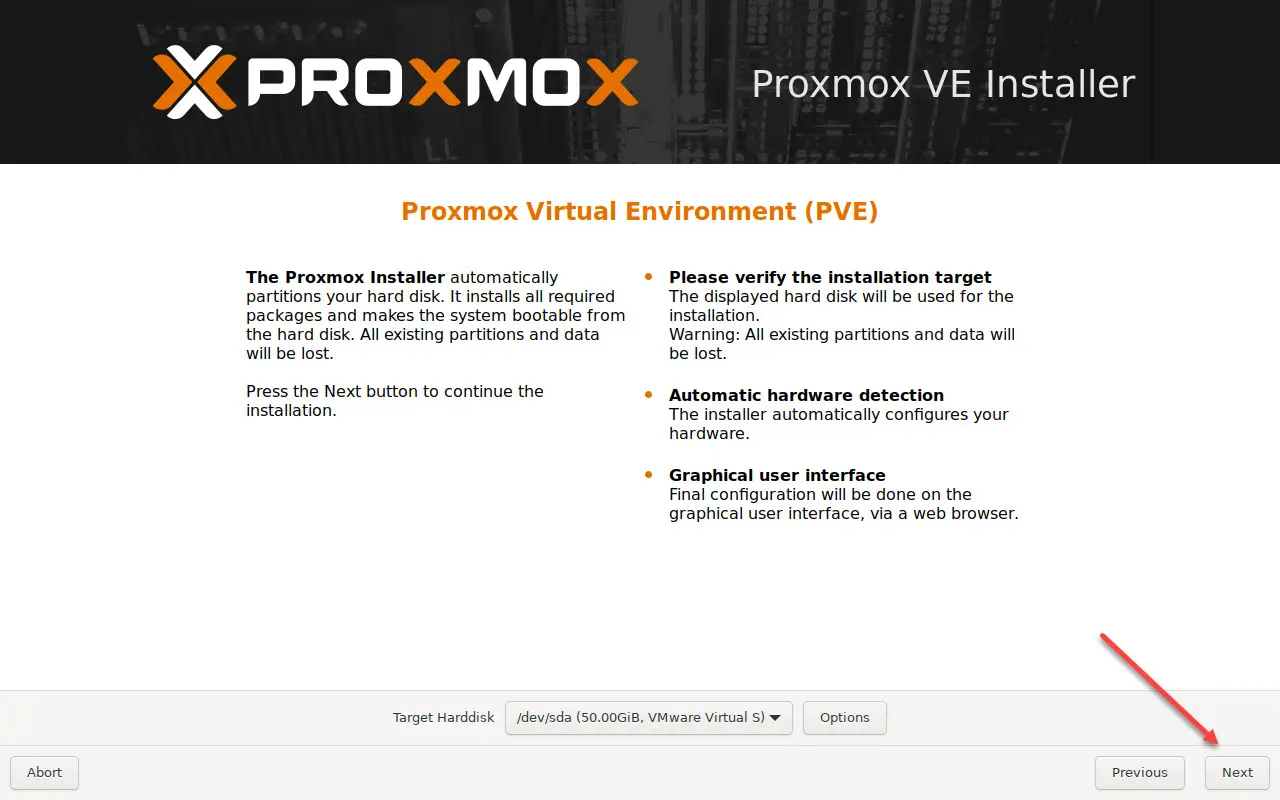
Select the target disk for the installation and click Next.
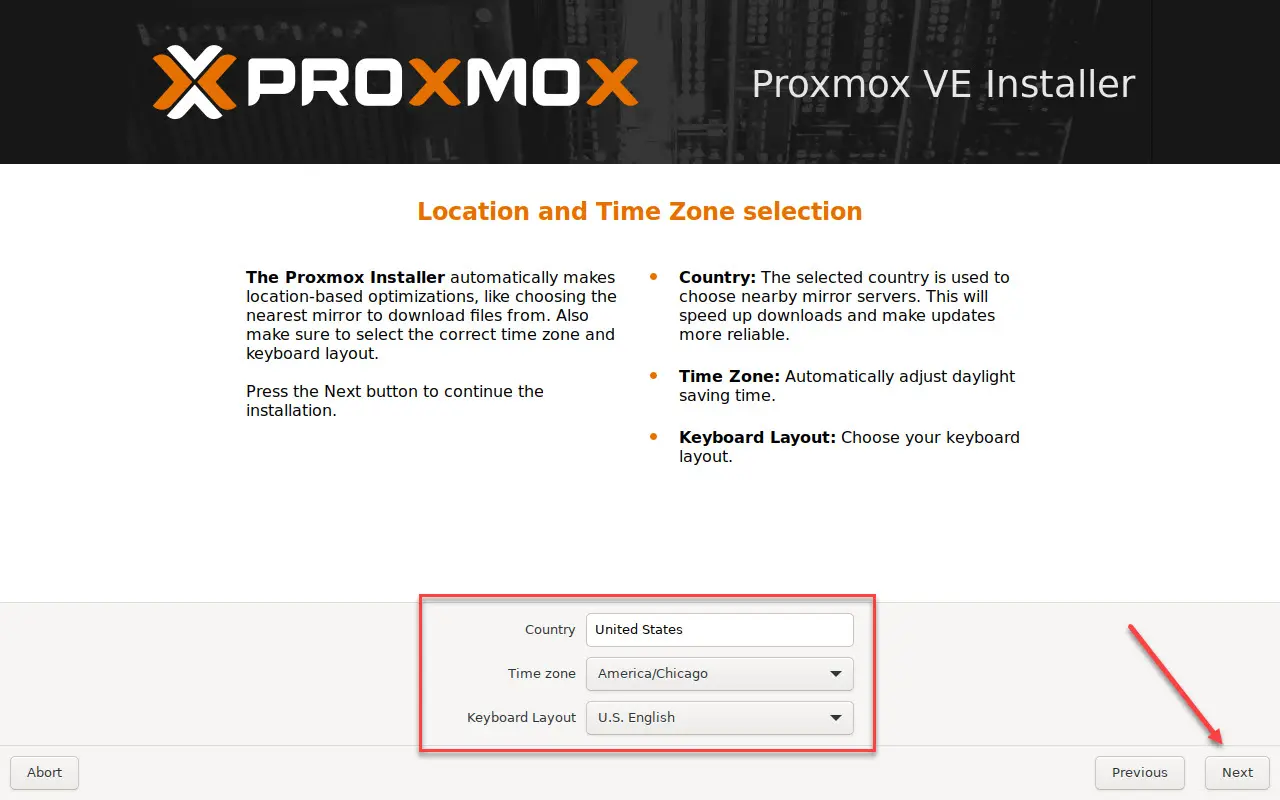
Set the location and time zone for the installation. Click Next.
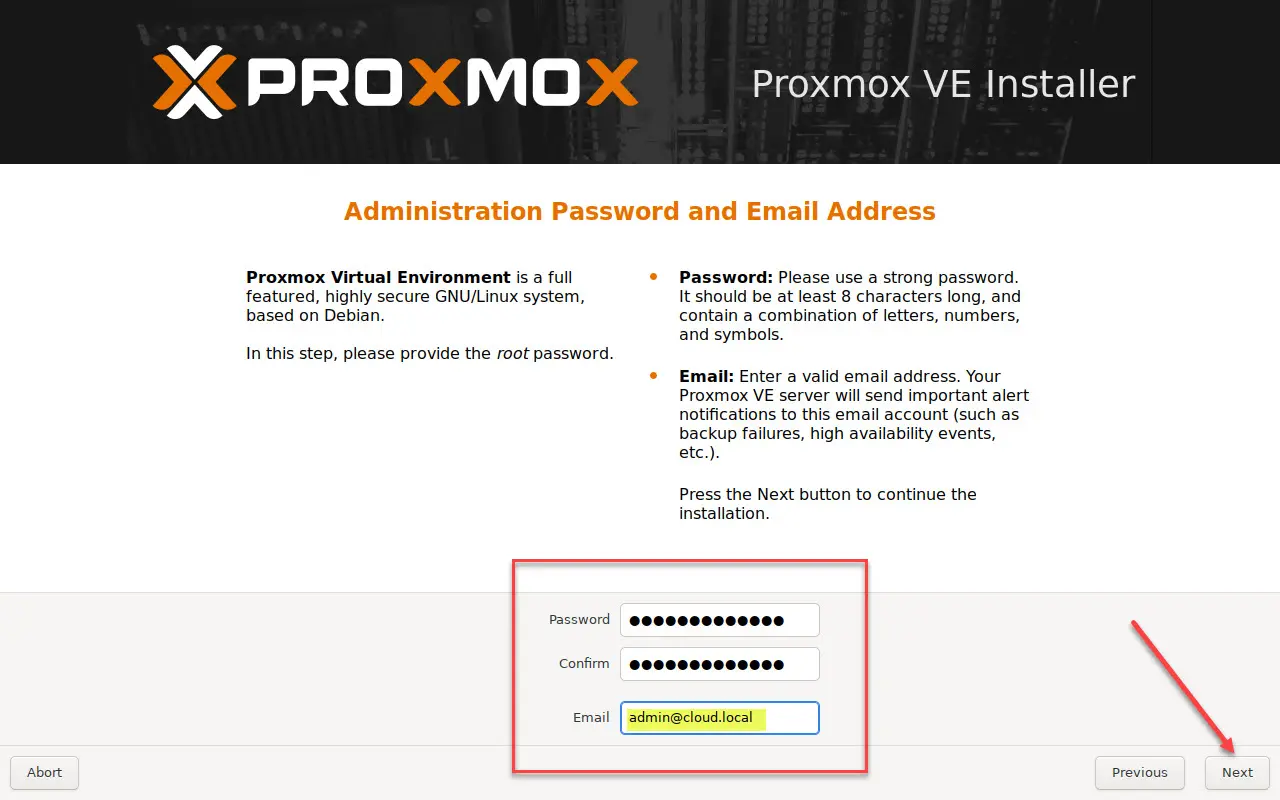
Set the administration password and email address. You can use a fake email address for your lab environment. Just make sure it follows proper email address formatting. Click Next.
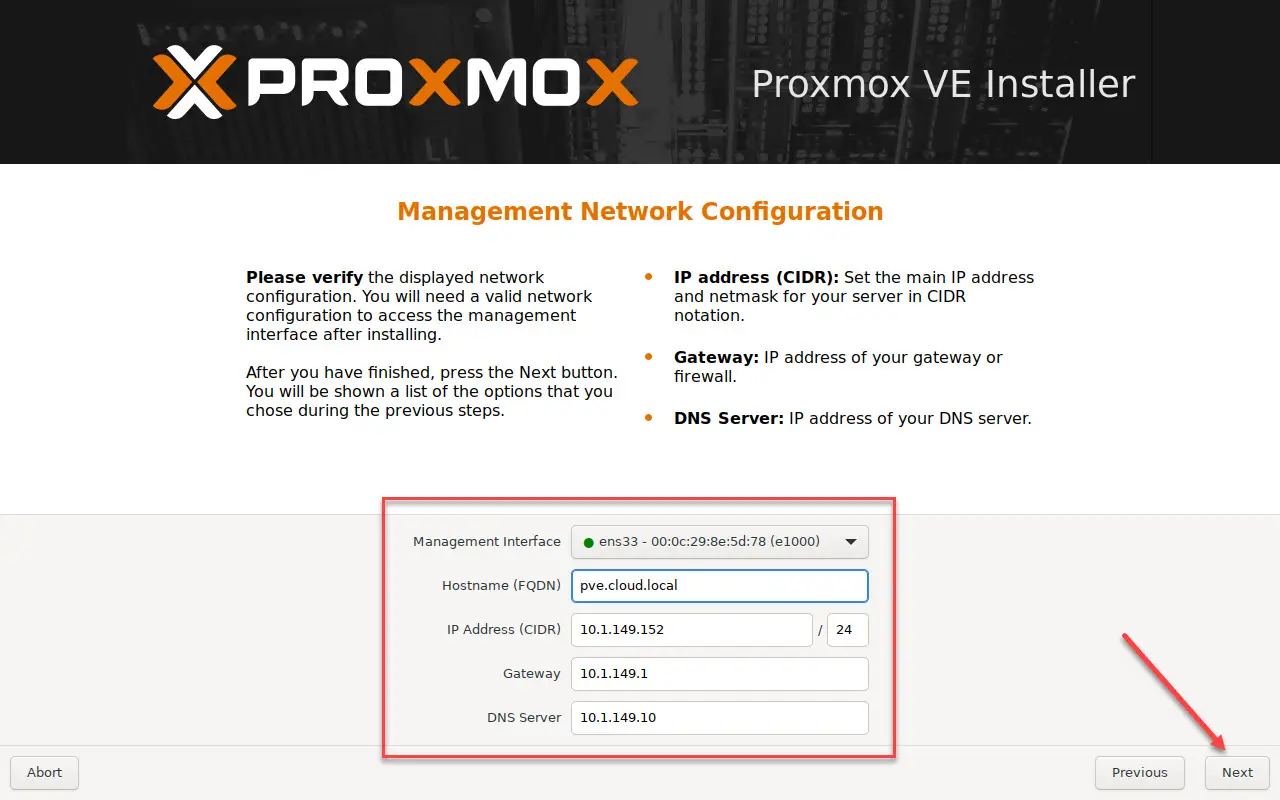
Set the hostname for your Proxmox server. It needs to be a proper FQDN to continue without error. Set the IP address, gateway, and DNS server. Then, click Next.
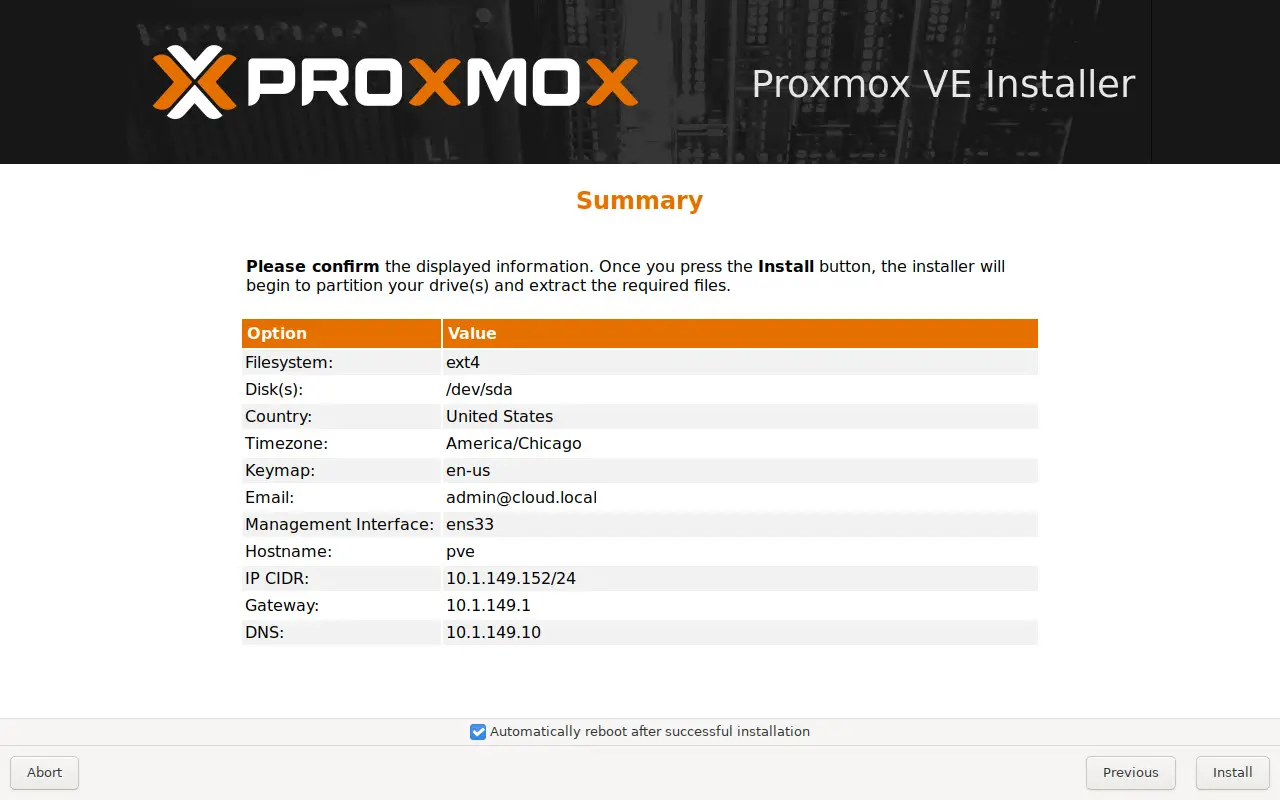
Review the summary screen and click Previous if you need to make any changes. Otherwise, click Install.
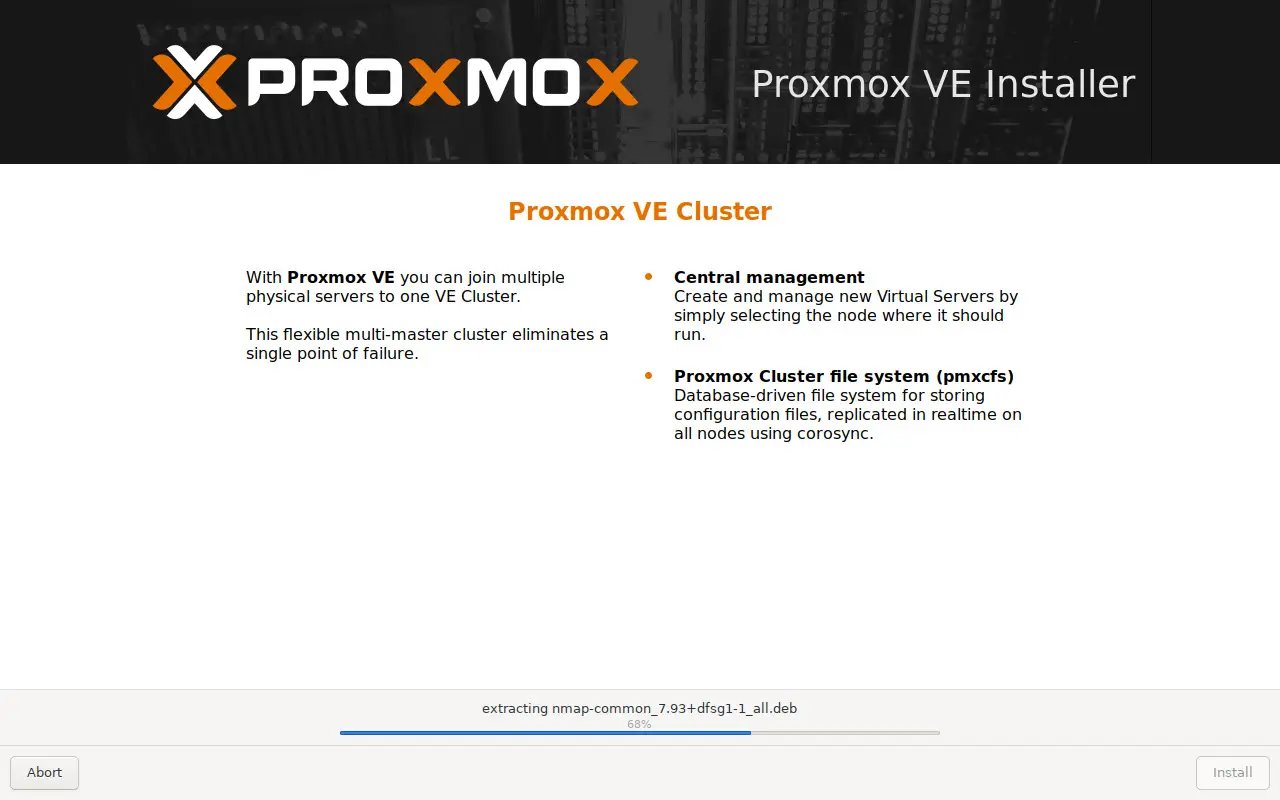
It will begin the installation process for Proxmox.
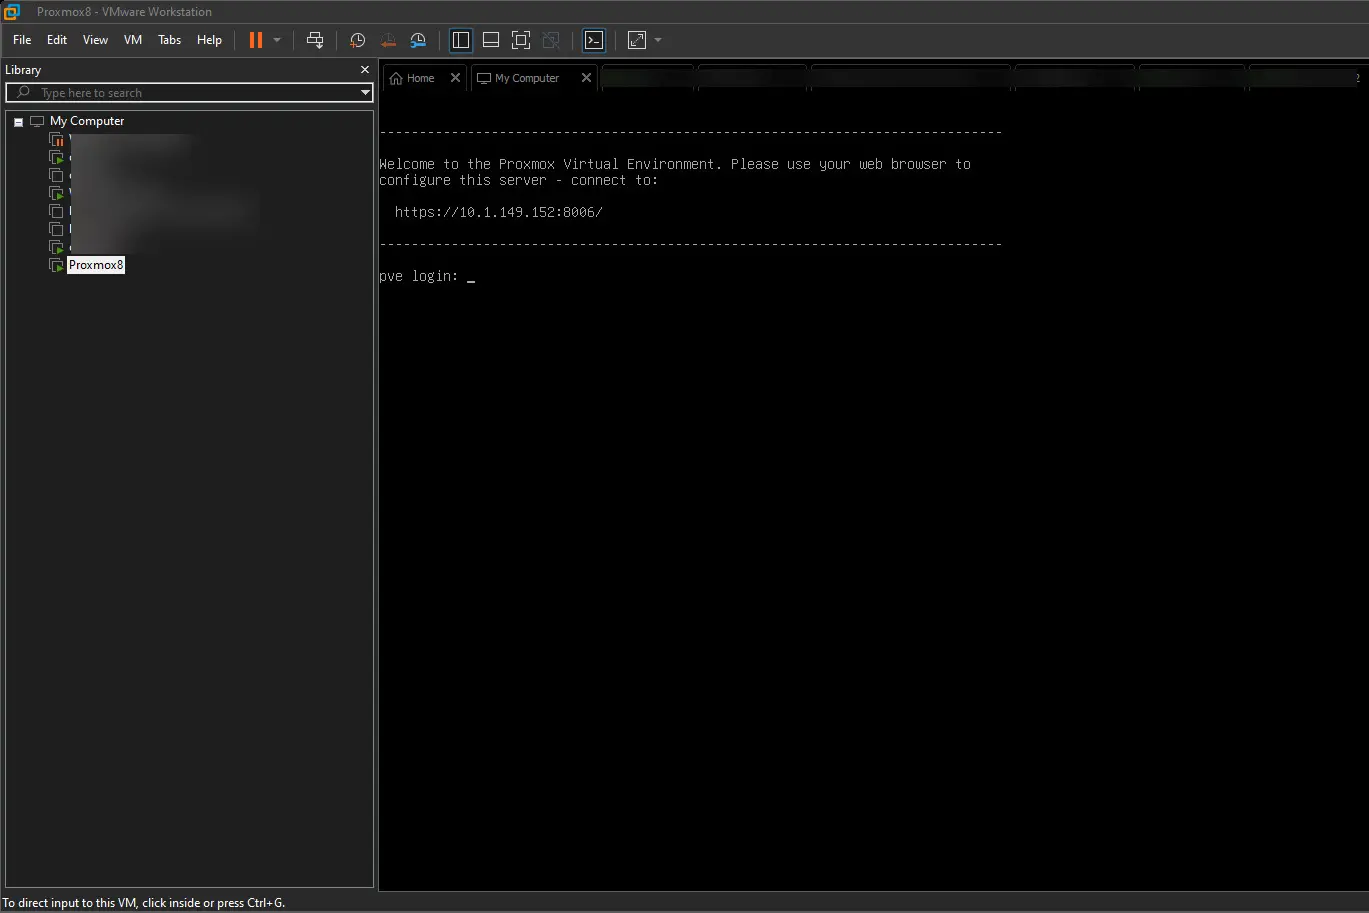
Once the installation process finishes, the VM will automatically reboot, and you should see a screen on the console that looks like the following: It should display the IP address followed by the Proxmox port of 8006.
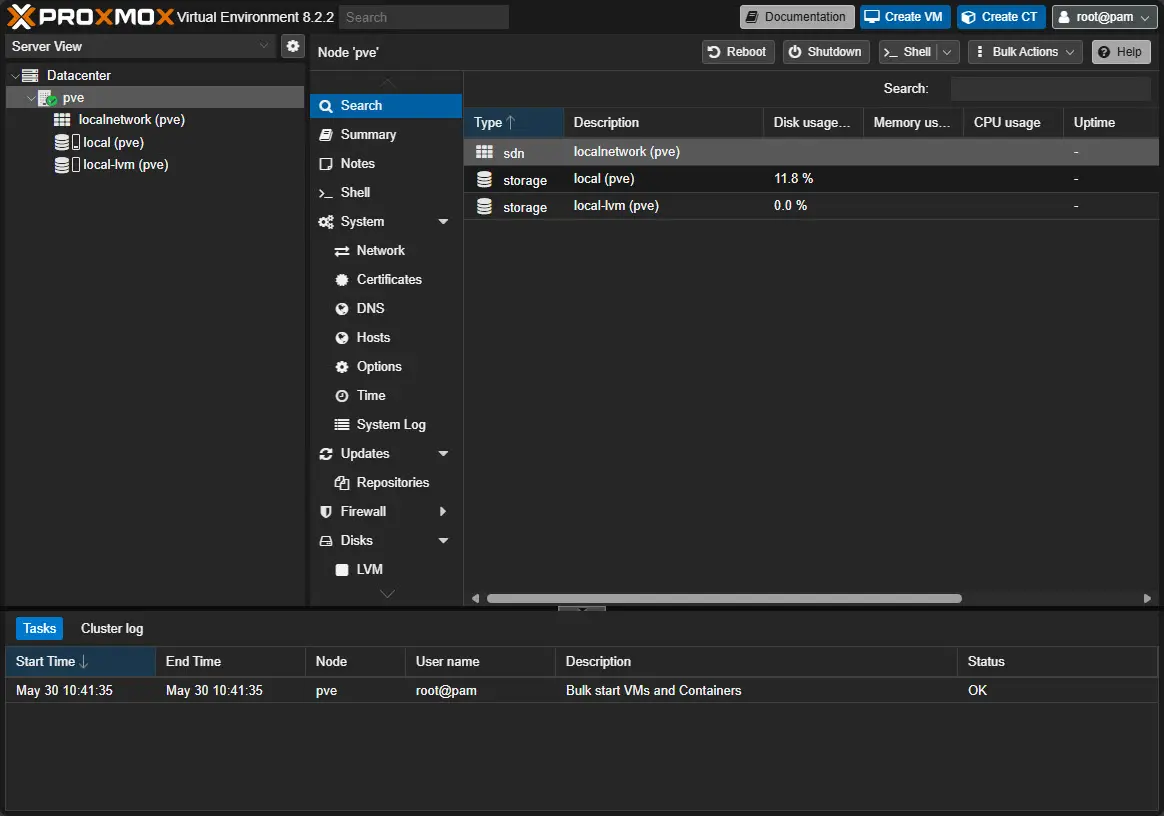
Connect to the Proxmox VE web interface
We can also now connect to the Proxmox VE web interface to administer Proxmox. Below, I have connected to the Proxmox web interface on port 8006.
You can run VMs on the new Proxmox instance nested inside of VMware Workstation.
What to do next
After looking at the guide, you can download the Proxmox ISO and VMware Workstation Pro if you havent’ already to take advantage of the personal license and use this to play around with Proxmox. Both are free now for use.
Why not just install Proxmox bare metal?
You can certainly do that. If you are looking at setting up a proper home lab server that will be on all the time to run home lab services, you will want to do a bare metal install. However, if you have a daily driver mini PC or laptop that you want to use to double as a home lab server, you can install VMware workstation and then install Proxmox as a VM. This is a great way to play around with the solution, learn administration and configuration and then you will be much further ahead before installing on bare metal.
Troubleshooting
Note the following for troubleshooting.
- Proxmox says there is “no support for hardware-accelerated KVM virtualization detected” – You need to enable nested virtualization for your VMware Workstation VM
- You can’t connect to your Proxmox installation – Make sure you have it connected to the right network that is routable. NAT’ing may present challenges with this as well. Consider bridging or using a custom network.
Wrapping up
Installing Proxmox in VMware Workstation is a great way to make use of your daily driver hardware or not have to have dedicated hardware to install Proxmox VE. Now that VMware Workstation Pro is free, it is a great platform for use as a home lab server. Cloud computing has definitely take off in recent years. However, there is still a need for on-premises virtualization solutions like Proxmox. With the VMware by Broadcom debacle over recent months, many are looking at Proxmox as a viable solution.
Google is updating how articles are shown. Don’t miss our leading home lab and tech content, written by humans, by setting Virtualization Howto as a preferred source.
About The Author


Thank you so much for your videos. This is just what I have been looking for. Today is June 5, 2024 and I just found you today. I found you at work but I cannot subscribe until I get home, because I work in a DOD facility and we have YouTube, but we are unable to login due to our STIGS. I have a Dell Precision workstation at home with 28 TB of storage, 256 GB of RAM, Dual Intel Zeon 16 cores, and Dual NICS. (It didn’t come with that I modified the heck out of it to be a server). As sooas I get home I am installing PROX-MOX. I had ESXi 7. Then I heard the news about Vmware. So I was looking for alternatives. What are your thoughts about Azure?
Gerald,
Thank you so much for the comment and glad you found the content! It sounds like you are a fellow geek and that is great 🙂 Proxmox is definitely a good alternative to VMware for home labbing. There are a lot of great options out there. If you are looking for a more enterprisey feel, then there is Nutanix Community Edition, and also XCP-ng on the Xen side of things. There are a lot of great solutions in Azure. However, cloud gets expensive really quickly for just running virtual machines 24×7. If you are wanting to run services for personal use, it is WAY cheaper to self-host. But let me know if that is not the context of the question. Thanks again Gerald, and reach out any time.
Brandon
Brandon,
Thank you so much for your comprehensive guides!
A small question. Do you think there is a need to install vmware tools for linux on an initially created VM with Proxmox? The VMware Workstation requests this operation. Will this affect Proxmox’s performance?
Brandon,
Thank you so much for your comprehensive guides!
A small question. Do you think there is a need to install vmware tools for linux on an initially created VM with Proxmox? The VMware Workstation requests this operation. Will this affect Proxmox’s performance?
Brandon,
Thank you so much for your comprehensive guides!
A small question. Do you think there is a need to install vmware tools for linux on an initially created VM with Proxmox? The VMware Workstation requests this operation. Will this affect Proxmox’s performance?