Setting up a VMware ESXi server is a process that requires a good understanding of the technologies and best practices. I have put together a list of installation and setup steps that I run through when setting up new ESXi servers in production and in the home lab.
When done correctly, the installation and setup set the stage for a secure, efficient, and high-performing virtualization environment. In this blog post, I’ll guide you through 15 crucial VMware ESXi installation and setup steps that I recommend when setting up a VMware ESXi server. So let’s dive right in!
Table of contents
- 1. Understanding and Configuring the Management Interface
- 2. The Direct Console User Interface (DCUI)
- 3. Navigating Network Configurations
- 4. Channeling Management Traffic with VLANs
- 5. Static IP Address: Why and How to Set it Up
- 6. Getting DNS Configurations Right
- 7. Applying Changes: Restarting the Management Network
- 8. Entering the ESXi Host Client
- 9. Taking Control with SSH on Your ESXi Host
- 10. Maintaining Optimal Performance: Patching the VMware ESXi Host
- 11. Keeping Time with NTP Server Configuration in VMware ESXi
- 12. Channeling ESXi Logs to a Syslog Server
- 13. Exploring iSCSI Software Adapters
- 14. Joining the Ranks: Adding a Standalone ESXi Host to a vCenter Server
- 15. Setting Up VMkernel Adapters on Your ESXi Hosts
- 16. Licensing Your ESXi Host
- VMware ESXi installation and setup FAQs
- Video Walkthrough
- Wrapping Up
- Other posts you may enjoy
1. Understanding and Configuring the Management Interface
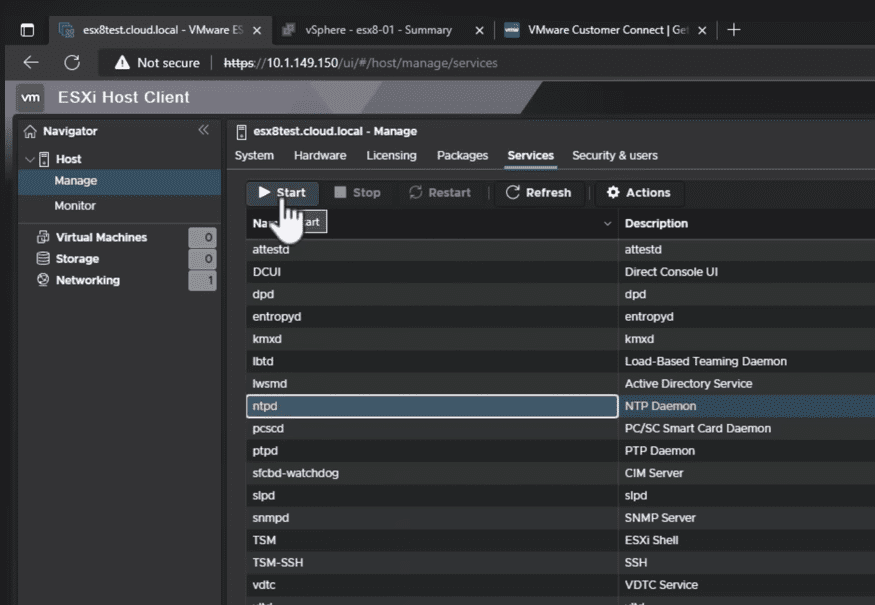
The management interface in ESXi is an essential component that provides a user interface for host management tasks. You can access it directly from the host client or remotely via a web browser. To configure the management interface, navigate to “Manage” in the ESXi host client, then select “Services.” You can start, stop, or restart the management agent services here.
2. The Direct Console User Interface (DCUI)
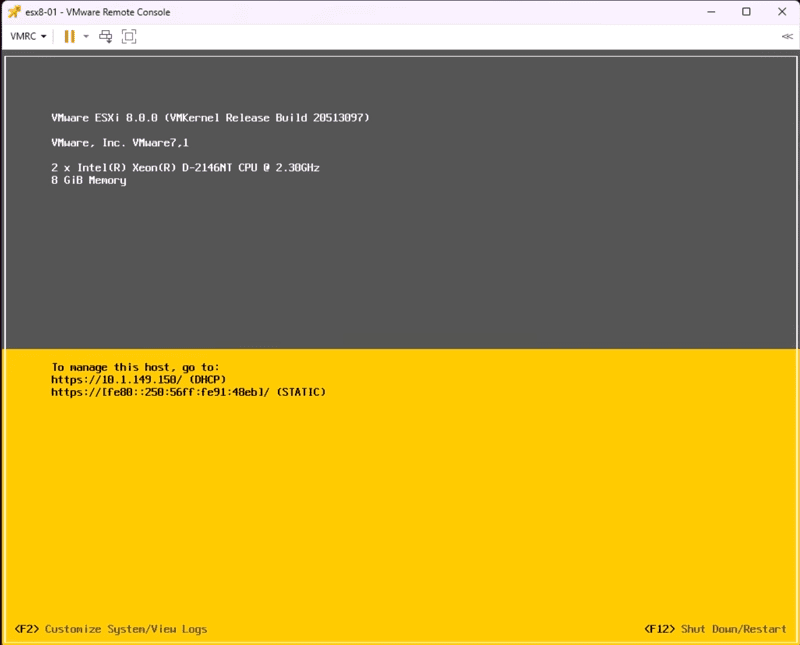
The DCUI is a text-based interface that allows direct interaction with the ESXi server from the console of the host machine. You can configure system settings, network options, troubleshooting, and more here. To access the DCUI, log into your server console and press F2 to customize the system settings.
Below is a look at the familiar DCUI interface.
3. Navigating Network Configurations
Proper network configurations are critical for the smooth operation of your ESXi host. Here, we’ll look at three important aspects.
- Management Network Configuration: Navigate to Networking > TCP/IP configuration to configure the management network settings.
- Network Adapter Configuration: This can be done under the “Physical NICs” tab in the “Networking” section of the ESXi host client.
- Adding an Additional Network Adapter for the Management Interface: Navigate to Networking > Network adapters > Add to add an additional network adapter.
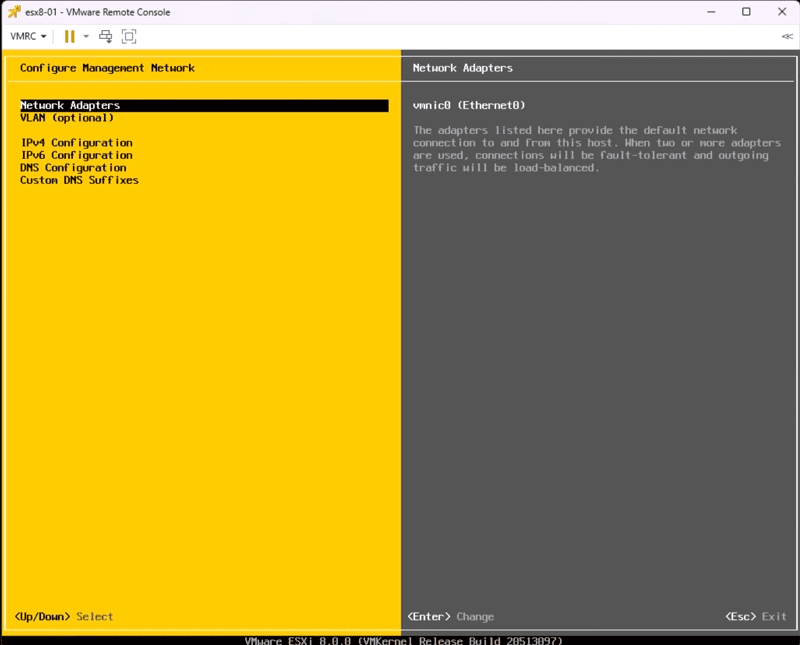
Below, we have chosen to configure the management network in the DCUI. You have several choices here:
- Netwokr adapters
- VLAN
- IPv4 Configuration
- IPv6 Configuration
- DNS Configuration
- Custom DNS Suffixes
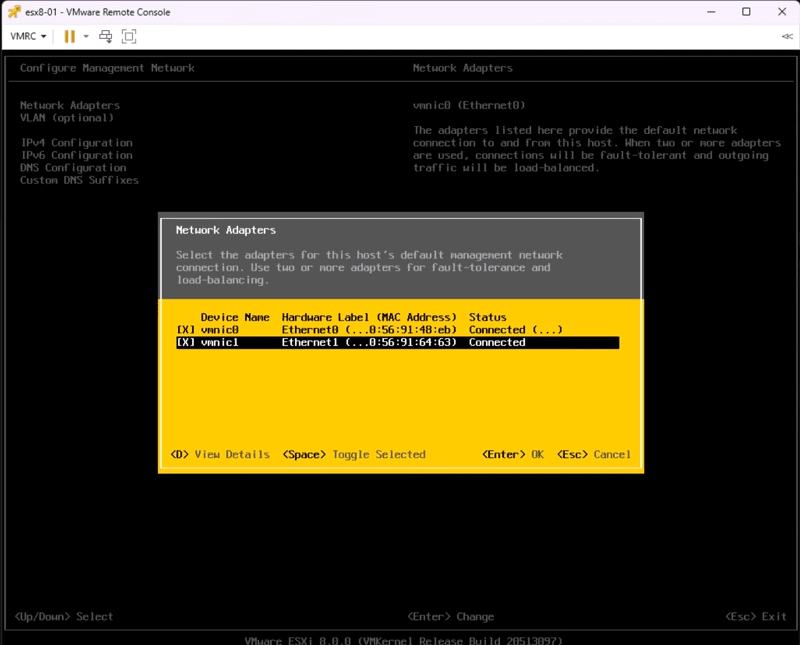
You can select which network adapters you want to service the management network.

Here I have selected both adapters for redundancy.
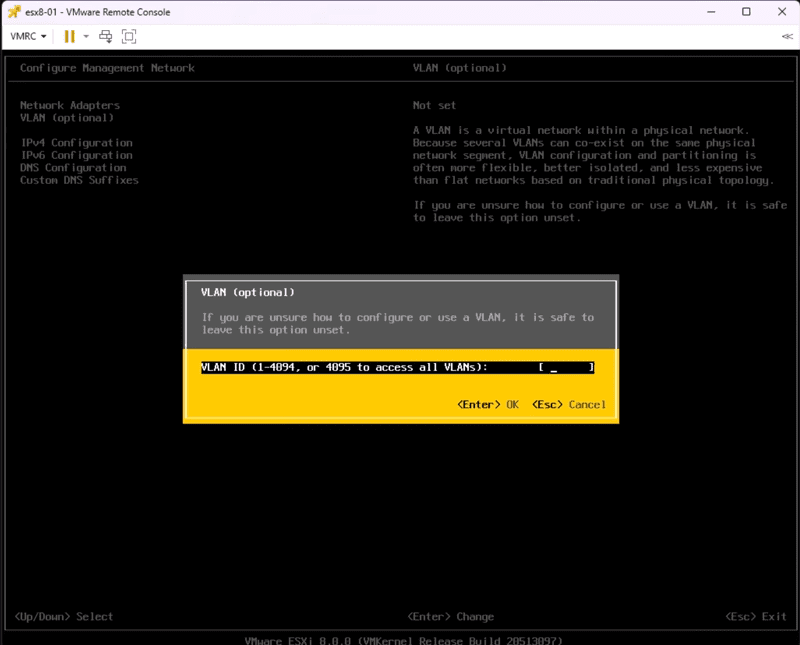
4. Channeling Management Traffic with VLANs
You can improve security and reduce network congestion by segregating your management traffic into a specific VLAN. This can be done under Networking > Port groups in the ESXi host client. Remember to configure your physical switch to tag this VLAN ID to the corresponding switch port.
You can also configure a management VLAN if you have one configured for your management traffic (best practice). You will need to make sure your network switches are properly configured with your management VLAN ID.
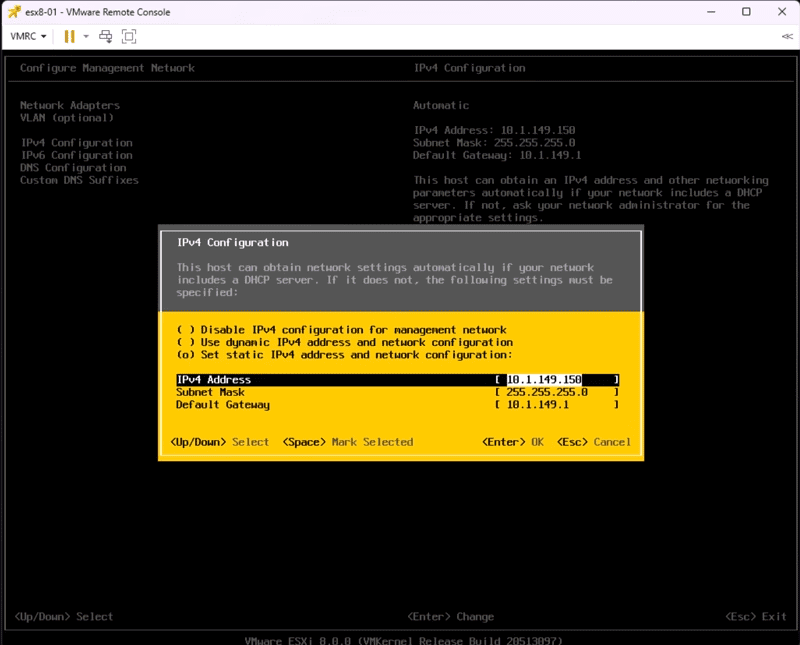
5. Static IP Address: Why and How to Set it Up
Static IP addresses facilitate consistent access to the ESXi host. This can be set in the DCUI under Configure Management Network > IP Configuration. Make sure to exit and restart for changes to take effect.
6. Getting DNS Configurations Right
Correct DNS configurations ensure your ESXi server can communicate with other network devices by name.
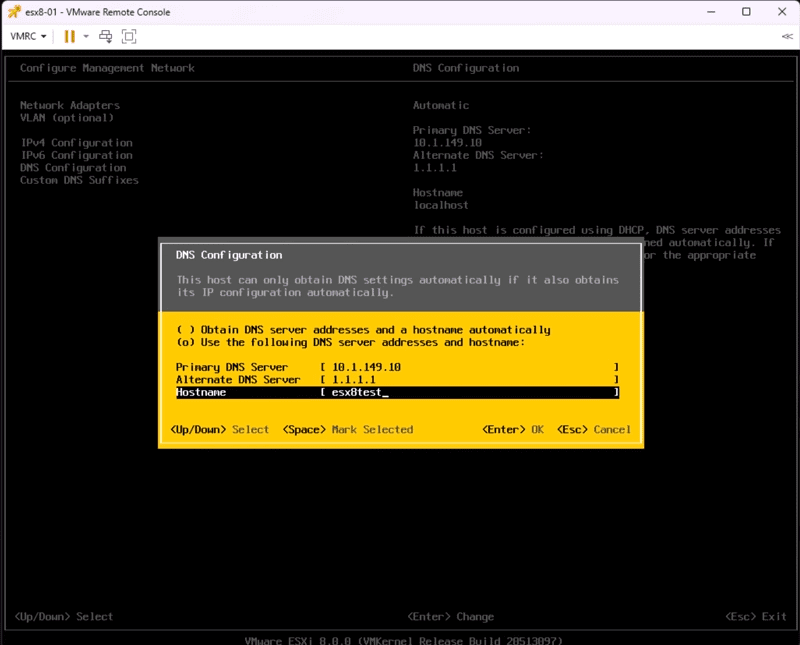
- DNS Configuration and DNS Servers: You can configure this under Configure Management Network > DNS Configuration in the DCUI.
- Setting the Hostname: This is the unique name for your ESXi server and can be configured under Configure Management Network > DNS Configuration > Hostname.
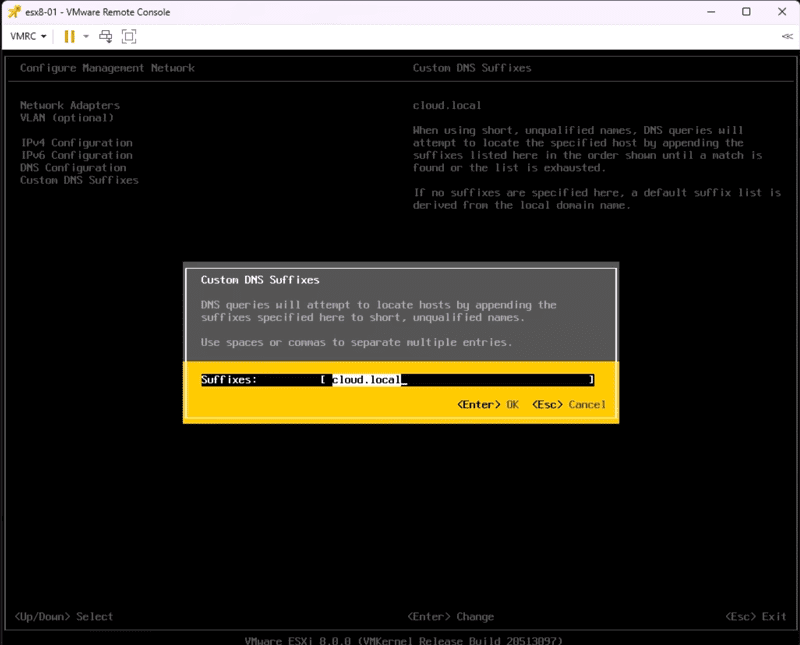
- Implementing DNS Suffixes for DNS Search Suffixes: You can set these in the same menu by navigating to Configure Management Network > DNS Configuration > DNS Suffixes.
Adding a DNS suffix for local DNS queries.
7. Applying Changes: Restarting the Management Network
Whenever you make changes to your management network configuration, it’s crucial to restart the management network to apply the changes. This can be done from the DCUI by selecting the “Restart Management Network” option.
Restarting the management network applies your changes.

8. Entering the ESXi Host Client
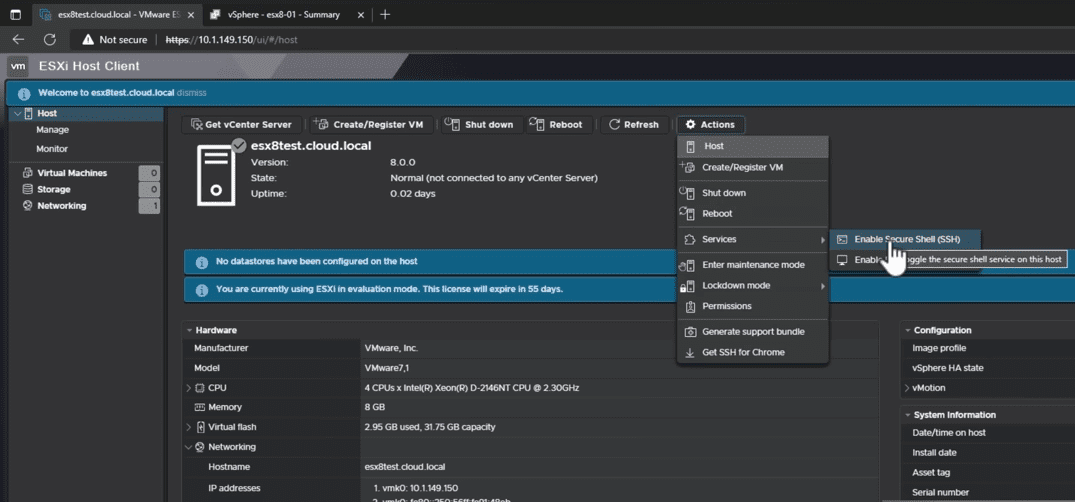
The ESXi host client is a web interface that allows you to manage your ESXi host. You can access the host client by entering the IP address of your ESXi host into a web browser. The new host client with ESXi 8.0 has had an enormous face lift and looks great with many features and capabilities.
9. Taking Control with SSH on Your ESXi Host
Secure Shell (SSH) enables secure remote management of your ESXi host.
- Enabling SSH on Your ESXi Host: This can be done from the ESXi host client under Host > Actions > Services > Enable Secure Shell (SSH).
- Testing SSH Connectivity to the ESXi Host: This can be done from a remote machine using an SSH client and the IP address of your ESXi host.
10. Maintaining Optimal Performance: Patching the VMware ESXi Host
Regularly patching your ESXi host ensures that it has the latest security updates and bug fixes. This is done using the esxcli software commands in SSH.
- Understanding Software Profiles and How They’re Used: Software profiles contain the image level (or version) and the list of VIBs that make up your ESXi installation.
- Getting the Software Profile: This can be retrieved using the “esxcli software profile get” command in SSH.
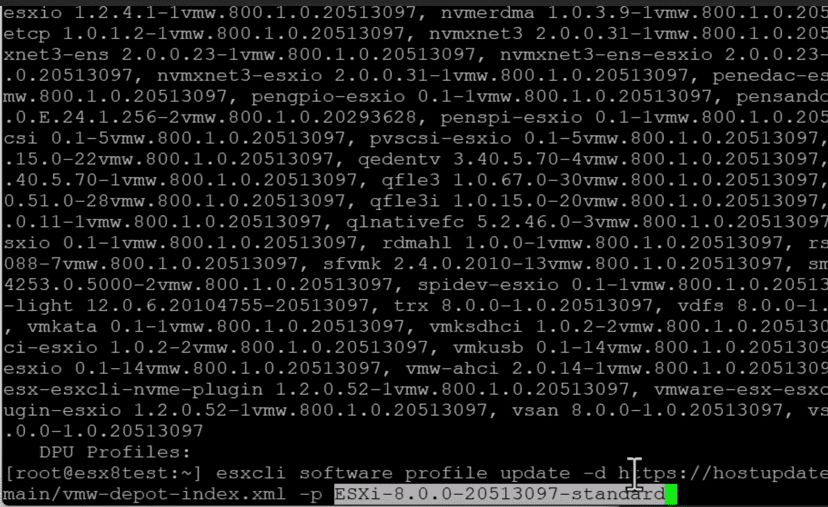
- Updating the ESXi Server: Use the “esxcli software profile update” command in SSH to update the ESXi server.
esxcli software profile get
esxcli network firewall ruleset set -e true -r httpClient
esxcli software profile update -d https://hostupdate.vmware.com/software/VUM/PRODUCTION/main/vmw-depot-index.xml -p <profile name and number>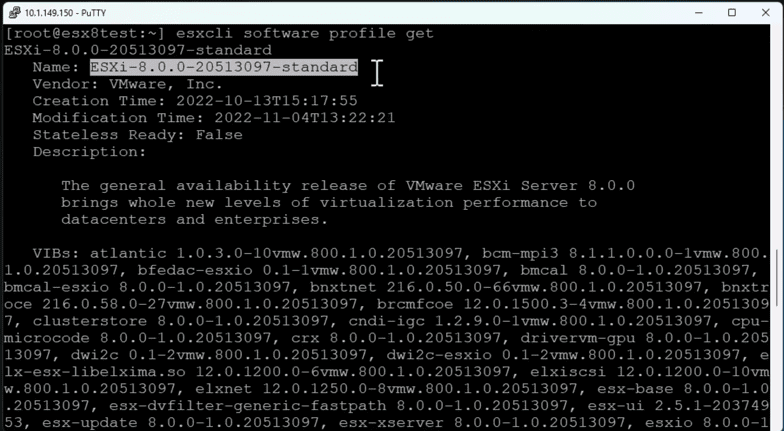
11. Keeping Time with NTP Server Configuration in VMware ESXi
Network Time Protocol (NTP) helps to synchronize the server’s clock with an external source.
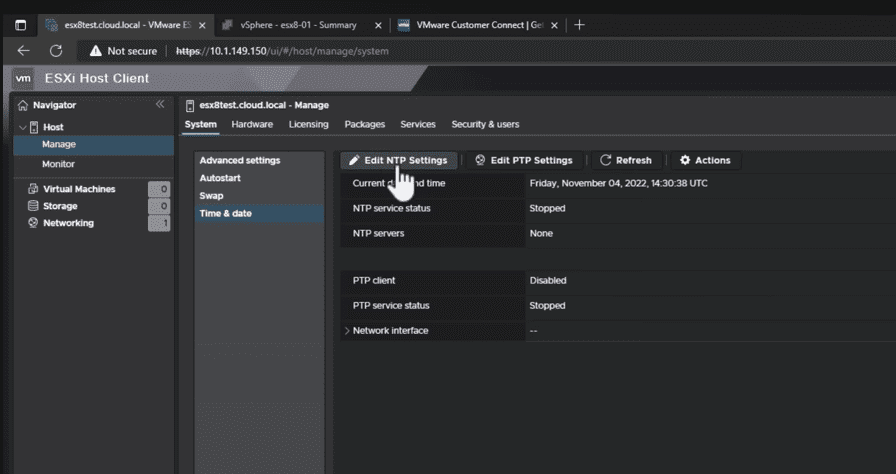
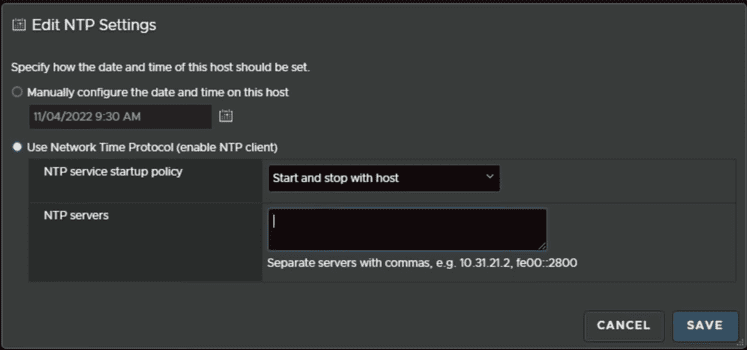
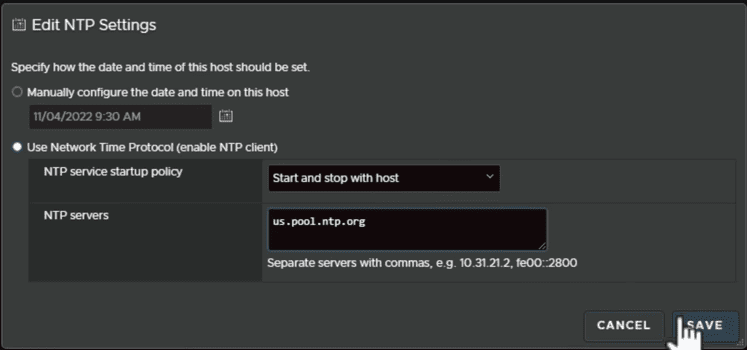
- Setting the NTP Server Configuration in VMware ESXi: This can be done in the ESXi host client under Host > Manage > Time & date > Edit NTP settings.
- Starting the NTP Service: Start the NTP service under Manage > Services > ntpd in the ESXi host client.
12. Channeling ESXi Logs to a Syslog Server
Having a centralized logging system like a syslog server can simplify log management.
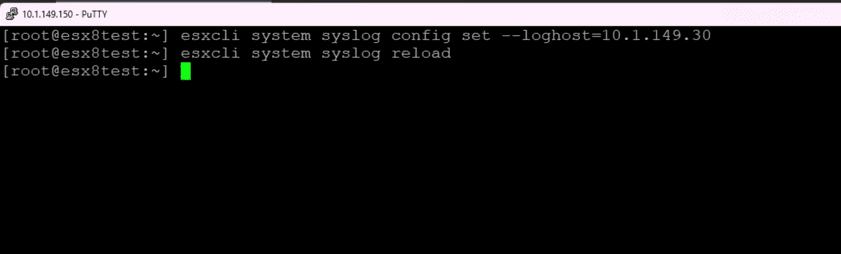
- Pointing Your ESXi Host to a Syslog Server: Navigate to Manage > System > Advanced System Settings in the ESXi host client, and modify the Syslog.global.logHost setting with the IP address of your syslog server.
- Restarting the Syslog Service: This can be done under Manage > Services > Syslog in the ESXi host client.
13. Exploring iSCSI Software Adapters
Software iSCSI adapters enable your host to connect to an iSCSI storage device.
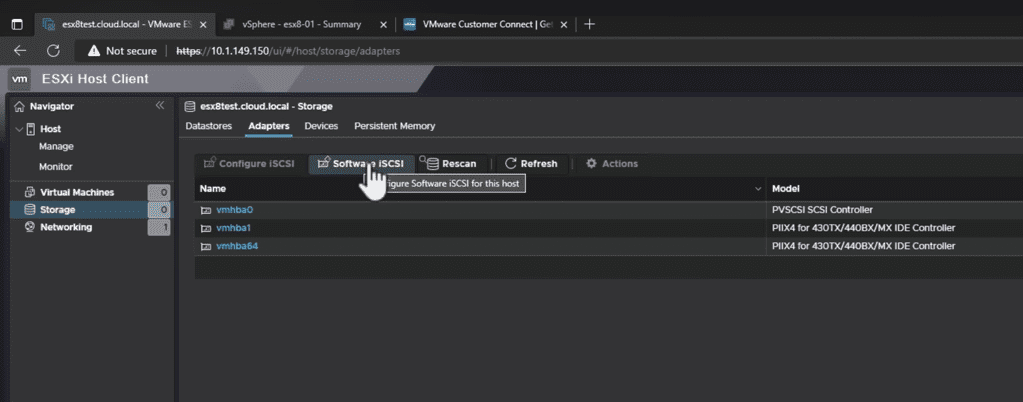
- Adding the Software iSCSI Adapter: This can be done under Storage > Storage Adapters > Add software iSCSI adapter in the ESXi host client.
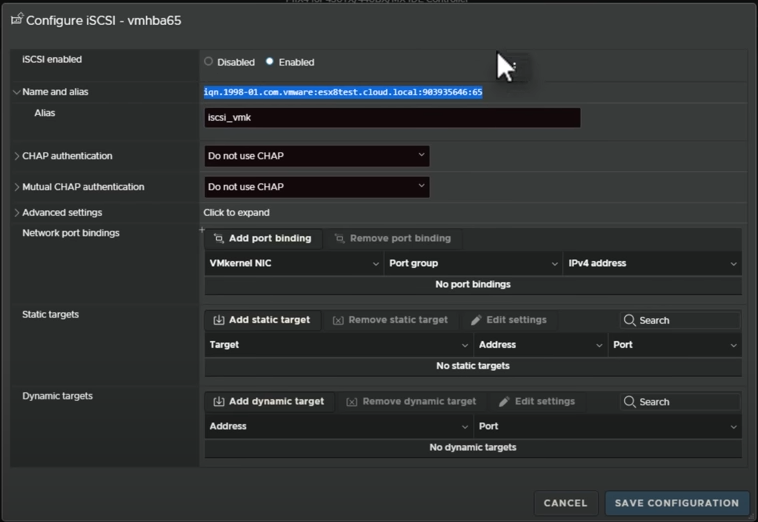
- Configuring iSCSI Software Adapter: Navigate to Storage > Storage Adapters, select your iSCSI adapter, and click on Targets to add your iSCSI target server.
After you add the iSCSI Software adapter, you will see the IQN that is generated for the iSCSI initiator.
14. Joining the Ranks: Adding a Standalone ESXi Host to a vCenter Server
vCenter Server allows centralized management of multiple ESXi hosts.
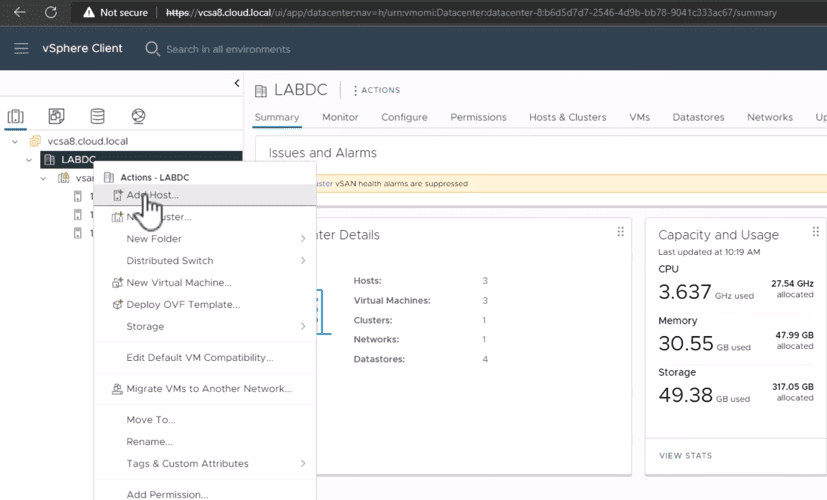
- Starting the Add Host Wizard in vSphere Client to Add to vCenter Server: In the vSphere Client, right-click on your datacenter or cluster and select Add Host.
- Understanding the Behavior of the Host After First Adding to vCenter Server: After adding, the host’s resources become part of the datacenter or cluster and can be managed centrally.
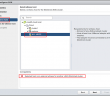
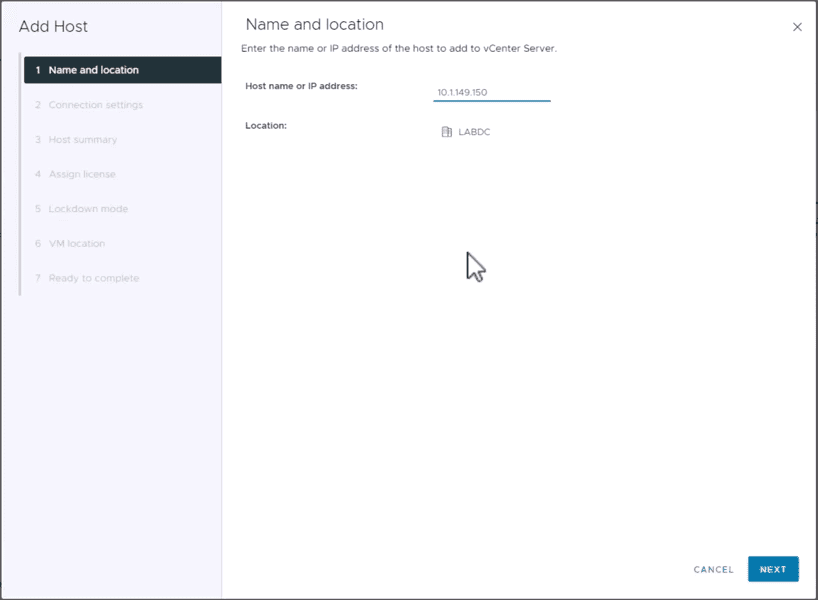
The Add Host wizard will launch. Enter the host name or IP address.
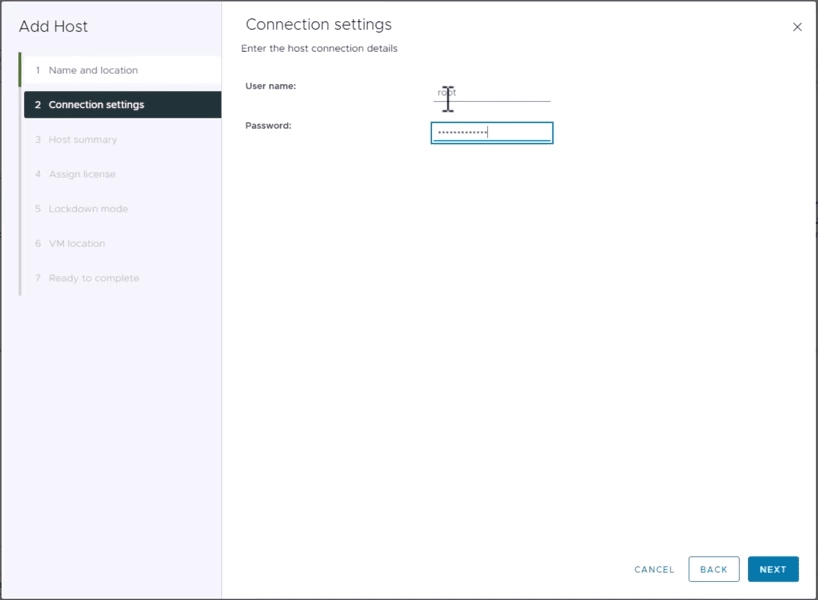
Enter the username and password to connect to your ESXi host. This is generally your root user.
15. Setting Up VMkernel Adapters on Your ESXi Hosts
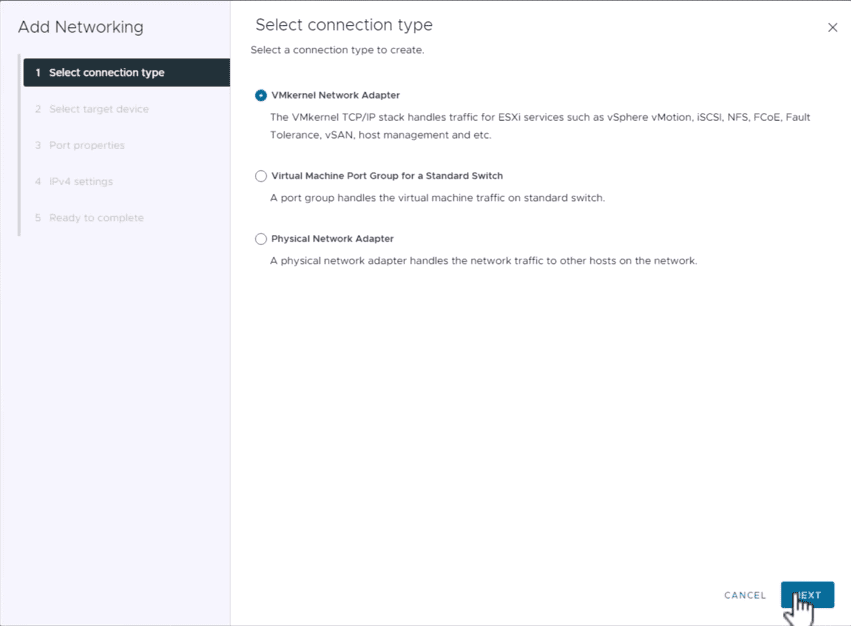
VMkernel adapters are key to networking functionality in ESXi and are used with specialized networking features and capabilities, such as vMotion.
- Beginning the Process to Add VMkernel Adapters and IP Addresses: Navigate to Networking > VMkernel NICs > Add VMkernel NIC in the ESXi host client.
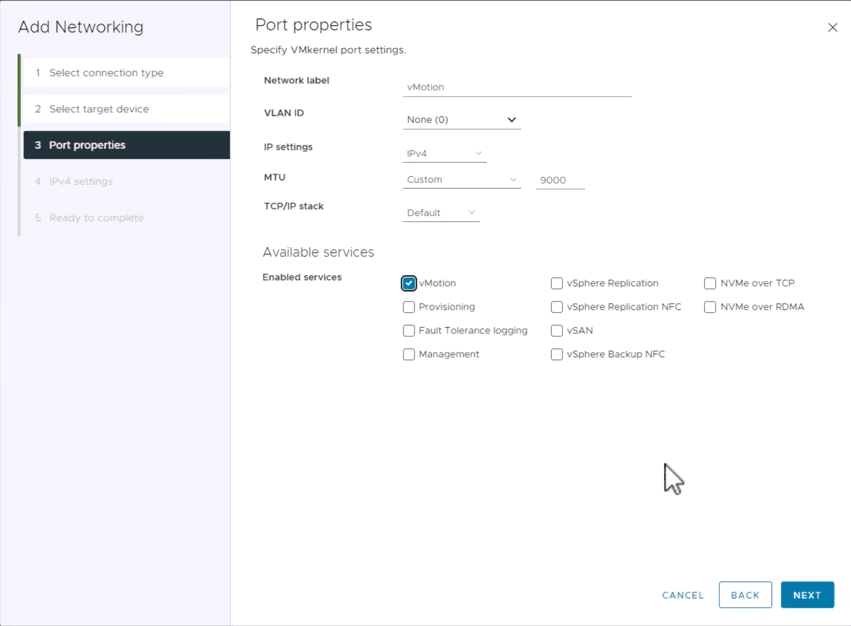
- Configuring the Port Properties: In the Add VMkernel NIC dialog box, configure the properties as per your requirements.
Configure the port properties. Enable the services you want to assign in the port properties.
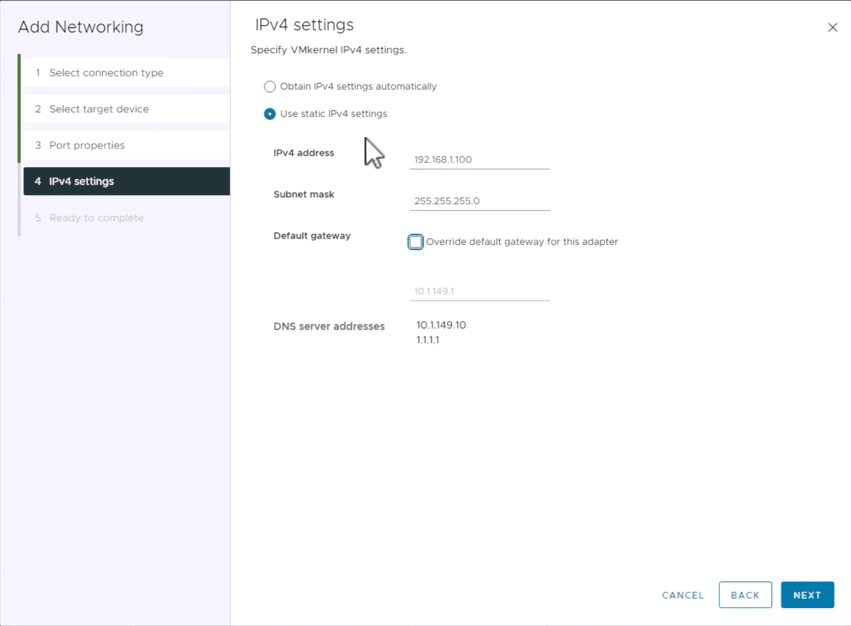
Assign the IPv4 settings for VMkernel network configuration.
16. Licensing Your ESXi Host
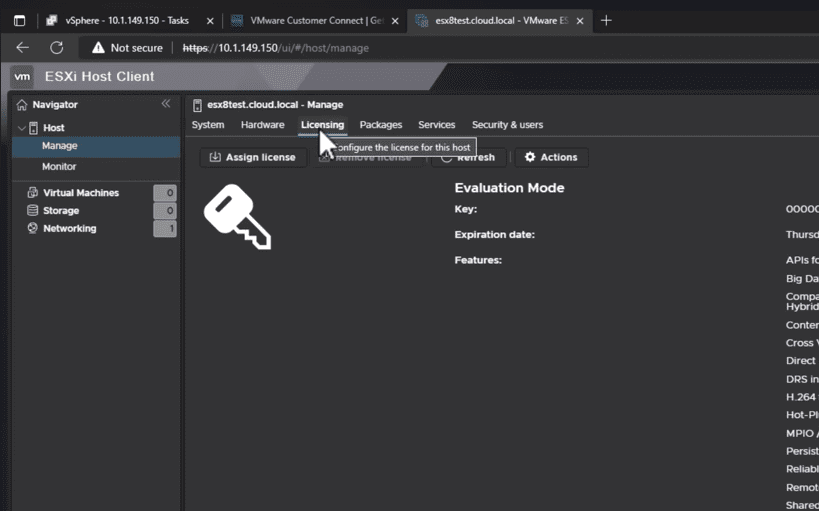
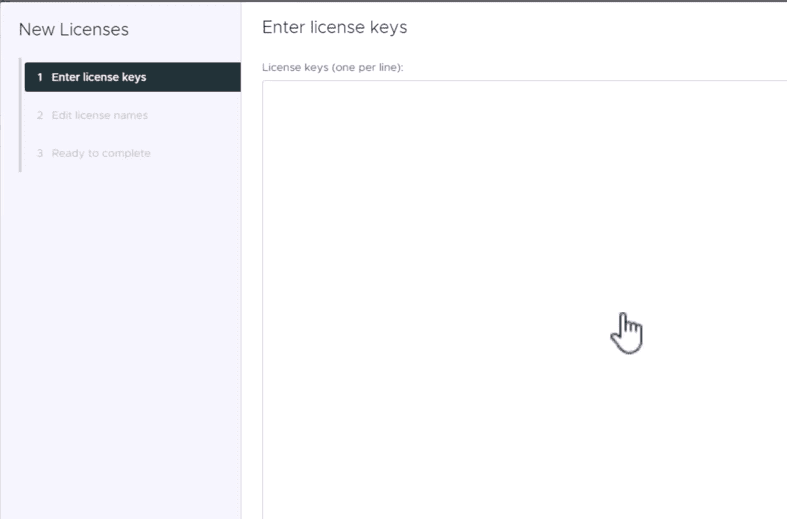
Finally, we’ll go through the process of adding a license to your ESXi host.
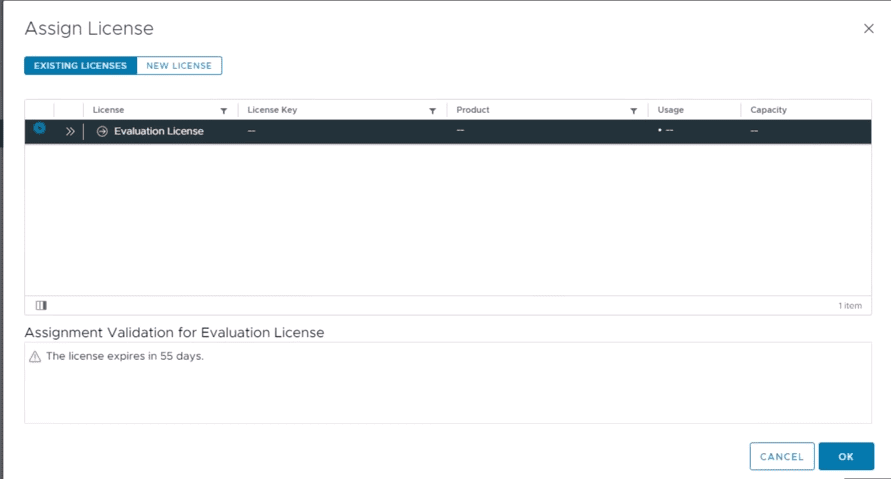
- Adding the License in the Host Client: This can be done in the ESXi host client under Manage > Licensing > Assign license.
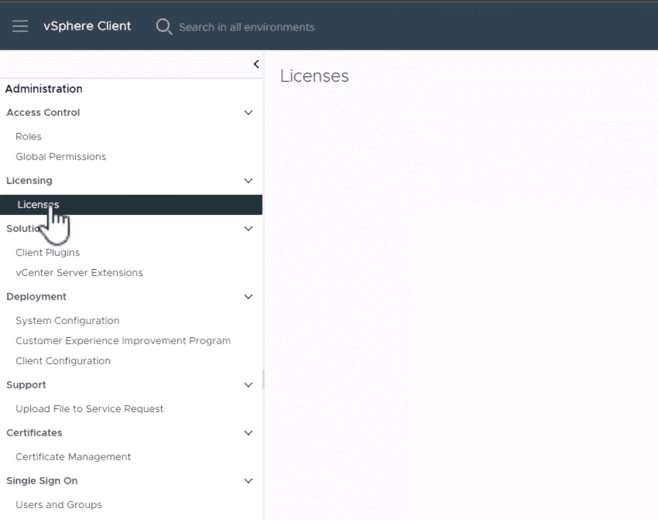
- Adding a License in vCenter Server: In the vSphere Client, navigate to Hosts and Clusters, select your host, then Manage > Settings > Licensing > Edit.
Below is the vSphere Client connected to vCenter Server.
VMware ESXi installation and setup FAQs
- What are the system requirements for installing VMware ESXi?
- VMware ESXi requires a 64-bit x86 processor, 4 GB minimum RAM, Gigabit or faster network adapter, and sufficient storage for the ESXi image and VMs.”
- Can I run VMware ESXi on a home computer for practice and learning purposes?
- Yes, you can use VMware ESXi on a home computer, given that it meets the hardware requirements, for practice and learning purposes.
- How can I secure my VMware ESXi host post-installation?
- Securing your VMware ESXi host involves setting up a firewall, disabling unnecessary services, and setting up role-based access control.
- Does VMware ESXi support automated installation and setup?
- Yes, VMware ESXi supports automated installation and setup using scripts and Auto Deploy, a component of the vSphere suite.
- What is the difference between vSphere and ESXi?
- While ESXi is the virtualization platform, vSphere is a software suite that includes ESXi and other tools like vCenter for managing multiple ESXi hosts.
Video Walkthrough
If you would like to see a video walkthrough of this process, see the following video:
Wrapping Up
Proper VMware ESXi installation and setup are crucial for a stable and effective virtualization environment. The steps we’ve covered in this blog post will help you establish a robust and secure configuration, ensuring you’re well on your way to achieving optimal server performance. Always remember that the key to successful setup and maintenance of your ESXi host lies in understanding each component and its role within your overall server infrastructure. Happy virtualizing!
Other posts you may enjoy
Google is updating how articles are shown. Don’t miss our leading home lab and tech content, written by humans, by setting Virtualization Howto as a preferred source.
About The Author