pfSense has a lot of great features that allow you to have an enterprise firewall in your home lab or even production environment for free. You can setup VPN connections using a variety of VPN solutions. One of these is Wireguard. Let’s look at pfSense Wireguard setup and see how this is configured.
Table of contents
What is pfSense?
It’s an open-source firewall solution you can download for free that is built on top of FreeBSD. It has many features, including VPN and can be installed on most hardware platforms. Using pfSense you can also have an endpoint that serves as a DNS server and allows you to do things like DNS query forwarding, DNS server override for DNS servers, and more with your DNS server settings, like enable forwarding mode.
Learn more about pfSense here: pfSense® – World’s Most Trusted Open Source Firewall.
pfSense open source firewall allows you to add a new gateway for your Wireguard server so you can have a security and VPN solution.
What is Wireguard
Wireguard has gained a lot of momentum in VPN solutions since it is an extremely lightweight and secure VPN protocol that also performs really well. These two things appeal to most when looking for a VPN solution in the home lab or enterprise.

Wireguard is fast, secure and getting to be more common among VPN solutions today that allows you to add a VPN gateway and VPN interface in combination with your firewall rule configuration on your pfSense firewall.
Learn more about Wireguard here: WireGuard: fast, modern, secure VPN tunnel.
pfSense and WireGuard together
When you combine the two, they provide a router, firewall and VPN solution all rolled into one and without any cost. Using pfSense with Wireguard, you can built really fast VPN tunnels that work well for your users.
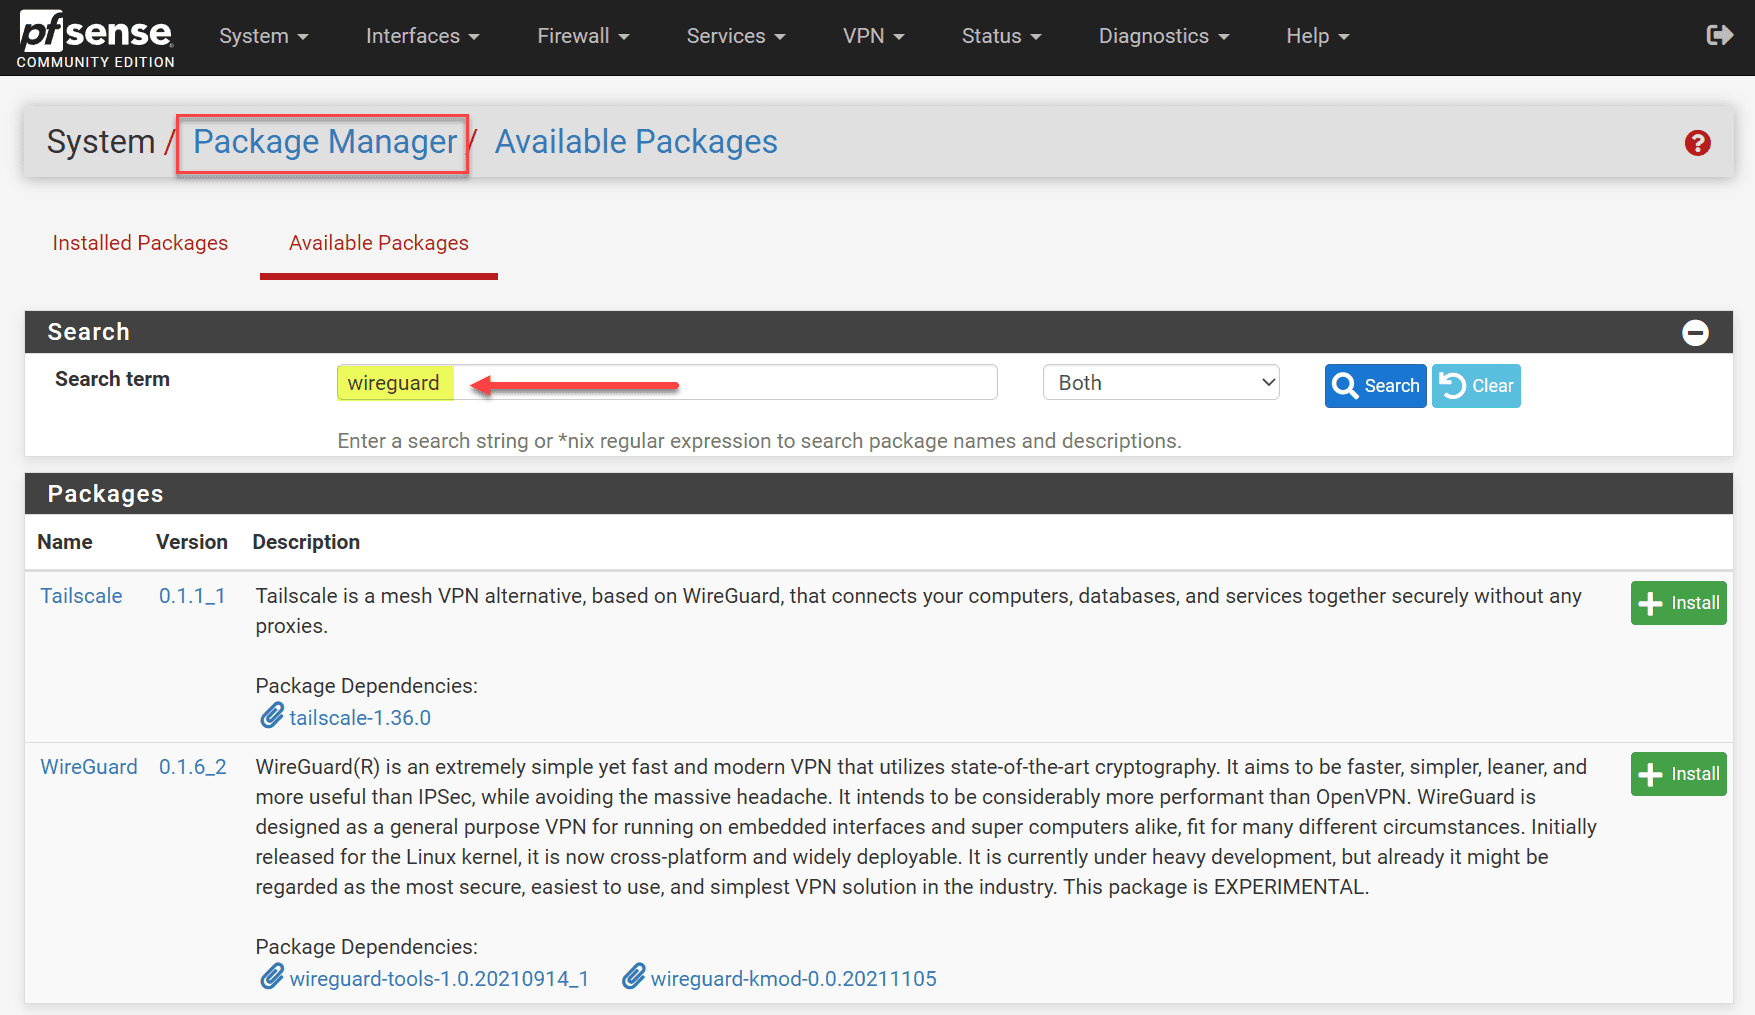
Installing the WireGuard Package in pfSense
Let’s see how you can install WireGuard in pfSense as this is the first step. We need to go to the pfSense Package Manager and search for “wireguard.” This will display the available packages built on top of WireGuard.
Click install next to the package you want to install. Make sure to check the ‘Enable WireGuard’ box after installation.
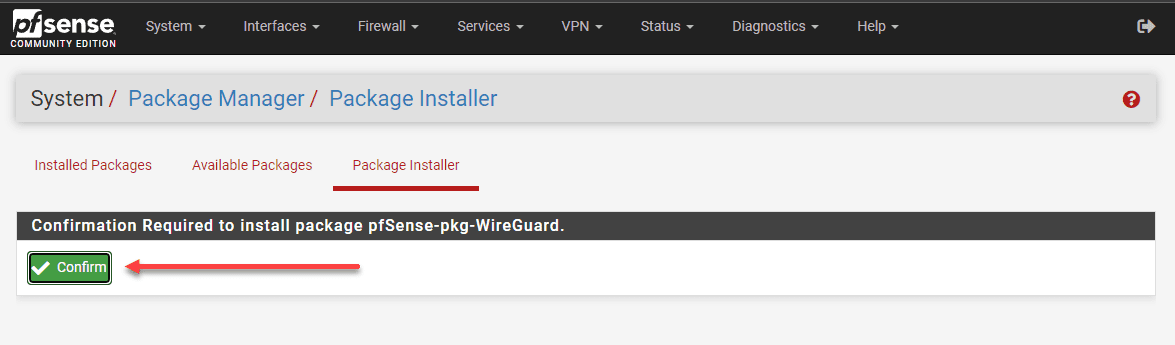
Next, you will need to confirm the installation of the package on your pfSense instance.
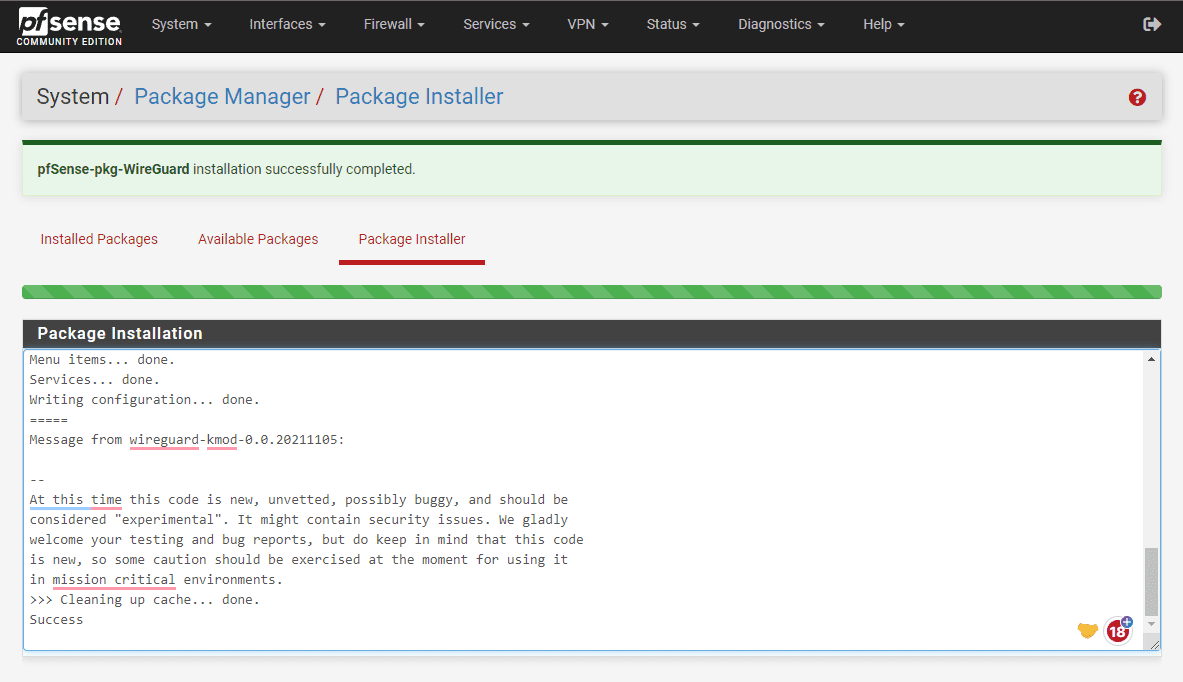
You will see the package installer status.
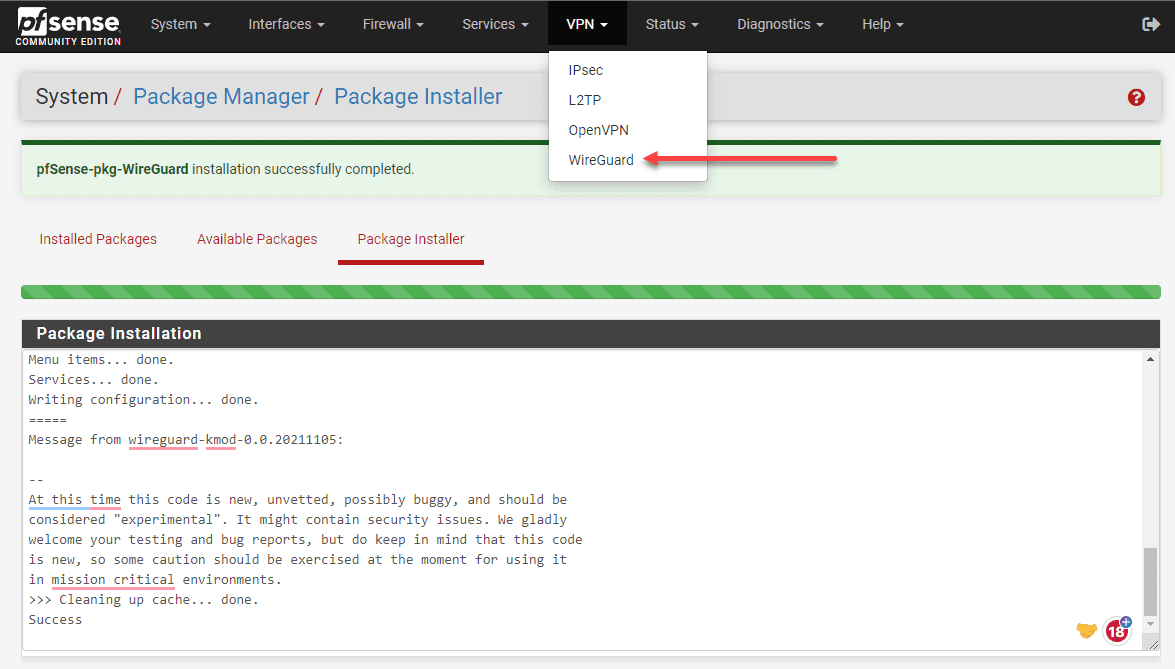
Now, you will see the Wireguard option listed under the VPN menu.
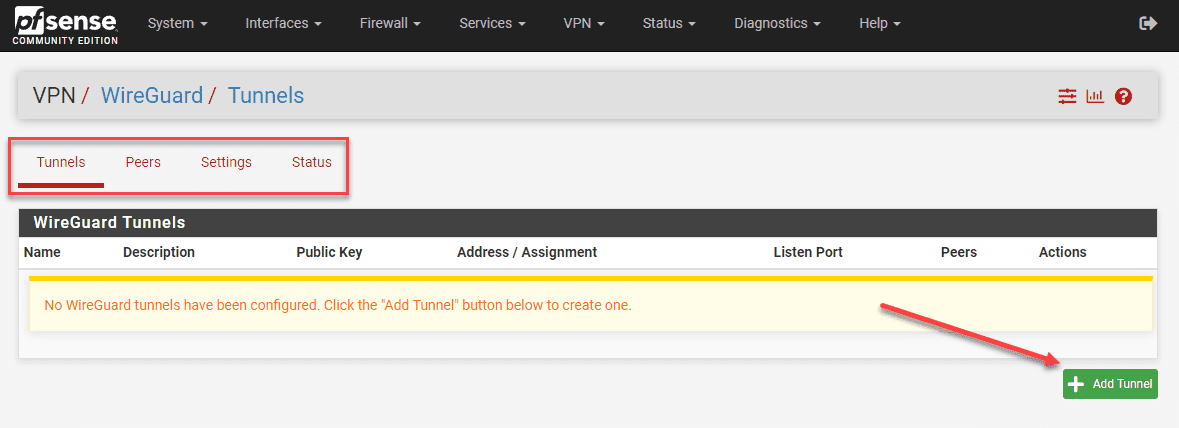
Creating the WireGuard Tunnel
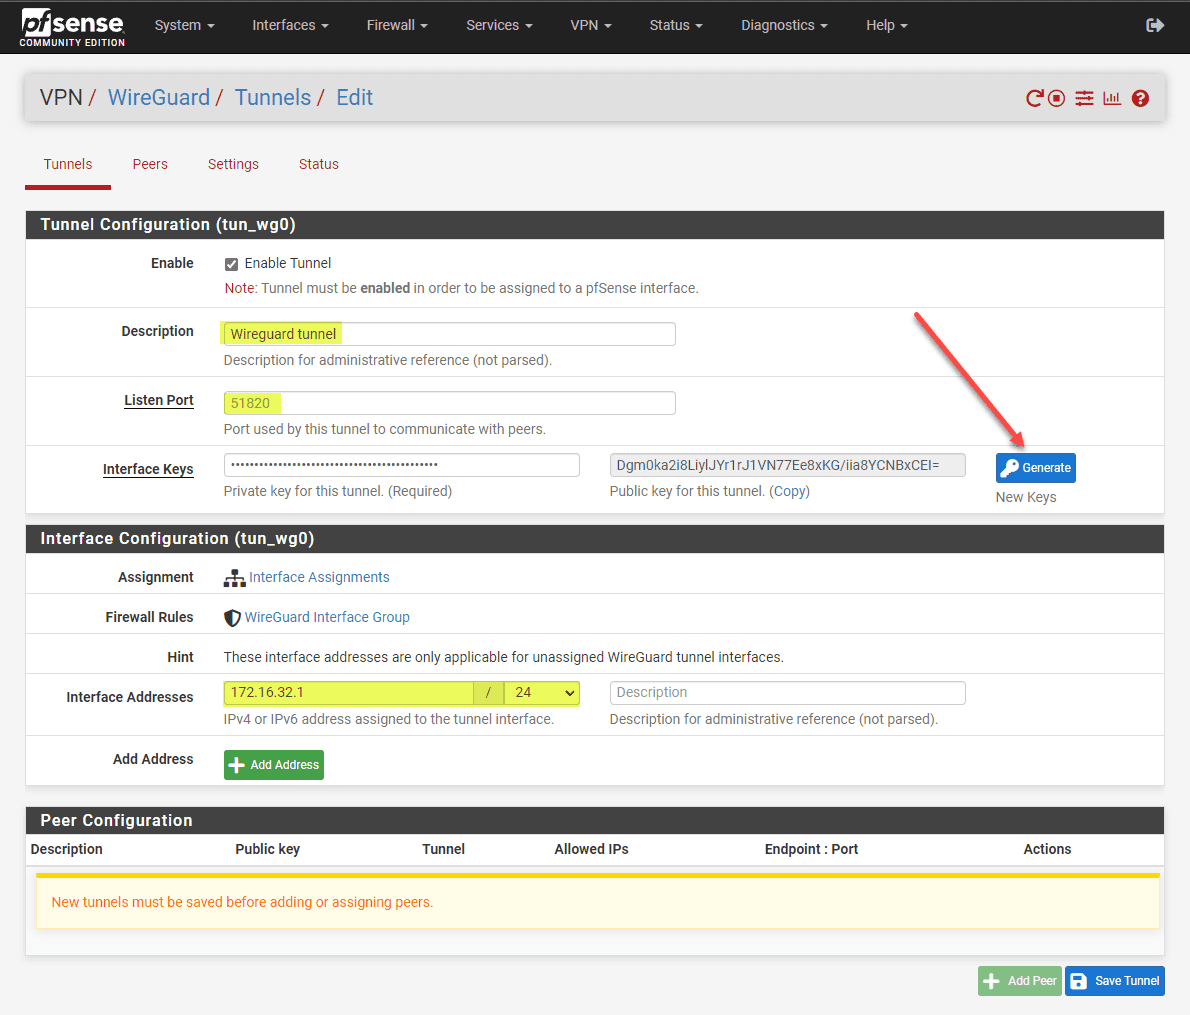
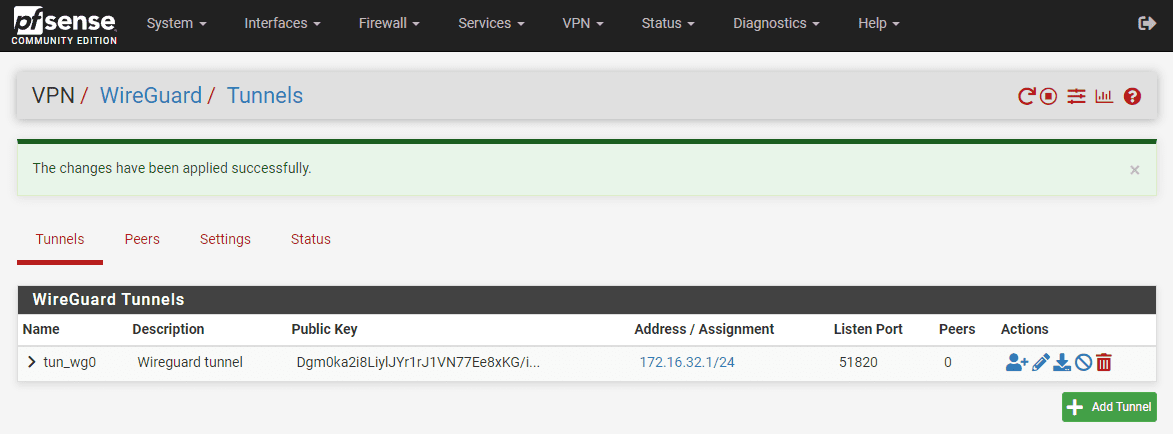
Let’s create the WireGuard tunnel for your VPN. Under WireGuard -> Tunnels, you will create your tunnel configuration. This will have as part of the config, the private key, listen port, and interface addresses. Check the tunnel settings and click save.
Below, we are clicking the Add Tunnel button.
Here, you will configure a listen port, generate the interface keys, and assign an interface address. You will also generate the keypair that will be used for creating connections securely. Then just click the Save Tunnel button.
Configuring the WireGuard Interface
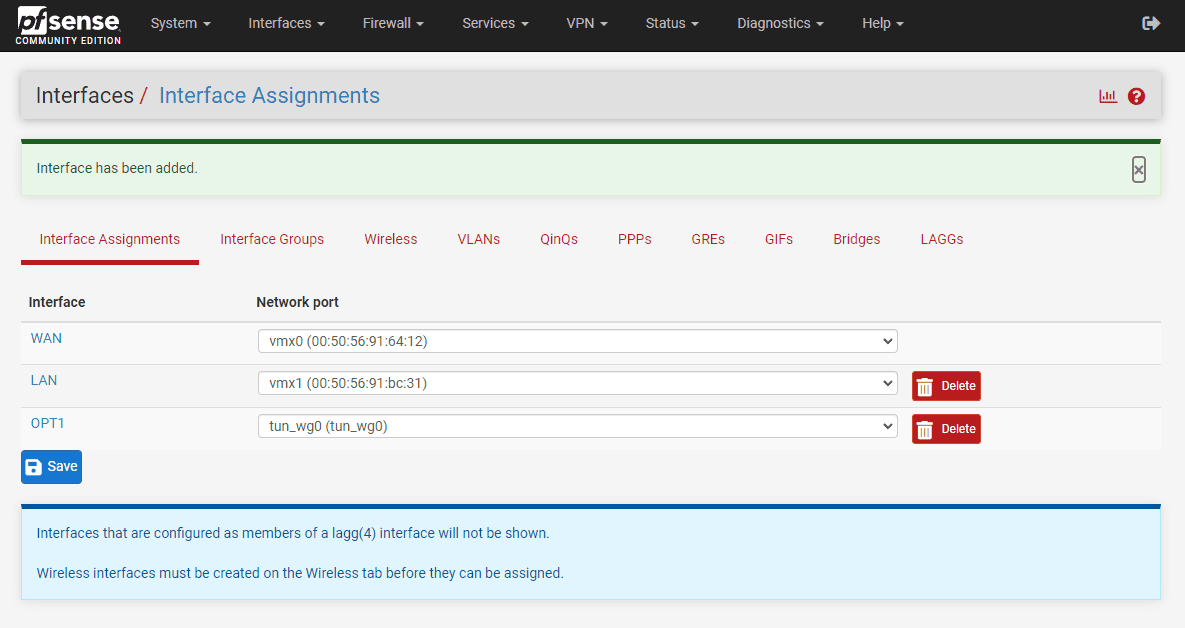
In the Interface Assignment tab you will assign the Wireguard interface. After adding the tunnel, you will see the new OPT interface, which may be numbered differently depending on your existing interfaces.
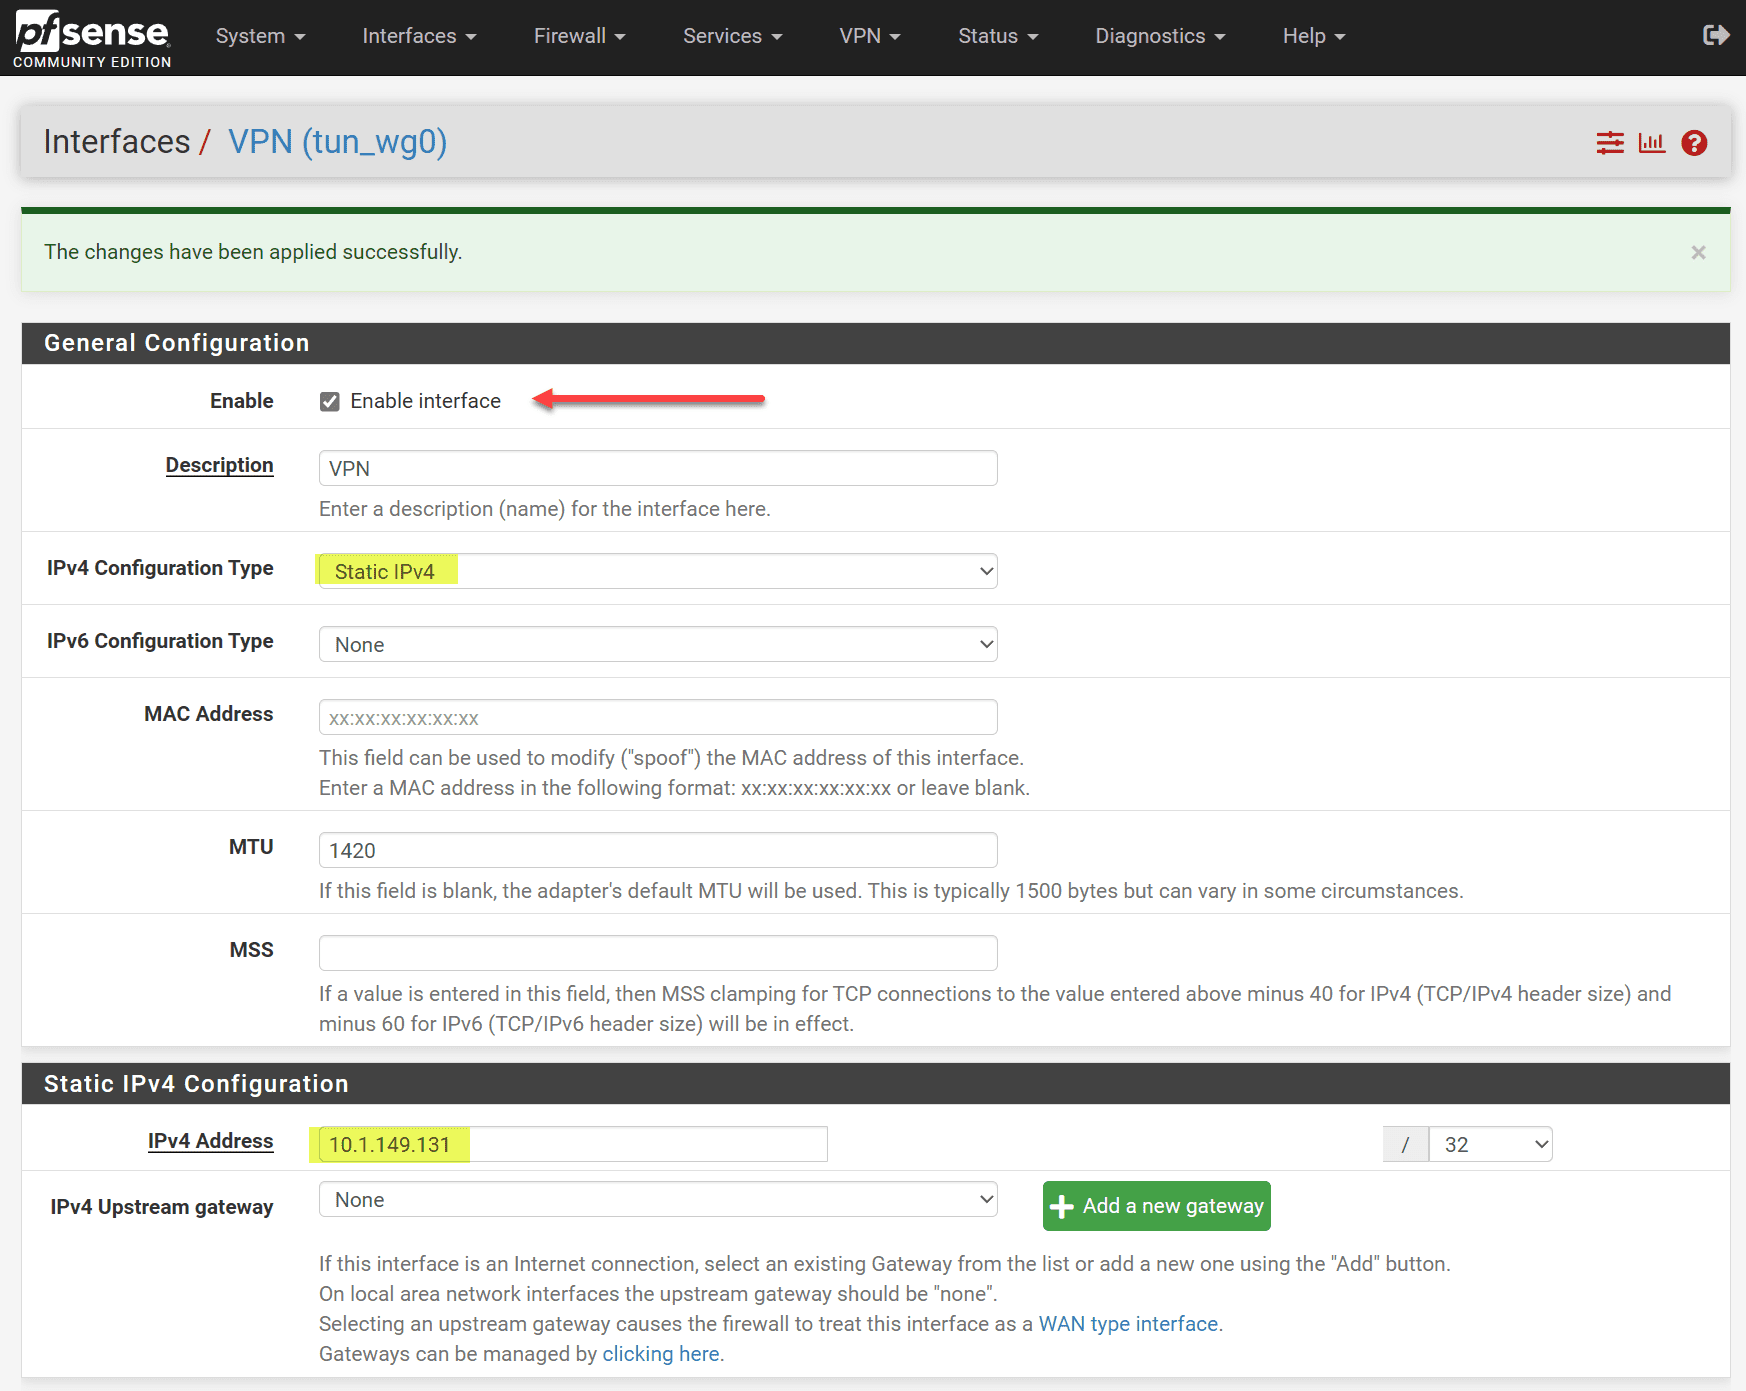
If you configure your OPT interface, you have the option to Enable interface. Also, set the IPv4 or IPv6 configuration type. Set your IP address configuration.
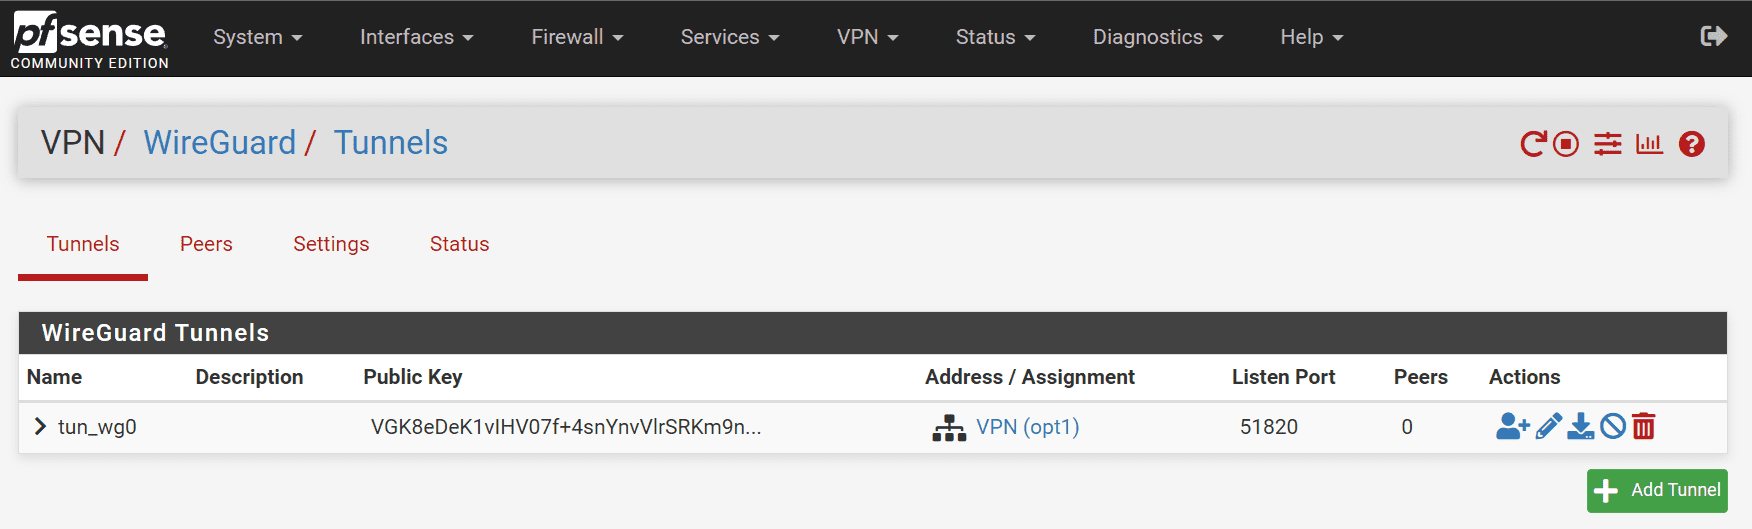
You can see the Address/Assignment is configured for the Wireguard tunnel.
If you just use an address and don’t create a new interface (which is perfectly fine), you will see the tunnel created and it looks like the following.
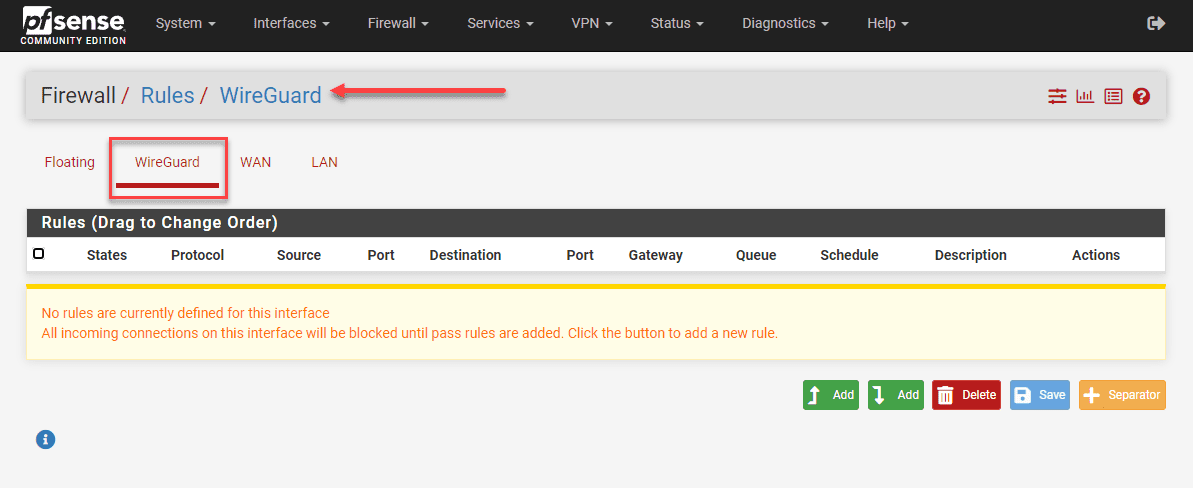
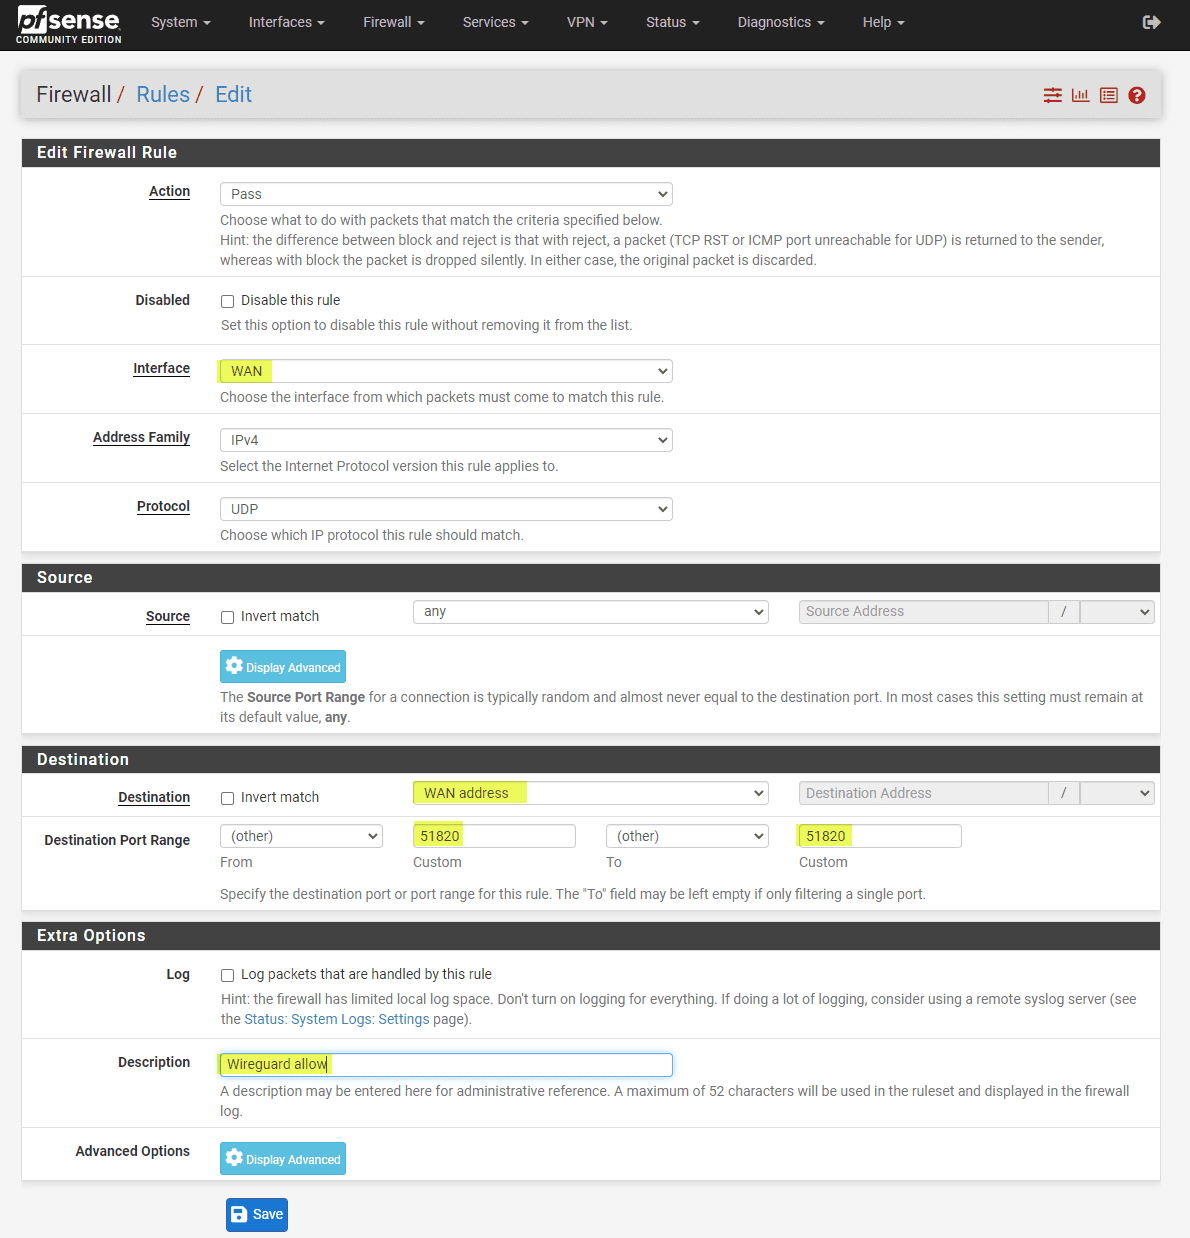
Firewall Rules
Go to your Firewall -> Rules -> WireGuard settings. Setting up firewall rules to govern the traffic flow through your WireGuard tunnel is an extremely important step. You will want to pay attention to rules about the local network (LAN net) and the allowed IPs for connecting. After you make sure of the rules, click save. You can also add rules later as needed.

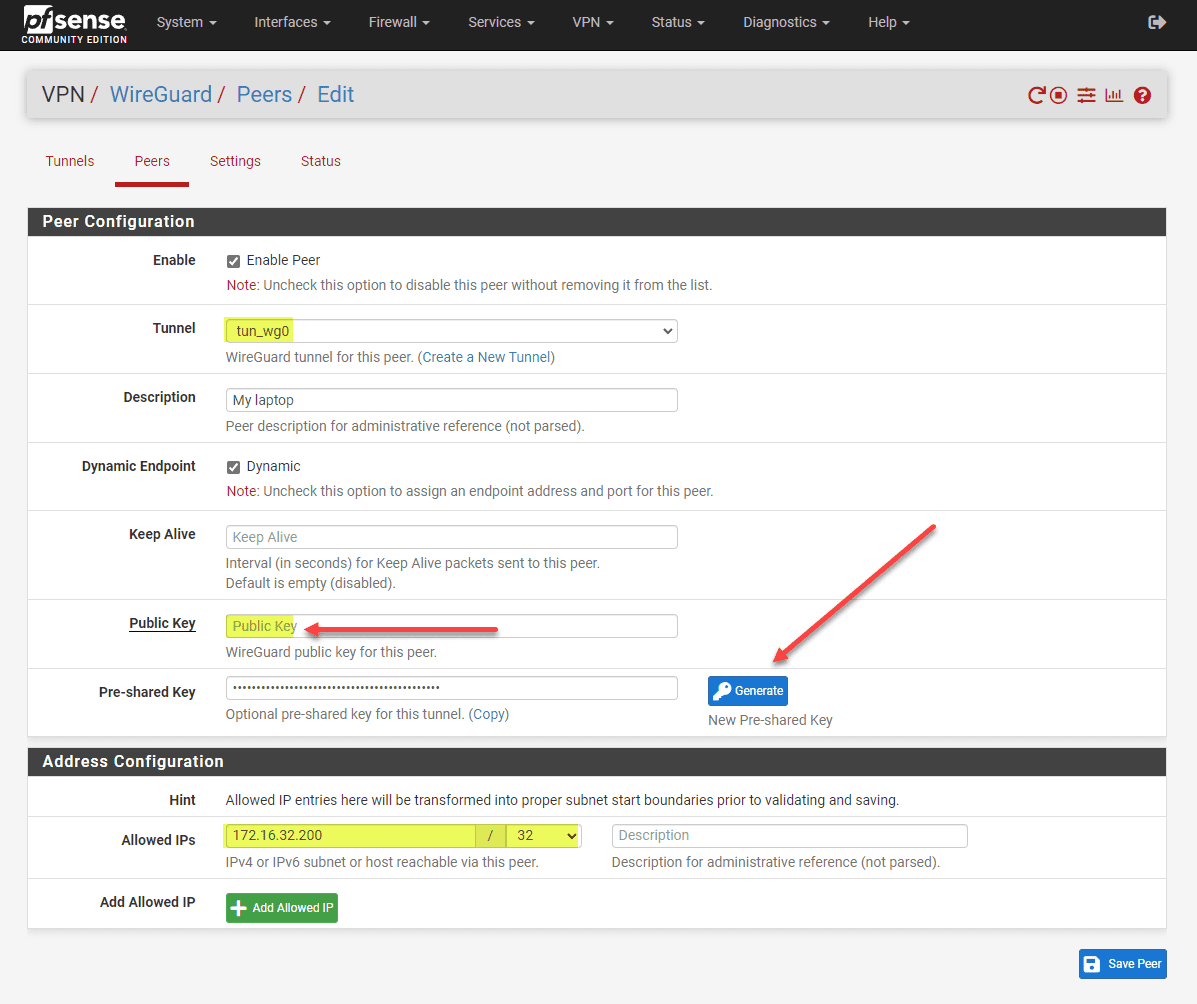
Peer Configuration
Next is peer configuration. For each Wireguard peer (e.g., client device), you will want to have a unique public key and IP address (allowed IPs). Also configure endpoint IP addresses and endpoint ports for the purposes of dynamic resolution.
Security can be increased by using a pre-shared key for the tunnel. You can also manually enter an IP address and if you are doing that, uncheck the Dynamic Endpoint checkbox.
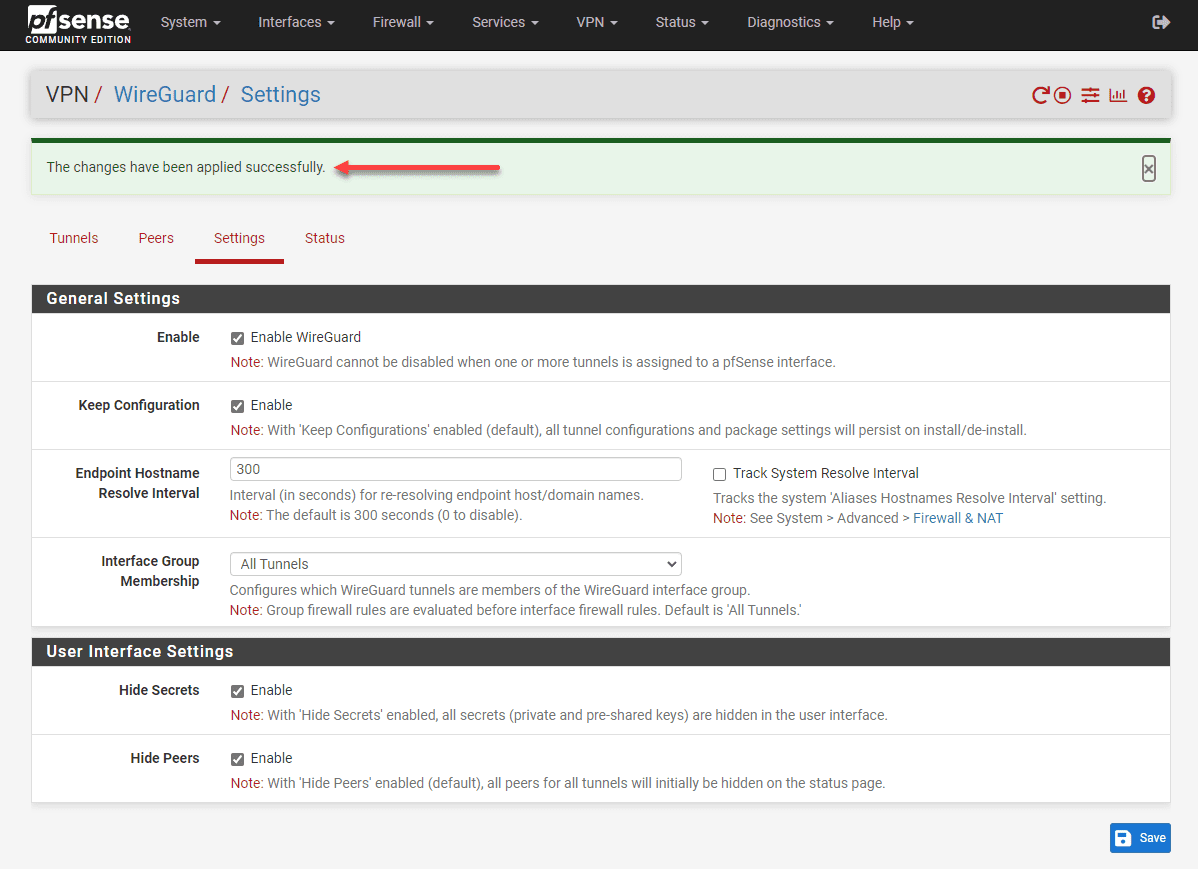
Make sure to apply all your changes to your Wireguard configuration.
Wrapping Up: Harnessing the Power of pfSense and WireGuard
Combining both pfSense and Wireguard VPN for a firewall and VPN solution is a great way to have enterprise features and connectivity without any cost. I really like pfSense as it is fairly intuitive and you get a lot of features right out of the box. Wireguard is definitely the VPN solution of choice among most today since it is lightweight, secure, and is fast. These are all the things most look for in a VPN solution.
Google is updating how articles are shown. Don’t miss our leading home lab and tech content, written by humans, by setting Virtualization Howto as a preferred source.
About The Author