Teleport VPN alternative for secure remote access
There is a really great VPN alternative solution in case you have not heard about it called Teleport. Teleport is an open-source solution that provides a community version of its enterprise offering. I decided to try this out in the home lab and stand up the Teleport VPN alternative to play around with remote connectivity. Let’s take a look at the Teleport VPN alternative for remote access and see how it is installed and configured.
What is Teleport?
The description provided by Teleport of what the Teleport service is exactly is it is a certificate authority and access plane for your infrastructure. It allows you to do several different things:
- You have a single entry point for your SSH servers, Kubernetes clusters, databases, desktops, and web apps
- You can define access policies for your infrastructure with audit logging and session recording
- You can easily onboard users with IdP providers like Github, Okta, and Google Workspace
- You have 2FA already built into the solution
- It will automatically do LetsEncrypt certificates and has that built into the solution with some configuration
Installing Teleport on a Linux Server
For the purposes of testing this in my home lab, I quickly spun up an Ubuntu 22.04 VM quickly with my Packer template and Terraform deployment process. You can read about how I configure Ubuntu 22.04 templates and deploy these using Terraform in the below two posts:
- Packer Build Ubuntu 22.04 for VMware vSphere – Virtualization Howto
- Terraform vSphere tutorial: Linux Virtual Machine Clone – Virtualization Howto
For this post, I followed the official documentation found here:
On your Linux server, to install Teleport, run the following:
sudo curl https://deb.releases.teleport.dev/teleport-pubkey.asc \
  -o /usr/share/keyrings/teleport-archive-keyring.asc
echo "deb [signed-by=/usr/share/keyrings/teleport-archive-keyring.asc] https://deb.releases.teleport.dev/ stable main" \
| sudo tee /etc/apt/sources.list.d/teleport.list > /dev/null
sudo apt-get update
sudo apt-get install teleport
I used the private network deployment so I used the following for configuring the Teleport service
sudo teleport configure -o file \
    --cluster-name=tele.example.com \
    --public-addr=tele.example.com:443 \
    --cert-file=/var/lib/teleport/fullchain.pem \
    --key-file=/var/lib/teleport/privkey.pem
Start the Teleport service:
sudo systemctl start teleportCreating the teleport-admin user
You need to run a command at the console to create the teleport-admin user:
sudo tctl users add teleport-admin --roles=editor,access --logins=root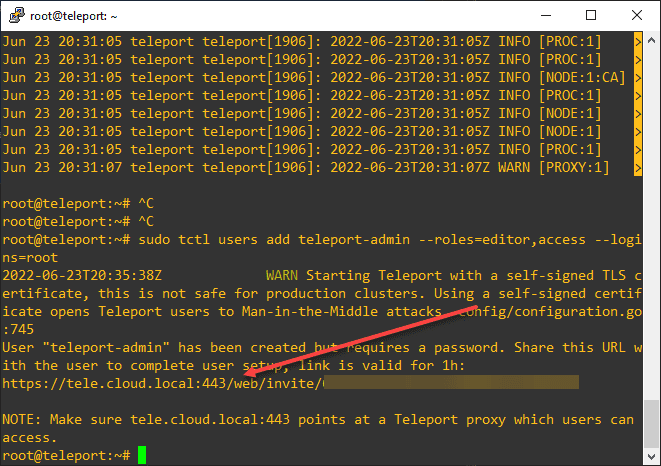
Once you generate the initial teleport-admin account and browse out to the Teleport URL, you will see the form below. It will have you set the teleport-admin credentials and you can also scan the QR code for adding 2FA to the account. When you access your resources remotely with the Teleport VPN alternative, you will be entering your strong password and 2FA OTP so it makes you feel good about the security of the solution.

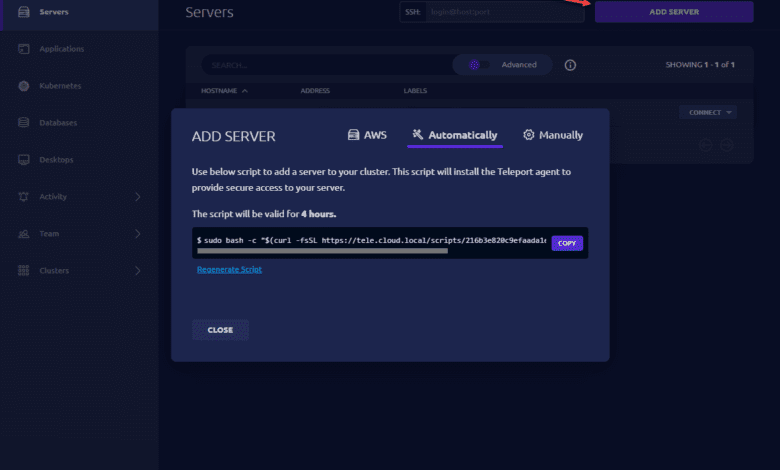
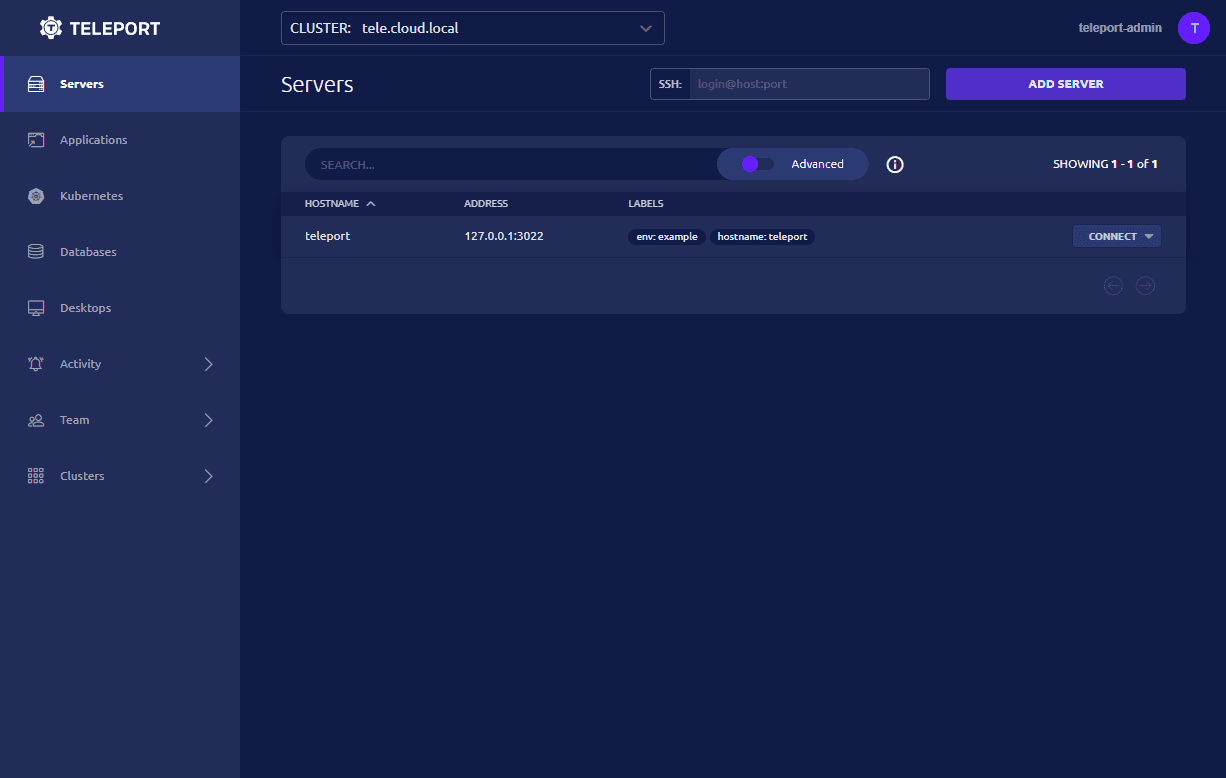
Below is the Teleport portal once you have installed the solution and logged in. You will see the teleport server itself listed.
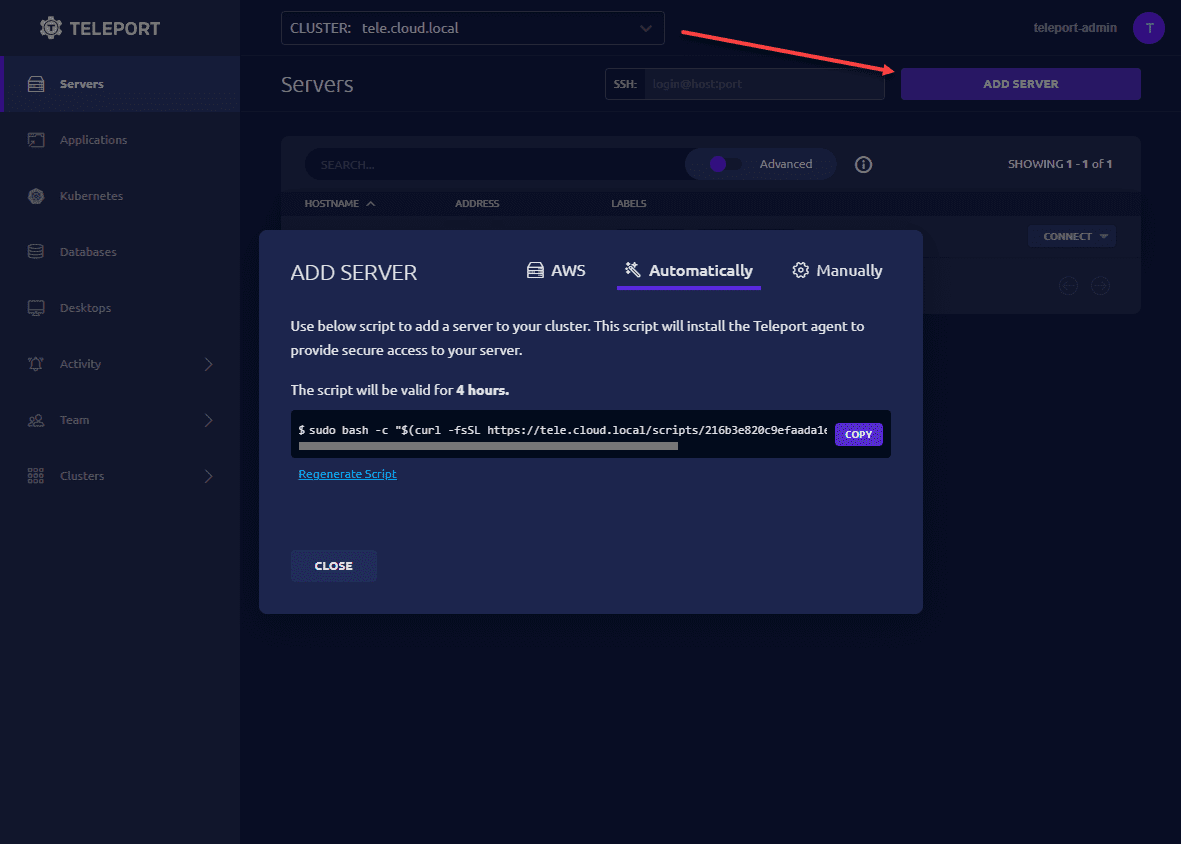
When you click the Add Server link, you will see the options to add an AWS server, automatically add a server using the command it displays, or you can manually add servers to the Teleport server.
Wrapping up and impressions
The Teleport VPN alternative provides an extremely interesting option for accessing internal home lab resources in a secure way. I like their attention to detail when it comes to security. They obviously understand the importance of security best practices with their guidance regarding certificates and 2FA authentication being mandatory when you configure your account.
The community edition is free to download and play around with and use for your home lab or other use cases. One of the other things I would like to try out is the Windows Desktop access using Teleport. However, it does look like the setup for the Windows desktop access is fairly involved. But, look for that in a future post where we will take a look at what it takes to setup access to Windows Servers, clients, etc.