Most of the time, if you are like me, you use Terraform to configure Linux EC2 instances for provisioning in AWS. However, you may have the need for Terraform AWS Windows instance code. In this simple walkthrough, I will show you guys how to quickly spin up a new AWS Windows Instance using Terraform code and automate your Windows Server deployments in AWS.
Find the AMI value for your Terraform AWS Windows Instance
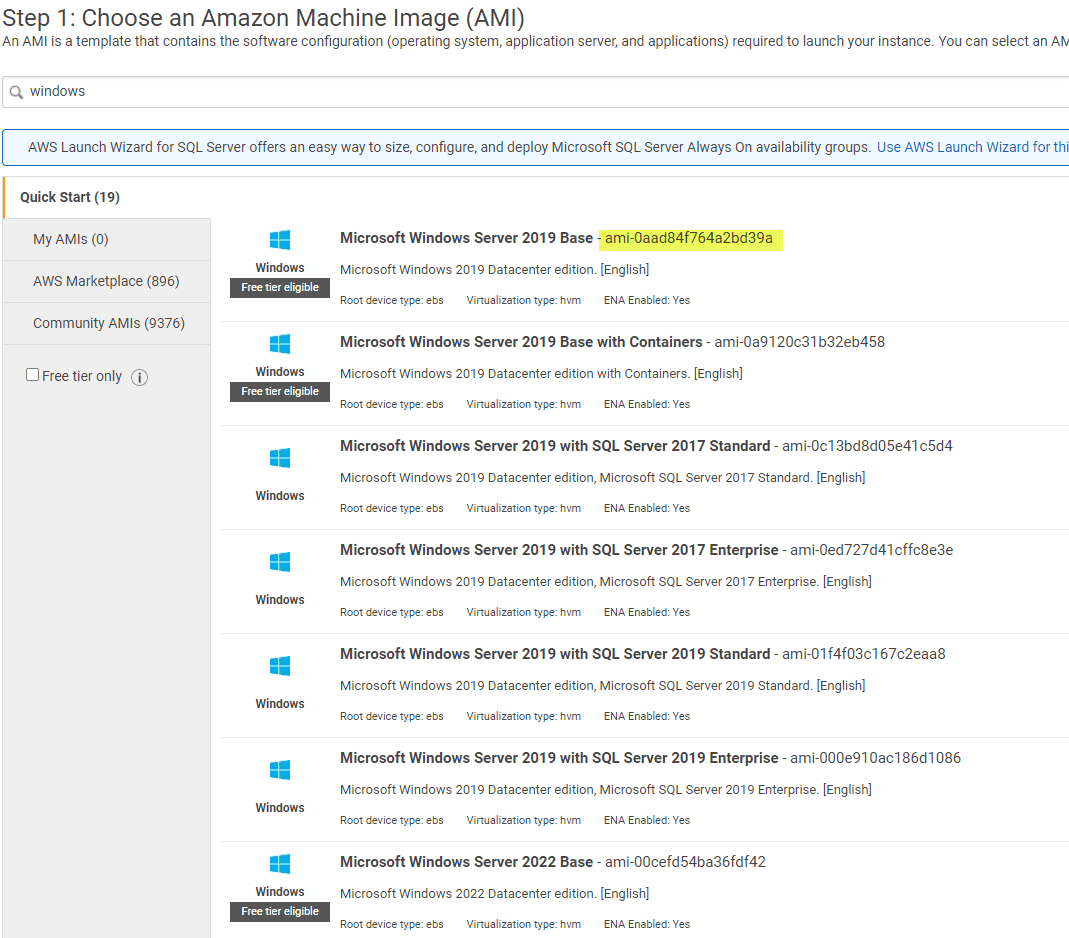
One of the first things you need to do is find the AMI value for the Terraform AWS Windows Instance you want to deploy. This is easily found by simply browsing in the AWS Console to deploy an instance under your EC2 instances, and noting the value next to the Windows Server instance you want to deploy.
With the AMI ID, we can plug this into the Terraform AWS Windows Instance Code. Aside from the AMI ID, you will want to do the following also with the code I have posted here:
- Create an AWS profile that allows connecting to your AWS environment – You can do this with PowerShell or with the AWS CLI
- Create a security group to use (you can also do this in Terraform)
- Create a keypair to use (you can also do this in Terraform)
As you note above, there are things we can include in Terraform. However, to keep it simple and basic, I have created the security group ahead of time along with the key pair used for the Windows machine.
I have created two files:
- main.tf – Holds the main code
- variables.tf – Holds variables
Main.tf for reference. Replace with your values below.
##################################################################################
# CONFIGURATION - added for Terraform 0.14
##################################################################################


terraform {
  required_providers {
    aws = {
      source  = "hashicorp/aws"
      version = "~>3.0"
    }
  }
}

##################################################################################
# PROVIDERS
##################################################################################


provider "aws" {
  profile = "myprofile1"
  region  = var.region
}


##################################################################################
# RESOURCES
##################################################################################


resource "aws_instance" "windows" {

  ami           = "ami-00cefd54ba36fdf42"
  instance_type = "t2.micro"
  associate_public_ip_address = true
  key_name = "winkey"
  vpc_security_group_ids = ["sg-23847238474f"]
  subnet_id     = "subnet-2348273423"

  tags = {
    Name = var.instance_names

}

}


##################################################################################
# OUTPUT
##################################################################################

output "aws_instance_public_dns" {
  value = aws_instance.windows.public_dns
}
The variables.tf file:
##################################################################################
# VARIABLES
##################################################################################
variable "region" {
default = "us-east-1"
}
variable "instance_names" {
default = "windows"
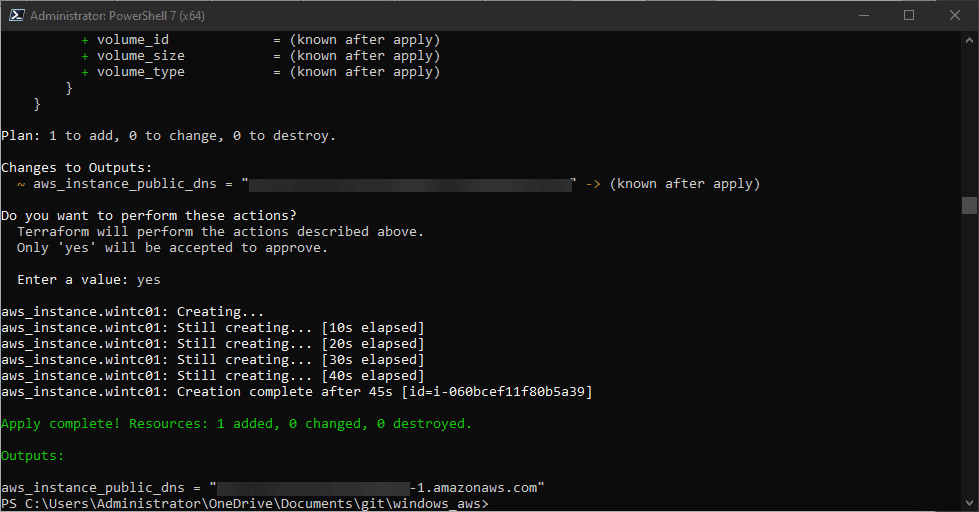
}Below is an output from running the Terraform apply command. The Windows machine is correctly provisioned. As you can see below, it outputs the public DNS name that can be copied to easily connect to your Windows EC2 instance.
Connecting to your Terraform AWS Windows Instance
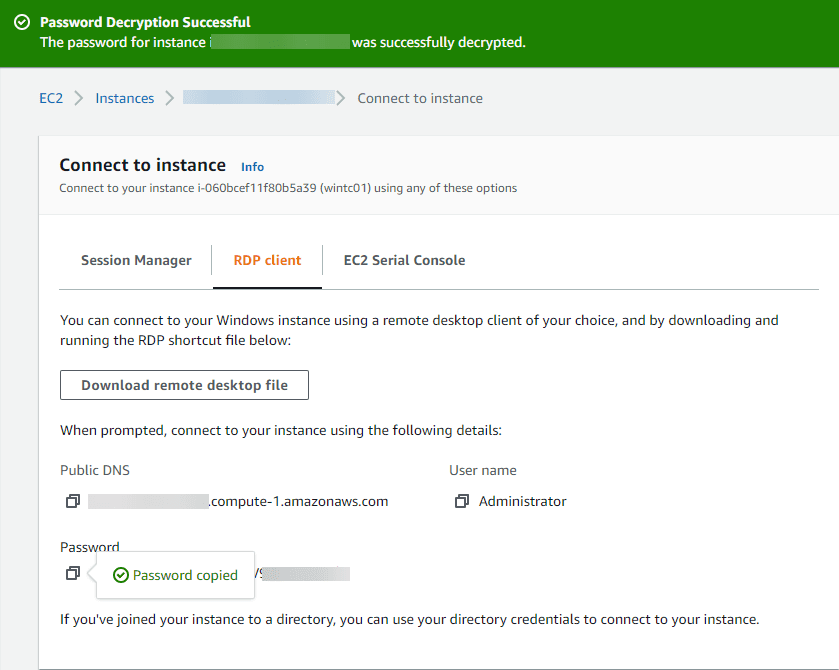
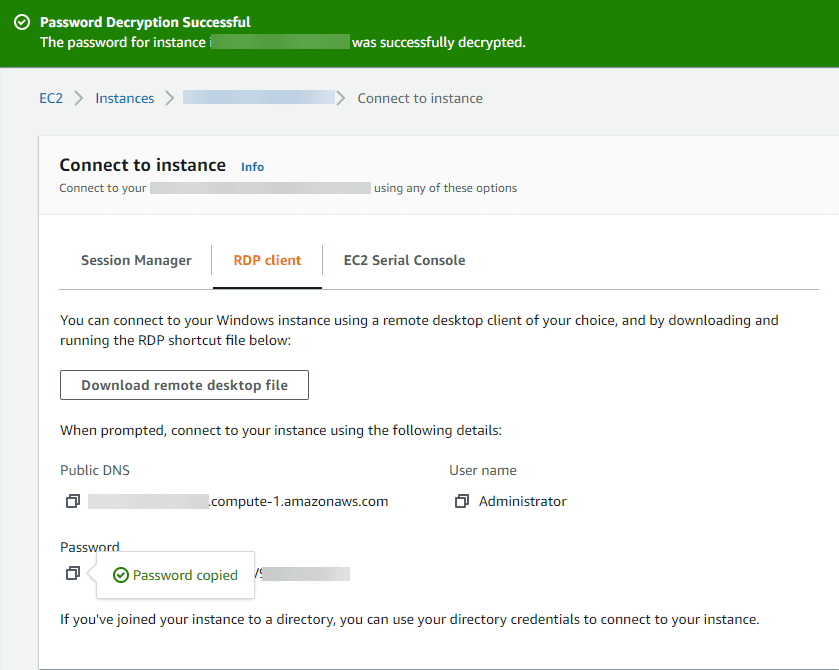
Now that the instance is deployed, we can connect to the Terraform AWS Windows instance. To do this, you use the private key of your key pair to decrypt the password configured on the Windows instance deployed with Terraform. Using the key, AWS decrypts the administrator password for the Windows instance.
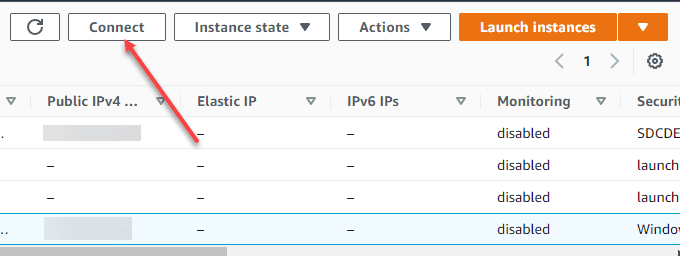
Highlight your EC2 instance in the AWS console, and click the Connect button.
Once you click the Connect button, navigate to the RDP client tab and click the Get password button. It will then allow you to browse to your private key from the key pair you created in AWS.
Take a look at my write up here on Windows EC2 RDP security for a more detailed walkthrough and explanation of this process here:
Wrapping Up
Terraform is a great way to capture your infrastructure as code. It allows capturing not only Linux machines, but also Windows Servers you may want to run in your AWS environment. While the above example is a very basic example of deploying a Windows machine, it can be customized to fit your needs. You can also use this as a starting point to modify and create resources on the fly, such as subnets, key pairs, and other information needed for deploying.
More in this topic


Discuss this in the Community
Google is updating how articles are shown. Don’t miss our leading home lab and tech content, written by humans, by setting Virtualization Howto as a preferred source.
About The Author
