I am doing a bit of network redesign in the home lab (a new post to come on that soon), for better manageability and security practices. With that being said, I had the need to move ESXi management IPs to a new subnet. I have a few VMware ESXi hosts that are outfitted with distributed switches and of course, running in vSphere vSAN clusters. I wanted to put together a quick post of the steps used to perform the change IP ESXi task for a vSAN host running with VDS.
Steps to Change IP ESXi FOR vSAN host
The steps are fairly straightforward to change IP ESXi. There are a few things to be aware of. It does make things a bit more tedious if a host is a member of a vSAN host and if it is running a vSphere Distributed Switch. These are the steps I used to change the IP for VMware ESXi that was running as part of a vSAN host.
- Place the host in maintenance mode
- Move the host out of the vSAN-enabled cluster
- Remove VDS (maybe)
- Change the management IP from the DCUI
- Remove the ESXi host from your vSphere inventory
- Add the host back to your vSphere inventory
- Reconcile VDS
- Move the host back into the vSAN cluster
- Check your vSAN partitions and networking
- Take the host out of maintenance mode
1. Place the host in maintenance mode
The first obvious step is to place the host in maintenance mode and make sure all workloads have been evacuated. With vSAN, choose your data evacuation option that suits your needs.
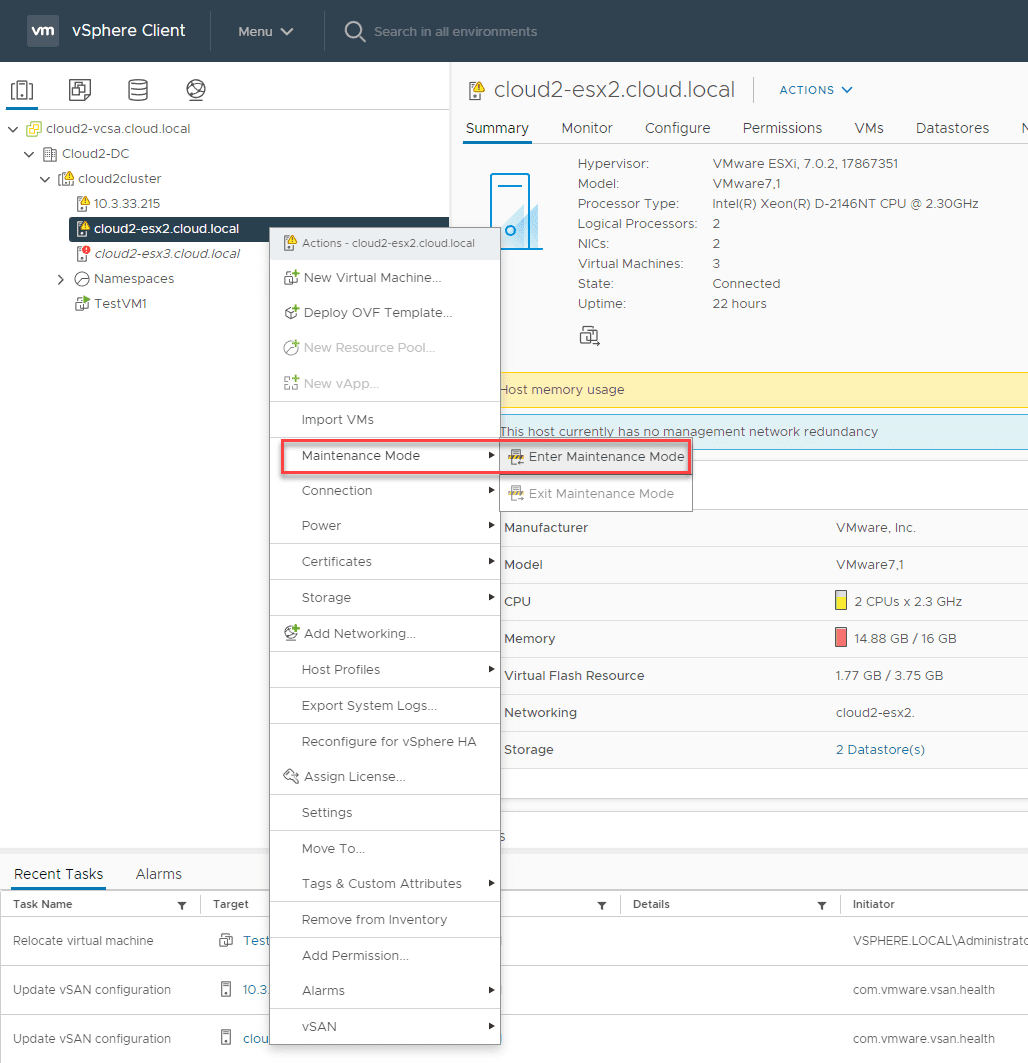
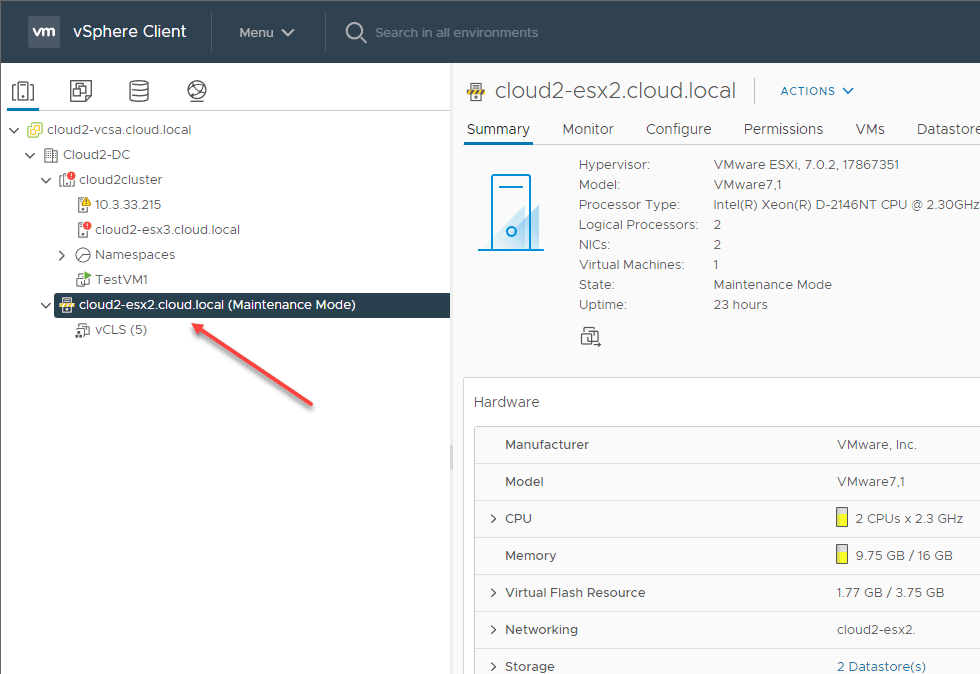
The VMware ESXi vSAN host is placed in maintenance mode with all the workloads migrated off.

2. Move the host out of the vSAN-enabled cluster
The next step is to move the ESXi host out of the vSAN-enabled cluster. This effectively disables vSAN for the host. You need to perform this step as you will run into issues if you just remove the host with vSAN enabled from vSphere altogether, change the IP and then bring it back in.
3. Remove VDS (maybe)
One sticky part of the vSphere Distributed Switch that can be a bear is removing the switch from the host altogether. You may run into issues with “resources in use” when trying to remove the switch from the host as shown below.
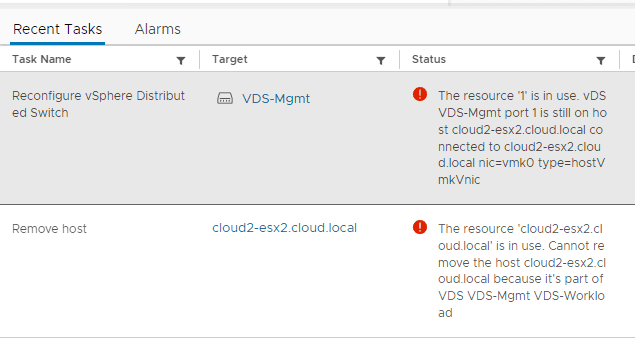
With my lab environment, I found it to be effective to leave the VDS intact on the ESXi host, remove it from your vSphere inventory, change the IP, bring it back into inventory, and then reconcile your VDS switch as I will show in just a bit.
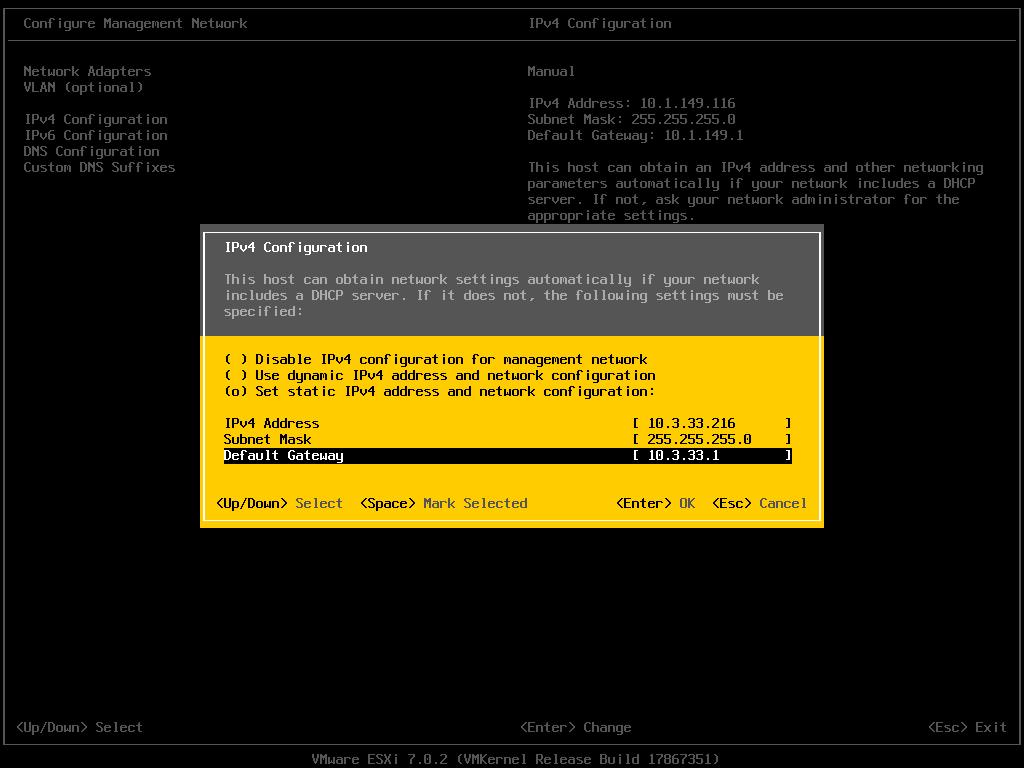
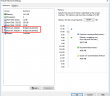
4. Change the management IP from the DCUI
Open the DCUI and select Configure Management Network.

Choose IPv4 Configuration.
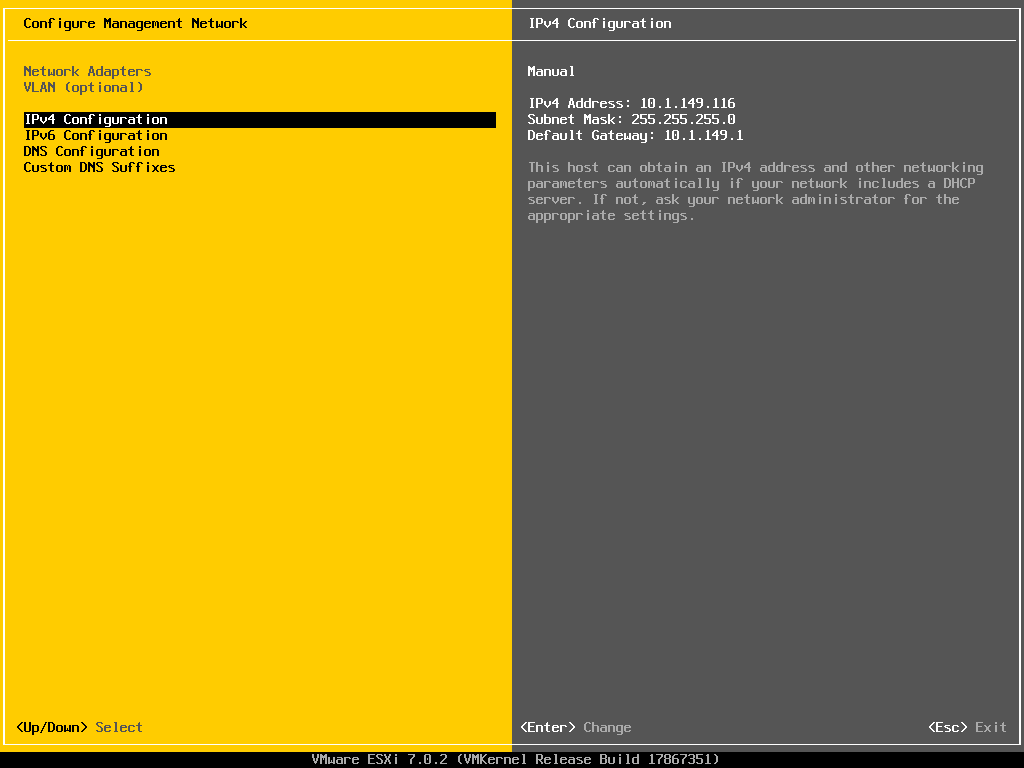
Change the IP to what you want it to be.
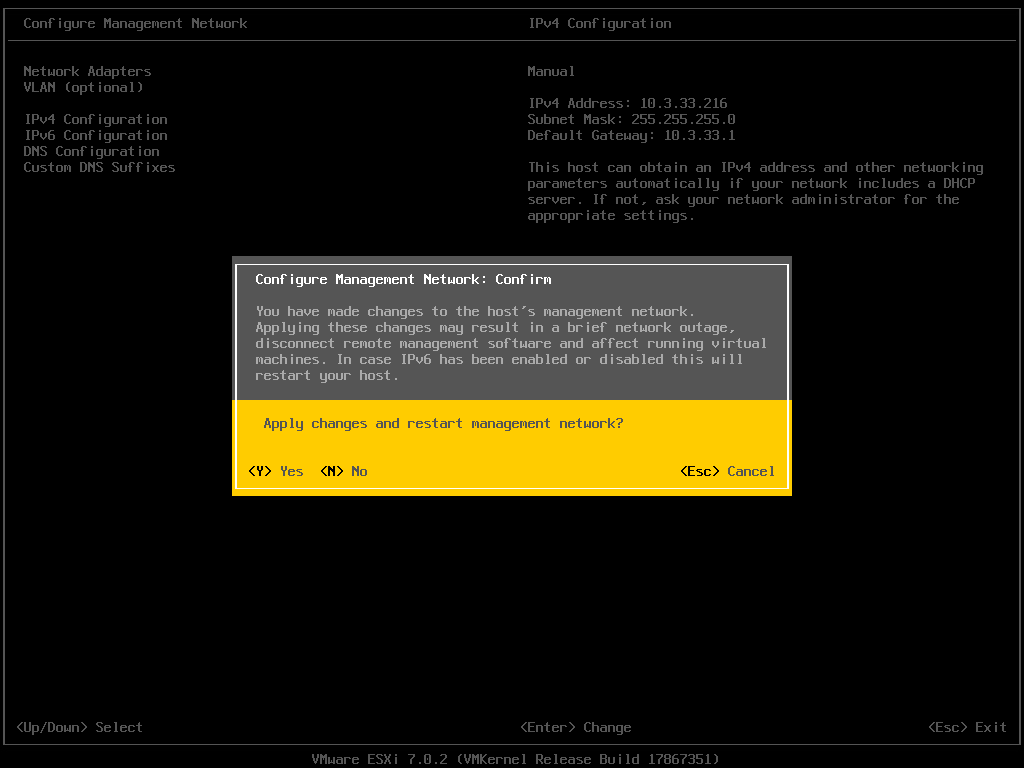
Apply the changes and restart the management network on your ESXi host.
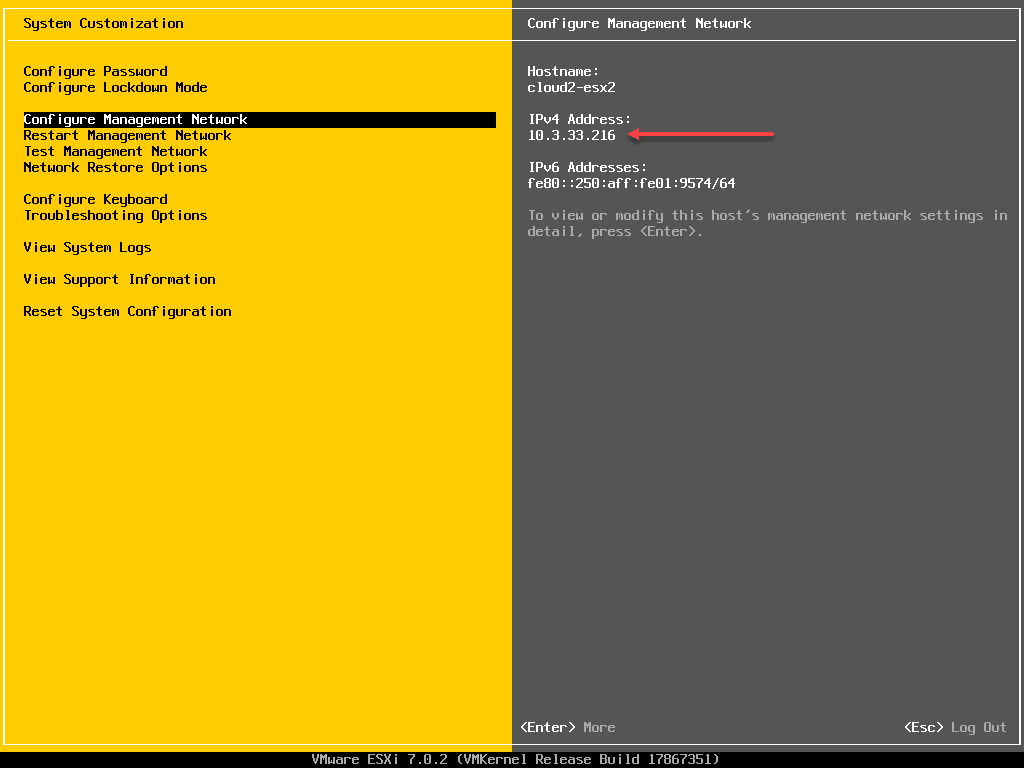
Verify you have the proper IP address reflected.
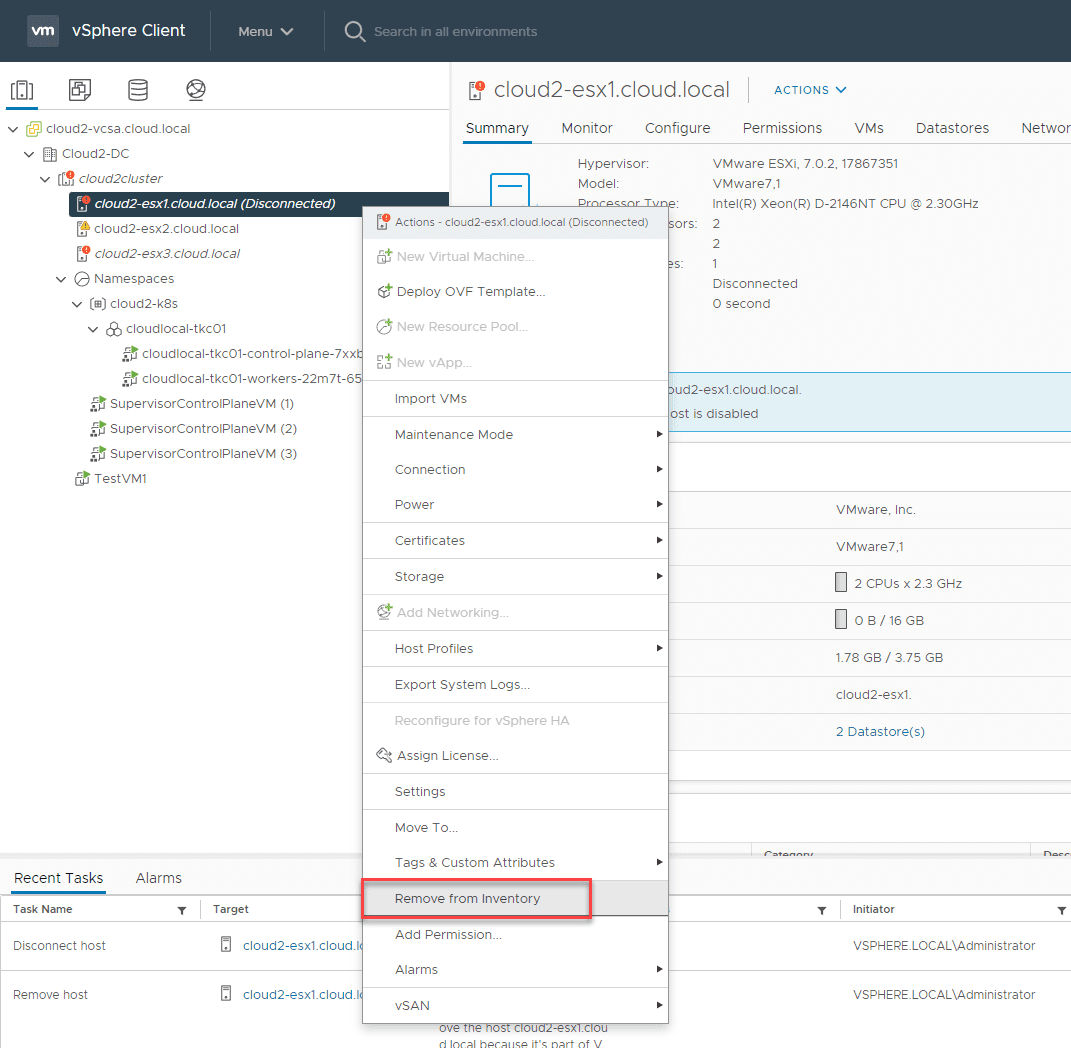
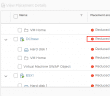
5. Remove the ESXi host from your vSphere inventory
The only way to remove your VMware ESXi host from vSphere inventory with connected VDS resources is to have the host in a disconnected state. After changing the IP address of the host, it should shortly go to disconnected. This will allow you to remove it from the vSphere inventory. As a note, the screenshot below shows a different host I removed from inventory as I rolled through the cluster. However, I used the same process throughout.
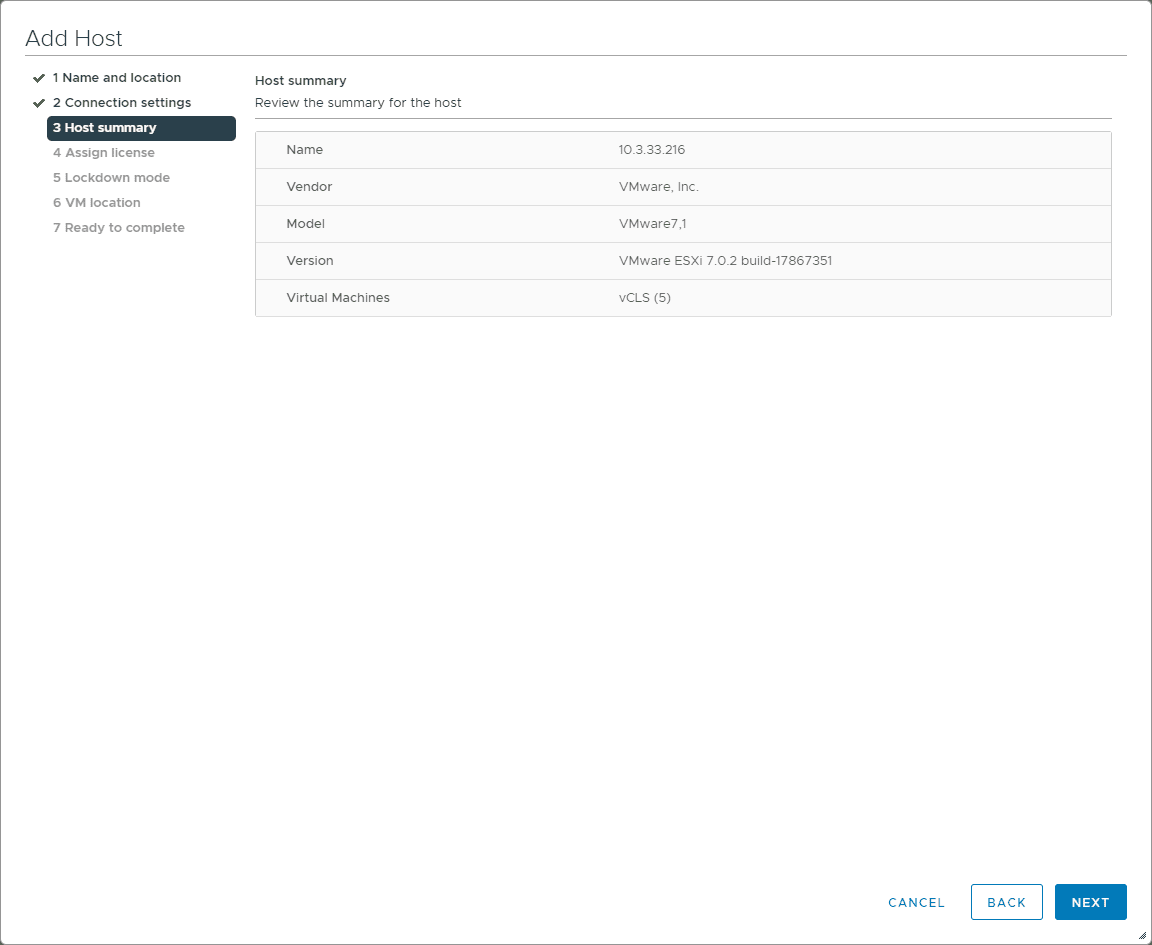
6. Add the host back to your vSphere inventory
Now that we have the VMware ESXi host’s IP address changed, we can add it back to the vSphere inventory.
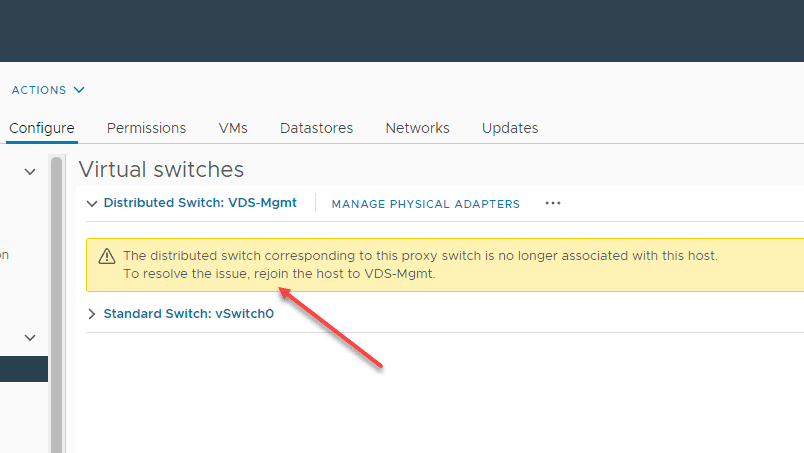
7. Reconcile VDS
After you add the ESXi host back to your vSphere inventory, you will need to reconcile your VDS switch. In my environment, I found that simply adding the switch back to the changed IP host correctly resolves VDS host proxy switch issues. You may see the below when the host is added back to vSphere inventory.
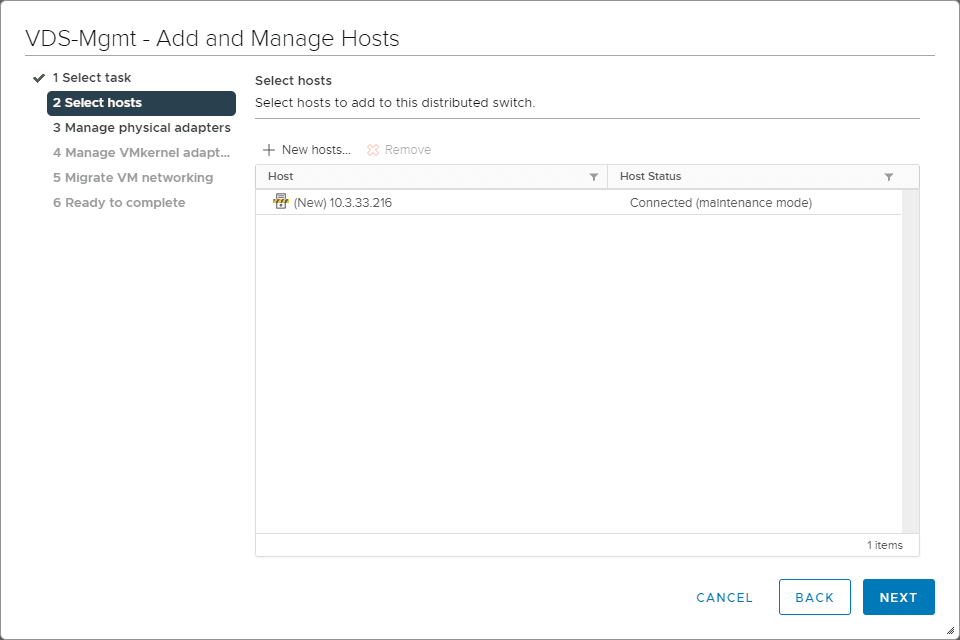
To reconcile VDS back to the host properly, you just need to add the VDS back to the host. This will reassociate the VDS proxy switch, etc.
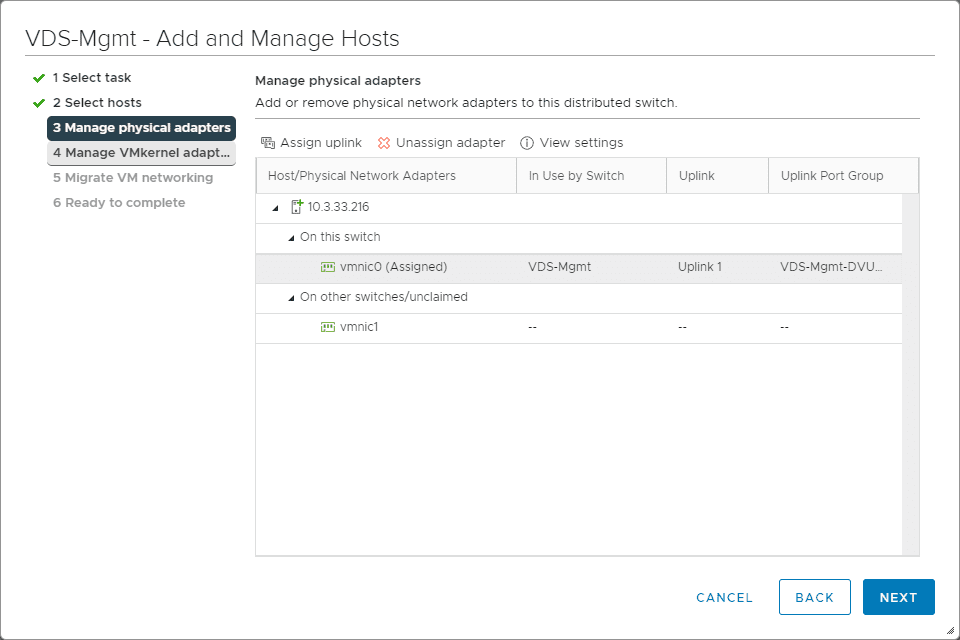
You will need to buzz through and make sure you have your uplinks and port groups assigned.
8. Move the host back into the vSAN cluster
Once you have your VDS switch synchronized back to the ESXi host, you can move it back into the vSAN-enabled cluster.

9. Check your vSAN partitions and networking
I like to double-check the vSAN partitions and information using the command:
esxcli vsan cluster get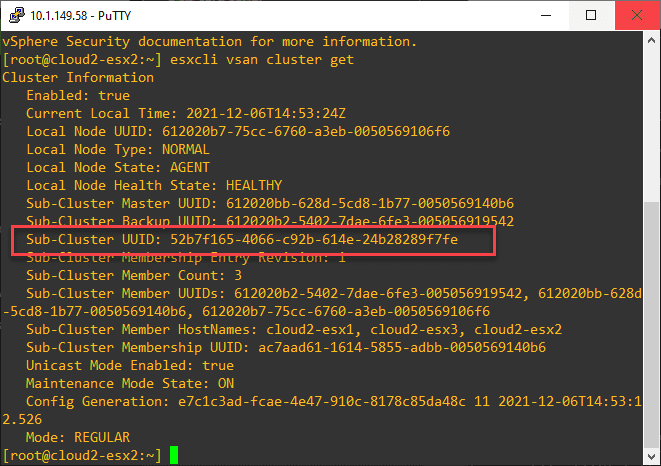
10. Take the host out of maintenance moe
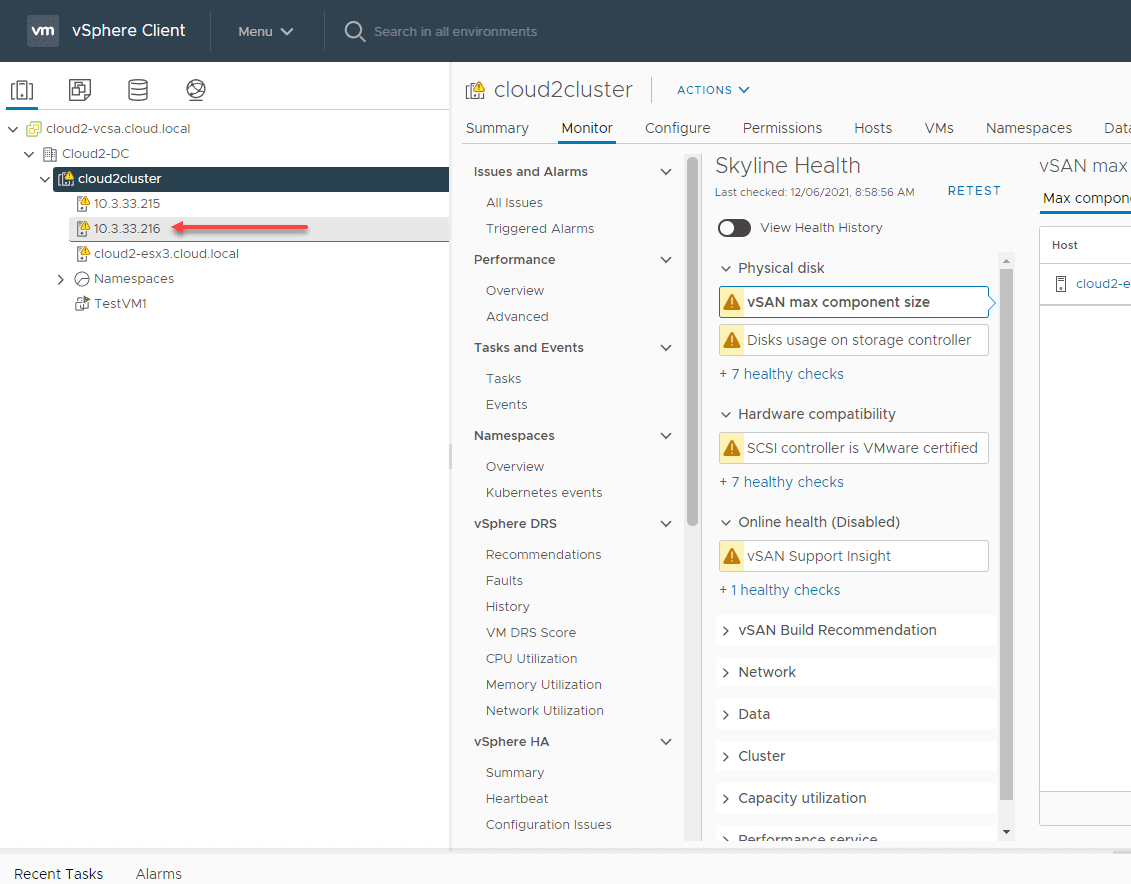
Now, we can take the host out of maintenance mode.

You should see any red bangs go away as the data is synchronized and your networking and everything else is like it should be.
Troubleshooting
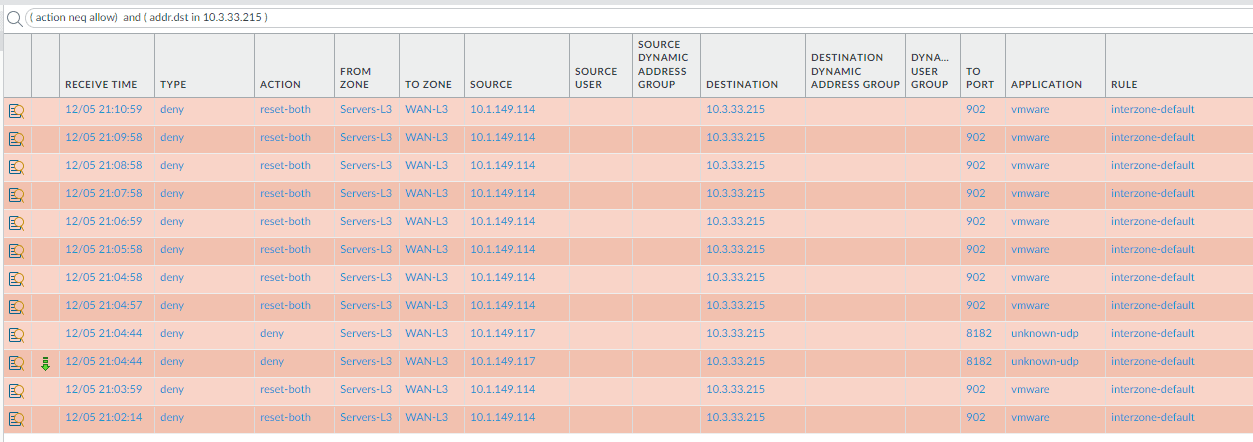
I did run into a couple of issues that were self-inflicted of sorts. This included that I didn’t have the proper firewall rules in place between my firewall zones to allow the traffic. Make sure if vCenter Server is on a separate subnet (for me it was for a while since I changed IPs of ESXi hosts first and then reIP’ed the vCenter Server), you have the proper rules in place to allow the traffic.
Another issue, on one of the hosts I wasn’t paying attention as I was performing other lab tasks and I removed the host from vSphere inventory without first taking it out of the vSAN cluster. This resulted in a cluster partition on the host, even though I had network connectivity between the host and vCenter. I had to leave the cluster once again and bring the host back into the vSAN-enabled cluster to rejoin it properly.
Wrapping Up
Make sure to lab your environment out first before making the changes to your production ESXi hosts. This helps to catch things like the firewall rules mentioned earlier. It also helps to get a feel for the process in your environment.
Google is updating how articles are shown. Don’t miss our leading home lab and tech content, written by humans, by setting Virtualization Howto as a preferred source.
About The Author

HI,Brandon,I would like to know if it’s possible to shut down the ESXI hosts of the entire vSAN cluster, modify the ESXI management IP, and then rejoin them to the cluster. Thank you!
Hardy,
I would do this one host at a time. Are the hosts added to the cluster via IP or FQDN? Also, is this vSphere Standard Switches or Distributed Switches? vSAN or traditional storage? FQDN makes things easier for sure since the hostname in the cluster won’t change only DNS needs to change. However, if the ESXi host is added to the cluster via IP and you have vSphere Standard Switches, the process I would go through would be to maintenance mode one host at a time. It is important to migrate the VMs off to other hosts. The reason for this is if you leave VMs on the host and it disconnects and you bring back in as another IP, all the VMs on that host will have new VM IDs generated. Most backup solutions will have problems with this and will require a new full backup. Once in maintenance mod, you don’t have to shutdown the host entirely. Go to the console of the host, change the management IP address on the host. The original IP’ed host will go to “not responding” in the cluster. Just remove the host from the cluster. Add the host back to the cluster with the new IP. The storage networks, vMotion networks, etc will remain intact with the same subnets, so you won’t see any change with that. The cluster will reconfigure HA on the host. Once back in the cluster, test vMotion, and other things, move a non-critical VM over there and make sure things work as expected. Then just rinse and repeat.
Brandon
Hi Brandon. we are being asked to consider this same task. However I noticed you did not mention changing the ip addresses associated with the vmkernal. We use separate ip addresses for vmkernal traffic ESXi, VSAN and vmotion.
Is your environment not configured this way?
Thank you.
Hey Damian,
Great question. My home lab at the time had a simpler setup so I was just changing the management IP addresses for the hosts in the cluster. If you have need to change the VMkernel addresses, you would have a couple of options as I see it. You would need to either have routing enabled between the current subnet and the new subnet so hosts could be brought back in and be able to communicate with the vSAN VMkernels across both. Or, you would need to have a maintenance window and bring down the cluster to reconfigure all the hosts at once with a new subnet configured for the vSAN VMkernels. Hopefully this makes sense or I am not missing a detail here.
Brandon