Backup DNS Windows Server 2016 2019 and 2022
DNS or Domain Naming System is the heart of everything we do, on the LAN, and on the Internet. It is the phone book that maps names to IP addresses so we don’t have to remember the numbers that represent hostnames, websites, and other resources. Windows Server DNS provides a really powerful DNS platform that is used by many organizations today. DNS is generally considered a critical infrastructure component. How do you back it up? Let’s take a look at how to backup DNS Windows Server 2016 2019 and 2022 to see how this can be done using these modern versions of Microsoft Windows.
Why is backing up Windows Server DNS necessary?
Disaster recovery in your environment should account for all aspects of business-critical infrastructure. This includes the DNS service as well as DNS zones. The DNS service in modern versions of Microsoft Windows Server 2016, 2019, and soon to be released Windows Server 2022, is a role that is added to Windows Server.
You may have manually created DNS records or PTR records for devices that cannot register themselves in DNS. These may be business-critical. If something catastrophic were to happen to DNS and you lose these records, it could lead to significantly longer downtime having to recreate DNS resources.
Also, as we will discuss, you may have DNS replicated as part of Active Directory Domain Services (ADDS) where DNS zones are configured as Active Directory Integrated Zones which means DNS information, zones, etc, are part of the replicated data between domain controllers. When this is the case, if you lose a DC that houses DNS records, the other DCs have a copy of the DNS information as part of Active Directory.
However, you may have a Primary standard zone that is not being replicated with Active Directory. These may need to be backed up by another means.
Active Directory Integrated Zones vs Standard Zones
You may wonder – why would you ever use just a Standard Primary DNS zone as we had in the early days with Windows Server when you can use Active Directory integrated zones now? I have seen use cases where businesses wanted to have a particular zone only reside in a particular region or site. So, they didn’t want those zones replicated around to different domain controllers. Additionally, if you want to have different records and IP addresses for different regions for specific hostnames, this can be accomplished by running Standard DNS zones and only having those reside on a particular DNS server and not replicated to other domain controllers.
Also, the process to backup an Active Directory Integrated zone and restore it is a tad bit different than the simpler standard zone.
Let’s now take a look at how to Backup DNS in Windows Server and see how this is done, and the considerations you will want to make.
Backup DNS Windows Server 2016 2019 and 2022
So, how do you backup DNS Windows Server 2016, 2019, and 2022? Let’s take a look at a DNS zone and see the options you can select and how this weighs into your backup strategy for DNS. As a note, this also works for Windows Server 2012 R2 as DNS hasn’t changed a whole lot through the latest versions of Microsoft Windows Server.
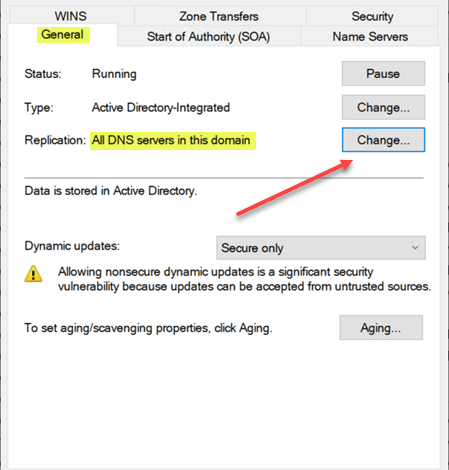
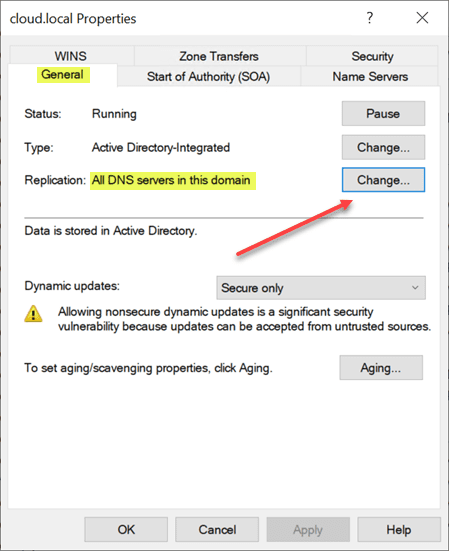
DNS can be replicated as part of the Active Directory partitions replicated between domain controllers. You see this when you create a new DNS zone, you can choose to make the zone an Active Directory integrated zone as mentioned earlier. Note what this looks like. On the General tab, you see the Replication section with the Change button you can click on.
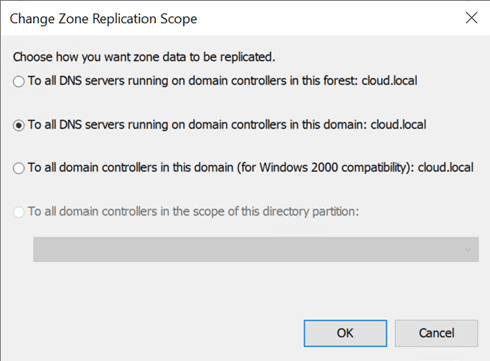
When you click the Change button, you can choose how you want zone data to be replicated. The options are:
- To all DNS servers running on domain controllers in this forest: <your forest name>
- To all DNS servers running on domain controllers in this domain: <your domain>
- To all domain controllers in this domain (for Windows 2000 compatibility): <your domain>
The point in showing this is that while replication is not a backup, you are creating duplicate copies of your DNS zones (in a good way) on the other domain controllers running in your Active Directory infrastructure. Just like you want to have more than one domain controller running to align with best practice, making the DNS zone a part of Active Directory applies the same principle to your DNS zones running on multiple domain controllers. The DNS zones that are AD-integrated are replicated to all other domain controllers, aligning with the settings you choose in the replication options.
On top of your DNS zone being replicated and having a copy of the AD-integrated zones on other domain controllers, your DNS information is essentially captured when you backup your domain controller and use the application-aware features of most modern backup solutions to backup Active Directory.
Backup DNS Windows Server 2016 2019 and 2022 with PowerShell and DNScmd.exe
Aside from making use of Active Directory integrated zones and allowing your DNS zones to replicate as part of normal Active Directory replication, you can also use PowerShell and DNScmd.exe to backup and restore DNS zones as needed. Using these tools can also provide a great way to rehydrate lab DNS records from production. Let’s say you have a lab environment where you only need to bring in DNS zones containing records from production. You can easily use PowerShell and DNScmd to export the zone(s) from production and then use DNScmd to import the zone into your lab environment.
There are three commands to be aware of for exporting your DNS zones and then importing them. These are:
Export-DNSServerZone "<zone name>" "<zone file name>"
dnscmd /zoneexport "<your zone name>" "<zone file name>"
dnscmd <dns server name> /zoneadd "yourzone.com" /primary /file yourzone.com.dns /load
I have written a detailed post called Export and Import DNS Zone with PowerShell from One Server to Another. In this post, I take you through a walkthrough of using these commands listed and exporting DNS zones from one server, and importing the DNS zones to another server.
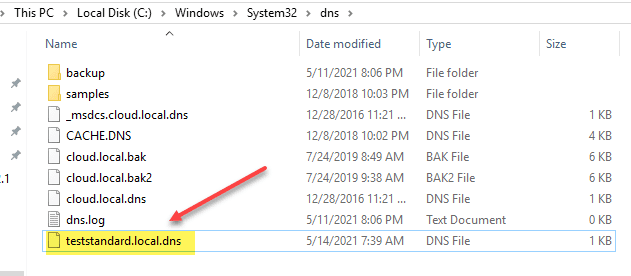
In short, when you use the dnscmd command line tool, it creates a backup file of your DNS zone in the windows system32 dns backup.
As a note, if you are running a DNS zone that is simply a standard zone, you can just copy the flat files from c:\windows\system32dns for the zone and place these on the new server you want to use as the DNS server. We will look at how to point to those files below using the DNS Management console.
By using these tools you can effectively create a backup of your DNS zones, even scheduling them if needed to run and grab copies of your DNS zones at select intervals.
Restore a zone using the DNS Manager
You may wonder, can I restore a DNS zone using the DNS Management console GUI? Yes, you can certainly do that. Ironically, Microsoft didn’t really build a way into the DNS Manager to backup your zones from the GUI, but you can point to the backups you have taken (flat files that are text files) when you create a new zone.
Take the zone file you have backed up and paste it in the root of the c:\\windows\\system32\\dns folder, not the backup folder.
Now, from the DNS management console, create a new zone on the DNS dialog box click Next.
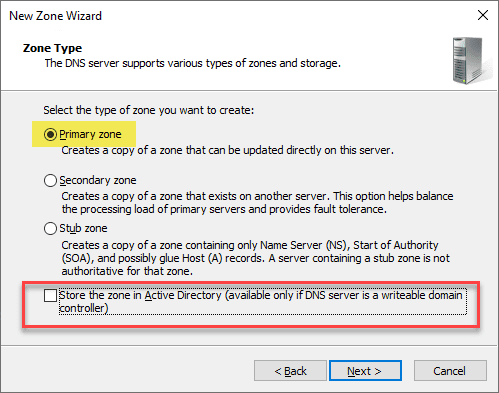
You can either check or uncheck the store in Active Directory checkbox to store a restored zone in AD during the creation process.
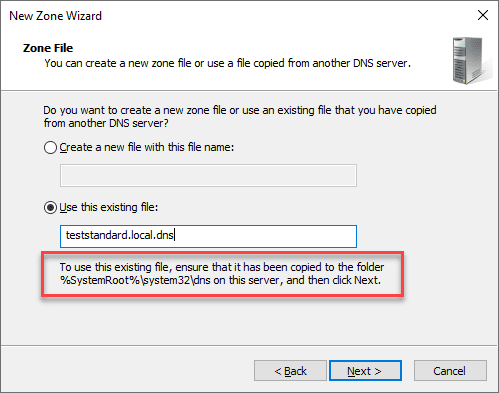
Name the DNS zone file exactly as the DNS zone you have backed up.

Notice the note that you need to ensure the file has been copied to the folder %systemroot\\system32\\dns.
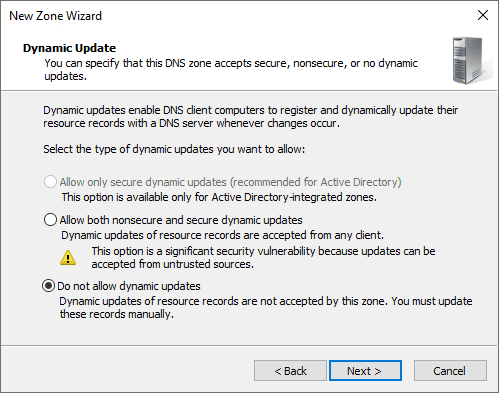
By default, when importing, the Dynamic Update option will be set to Do not allow dynamic updates. This means your clients will not be able to update DNS automatically. You can set it to allow both nonsecure and secure dynamic updates, however, this is a security risk. Note the allow only secure dynamic updates is greyed out. This option is Active Directory available only for integrated zones.
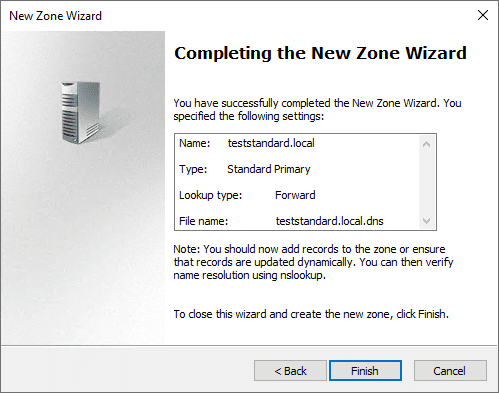
Finish the New Zone Wizard.
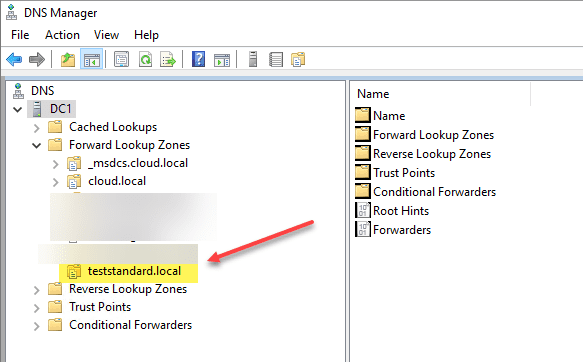
As you can see below, the new zone is created and mounted in the DNS server.
By using the above processes, you can control, backup, and restore, the copies of your DNS zones in a way that allows high-availability for your DNS and name resolution infrastructure in business-critical environments.