Dell Switch OS10 and ONIE Firmware Update
Not long ago, I posted about basic Dell EMC OS10 network switch configuration and how to get a basic configuration on the open network platform switches. Part of setting up new network switches is checking for new firmware available for them. The process to update the Dell EMC OS10 network switches is a bit different especially if you are used to updating standard network switches. It also depends on what version of the firmware your switches come with out of the box as to the process. This post will detail my experience with Dell Switch OS10 and ONIE firmware update to see what steps you need to take to properly upgrade your Dell OS10 switch.
Update files needed
I want to detail where I am coming from with my switc upgrade. The switches received had an old version of OS10 installed from Dell. These were the 10.4.x version. The newest at the time of this writing is 10.5.2.2. This is quite a major jump.
Dell has changed a few things since 10.4.x and 10.5.x. One of which is a change in how the ONIE update works. What is ONIE? It is the Open Network Install Environment. It is what Dell is using on their OS10 switches to handle upgrades, installs, etc.
To upgrade ONIE in the 10.4.x family, you have to boot into ONIE to upgrade the ONIE updater and firmware. However, in 10.5.x, ONIE can be updated from within OS10 itself. The process shown, will be the process coming from OS10 10.4.x going to 10.5.x, so will show booting into ONIE for the updates to ONIE.
You will want to have a USB drive formatted with FAT32. You can use TFTP but it is much slower than using the USB file attached to the USB port on the front of the Dell S5200 series switch running OS10. The three files that you will need come from the Dell digital locker.
You will need to be entitled to the switch files with a licensed OS10 switch. You can download these at The ONIE and CPLD updates can be found at www.support.dell.com
Your USB key will need (generic filenames listed below):
- ONIE updater.bin
- ONIE firmware.bin
- OS10 firmware update.bin
Dell Switch OS10 and ONIE Firmware Update
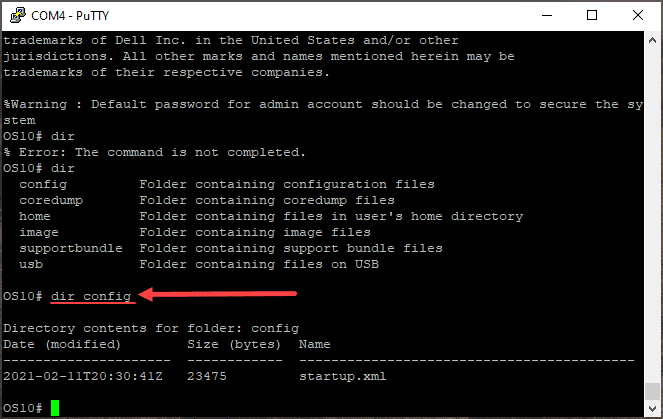
Before updating the firmware on your Dell OS10 switch, make sure you backup your configuration. I like to backup both the .XML and the traditional startup config file. First, let’s backup the startup.xml file. You can take a look at the startup XML config name by using:
dir config
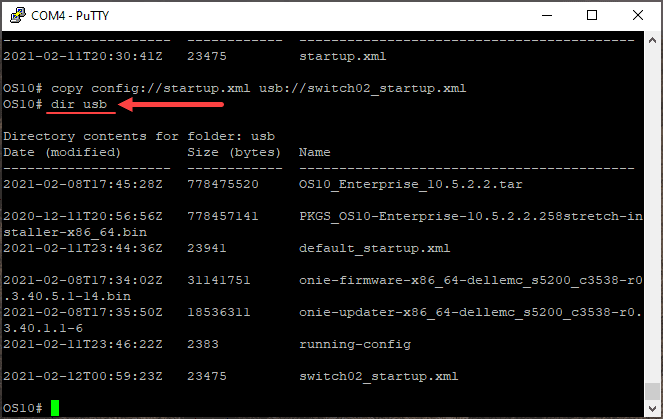
To backup the startup.xml file to your USB drive, plugged into the front of the switch:
copy config://startup.xml usb://<your file name>.xml

You can make sure the file made it to the USB drive:
dir usb
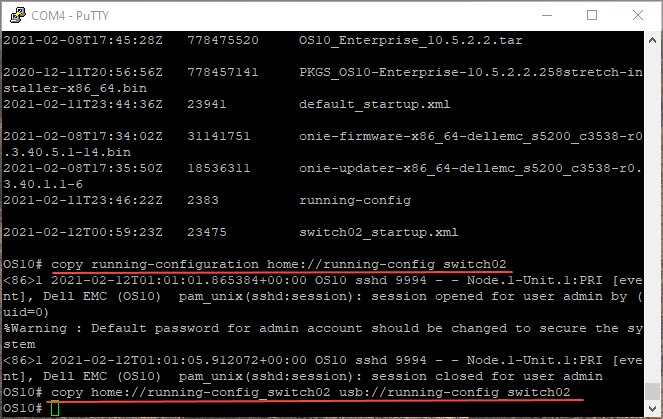
Now, let’s copy the running configuration to the USB drive. We first have to copy it to the home directory and then to the USB drive.
copy running-configuration home://<running config name>
copy home://<what you named the file> usb://<file name>
Next, let’s write memory and reboot the switch:
write memory
reload
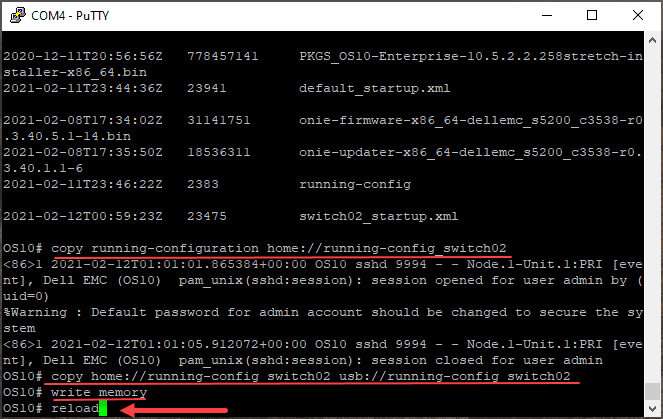
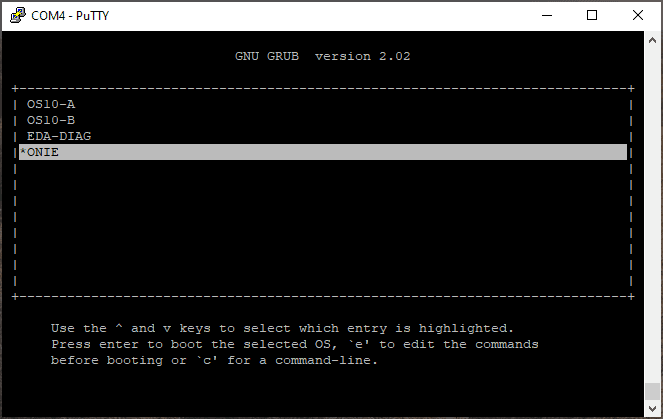
Now, when the switch reboots, you have a couple of seconds to choose ONIE.
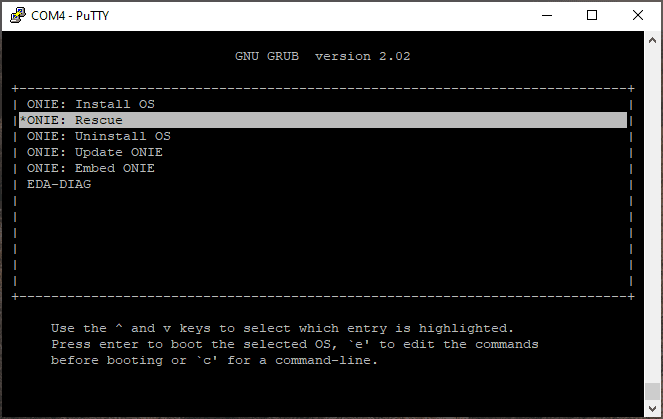
Next, choose ONIE: Rescue.
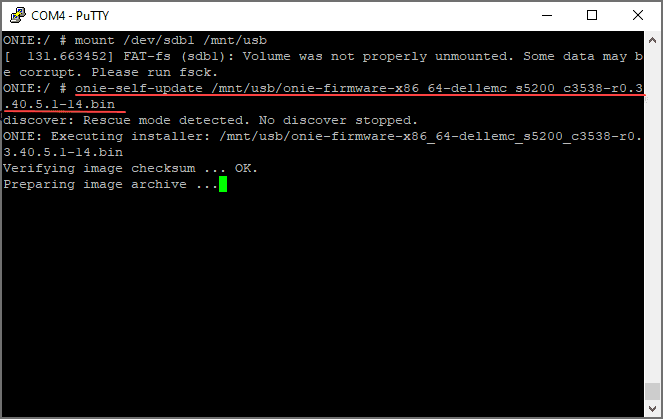
Now, mount the USB drive and then use the onie-self-update command to update the updater and then the firmware.
mount /dev/sdb1 /mnt/usb
onie-self-update /mnt/usb/<onie-updater filename>
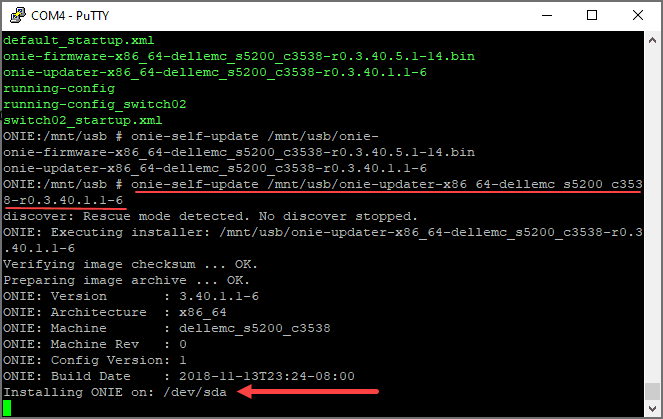
The onie-updater update does not take too long at all. The switch will automatically reboot once it applies the updater image. Reboot back into the Onie Rescue menu, mount the USB drive, then apply the onie-firmware file.
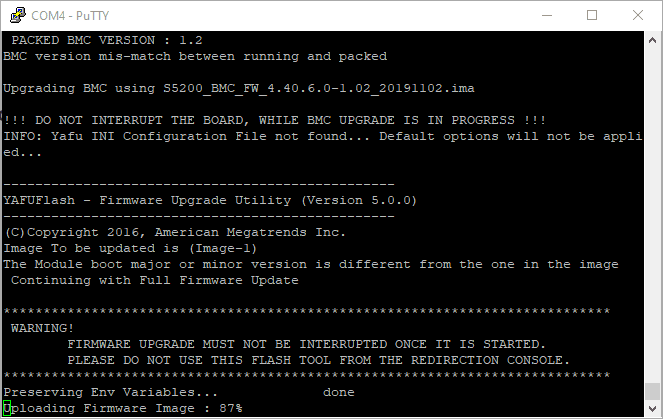
mount /dev/sdb1 /mnt/usb
onie-self-update /mnt/usb/<onie-firmware file>
The firmware file for ONIE will take a few minutes.
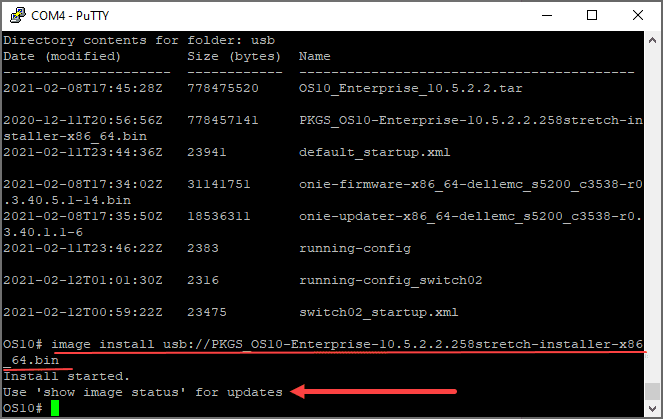
Now, to update the OS10 image, use the following command:
image install usb://<OS10 image file.bin>
To view the status of the update, use the show image status command.
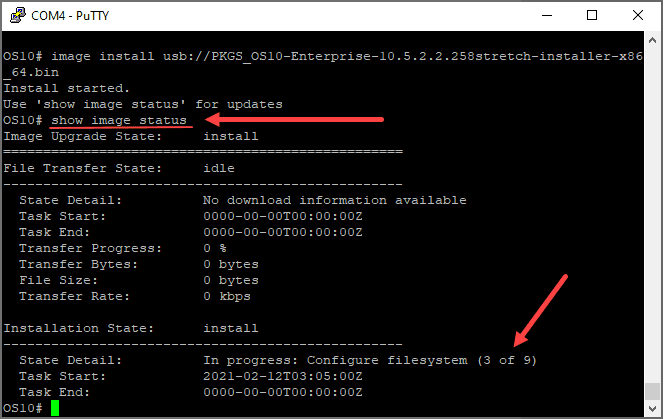
This update will take several minutes. You will need to keep looking at the show image status command to check to see if the update has finished. You will eventually see the Completed: Success message.
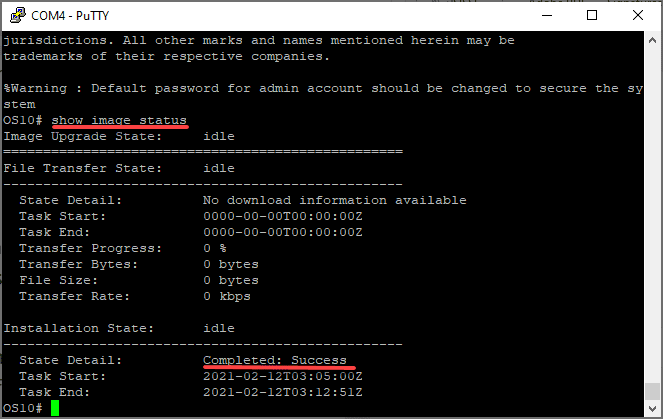
After you see the successful message, you will want to issue the following commands:
boot system standby
reload
yes

Once the switch reboots from applying the OS10 update, you can use the:
show version
to verify the update to the latest version of OS10 is installed.
Troubleshooting
Hopefully, your Dell Switch OS10 and ONIE firmware update will be smooth sailing. One weird thing I saw happen was self-inflicted. I selected ONIE Install on the menu prompt on a reload of the switch. After I selected this once, it was as if the switch was in a boot loop where I could not see the menu to allow booting the OS10 operating system.
However, I found a thread here that described the issue I was seeing. To get out of the boot loop of the ONIE menu, you hit “c” and then type “exit.” Afterward, you will need to go into the System setup screen by hitting the Delete Key just like you would an x86 box to get to the BIOS. Once into the BIOS, change the Startup order to have OS10 as the first to boot.