Windows Server 2016 Install Remote Desktop Services
This year has been a year like none other with organizations scrambling to bolster their remote work infrastructure. It has meant that businesses have had to provision the infrastructure needed to allow workers to connect to business-critical applications, services, and data to carry out essential job functions. One of the technologies that has been around for a while is Remote Desktop Services (RDS). Remote Desktop Services is newer technology iteration of the older Terminal Services technology that many remember from older Windows Server operating systems. Remote Desktop Services is fairly easy to provision and provides the ability to allow remote workers to easily connect to business infrastructure. In this post, we will take a look at Windows Server 2016 install remote desktop services steps to see how you can easily provision a Windows Server 2016 RDS server.
What is Remote Desktop Services?
Remote Desktop Services (RDS) allows delivering virtualized applications, providing secure mobile and remote desktop access, and providing end users with the ability to run business-critical applications from the cloud.
Windows Server 2016 Remote Desktop Services delivers a wide array of flexibility for your end-users when accessing your organization’s infrastructure. This includes:
- Session-based virtualization – This is the traditional concept of leveraging a Windows Server to deliver a full-blown desktop to an end-user who needs to access applications, data, and services.
- Virtual Desktop Infrastructure (VDI) – With VDI, you can deliver individual virtual desktops to your end-users. This provides a great option for users who need a highly customized desktop with individualized toolsets
What other benefits and features does Windows Server Remote Desktop give to your end-users? Within the capabilities of RDS, you also have the ability to deliver:
- Desktops – Either with session-based virtualization or full-blown VDI desktops, you can deliver a full desktop to your end-users who need this functionality
- RemoteApps – Remote applications are often a much more efficient way of delivering applications to end users since you are only publishing the application and not the desktop environment. Often, an end-user only needs to access an application. If they only need to interact with an application, offering the full desktop is very inefficient from a resource perspective.
Windows Server 2016 Remote Desktop Services Best Practices
There are a few best practices with Windows Server 2016 Remote Desktop Services install. Consider the following as recommended by Microsoft:
- For your forward-facing environment including Web Access, Gateway, Connection Broker, and license server, use Windows Server 2019 when possible. Windows Server 2019 is backward compatible which means you can still use Windows Server 2016 or Windows Server 2012 R2 RD session hosts.
- Your RDSH servers need to be the same version of Windows, so you would need to group your RDSH servers into collections like Windows Server 2016 Session Hosts and Windows Server 2019 Session Hosts.
- If you upgrade your RD Session host, be sure to upgrade your license server as well.
- Upgrade your environment in the proper order
- For HA, make sure your connection brokers are at the same version of Windows Server
Windows Server 2016 Install Remote Desktop Services
Let’s now take a look at the process to install Windows Server 2016 RDS in your environment. With Windows Server 2016, Microsoft has made this process fairly easy and wizard-driven with the Server Manager console. Also, it automates the process of installing the needed roles so you don’t have to do this individually on the different servers for the Remote Desktop Services infrastructure.
My infrastructure is as follows:
- win2016rdgw – This will be used to host connection broker, gateway, and web access
- win2016rds – This is the session host server
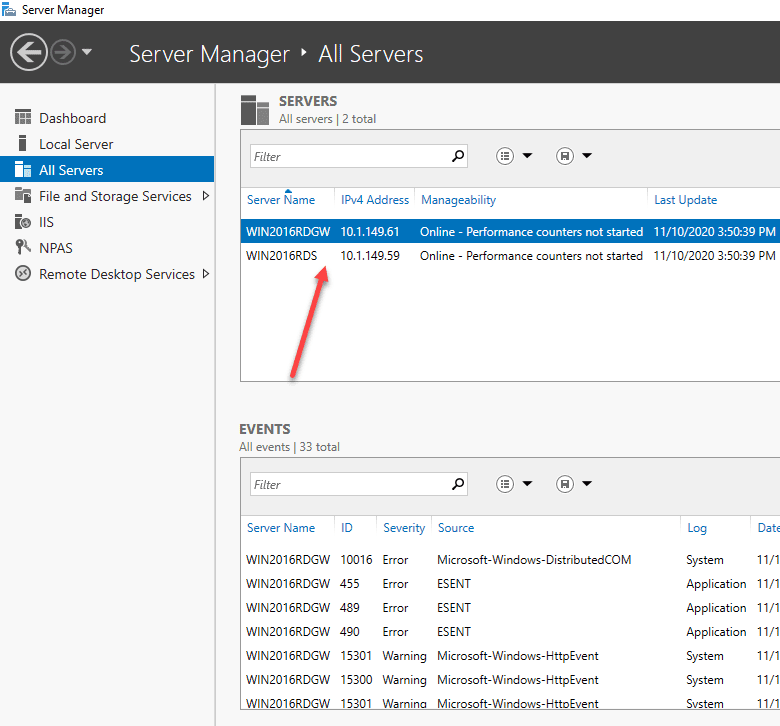
Below, I have added both my RDSH server as well as the server that I am going to use to host the Connection Broker, Web Access, and Gateway. This is the server manager located on the RDS server. In server manager, right-click on All Servers and choose Add Server.
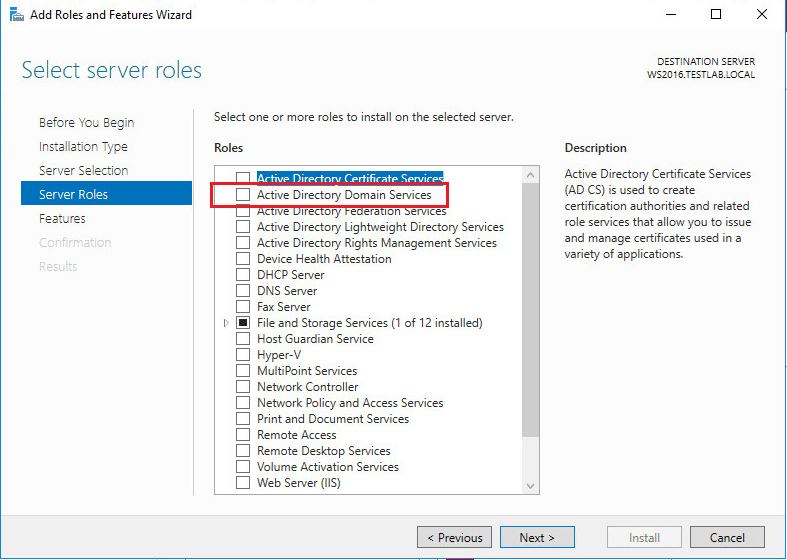
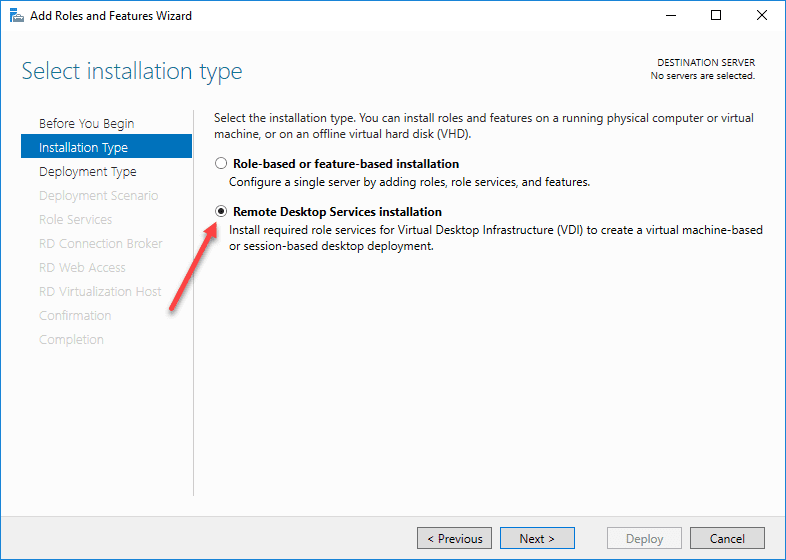
Next, in Server Manager, choose to Add Roles and Features. The wizard will ask you the installation type. Choose Remote Desktop Services installation.
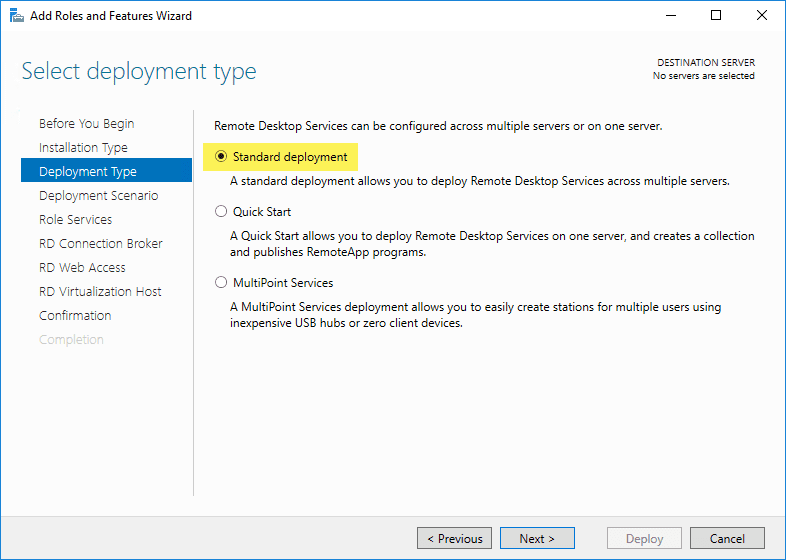
I am performing the Standard deployment type here which allows you to deploy Remote Desktop Services across multiple servers.
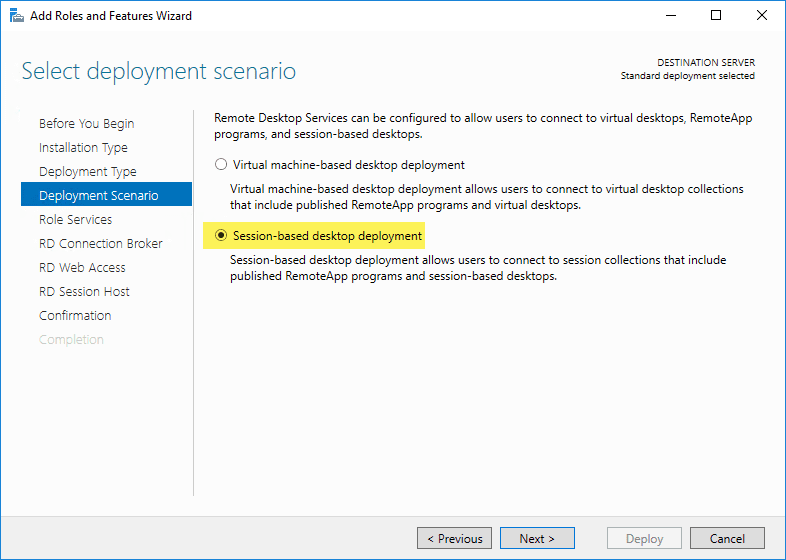
Next, you choose the deployment scenario. I am deploying a session-based desktop deployment so this is what I am choosing here. If you are doing Hyper-V and want to deploy VDI, you choose the Virtual machine-based desktop deployment.
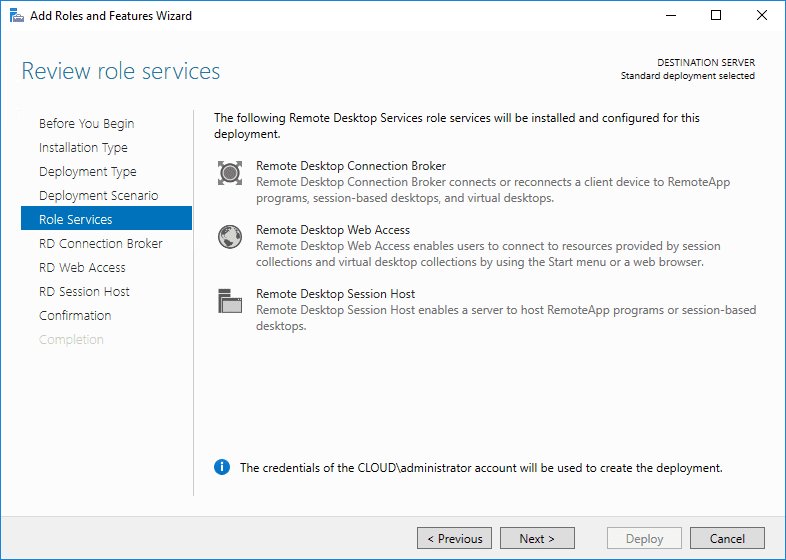
On the role services screen, the wizard displays the roles services that will be deployed as part of the Windows Server 2016 Remote Desktop Services installation.
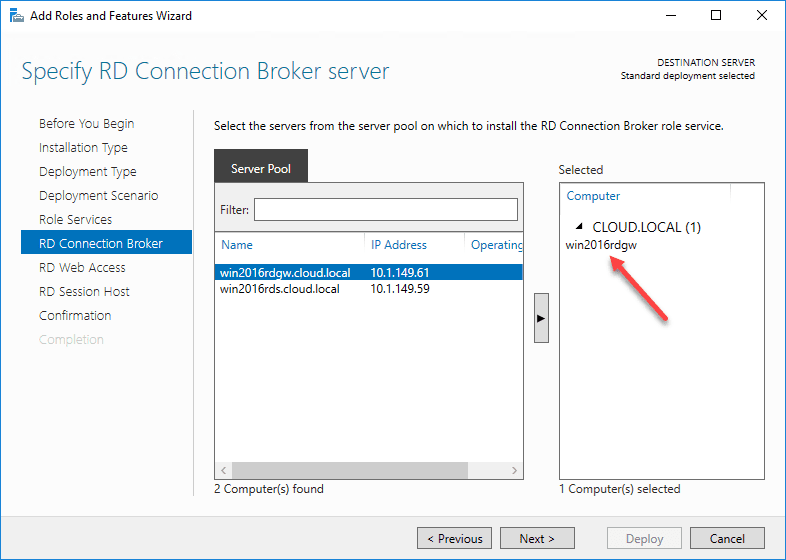
Next, you get to the part of the wizard where you start choosing the servers that you want to use for each role. The first choice is the RD Connection Broker.
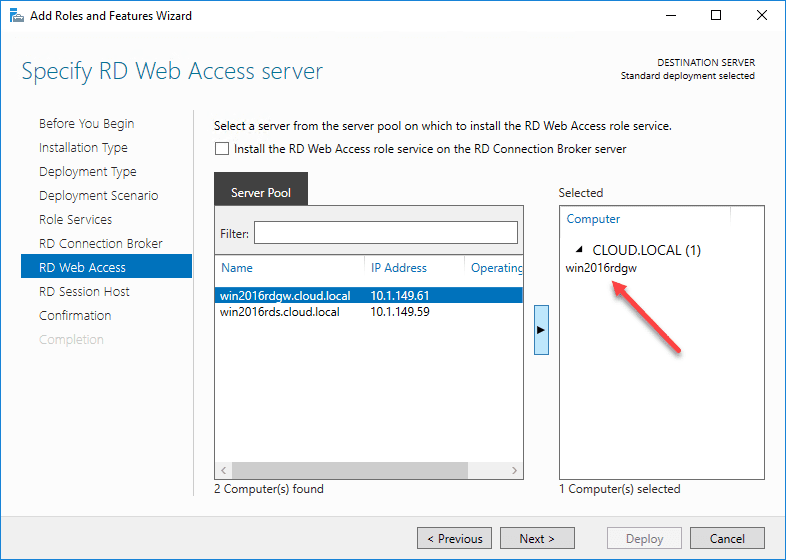
Next, is the RD Web Access Server.
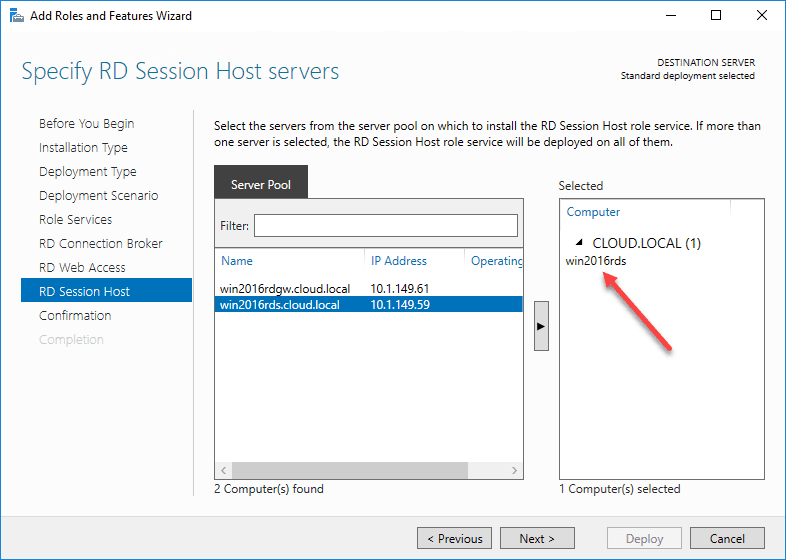
Finally, you choose the RD Session Host servers.
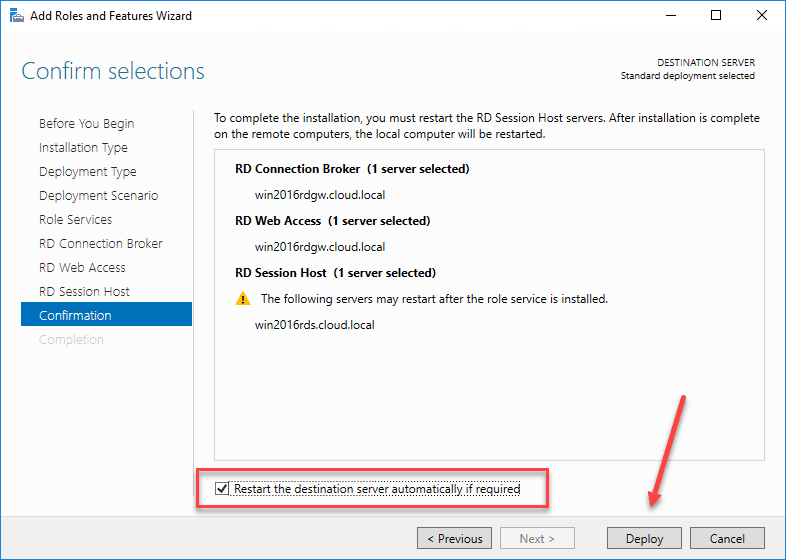
Now that we have selected the servers that will house each role, we can begin the deployment of the solution. I have selected the box to restart the destination server automatically if required. The Remote Desktop Services box that will host the RDSH role will need to be rebooted after the role service is installed.
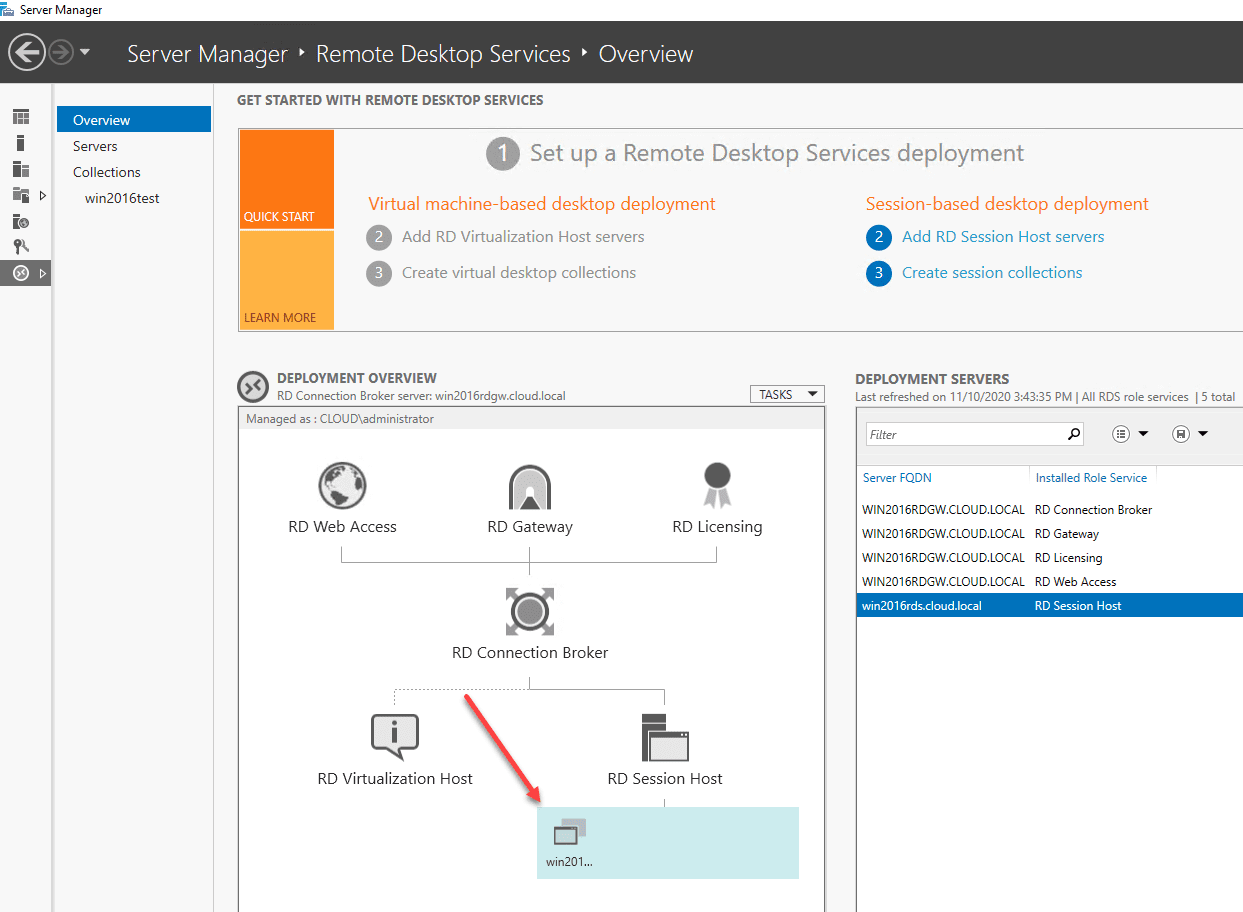
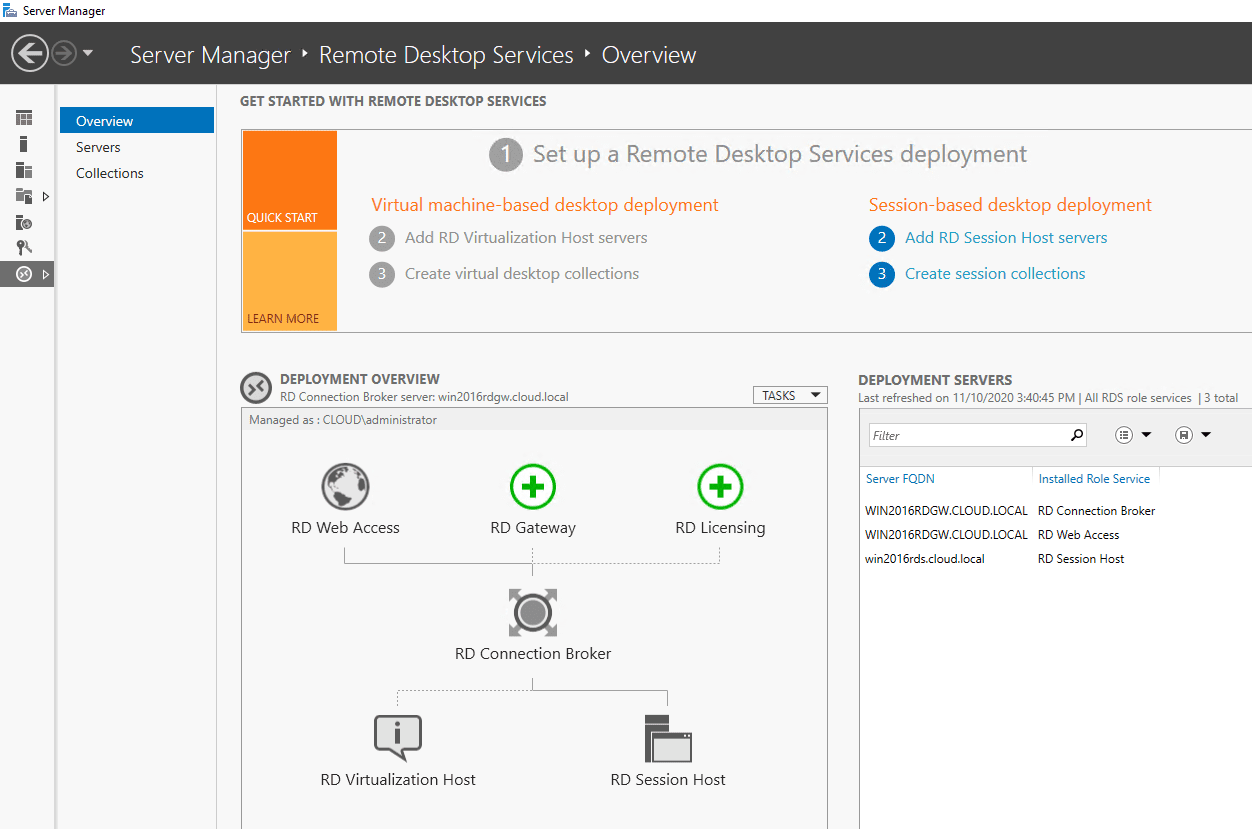
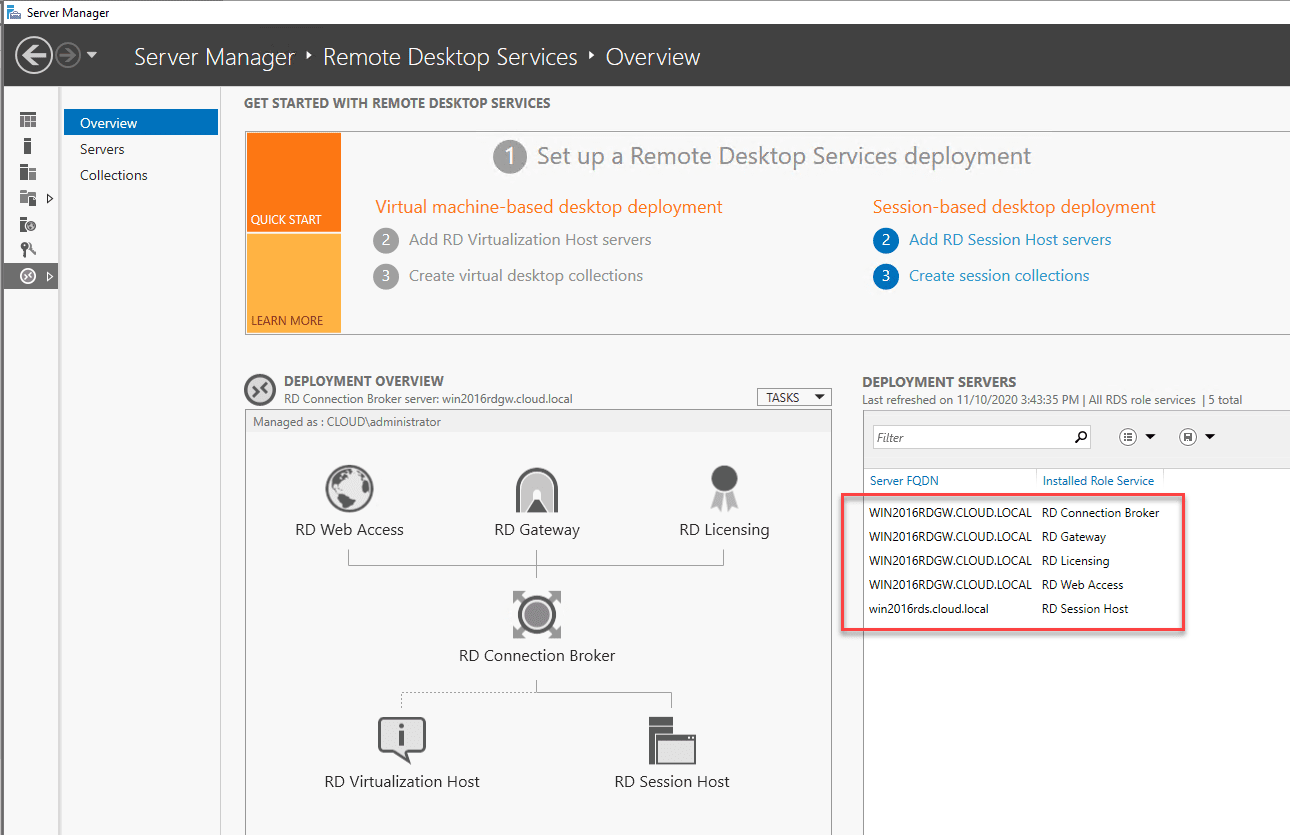
After the server comes back up from a reboot, go back to Server Manager and you will see the Remote Desktop Services role listed in Server Manager. Click this role and it will display the Set up a Remote Desktop Services deployment.
At this stage, we have merely installed the role services. So, we need to configure things such as the remote desktop gateway URL and setup the session collections. The items with a “green plus” sign need to be configured.
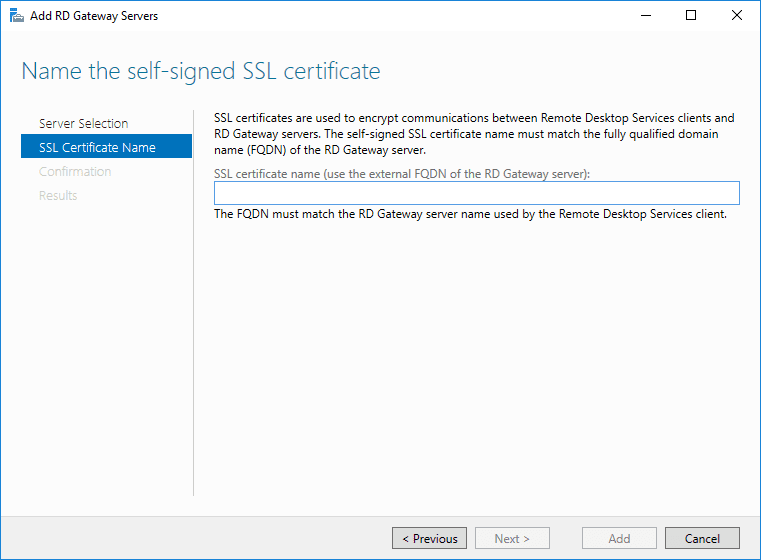
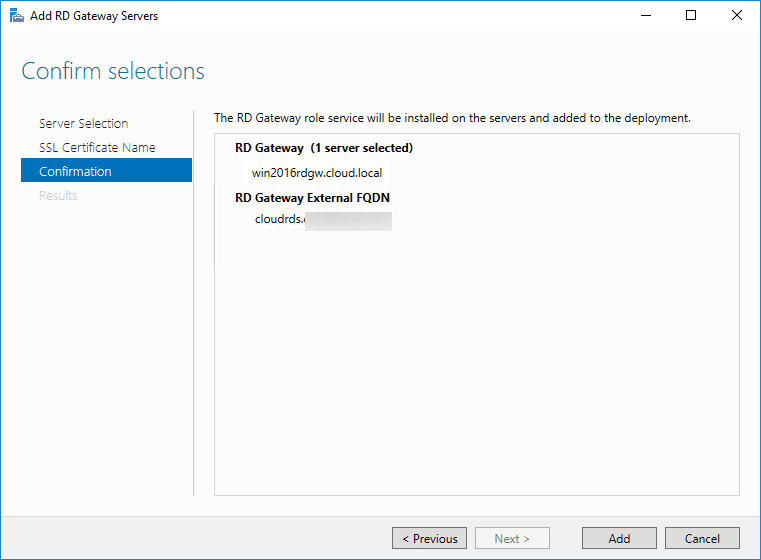
First I go through the Add RD Gateway Servers wizard. Adding the RD Gateway Server role to a server effectively installs the Network Policy Server role on the server chosen to serve as the RD Gateway.
You will be able to see the Remote Desktop Gateway Manager administrative console installed on the RDGW server. By default it will install the default Connection authorization policy and resource authorization policy on the gateway server. By default <DOMAIN>Domain Users will be authorized. You can tweak this.
Let’s go through the wizard. Enter the FQDN you want to use as the FQDN for the RD Gateway server.
After you are done configuring, click Add to finish the deployment.
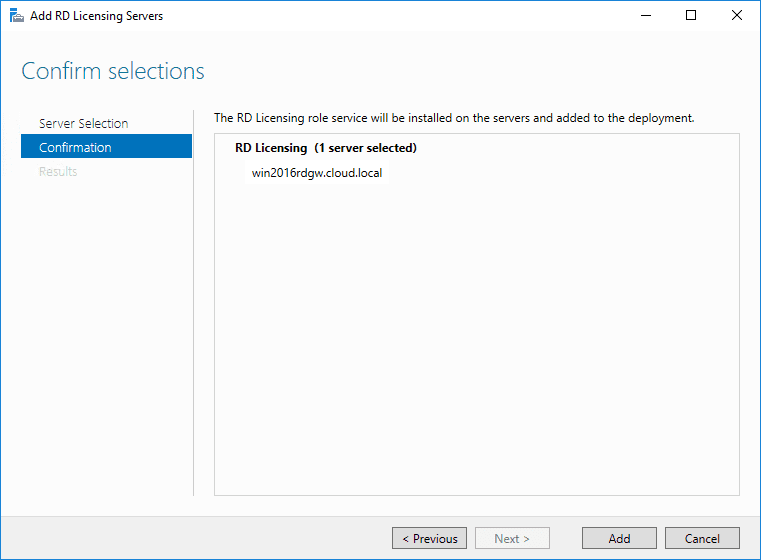
Next, is RD Licensing servers. Add the server that you want to use for RD licensing.
You will now note that all required roles are grey meaning they have been configured. You will see the servers selected and configured for each role under the Deployment Servers pane.
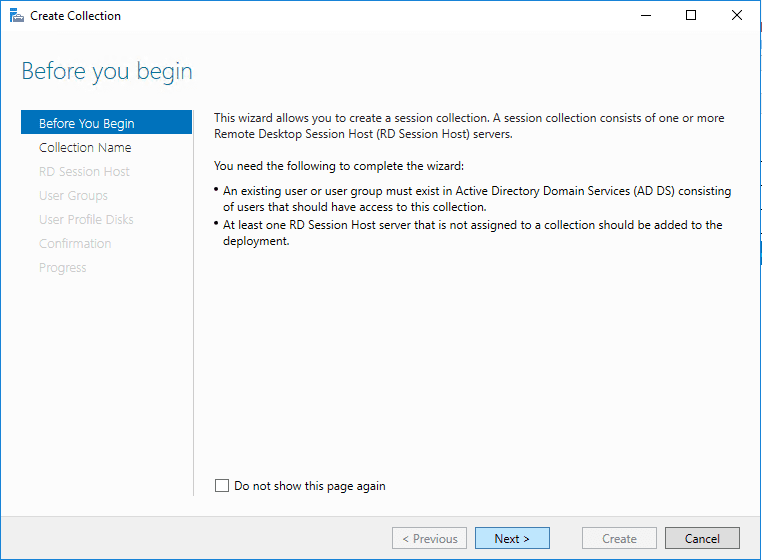
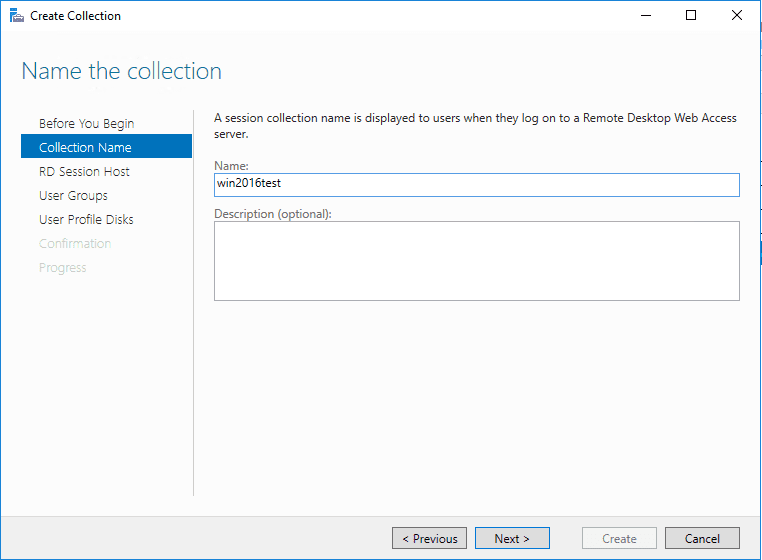
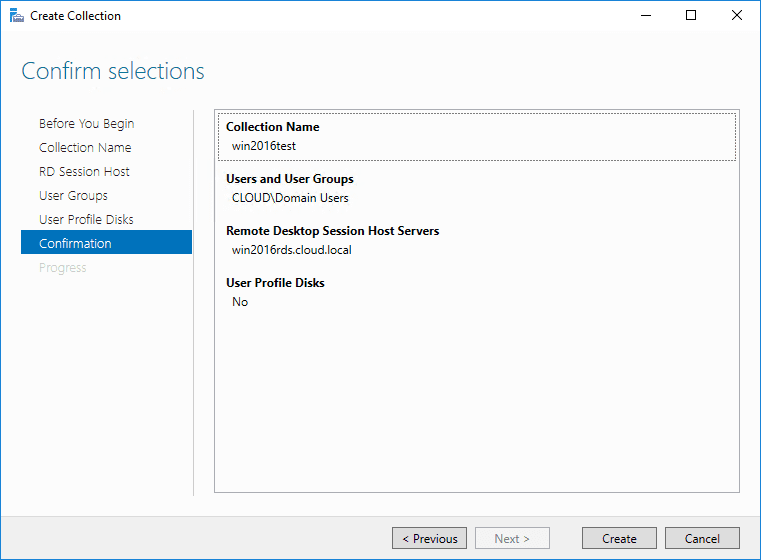
We now need to configure a session collection. This is another wizard that you launch from the deployment screen above under Session-based desktop deployment.
Choose the collection name.
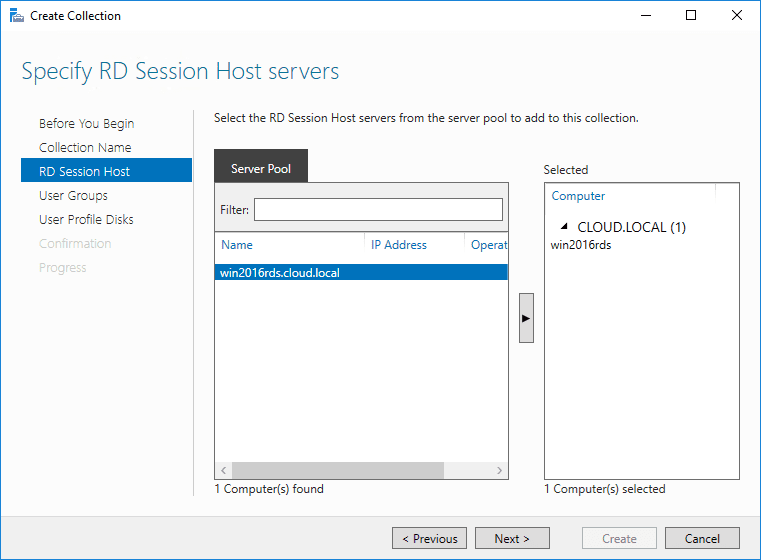
Select the RDSH server(s) that will participate in the session collection.
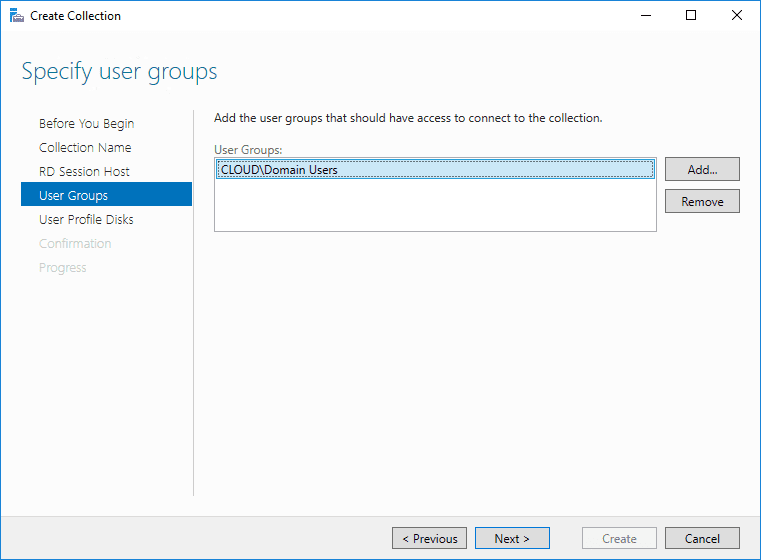
Specify user groups you want to have access to the session collection.
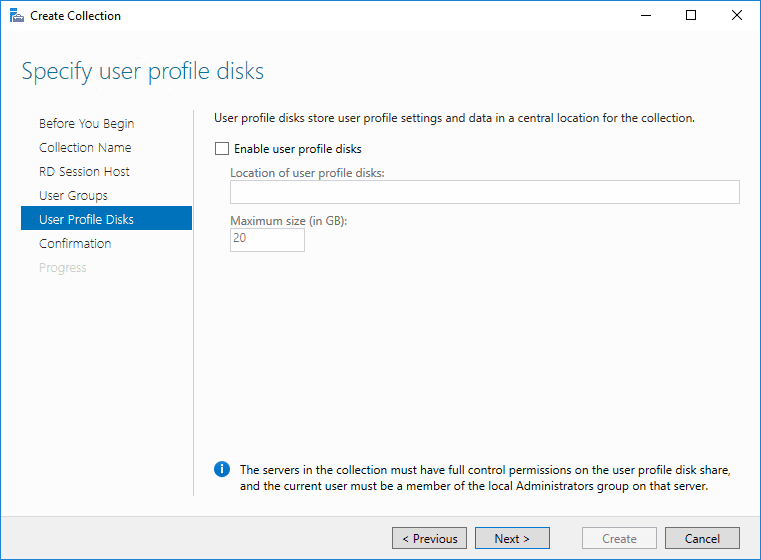
You can specify user profile disks to be used for profile settings and data in a central location for the collection if you want.
Finally, choose Create to create the session collection.
The new session collection is created successfully.
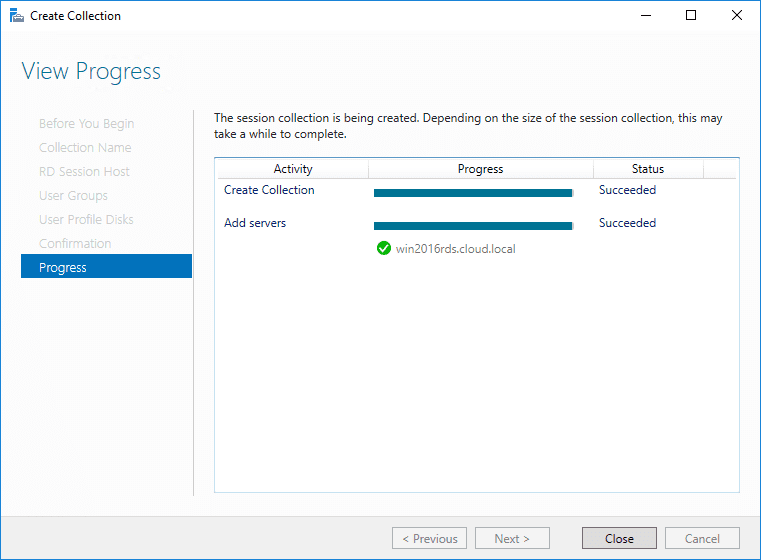
You now see the session collection in the deployment overview pane under your RD Session host.
Next Steps for Windows Server 2016 RDS Configuration
At this point, we have most of the configuration in place for a functional RDS environment with the exception of configuring the Remote Desktop Gateway Server with a proper SSL certificate. Without a proper SSL certificate from a CA, you will have to import the self-signed cert to all clients who will use the RDGW server to connect to the environment.
Additionally, you will most likely want to setup high-availability for the remote desktop gateway as well as add multiple remote desktop session hosts to the pool.
Check out my post I wrote not long ago covering the configuration of Remote Desktop Gateway Server in either Windows Server 2016 or 2019.
Concluding Thoughts
The Windows Server 2016 Install Remote Desktop Services process is made very intuitive with the built-in wizards found in Server Manager. It makes installing all the necessary roles needed for your Remote Desktop Services infrastructure straightforward.
Hopefully this walkthrough of the basic steps will help any who want to see what this process looks like. Additionally, this process is the exact same for Windows Server 2019 so not much has changed there.