Many Windows administrators remember the term from back in the day of “slipstreaming.” This was where you would take the latest patches that were released and you took these patches and essentially combined them into the installation media so when you installed from the media, you would have the latest installation of Windows, Office, etc. As it turns out, this process is helpful with VMware vSphere ESXi as well. Slipstreaming allows you to save the step of installing ESXi from a base install and then having to turn around and install the updates that may have been released for the version you are installing. Let’s take a look at the process to slipstream the latest VMware ESXi patches into the installation ISO and see how this works.
Requirements for VMware ESXi ISO slipstreaming
What are the requirements to slipstream ESXi patches into the VMware ESXi installation ISO media? Well, you only need a few things. You will need the following:
- A VMware account
- VMware PowerCLI module installed in PowerShell
- The VMware patch downloaded from the VMware patch site
- Rufus to “burn” the ISO you will create using VMware PowerCLI
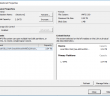
Grab the latest patch from the VMware Patch download Center. This is where you will need your VMware account handy as you will be prompted to login to the patch center site.
Here I am downloading the latest and greatest VMware ESXi 7.0 Update 1a which is build number 17119627.
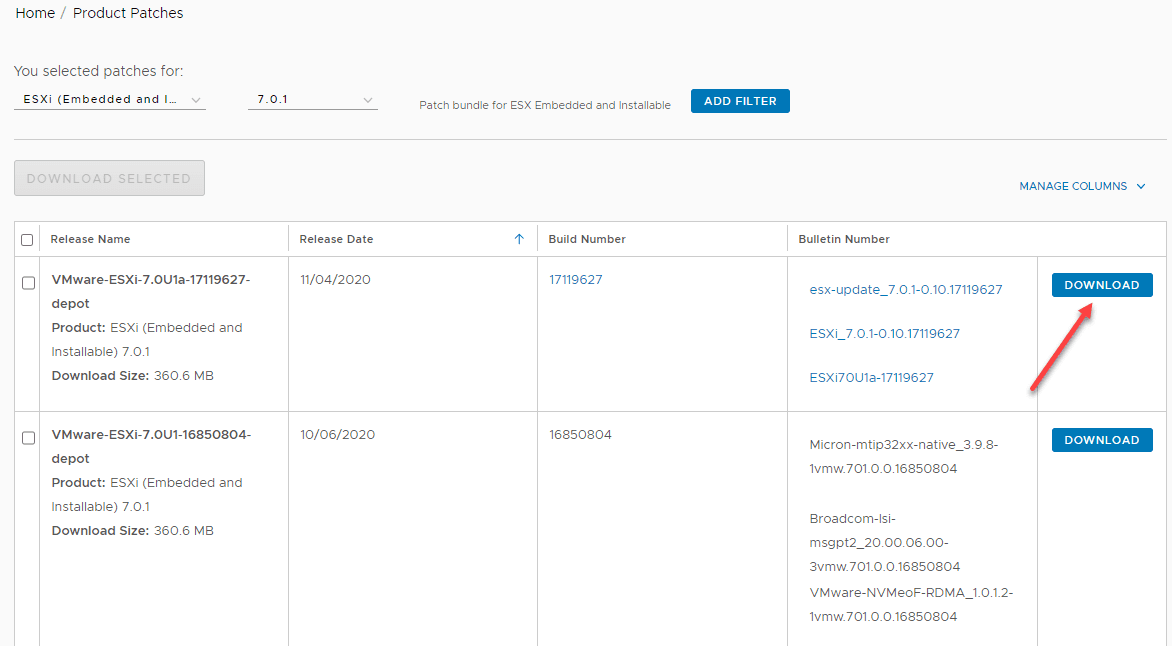
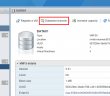
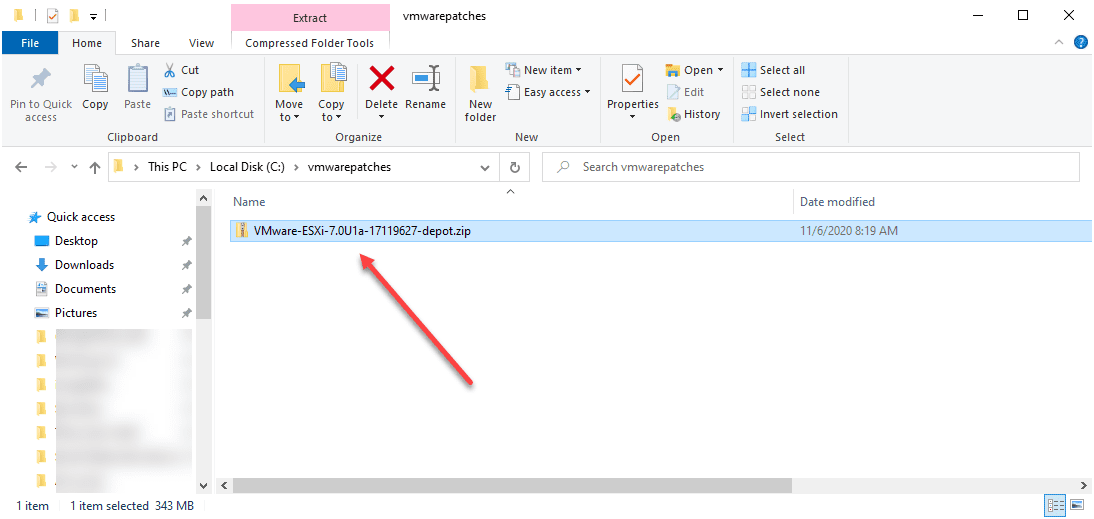
Download the .zip file to a folder on your workstation. Note, you do not have to extract the .zip file. Just simply leave it intact. With VMware PowerCLI, we will do what we need to do to create the ISO.
Most of you will already have VMware PowerCLI installed on your workstation if you work with VMware to any degree. If not, read here to learn how to install the VMware.PowerCLI module.
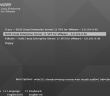
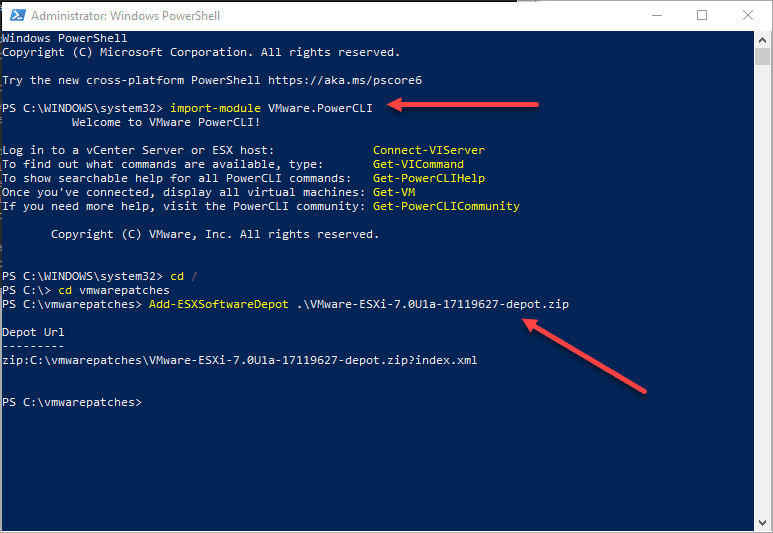
After installation, you just need to import the module if you don’t already have it loaded in your PowerShell profile. Also, we will then add the .zip file as the patch depot. So, change to that directory first, then load PowerCLI. to do that:
import-module VMware.PowerCLI

Add-ESXSoftwareDepot .<your .ZIP file>
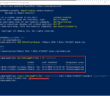
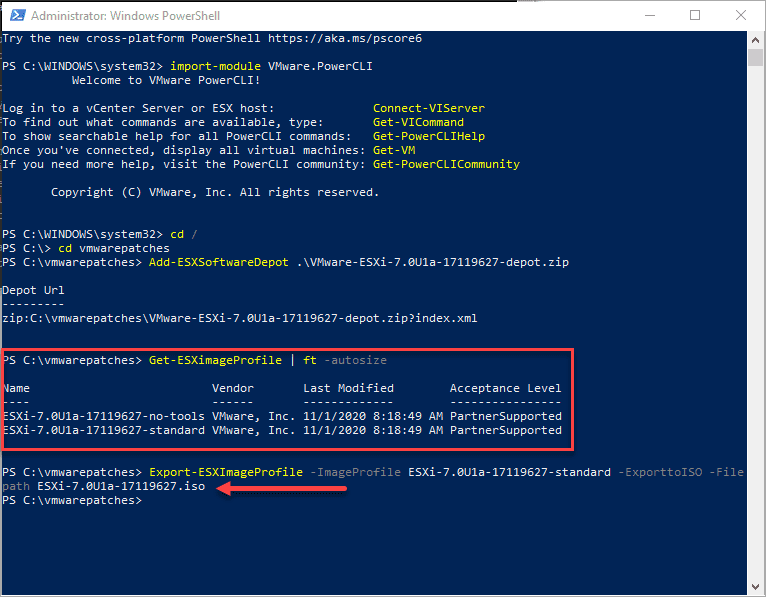
Next, you can view the image profiles contained in the .zip file and then actually build the ISO file from the .zip patch file.
Get-ESXImageProfile | ft -autosize

Export-ESXImageProfile -ImageProfile <your image profile> -exporttoISO -filepath <your file path>
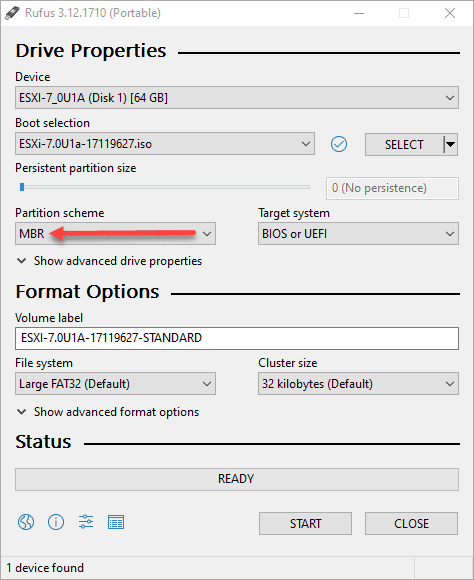
The next step is super easy as well and is likely a process you are already familiar with. We will take the ISO that we just created with VMware.PowerCLI and use Rufus to “burn” the ISO to a USB drive to use for installation on a physical ESXi host.
Note below, you will select your USB drive, the ISO image in the folder where you specified in the VMware.PowerCLI command, then make sure you choose MBR under the partition scheme. If you don’t you will get an error on your host most likely related to UEFI. Let Rufus burn the image and you will have a newly slipstreamed USB key with the latest patches for your particular ESXi installation.
Use Cases and Benefits of Slipstreaming VMware ESXi patches
You may wonder, what is the benefits of using the slipstreamed patching approach to create your ISO for installing ESXi? I can think of a few among others that you may think of in your particular environment. For me, these include the following:
- Use a one-step approach to installing ESXi and getting the latest patches as well
- Saving time installing a cluster of hosts without the update time required
- Not having to wait for the latest installation media to be made available on VMware’s download site
- Staying up-to-date with the latest patches, even if you have problems with the update process
Thest are just a few that I could think of. I have been running into a bug of sorts since ESXi 7.0. When I update my ESXi hosts, I have a failure of the EPD process that will not start on my ESXi hosts. This seems to be related to storage changes that were made with ESXi 7.0. I am booting from USB keys without persistent datastores other than vSAN as well that is probably contributing. You can read about this challenge as I saw it in my lab environment here.
Concluding Thoughts
VMware has made it extremely easy with VMware PowerCLI to Slipstream the Latest VMware ESXi Patches into the Installation ISO. By simply downloading the latest ESXi patch from the VMware patch download site, and using a couple of VMware.PowerCLI commands, you can easily create a new ISO file from the patch .zip file directly. Then, you can use this ISO file as you would any other ISO file you would get from VMware. This allows staying up-to-date with the latest patches as they are available from VMware and installing these all in one fell swoop with the base installation of VMware ESXi.
Google is updating how articles are shown. Don’t miss our leading home lab and tech content, written by humans, by setting Virtualization Howto as a preferred source.
About The Author