Apply New ESXi 7.0 updates with vSphere Lifecycle Manager vLCM
If you are like me you have been waiting for updates to be released for ESXi 7 so you could try out the vSphere Lifecycle Manager vLCM tool to apply those updates to your ESXi 7 vSphere cluster. The new vSphere Lifecycle Manager vLCM tool is a declarative, desired-state solution that looks at the current state of your cluster and determines if it is out of compliance with the image version level required by the vLCM image baseline. VMware just came out with updates to ESXi 7.0 with image build ESXi-7.0.0-16324942. Let’s take a look at how to apply new ESXi 7.0 updates with vSphere Lifecycle Manager vLCM.
Update your base ESXi 7.0 Image in vSphere Lifecycle Manager with Sync
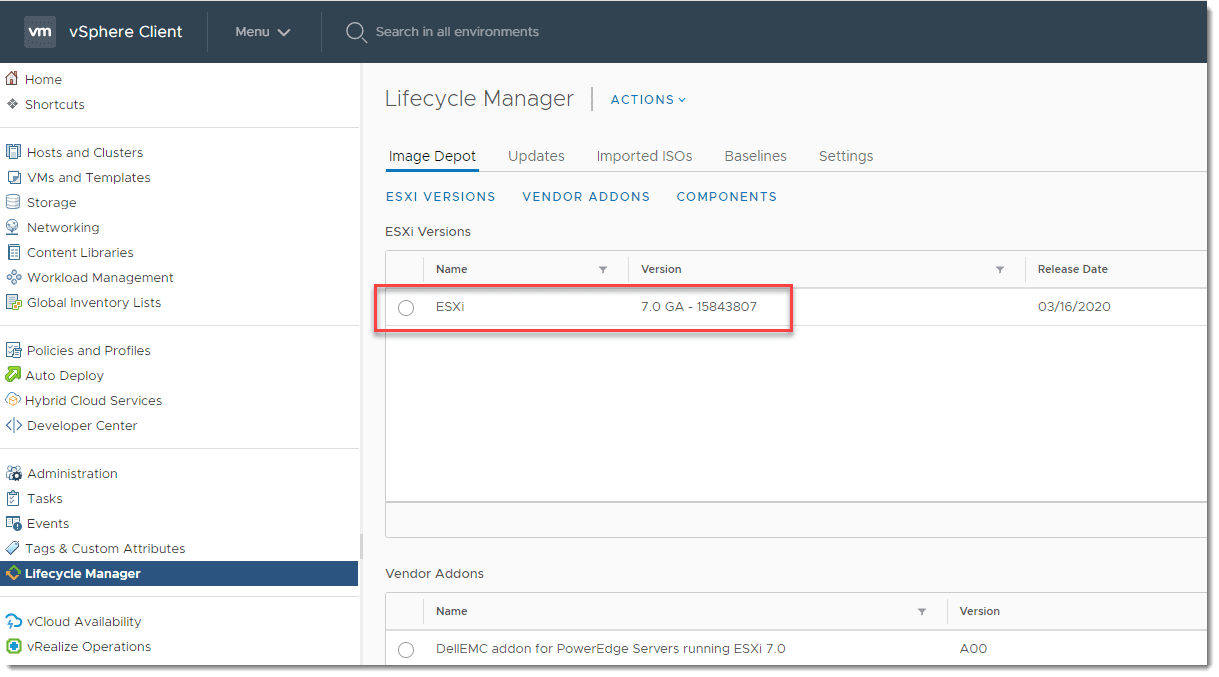
If you are like me, in my lab environments, I am running the vSphere ESXi 7.0 clusters running the GA build of ESXi. So, when you look at your vSphere Lifecycle Manager vLCM, you will see this image listed.
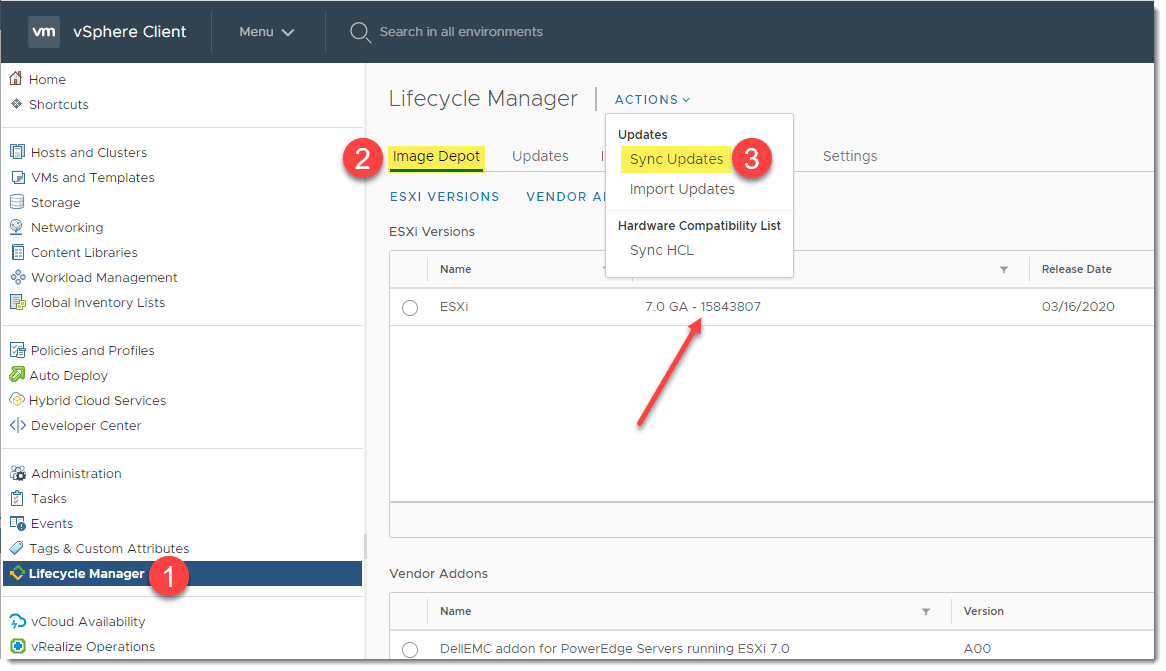
To see recently released updates, select the Actions drop down and select Sync Updates. The sync updates command will actively go out and pull down the latest updates that have been released. By default, this operation runs periodically. However, running ad-hoc ensures you are seeing the latest and greatest updates available.
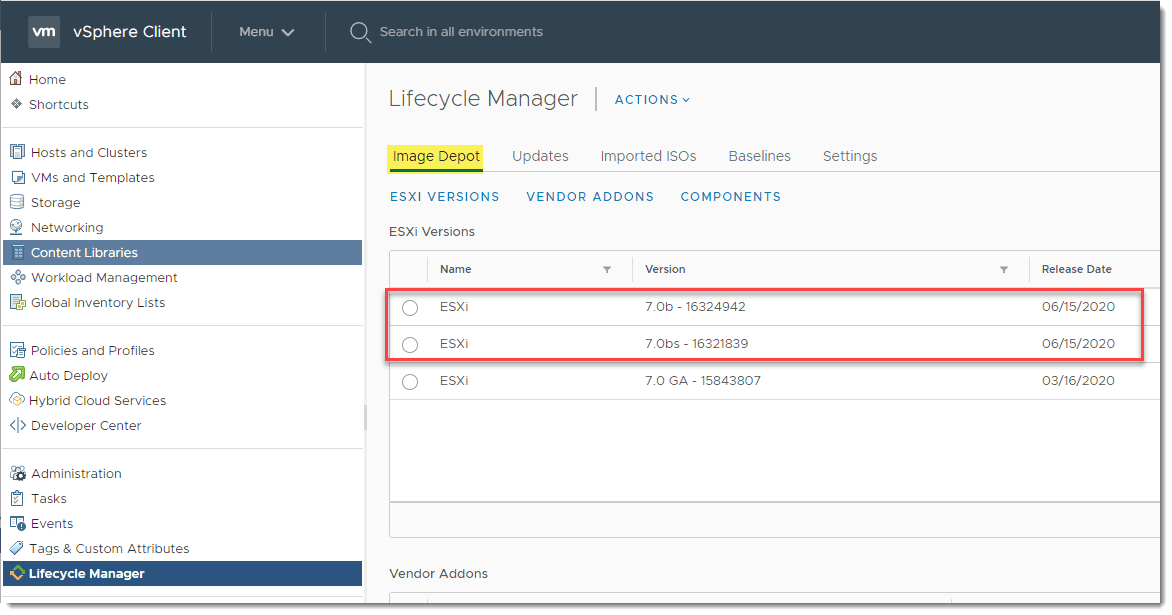
After a couple of minutes, you should see new ESXi 7.0 base images pulled down as part of the synchronization update. ***Note*** I had to refresh my browser screen to see the new images appear even after the sync operation had completed.
Update your vSphere cluster ESXi 7.0 hosts with vSphere Lifecycle Manager
Now we need to apply this new image to the vSphere cluster running the ESXi 7.0 hosts.
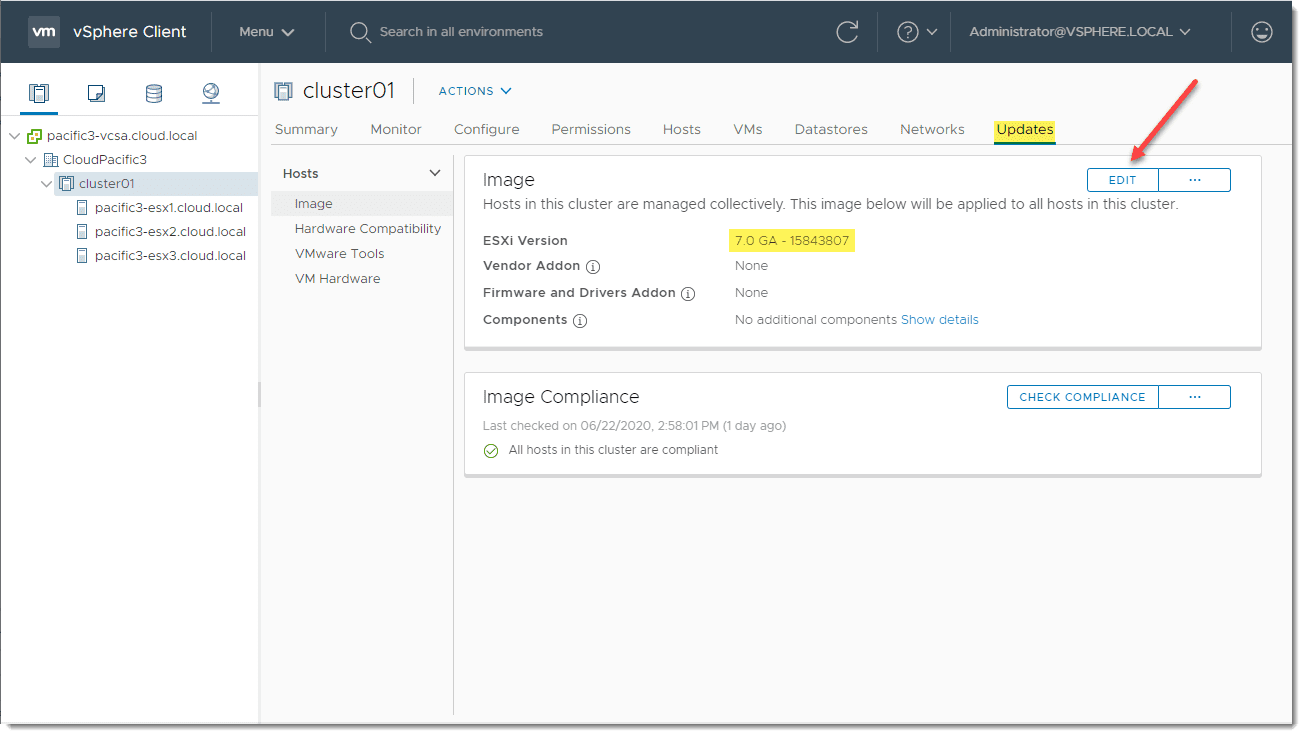
To begin, I have already changed over to using the vSphere Lifecycle Manager vLCM on this cluster instead of using the legacy vSphere Update Manager (VUM), so you don’t see the Baselines menu under the Updates tab. To see how to do that, see my post here on What is vSphere Lifecycle Manager vLCM?
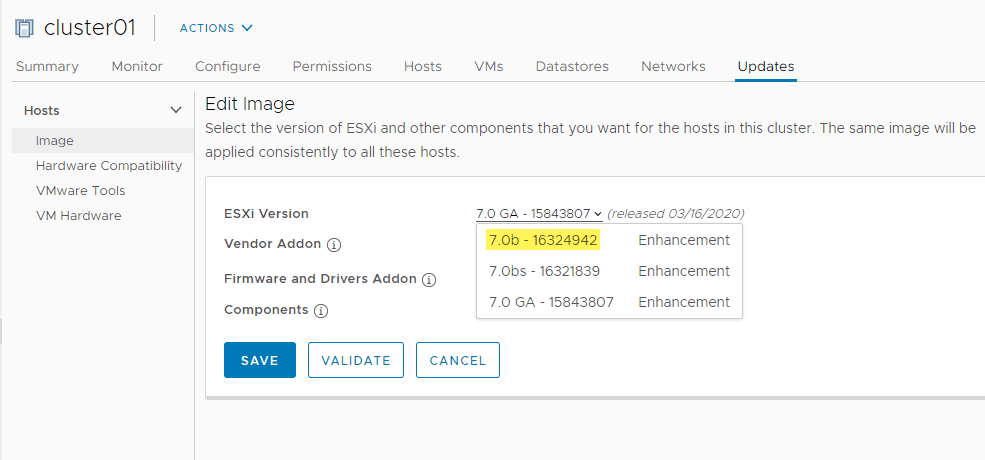
Let’s change to using the new image for remediating the cluster. Under the Updates tab > Image, click the Edit button.
Now under the drop down for ESXi Version, you should see the new versions of the ESXi 7.0 images. Click the latest image and click Save.
You will see the task kick off that vSphere Lifecycle Manager starts checking the compliance of the cluster against the newly selected image.
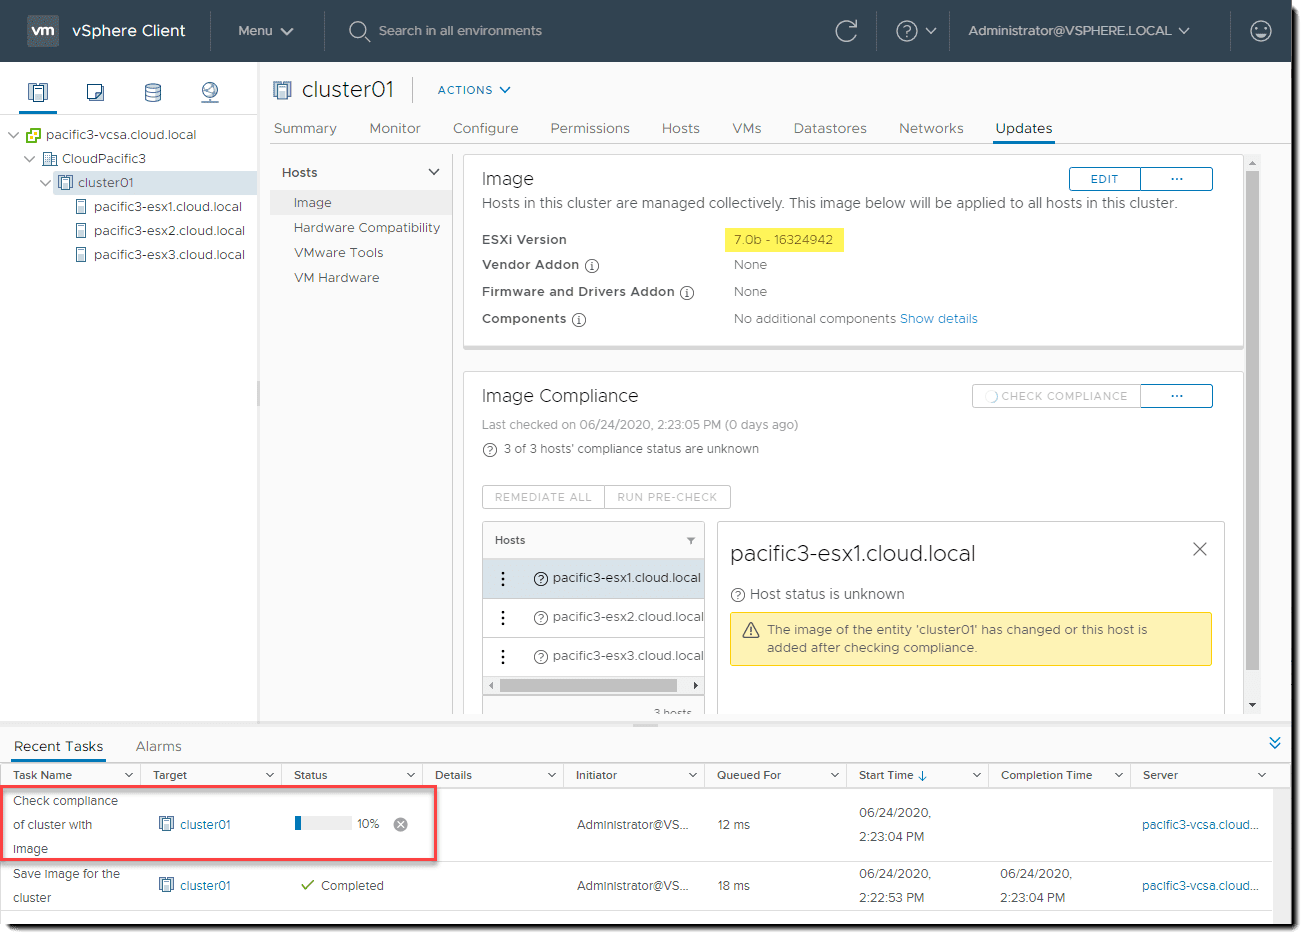
Once the compliance check finishes, the cluster will show as needing remediation. In very “declarative, desired state speak”, it notes this as configuration drift.
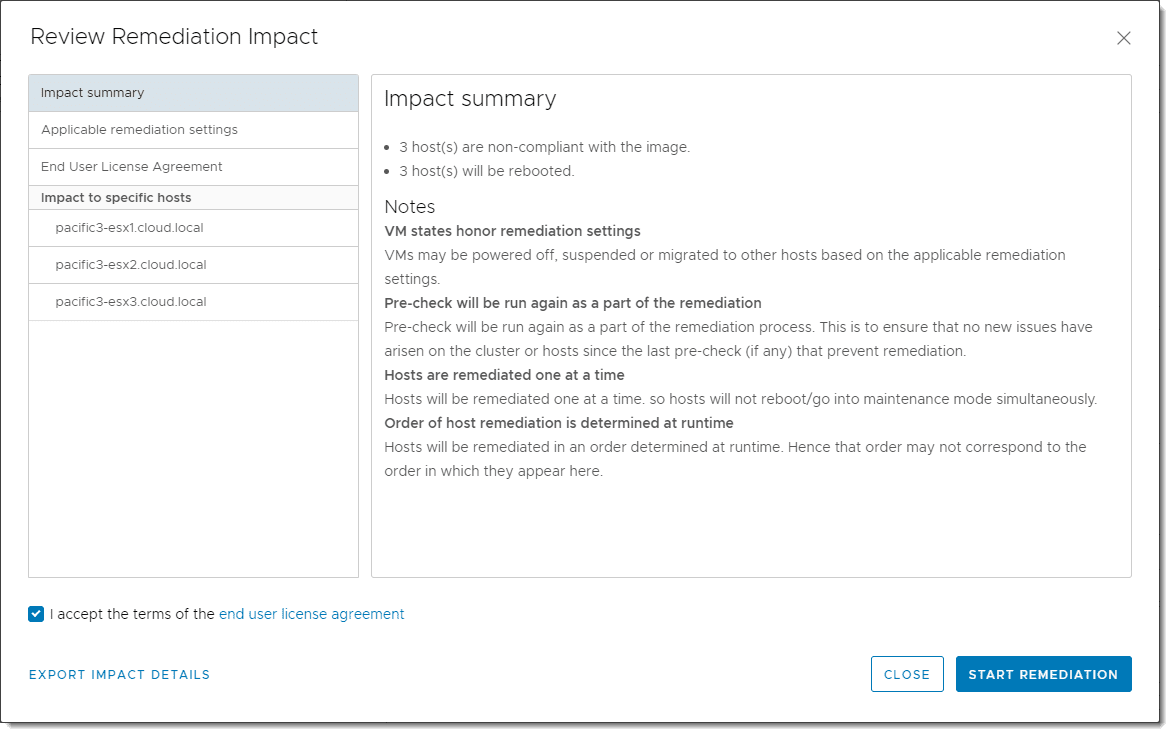
To remediate the cluster in one action, click the Remediate All button.

Review the Remediation Impact summary. Then click Start Remediation.
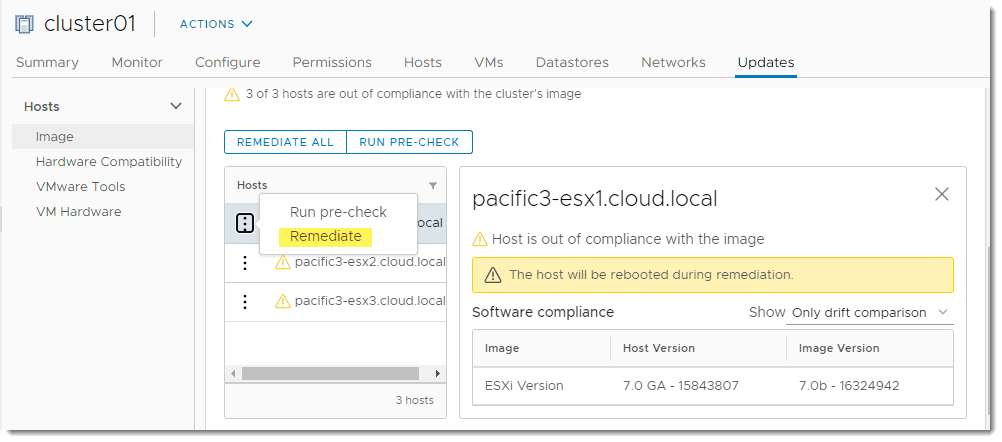
As a note here, you can also select a single ESXi 7.0 host instead of remediating the entire cluster. Click the ellipse next to the ESXi 7.0 host. Select Remediate.
The compliance and remediation tasks kick off and will show progress as the cluster is remediated using the vSphere Lifecycle Manager vLCM.
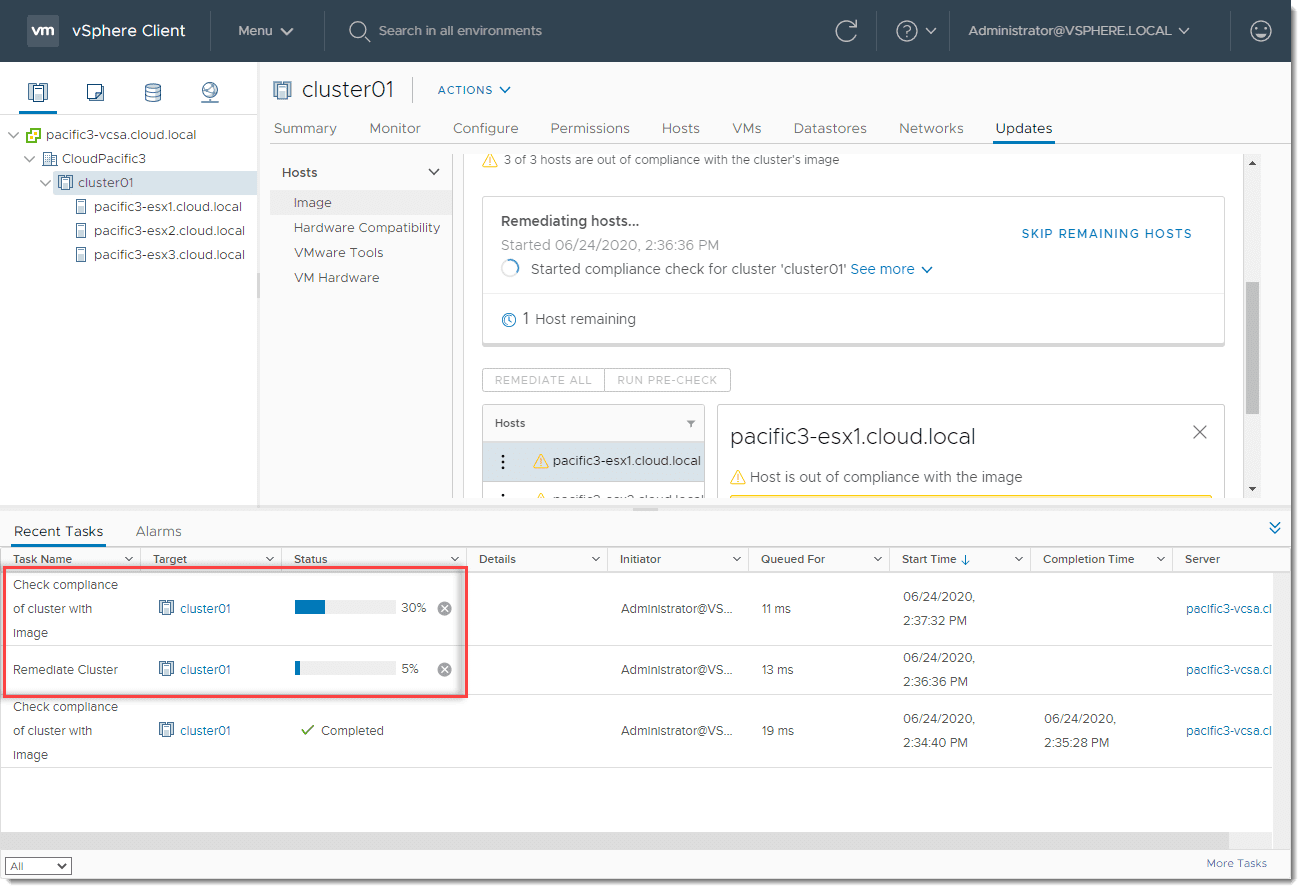
After a while, the cluster should be remediated as each host is placed into maintenance mode, has the image applied, rebooted, and then brought back into the cluster before the next host is remediated.
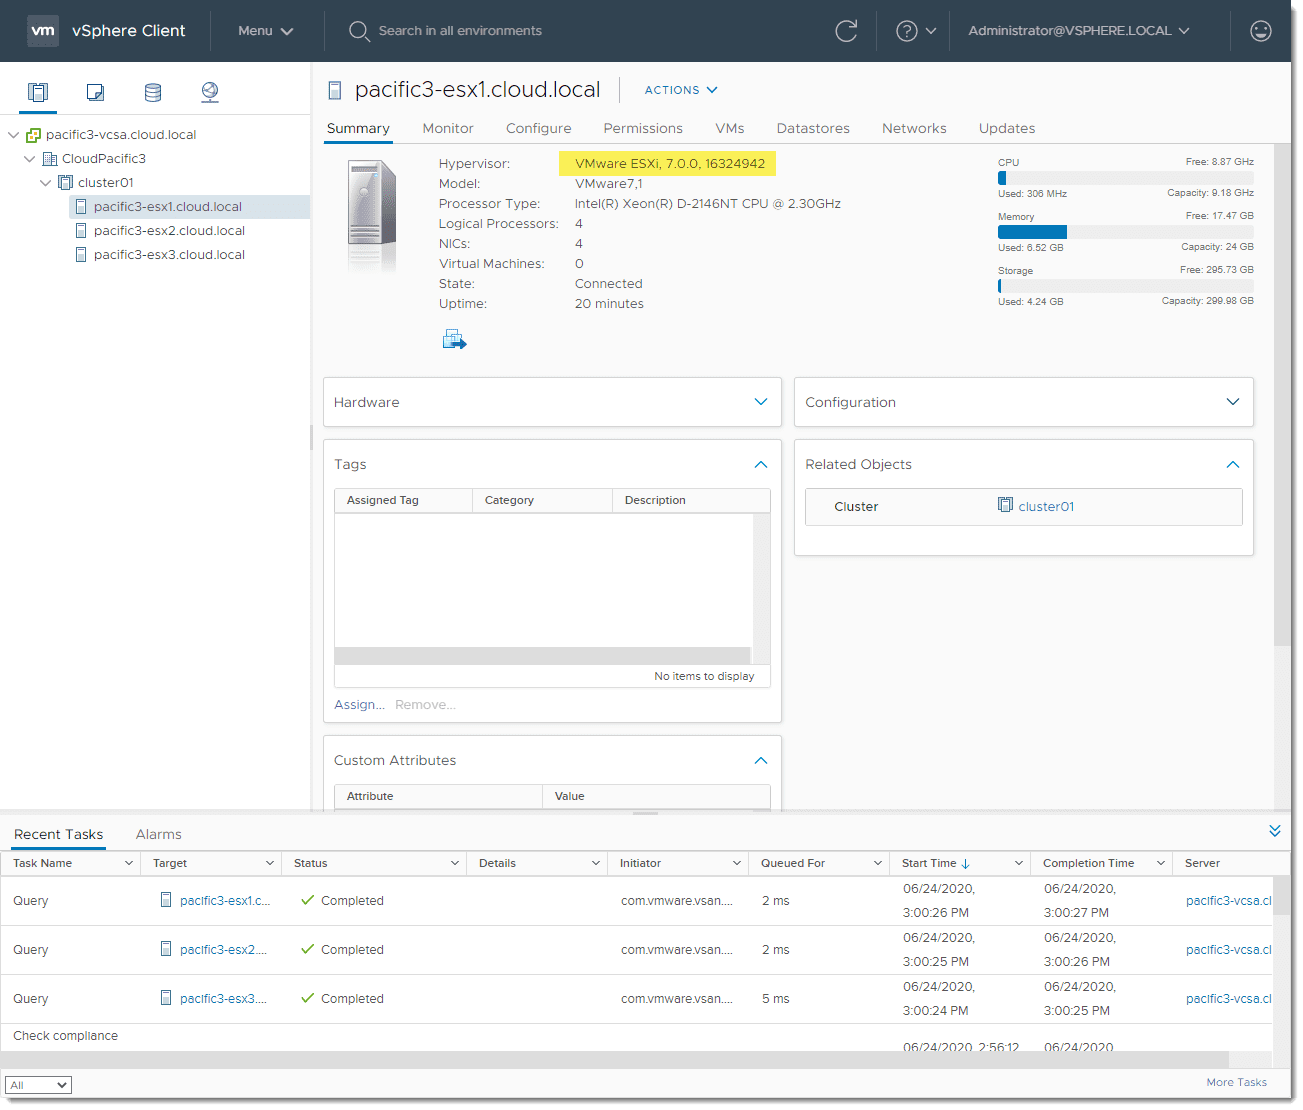
After all are finished, you can quickly look at the build number displayed on the Summary screen for each host to verify the version has updated correctly.
Wrapping Up
I really like the workflow and feel of the new vSphere Lifecycle Manager vLCM in vSphere 7. It seems to simplify the process of applying updates. Instead of thinking about each individual module that is patched, it is a very holistic approach to versioning the image itself and apply this image to the entire vSphere cluster.
The image is easily updated in the vSphere Lifecycle Manager vLCM. Once you have pulled down the most recent updates, you simply change to the new image in the Updates tab of your vSphere cluster. After you do this, compliance with the new image is checked across the cluster and you can begin remediating. You can choose a single host or have your entire cluster updated in one operation.