In the previous Altaro VM Backup Review Part 1, we looked at Altaro as a backup solution from downloading, installation, and provisioning storage as a backup target. In our Altaro VM Backup Review Part 2, we will take a look at taking backups using Altaro, creating scheduled backups, compression and deduplication, and other restore options including using VM Replication for site-level recovery.
Taking Backups and Creating Backup Schedules for VMs
After assigning the primary backup location for the virtual machines, you can start taking backups as well as create backup schedules for backing up your VMs.
In the screenshot below:
- Step 3 of the Quick Setup process – clicking the Backups button to start taking backups
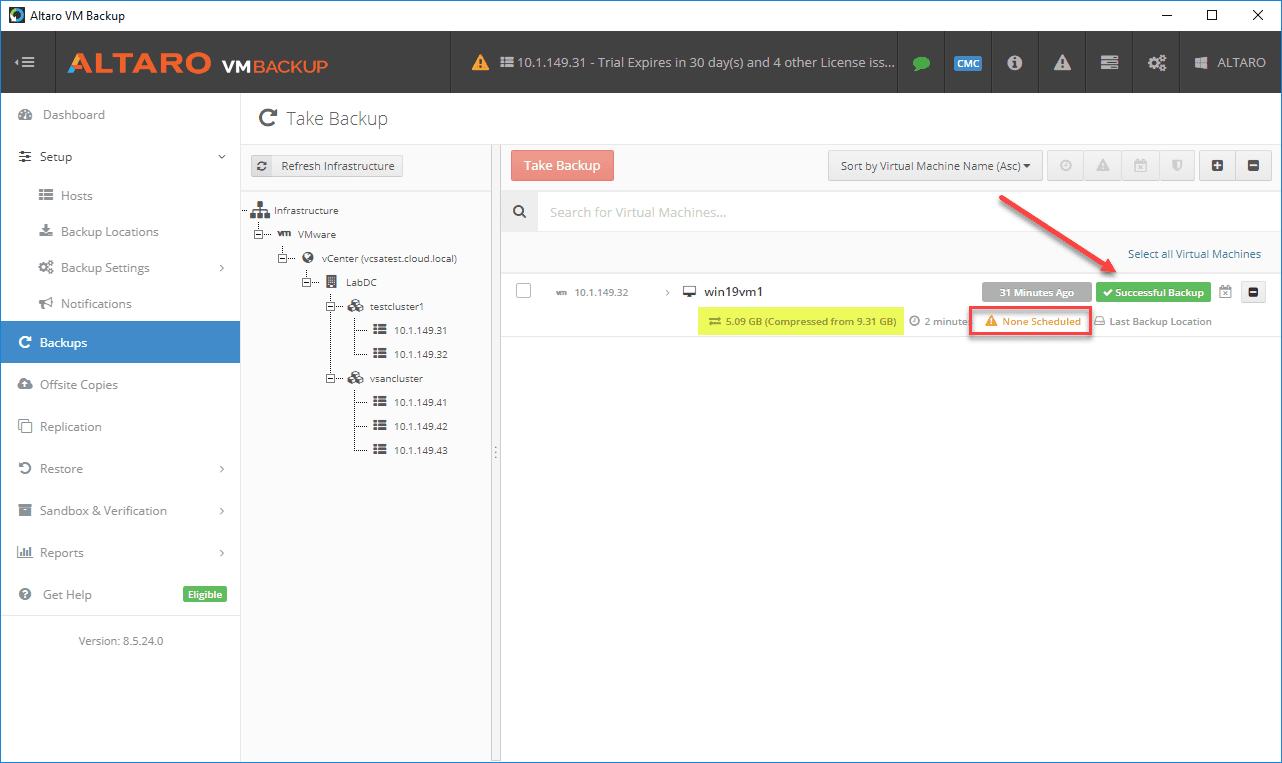
- Taking Backups by clicking the Take Backup button. This is an ad-hoc backup.
- Click the small calendar icon for creating a backup schedule. This will allow taking backups automatically.

After kicking the backup off, it completed quickly and successfully. Altaro lets you know if you don’t have backups scheduled as you can see in the summary of the job.
I have highlighted the backup job here in regards to the space that is used by Altaro. As you can see there was 9.31 GB of data and after the compression by Altaro, this was reduced to 5.09 GB.
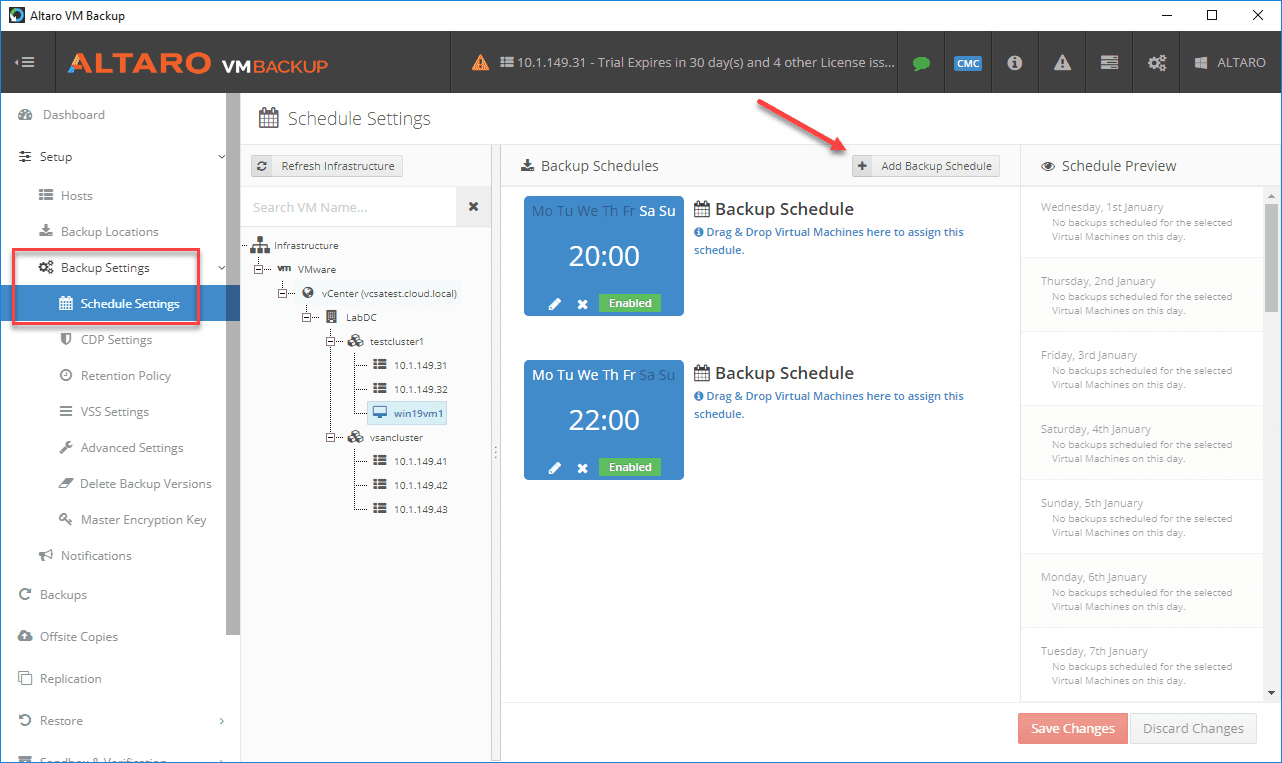
If you click the small calendar icon on the Backups screen, or if you navigate to Backup Settings > Schedule Settings, you will be able to create new backup schedules either by using the backup schedules that have been created by default, or create your own backup schedules.
If you want to use the ones that have already been created by default in Altaro or a backup schedule you have created, simply drag the VM from the inventory displayed to the backup schedule you would like to assign.
Altaro VM Backup Compression and Inline Deduplication
One of the strong suits of Altaro is the efficiency of the solution from a storage perspective. Altaro uses what it calls augmented inline deduplication that provides the space saving technology used by the platform.
Using augmented inline deduplication allows Altaro to ensure common blocks of data are stored only once. Not only does this bring space saving benefits to local storage, it also helps to minimize backup times and allow very efficient transfers to offsite copy locations including cloud environments. It also makes continuous backups and replication up to every 5 minutes possible.
Another important feature of the “inline” deduplication is that it is performed “inline” with the various Altaro VM Backup jobs across the VM backups in the repository. This means there is no post-process deduplication that happens.
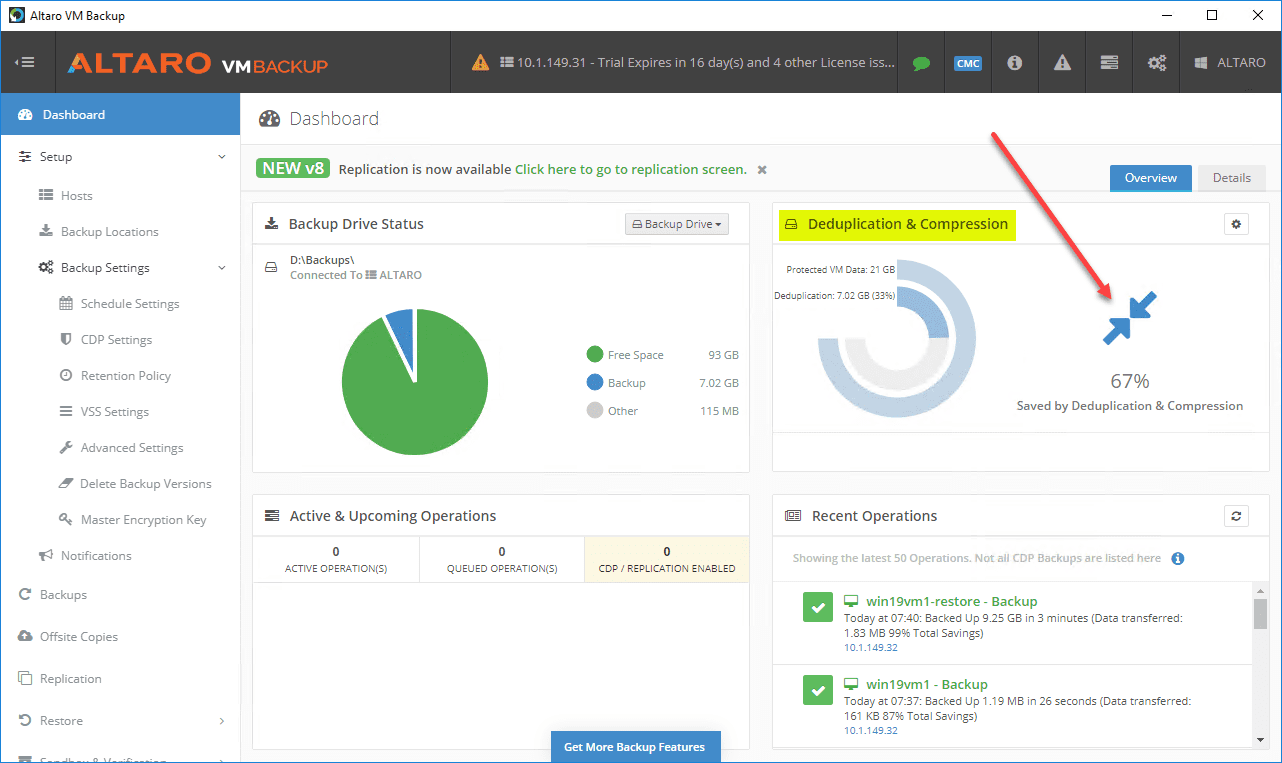
After you perform a backup of VMs with Altaro VM backup, you can see the deduplication and compression benefits in the Altaro VM Backup dashboard.
Let’s look at how Altaro VM Backup restores data to your environment.
Restoring Data Using Altaro VM Backup
Altaro VM Backup provides many options for restoring your business-critical data in your environment. The options cover the gamut of restoring everything from files to virtual machines. Altaro VM Backup restore options include:
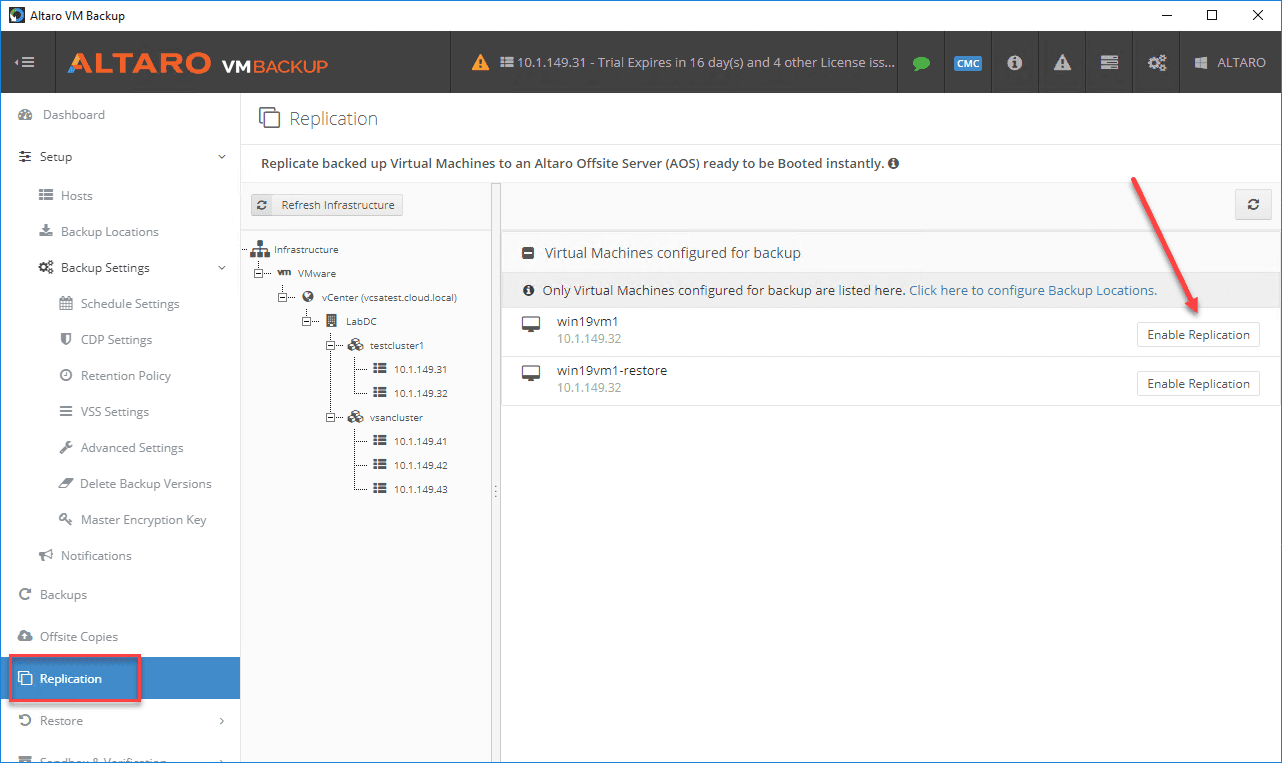
- Booting from an Altaro VM Backup Replicated VM – Boot a replicated virtual machine using the Altaro Offsite Server
- Restore VM as Clone – Restore the entire virtual machine as a clone from the backup restore point
- Restore Virtual Disk – Restore specific virtual disks
- File Granular Restore – Restore specific files from your virtual machines without the need to restore the entire VM first
- Exchange Granular Restore – Restore application aware data from Microsoft Exchange Server
- Boot from Backup – Instant recovery of your VMs by booting a VM from a backup restore point
Let’s look at a couple of these options a bit closer.
Boot from a Replicated Virtual Machine
Using an Altaro Offsite Server, you can create offsite copy jobs as well as replicate your business-critical virtual machines to a DR/offsite location. To make use of the Altaro Offsite Server, simply download it, install it in the secondary location, and start setting up your offsite and replication jobs.
There are just a few initial steps after installing the AOS installation such as adding a replication and copy job local folder that is used for staging these operations as well as adding your target hypervisor hosts in the DR location.
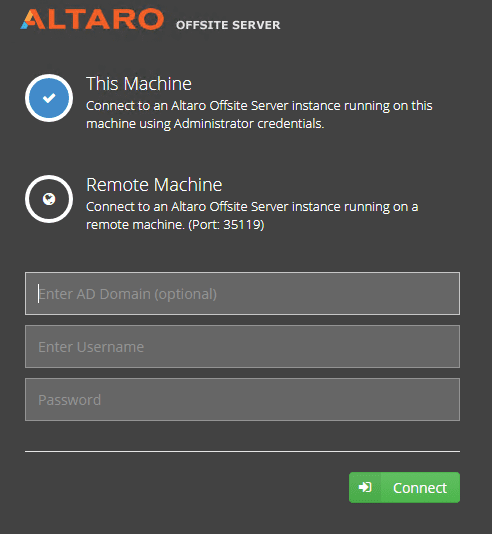
After standing up the Altaro Offsite Server, you add it to the backup locations under Offsite Locations.

By default, Altaro enables Continuous Data Protection (CDP) as of version 7.6. This means you will have your VMs replicated every 5 minutes.
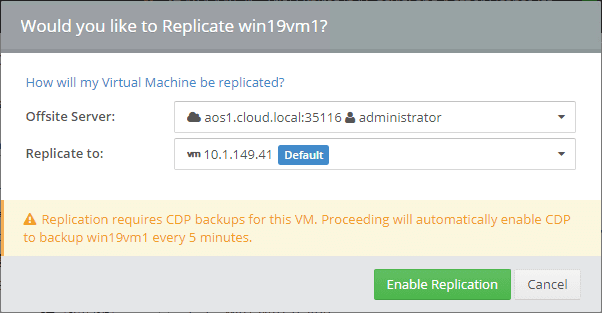
Altaro VM Backup replication allows you to protect your business-critical infrastructure at a site-level. If an entire production site goes down, VMs that have been replicated to the secondary location will be available to assume the workloads.
Restore VM as Clone
To perform a full restore of a virtual machine which is required in some instances to completely recover data that has been lost for a number of reasons, Altaro provides the Restore VM as Clone option.
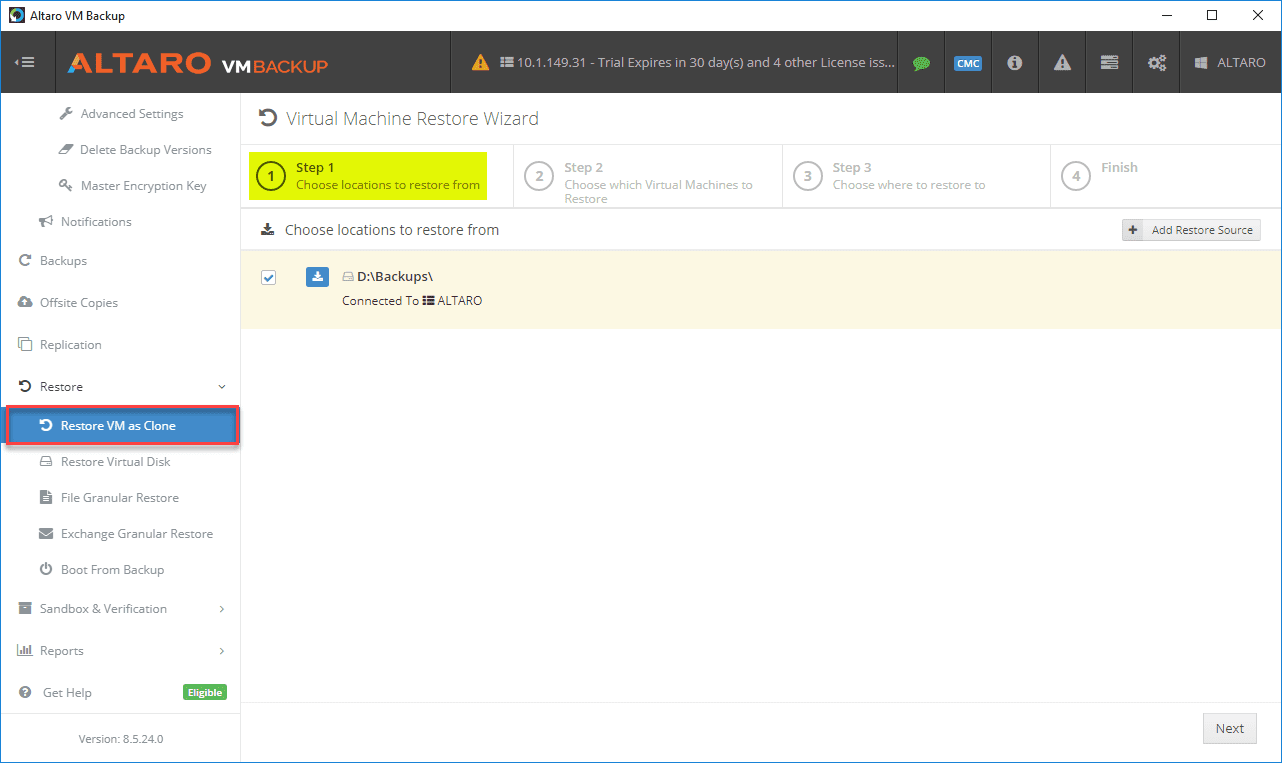
After stepping through the intuitive wizard, choosing the VMs to restore and a few other options, Altaro
Performing File Level Restore
In many cases a full restore of a virtual machine is not necessary, especially if only a single file or two need to be restored. In a situation where a critical spreadsheet is deleted from a file server that may have many gigabytes worth of data, it would be highly inefficient to restore the entire virtual machine just to recover a single file.
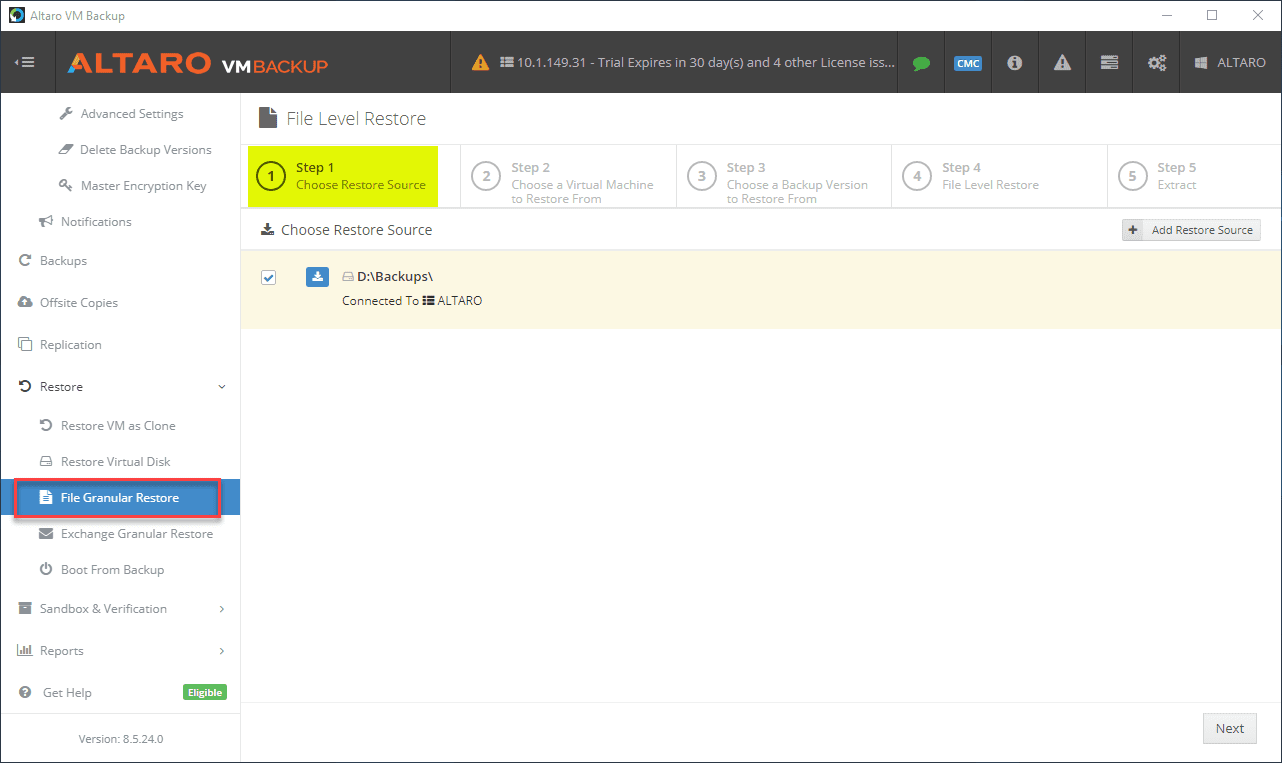
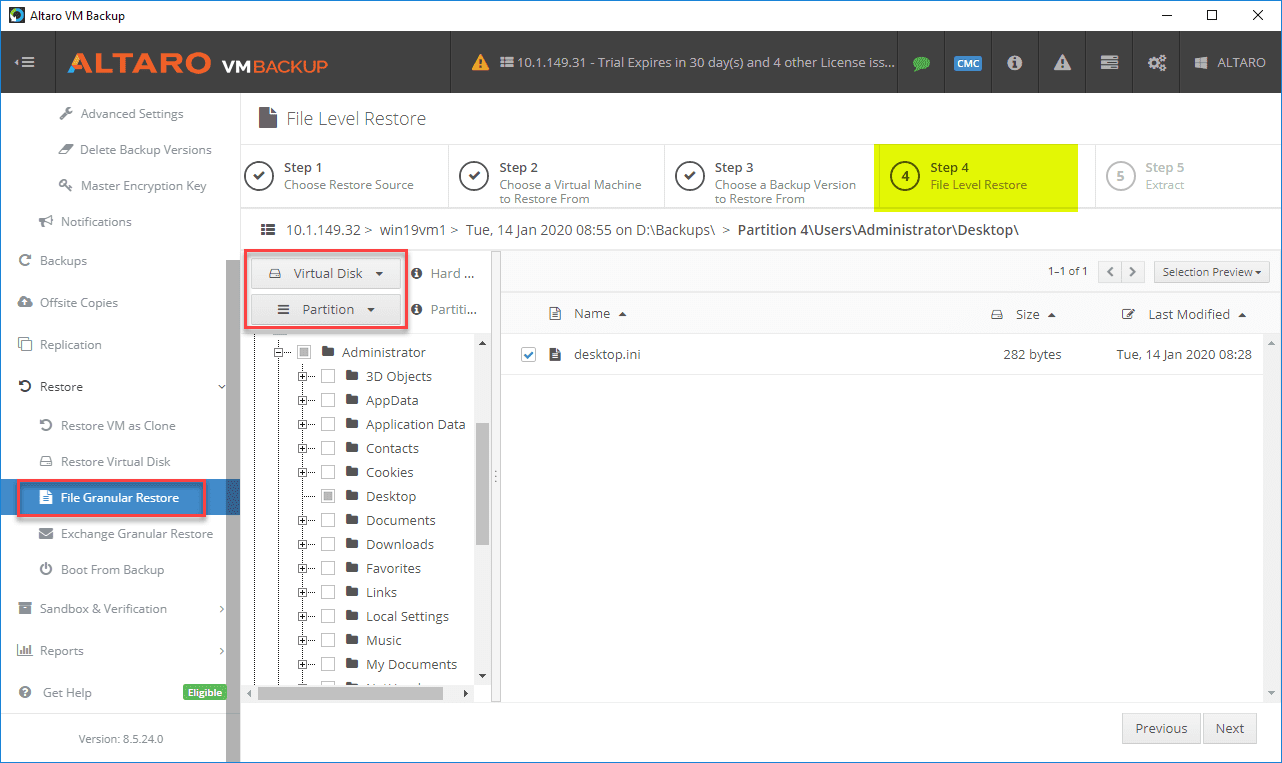
Altaro VM Backup provides File Level Restore capabilities. This allows mounting a backup, choosing a restore point, and then choosing only the file(s) you want to restore.
First, select the backup location where the backup resides.
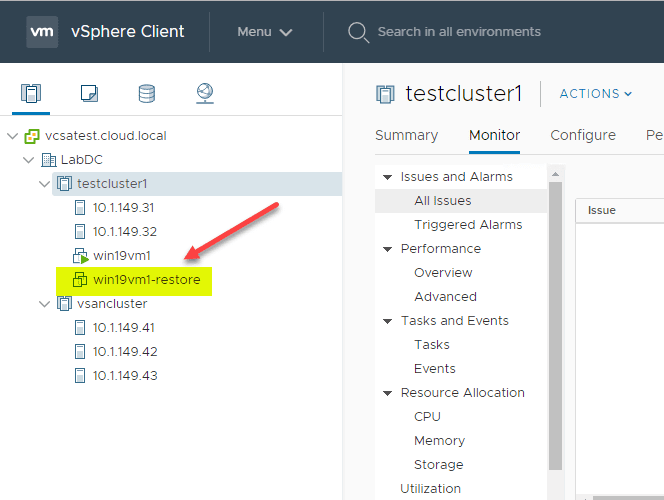
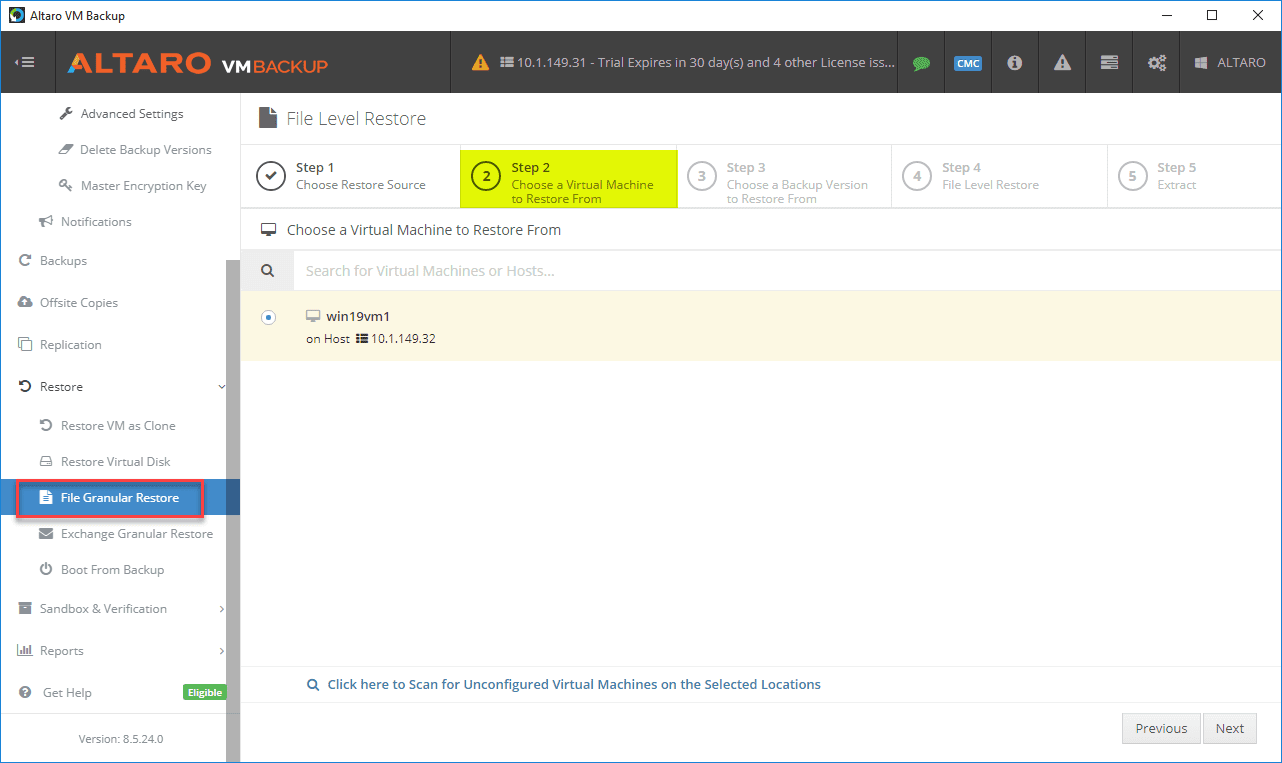
Choose the VM you want to restore a file to.
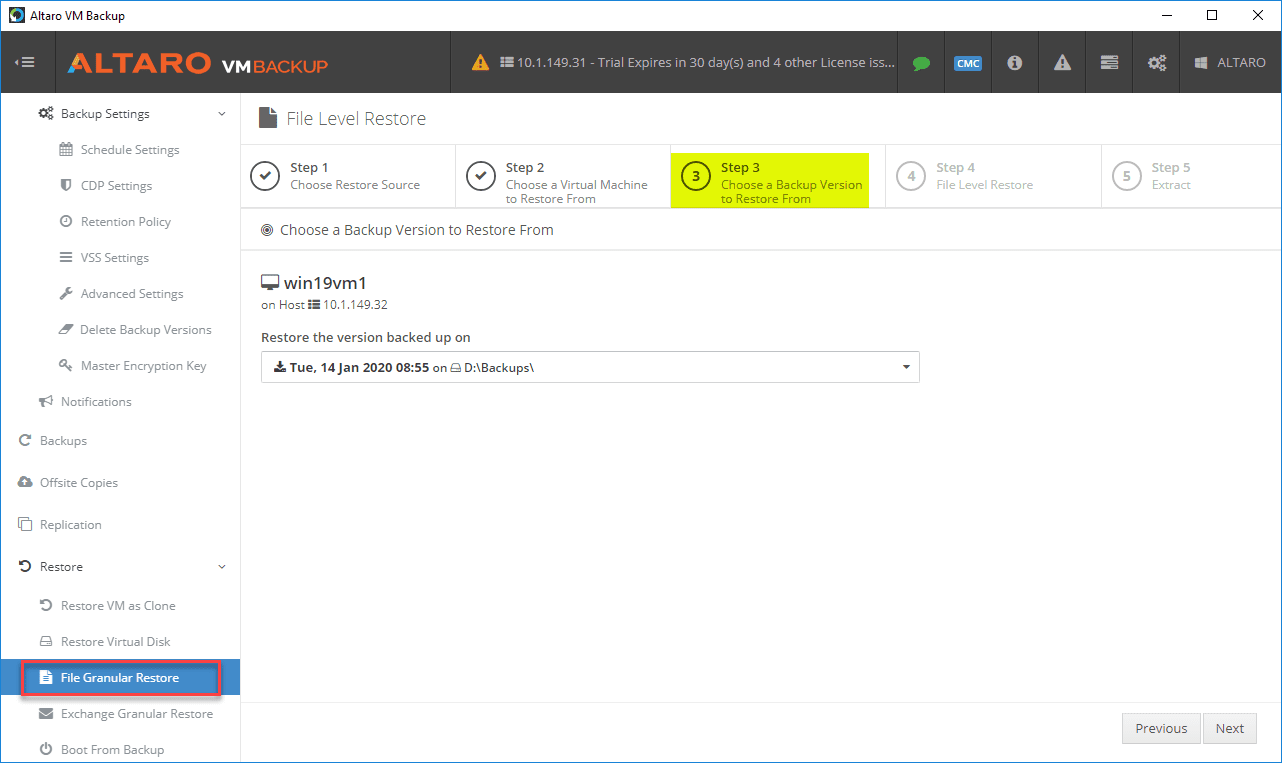
Choose a backup version (restore point) you want to recover the file from.
Choose the file you want to restore. Here, a simple small file is chosen to demonstrate the capabilities.
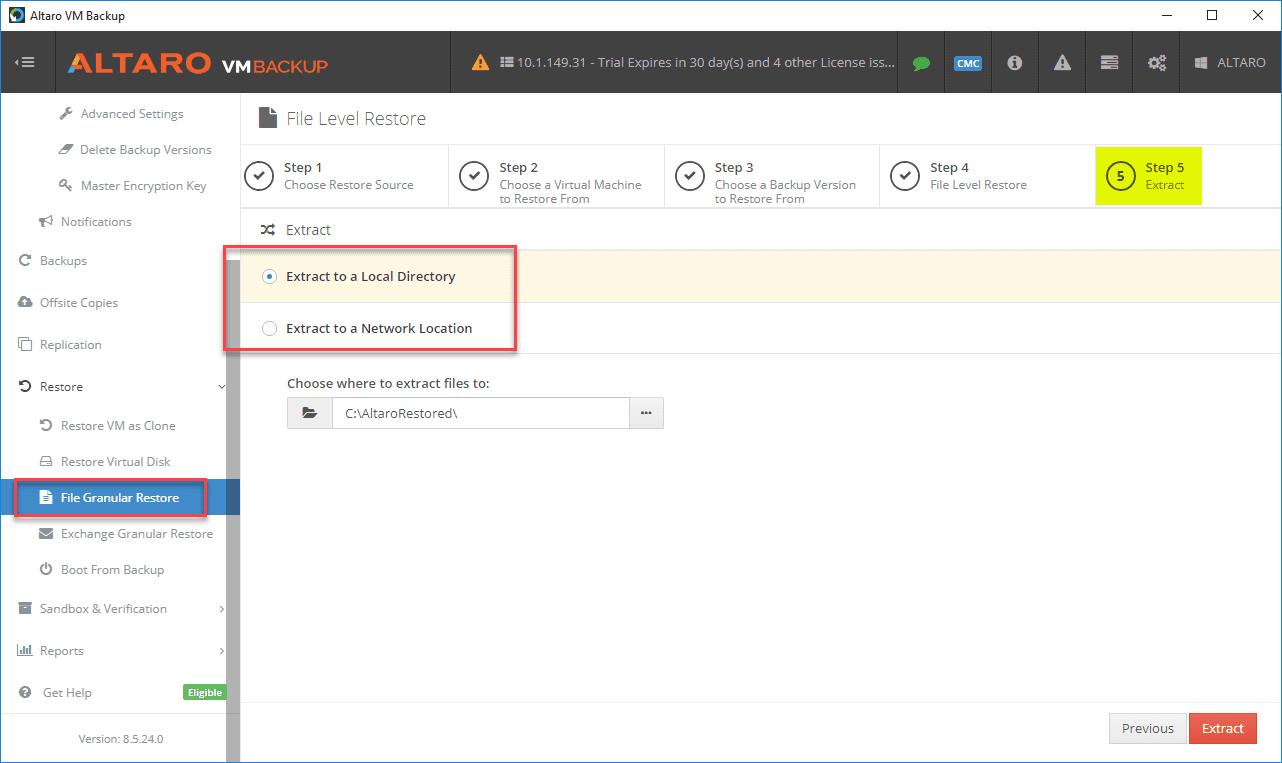
Next, choose where you want the restored file to be extracted. The options are to extract it to a local directory on the source server which is by default c:AltaroRestored. Additionally, you can choose a network location.
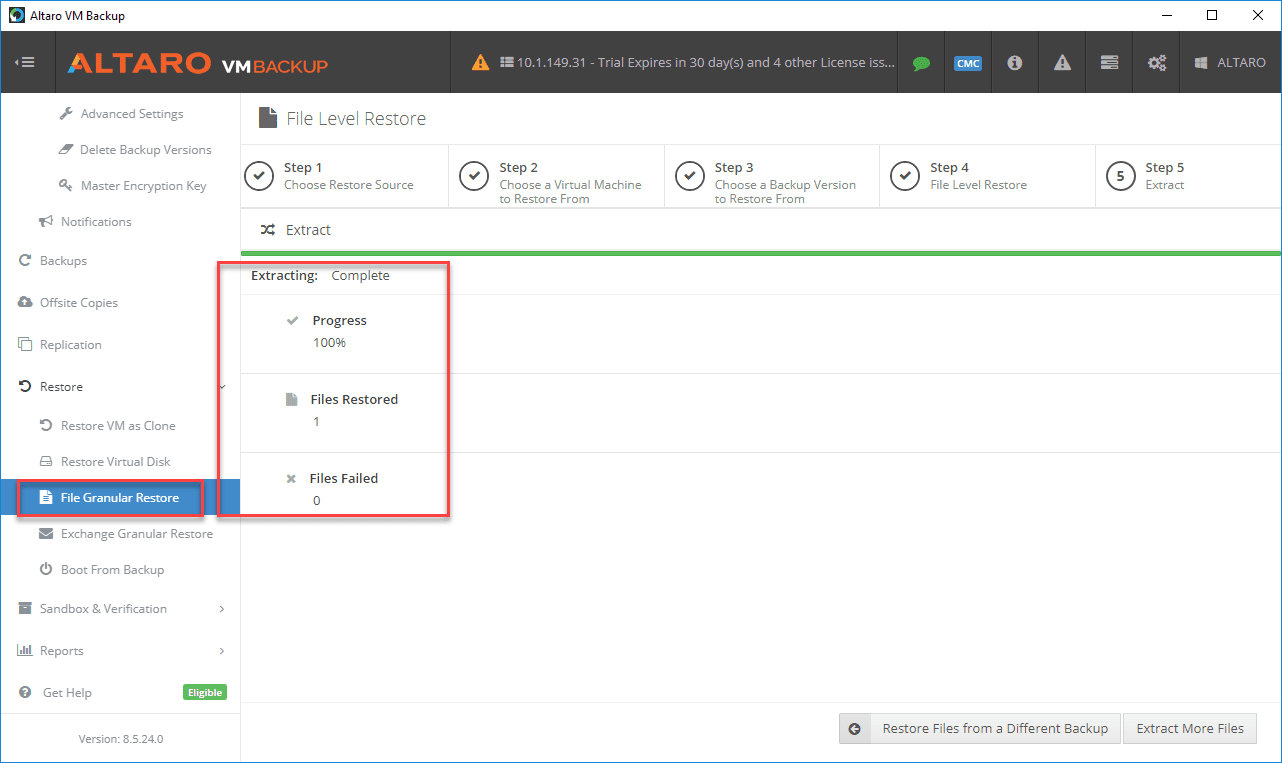
The file is restored successfully.
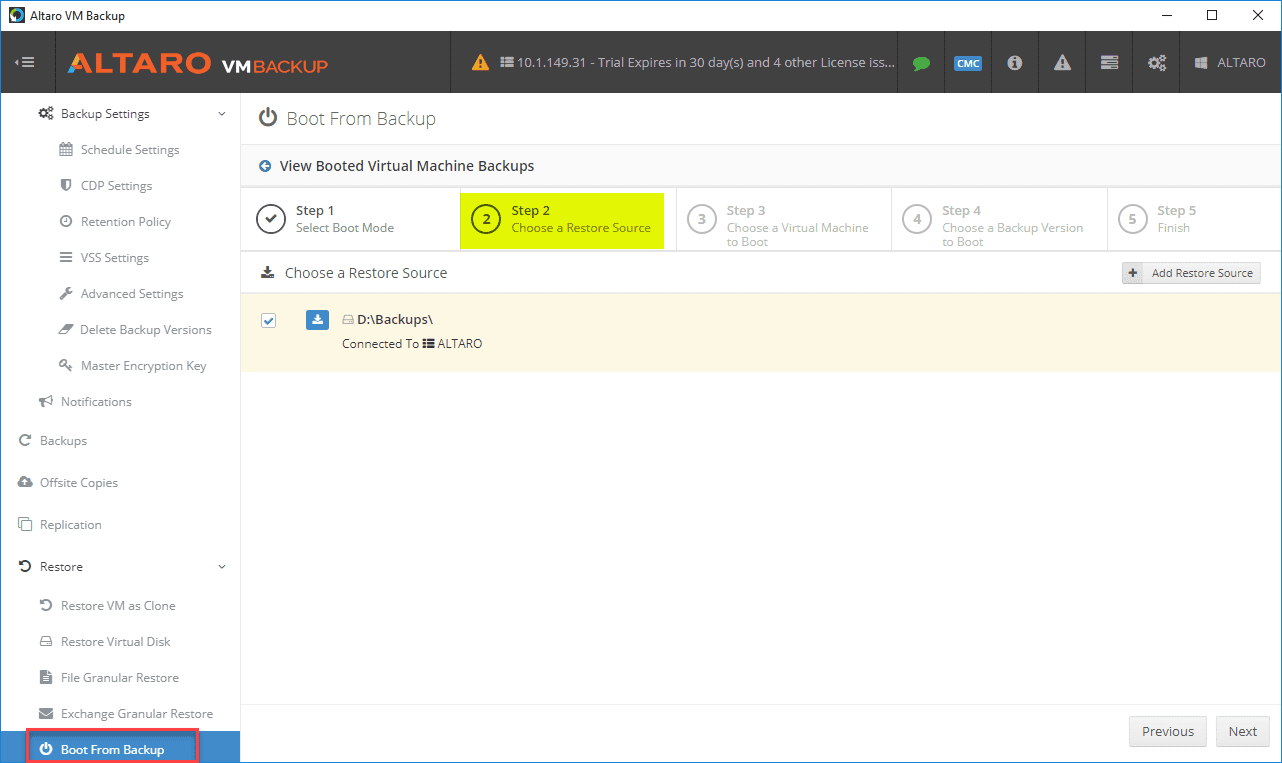
Boot from Backup (Instant Restore)
There is another capability with Altaro VM Backup called Boot from Backup that provides Instant restores of virtual machines. This type of restore allows you to boot a virtual machine directly from the Altaro backup repository. This kind of recovery supports extremely low RTO times.
Imagine a DR scenario where minutes or even seconds count with a highly critical virtual machine protected with Altaro VM Backup. With the Boot from Backup feature, the VM can be instantly booted to restore access to business-critical services. At the same time, as soon as the VM is booted, Altaro starts full restore operation in the background to your virtual environment!
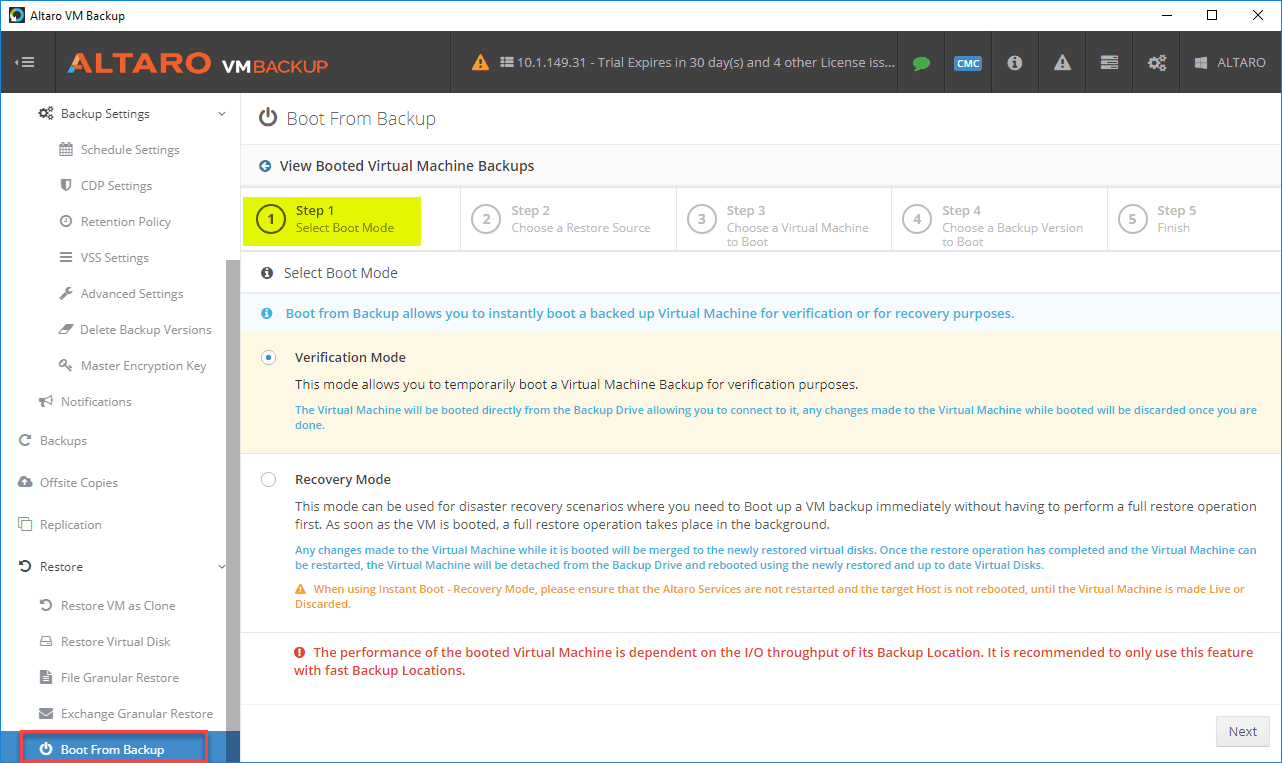
There are two possible modes for the Instant boot of the VM.
- Verification Mode – allows you to temporarily boot a virtual machine backup for verification purposes
- Recovery Mode – This mode can be used for disaster recovery scenarios where you need to Boot up a VM backup immediately without having to perform a full restore operation first
Like the other restore types, choose the backup source.
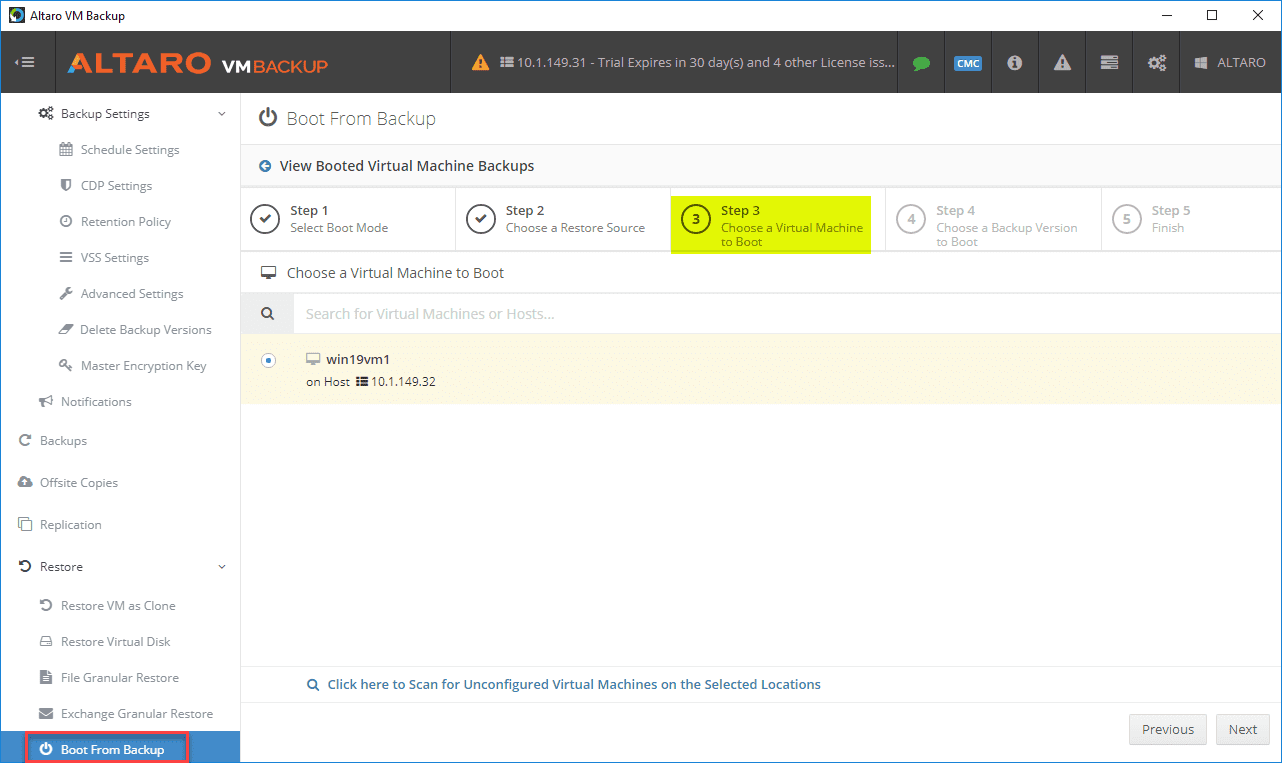
Choose the VM to boot from the backup repository.
Choose a backup version or restore point to use as the source of the booted VM. Click the Boot button.
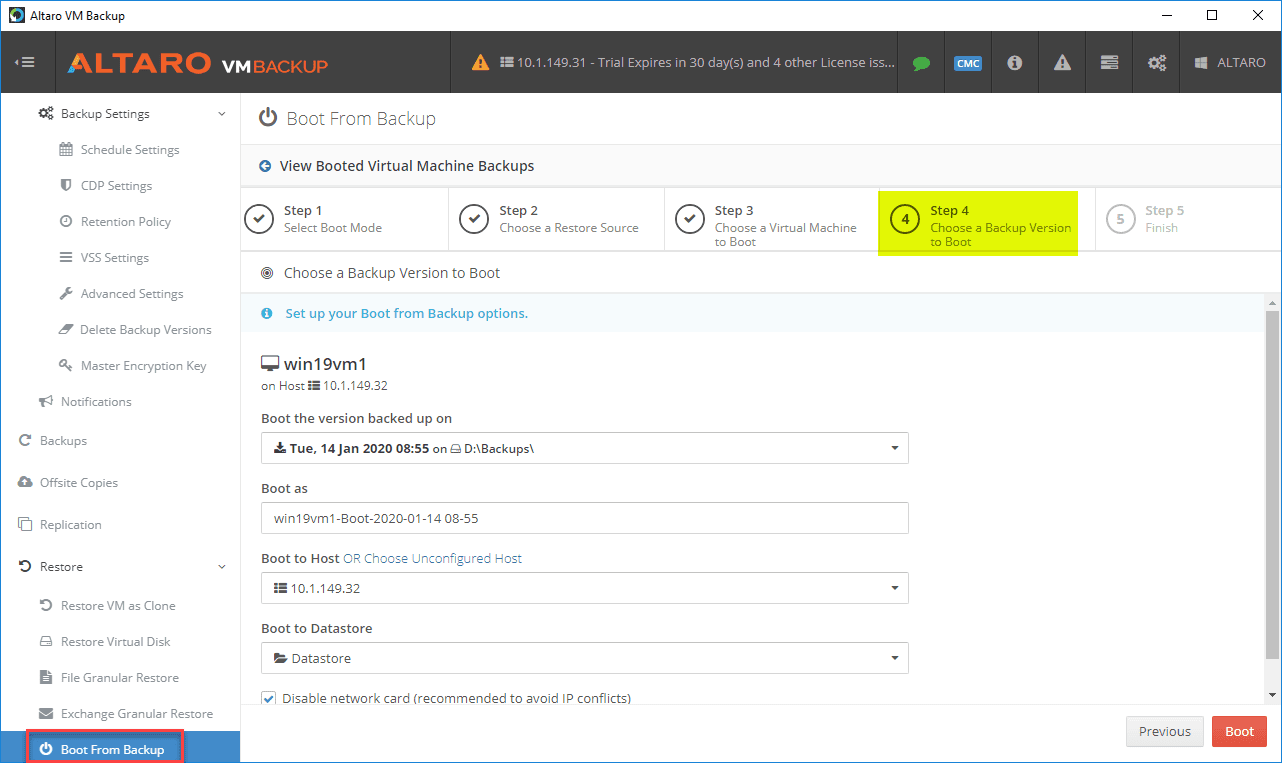
The VM will boot directly from storage and be provisioned to your virtual hosts via iSCSI connections between the Altaro VM Backup server and the virtual environment.
Altaro VM Backup Provides Restore Capabilities for DR Scenarios
Protecting your virtual machines and application data in your Hyper-V and VMware environments is extremely critical. This means using effective backups to protect your business-critical data. Altaro VM Backup allows restoring a single file, all the way to restoring an entire VM.
It also allows you to have the tools needed to meet the 3-2-1 backup best practice methodology with offsite backups. You can store copies of your Altaro backups offsite to provide extra resiliency for your data.
All in all, I found the Altaro VM Backup solution to be extremely easy to install, setup backups, schedule backups, and perform restores effectively for my VMware environment.
Download your Altaro VM Backup Free 30-day Trial now.
More in this topic

Discuss this in the Community
Google is updating how articles are shown. Don’t miss our leading home lab and tech content, written by humans, by setting Virtualization Howto as a preferred source.
About The Author
