StarWind VSAN for vSphere Virtual Appliances

You may have been considering VMware vSAN for your ROBO or Edge environment, however, your budget constraints simply do not allow purchasing a supported configuration for use with a VMware vSAN solution. The reality is that if you don’t have the budget to configure specific hardware and other configurations, you are simply not able to leverage software-defined storage architectures. I would like to introduce you to StarWind VSAN for vSphere solution as it may be a great fit for your needs. It allows you to have the flexibility and fault tolerance you need for virtual workloads, even if you are bound by strict budgets and hardware configuration that may not be supported by the VMware HCL. Let’s take a look at StarWind VSAN for vSphere – what it is, how it is configured, and what capabilities it gives your business.
StarWind Virtual SAN for vSphere Overview
What is the StarWind Virtual SAN solution and how is it different from other
storage solutions? StarWind Virtual SAN
(VSAN) for vSphere offers a really unique approach to storage provisioning in
vSphere environments. It is a
prepackaged Linux virtual machine that is configured as a VM on vSphere. The Linux virtual machine creates a
VM-centric and high-performance storage pool for VMware vSphere clusters. So, now, there is no need to make use of
Windows Server VMs to host the StarWind solution, saving on both complexity and
licensing costs.
The appeal to the StarWind VSAN solution is that it eliminates the need for any physical shared storage. On top of this, it is able to achieve a high performance and high availability storage solution for vSphere on minimalistic hardware requirements.
While software-defined storage like VMware vSAN can be great for many different environments, it has very strict standards of hardware and compatibility to have a supported vSAN configuration. Additionally, licensing for products like vSAN can present challenges to your environment. If you need certain features, you may be required to upgrade the next level of licensing for those capabilities.
Instead of being locked into specific hardware vendors and other hardware compatibility requirements, StarWind allows you to use simple, commercially available hardware configurations that remove the need for costly proprietary components and configurations.
There are a number of features and key points around the StarWind VSAN for vSphere solution that stand out to me. Those include:
- StarWind provides the ability to have true high availability with just two nodes in your vSphere environment
- Unlike the VMware vSAN solution, this is without the need for a witness host that provides the quorum functionality
- There is no Hardware Compatibility List (HCL) for StarWind VSAN as it is supported in any environment that meets the minimum requirements
- There are no different levels of licensing for different feature sets
Free vs Paid
StarWind does have a VSAN free offering and a paid option for vSphere and Hyper-V. While both are supported for production purposes, there are three main differences between them.
- Free is limited to 3 VSAN nodes
- You can only use the StarWind Management Console with the paid version
- There is no support with the free version
StarWind VSAN for vSphere Requirements
As mentioned, the solution uses very lightweight Linux appliances that make the software-defined storage solution possible. The requirements for the Linux VM appliances are straightforward.
- Minimum of 4 virtual processors with 2 GHz reserved
- 4 GB of RAM
- 3 virtual NICs provisioned for management, iSCSI, and synchronization
- L2/L3 multisite network applied according to the appropriate StarWind failover strategy
- Each iSCSI and Synchronization network channel throughput should be at least 1Gbps
- The 10Gbps or higher link bandwidth is highly recommended
- The maximum supported latency for StarWind synchronous storage replication should be 10ms round-trip time (RTT)
- The maximum supported latency between the ESXi ethernet networks should be 10ms round-trip time (RTT)
Now that we know the requirements of the solution, let’s take a look at deploying the Linux virtual appliances in a VMware vSphere environment.
Installing StarWind VSAN for vSphere
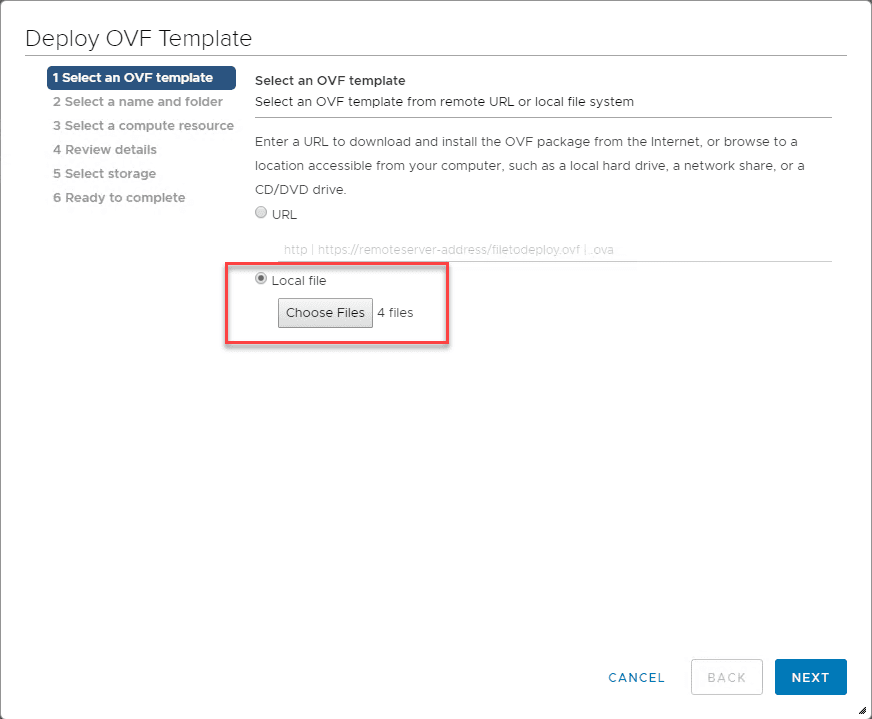
The download of StarWind VSAN for vSphere is provided as a .zip file that you download from a StarWind website. Unzip the package and you will have the following files to choose for deploying the Linux virtual appliance:
- StarWindVSAN_vSphere.mf
- StarWindVSAN_vSphere.ovf
- StarWindVSAN_vSphere-1.vmdk
- StarWindVSAN_vSphere-2.nvram
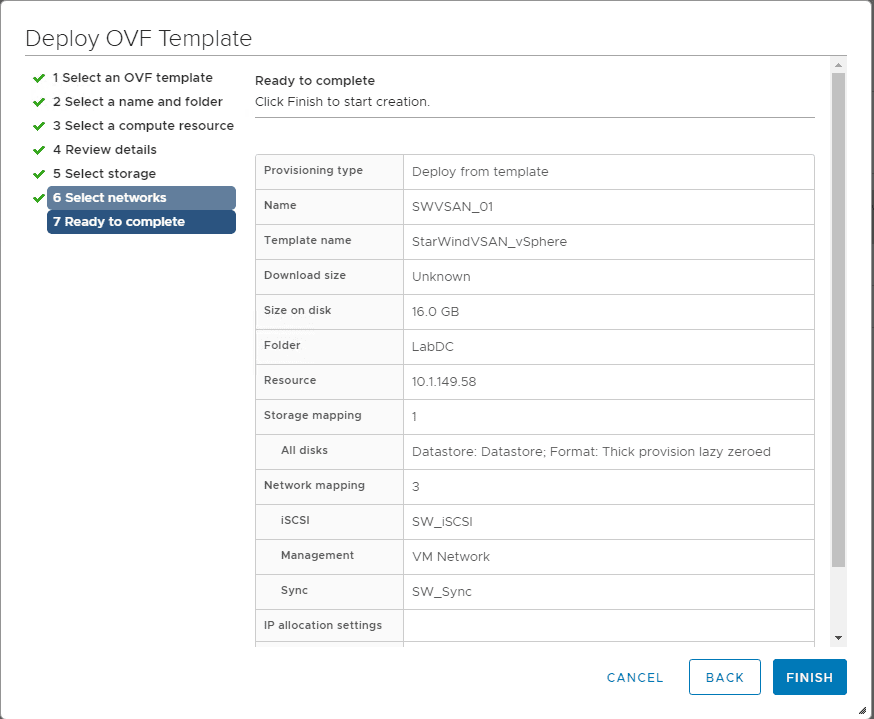
The process is just standard for deploying an OVA/OVF template. Choose your files and click Next.
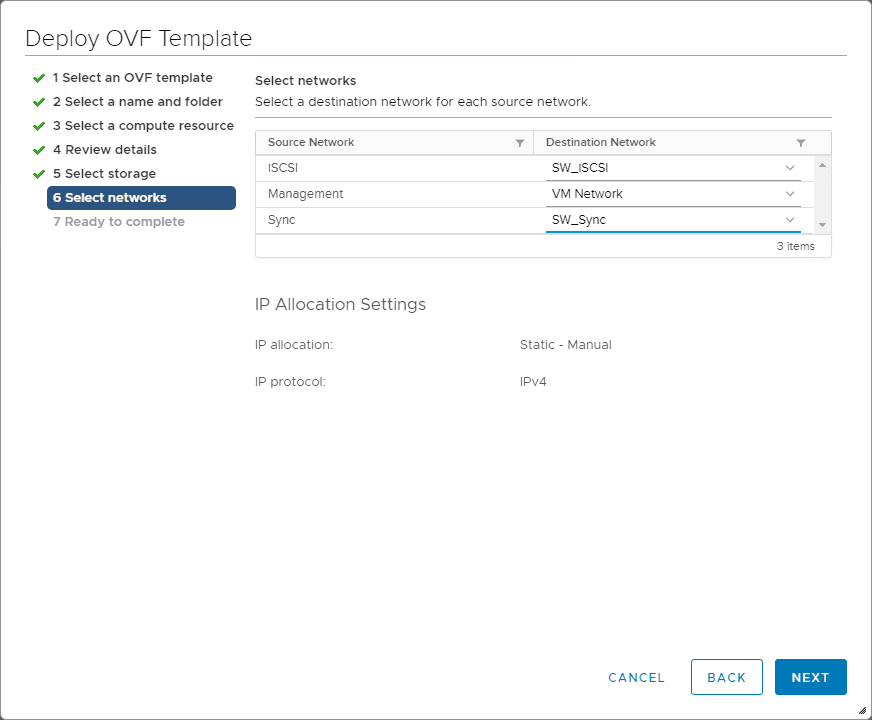
Skipping ahead in the Linux appliance deployment process, the next screen that you want to specifically pay attention to is the 6. Select networks screen. Here you want to line up your port groups with the respective source networks configured on the Linux virtual appliances.
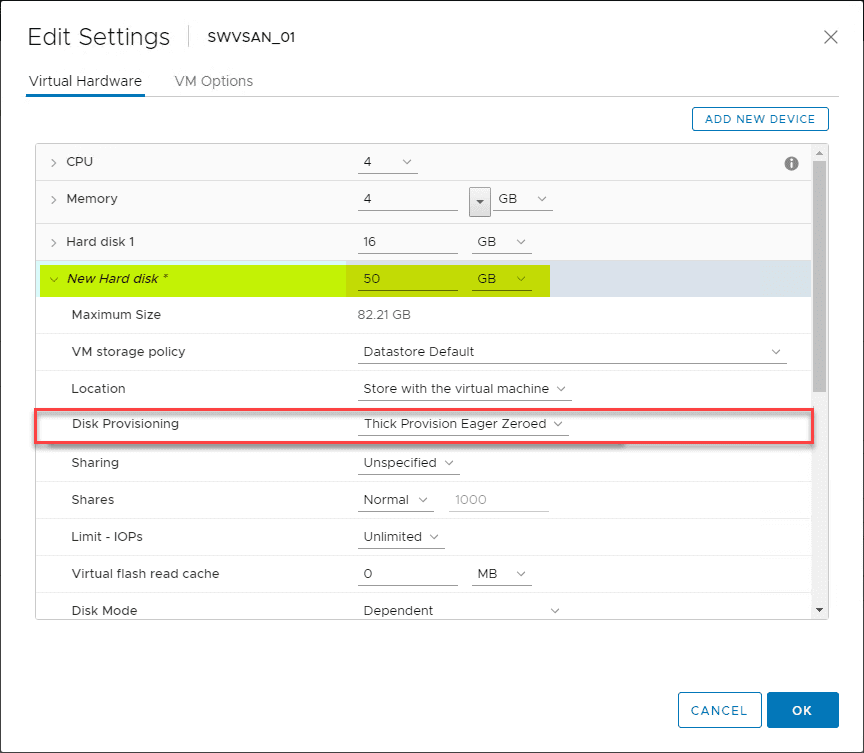
Once the Linux virtual appliance is deployed, you will want to add a new VMDK virtual disk for the purposes of presenting as storage to your ESXi hosts. To do this, you simply add a new hard disk to your Linux virtual appliance. Make sure Disk Provisioning is set to Thick Provision Eager Zeroed as per best practice outlined by StarWind.
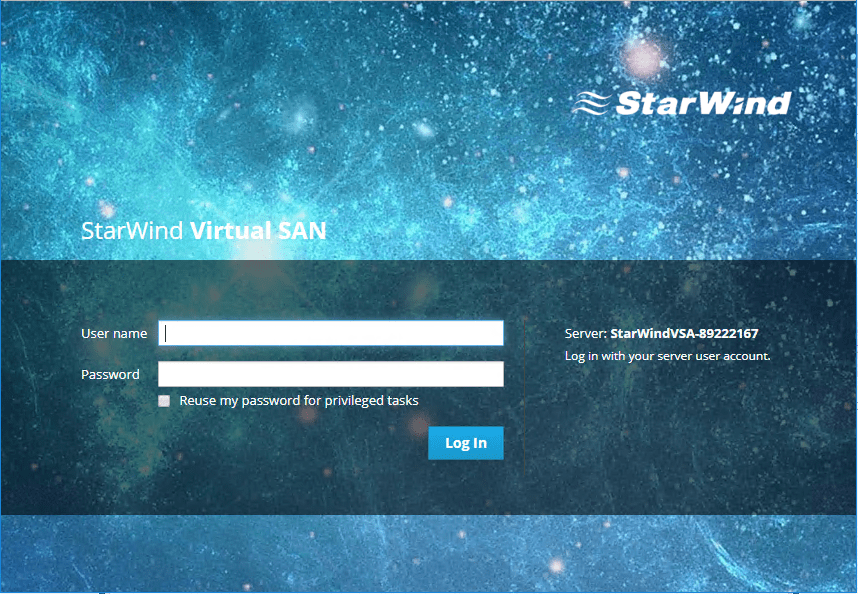
Once the new disk is added to the StarWind Linux virtual appliance, you are ready to boot up the VM and continue configuration from the web admin console on the Linux virtual appliance itself. Log in to the solution using the default username and password:
root/root
Now, let’s set up storage for the solution.
Configuring Storage
One of the important steps in the Linux virtual appliance setup is configuring storage for the solution. When you deploy the Linux appliance, it is not configured with the storage that will be used for block storage which will be attached to your vSphere ESXi hosts.
As shown above, we added a “thick provisioned eager zeroed” VMDK for that purpose. There are a couple of extra steps we need to perform to provision storage that was attached to the virtual machine in vSphere.
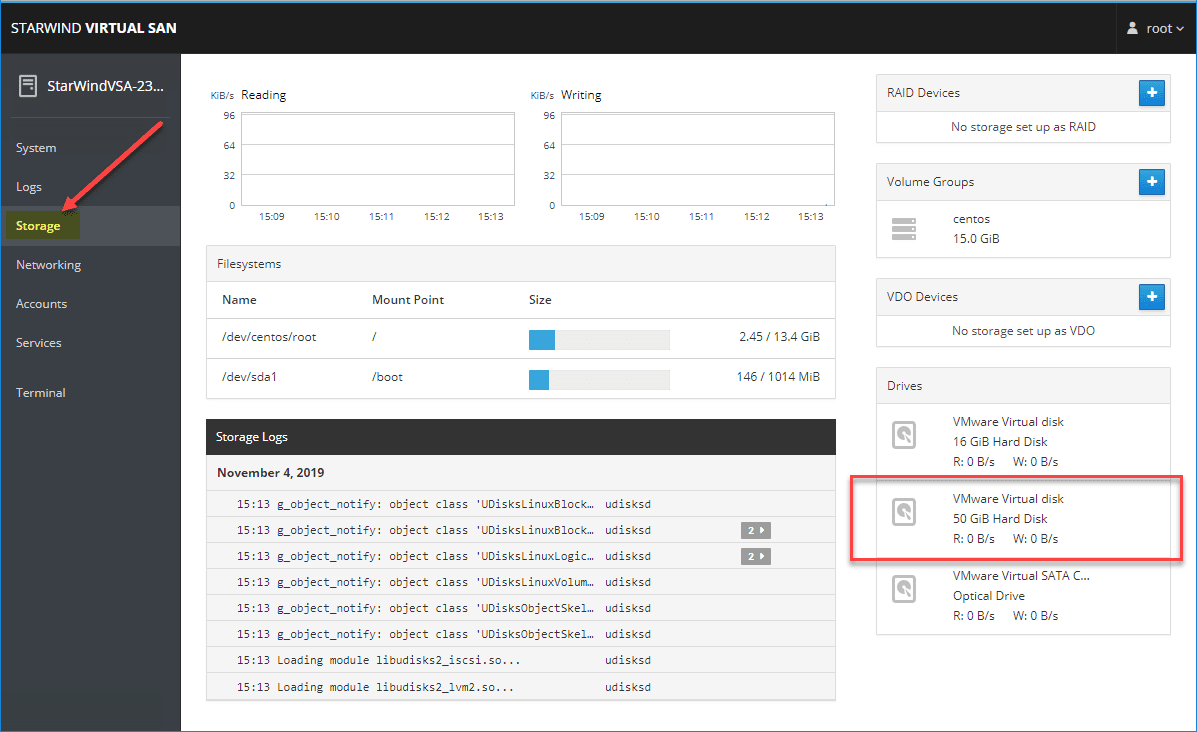
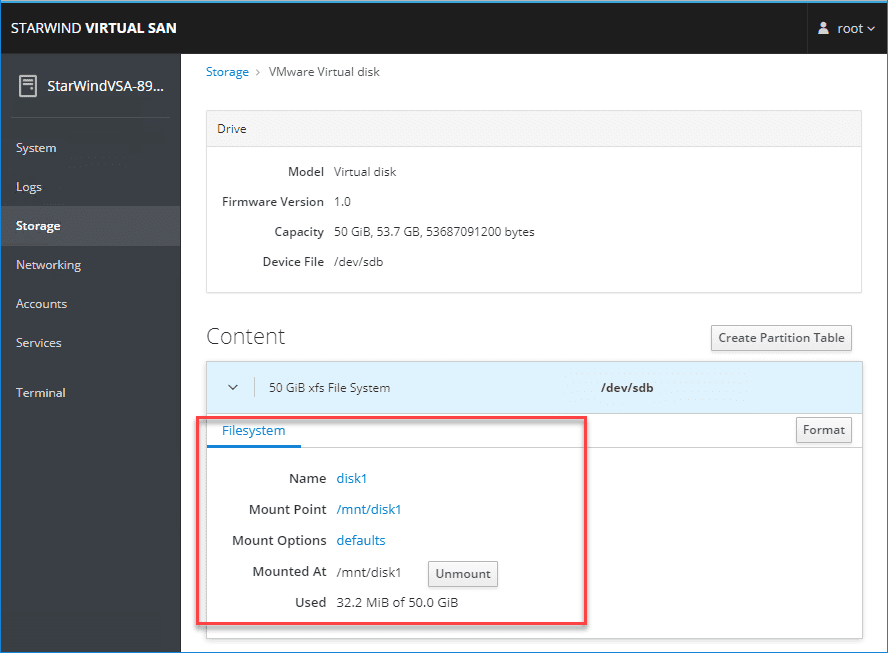
Click Storage and then click the disk that was added in the right-hand pane under Drives.
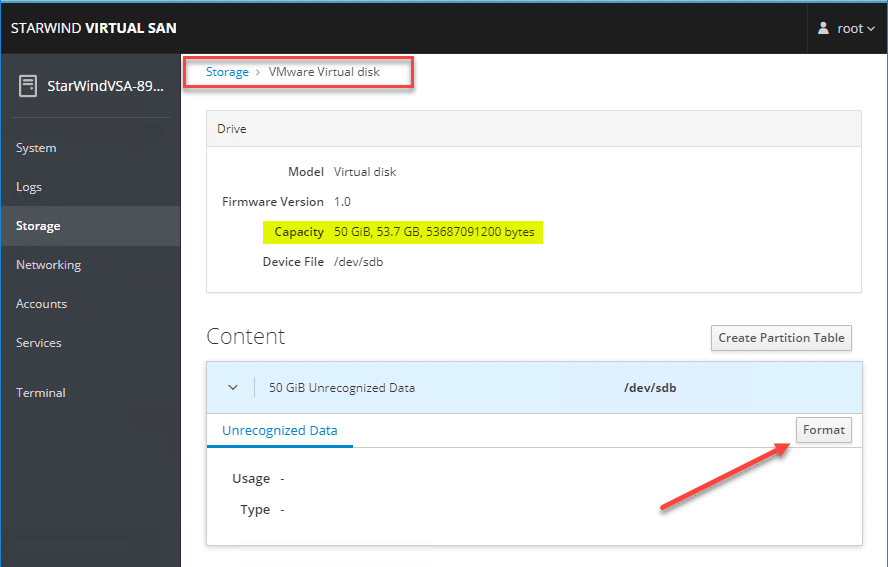
We need to format the drive so that it can be used. Click the Format button.
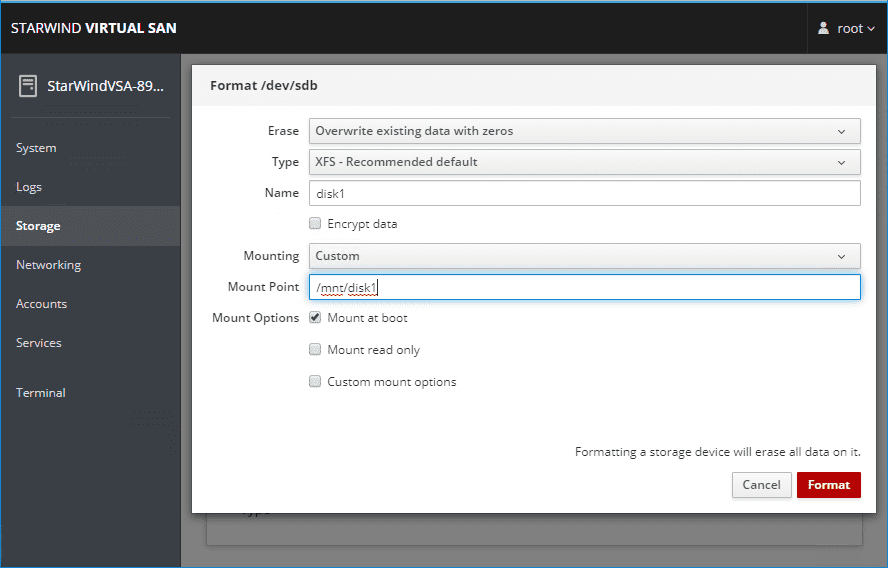
Choose the following:
- Erase – Overwrite existing data with zeros
- Mounting – Custom
- Mount Point – here as an example we are using the path /mnt/disk1
- Mount Options – Mount at boot
After the format operation is finished, click the Mount button.
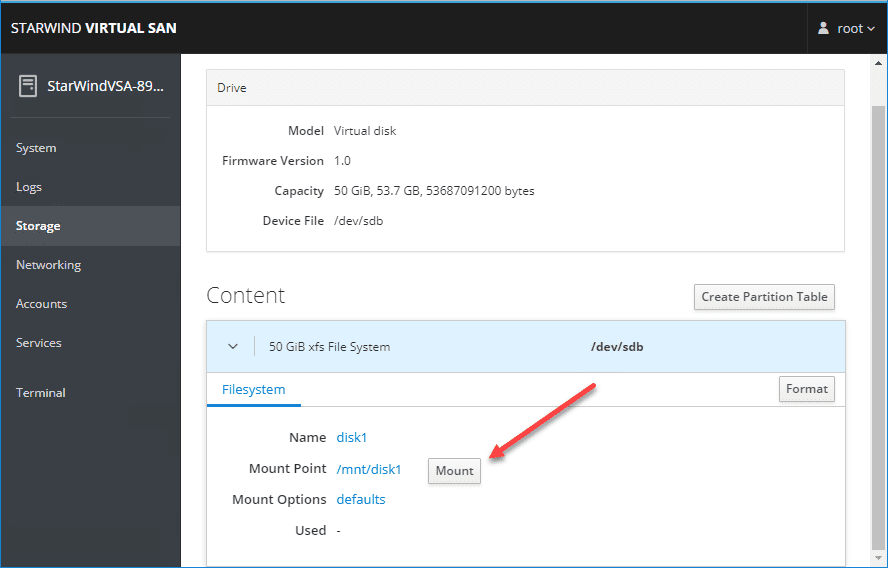
The storage is now formatted and mounted.
Now, the storage is ready to go to be managed as part of the StarWind VSAN for vSphere solution. What about the network configuration for the required networks?
Configuring the Linux Appliance Networking
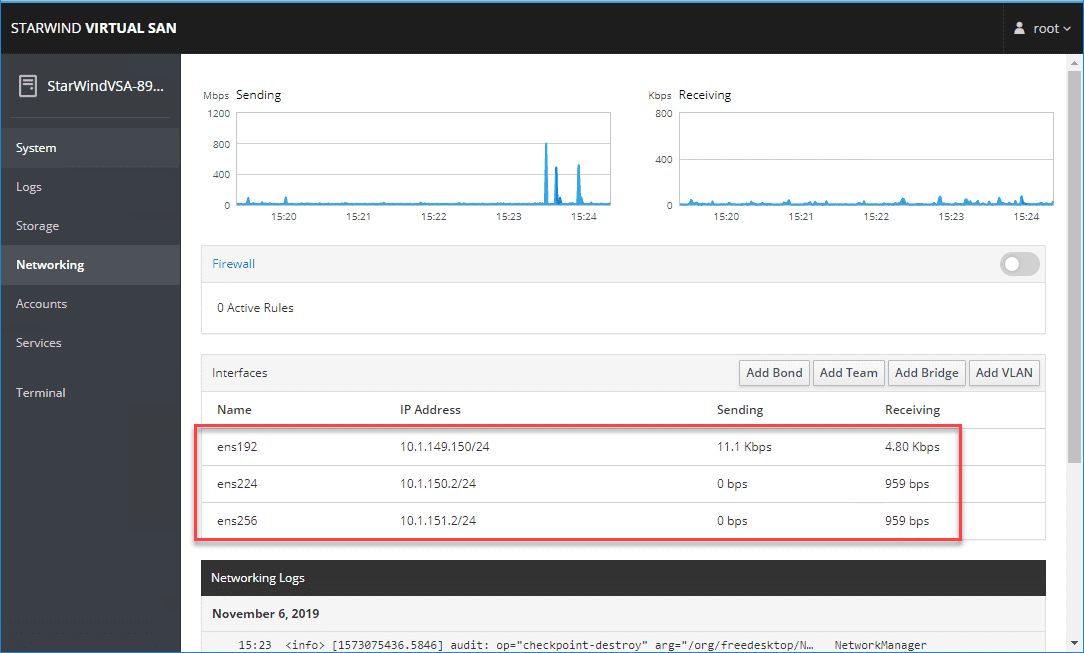
The Linux Virtual Appliance deploys with three virtual NICs provisioned with the appliance. You need to connect these with the virtual network port group that you want to carry traffic for management, iSCSI, and synchronization traffic.
The adapters will attempt to auto-configure with DHCP. However, as in my case, I needed to configure the iSCSI and Sync adapter IP addresses.
This can be done in the web management interface of the Linux appliance. As you can see below, I have connected the respective adapters to the network I want to use for carrying the different types of traffic.
StarWind Management Console Installation
To manage the solution, you still need to install the StarWind Management Console. You may wonder where you can get this installation. This is part of the Windows StarWind Virtual VSAN installation when you run the installer for the Windows installation of StarWind VSAN.
If you only want to install the StarWind Management Console, simply uncheck all the other components besides the StarWind Management Console. As you may have determined, you will need a Windows management host of some type such as a Windows 10 workstation to install the StarWind Management Console.

Configuring StarWind VSAN for vSphere
Now that we have the StarWind VSAN for vSphere solution components installed, including the Linux virtual appliances and the StarWind Management Console, we are ready to begin configuring the solution. This will be done using the StarWind Management Console on your Windows management workstation.
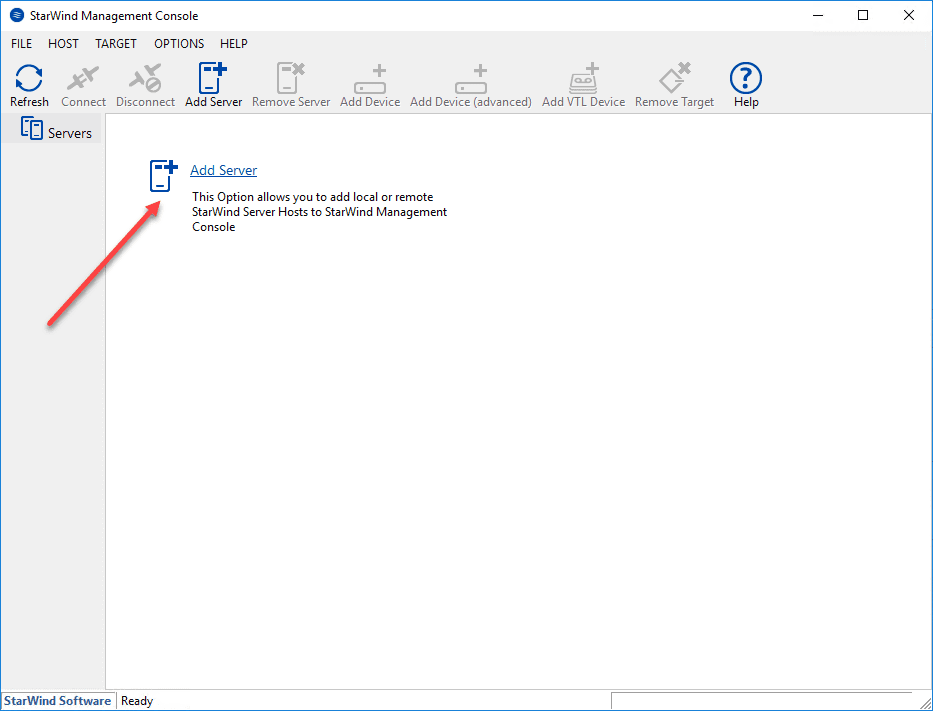
Open the StarWind Management Console and add your Linux virtual appliances to it. You will see the +Add Server button on the dashboard of the management console. Click on the link and enter the IP/FQDN of your Linux appliance(s).
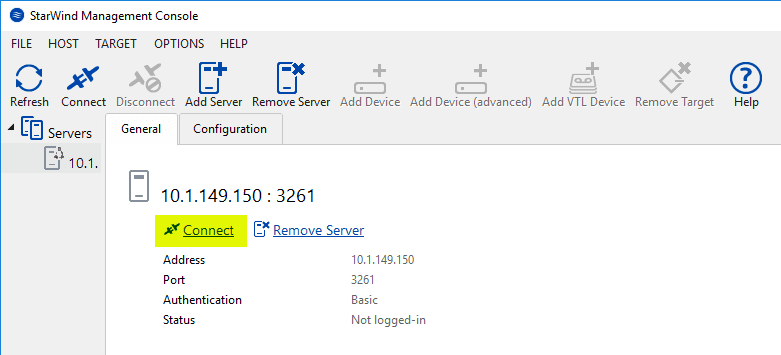
Enter the StarWind Server IP address.

Next, connect to the StarWind server.
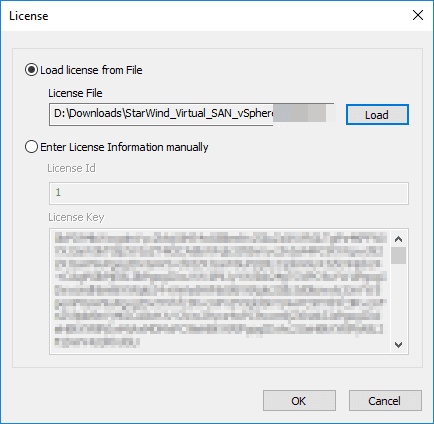
You will be prompted to enter a License key for the solution. Browse to your license key and provide this before moving on with the configuration.
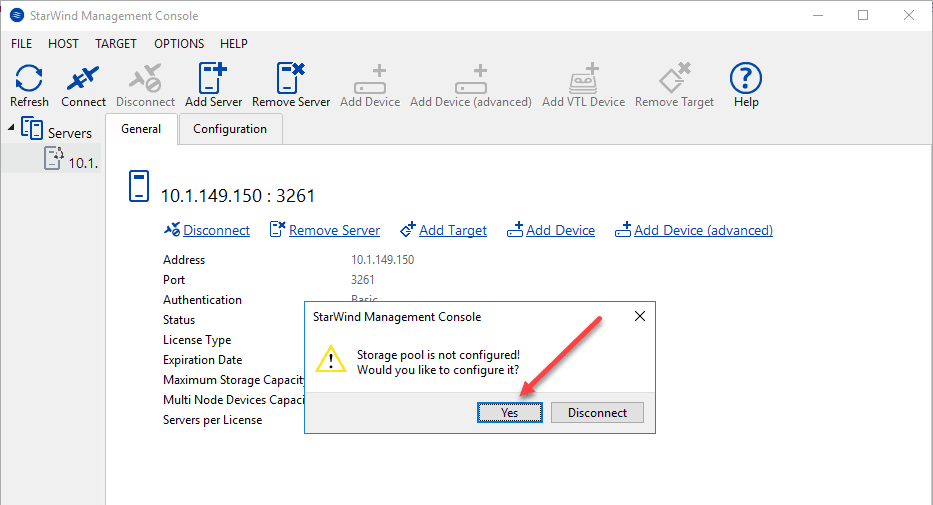
One of the first tasks you will be prompted to complete is configuring a storage pool.
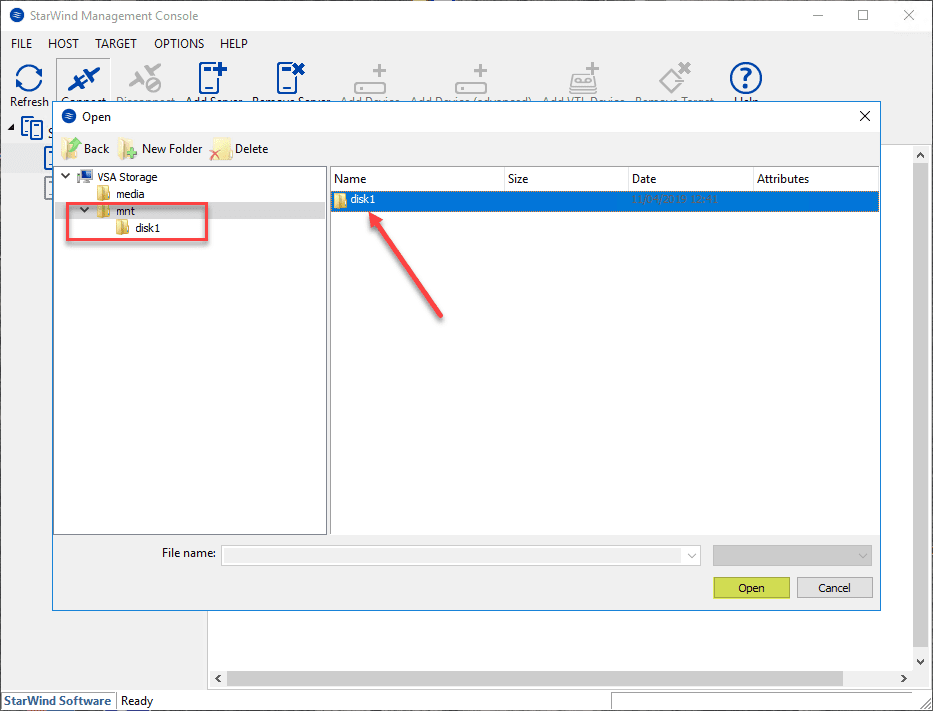
In the storage pool configuration, I am choosing the disk that we added to the Linux virtual appliance.
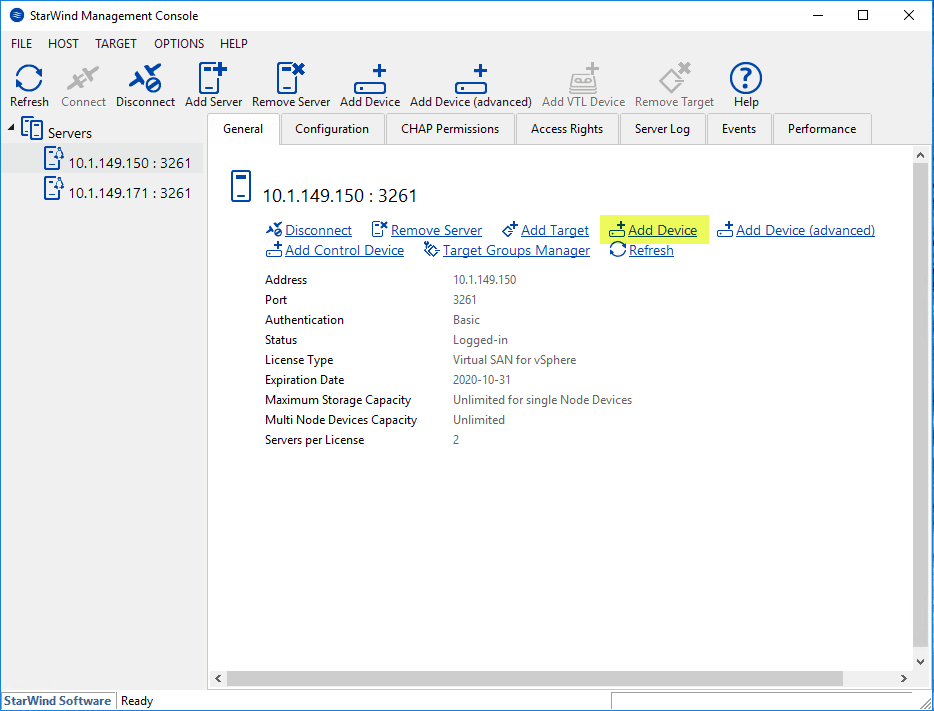
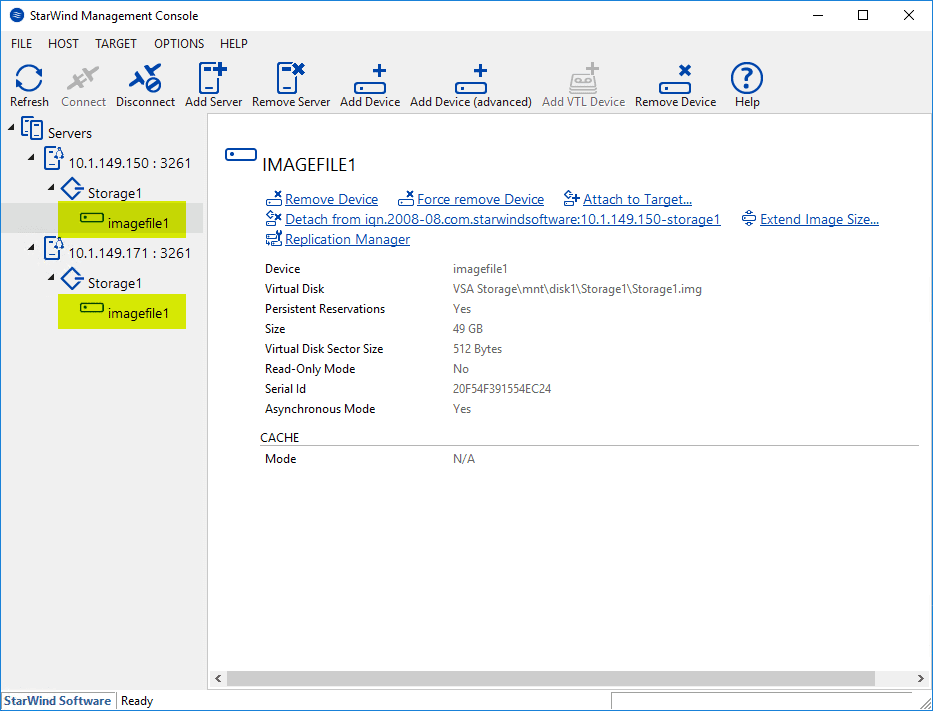
After adding two StarWind Linux virtual appliance nodes to the StarWind Management Console
Now that we have our Linux appliances added to the StarWind Management Console, let’s take a look at how to configure the appliances’ storage devices and storage.
Adding Storage Devices and Storage
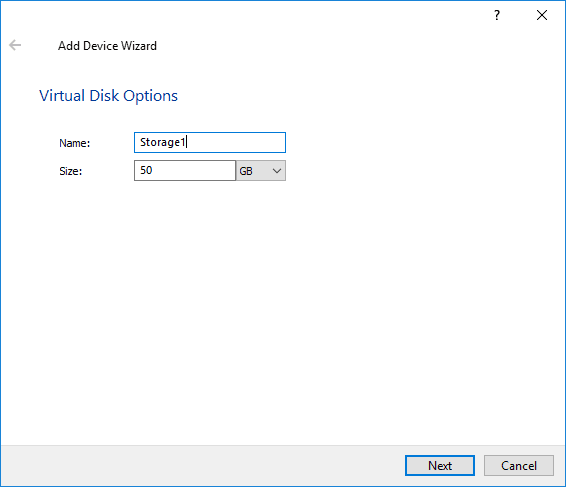
Click the Add Device button.
You will be asked for a Name and Size of the Virtual Disk.
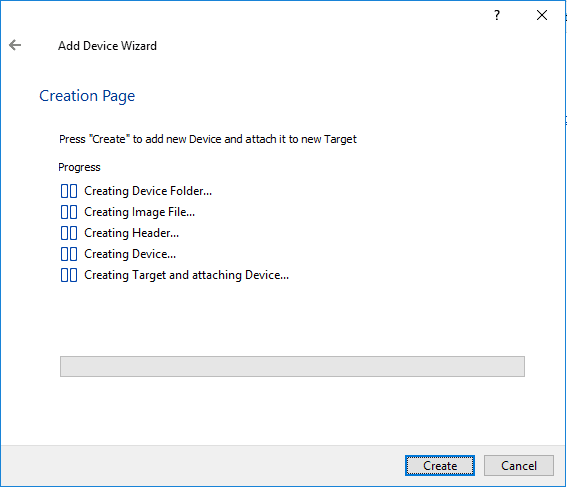
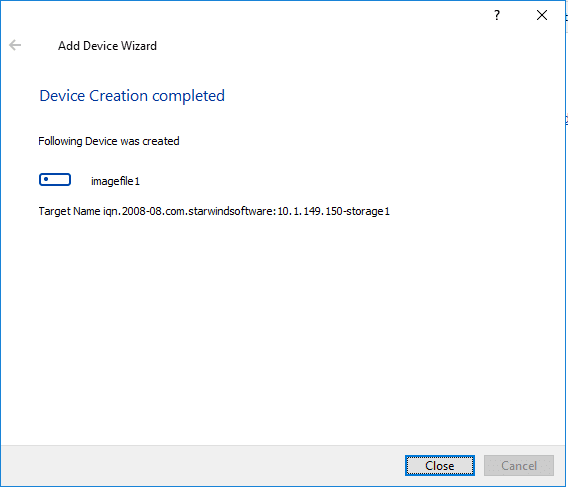
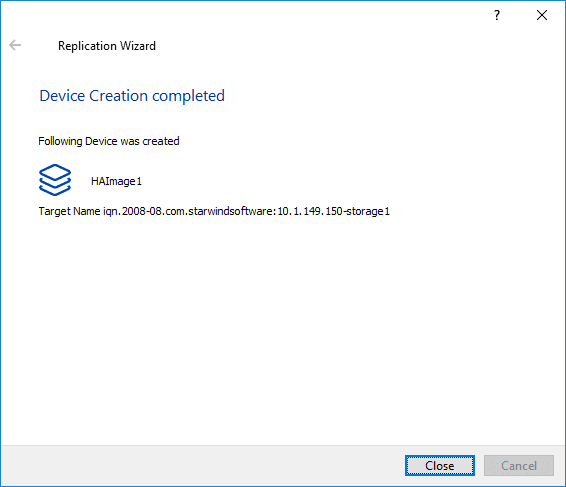
The device is created successfully.
Now that we have the actual storage devices configured, let’s look at setting up Replication between the two Linux appliances.
Configuring Replication for StarWind VSAN for vSphere
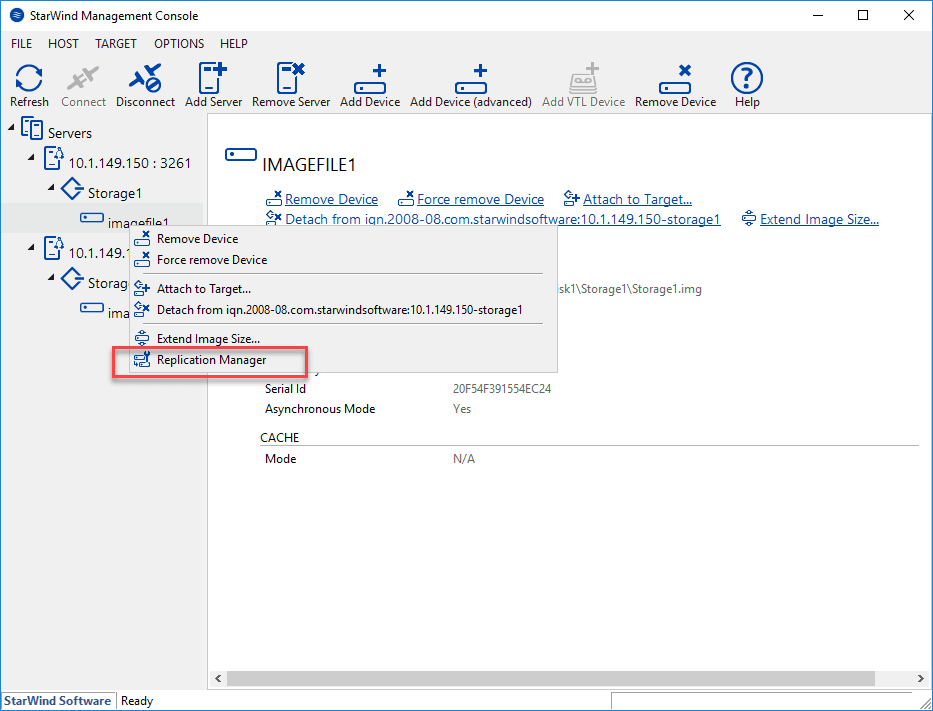
To take care of high availability of your data, StarWind uses a replication mechanism that synchronizes your data from one StarWind Linux virtual appliance with another. This can be a synchronous or asynchronous replication. To configure replication, launch the StarWind Management Console. Right-click on your device and select Replication Manager.
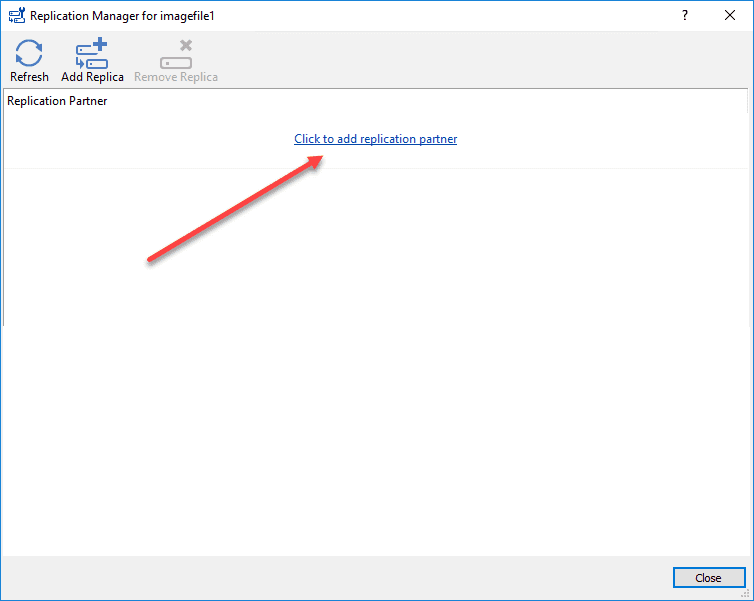
Next, we will add a replication partner.
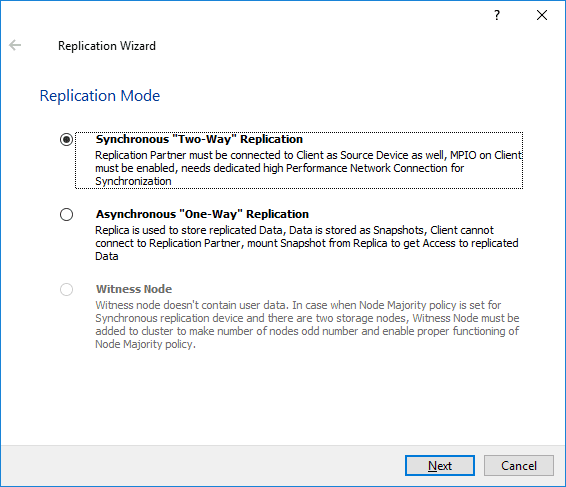
Next, choose the replication mode of data synchronization.
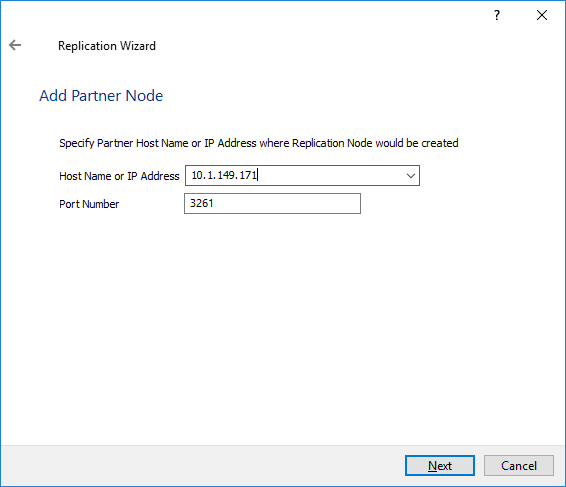
Enter the address of the replication partner.
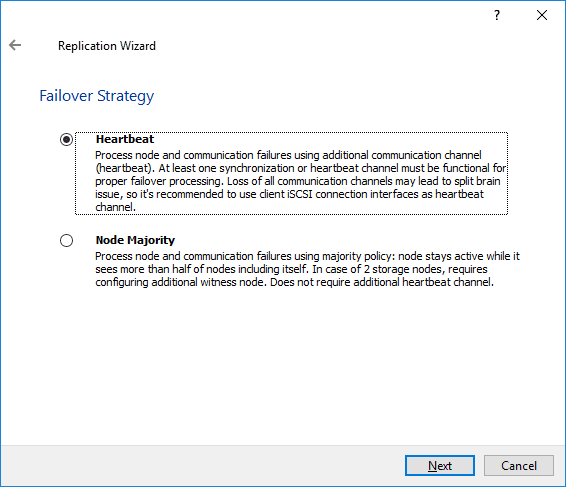
Define the Failover Strategy.
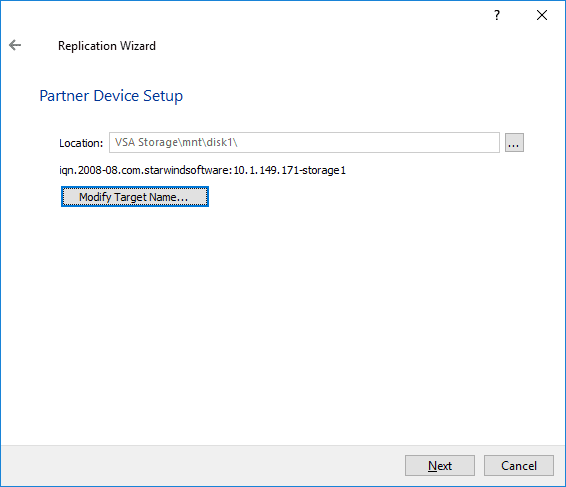
Either create a new device or select an existing Partner Device.
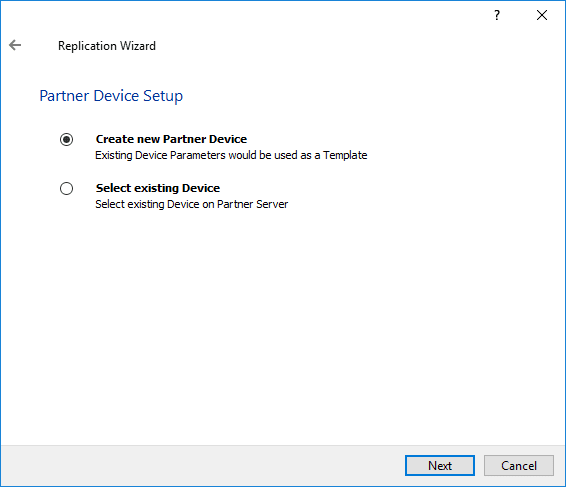
A new partner device will be created.
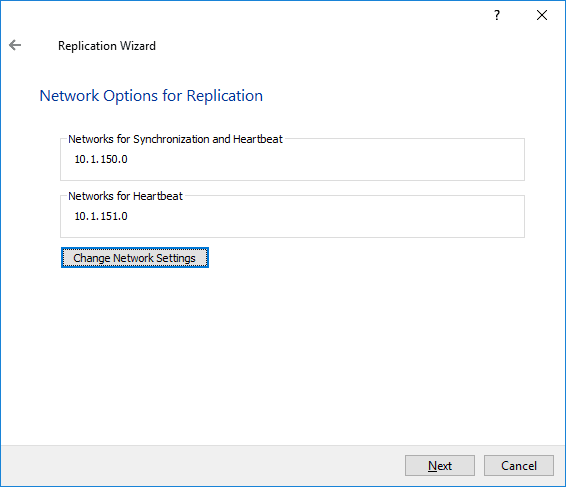
The network options for replication allows configuring the specific networks that will carry different kinds of traffic. Click the Change Network Settings button.
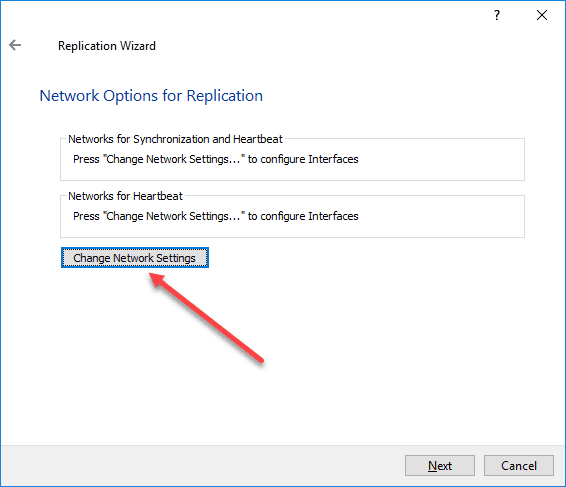
By way of placing checks in the boxes, designate which networks will be used for which services.
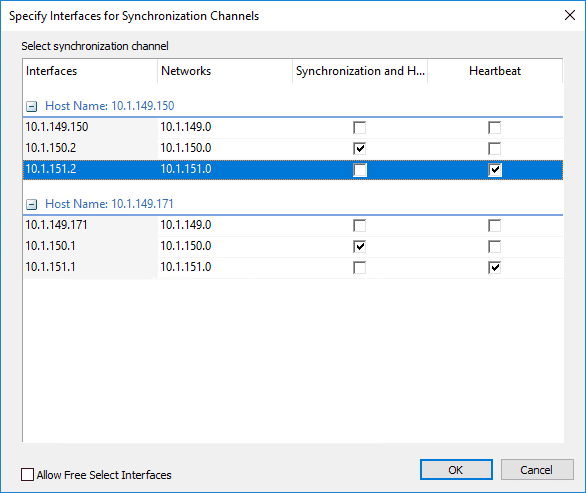
The networks are selected for synchronization and heartbeat services.
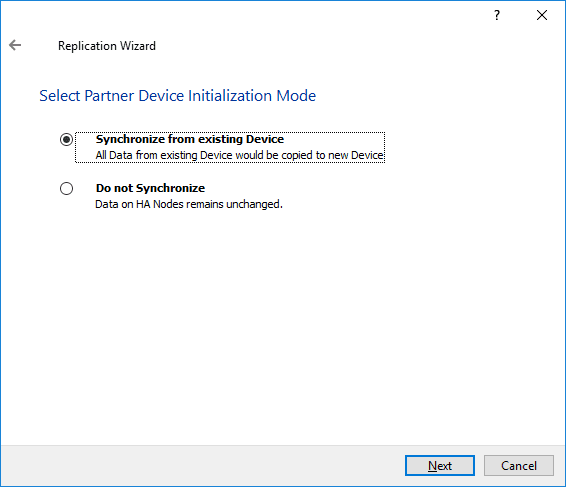
Choose whether or not you want to synchronize the data after creating the replica node.
Now, you are ready to create the partner host.
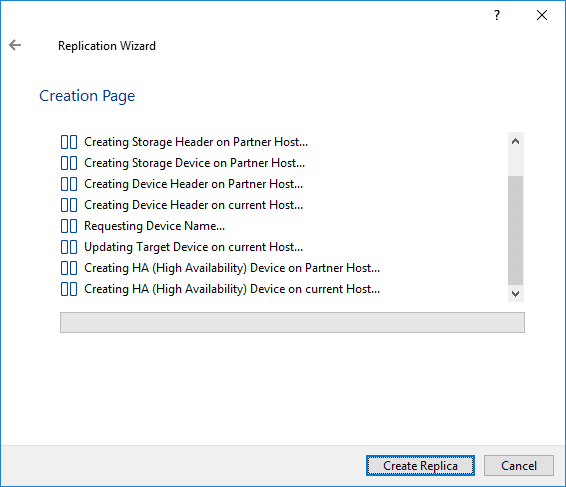
After the device is created, the synchronization process will begin.
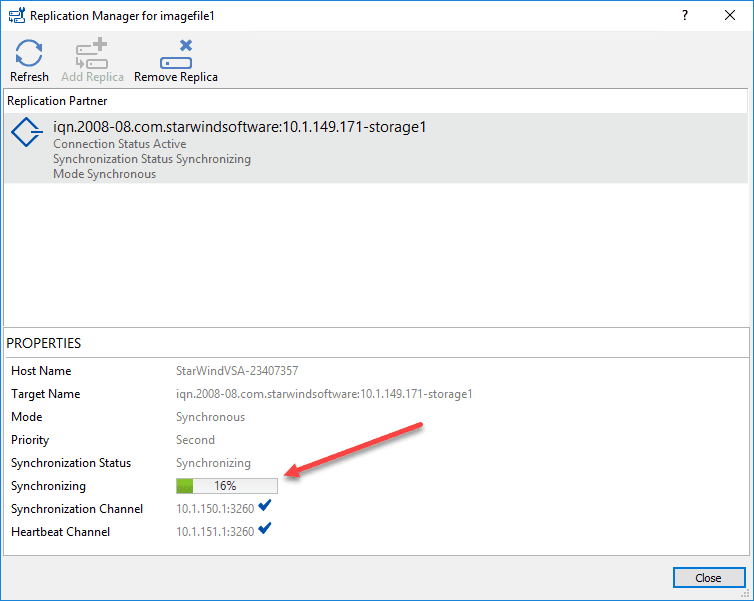
Since I had a clean slate, the data synchronized successfully between the two Linux appliances after a bit.
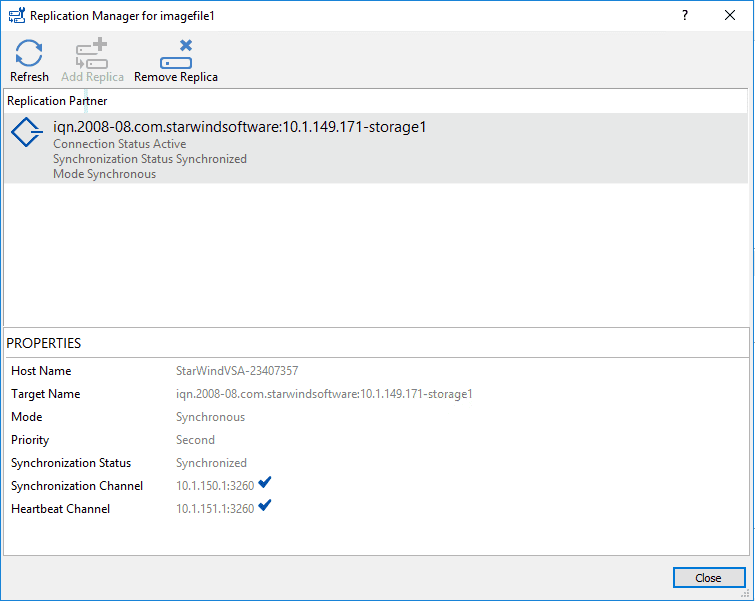
The synchronization process between the StarWind nodes completes successfully
Adding the StarWind Datastore to ESXi Hosts
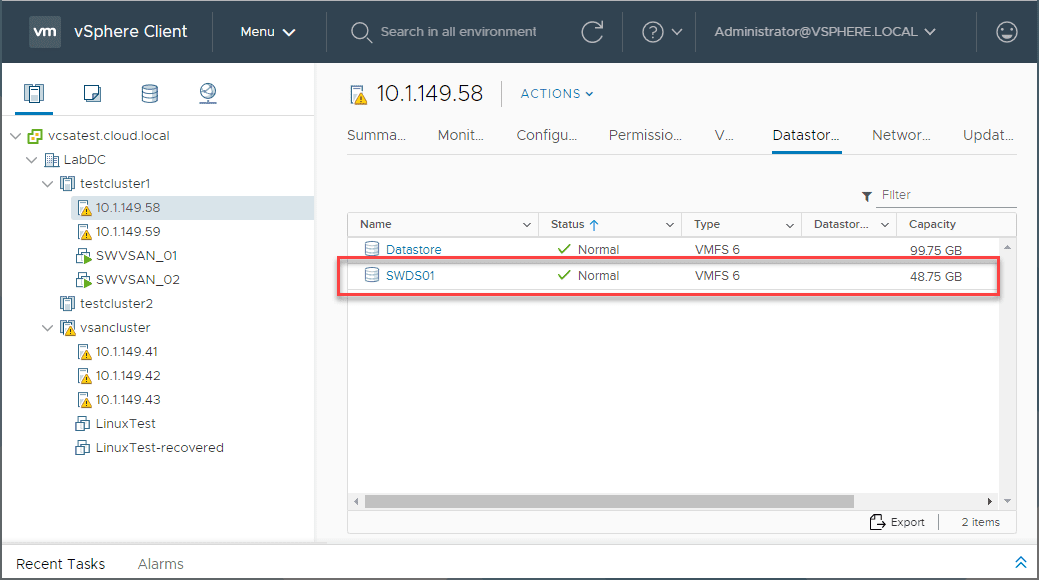
Now that storage is provisioned and available, we can add storage to the ESXi hosts. After configuring the iSCSI properties and discovering the iSCSI targets, we can see the STARWIND iSCSI Disk presented as ready to back a VMFS datastore.

The new StarWind-backed datastore is successfully added to the ESXi hosts in the cluster.
Wrapping Up
The StarWind VSAN for vSphere solution allows you to have a resilient and performant vSphere storage without the need to meet various HCL criteria or buy a physical shared storage device. StarWind works with any hardware as long as it is able to meet the requirements for the Linux virtual appliances.
I found the solution with the Linux virtual appliances extremely easy to configure and manage using the StarWind Management Console. In my opinion, StarWind is definitely a viable option for many different interesting use cases. They certainly will accelerate edge and ROBO environments due to the freedom of using all kinds of hardware. However, the StarWind storage solution will be equally adept backing your core production workloads as well.
Be sure to check out StarWind VSAN downloads for vSphere and Hyper-V here to test out the great features of this storage solution yourself.
Also, check out StarWind’s resource library for more information on StardWind VSAN for vSphere and Hyper-V information as well as information on other products and solutions: