Azure Stack HCI Deployment with New Cluster Creation Extension

Microsoft is certainly serious about Windows Admin Center. With Windows Admin Center 1910, there have been many great new features introduced as part of the newest version of the WAC tool. Part of what Microsoft is trying to achieve with Windows Admin Center is ease of operations and helping administrators to spend less time performing complex server tasks. One of the tasks that will now be much easier thanks to Windows Admin Center is Azure Stack HCI deployment with new cluster creation extension that is now available as a new extension download in Windows Admin Center 1910.
Azure Stack HCI – Difficult to Deploy
If you have attempted to deploy a new Azure Stack HCI cluster, it is extremely complex. There are many moving parts and nuances that you must give full attention to. Up until now PowerShell has been the preferred or the only way to accomplish many of the tasks needed to get the HCI cluster deployed. What are some of the challenges traditionally in deploying Azure Stack HCI?
- Azure Stack HCI Deployment is very difficult when performed manually
- End-to-end, the steps required are complex and number well over 100 steps.
- Order of operations is key and tasks must be performed in the right order
- There may be a lack of information on the default values that you need to use in some cases. Microsoft documentation is unclear on these.
- There is no one single source of truth on the process. It can be difficult to come up with these steps when going through the Microsoft documentation
- Repetitive steps need to be completed for each server
Cluster Creation Extension in Windows Admin Center
One of the things that I really like about the Windows Admin Center utility is the fact that it is extremely extensible. Microsoft has created a framework that allows a very modular approach to adding functionality to Windows Admin Center. New functionality can simply be introduced as a new extension.
Now, Microsoft has introduced a new tool that will drastically simplify the deployment of Azure Stack HCI in your environment – the new Cluster Creation extension that is now available in Preview. What is the Cluster Creation extension?
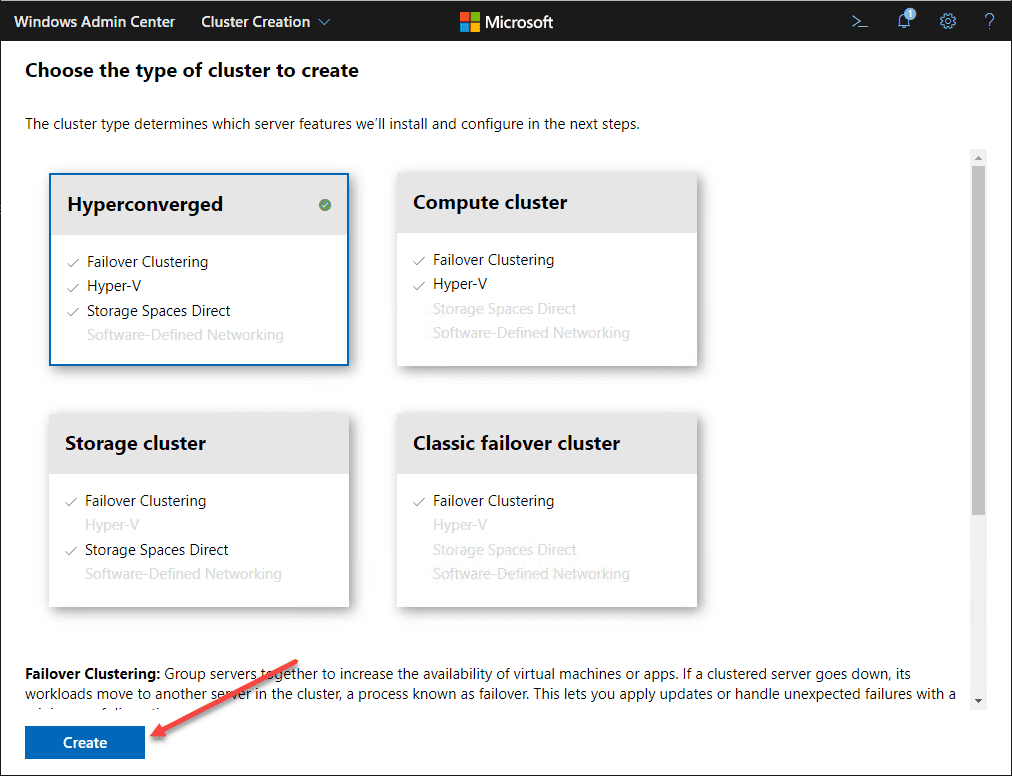
It is a new extension made available from Microsoft that “wizardizes” the entire process of provisioning new servers into various cluster configurations. This includes as of now the following cluster types:
- Hyperconverged
- Compute Cluster
- Storage Cluster
- Classic failover cluster
Each type of cluster has the required sub-components that the wizard handles installing and configuring for you. This includes:
- Failover Clustering: Group servers together to increase the availability of virtual machines or apps. If a clustered server goes down, its workloads move to another server in the cluster, a process known as failover. This lets you apply updates or handle unexpected failures with a minimum of disruption.
- Hyper-V: Flexibly share computing resources through hardware virtualization. Run multiple Windows or Linux operating systems side by side, isolated from each other, to avoid problems such as a crash affecting the other workloads, or to give different people access to different systems.
- Storage Spaces Direct: Build software-defined storage from locally-attached flash and hard drives, eliminating the need for separate SAN or NAS arrays. Ensure fault tolerance with distributed software resiliency, increase performance with read/write caching, and save space with deduplication and compression.
- Software-Defined Networking: Virtualize your network to meet the evolving needs of your apps. Prevent security vulnerabilities from spreading with micro-segmentation, access-control lists, and encrypted networks, and reduce costs with virtual appliances like the software load balancer and software gateway.
Installing Windows Admin Center Cluster Creation Extension
The Extension couldn’t be easier to install in Windows Admin Center. You simply go to the Settings in WAC, search for the extension (which is in Preview), and install it.
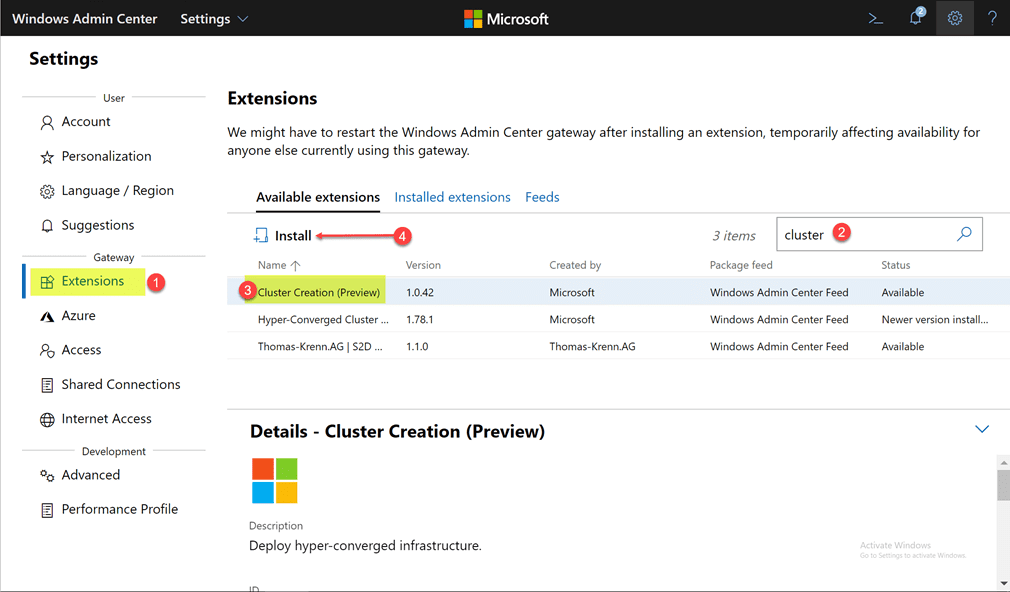
Under the Available extensions, simply search for “cluster” and it should appear as the first result as it did for me below.
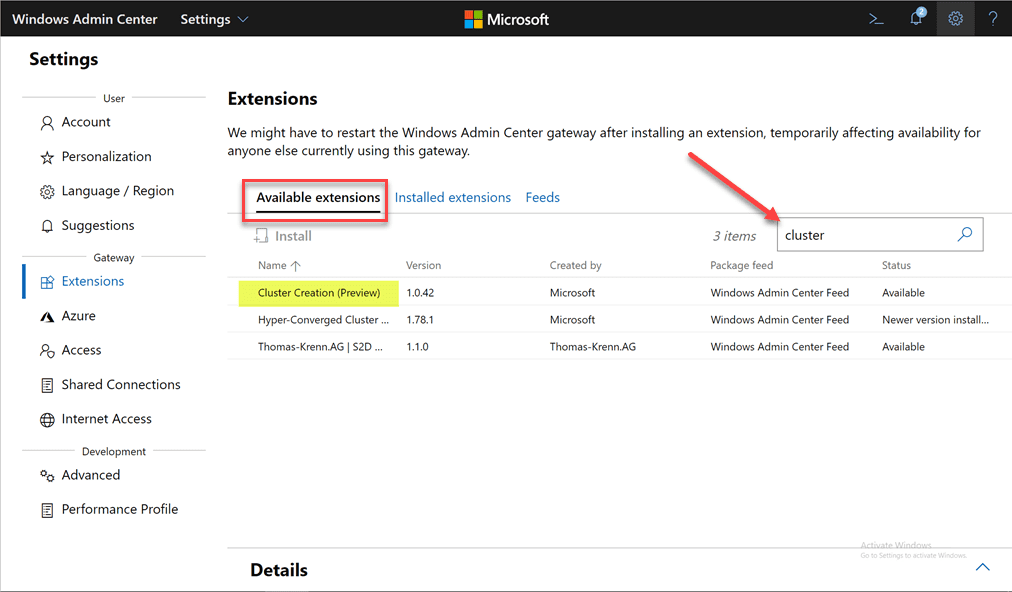
To install the extension, simply click on it, and then click the Install button.
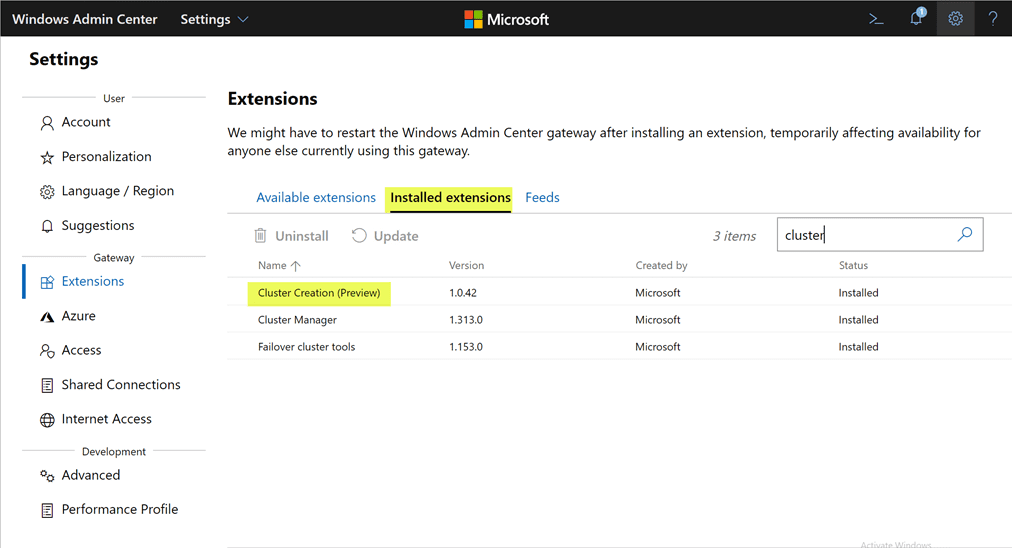
It should install fairly quickly. To verify it is installed, click teh Installed extensions tab and you should see the Cluster Creation (Preview) listed.
Now, let’s look at running the actual Cluster Creation wizard.
Azure Stack HCI Deployment with New Cluster Creation Extension
After you have installed the extension, you have a new menu option available called Cluster Creation under the Settings menu which will guide you through the entire process of creating an HCI cluster.
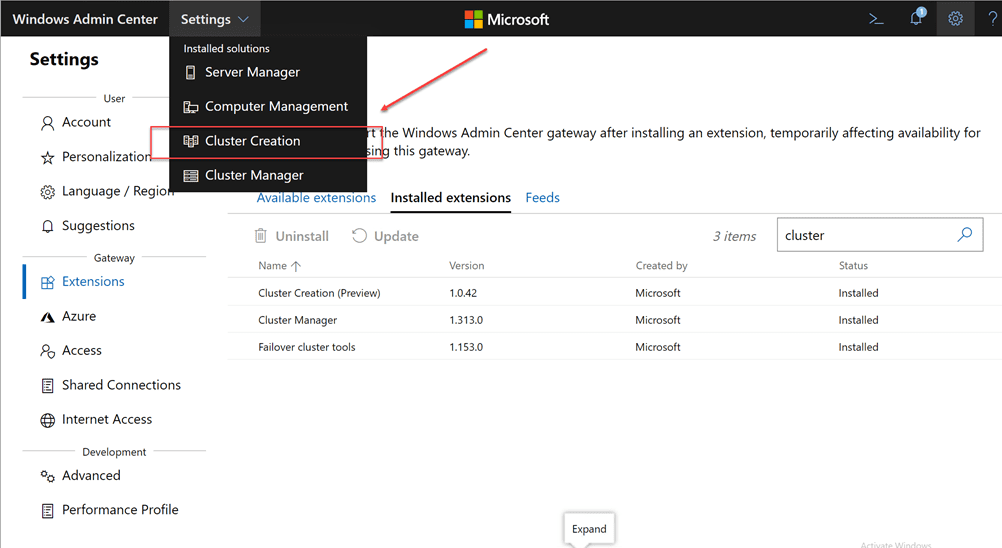
Click Cluster Creation and this will begin the Cluster Creation wizard.
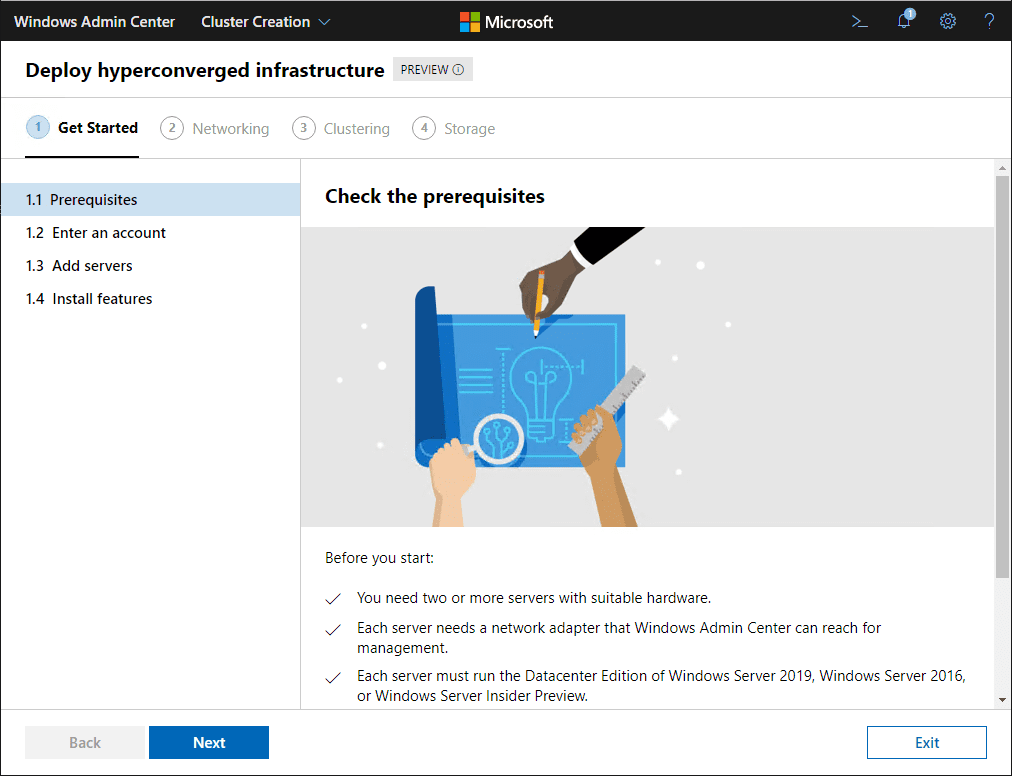
As listed by the Check the prerequisites section, the requirements include:
- You need two or more servers with suitable hardware.
- Each server needs a network adapter that Windows Admin Center can reach for management.
- Each server must run the Datacenter Edition of Windows Server 2019, Windows Server 2016, or Windows Server Insider Preview.
- Each server must be joined to the same Active Directory domain as where Windows Admin Center is running.
- You need a domain account that’s a member of the local Administrators group on each server.
HCI Cluster Creation Process
The process for HCI Cluster Creation is a four step process that takes you configuring:
- Prerequisites
- Networking
- Clustering
- Storage
You will see each screen is broken up into sub points that will walk you through each stage of the cluster creation process.
Prerequisites
In Section 1, you are giving the wizard all the information it needs to connect to the prospective hosts, install required features, etc. First up, enter an account to connect to the cluster hosts.

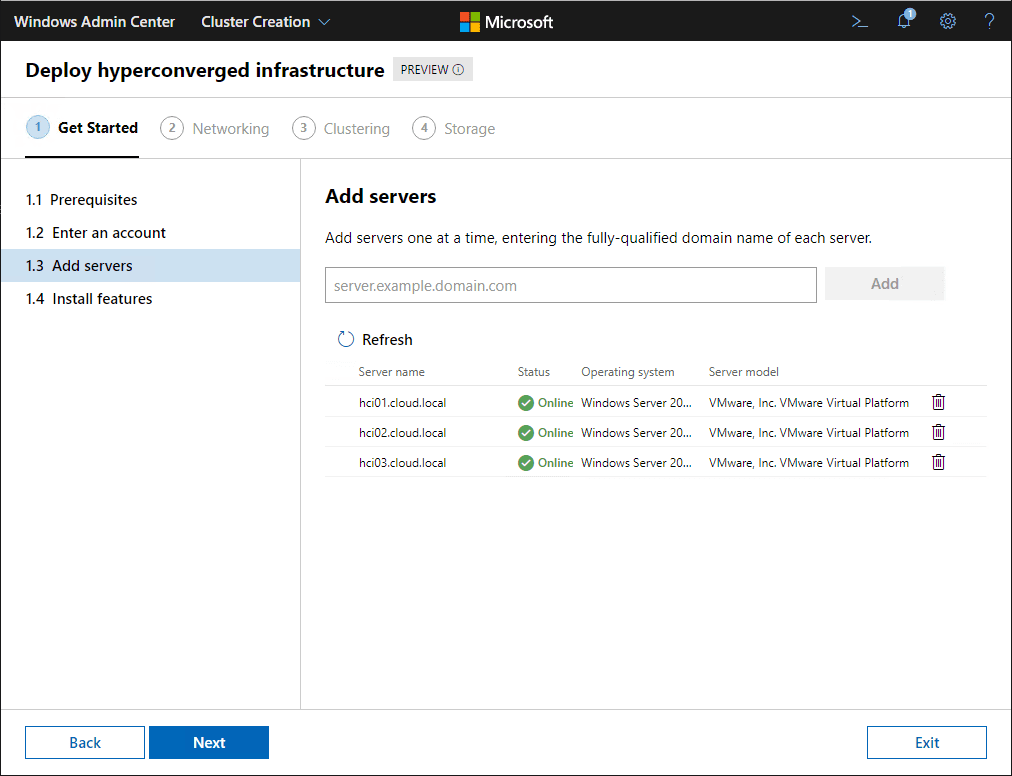
Next, Add servers to use for the cluster. Enter each server and click Add.
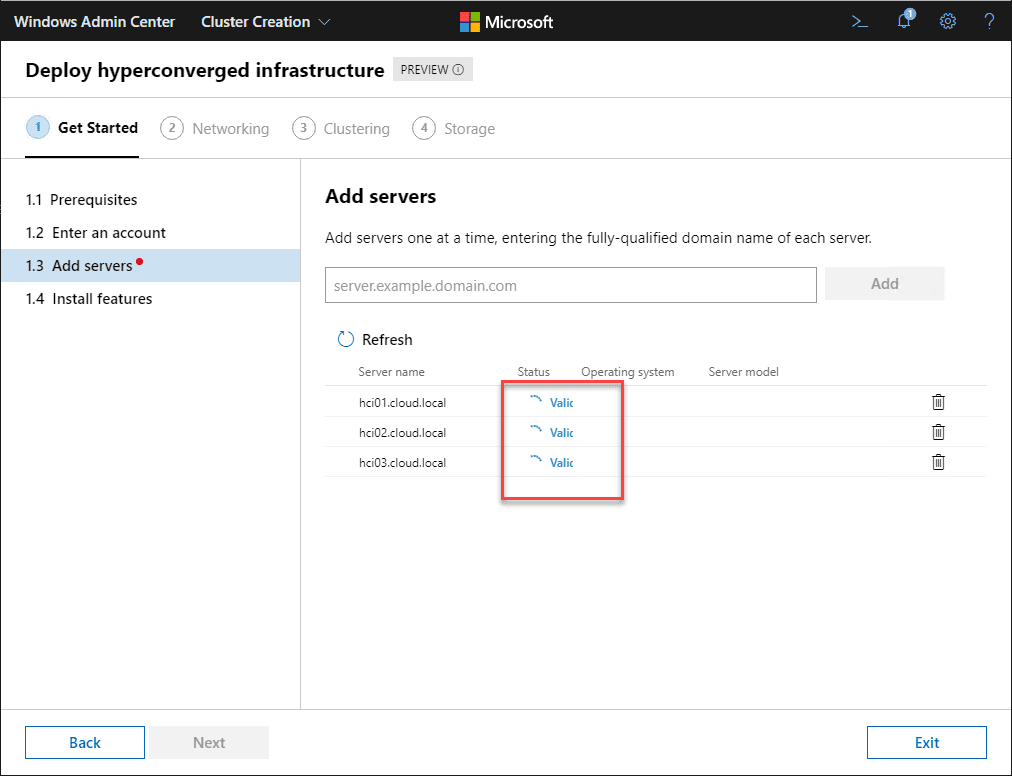
The servers are added and successfully show Online.
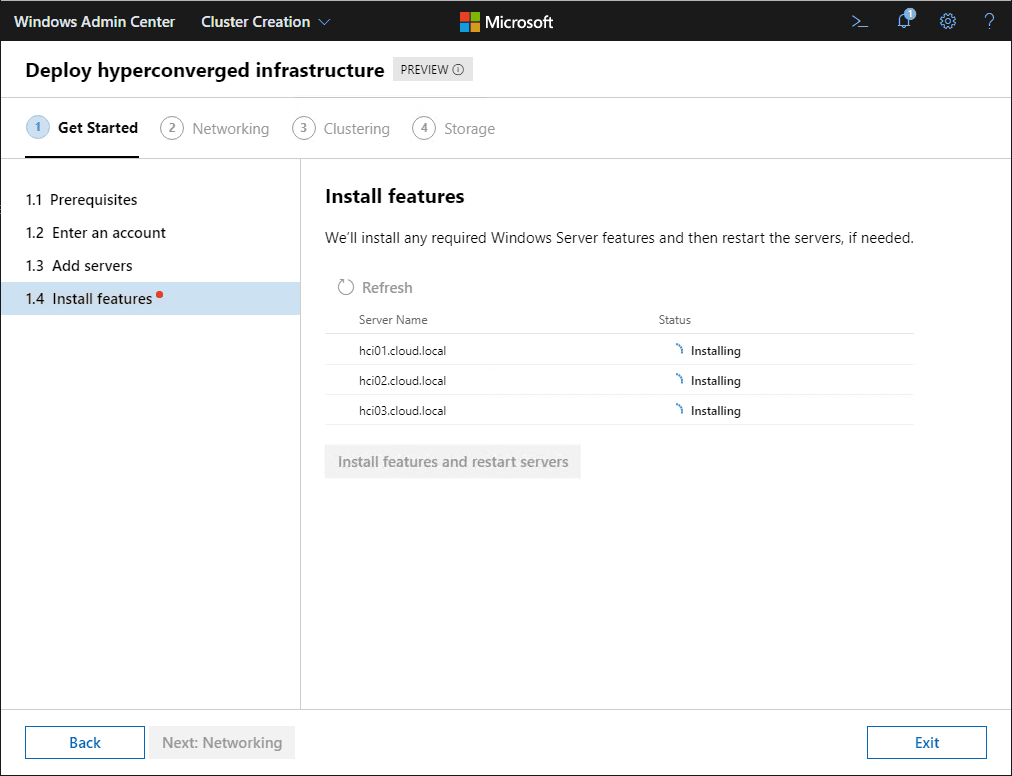
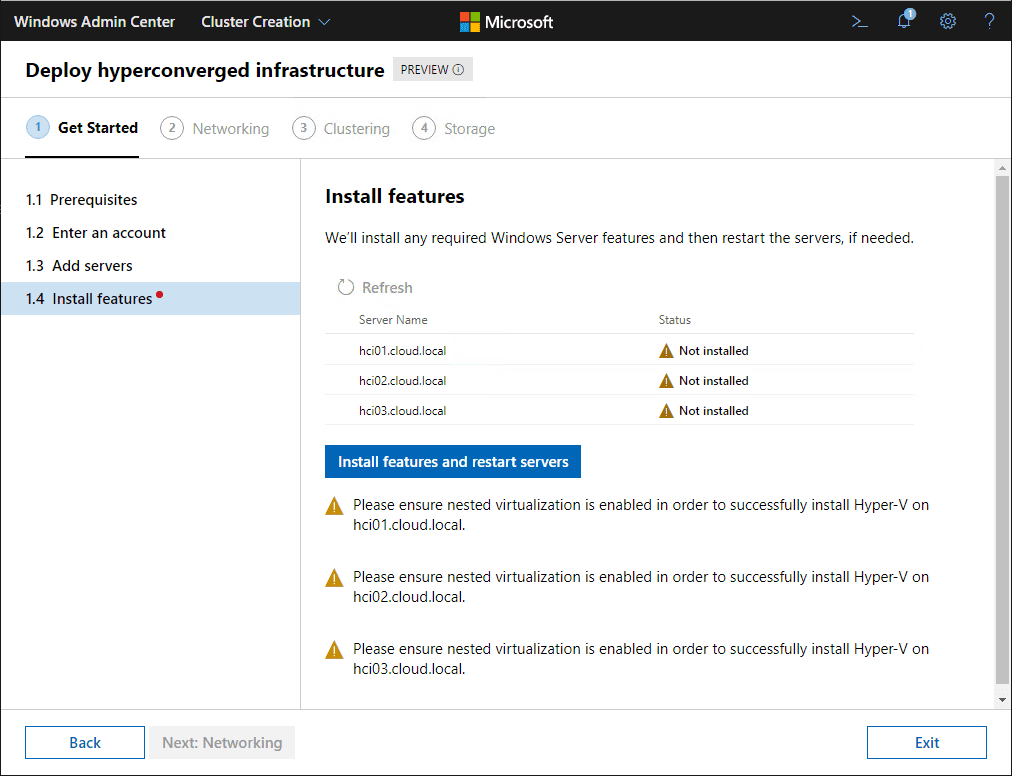
The Install features screen 1.4 is where you install all the required components including Hyper-V. Click Install features and restart servers.

The features begin installing.
One surprise to me was the fact the wizard actually realized I was using VMs as the “hosts” for the cluster creation. It noted that I needed to ensure nested virtualization is enabled in order to successfully install Hyper-V on each host.
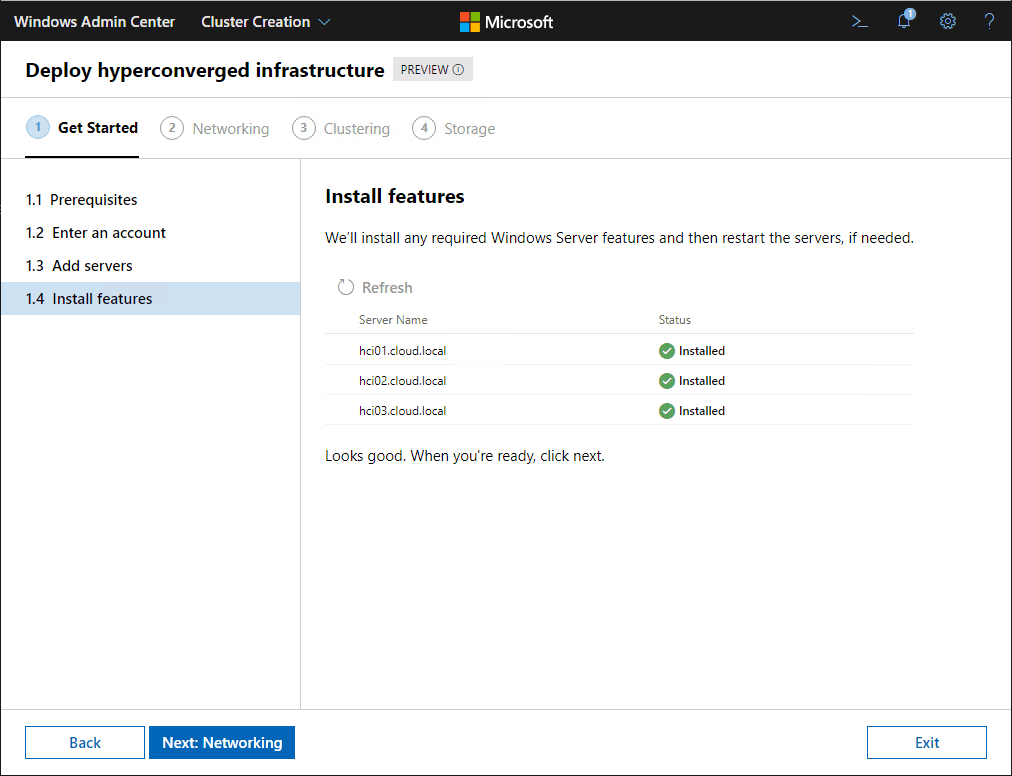
After enabling hardware virtualization on each VM, the features installed correctly.
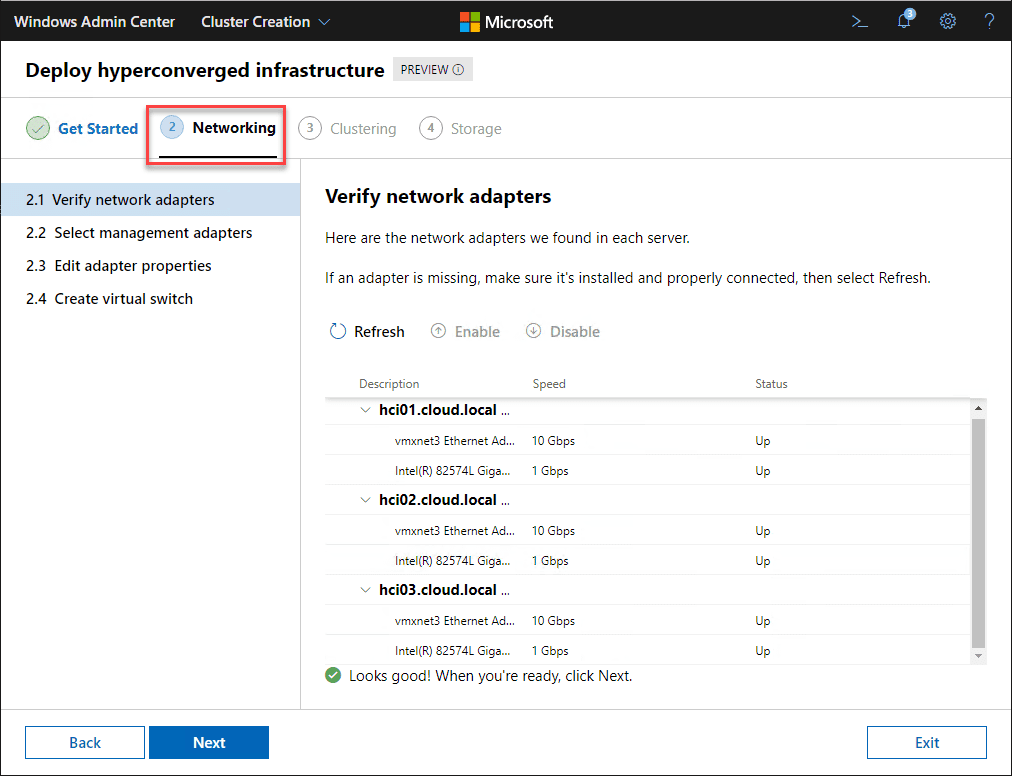
Networking
In section 2, we are configuring the networking of the HCI cluster.
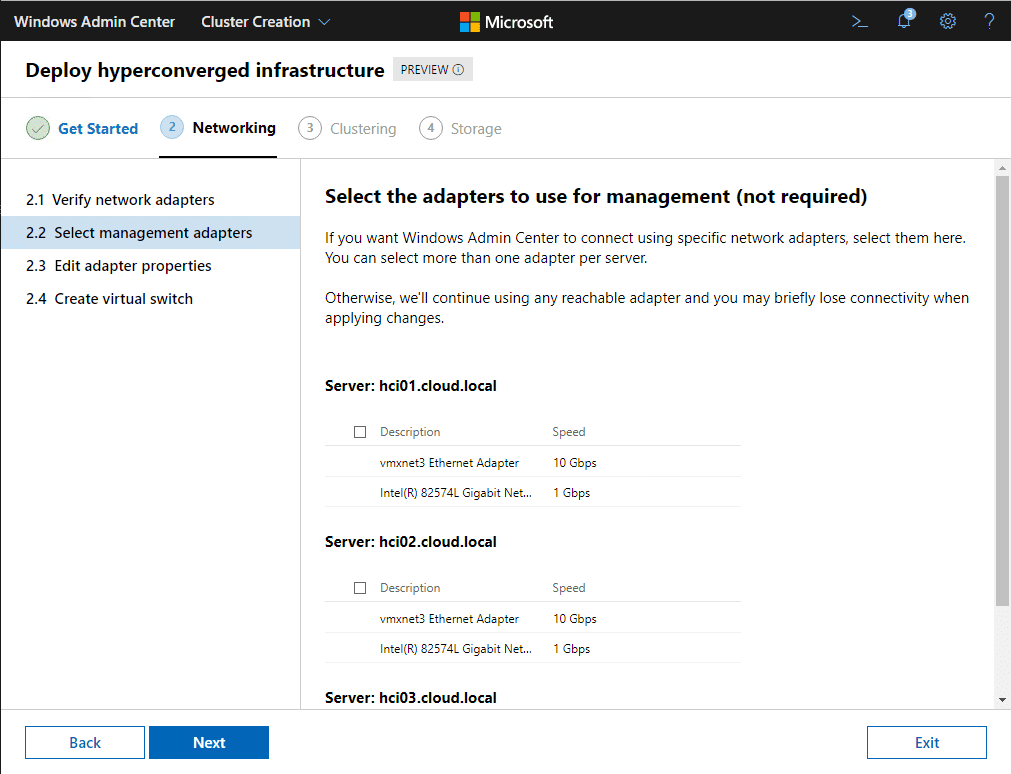
You can select specific management adapters if you want, however the wizard will use any and all adapters if you don’t choose specific ones.
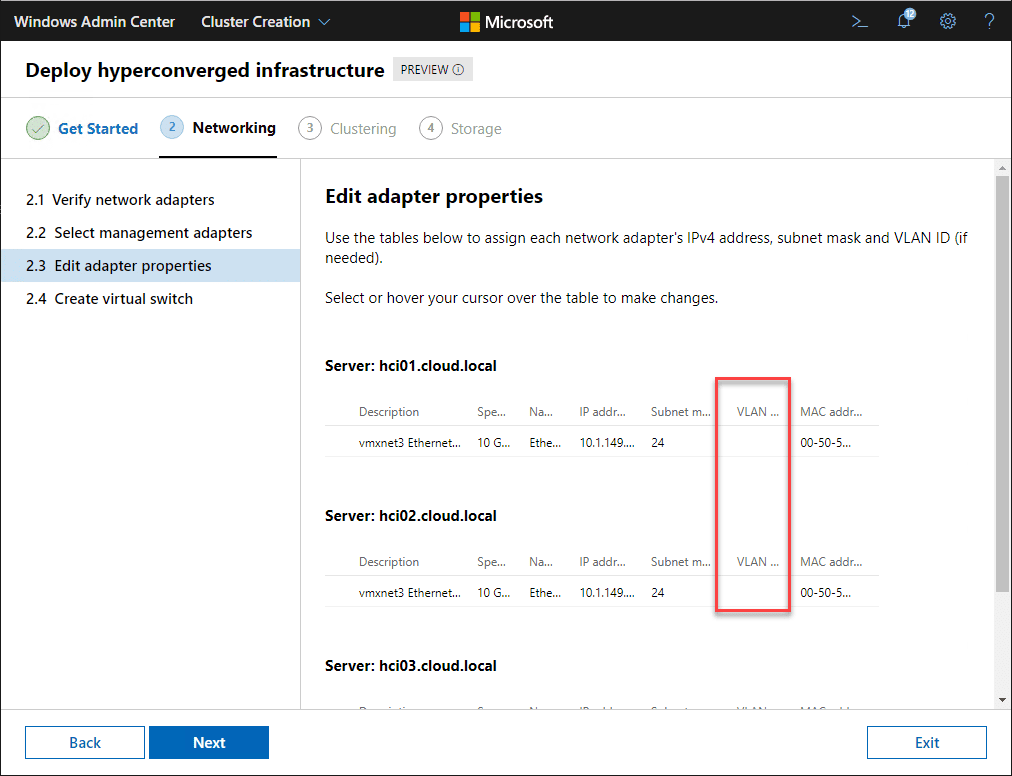
In the edit adapter properties, you can configure the IPs. One thing I found here is that you need to put something in the VLAN field. Since I am already tagging the VLAN on my vSwitch, you can put 0 in the VLAN field. You will get an error past this point or at least I did without it.
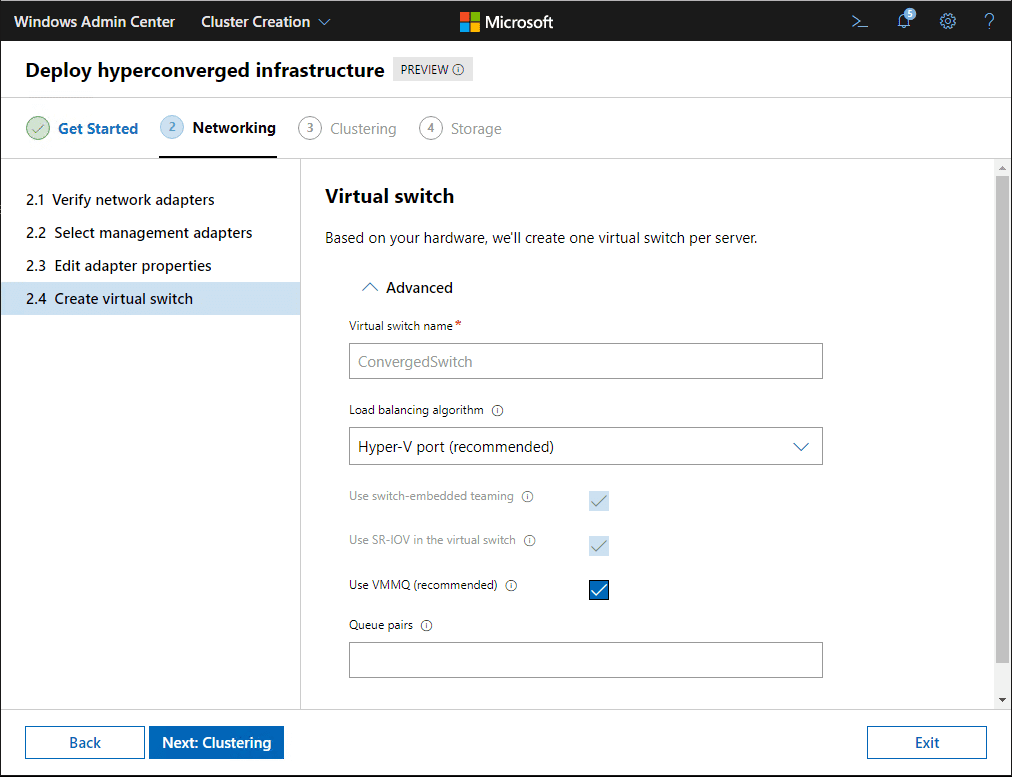
Specify a virtual switch name under the Advanced properties if you want, otherwise you can leave the defaults here. Notice how it will automatically enable best practice settings for your cluster.
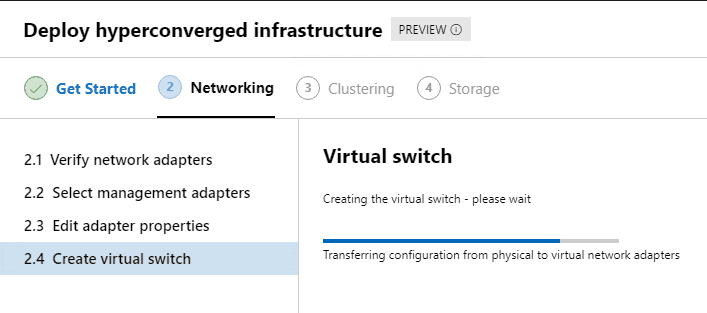
Virtual switch begins creating.
Clustering
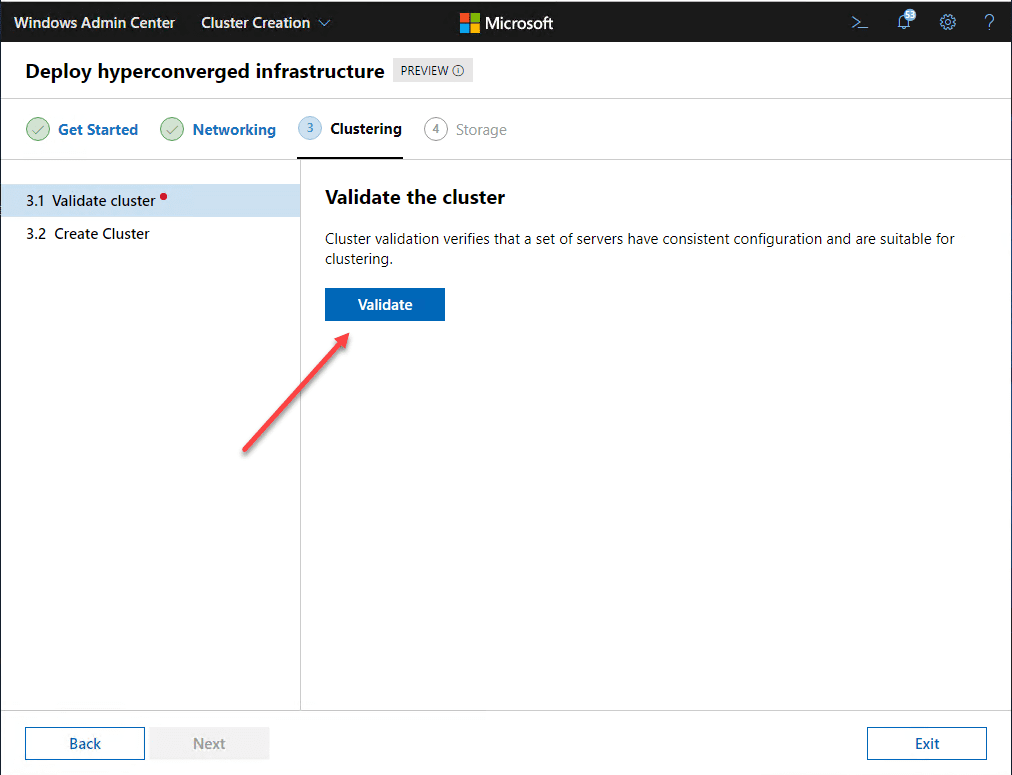
This moves us to the third phase, Clustering.
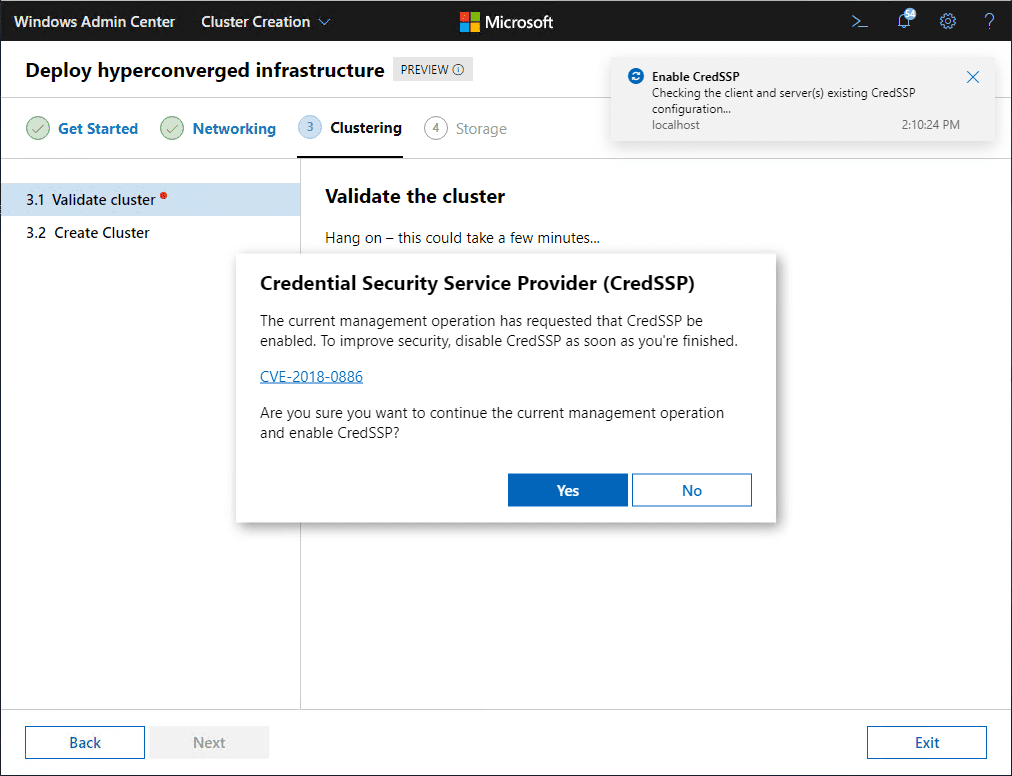
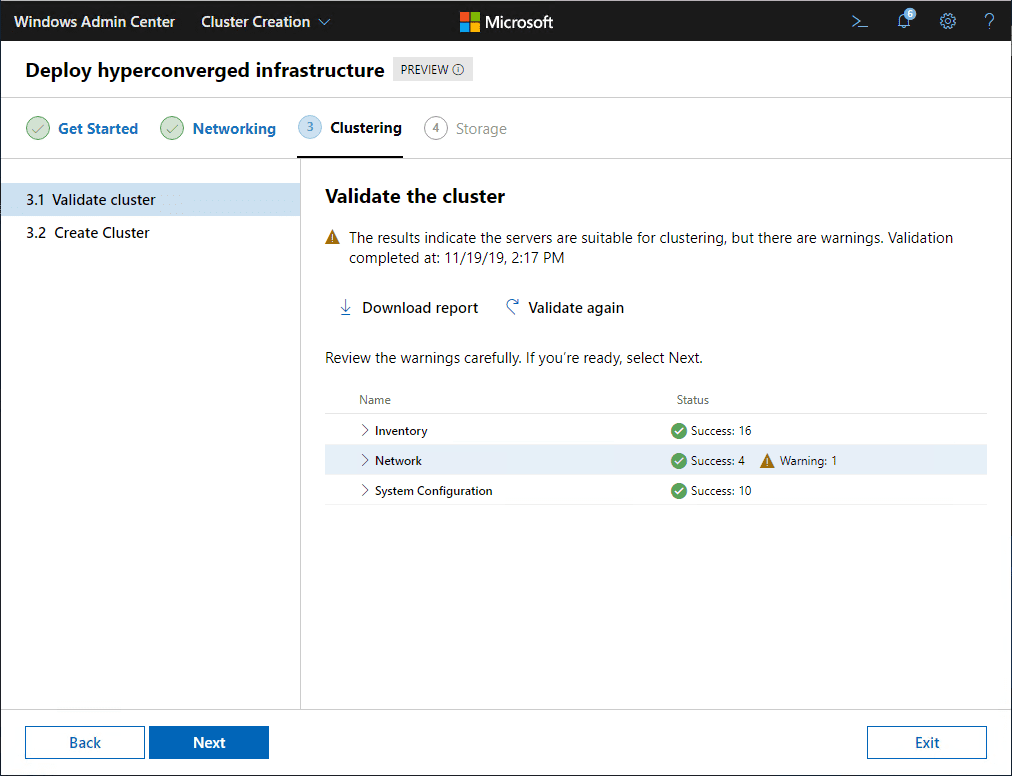
This has only two tasks, Validating the Cluster and Creating the Cluster. Click the Validate button to validate the cluster for creation.
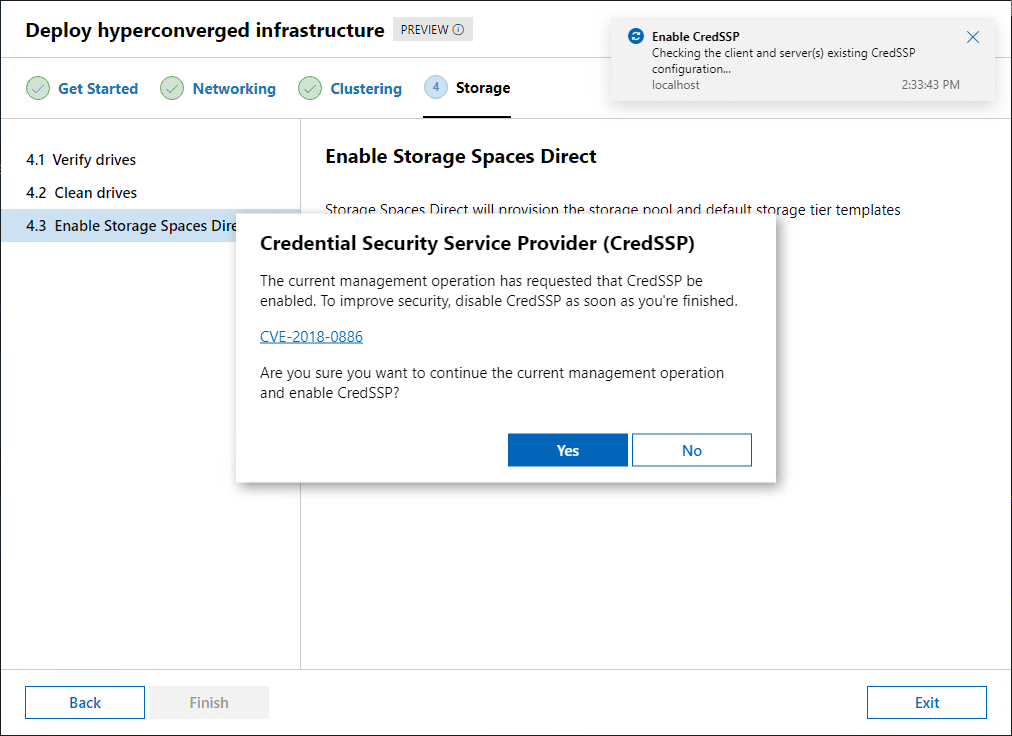
Interestingly, you have to enable CredSSP for the wizard. Click Yes.
Note any errors and warnings for the validation check. Click Next.
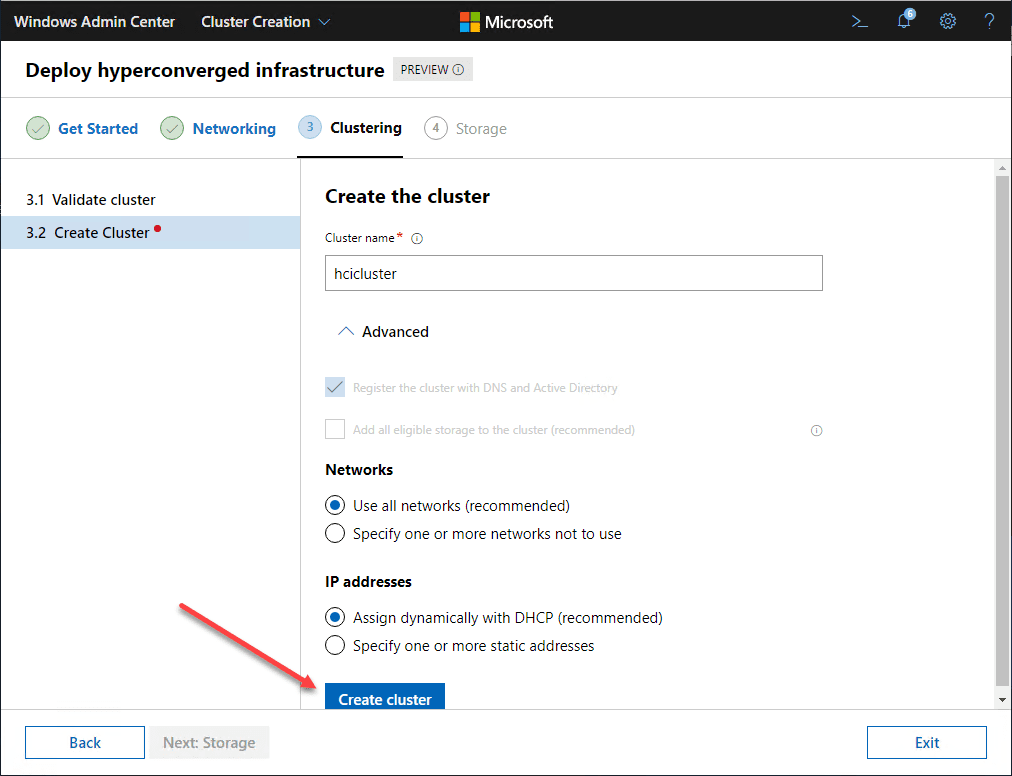
Click the Create Cluster button.
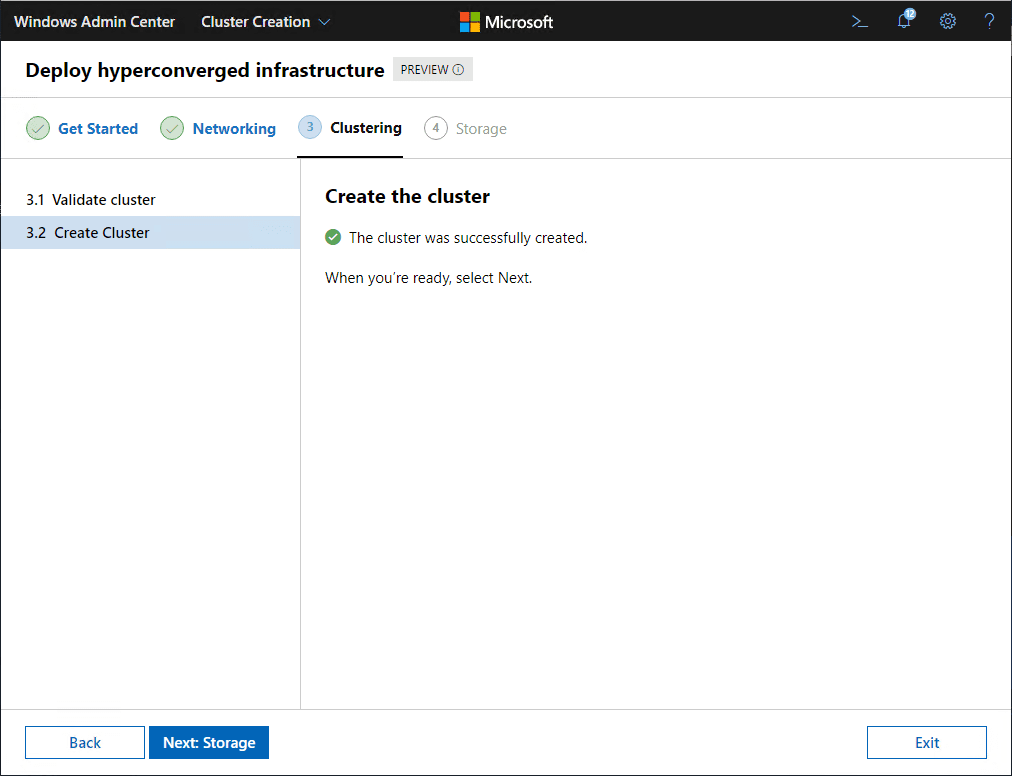
Cluster is created. Next, is storage.
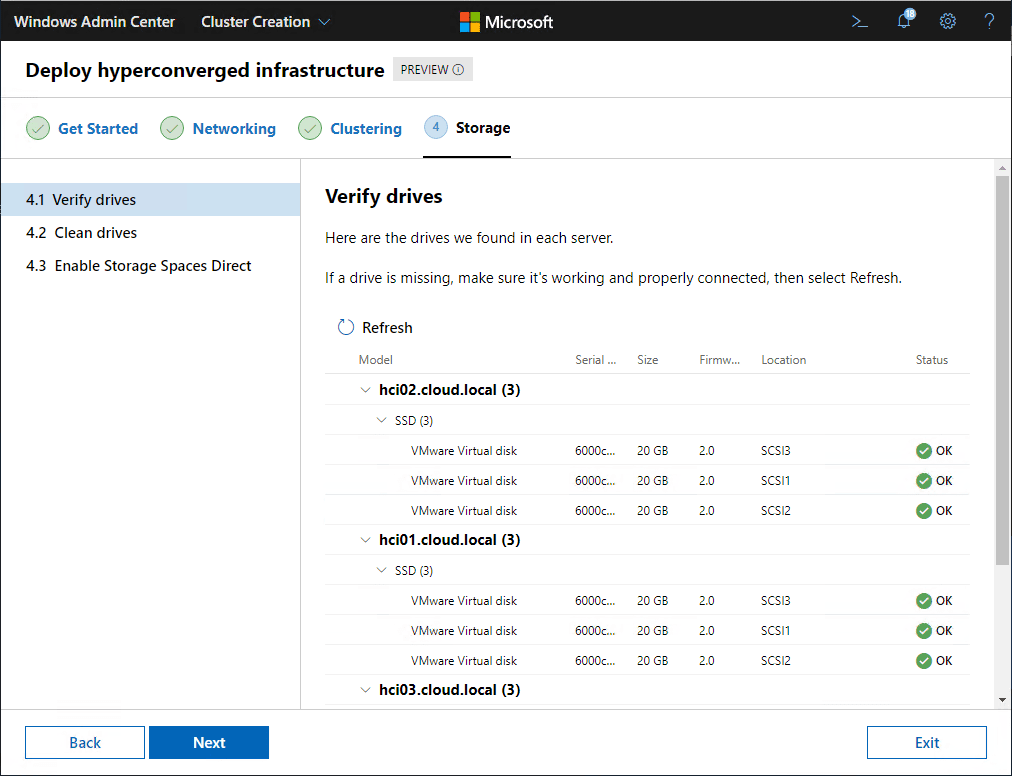
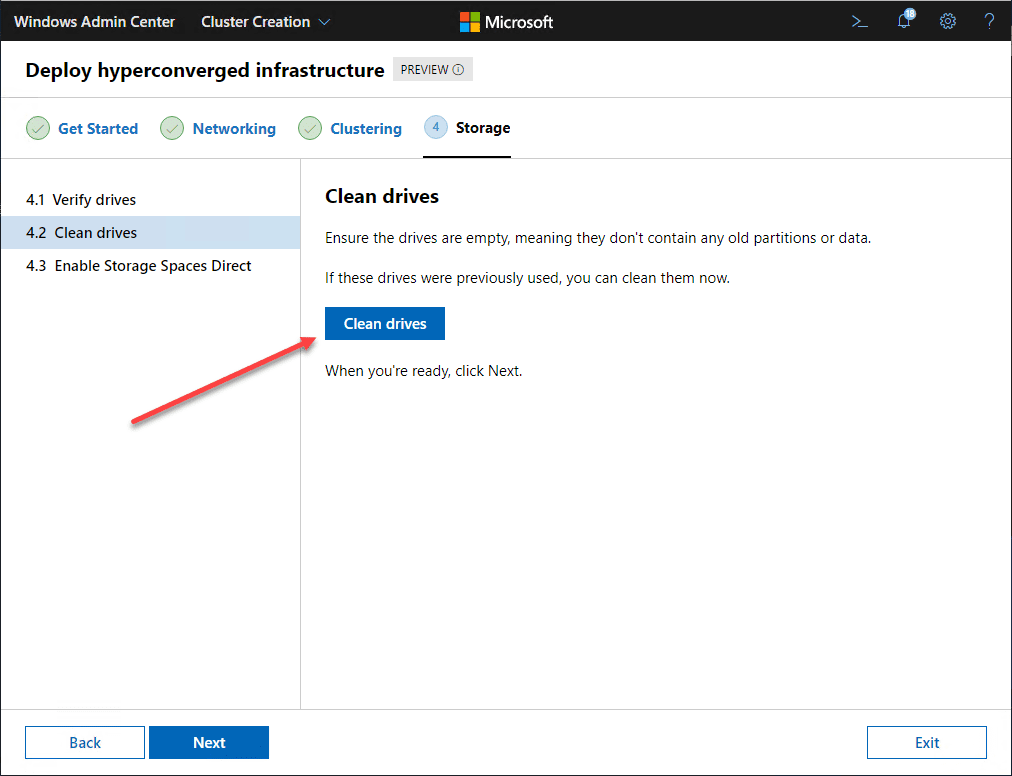
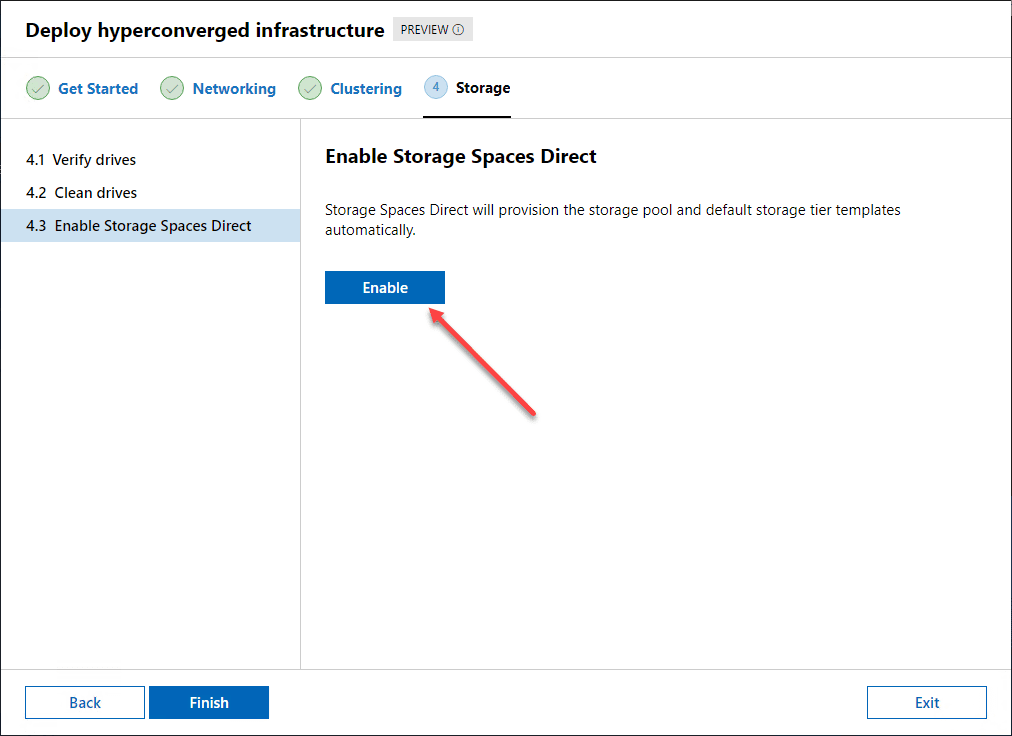
Storage
The last section configures storage. First, verify the drives show up and the status is OK.
Next, click the button to Clean the drives.
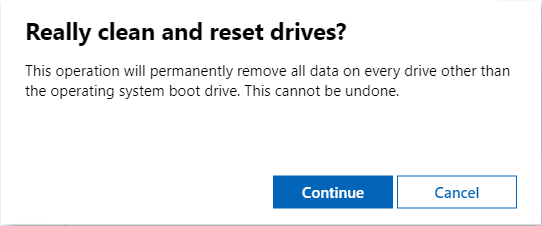
Verify you want to clean the drives.
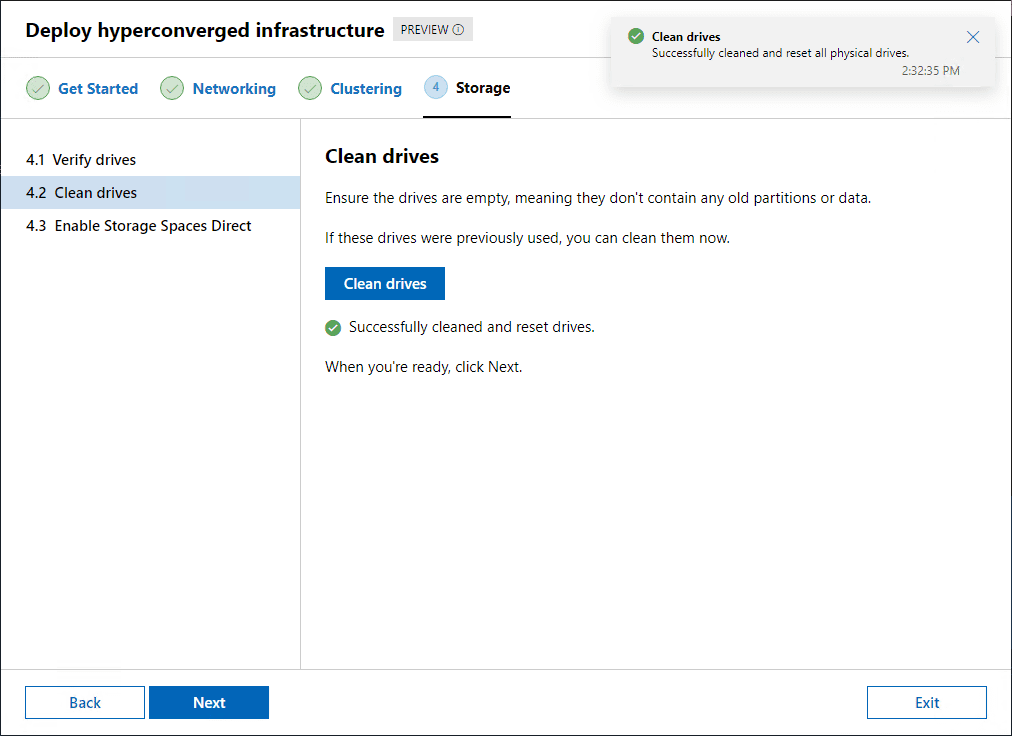
Drive clean finishes successfully.
Click Enable to enable Storage Spaces Direct.
Again, you will see the CredSSP dialog box for enabling.
Alas, I was able to proceed all the way to the end without an error. I suspected this was a result of non-WSSD hardware.
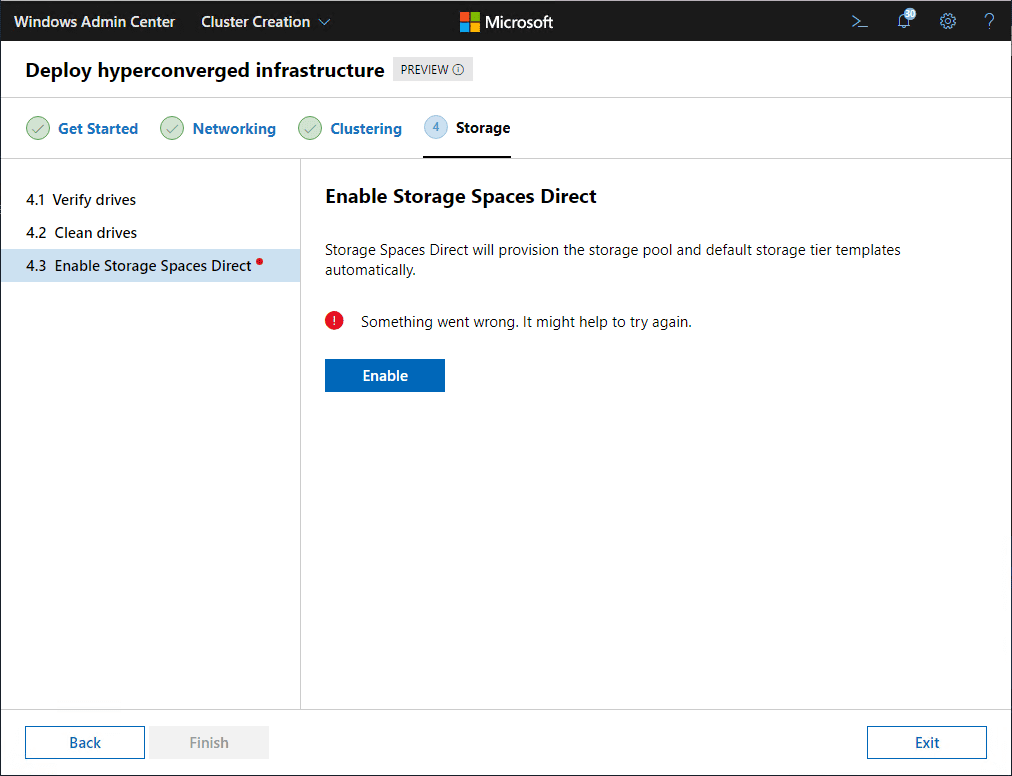
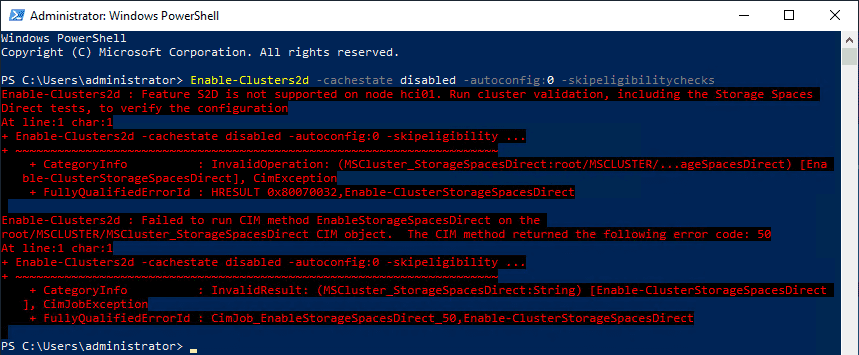
Sure enough, trying to enable S2D from PowerShell results in a not supported error.
However, I was well pleased with the new wizard even if I didn’t see everything complete without error. I knew I was in unsupported territory here using VMware VMs to enable the HCI cluster using the wizard.
I did try the registry key hack but still received the error. I will investigate this a bit further when I have some time.
Wrapping Up
The new Azure Stack HCI Deployment with New Cluster Creation Extension in Windows Admin Center is a great addition to WAC. It allows a very simple way to configure an HCI cluster. Microsoft is definitely doing some good work with Windows Admin Center and making up some ground in the area of administration and ease of use with S2D and other technologies.
Keep in mind, this is Preview, so it is still buggy at this point. However, it is great to see where things are headed with Azure Stack HCI deployment. Previously the deployment was painful to put it lightly. Stay tuned for more.