Netbox Network Modeling and Documentation Ubuntu Installation
Typically in many environments, most keep up with documentation of network information through various spreadsheets and other documentation, including perhaps Visio diagrams and such. Some have an IPAM or DCIM solution and others may not already be running an official IPAM or DCIM solution. An extremely cool open-source project called Netbox is a great tool for use as a IPAM and DCIM tool. It was originally conceived by the network engineering team at DigitalOcean to address specific needs they wanted to address there. However, now being open-source, it is designed to help others manage and document computer networks and also serve as a “source of truth” for network automation tasks. In this post we will take a look at Netbox Network Modeling and Documentation Ubuntu Installation.
What Netbox Is and Isn’t
Before beginning, let’s take a quick look at what problems Netbox sets out to solve and what use cases it does not solve.
- IP address management (IPAM) – IP networks and addresses, VRFs, and VLANs
- Equipment racks – Organized by group and site
- Devices – Types of devices and where they are installed
- Connections – Network, console, and power connections among devices
- Virtualization – Virtual machines and clusters
- Data circuits – Long-haul communications circuits and providers
- Secrets – Encrypted storage of sensitive credentials
Netbox does not contain the following functionality:
- Network monitoring
- DNS server
- RADIUS server
- Configuration management
- Facilities management
However, Netbox can very effectively serve as the “source of truth” for serving out the information needed to populate other external tools to perform these functions.
A huge shift in enterprise IT automation is “desired state“. In other words you declare what you want the end result or environment to look like and then automation and other configuration management tools use this desired state to effectively align the environment with the end result. Netbox serving as this source of truth allows it to represent the desired state of the network versus its operational state.
For this reason, Netbox discourages performing automated imports of current network live states to populate Netbox. Instead the data that is contained in Netbox should first be audited by a human to make sure the desired state is correctly represented. After this process is completed, Netbox can then be used to populate monitoring and provisioning systems.
Netbox Application Architecture
One of the great things about the Netbox application is that it is made up of readily downloadable components that commonly found in the enterprise. Netbox is made up of the following:
- Web server – nginx or Apache
- WSGI service – gunicorn or uWSGI
- Application – Django/Python
- Database – PostgreSQL 9.4+
- Task queuing – Redis/django-rq
- Live device access – NAPALM
Netbox Network Modeling and Documentation Ubuntu Installation
There is a really good walk through of most of the commands I am showing below found in the blog post from ComputingforGeeks. However, I did run into a couple of little issues as I went through the steps. For me the following steps were what I used to get the installation up and running.
For this post, I am using an Ubuntu 18.04 LTS installation. The steps below are after installing Ubuntu, fully patching, and configuring for my network. Be sure to take a quick snapshot of the VM before running any configuration or installation of components. This will give you an easy roll back in case you want to start clean. If you want to be able to get a quick Ubuntu 18.04 template provisioned for cloning from, be sure to check out how to do this with Packer.
First step is to install the PostgreSQL DB and tools and see if it is running after installation:
sudo apt-get install -y postgresql libpq-dev
systemctl status postgresql
Next, we want to login to PostgreSQL, create a DB, and a user that has access to the DB:
sudo -u postgres psql

CREATE DATABASE <your netbox DB>
CREATE USER <your netbox user> WITH PASSWORD '<your password>'
GRANT ALL PRIVILEGES ON DATABASE <your netbox DB nae> TO <your netbox user>;
q

psql -U <your netbox user> -W -h localhost <your netbox DB>
Install Python3 components and Git:
sudo apt-get install -y python3 python3-pip python3-dev python3-setuptools build-essential libxml2-dev libxslt1-dev libffi-dev graphviz libpq-dev libssl-dev zlib1g-dev

sudo apt-get install -y git
Create a /opt/netbox directory and clone the Netbox Git repo:
sudo mkdir -p /opt/netbox/
cd /opt/netbox/

git clone -b master https://github.com/digitalocean/netbox.git .
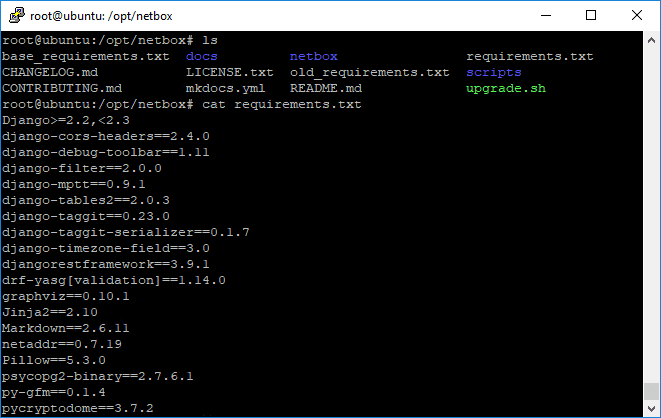
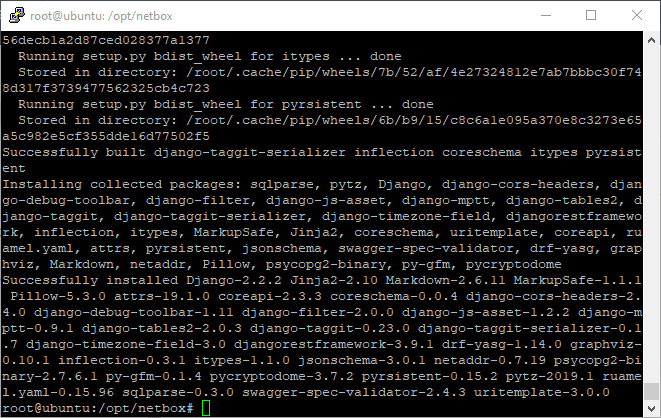
The Git clone directory contains a “requirements.txt” that you can use “pip3” to install the remaining requirements. Then copy the sample configuration file to configuration.py:
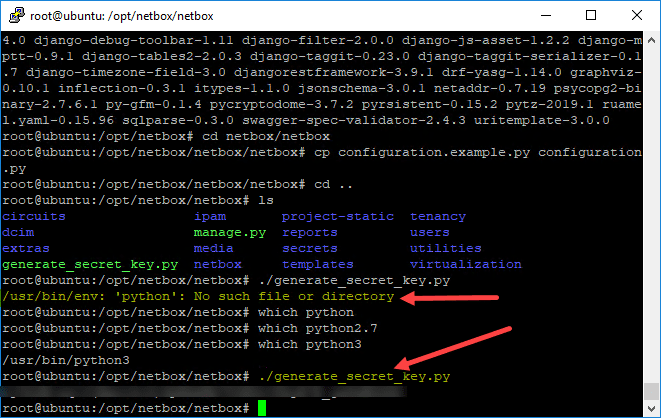
pip3 install -r requirements.txt

cd /opt/netbox

cp configuration.example.py configuration.py
Edit the configuration.py script and add your allowed host (your IP or DNS name of your Netbox server), and secret key. The secret key is generated the secret key by running the generate_secret_key.py script. ***Note*** I had to replace the “python” with python3 in the script to get it to work.
All I had to do was open the “generate_secret_key.py” file and change “python” to “python3” .
After you get the secret key, copy the secret key and use it to populate the configuration section for the secret key in the configuration file.
Finally, there are a few more Python configuration commands to run to finish out the configuration. The createsuperuser script allows you to create a netbox user for managing and administrating the solution.
sudo python3 manage.py migrate

sudo python3 manage.py createsuperuser

sudo python3 manage.py collectstatic --no-input

sudo python3 manage.py loaddata initial_data
At this point, you can actually start Netbox installation via a bootstrapped web server. You can start the ad hoc web server and connect to Netbox using the following command:
sudo python3 manage.py runserver 0.0.0.0:8000 --insecure
Installing a Persistent Web Server
If you want to install a persistent web server to run your installation of Netbox, you can install either Nginx or Apache to serve out the Netbox instance. To do that, I simply followed the instructions found here step-by-step: https://docs.netbox.dev/en/stable/
I chose the Nginx installation. This will require you install the following extra components:
- apt-get install -y nginx
- pip3 install gunicorn
- apt-get install -y supervisor
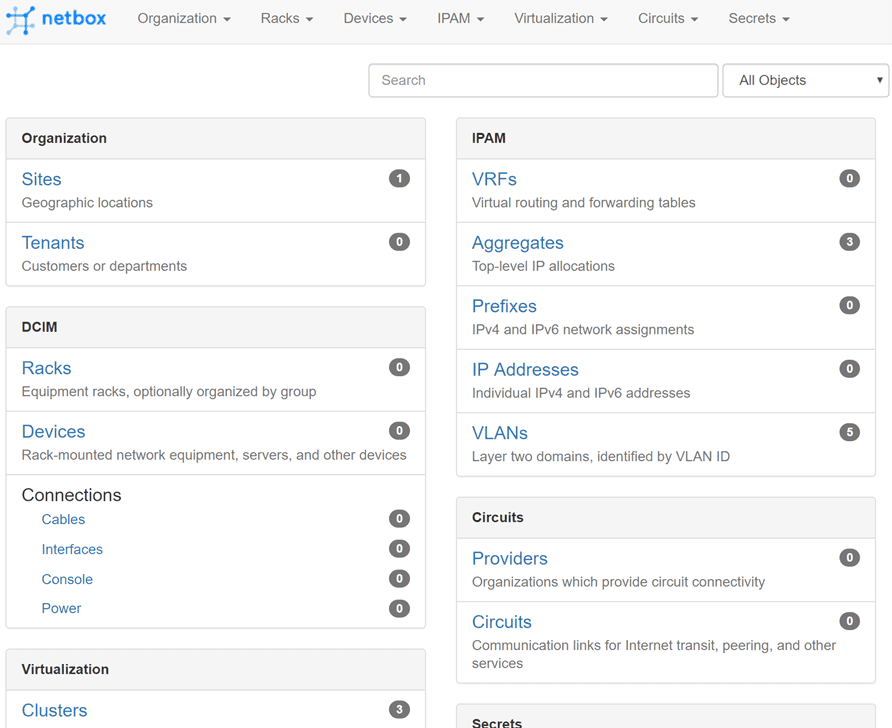
Finally, we can connect to the Netbox installation and begin setting up our source of truth for network resources!

Wrapping Up
Hopefully this look at Netbox Network Modeling and Documentation Ubuntu Installation will help any who want to get this setup on an Ubuntu server. Needless to say, the process is not really for the faint of heart as there are quite a few manual configuration steps to get up and running. Hopefully this will be something that can be improved upon by the Netbox community contributors. The installation process aside, from my very limited use of Netbox so far, it looks to be a great tool that can provide tremendous value for documenting and serving as a source of truth for declarative network automation tasks. Stay tuned for more posts highlighting Netbox functionality.