How To Implement Policy Driven Data Protection with NAKIVO

Today’s IT operations across the board are having to adopt new methods of automating various workflows as there is simply no way to keep up in today’s fast-paced environments with manual operations anymore. Automation is the key to being able to perform tasks in the effective, efficient, and expedient manner that is required of today’s IT operations teams. A crucial area of IT operations that requires day-to-day tasks be completed is data protection/backups. Backing up business-critical resources is certainly not a glorious or exciting operational task to be completed, but it is absolutely necessary. It is crucial that organizations are able to perform backups of mission critical server and data resources effectively. How can automation help with this?
Many of the mundane tasks associated with keeping data protection functioning as expected is the simple task of adding and removing server resources from appropriate data protection jobs. One of the powerful mechanisms being baked into today’s software-driven solutions is policies. Policy driven operations are extremely powerful. We can look at VMware vSAN’s SPBM, policy-based managed of storage to see how powerful policies can be with software-driven solutions. Recently, NAKIVO introduced policy-driven data protection that allows automatically taking care of many of the mundane tasks such as adding and removing resources from backup jobs. Let’s take a look at How To Implement Policy Driven Data Protection with NAKIVO Backup & Replication.
Benefits of Policy Driven Data Protection
We have alluded to this a bit, however, what are the benefits of policy driven
data protection and why do organizations want to make use of policies in
protecting data? Let’s briefly consider the following:
- Take human-error out of the equation
- Increase efficiency
- Automatically provision and deprovision data protection for virtual machines
- Drive Data protection from the hypervisor
Take Human-Error out of the Equation
Today’s IT operations are being required to move quicker and more efficiently than ever before. This is requiring IT ops to look at ways to streamline and automate processes and procedures to ensure that they happen automatically and without an operations person having to manually intervene to make it happen. Automation is key to operating with today’s modern infrastructure and hybrid infrastructure systems. Automation allows taking care of many of the mundane, time-consuming operations that typically take a tremendous amount of time for operations to manually care for and perform. When related to data-protection, there are many operational tasks that must be taken care of when thinking about the tasks involved with keeping an environment protected, deprovisioning data protection from resources, and having resources automatically protected when coming online.
Human error is a typical culprit to systems failing. Often, systems are fragile because of the human-involved processes that are required to keep systems running. Today’s infrastructure is powerful and often has built-in means to automate processes such as API endpoints. Failing to do so is failing to take advantage of an opportunity to streamline processes and take the heavy-lifting out of mundane tasks.
The great benefit of automation is that it lets the systems do the mundane, boring, repetitive tasks that humans are not that great at and frees up time to concentrate on larger and more complicated technology or business problems. Policy driven systems allow defining a desired state of how you want the system to look and then letting the system perform the tasks required to achieve this desired state.
Increase Efficiency
This certainly plays into what we have already mentioned. Computers are much more efficient than we are at performing mundane, repetitive tasks. By using automated processes to accomplish these, efficiency is drastically increased. Again, using policy driven technology to define a desired state, you can achieve much greater efficiency with IT operations, especially in the realm of disaster recovery and data protection.
Automatically Provision and Deprovision Data Protection for Virtual Machines
Focusing a bit more in on policy driven data protection, one of the typical tasks that is continuously performed in a virtualized environment is ensuring that virtual machines are protected by data protection solutions. This includes deprovisioning VMs that are no longer needed or no longer need to be protected as well.
Having a data protection solution that is capable of driving this process for you, automatically, can save tremendous amounts of time from an operations standpoint, and eliminate mistakes that can be made in protecting or halting protection on virtual machines as needed.
Define Data Protection from the Hypervisor
NAKIVO Backup & Replication’s new policy driven data protection solution allows defining data protection at the hypervisor level. This is accomplished by means of utilizing hypervisor specific objects, locations, and other means to identify virtual machines. This information is then taken by NAKIVO Backup & Replication and used to form data protection policies that can automatically include or exclude virtual machines based off the hypervisor related objects, locations, and metadata.
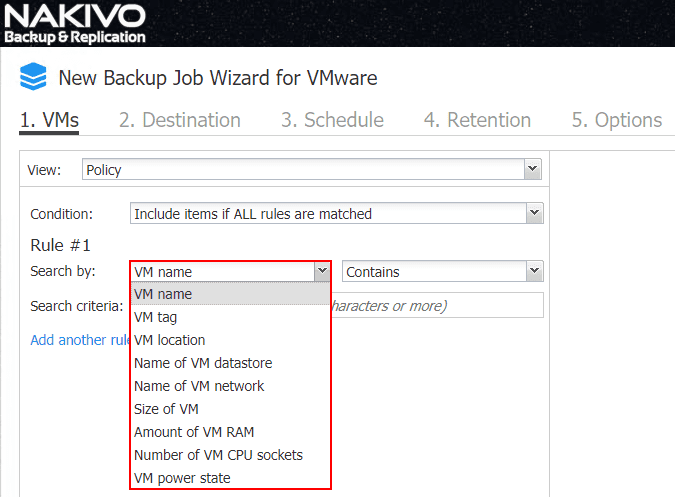
NAKIVO has several means defining policy based on objects and other attributes defined by the hypervisor. These include the following for VMware:
- VM name
- VM tag
- VM location
- Name of VM datastore
- Name of VM network
- Size of VM
- Amount of VM RAM
- Number of VM CPU sockets
- VM power state
Hyper-V options consist of the following:
- VM name
- VM location
- VM Path
- Name of VM network
- Size of VM
- Amount of VM RAM
- Number of VM processors
- VM power state
How To Implement Policy Driven Data Protection with NAKIVO
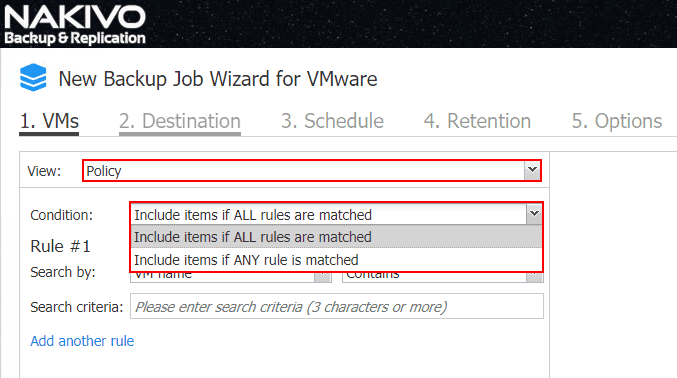
Let’s look at How To Implement Policy Driven Data Protection with NAKIVO. To get to the Policy configuration, on any new job creation, such as a backup, replication, or copy job, you can change the View to Policy which gives you access to the policy rule configuration and logic. I really like the power of the rules builder here as you can build your rules and match as you like. Notice the options:
- Include items if ALL rules are matched
- Include items if ANY rules are matched
This effectively allows you to determine how specifically you want the policy to match the rules contained in the policy based job. This is very intuitive but you can decide whether you want to force matching all rules or any of the rules to determine which VMs are pulled into the backup job for protection.
As mentioned earlier, there are a wealth of Search by criteria that can be defined. Below, is a image of a New Backup Job Wizard for VMware showing these Search by criteria.
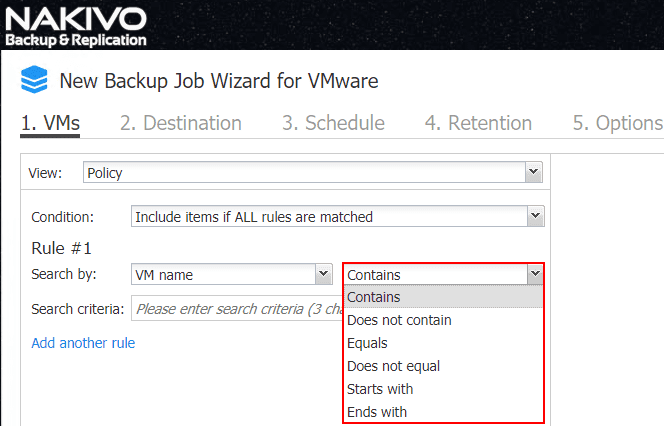
The second part of the logic that can be defined for the Search by criteria. You can select:
- Contains
- Does not contain
- Equals
- Does not equal
- Starts with
- Ends with
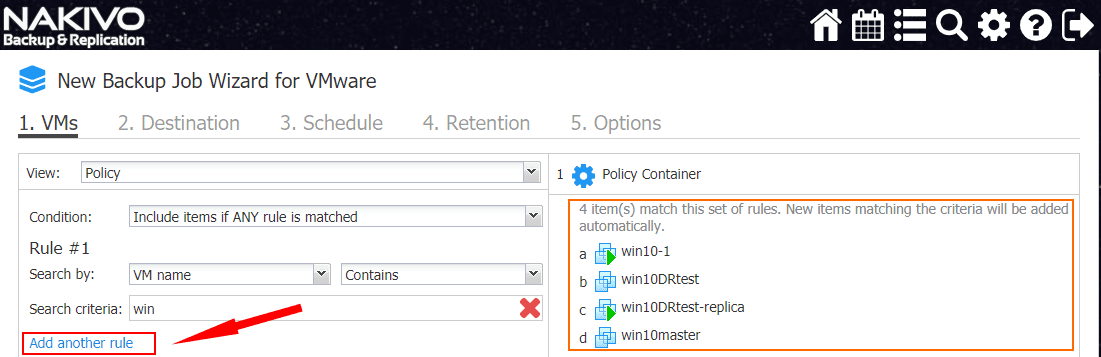
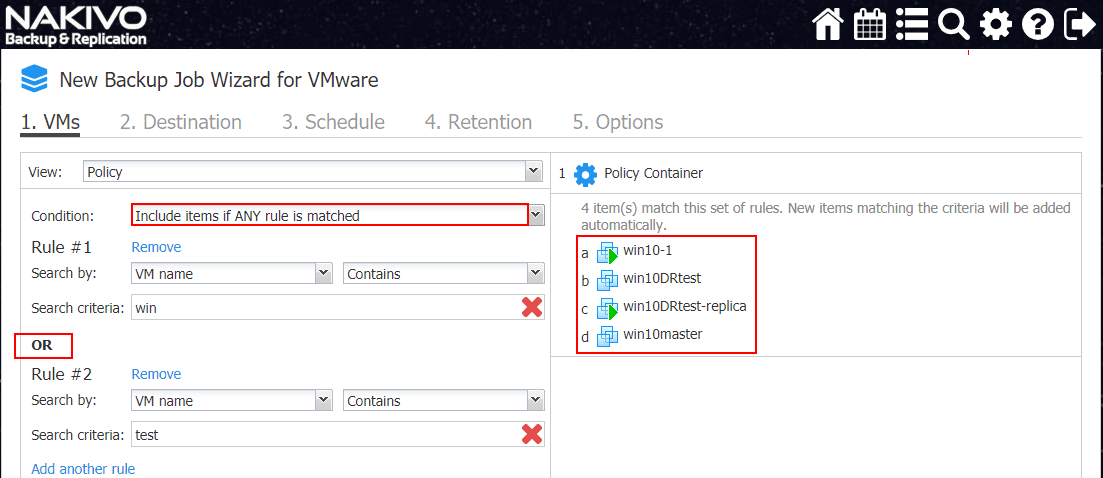
Below is an example of how powerful the policy rules can be. Note I am creating a simple policy based rule that will backup VMs with a name containing win. The great thing about the rules builder in the Job wizard is under the Policy Container you will see the virtual machines that are a result of the policy query in the policy based backup. Note below the added ability to Add another rule which effectively allows stacking rules.
Note, a simple change here, I have added another rule that adds another Search by criteria to the mix. I added the VM name contains test to a new rule. Note how it doesn’t change the result, as we have Include items if ANY rule is matched selected.
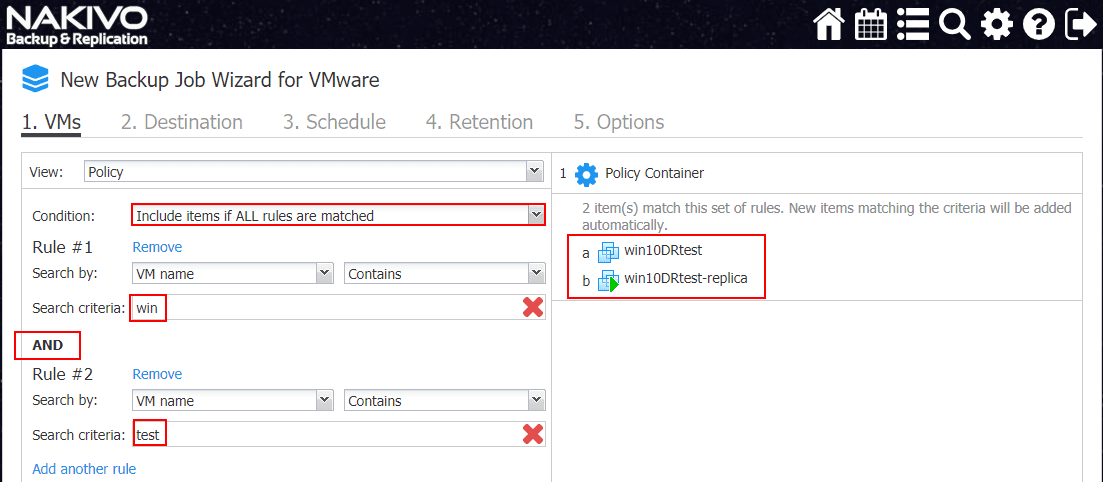
Now, note how changing to Include items if ALL rules are matched changes the Policy container results. This effectively says the VM has to contain both texts in the VM name. Now, the results are much smaller.
Policy-Based Data Protection Driven at the Hypervisor level
An important aspect of the NAKIVO Policy based data protection is that it allows centralizing your data protection based on the hypervisor level. This means based on structuring, tagging, VM location, naming, etc, you can effectively define your data protection as the NAKIVO policy based data protection allows building this functionality via policy, providing the framework for your data protection. Then the rest happens at the virtualization management level, based on placement, naming, tagging, etc as mentioned. One of the powerful metadata mechanisms available with VMware vSphere is tags. Tags effectively allow adding metadata to a VM and allowing the metadata to be used in queries and other means to find VMs that match polices. Let’s take a look at how easy it is to create tags and assign these to VMs and then use these in the NAKIVO policy based data protection.
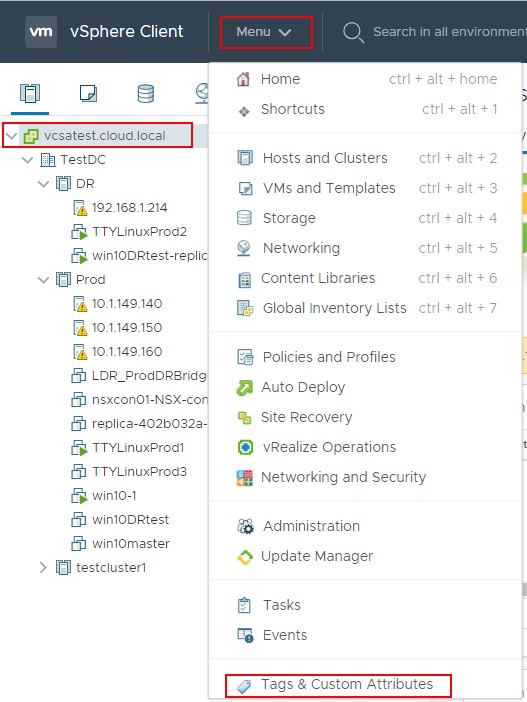
In vSphere vCenter Server, you can create and assign tags to virtual machines. This is fairly easy to do in the vSphere client. First, navigate to your vCenter Server node > Menu > Tags & Custom Attributes.
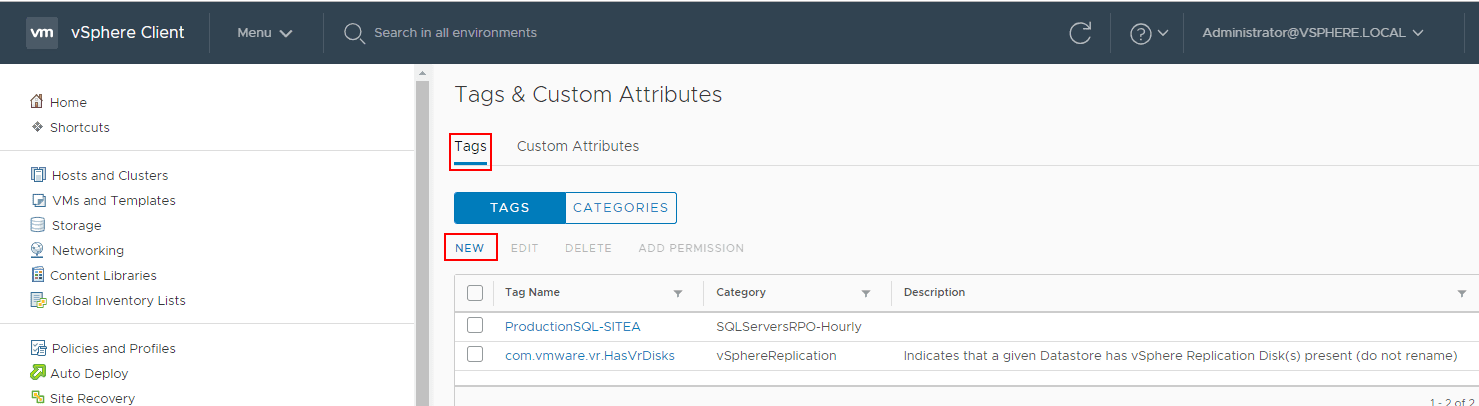
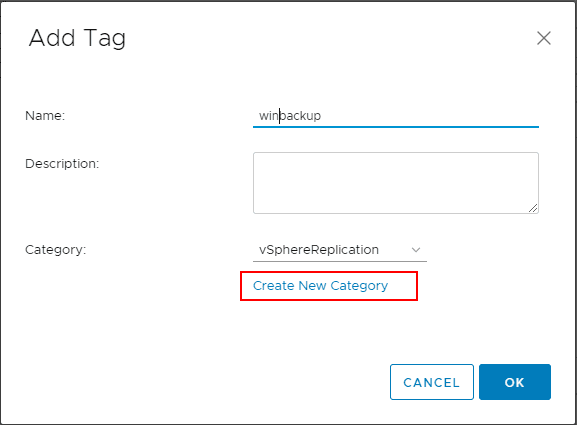
Once you see the Tags & Custom Attributes, you will see any existing tags and categories and you have the ability here to create new tags. Click the New link to create a new tag.
This launches the Add Tag dialog box. Enter the name of the new tag. Also, you can click the Create New Category link to create a new category to contain the new tag if you don’t already have something you want to use already.
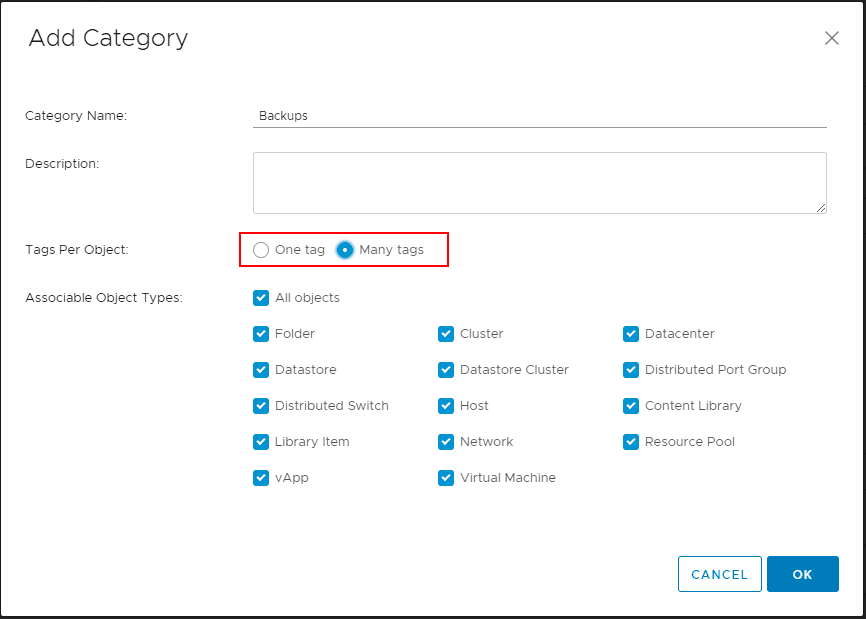
After clicking the Create New Category link, you see the Add Category dialog box. Here you can name the category, choose the tags per object and also associate the object types. Once you have the options you want configured and the name, click OK.
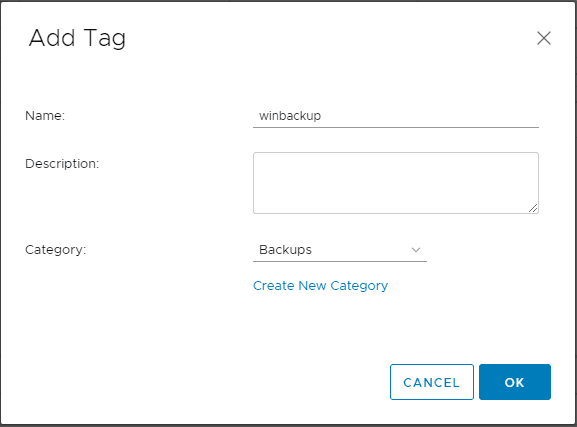
This takes you back to the Add Tag dialog box. The Category will be defaulted to the new category you just created. Click OK.
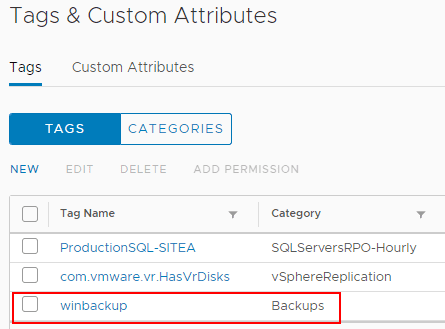
Back at the Tags & Custom Attributes configuration, you should now see your new Tag that was created.
Now to assign the newly created tag to a virtual machine to use with data protection, simply navigate to the virtual machine you want to add the tag to, click Actions > Tags & Custom Attributes > Assign Tag to pick the tag that was just created.Adding the new tag to a virtual machine

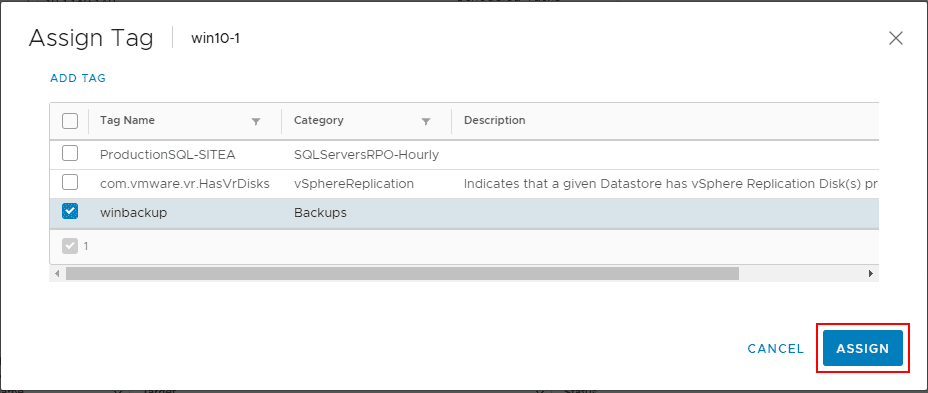
Choose the tag you just created to assign to the virtual machine by placing a check box next to it. Then click the Assign button.
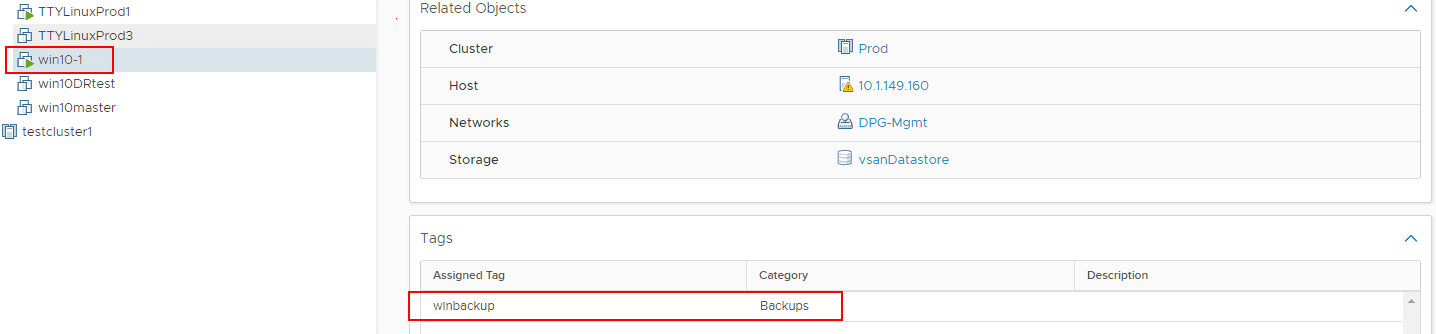
Under the Summary section for the virtual machine, you should see the tag listed under the Tags section for the virtual machine.
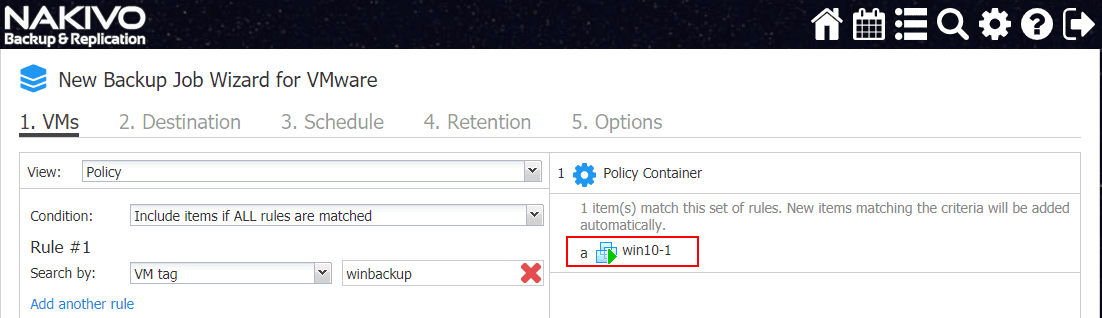
To quickly demonstrate how powerful this tags based, policy-based data protection can be, notice that under the policy configuration, we can create a rule with the Search by selected to VM tag which allows you to enter the tag you want to use for the policy rule. As you can see, we see the correct virtual machine under the Policy Container that we assigned the tag to previously.
In thinking about how powerful this can be, you can essentially configure your tags and your NAKIVO policy-based data protection rules which allows the data protection to now be defined and automatically add or remove VMs that either have the tags defined or removed that coincide with a particular policy based data protection job defined in NAKIVO. This allows you to drive your data protection from a centralized source – VMware vSphere.
Wrapping Up
Automation is a necessary tool in today’s fast paced and extremely complex and task intensive operations and infrastructure environments. Automation allows operations to perform effectively and efficiently and takes the heavy lifting out of many of the mundane day-to-day processes that are required for operations. This certainly includes data protection. It is critically important and is required to protect your data. In this How To Implement Policy Driven Data Protection with NAKIVO, NAKIVO’s policy-based data protection is a great new feature that introduces automation in to the mix for creating and maintaining data protection for your infrastructure. By using policy rules, you can have the policy create a desired state, end-result of how you want the data protection to look, then NAKIVO is able to protect virtual machines based on the rules defined in the policies. This includes the very powerful tags found in VMware vSphere. Tags allow you to use metadata to add descriptors to virtual machines that can be used to query the vSphere environment to perform data protection. Download a trial copy of NAKIVO Backup & Replication 8.1 here and try this new feature out in your environment.